Default Dashboards
Every YouTrack site has a single default dashboard. This dashboard is available to all registered users and provides a central place for your organization to display and share key data.

To view the default dashboard, select Dashboards from the main navigation, then and select the name of the default dashboard from the list in the breadcrumb navigation.
For YouTrack Server installations, the dashboard is named based on your YouTrack license name and follows the format: [YouTrack license name] Dashboard.
You can rename the dashboard at any time to make it more easily recognizable to other users. For instructions, see Renaming the Default Dashboard.
Editing the Default Dashboard
The default dashboard is meant to provide every user with a starting point for managing their tasks and projects. The layout and selection of widgets are only meant to make sure users don't land on an empty page when they open YouTrack for the first time. It’s a helpful foundation, but we fully expect that administrators will customize the dashboard to make it more relevant to their organization's unique workflows and needs.
The default dashboard contains the following widgets:
Widget | Description |
|---|---|
Lists every issue that has been created in your YouTrack installation, sorted by last update. | |
Provides instructions for working with dashboards in YouTrack. |
If you have the appropriate level of access, you can customize the dashboard to show information that is more meaningful and informative for your team. The following options are available:
Resize and drag widgets around the dashboard to organize existing content For more information, see Organize a Dashboard.
Update the content displayed in default widgets. All you need to do here is edit the query used by the existing Issue List widget to show a different set of issues and edit the content shown in the Quick Notes widget.
To learn how to reconfigure these widgets, see Issue List Widgets and Quick Notes Widgets.
Add widgets that display relevant content for all users. You can choose widgets that are built into YouTrack by default or install widgets supported by apps from the JetBrains Marketplace. For more information, see Widgets.
The ability to customize the default dashboard is available to users who have Low Level Admin Write permissions. If you have this permission, the following message is shown in a banner at the top of the dashboard.

This banner is not visible to users who don't have permission to edit default dashboard content.
Renaming the Default Dashboard
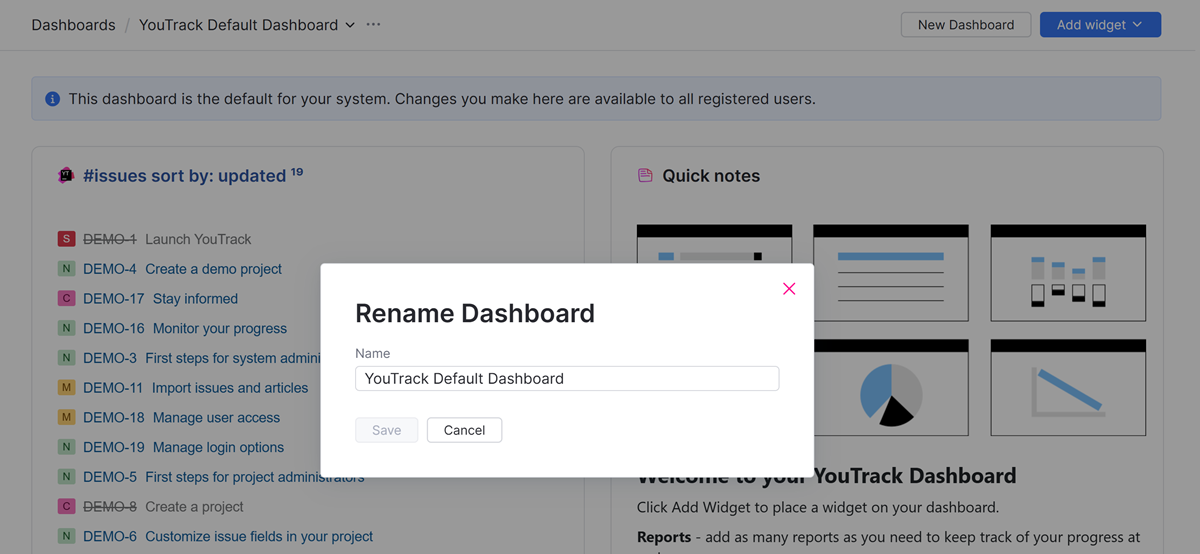
Since the name for the default dashboard is generated automatically, it might not be easily recognized by users who weren't involved in the setup of your YouTrack site. To make sure everyone who has access to your installation knows exactly what they're working with, an administrator can update the name of the default dashboard at any time.
To rename the default dashboard:
From the main navigation menu, select
Dashboards.
Select the name of the default dashboard from the list in the breadcrumb navigation.
For YouTrack Server installations, the dashboard is named based on your YouTrack license name and follows the format: [YouTrack license name] Dashboard.
Click the
More icon to the right of the dashboard name, then select the Rename option.

In the Name field, edit the existing name.
Click the Save button.
Sharing the Default Dashboard
YouTrack dashboards have settings that determine whether the dashboard is available for personal use or shared with other users. The default dashboard is automatically shared with all registered users. These settings cannot be changed.
Cloning the Default Dashboard
The option to clone a dashboard is available to anyone who has been given access to view it. Since the default dashboard is available to all registered users, anyone can clone it.
Cloning can be useful in situations where you want to create an exact copy of the default dashboard and customize it for personal use or want to reuse this layout and build a similar dashboard for your team.
To learn more about this option, see Clone a Dashboard.
Use Cases for the Default Dashboard
The default dashboard has been designed to provide baseline functionality out of the box. However, your organization will probably want to transform it from a generic starting point into a powerful tool that supports your unique needs. By tailoring it to provide value to all users, you ensure that it becomes a central hub for transparency, collaboration, and productivity.
Here are a few suggestions for getting the most out of this feature.
Personalized Landing Pages
With one tiny adjustment, you can transform the default dashboard into a personalized landing page for everyone on your team.
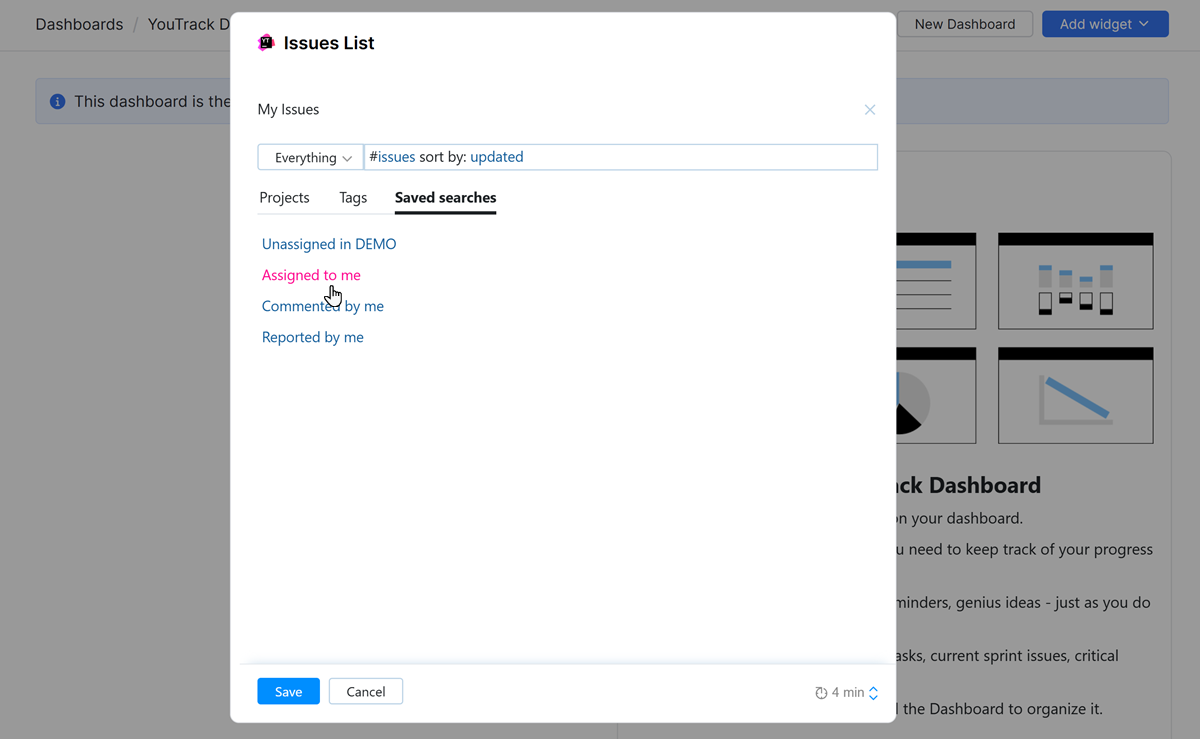
The Issue List widget provided in the default layout is configured to display all issues, sorted by last update. You can open this widget in edit mode and add the search criteria for: me to the existing query. There's even a shortcut for accessing this search criteria in the widget settings. Just select the Saved searches tab and click Assigned to me.
You can then decide if you want to customize the content of the default Quick Notes widget. You can also replace it with another widget or just delete it.
This example shows a dashboard that contains an Issue List widget that has been filtered to show issues for the current user as described here. We've then removed the Quick Notes widget and replaced it with an Issue Activity Feed widget that has also been filtered to show activity for the current user.
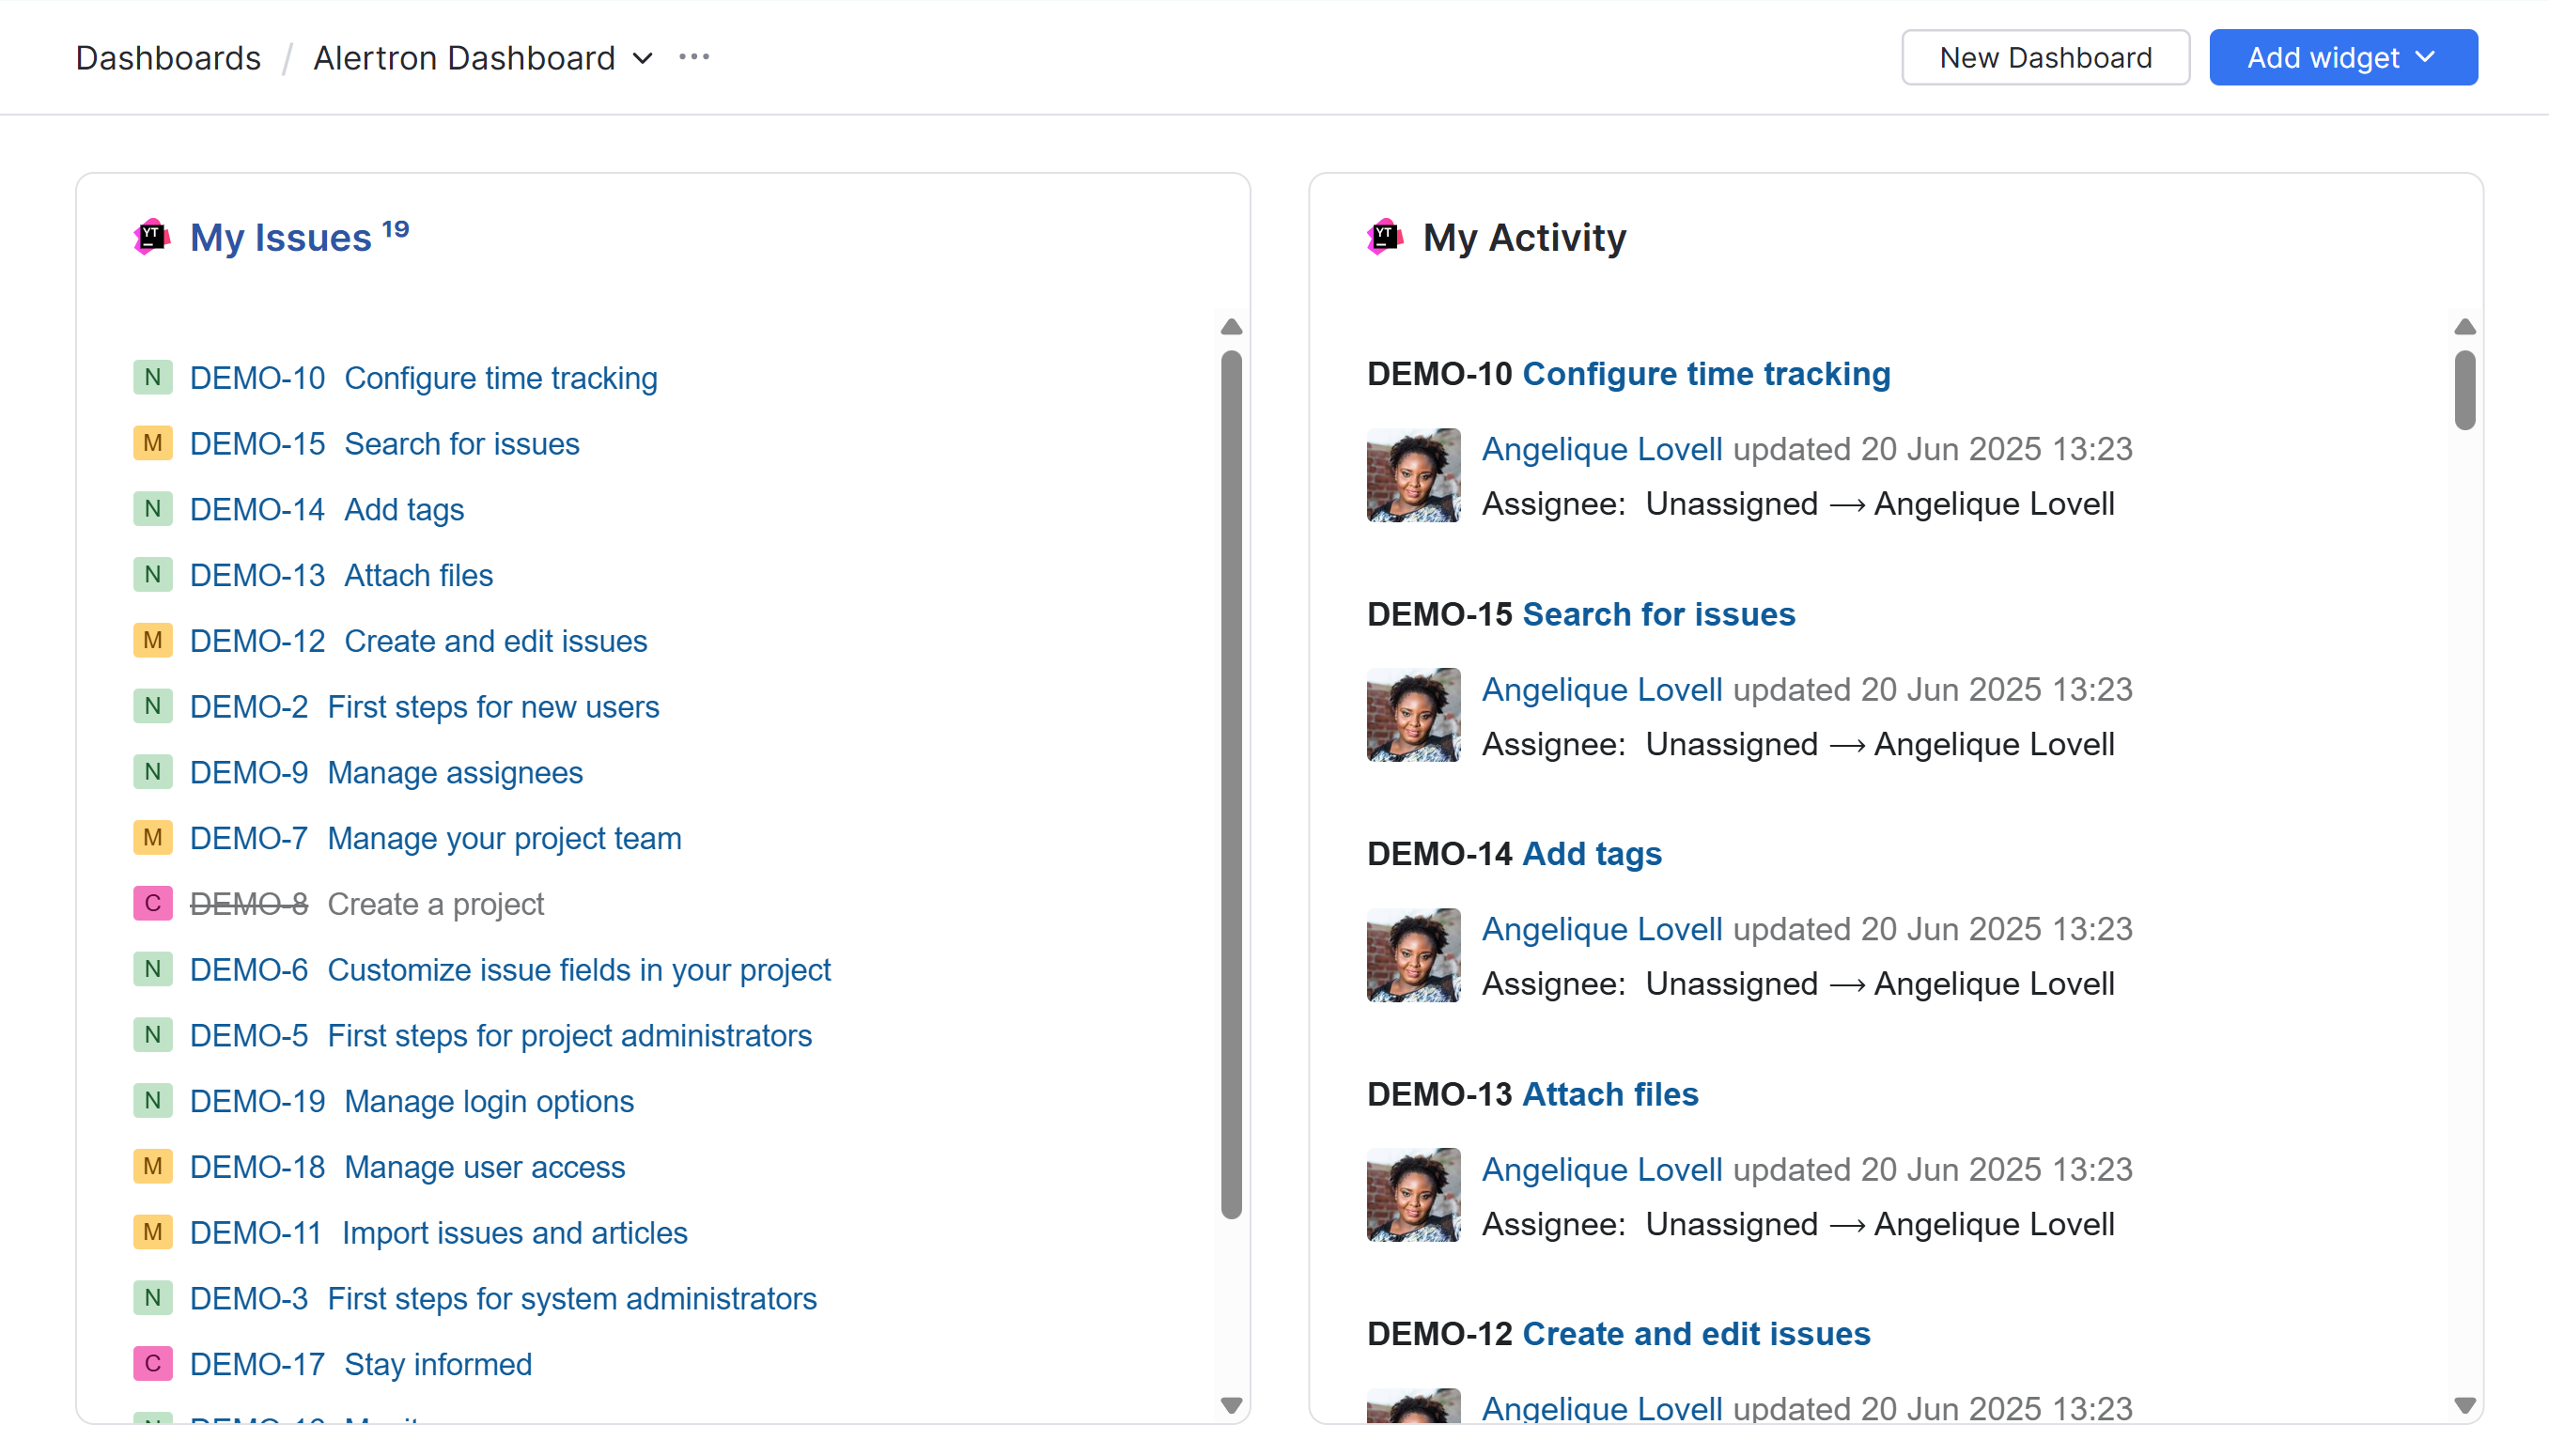
With this setup, each user sees a personalized list of their assigned issues whenever they open YouTrack. The activity feed helps them resume unfinished tasks right where they left off.
To learn how to configure a widget that displays a list of issues, see Issue List Widgets.
To learn how to set up a widget that shows an activity feed, see Issue Activity Feed Widgets.
If your organization uses time tracking, you can take it one step further and add a Personal Time Tracking widget to the dashboard. This widget displays a summary of the time spent working on issues assigned to the current user. To learn how to configure this widget, see Personal Time Tracking Widgets.
Cross-Team Reporting
Default dashboards in YouTrack are great for keeping an eye on progress across multiple teams. High-level boards pull in data from several projects, giving stakeholders and senior managers a clear view of company-wide activity. With real-time updates, these dashboards help teams stay aligned and focused on shared goals.
This dashboard uses widgets to display data from different reports. This is supported using multiple Report widgets.
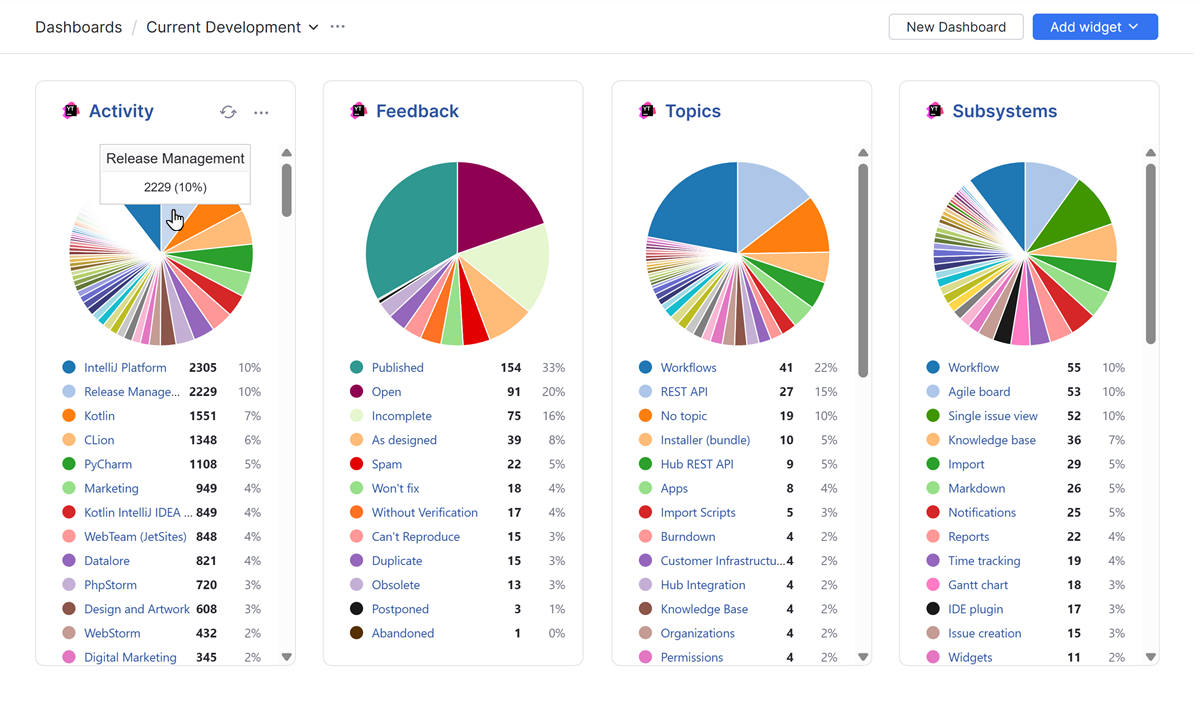
Each widget is interactive, showing totals when you move the pointer over a segment and opening a filtered list of issues when you select a value. Clicking the title opens the full report.
You have full control over which reports you want to show on the dashboard and how you want to lay out the data. To learn more about the available configuration options for this type of widget, see Reports Widgets.
Onboarding and Training
The default dashboard can serve as a practical tool for onboarding new users. By providing onboarding information in a centralized location, you can ensure that everyone has a clear picture of your organization and how to interact with other members.
This example shows a dashboard that shows a directory of information for the whole team. This is supported using multiple Quick Notes widgets.
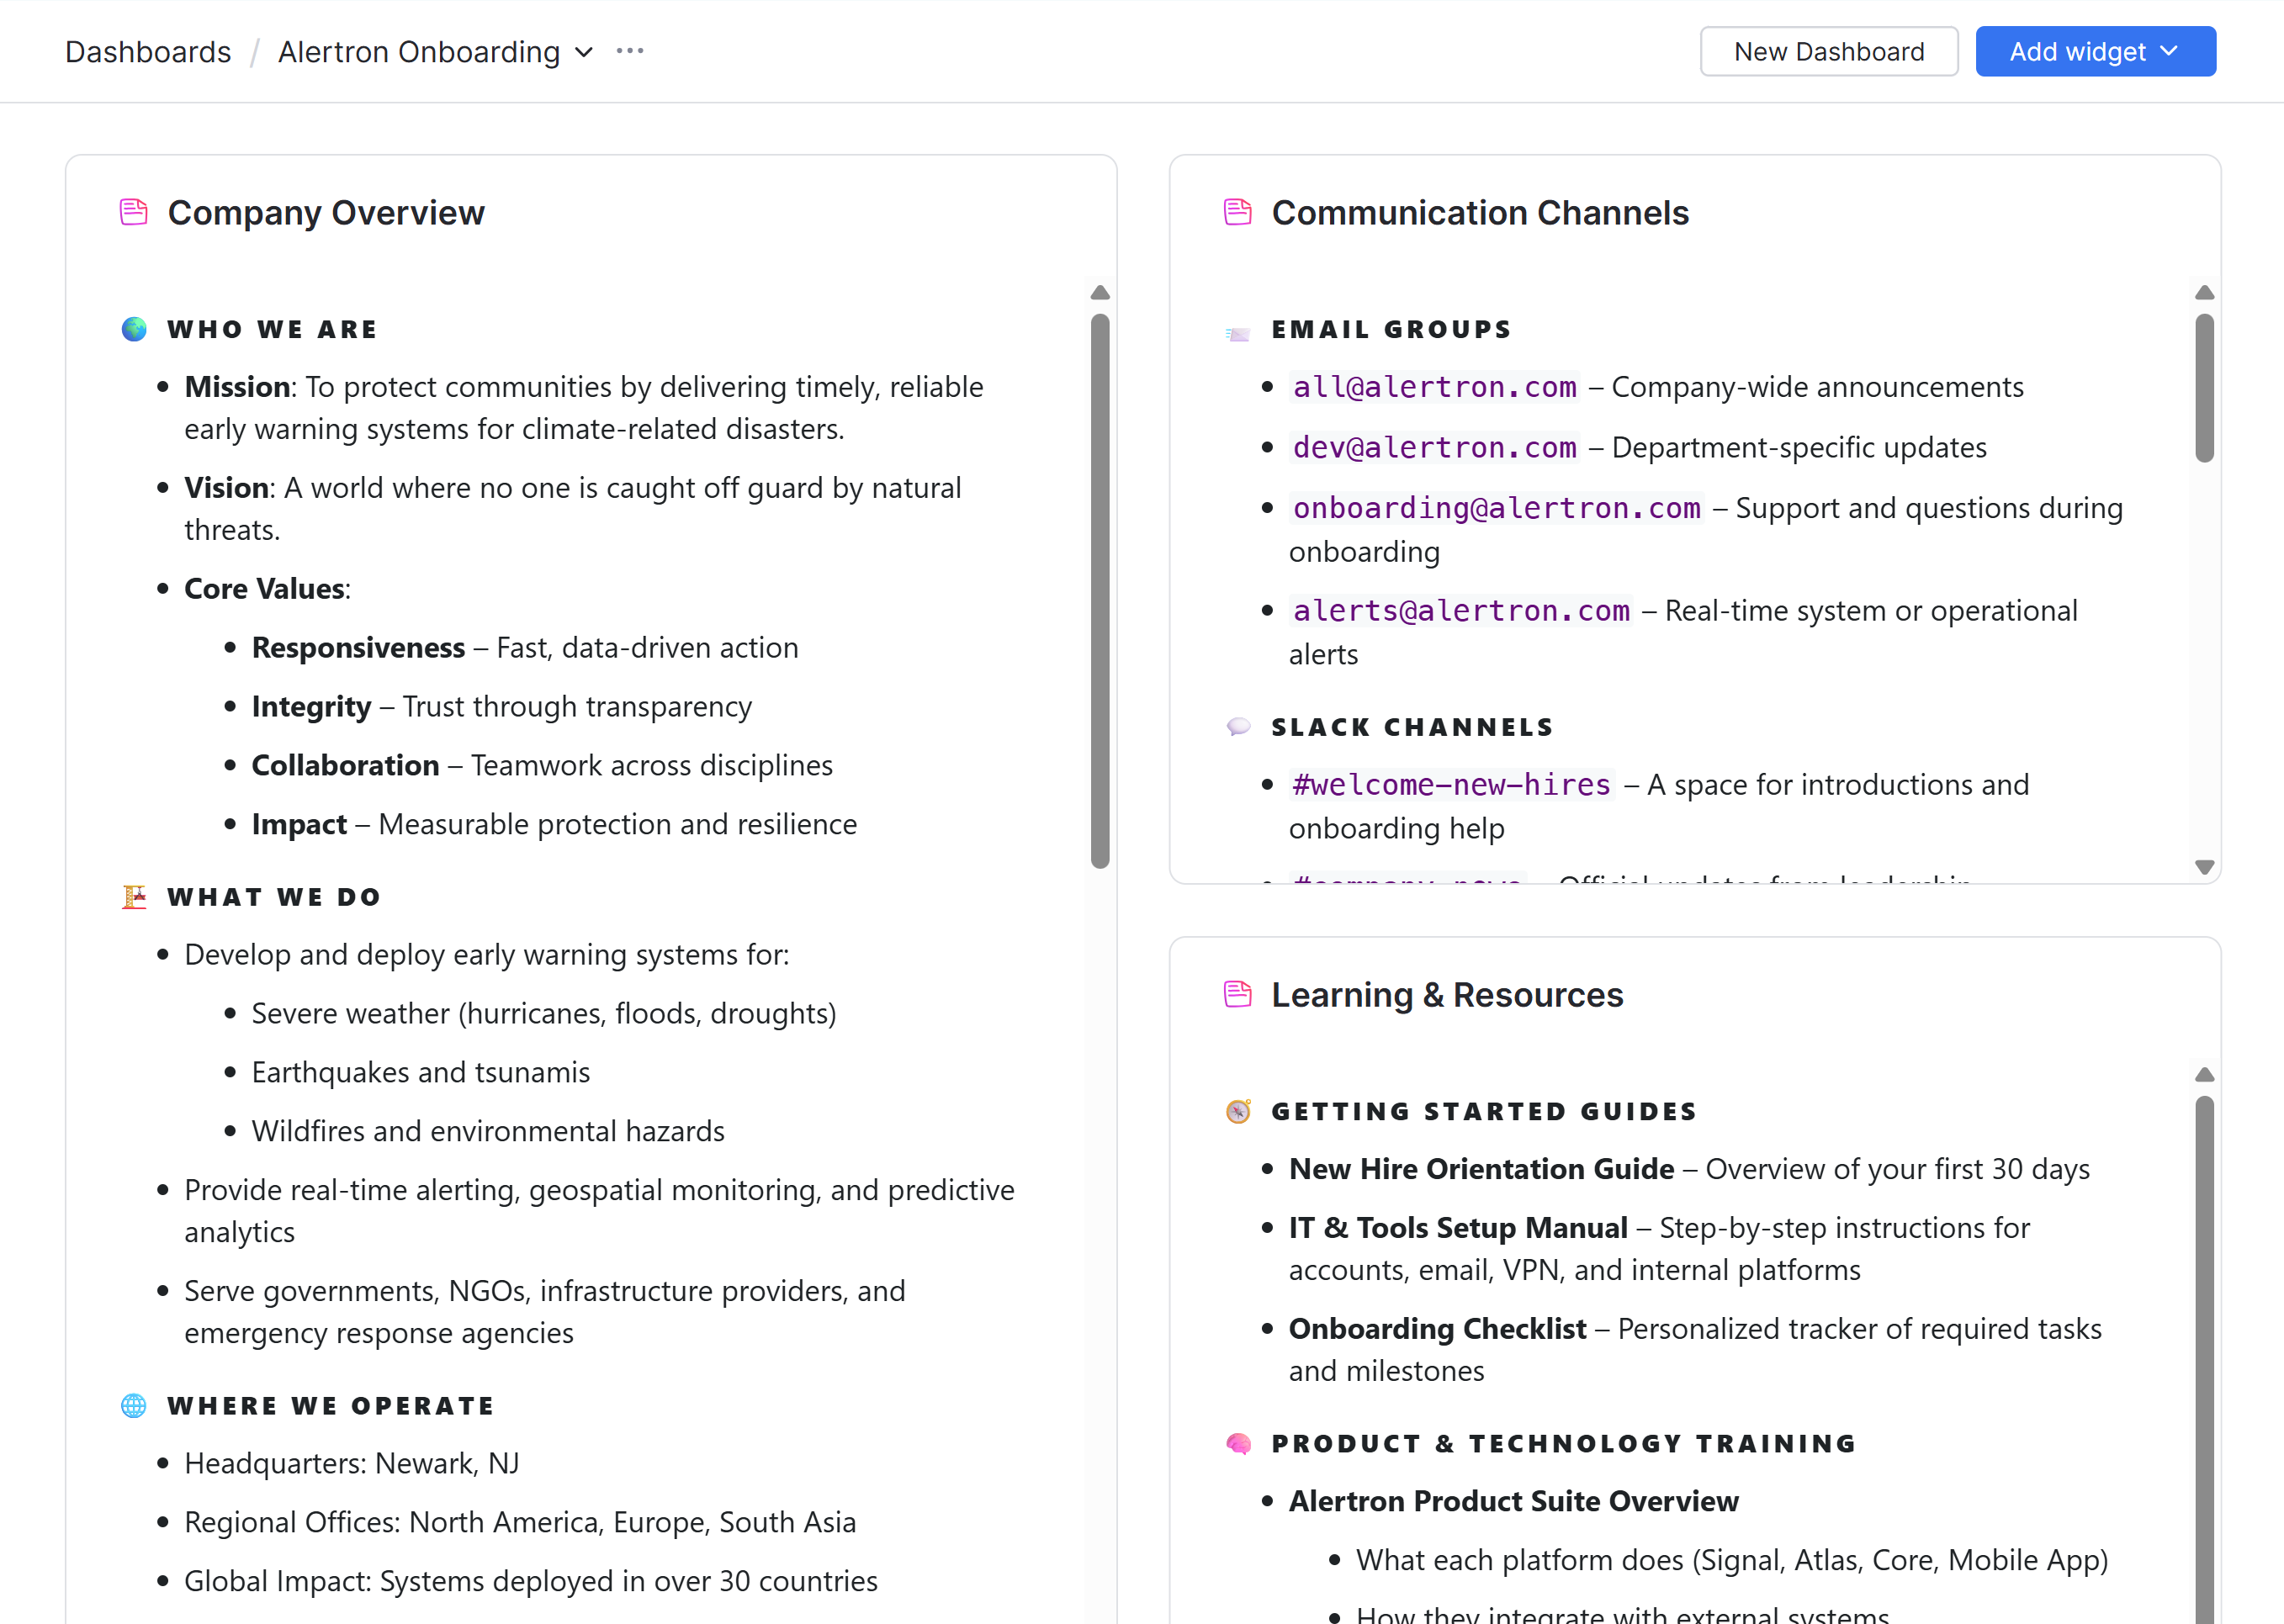
To learn how to work this type of widget, see Quick Notes Widgets.
Team Directory
The default dashboard can be used as a team directory. This provides a quick overview that lets you see who's in charge of a given project and the people who are currently assigned to each team.
To support this setup, just add a Project Team widget for each project you manage in YouTrack.
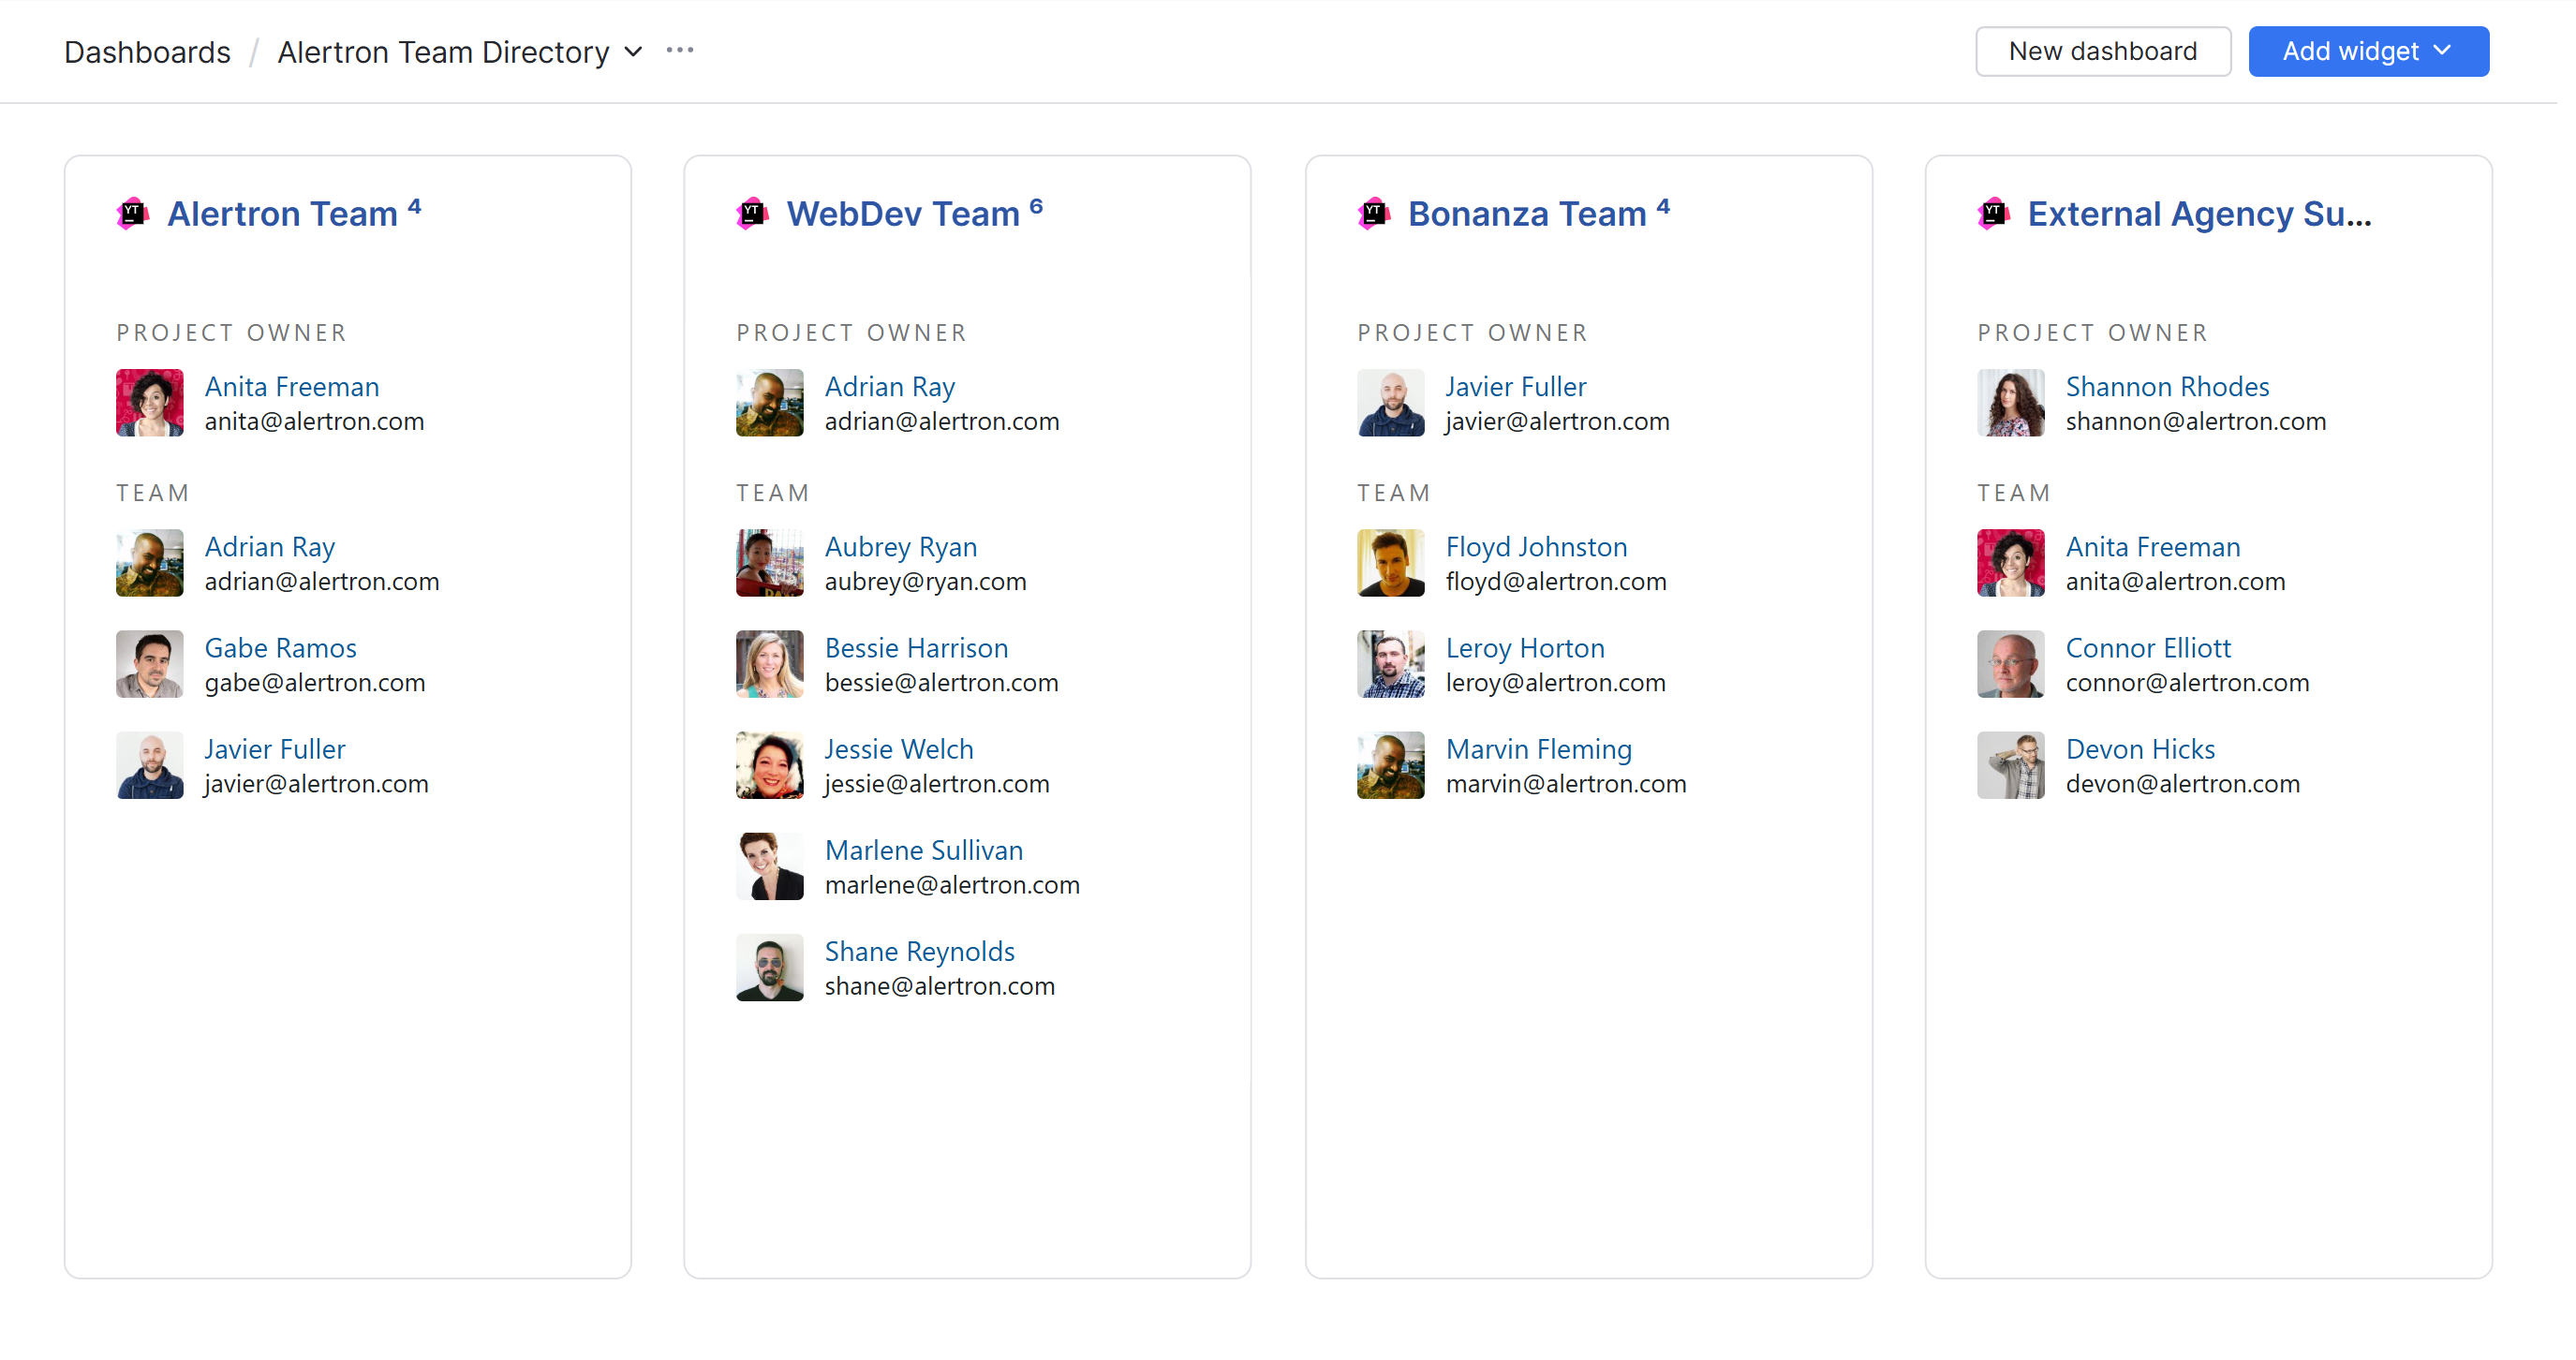
To learn how to configure these widgets, see Project Team Widgets.
Release Management
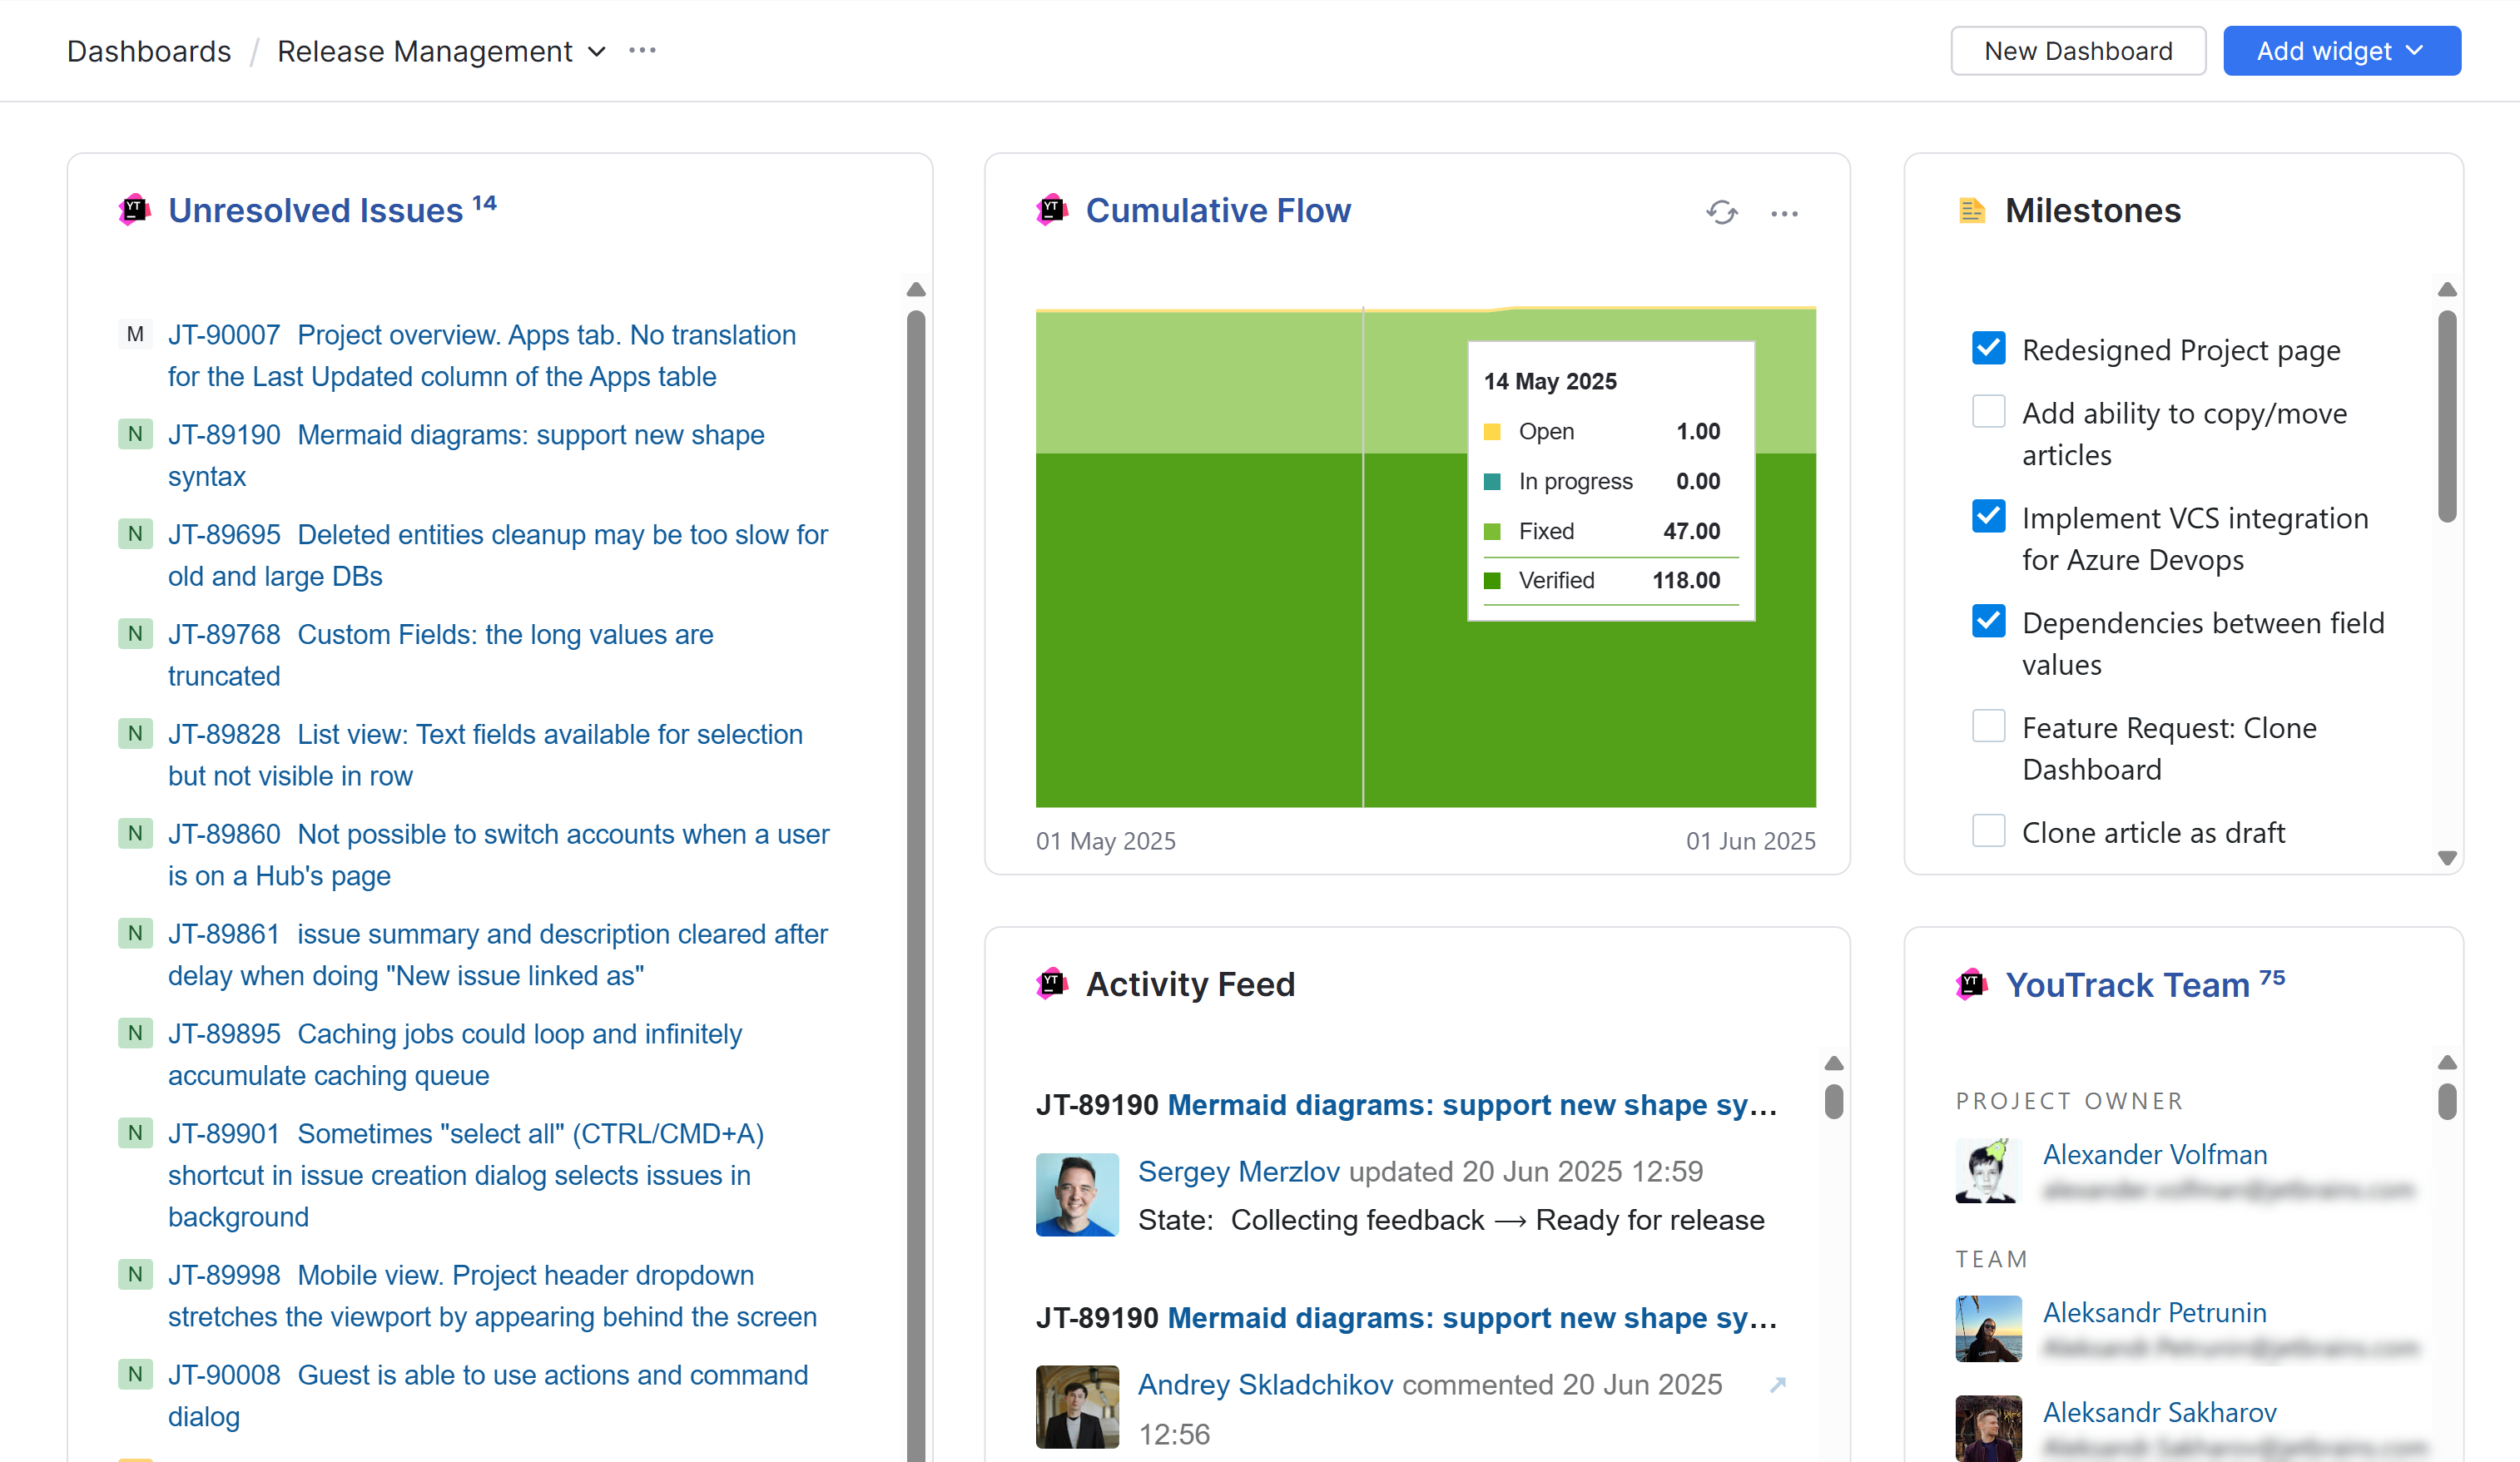
For smaller organizations, the default dashboard can be adapted to help track the planning and delivery of a release. By combining relevant widgets, you get a centralized view of your release pipeline, helping your team stay aligned and responsive.
Here are some widgets you might use for this setup:
Issue List — Filter unresolved issues by release version (
Fix version: <version-name>) to show tasks planned for the current release. Sort them by priority to make sure focus on what matters most.Report — Add burn down charts, cumulative flow diagrams, or pie charts that visualize issue states, completion rates, or blockers per release. These help you assess whether the release is on track.
Issue Activity Feed — Show recent changes to release-related issues. This helps product owners and leads track late-stage updates, reassignments, or last-minute blockers.
Quick Notes — Include checklists for release milestones, QA gates, or deployment steps. You can also add links to deployment environments and release note drafts.
Project Team — Display the team responsible for the release. This makes it easy to see who’s involved and how to reach them.
Here's an example that shows what a dashboard like this could look like.
Larger organizations might consider using the default dashboard to display an overview of key milestones or release activity. The example shown below is set up using a Due Date Calendar widget.
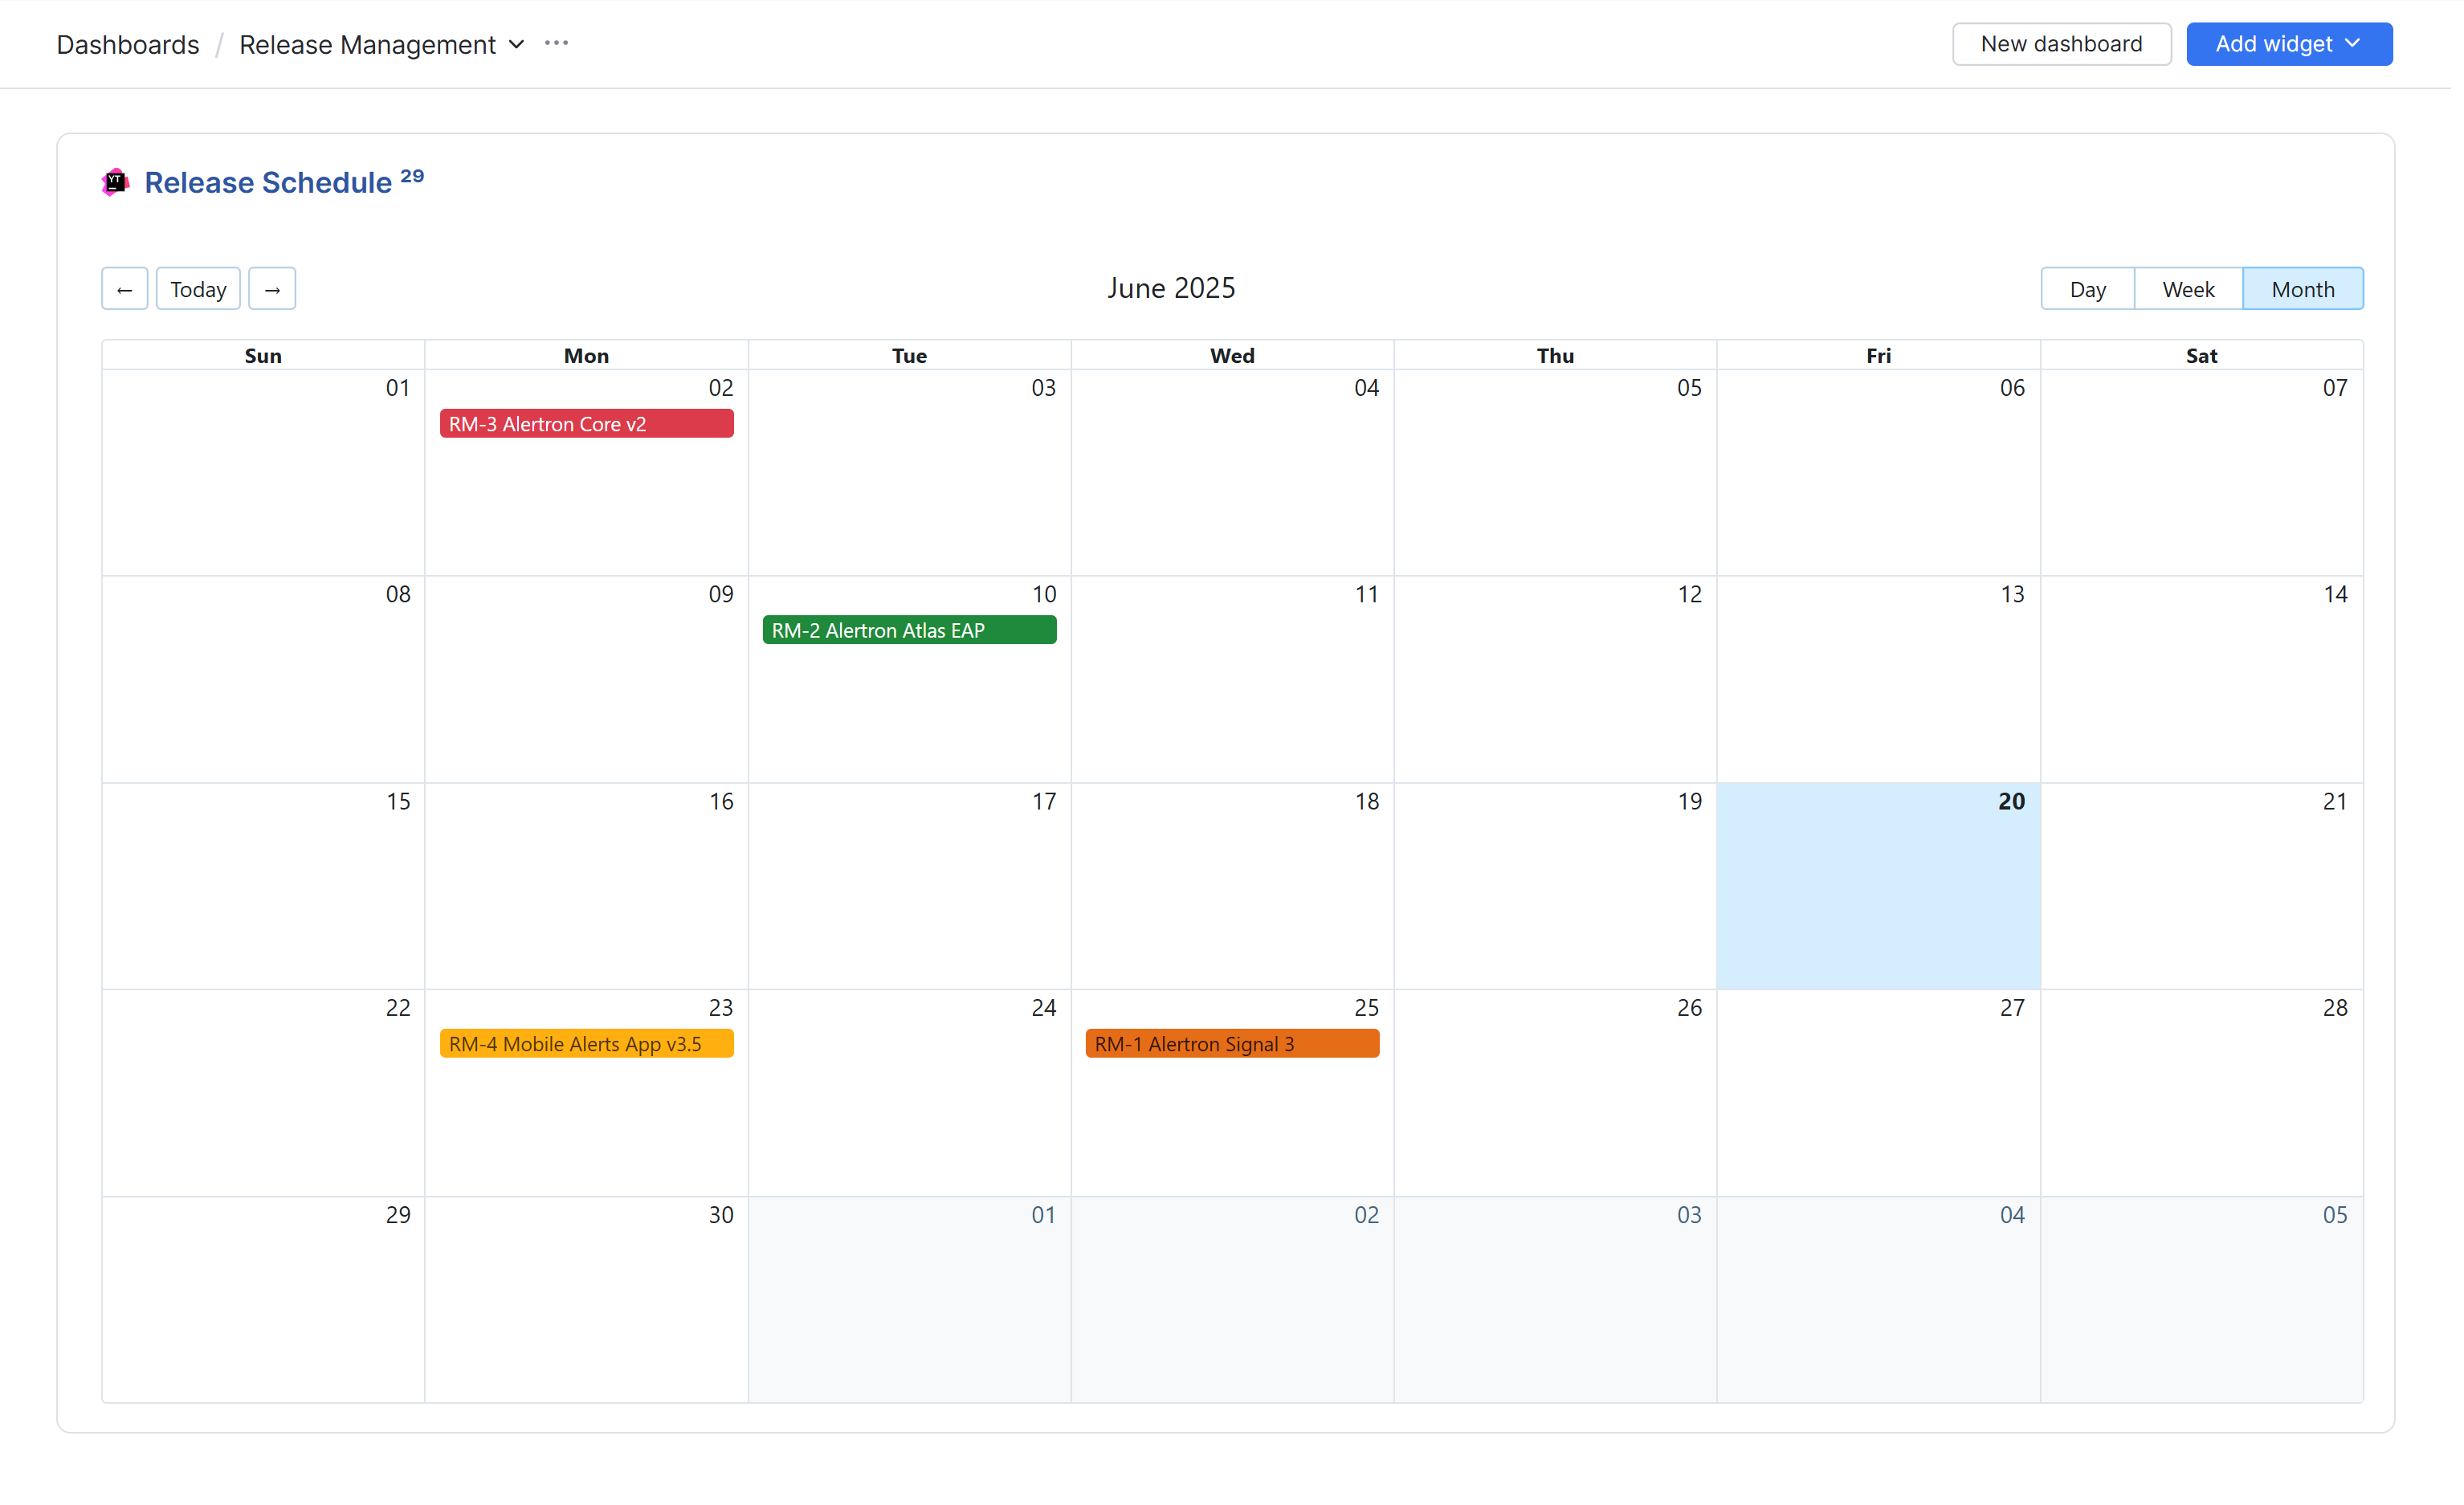
To learn how to configure this widget, see Due Date Calendar Widgets.
Mixing it Up
You don’t have to limit your dashboard to a single use case. YouTrack’s default dashboard is flexible enough to support any combination of widgets. Whether you're tracking personal tasks, visualizing team progress, sharing onboarding resources, or displaying team structures, you can mix and match widgets from each use case to build a dashboard that fits your role or team’s unique needs. This modular approach lets you create a tailored workspace that brings together the information that matters most, all in one place.
You can discover additional widget options by browsing the JetBrains Marketplace. It offers a variety of third-party and JetBrains-supported widgets that extend your dashboard's capabilities, ranging from advanced charts and integrations to custom views tailored to specific departments and industries. Exploring the marketplace is a great way to find tools that better match your team's needs and enhance your overall dashboard experience.
Here are a few ideas you might explore using apps from the marketplace:
Use the Embedded Sites widget to display content from your company website.
Use the Stack Overflow Digest widget to show a list of questions from Stack Overflow that match one or more tags.
Be sure to check the YouTrack Marketplace regularly, as new widgets and apps are added frequently. It’s a great way to discover fresh tools and integrations that can enhance your dashboards and adapt to evolving team needs.
