Manage Assignees
Before you can assign an issue to a user, you need to add this user to the list of assignees in the project where the issue was created.
In YouTrack, any issue field is a custom field. The Assignee field is a default custom field with the user[1] type. This field is auto-attached to all projects. This means that:
The Assignee field is available in YouTrack without additional configuration.
The Assignee can be set to a single value (user account), selected from a predefined list of users.
This field is added automatically to any new project.
The list of users is defined by a set of values that are attached to the Assignee field.
In a new project, the Assignee field includes all members of the project team by default.
You can customize the list of assignees to suit the needs of your project. For more information, see Manage the Project Team.
The most frequent task is to remove users from the list of assignees. If your project requires it, you can add a user or a group that are not members of the project team to the list of assignees.
When you add a user or a group to the list of assignees, provide this user or group with a sufficient permissions to view and edit issues in the project.
Configure Project Assignees
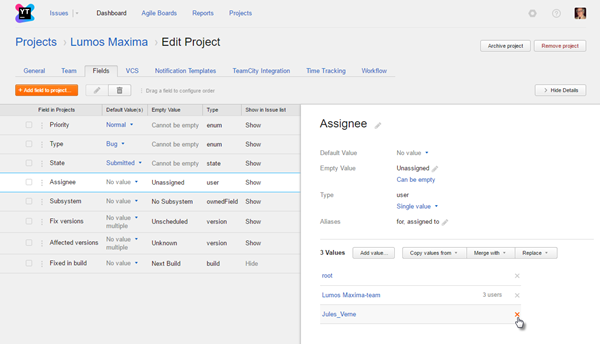
You can add users to or remove users from the list of assignees by editing the values of the Assignee field for this project.
To set the list of assignees for a project:
- Select a project on the Projects page.
Here, you can add a user or group to the project team. For more information, see Manage the Project Team.
Click the Edit project link, then select the Fields tab.
To remove users or groups who should not be assignees in this project, click the Remove icon and confirm the operation.
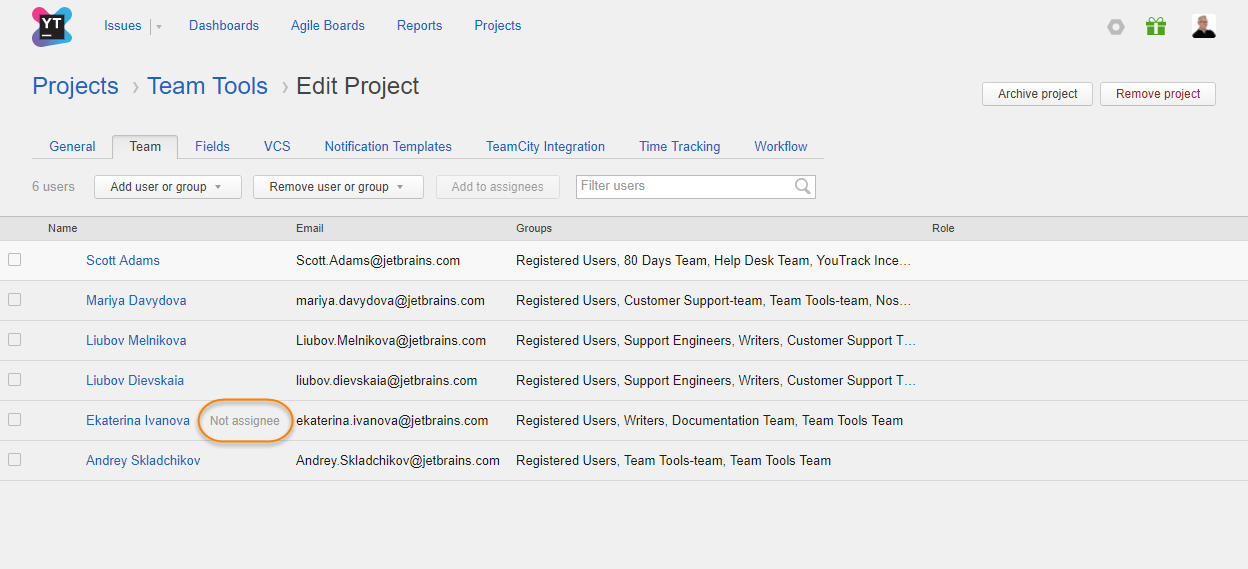
When a member of the project team is not on the list of assignees, the Not assignee flag is visible in the Team tab of the Edit Project page.
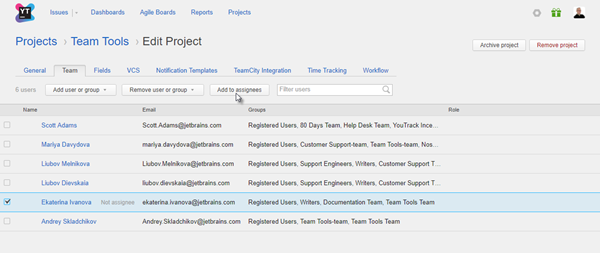
To add a team member to the list of assignees:
Tools for Editing the List of Assignees
The tools described here are applicable to any user or group in the system that is available to you as a project administrator, including users and groups that are not assigned to the project team. When you add a user or a group from outside the project team, provide this user or group with sufficient permissions to view and edit issues in the project.
The following options are available when you select the Assignee field on the Fields tab of your project.
To add a group so that all group members are added to the list of project assignees, click the Add value button and select a group in the dialog.
To add an individual user, click the Add value button and select a user account.
To copy a user from the values in the Assignee field of another project, click the Copy values from button and select an existing set of assignees.
To merge the list of assignees with another set of users, click the Merge with button. In this case, you get a single set of users who are assignees in multiple projects.
To replace the list of assignees with the list of assignees in another project, click the Replace button, and select the Assignee field associated with the project that you want to use.
Assign Issues to Multiple Assignees
The default Assignee field stores a single value. This means that issues can only be assigned to a single user. If you want to assign issues to multiple users instead, there are several options at your disposal. Use the following guidelines to determine which approach works best for you and your team.
Update the Base Properties of the Assignee Field
One of the base properties of the Assignee field determines whether the field stores single or multiple values. One way to assign issues to multiple users is to enable the Multi-value option for this field.
While this might seem like the simplest solution, there are a number of downsides to this approach:
This property affects all of the projects that use this custom field. As the default Assignee field is auto-attached to new projects, the field is generally used in every project in YouTrack. Every project that uses the field will store multiple assignees.
- There are a number of default workflows that set or change the value of the Assignee field. These workflows assume that the field stores a single value. If you modify this field to store multiple values, these workflows stop working.
To continue to use workflows with an Assignee field that stores multiple values, you need to re-write all of the rules to work with a field that stores a set.
Agile boards that use values from the Assignee field in the configuration stop working. For example, an agile board that uses values from the Assignee field to identify swimlanes will show a configuration error. You can only identify swimlanes by values in a custom field that stores single values.
If you can live with these limitations, you might settle for this approach. This solution is most appropriate for smaller organizations that carefully coordinate their project management processes. Larger organizations with a lot of project-specific customizations in the form of workflows can run into trouble.
Editing the base properties of a custom field that is auto-attached to new projects requires the Low-level Administration permission. You will probably require the assistance of a system administrator. To learn how to edit custom fields, see Create and Edit Custom Fields.
Clone the Assignee Field
The Clone field operation lets you copy the base properties of a custom field and manage the field independently in your project. You can clone the Assignee field in your project, then enable the Multi-value option without affecting other projects in YouTrack.
As a project administrator, you can update the custom fields in your project without the assistance of a system administrator. However, you encounter the same problems that are described in the previous approach:
Any workflow that is attached to your project that references the Assignee field must be updated to reference the cloned field and modified to work with sets.
As it stores multiple values, you cannot use the cloned field to identify swimlanes on an agile board.
If you manage assignees in your project without workflow support, this might be your best bet. To learn how to clone fields in your project, see Clone an Existing Field.
Store Additional Assignments in a Separate Field
While this may not seem like the most straightforward solution, it is the easiest to implement.
Use the default Assignee field to store the person who has primary responsibility for the issue.
Add a field to your project that allows multiple values and stores a
usertype. Use this field to store the names of additional users who are also working to resolve the issue.
You can also support this use case by adding multiple fields that store a single user in your project. In our YouTrack development project, the developer who is responsible for the changes is set as the Assignee. We use the additional fields Reviewed by and Verified by to store the user who performed these activities.
With this approach, you can continue to use workflows that manage the values for the Assignee field without modification.
If you use any reports to track the current work assignments for your team, you should update the report configuration to include the additional assignments. To learn how to add fields to your project, see Add a Custom Field.


