Time Tracking
Time Tracking lets users log their work on a particular issue to track the progress towards completion and time spent. This feature also lets users create reports that show the total time spent on a project based on a variety of parameters.
Define Your Work Week
The system-wide time tracking settings help YouTrack count and transform the values of period-type issue fields and work items. When users log their progress on an issue in work items, these settings transform the number of working hours into days and weeks of spent time.
For example, a user logs four hours of work on Monday and another four hours on Tuesday. If the Working period per day is set to 8, the total time spent is shown as 1 day (1d). If this setting had been configured for 10-hour workdays, the total time spent would be 8 hours (8h).
These settings affect the calculations for cumulative estimation and spent time.
The list of workdays also affect calculations on an agile board:
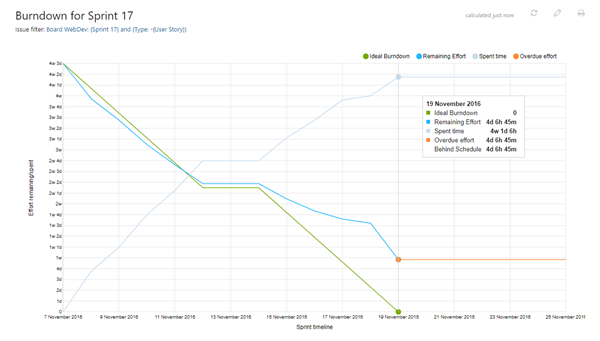
The ideal burndown that is shown on the Burndown report for a sprint has "steps" that represent non-working days. These steps indicate that progress is not expected on non-working days.
These settings are system-wide and affect every project in the system.
To set system-wide time tracking:
From the Core Features section of the Administration menu, select Time Tracking.
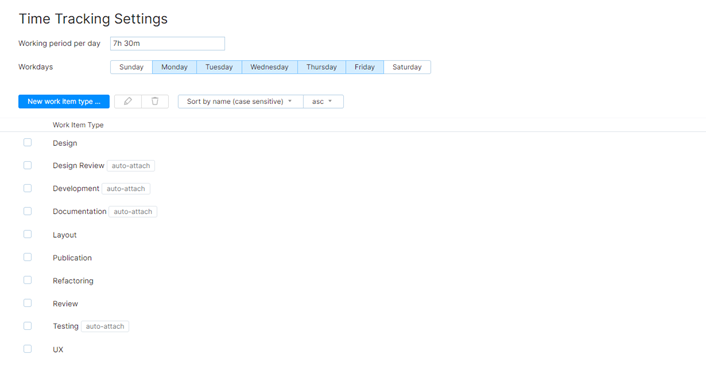
In the Working period per day field, enter the number of working hours in a workday as a period. For example, if your working days are billed at 7.5 hours, enter
7h30m.In the Workdays section, select the days of the week that are counted as working days.
Modify Working Hours per Day
In YouTrack 2018.3, we transformed the value that defines your working hours per day from an integer to a period value. This means that you can use fractional values to define your workdays.
When you edit the value for the Working period per day setting, the values for time tracking are recalculated. The recalculation applies to spent time in work items, calculated values in the field that stores total spent time, estimations, and all fields that store values as a period type. The actual value for period fields is stored in minutes. The presentation of the values in minutes, hours, days, weeks, and higher is based on the definition of a working day as defined by this setting.
Changes to your working period per day also affect the calculations for reports that include period values, including the Burndown, Time Report, Gantt Chart, and Estimation Report.
When you update this setting, you have two options.
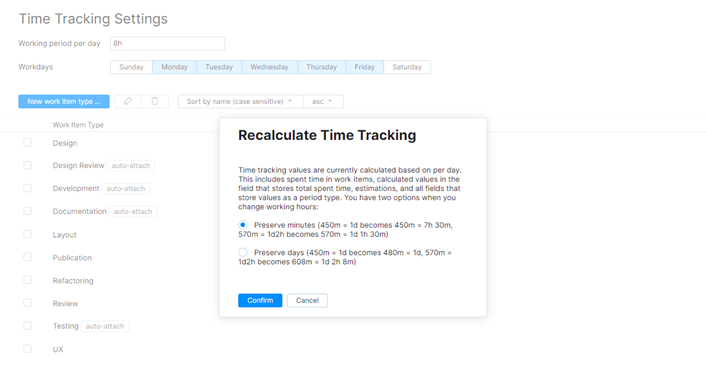
Use the following guidelines to determine which option is most appropriate for your use case:
Option | Description |
|---|---|
Preserve minutes | The values in minutes that are currently stored in period fields are untouched. The presentation of values in hours and days is updated based on the new working period per day. Use this option when you log spent time in actual minutes worked and ignore the values that are shown for days and larger periods in YouTrack. For example, your actual working day is 8.4 hours and you enter estimations for tasks that require two days as 1008m. Most teams that use this approach export values for time tracking to an external reporting tool that support non-integer values for calculating days. When you update the working period to match your actual workday and select this option, you can use the time tracking reports in YouTrack. |
Preserve days | The values that are currently stored in period fields are adjusted to match the number of minutes in the period that defines the working day. The presentation of values that are shown in days and weeks remain the same. Use this option when you have adjusted the amount of time that you log in work items to compensate for the number of hours per day as an integer. For example, your actual working day is 7.5 hours and you report half a day as 4 hours instead of 3h45m. |
No matter which option you choose, all of the values that are stored as a period are changed in some way. The following table shows you how time tracking values are recalculated when you change the working period per day from 8h to 7h30m.
Initial Value | Preserve hours | Preserve days |
|---|---|---|
1d | 1d30m | 1d |
1w3d | 1w3d4h | 1w3d |
1d2h | 1d2h30m | 1d1h52m |
6h | 6h | 5h37m |
Recalculation of period values is reversible. If you change the working period per day from 8h to 7h30m, you can revert the changes as long as you choose to preserve the same value that was selected in the previous operation. You may see some minor differences where fractional values have been rounded.
Categorize Your Work Activities
Users can categorize the type of work that they perform in an issue by assigning work item types to each work item. On the Time Tracking Settings page, you can add work item types to YouTrack. These work item types are available for use in all projects that have time tracking enabled.
Project administrators can choose which work item types they want to use in each project and can add their own work item types on the Time Tracking tab of the Edit Project page. Work item types that are added directly in the settings for a project are also shown in the list on the Time Tracking Settings page. For details, see Define Work Item Types.
To add a work item type:
From the Core Features section of the Administration menu, select Time Tracking.
Click the New work item type button.
The New Work Item Type dialog opens.
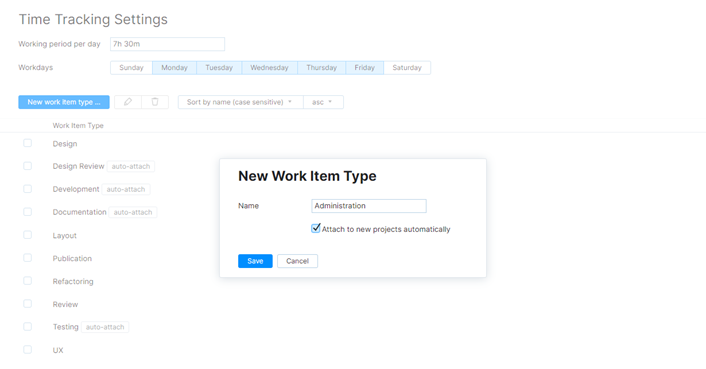
Enter a name for the work item type in the Name field.
If you want to add this work item type to all new projects, select the Attach to new projects automatically checkbox. This doesn't add the work item type to projects that already have time tracking enabled.
Click the Save button.
The work item type is added to YouTrack.
The work item type is available for use in all projects that have time tracking enabled. To use the new work item type in a project, a project administrator must add it to the project on the Time Tracking tab of the Edit Project page.
Sort Work Item Types
By default, work items are sorted manually in the order that they were added to the application. When ordered manually, each value is assigned an ordinal value that represents its position in the list. To change this order, drag each work item and drop it in its desired location.
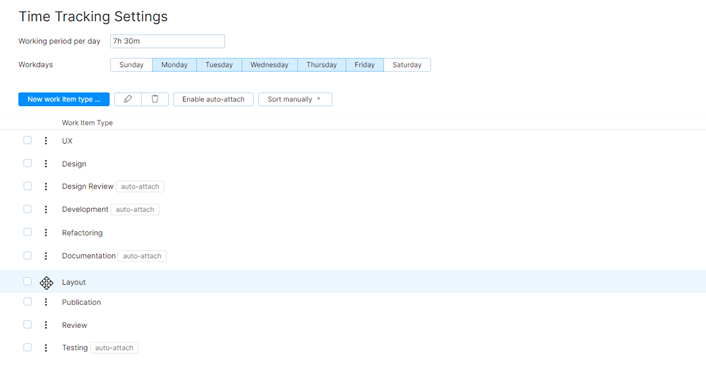
You also have the option to automatically sort work item types by name. These can be sorted by name in ascending or descending order. There are two options for sorting by name:
The case-sensitive option sorts values alphabetically from A - Z, then a - z.
The case-insensitive option sorts values alphabetically regardless of which case is used for the first letter.
When you switch from manual sorting to any other sort option, the manual option is discarded. If you revert to sorting work item types manually, you have to reapply the custom order.