Single Issue View
The single issue view displays all of the information related to an issue. Here's an overview of the functionality that is supported in this issue view.
Live Updates
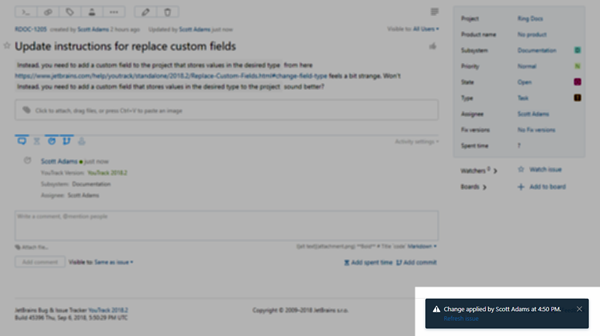
In single issue view, updates are applied to issues in real time. When another user applies a change to an issue that you are currently viewing, the update is shown immediately. If the update is added to a section of the activity stream that is not currently visible in your web browser, a notification is shown at the bottom of the page.
If changes are applied to an issue that is open in an inactive browser tab, you are notified that there are updates available and prompted to refresh the page.
Search Bar
The search bar is displayed in the single issue view.

This shows you the search context and query that determine which issues are shown and can be displayed by navigating between issues in this view.
The search context includes a visible input field to filter items in the list.
The query completion highlights search attributes that match the current input.
Attribute values are shown in blue text. Words that are parsed as text search are shown in gold.
The counter for issues that match the current search query is shown inline to the right the search bar.
When you access an issue from the Issues list, the following options are available in the search bar:
Option | Description |
|---|---|
Go back to search | Navigates back to show issues that match the current search query in the Issues list. |
Previous issue | Navigates to the previous issue in the list that matches the search query. |
Next issue | Navigates to the next issue in the list that matches the search query. |
To learn more about search queries, see Search.
Issue Toolbar
The single issue view includes a toolbar that lets you apply specific actions to the current issue.
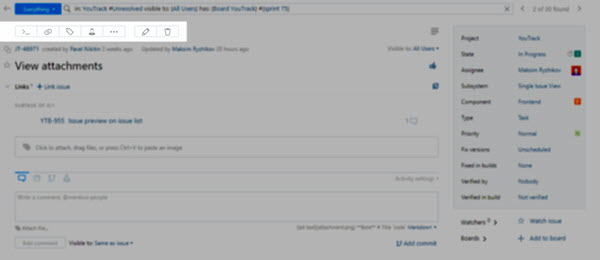
The following controls are available in single issue view:
Control | Description |
|---|---|
Open command dialog | Opens a dialog that lets you apply one or more commands to the current issue. For a list of supported commands, see Command Reference. |
Link issue | Opens a list from which you can select an issue link type. When you select an issue link type, a dialog for linking the current issue to one or more target issues opens. |
Add tag | Opens a list of tags that are available to you. Select a tag from the list to add the tag to the current issue. |
Assign | Opens a list of users to whom the issue can be assigned. Select a user from the list to update the value in the Assignee field. |
Show more | Displays a list of additional actions. This menu also contains custom actions that are supported by workflows. For details, see Show More Menu. |
Edit issue | Opens the issue in edit mode. Here, you can change the basic properties of the issue, such as the Project, Summary, and Description. You also have access to set or change the values for supplemental text fields. |
Delete issue | Deletes the current issue following a confirmation message. This action deletes the issue permanently and cannot be undone. To learn more about deleting issues in YouTrack, see Delete Issues. |
Show More Menu
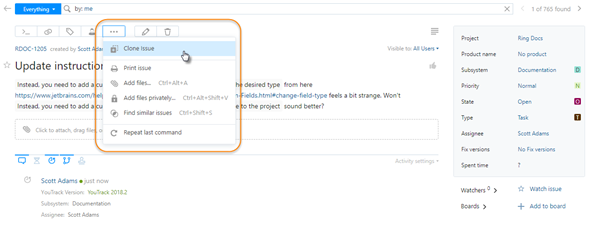
The following actions are available from the Show more menu:
Control | Description |
|---|---|
Clone issue | Creates a copy of the current issue. For more information, see Clone Issues. |
Clone issue as draft | Creates a copy of the current issue and adds it to your list of issue drafts. |
Custom actions | The first items in the Show more menu are custom actions that are supported by workflows. The set of actions that are available in each issue is determined by the workflows that are attached to the current project. For more information, see Action Rules. |
Print issue | Opens the issue on a printer-friendly page. Use the Print command in your browser to print the page. |
Attach files | Opens a dialog that lets you locate and attach a file from your local directory. |
Attach files privately | Opens the Attach Files Privately dialog. Here, you have the option to restrict the visibility for all files to specific groups and/or users. Use this option for files that contain sensitive information. |
Find similar issues | Opens a list of issues that are similar to the current issue in a new browser tab. The Issues list uses the |
Repeat last command | Open the Apply Command dialog with the most recent command in the input field. |
Distraction-free Mode
The Toggle distraction-free mode button in the toolbar hides the menu and search bar in the header as well as the sidebar for custom fields. This lets you focus on the issue description and the content in the activity stream.
This view mode is extremely useful when your description contains a lot of text, as the content is presented in the full width of the page.
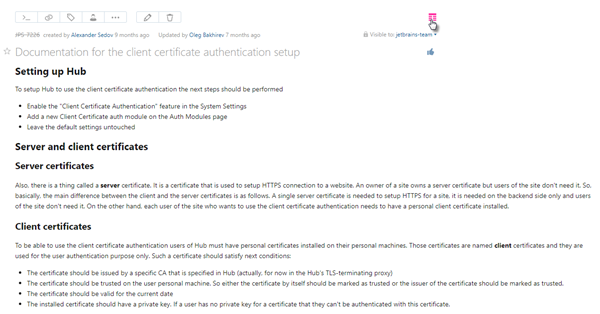
Even though the custom fields are hidden, you can still open the Apply Command dialog with your keyboard and update the values using commands.
Tags
Just below the toolbar, you'll find a list of tags that are currently attached to the issue.

To add a tag, click the Add tag button in the toolbar or use the
add tag <tag name>command.To remove a tag, click the Remove tag icon inside the tag or use the
remove tag <tag name>command.
or more information about tags, see Tag Issues.
Issue Details
The single issue view displays detailed information for the current issue.
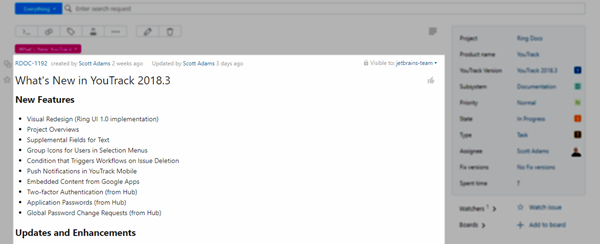
The following issue details are shown in the body of the page:
Item | Description |
|---|---|
Issue ID | Displays the ID of the issue. |
Created by | Displays the full name of the user who reported the issue. The date and time the issue was reported is also shown. Click the name to open the profile page for this user. |
Updated by | Displays the full name of the user who last updated the issue. The date and time of the last update is also shown. Click the name to open the profile page for this user. |
Visible to | Displays the current visibility setting for the issue. For issues with restricted visibility, the lock icon is displayed to the left of this label. Click the link to set or change the visibility of the issue. For more information, see Issue Visibility. |
Issue Summary | Displays the summary of the issue. You can update this information in edit mode. |
Issue Description | Displays the description of the issue. You can update this information in edit mode. |
Quick Copy Options
Clickable controls to the left of the page let you copy the issue ID and summary or description to the dashboard.
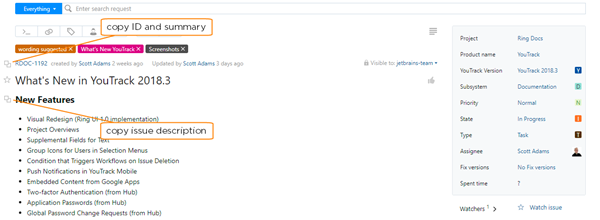
These controls are shown when you move your pointer over the element that you want to copy.
Star Tag
To the left of the issue summary is a control that lets you add the Star tag to the issue. This action also adds you to the list of watchers.
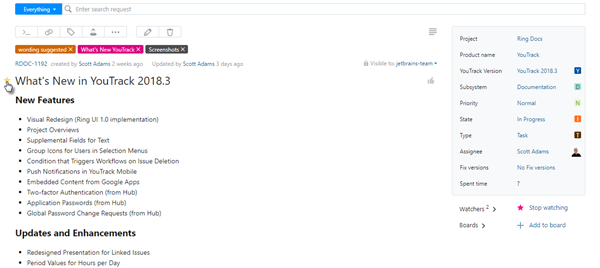
Click the icon a second time to stop watching the issue.
For more information, see Watch Issues.
Voters
To the right of the issue summary is a control that lets you vote for an issue and view the list of voters.
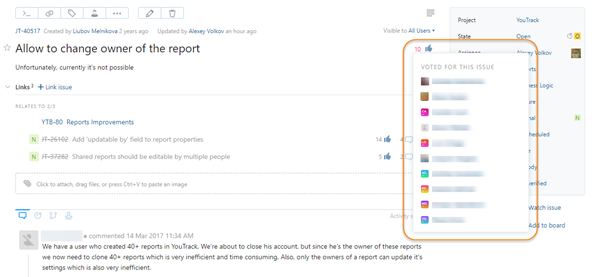
Click the Vote icon to vote for an issue. If you are the reporter for the current issue, this control is disabled.
When an issue has one or more votes, a counter is shown to the left of the Vote icon. Click the counter to show the list of users who have voted for the issue.
For more information, see Vote for Issues.
Supplemental Text Fields
Single issue view supports a new type of custom field for text. These fields store a string of characters that is interpreted in Markdown syntax when shown in the issue.
Fields with this type are not shown in the sidebar with other custom fields. Instead, they appear just below the issue description.
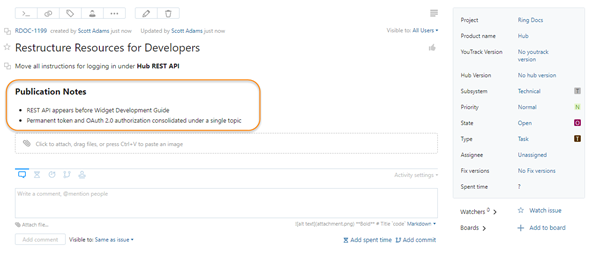
As with the issue summary and description, you can only change the values for text-based fields when an issue is open in create or edit mode. When editing these fields, a preview of the input is shown as formatted in Markdown. For a complete list of formatting options, see Markdown Syntax.
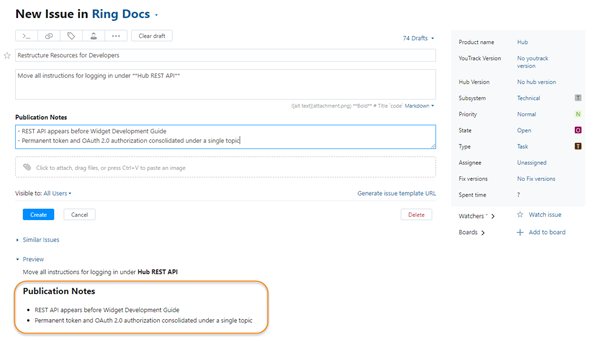
Otherwise, working with supplemental text fields is just like any other custom field in YouTrack.
To learn how to add fields to a project, see Add a Custom Field.
To learn more about fields that store vales as
text, see Simple Types.
Issue Links
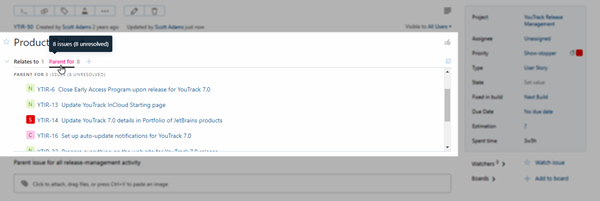
This panel displays a list of issues that are linked to the current issue. It is only visible when the current issue is linked to at least one issue. When this panel is hidden, you can either use the Link issue button in the toolbar to link to other issues or use the syntax add <link type> <target issue> to link to other issues with a command.
The toolbar displays counters for each issue link type. A tooltip for each counter shows the total number of issues that are linked to the current issue with this link type. The tooltip also tells you how many linked issues are unresolved.
All of the issues that are linked to the current issue are displayed as a list, grouped by issue link type.
Unresolved issues are shown higher in the list.
The height of the panel is restricted. You can scroll to view more linked issues, click the tabs to show issues by link type, or click the expand control at the bottom of the panel to show all linked issues.
The following controls are available in this panel:
Control | Description |
|---|---|
Show/Hide linked issues | Collapses and expands the list of linked issues. |
Link issue | Opens a list of issues in a dialog that lets you link one or more issues to the current issue. Use the search box in the dialog to filter the list. |
View linked issues in Issues list | Opens a list of linked issues in a new browser tab. |
expand/collapse | Expands and collapses the issue links panel. |
For each issue that is linked to the current issue, you see an icon that represents the issue priority, the issue ID and summary, and the current number of votes and comments. Click the link for the ID and summary to open a linked issue in single issue view.
The following options are available for each issue in the linked issues panel:
Option | Description |
|---|---|
Star issue | Adds the Star tag to the linked issue. This action also adds you to the list of watchers. For more information, see Watch Issues. |
Vote for issue | Adds you to the list of voters for an issue. If you are the reporter for the linked issue, this control is disabled. For more information, see Vote for Issues. |
Remove link | Removes the link between the current issue and the linked issue. |
For more information, see Link Issues.
Attachments
Relevant information is often contained in external files that are attached to an issue. The files that are attached the current issue are shown as thumbnails in the attachments panel.
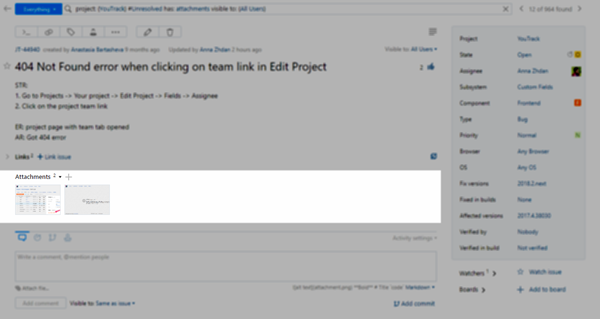
Here, you also find a dedicated menu for managing attachments.
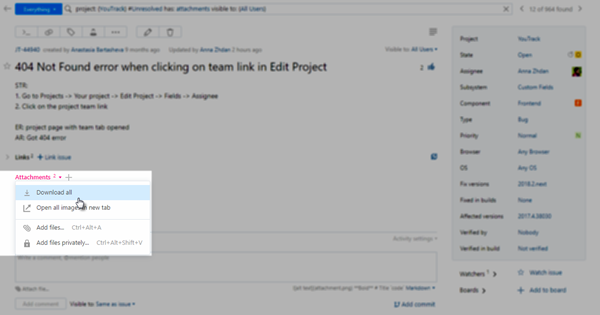
The following options are available from the Attachments menu:
Option | Description |
|---|---|
Download all | Just like you'd expect, this downloads all of the files that are attached to the issue to your local directory as a ZIP archive. |
Open all images in new tab | Displays all of the image files that are attached to the issue in a new browser tab. |
Add files | Opens a dialog that lets you locate and attach a file from your local directory. |
Add files privately | Opens the Attach Files Privately dialog. Here, you have the option to restrict the visibility for all files to specific groups and/or users. Use this option for files that contain sensitive information. |
For more information, see Attach Files.
Activity Stream
The activity stream at the bottom of the page provides a chronological list of changes that have been applied to the issue. The filters at the top of the list let you select which types of changes you want to show or hide.
Here's an example of the activity stream filtered to show comments and VCS changes:
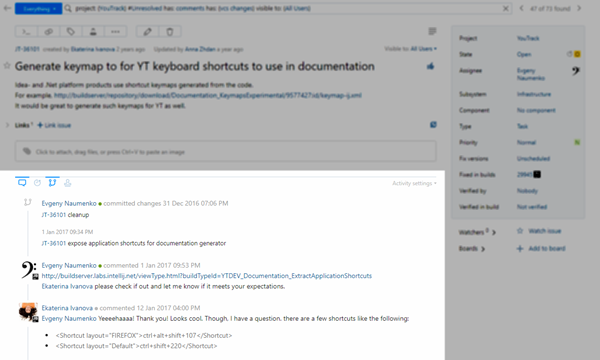
The following filters are shown in the toolbar at the top of the activity stream:
Filter | Description |
|---|---|
Comments | Toggles the visibility of comments in the activity stream. |
Spent time | Toggles the visibility of work items. This control is only visible when the Time Tracking feature is enabled in the project. For details, see Enable Time Tracking. |
Issue history | Toggles the visibility of the issue change history. |
VCS changes | Toggles the visibility of VCS changes that have been linked to the issue. This control is only visible when the project is integrated with a version control system or is connected to a VCS through an integration with TeamCity. For details, see Connect to a VCS and Integrate with TeamCity. |
Code reviews | Toggles the visibility of activities related to a code review in Upsource. This control is only visible when an integration with Upsource is configured for the project. For details, see Upsource Integration. |
For more information about the updates that are shown in the activity stream, see View Issue Updates.
The Activity settings menu stores your preferences for viewing items in the activity stream. You can select whether to show activity from newest to oldest or vice versa.
The following options are available from the Activity settings menu:
Control | Description |
|---|---|
Sort: oldest first | Displays changes in chronological order. The input field for comments, work items, and manual commits is shown at the bottom of the page. |
Sort: newest first | Displays changes in reverse-chronological order. In this mode, the input field for comments, work items, and manual commits is displayed at the top of the activity stream. |
Expand issue history items | When enabled, each issue history item is expanded automatically. Otherwise, issue history items with more than one line of information are collapsed. |
Show permalink | Displays a link to the issue with the set of filters that are currently active. |
Fields Panel
The panel to the right of the issue detail displays additional information related to the current issue.
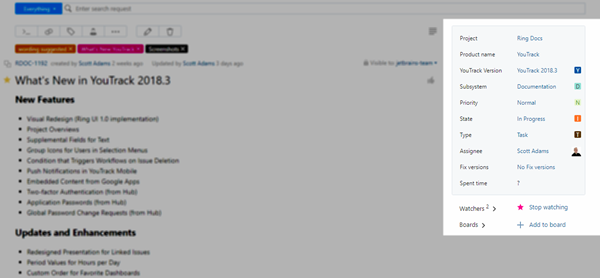
The following information is shown in this section of the page:
Item | Description |
|---|---|
Custom Fields | This section displays the custom fields that are attached to the project and the current values that are set for each field. Click a value to select or enter a new value for the field. |
Watchers | Displays the number of users who are watching the issue.
|
Boards | Displays the list of agile boards that the current issue appears on.
|
There's an option in your YouTrack profile that lets you move the fields panel to the left side of the page. Many users who participated in internal testing of the feature found that the current layout works best with this option enabled. This consolidates all of the important information to the left of the page where it can be scanned at a glance.
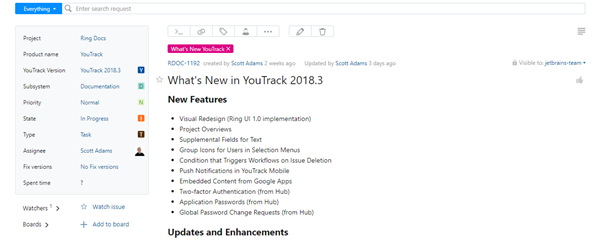
To move the fields panel:
Click your avatar and select the Profile link.
On the General Settings tab, enable the Show fields pane on the left option.
Your profile settings are updated
When you open a new issue or refresh an open page in single issue view, the fields panel is displayed to the left of the issue detail.
Quick Search Overlay
You can now execute a search request without navigating away from the current issue to the Issues list. To open the search overlay, press Ctrl + K (Windows) or ⌘ + K (macOS).
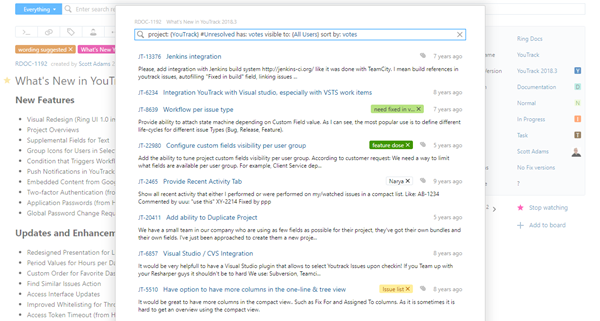
Enter your search query in the input field to show a list or matching issues.
For a complete list of search terms and parameters, see Search Query Reference.