Migrate from Visual Studio Code
This guide is intended for Python developers who use Visual Studio Code and need information about switching to PyCharm. It includes the practical steps required to import a Visual Studio Code project into PyCharm followed by a brief explanation of the most notable differences between the two IDEs, including the user interface, the general workflow, and the shortcuts.
Import a Python project to PyCharm
To import a Python project created in Visual Studio Code, just open the project directory in PyCharm:
Do one of the following:
Go to .
On the Welcome Screen, click Open.
In the dialog that opens, select the directory that contains the desired source code. Note that applications created externally are marked with the regular directory icon
.
Click Open (on Mac) or OK (on Windows).
If you have another project open, specify whether you want the new project to be opened in a separate window or close the current project and reuse the existing window.
Configure a Python interpreter
PyCharm searches for a virtual environment in the source directory. If detected, PyCharm suggests using it for the project or configuring a new interpreter.
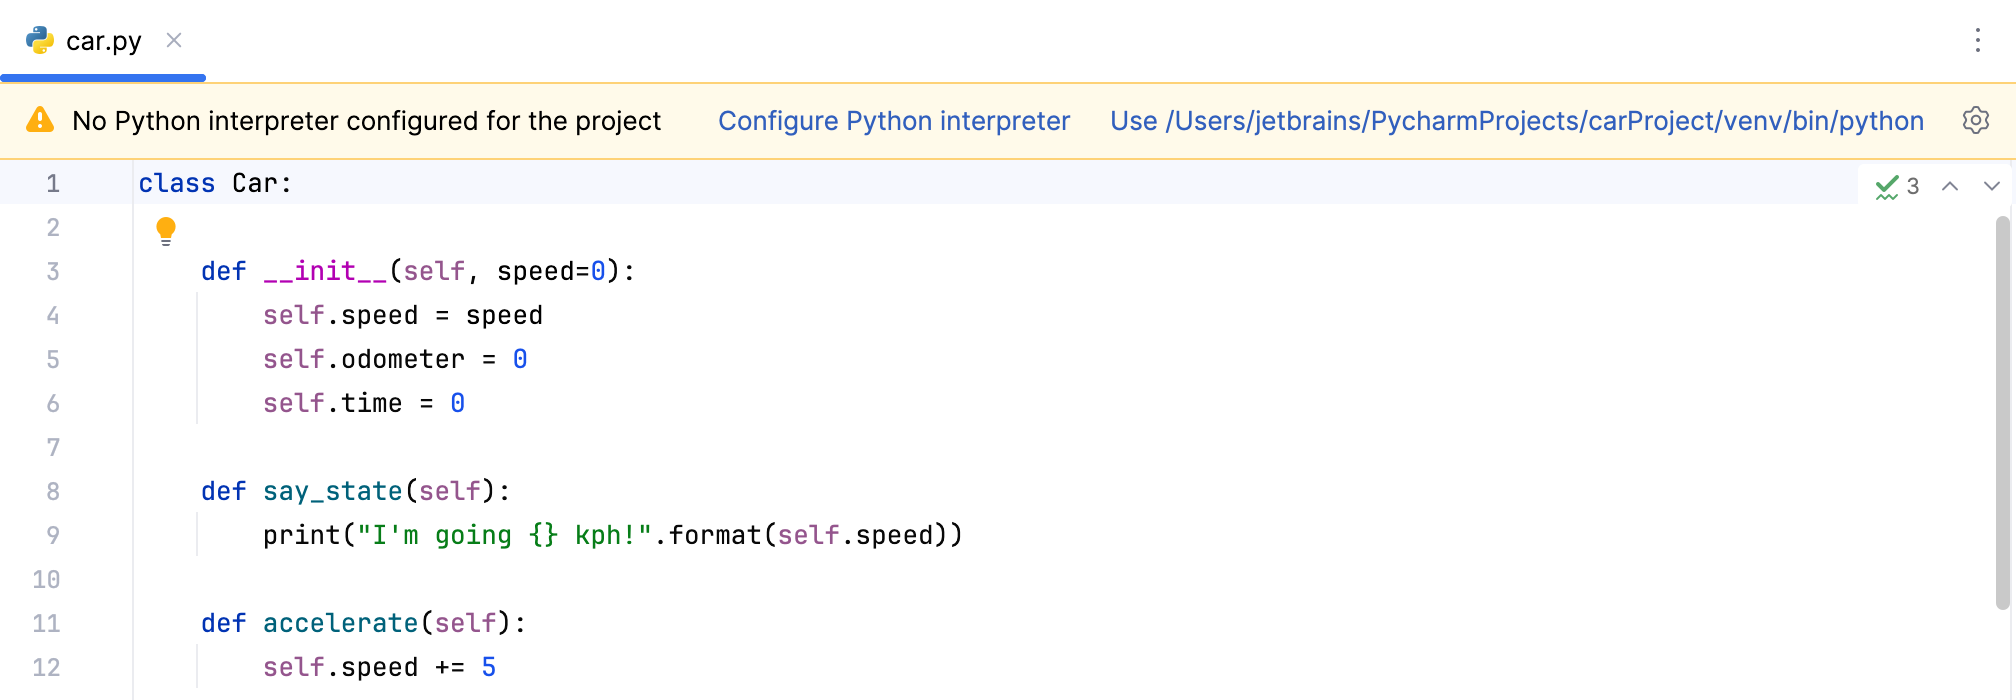
If no environment is detected, PyCharm sets up the system interpreter for the project.
For information about configuring other types of Python interpreters, refer to one of the following sections:
Install the required packages
If the imported project does not contain a virtual environment, you can configure a new Python interpreter, and then install the required packages for it:
For conda and virtualenv environments, you can install the required packages from requirements.txt.
You can also create a virtualenv environment using requirements.txt.
For pipenv environments, enable the Install packages from Pipfile checkbox when creating the environment, or create an environment using the Pipfile.
For Poetry environments, enable the Install packages from pyproject.toml checkbox when creating the environment, or create an environment using pyproject.toml.
Import run configurations
At the moment, PyCharm doesn't support importing run/debug configurations from launch.json. You will need to create a run/debug configuration for your project manually:
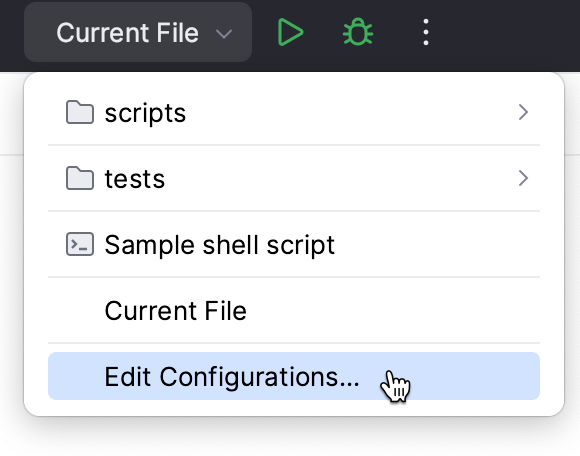
Go to . Alternatively, click
in the Run widget and select Edit Configurations from the drop-down menu.
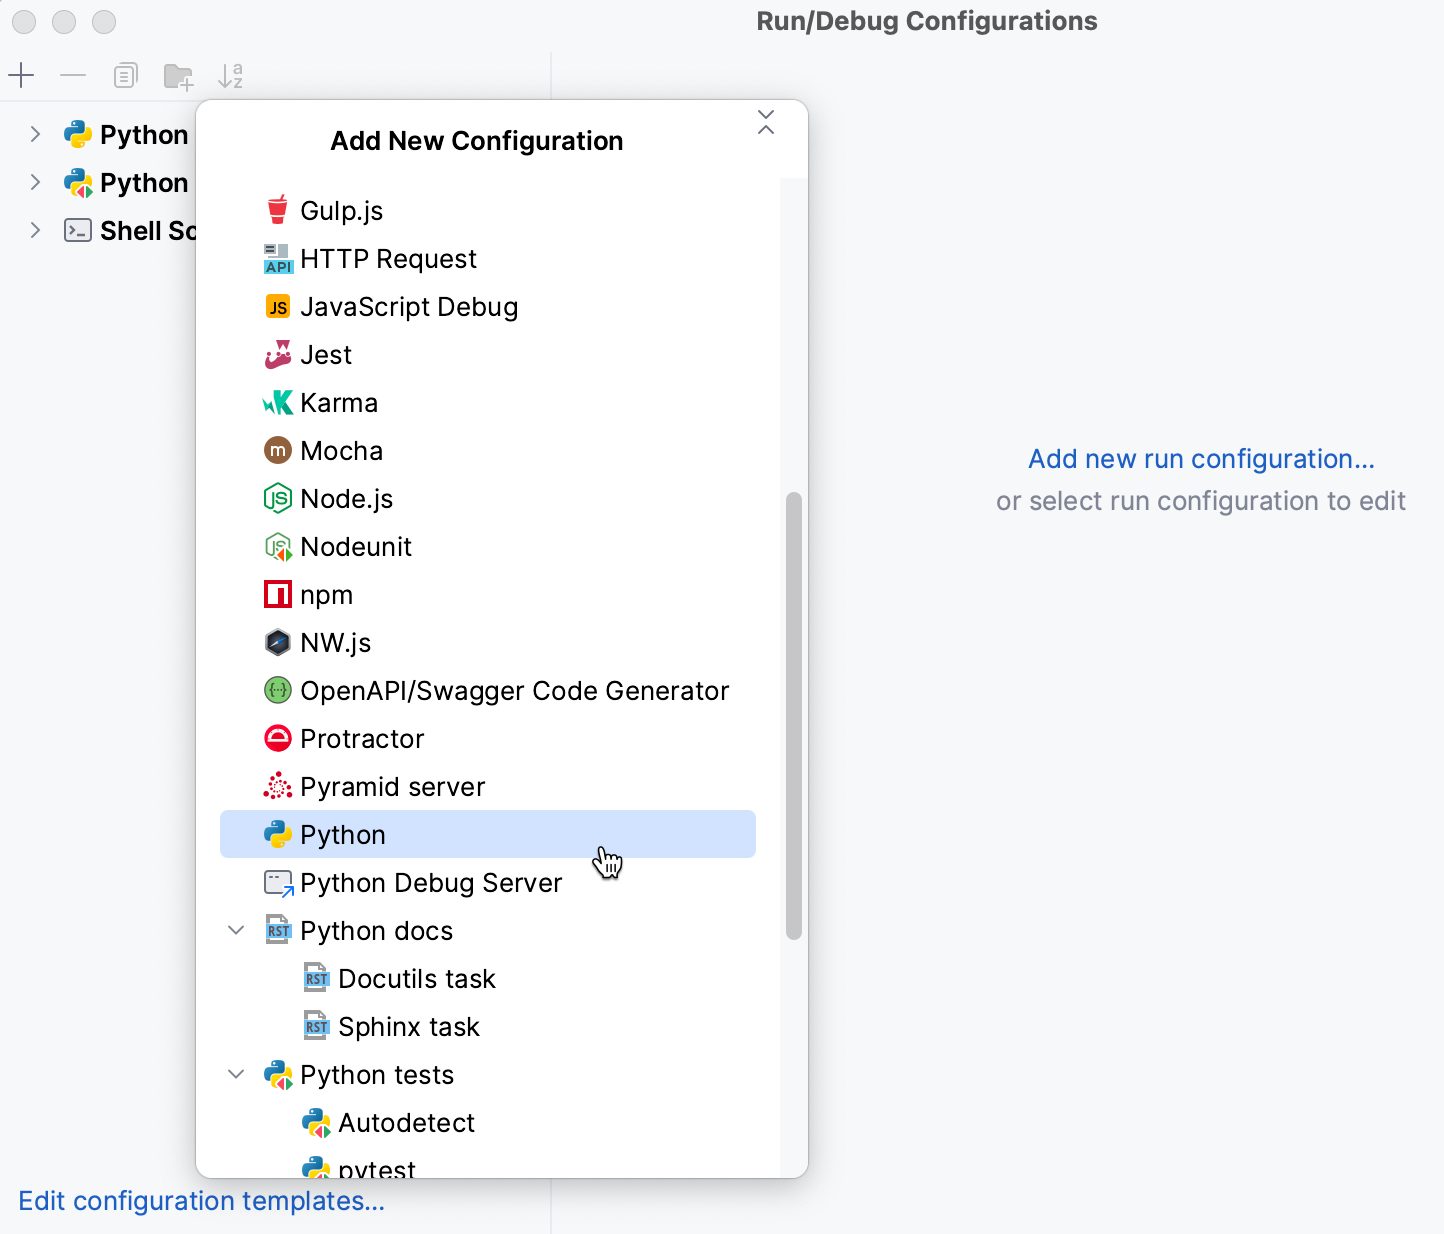
In the Run/Debug Configuration dialog, click
on the toolbar or press Alt+Insert. The list shows the run/debug configuration templates. Select Python.
Specify the run/debug configuration parameters in accordance with the configuration in launch.json.
Here is how the most common launch.json attributes can be converted into parameters when creating a run/debug configuration:
- name
The name of the run/debug configuration.
Specify it in the Name field.
- type
The type of the run/debug configuration.
Select the corresponding type when creating the configuration.
- request
Specifies whether to launch a program in debug mode or attach the debugger to an already running program.
For
"request": "launch", you do not need to set any configuration parameters.If your configuration contains
"request": "attach", you cannot create a similar run/debug configuration in PyCharm. For information, refer to Attach to process.- program
Executable or file to run when the configuration is launched.
Select a type of target to run from the dropdown. Then specify the path to the Python script or the module name to be executed.
- cwd
Current working directory for finding dependencies and other files.
Specify it in the Working directory field.
- args
Arguments passed to the program when running or debugging it.
Specify the arguments in the Script parameters field. In this field, you can use macros which correspond to variables in Visual Studio Code configuration files. For information, refer to Pass parameters to the running script.
- env
Environment variables.
Specify the environment variables in the Environment variables field. For information, refer to Run/debug configurations.
- envFile
Path to dotenv file with environment variables.
Specify the path to the file in the Paths to ".env" files field. For information, refer to Run/debug configurations.
- console
Console to use for running or debugging the program.
In PyCharm, code is usually executed in the Run tool window. When debugging, the Debug console is opened by default. However, you may want to specify other execution options. For information, refer to Run/debug configurations.
- justMyCode
When omitted or set to
true, debugging is restricted to user-written code only.In PyCharm, you can configure that by enabling or disabling the Do not step into library scripts checkbox in . For information, refer to Step into.
User Interface
No workspace
The first thing you'll notice when launching PyCharm is that it has no workspace concept. This means that you can work with only one project at a time. While in Visual Studio Code you normally have a set of projects that may depend on each other, in PyCharm you have a single project that consists of a set of modules.
If you have several unrelated projects, you can open them in separate windows.
Tool windows
Just like in Visual Studio Code, in PyCharm you also have tool windows.
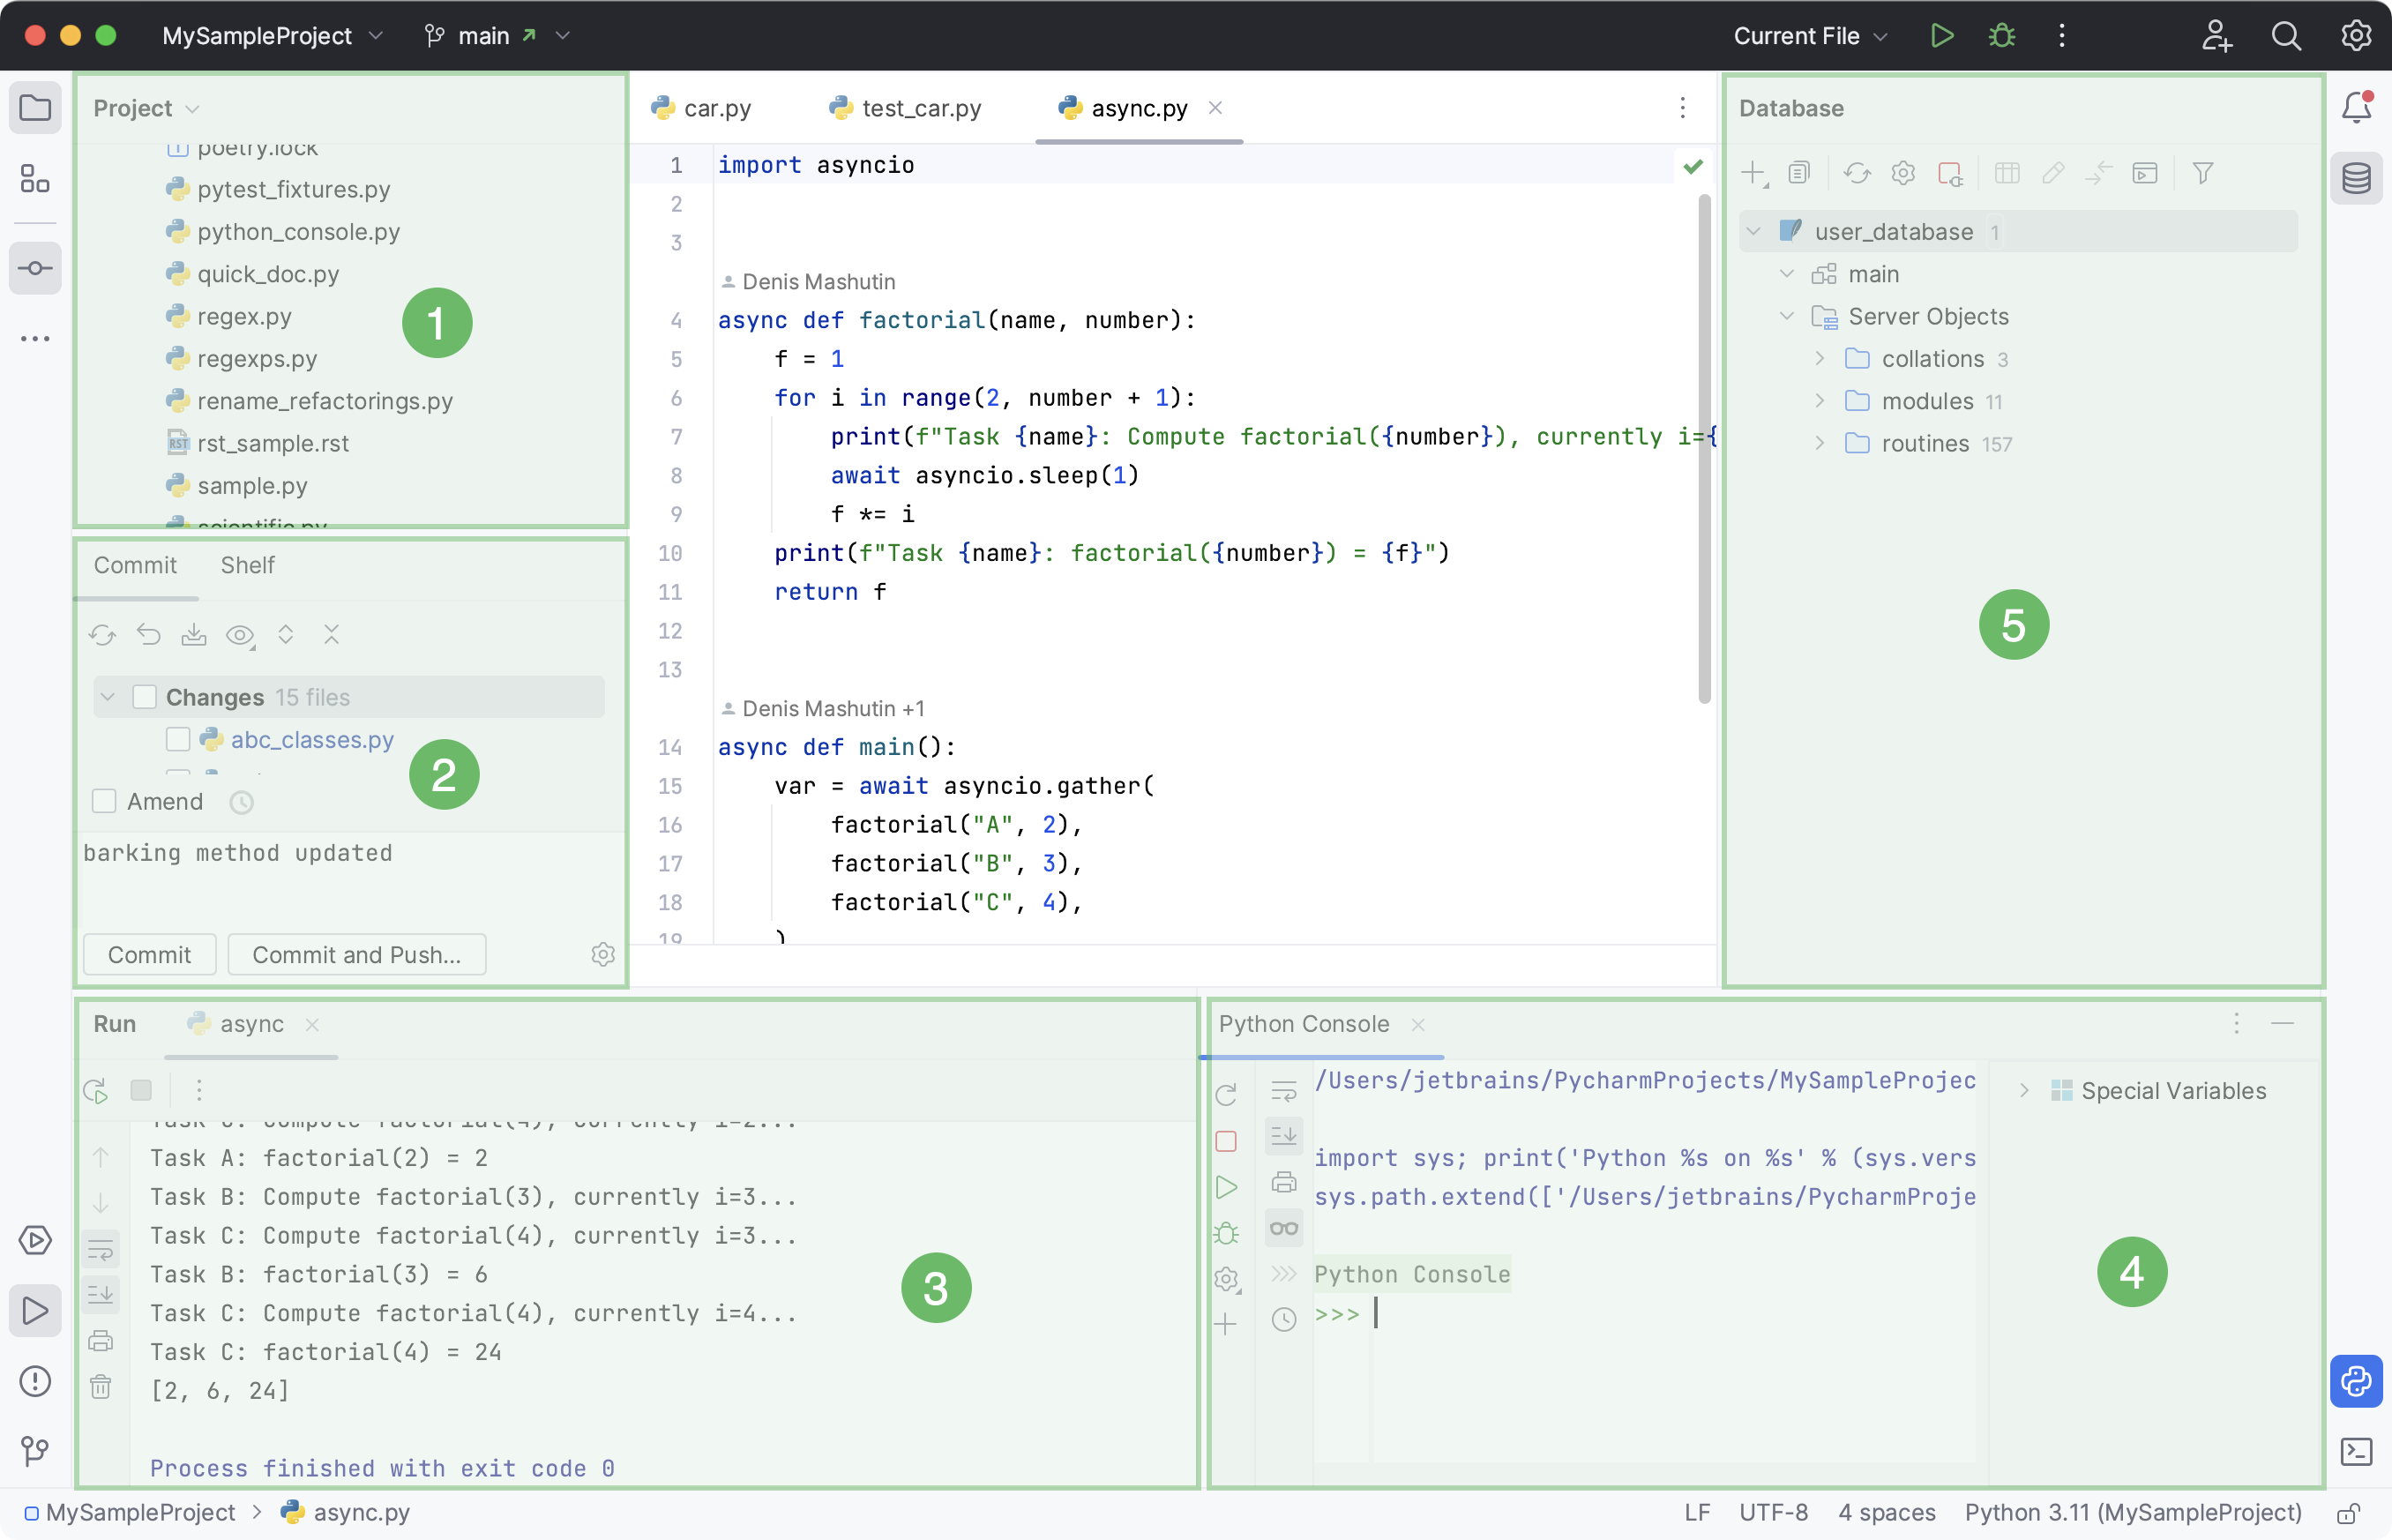
Project
Commit tool window
Run tool window
Python Console tool window
Database tool window
To open a tool window, click the corresponding tool window button:
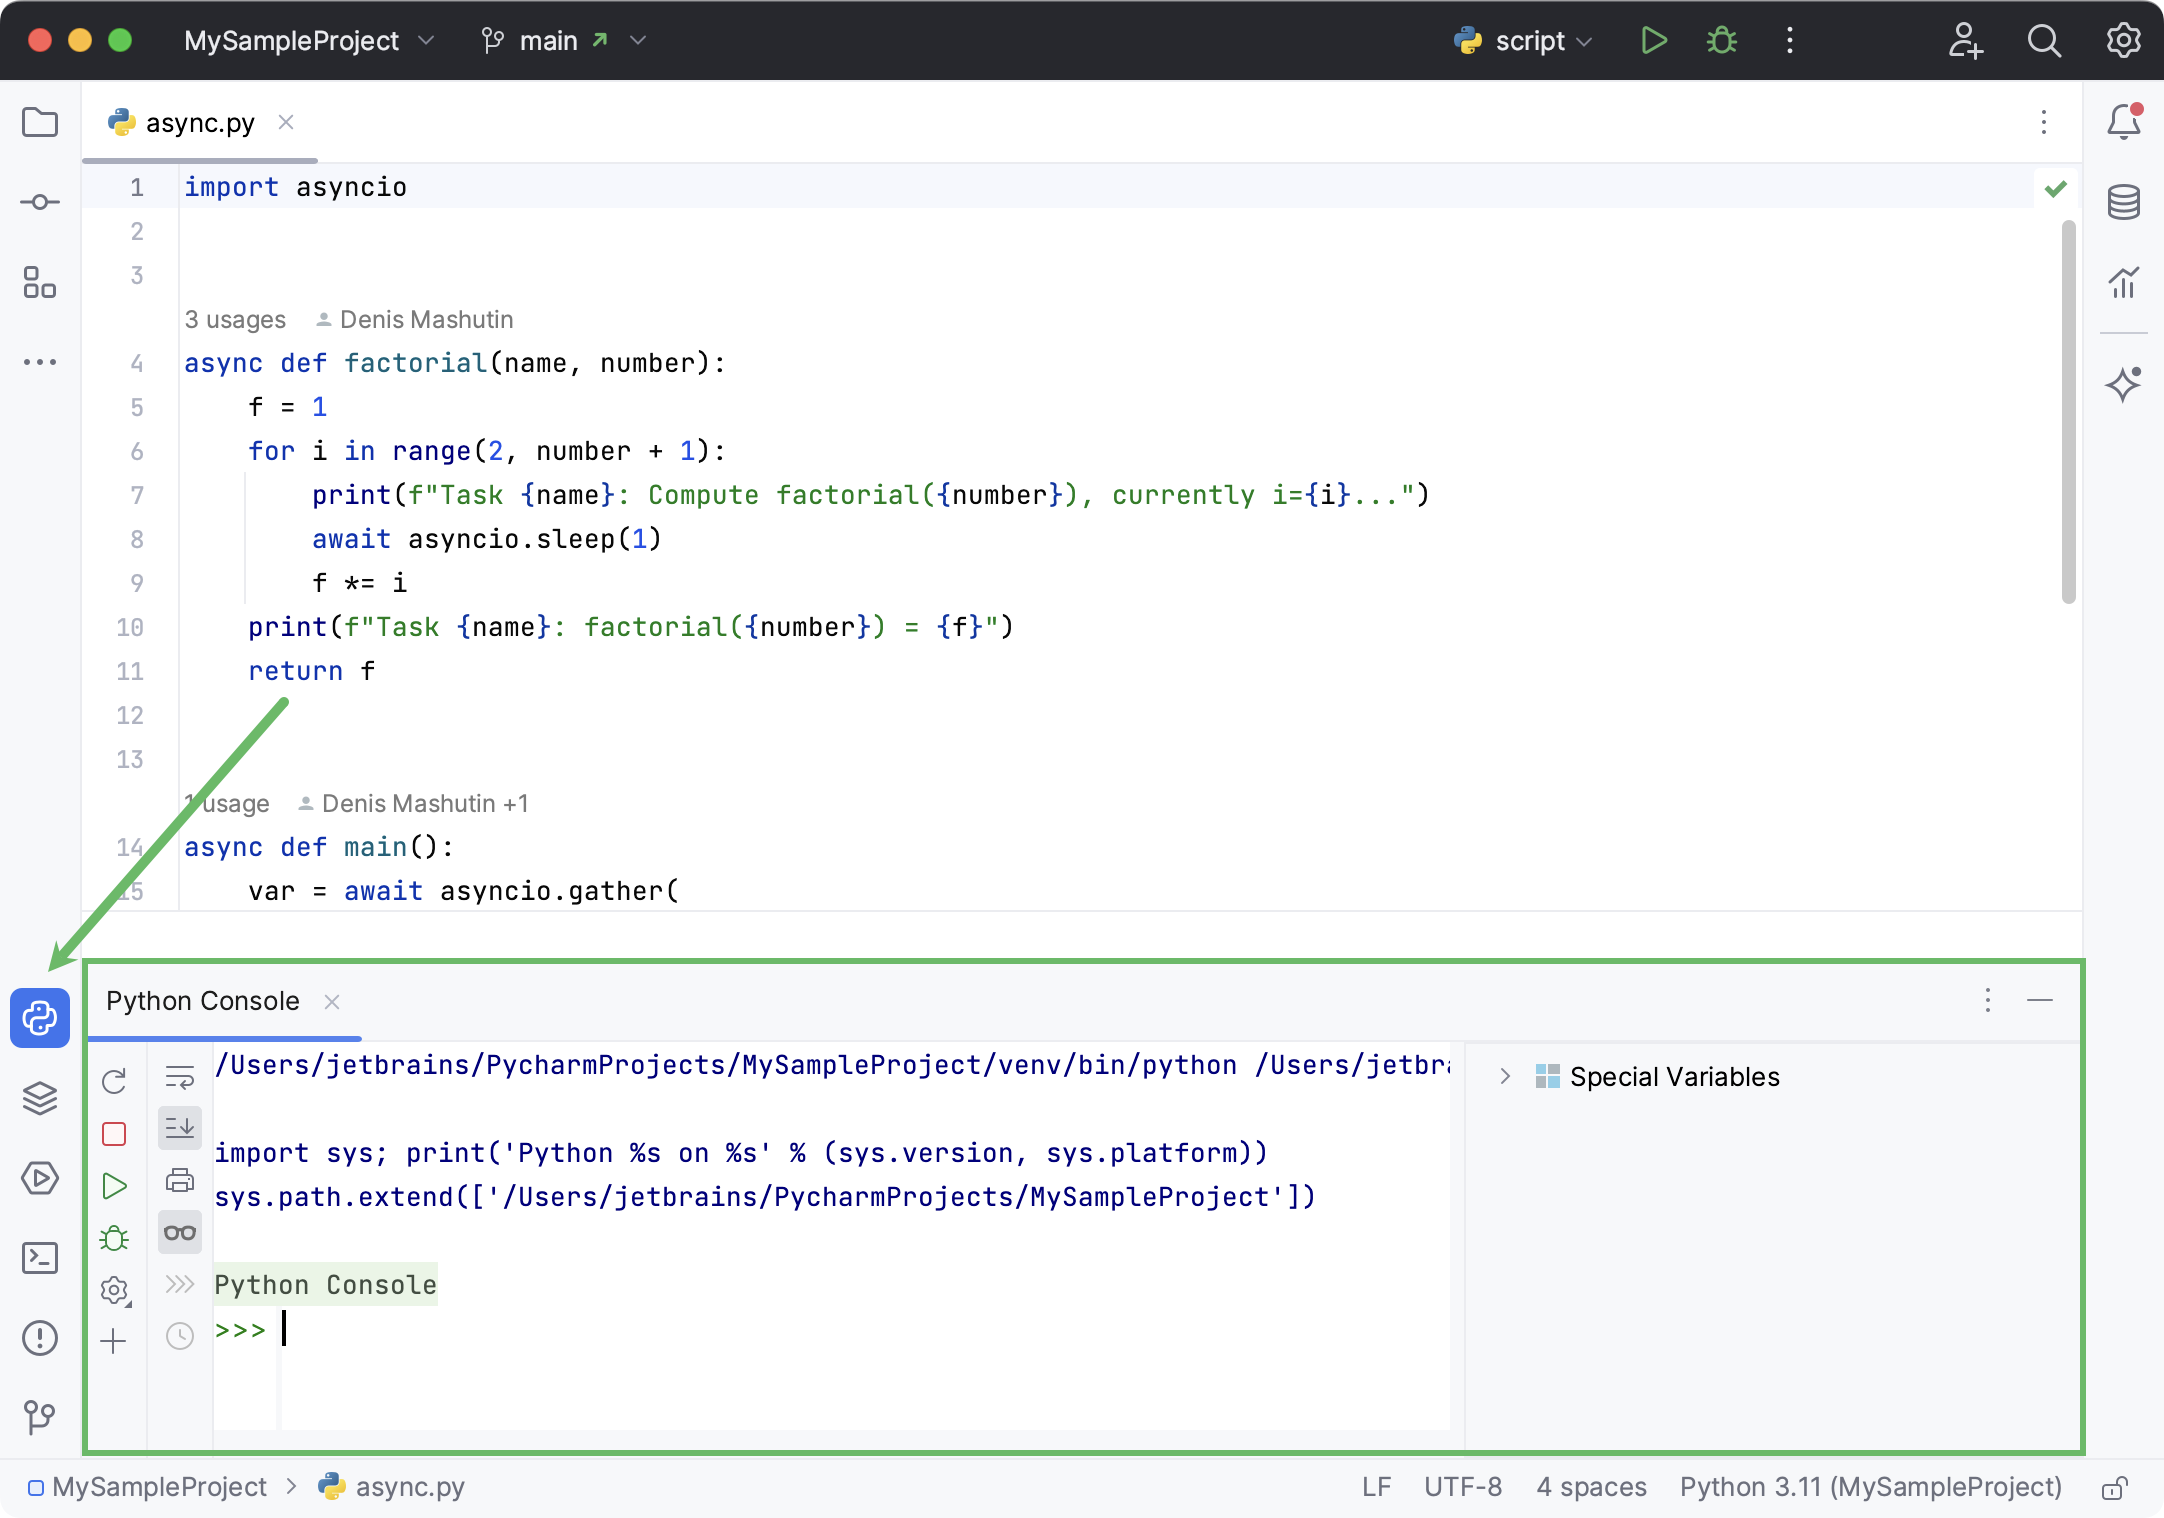
If you don't want to use the mouse, you can always switch to any toolbar by pressing the shortcut assigned to it. The most important shortcuts to remember are:
Project: Alt+1
Commit: Alt+0
Terminal: Alt+F12
Another thing about tool windows is that you can drag, pin, unpin, attach and detach them:
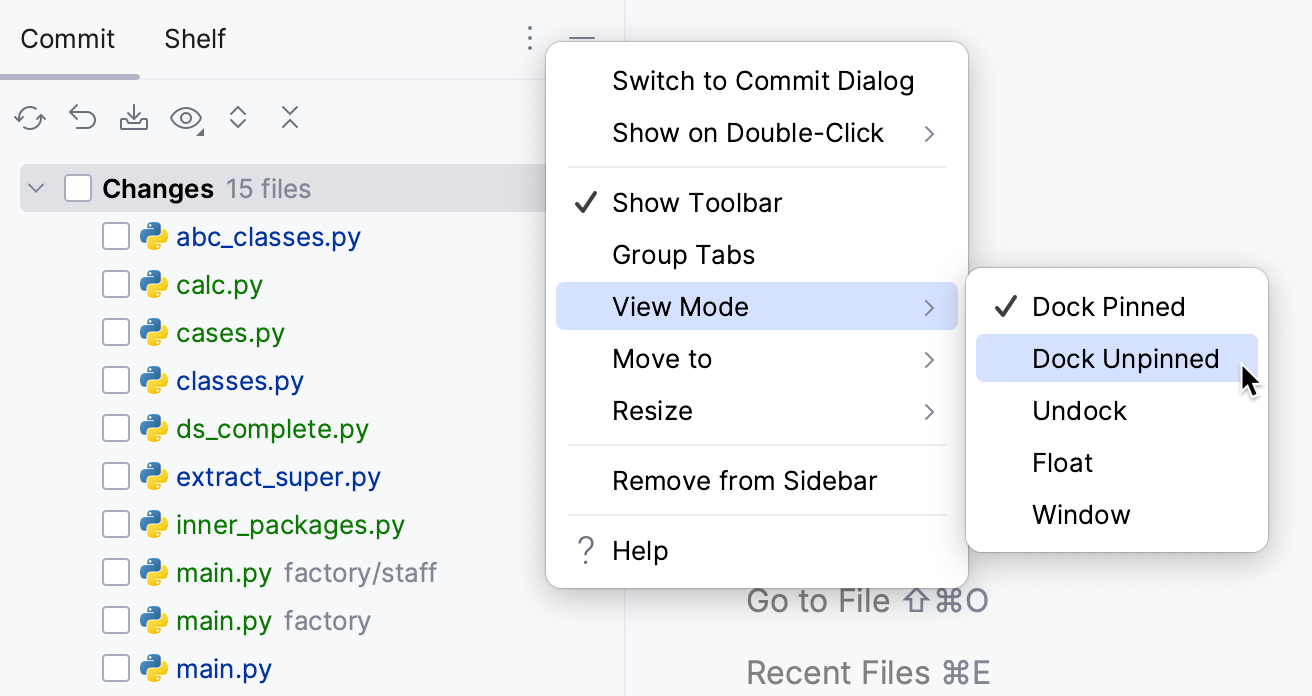
For more information, refer to Arrange tool windows and Tool window view modes.
To help store/restore the tool windows layout, there are several useful commands:
: save the arrangement as a new layout.
: reset changes in your current layout. (also available via Shift+F12)
For more information, refer to Layouts.
Multiple windows
Windows management in PyCharm is slightly different from Visual Studio Code. You can't open several windows with one project, but you can detach any number of editor tabs into separate windows.
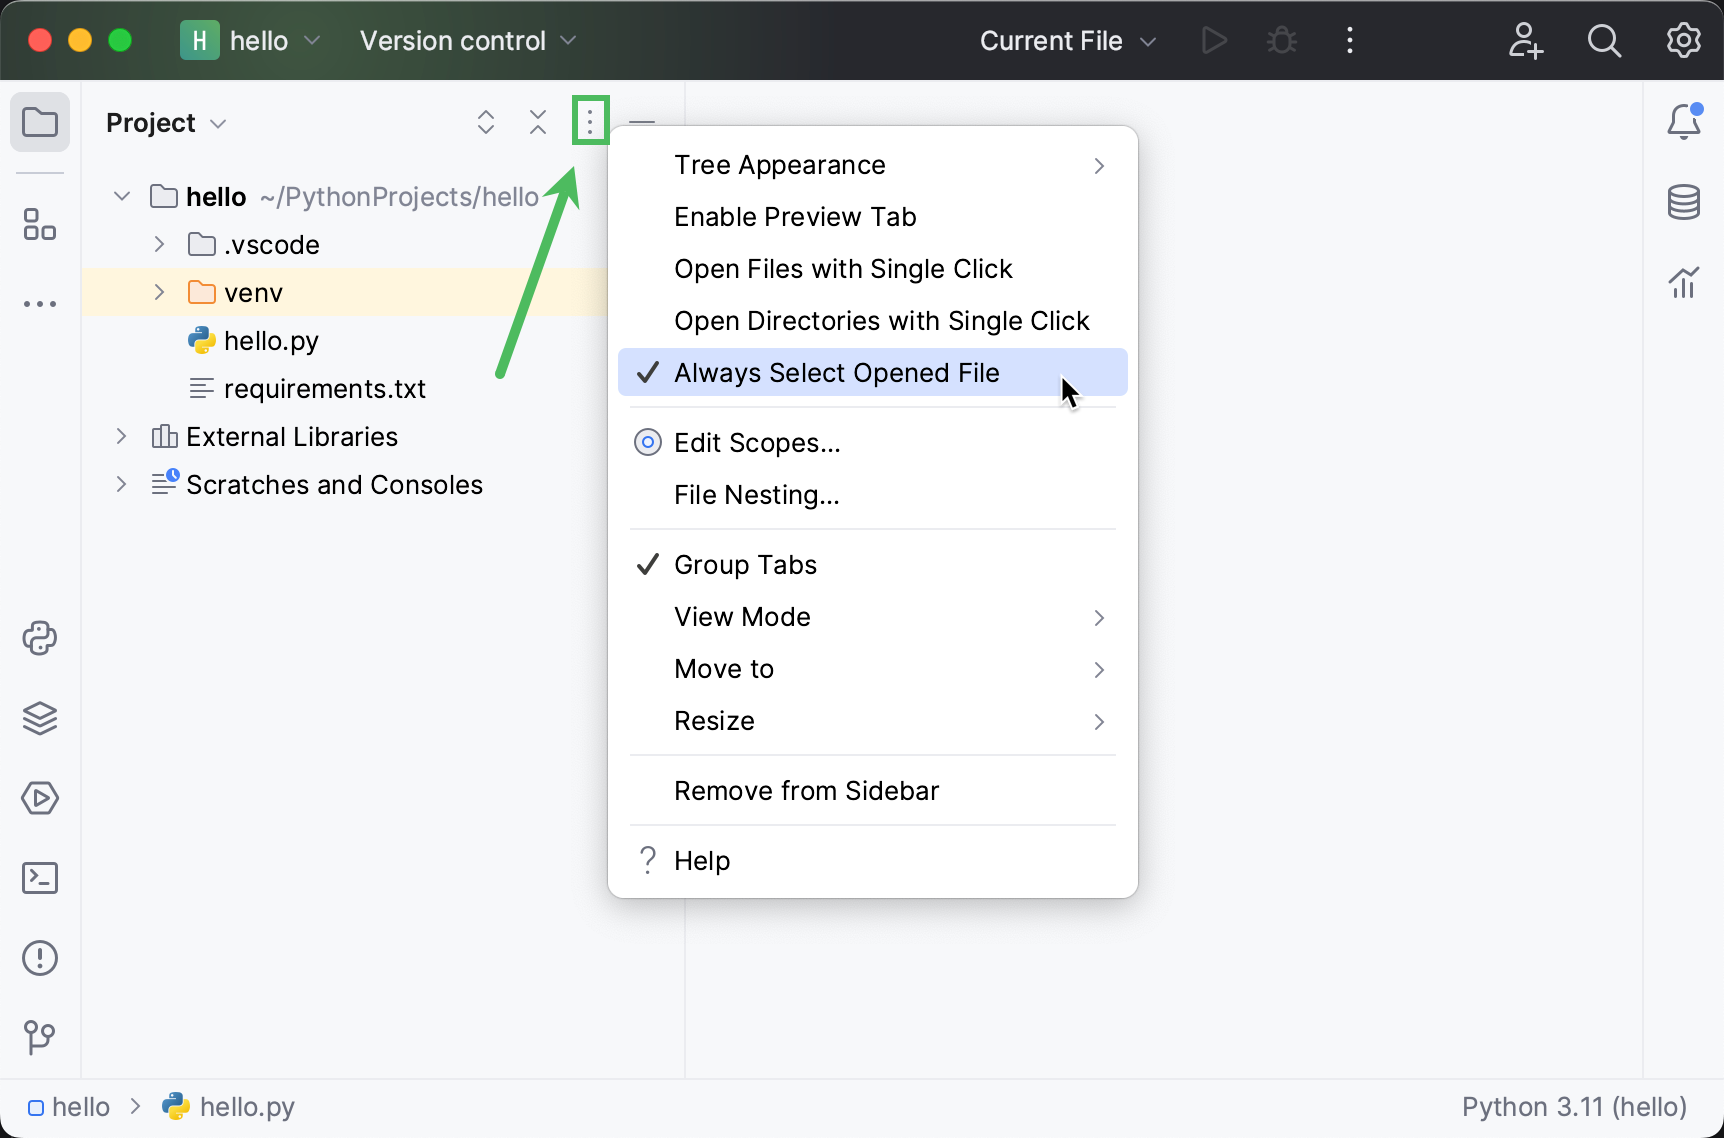
Always select opened files
By default, PyCharm doesn't change the selection in the Project tool window when you switch between editor tabs. However, you can enable it in the Project tool window settings:
General workflows
No 'save' button
PyCharm has no Save button. Since in PyCharm you can undo refactorings and revert changes from Local History, it makes no sense to ask you to save your changes every time.
Still, it's worth knowing that physical saving to disk is triggered by certain events, including compilation, closing a file, switching focus out of the IDE, and so on. You can change this behavior via :
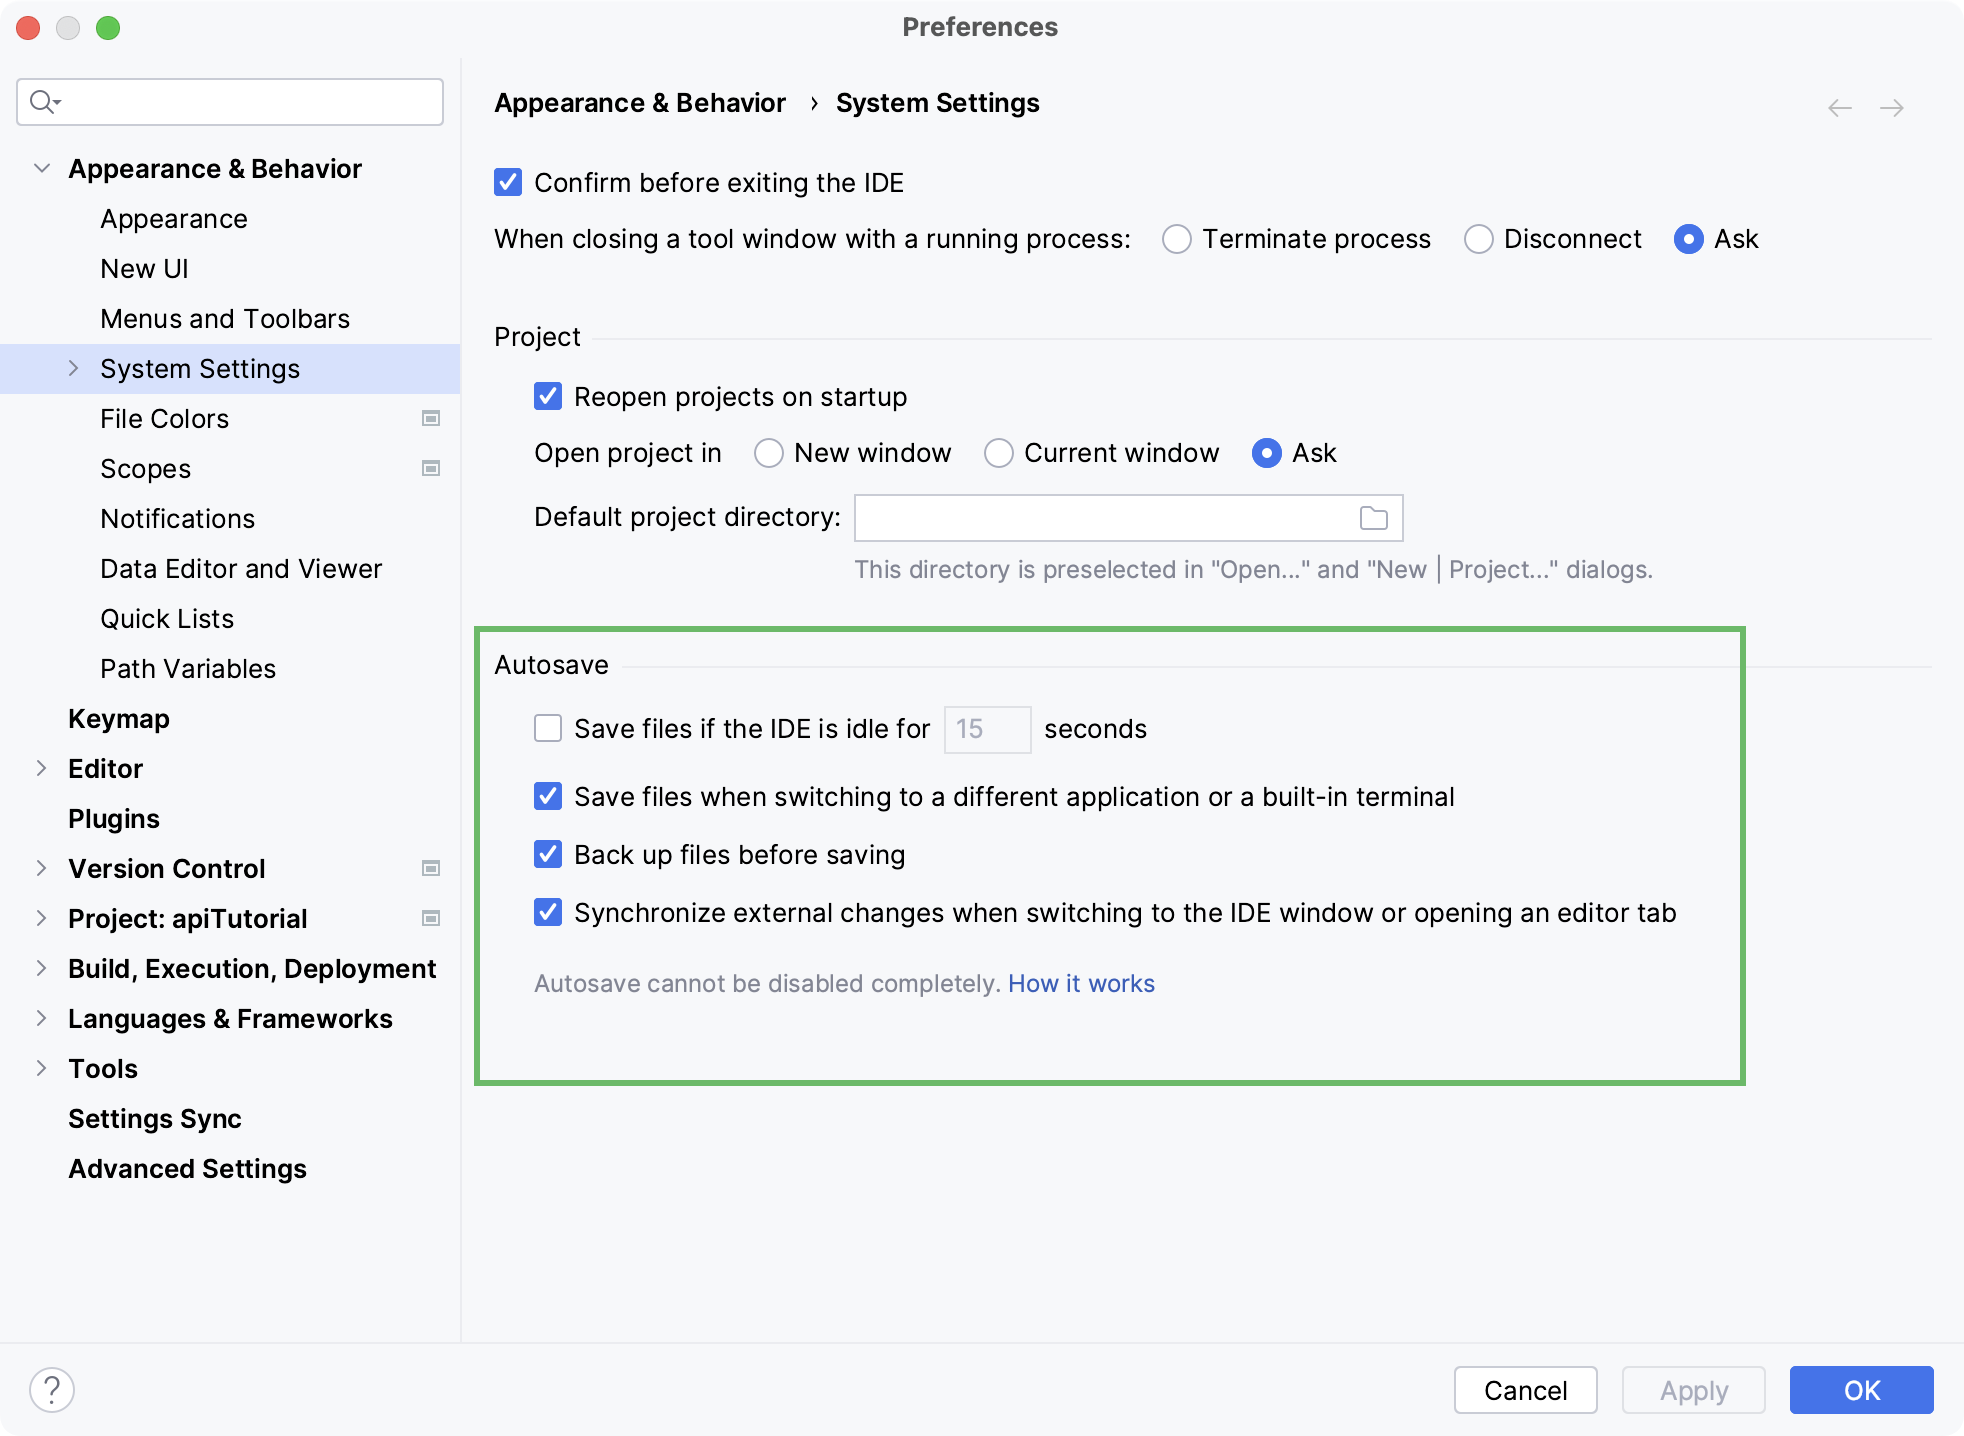
Save actions
If you are an experienced Visual Studio Code user, you are familiar with save actions: the actions triggered automatically on save, such as reformatting code, organizing imports, and so on.
PyCharm also features save actions that you can find and enable in .
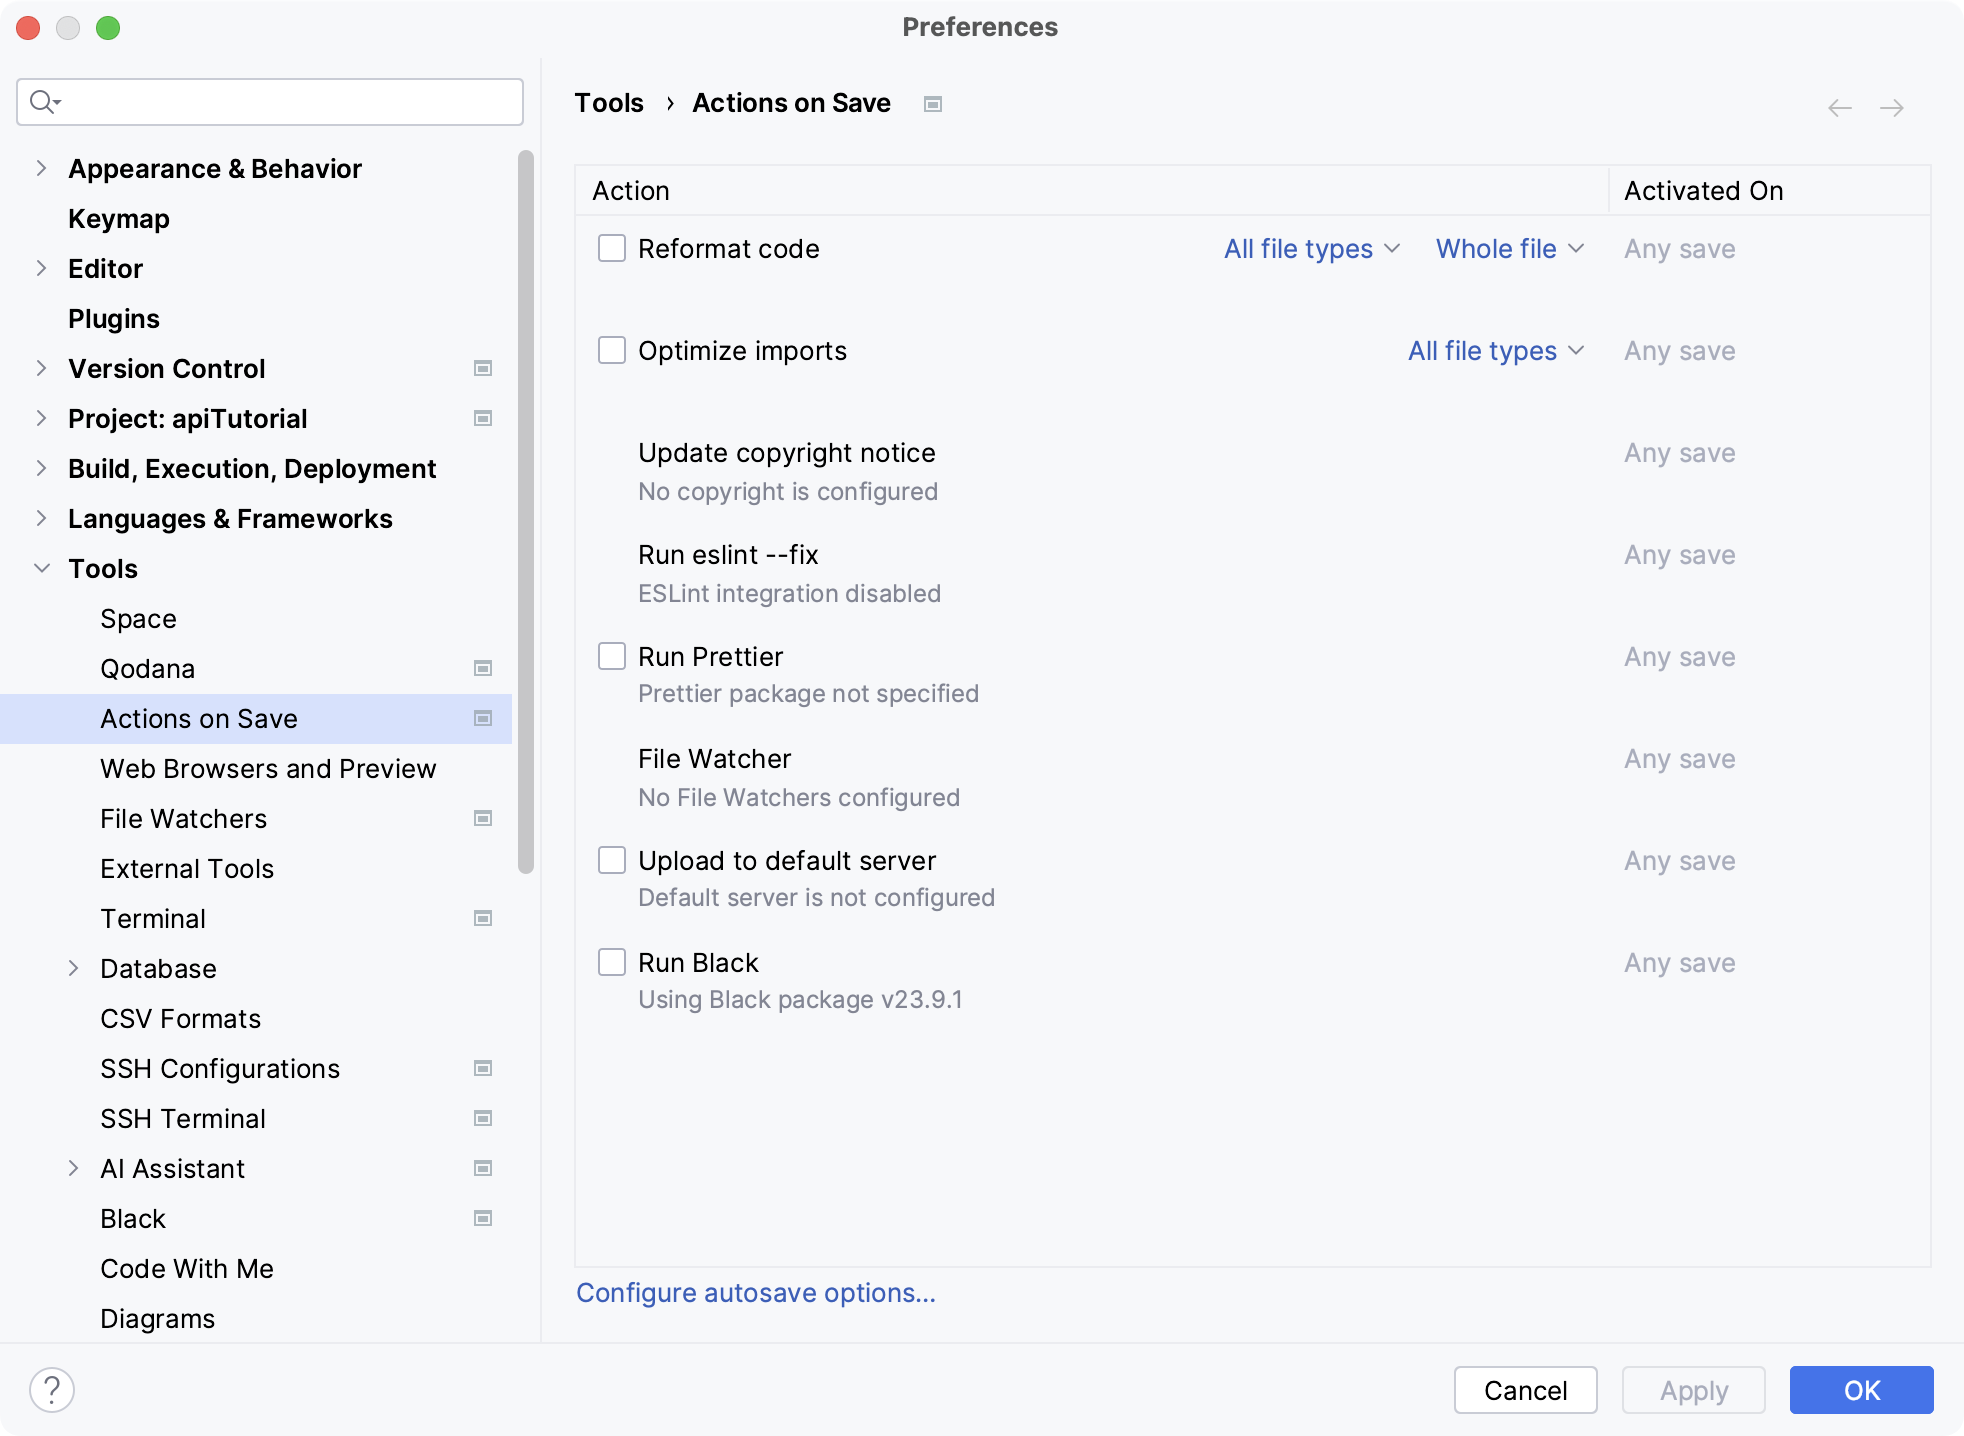
On top of that, PyCharm offers you to run the corresponding actions automatically on commit:
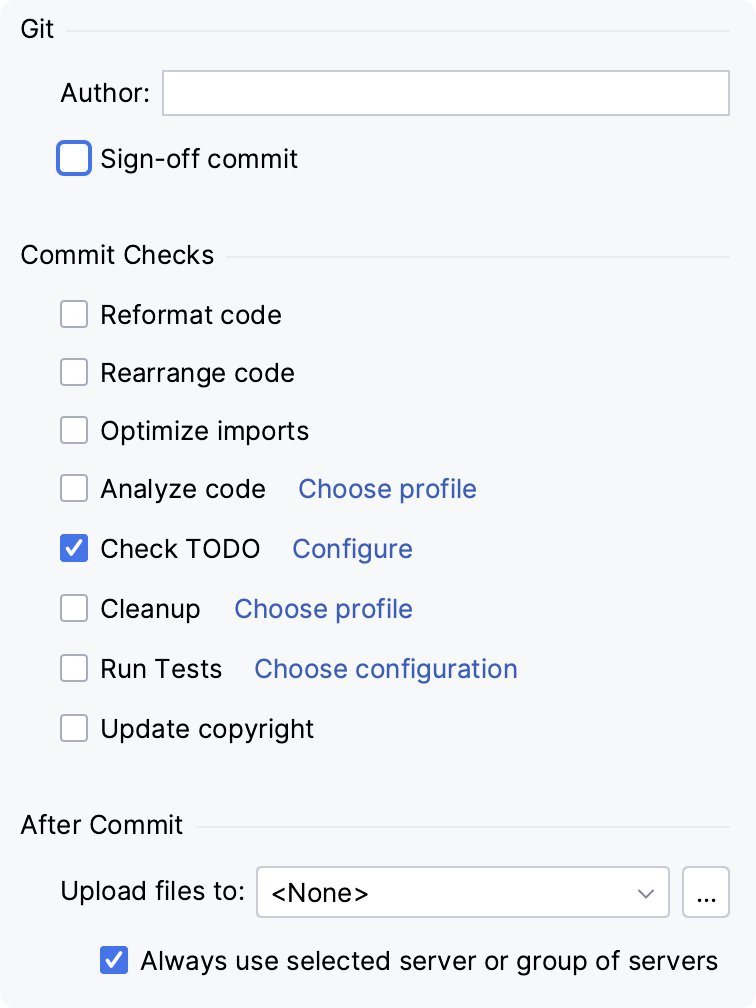
Or manually:
Ctrl+Alt+L
Ctrl+Alt+O
Shortcuts
The table below shows how the top Visual Studio Code actions (and their shortcuts) are mapped to PyCharm (you may want to print it out to always have it handy).
Visual Studio Code | PyCharm | ||
|---|---|---|---|
Action | Shortcut | Action | Shortcut |
Trigger suggestion | Ctrl+Space, Ctrl+I ⌃ Space, ⌘ I | Basic completion | Ctrl+Space |
Go to File | Ctrl+P ⌘ P | Go to File | Ctrl+Shift+N |
Show Command Palette | Ctrl+Shift+P, F1 ⇧ ⌘ P, F1 | Find Action | Ctrl+Shift+A |
Show all Symbols | Ctrl+T ⌘ T | Go to Symbol | Ctrl+Alt+Shift+N |
Toggle Sidebar visibility | Ctrl+B ⌘ B | Hide all tool windows | Ctrl+Shift+F12 |
Move line down/up | Alt+Up/Down ⌥ ↑/⌥ ↓ | Move lines | Alt+Shift+Up/Alt+Shift+Down |
Delete line | Ctrl+Shift+K ⇧ ⌘ P | Delete line | Ctrl+Y |
Quick Fix | Ctrl+. ⌘ . | Show quick-fix / intention action | Alt+Enter |
Navigate editor group history | Ctrl+Shift+Tab ⌃ ⇧ ⇥ | Switcher | Ctrl+Shift+Tab |
Run | F5 | Run | Shift+F10 |
Run and Debug | Ctrl+Shift+D ⇧ ⌘ P | Debug | Shift+F9 |
Format Document | Shift+Alt+F ⇧ ⌥ F | Reformat code | Ctrl+Alt+L |
Go to Definition | F12 | Go to Declaration or Usages | Ctrl+B |
Peek Definition | Alt+F12 ⌥ F12 | Quick definition | Ctrl+Shift+I |
Show References | Shift+F12 ⇧ F12 | Show usages | Ctrl+Alt+F7 |
Find All References | Alt+Shift+F12 ⌥ ⇧ F12 | Find usages | Alt+F7 |
Find in Files | Ctrl+Shift+F ⇧ ⌘ F | Find in Files | Ctrl+Shift+F |
Refactor | Ctrl+Shift+R ⌃ ⇧ ⇥ | Refactor this | Ctrl+Alt+Shift+T |
Rename Symbol | F2 | Rename | Shift+F6 |
Go to Line | Ctrl+G ⌃ G | Navigate to line | Ctrl+G |
Find next | F3 ⌘ G | Find next | F3 |
Go back | Alt+Left ⌃ - | Back | Ctrl+Alt+Left |
Go forward | Alt+Right ⌃ ⇧ - | Forward | Ctrl+Alt+Right |
VSCode keymap
If you prefer not to learn new shortcuts, you can install the VSCode Keymap plugin. It will add the VSCode keymap to PyCharm, which closely mimics the Visual Studio Code shorcuts.
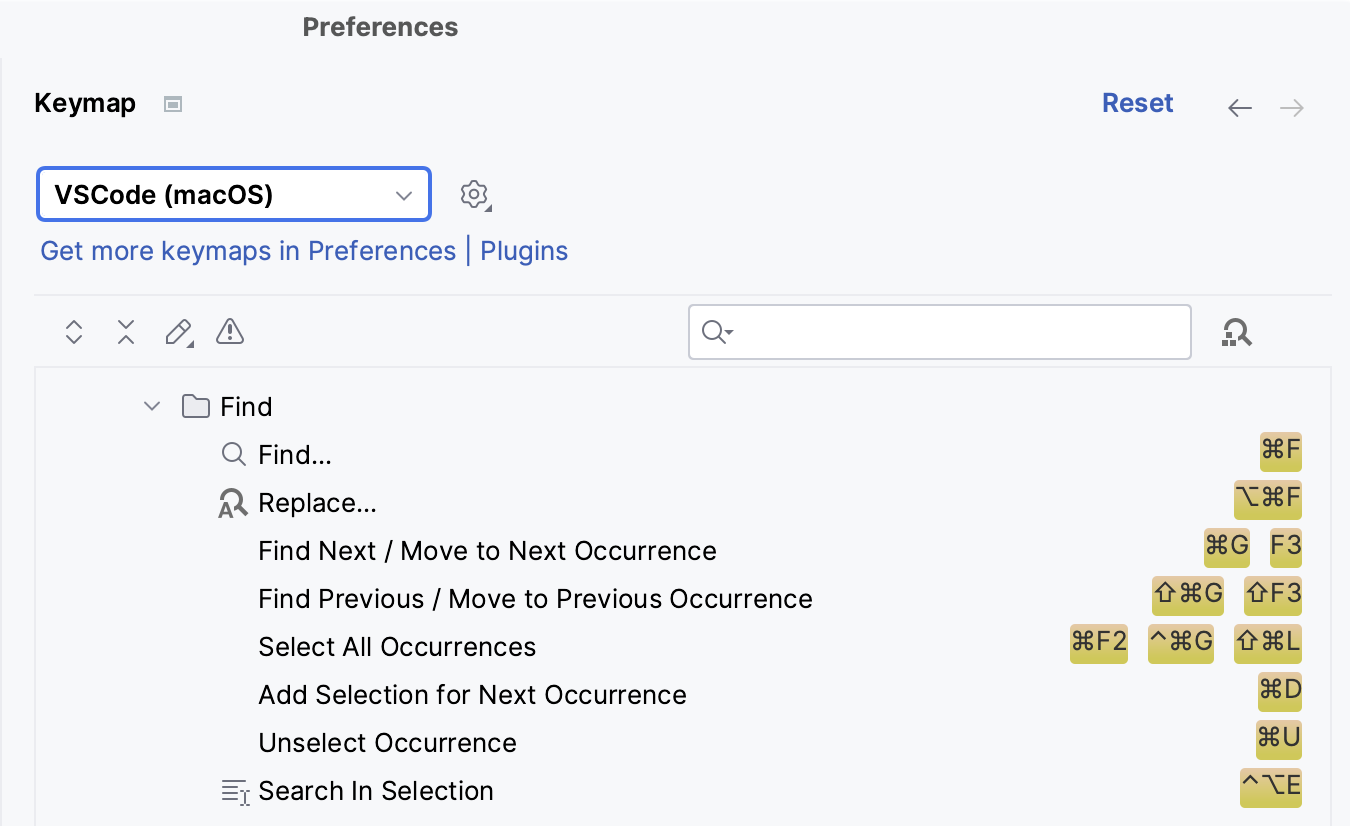
Find action
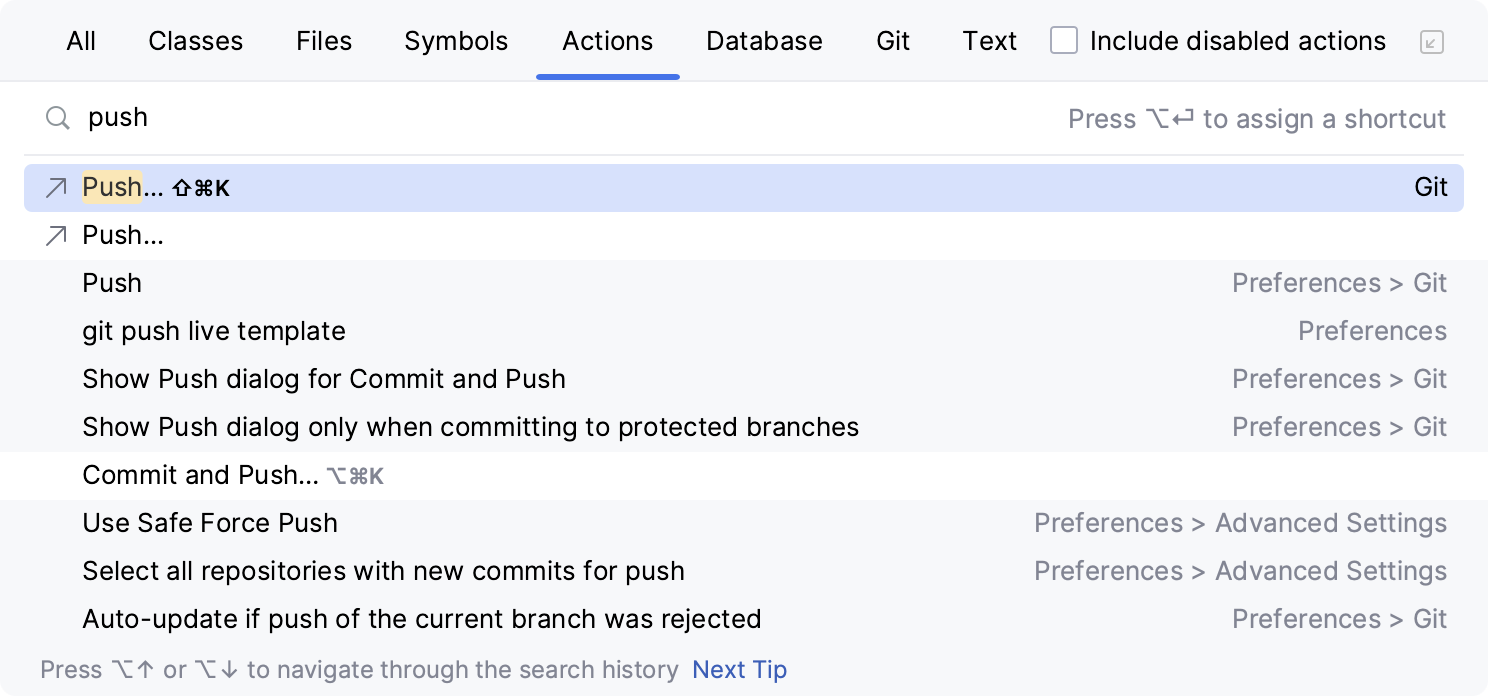
When you don't know the shortcut for some action, try using the Find action feature available via Ctrl+Shift+A. Start typing to find an action by its name, see its shortcut, or call it:
