
Project Setup
Create a React+TypeScript project with the create-react-app scaffolding tool.
React has become very popular, as has TypeScript. But it can be difficult to keep your tools and build configurations up-to-date. Many frameworks have CLI (command-line interface) tools that make those decisions for you, using best practices. They'll generate a project with the right choices, then update those choices as things evolve.
React's create-react-app takes care of this, including for TypeScript projects. In this tutorial step, we will generate a React+TypeScript project then open it in the IDE.
Code
The finished code for this tutorial step is in the repository.
Project Creation
Before starting, make sure to install NodeJS on your system.
As shown in the create-react-app docs, use the npx command introduced in npm 5.2 to get a package and install a command, without having to globally install a package.
Thus, to use create-react-app to make a TypeScript project:
npx create-react-app cra --template typescript
If you are using a JetBrains IDE that includes WebStorm, you can use a nice UI for new projects:
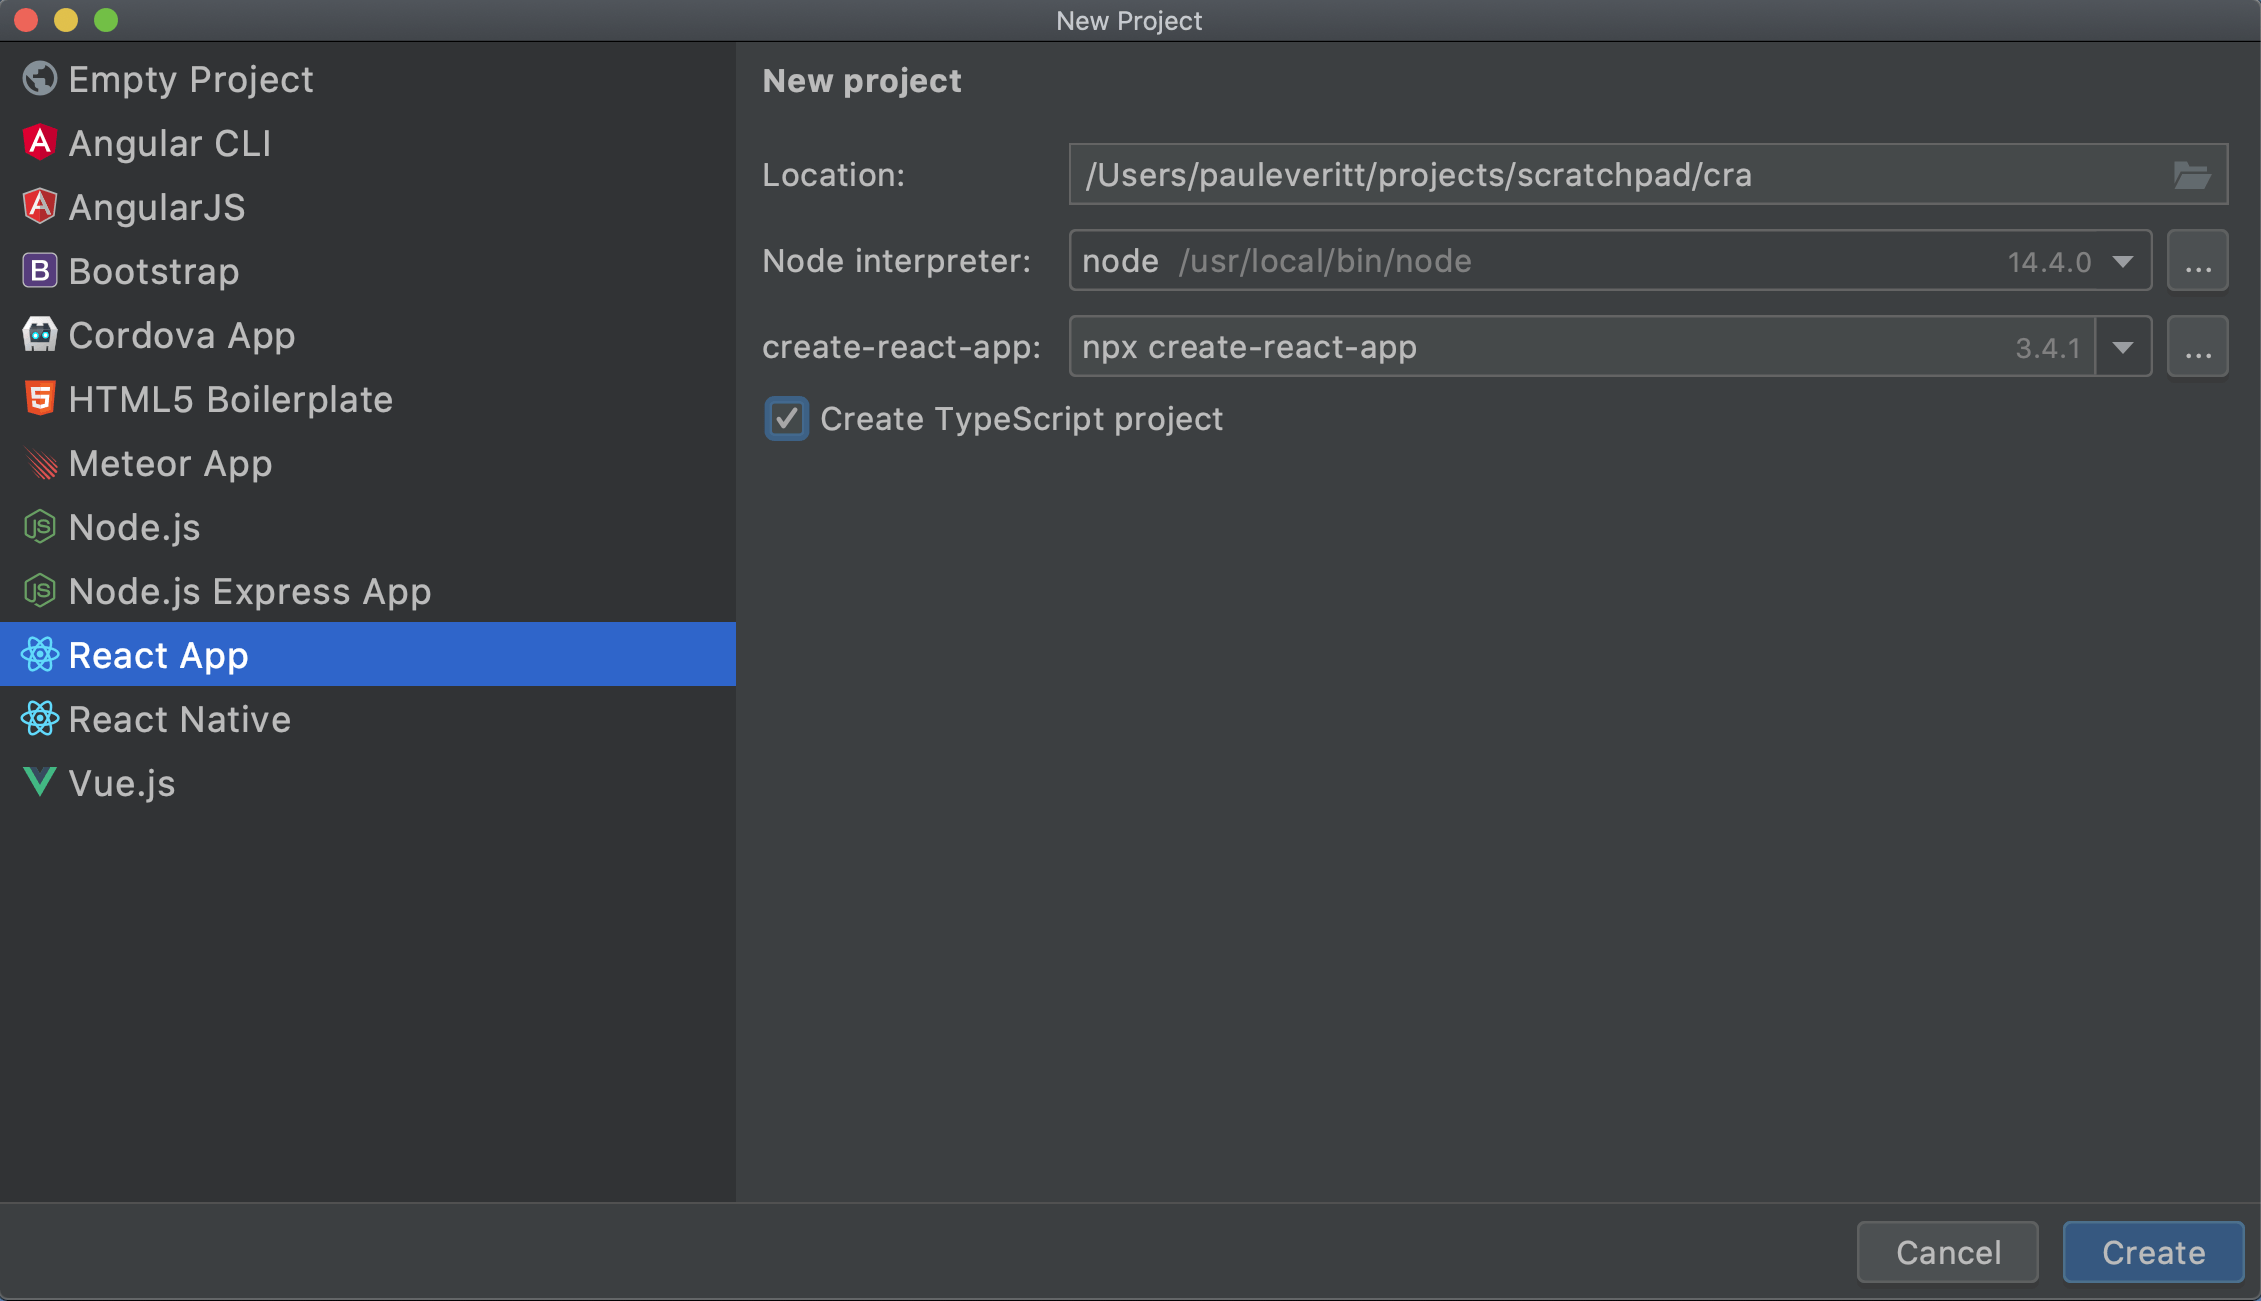
You now have a working React+TypeScript project, toolchain, and hello-world style app.
It's actually quite an achievement.
Assembling all of this, and keeping it assembled, is an incredible effort.
create-react-app has shifted that off your shoulders, onto their shoulders.
Show Me a Page
Let's see this React+TypeScript app in our browser.
npm scripts make it easy to discover commands that are common to a project.
The most common?
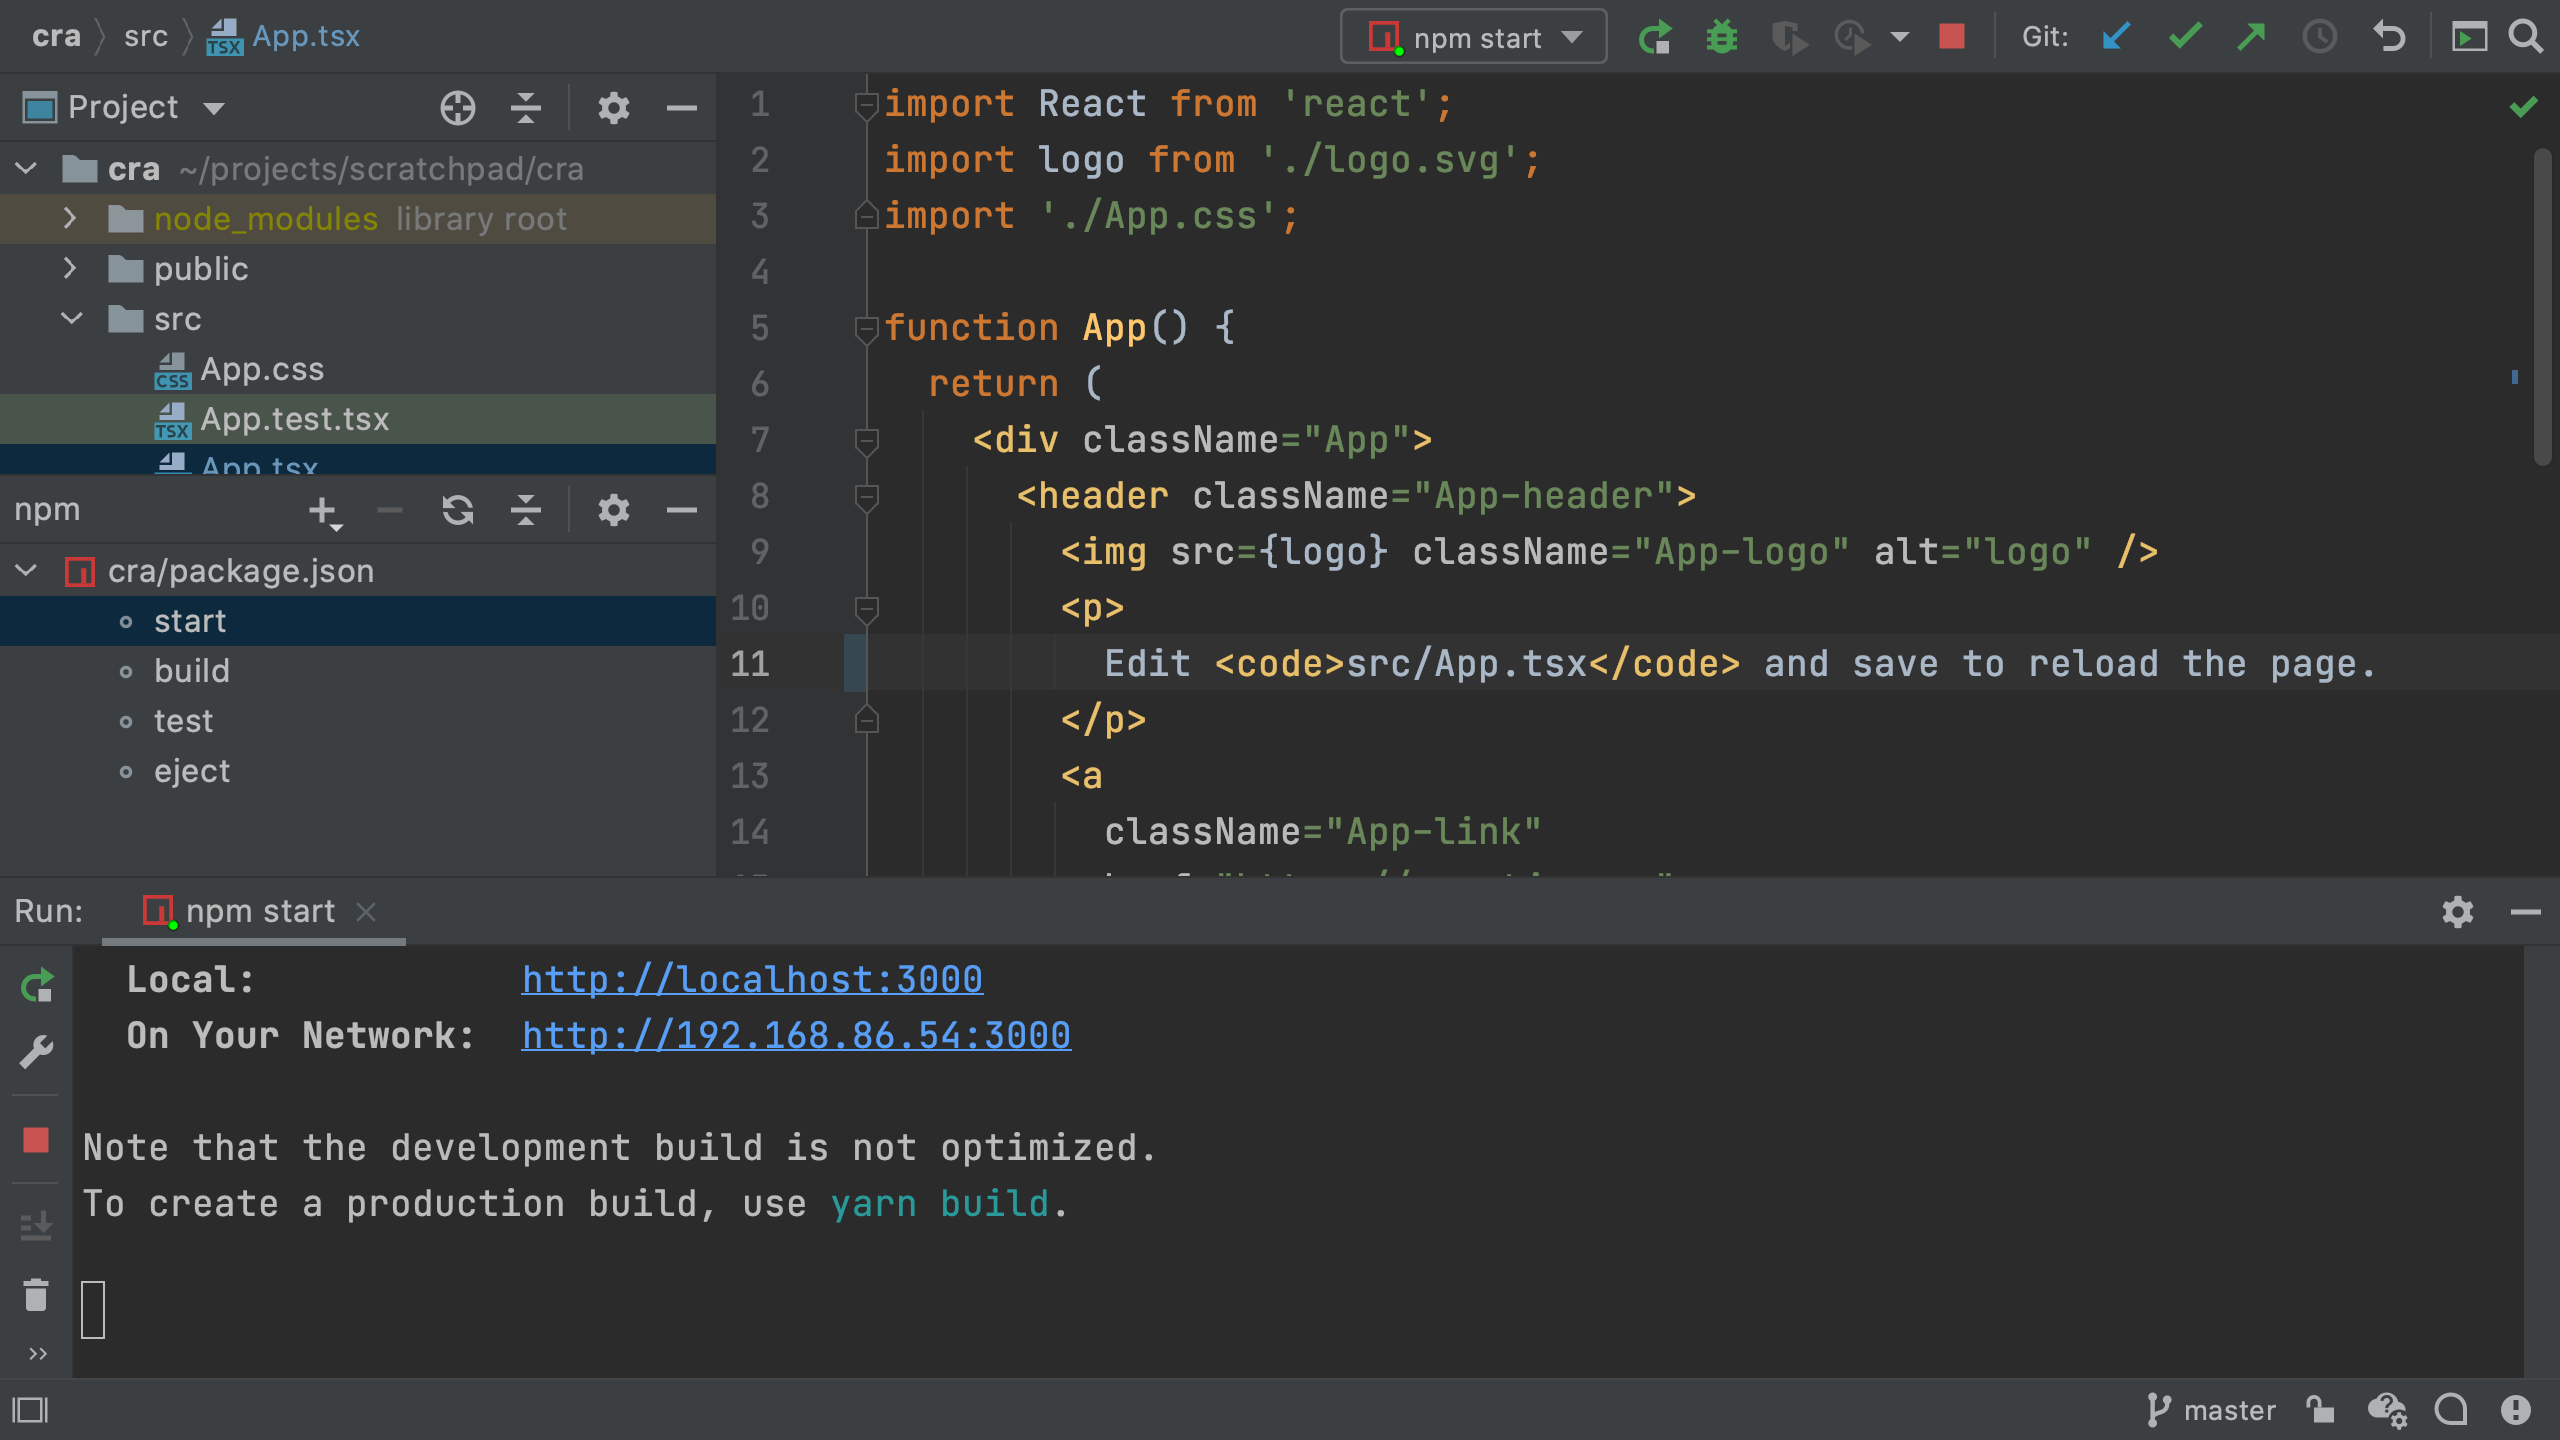
Starting the dev server, which compiles the universe, serves a page over HTTP, and helpfully opens your browser:
npm start
This dev server is now watching for changes.
If you edit a file, it will regenerate the universe and tell the browser to reload the page.
Open src/App.tsx and change save to reload to save to reload the page, then save.
Your terminal shows a recompile and your browser updates.
In the terminal, ⌃C (macOS) / Ctrl+C (Windows/Linux) to stop the dev server.
Let's take a look at how the IDE can put a nice friendly face on running npm scripts.
We will first use the npm tool window.
Click on the npm tool icon (usually on the left) and double click start in the listing of run scripts.
You'll get a run window at the bottom with a UI for showing output and restarting.
Alternatively, open the top-level package.json that was generated by create-react-app.
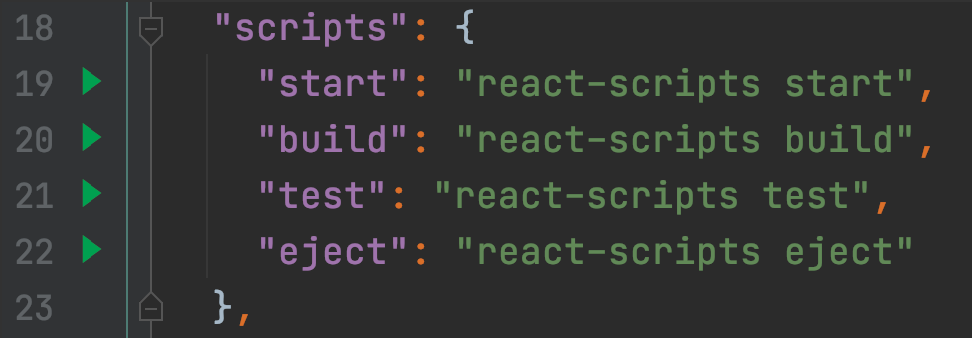
Here's what the scaffold provided -- note the scripts section:
{
	"name": "cra",
	"version": "0.1.0",
	"private": true,
	"dependencies": {
		"@testing-library/jest-dom": "^5.11.4",
		"@testing-library/react": "^11.1.0",
		"@testing-library/user-event": "^12.1.10",
		"@types/jest": "^26.0.15",
		"@types/node": "^12.0.0",
		"@types/react": "^17.0.0",
		"@types/react-dom": "^17.0.0",
		"react": "^17.0.2",
		"react-dom": "^17.0.2",
		"react-scripts": "4.0.3",
		"typescript": "^4.1.2",
		"web-vitals": "^1.0.1"
	},
	"scripts": {
		"start": "react-scripts start",
		"build": "react-scripts build",
		"test": "react-scripts test",
		"eject": "react-scripts eject"
	},
	"eslintConfig": {
		"extends": [
			"react-app",
			"react-app/jest"
		]
	},
	"browserslist": {
		"production": [
			">0.2%",
			"not dead",
			"not op_mini all"
		],
		"development": [
			"last 1 chrome version",
			"last 1 firefox version",
			"last 1 safari version"
		]
	}
}
Let's run the start script from here, instead of the npm tool window.
First, close the currently-running tool window and dev server, then close the npm tool that is listing the available scripts.
Now, in package.json, click the green play icon in the gutter by the start run script:
As you can see, the generated package.json is quite compact.
The genius of create-react-app lies in moving a bunch of "What the hell is this?" configuration files, into its packages.
Thus, they own those decisions and complexity.
You can then upgrade those packages and gain new/fixed wiring of all the JavaScript build tools.
Production Build
That's great for development, but for production, we need files on disk, shrunk as small as possible.
There's a lot of complexity behind this, but create-react-app has hidden it behind an npm script:
npm run-script build
This generates output into a build directory.
The output is self-contained, even including an index.html file.
Thus, you can copy the site to a static hosting site, as-is.
Running this in the IDE's UI, instead of the terminal, is easy: just click on build in the npm tool window, or better still, use the gutter icon in package.json.
The IDE should mark the new build directory as "excluded" giving it a different color in the folder listing.
If not, right-click on the new build directory and Mark Directory As | Excluded.
This prevents the IDE from indexing the contents of that directory.
This Is Only a Test
Projects generated from create-react-app are also wired up for testing: dependencies, configuration files, and sample tests. We'll see more later, but for now, let's run the tests.
Unsurprisingly, it's similar to the above:
npm run-script test
create-react-app uses the Jest test framework along with helpers from Testing Library.
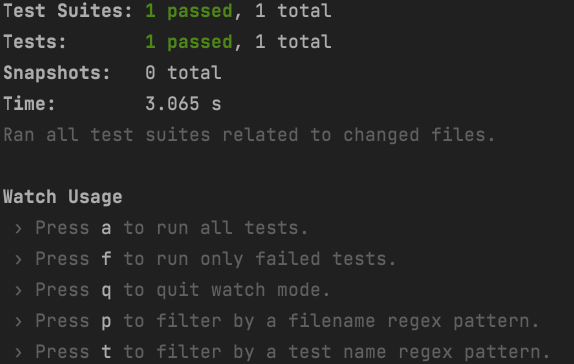
Jest runs when source or test files change, so make a small edit src/App.tsx to change the the page to this page.
When you save the file, you'll see that the tests re-run and pass:
We can also run this npm script in the IDE.
Ctrl-C to stop the test runner in the terminal, then back in package.json, click the green play icon in the gutter beside test.
Conclusion
In this first step we used existing tools to generate a working React+TypeScript project, with all the tooling configured. We also gave a brief tour of driving this in the IDE.
In our next step we'll clean up some of the generated app, fix some of the tooling, and take a look a little more at how TypeScript helps your productivity.