GitHub Copilot
 GitHub Copilot is a third-party coding agent by GitHub available for use in AI Assistant. It can write, debug, and explain code, perform Git operations such as committing and branching, and manage pull requests and issues on GitHub.
Get started with GitHub Copilot
To use GitHub Copilot, you need to install and activate it with your GitHub account.
After setup, select GitHub Copilot in AI Chat to start using it.
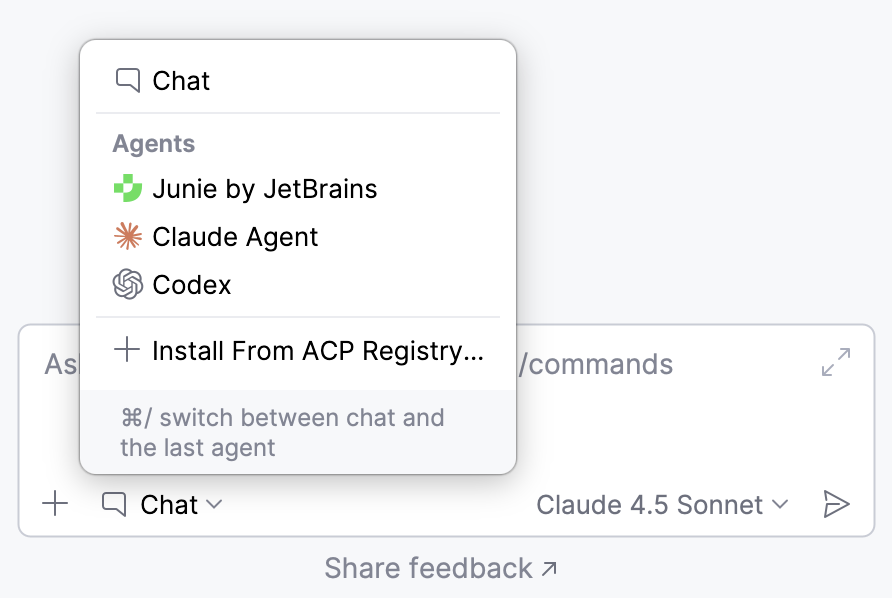
Collect IDE context
GitHub Copilot can automatically receive context about your current editing session, so you don't have to attach it manually with every prompt. When automatic context is enabled, each request you send includes:
The file currently open in the editor.
The text you have selected in that file, if any.
An indicator in the chat input field shows the current state of automatic context. Click it to switch between the two states:
 IDE context enabled – the active file name and any selected text are attached to each prompt.
 IDE context disabled – no editor context is attached automatically.

Select operation mode
GitHub Copilot can operate in different modes, each providing a distinct level of autonomy and interaction.
To select an operation mode, click  and select a mode from the list.
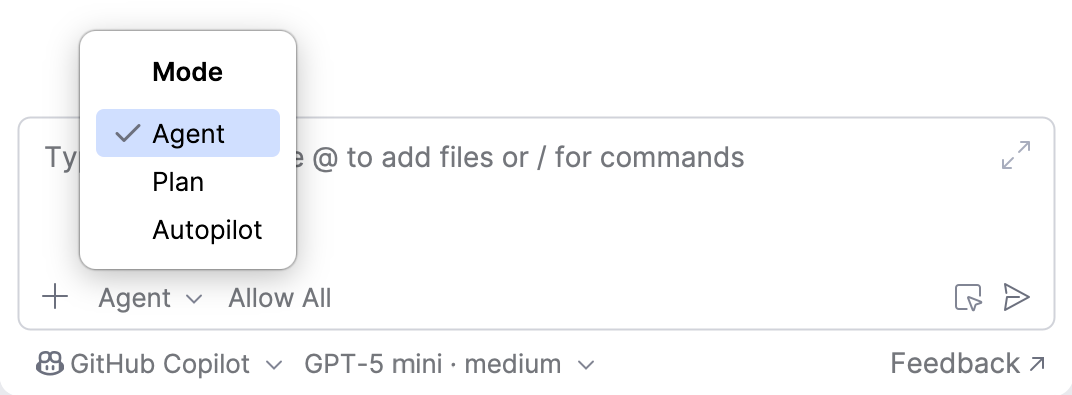
The following modes are available:
Agent – GitHub Copilot can read and modify files and run commands to complete the requested task.
Plan – a read-only mode. GitHub Copilot analyzes your request and produces a structured plan for you to review before any changes are made.
Autopilot – GitHub Copilot works through a multi-step task on its own, without pausing for your input between steps, until it finishes.
Select a model and reasoning level
To select a model that GitHub Copilot uses to process your requests, click and select the model from the list.
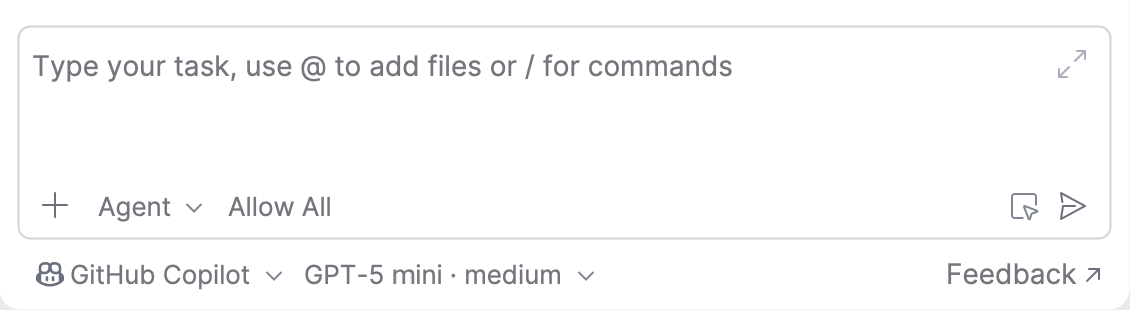
You can also select the Reasoning level for the model. Model reasoning refers to a model's ability to perform multi-step analysis and solve complex tasks. Higher levels increase the amount of reasoning the model applies before it responds, which can lead to higher-quality results on complex or critical tasks but may take longer.
The list includes only the models enabled in your GitHub Copilot account.
Grant permissions to the agent
By default, GitHub Copilot requests your permission to use a tool, access a path, or open a URL. You can control this behavior with the Allow All setting in the chat input field:
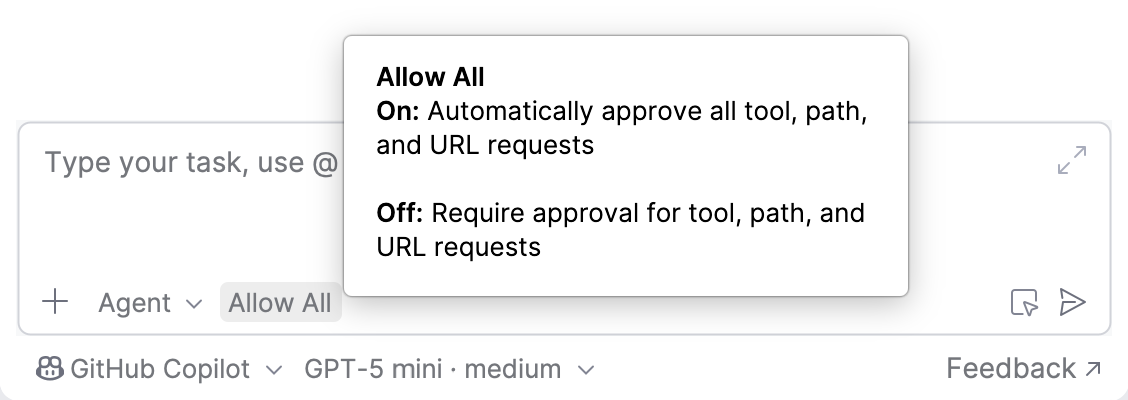
Allow All turned on – GitHub Copilot proceeds without asking for approval each time it needs to use a tool, access a file path, or open a URL.
Allow All turned off – GitHub Copilot asks for your approval each time it needs to use a tool, access a file path, or open a URL.
Approve operations
When Allow All is turned off, GitHub Copilot requests your permission to run suggested bash commands, introduce changes, perform file operations, or use external tools. In this case, you can either approve or reject the operation.
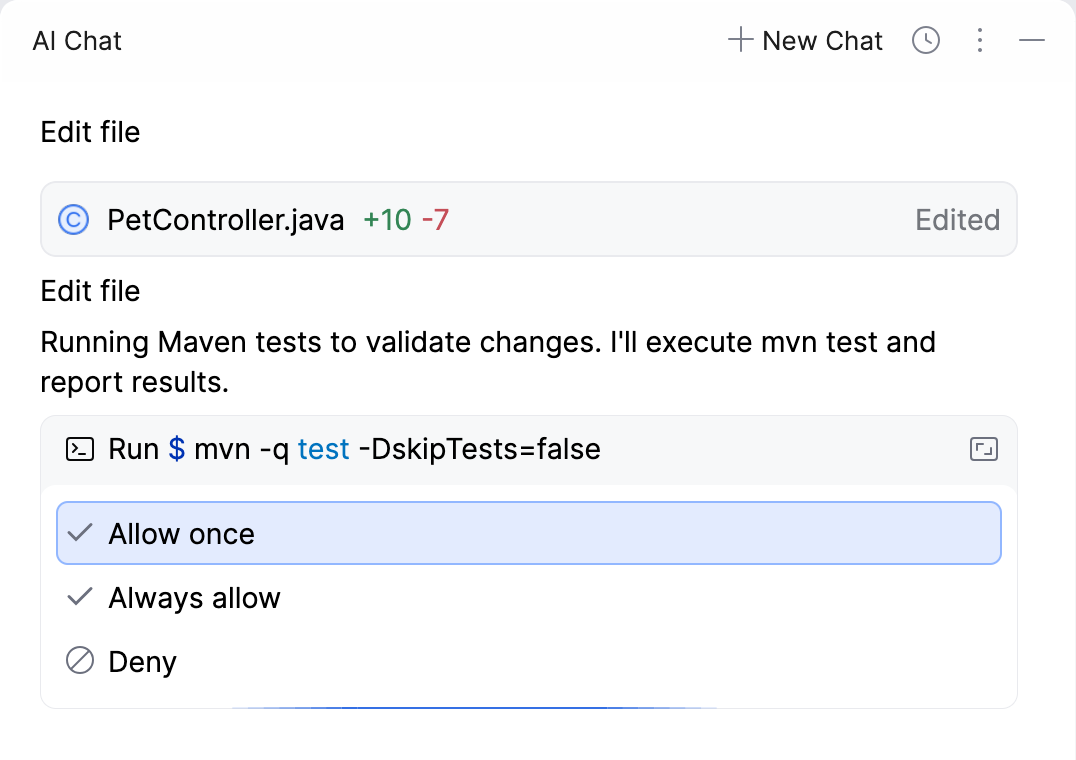
Allow once – allows GitHub Copilot to perform the action this time only. You will be asked again if the same action is requested later.
Always allow – allows GitHub Copilot to perform this action automatically, without asking for permission.
Deny – prevents GitHub Copilot from performing this action.
Before you decide, you can review what the agent is about to do:
For a suggested file change, click to review the changes the agent introduces.

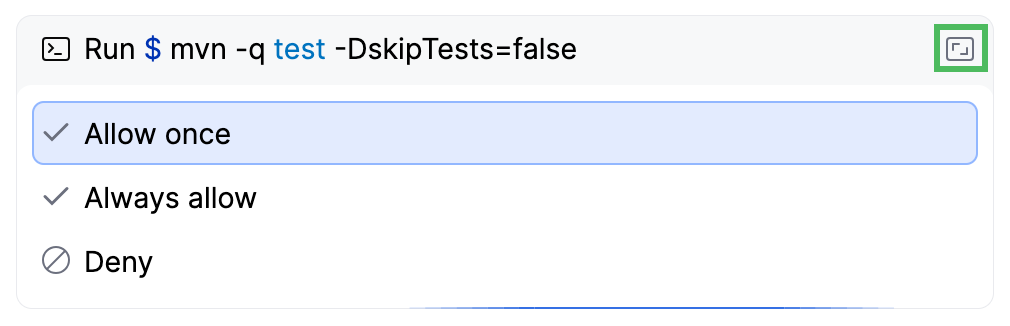
For a suggested command, click Open in editor in the top-right corner of the widget to review the complete command the agent suggests to run.
Rollback operations
If the changes introduced by GitHub Copilot do not suit you, you can roll them back. To do this:
Navigate to the pane listing the changed files.
Do one of the following:
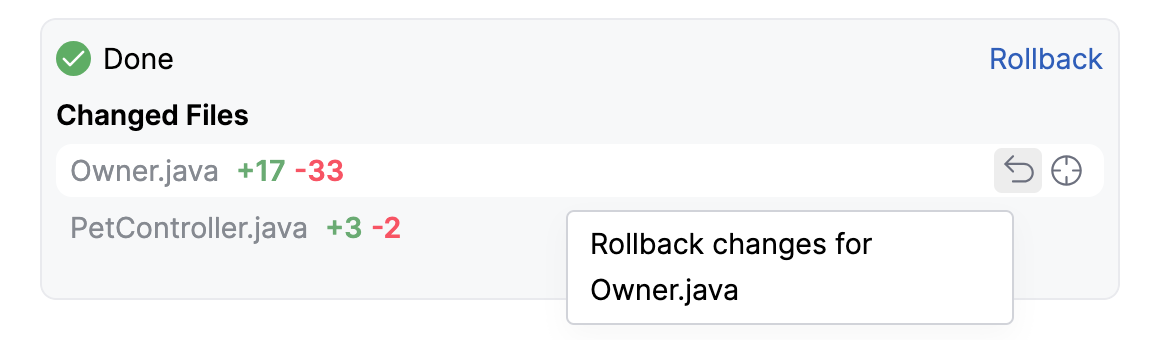
To roll back changes in a specific file, hover over it and click
 .
.
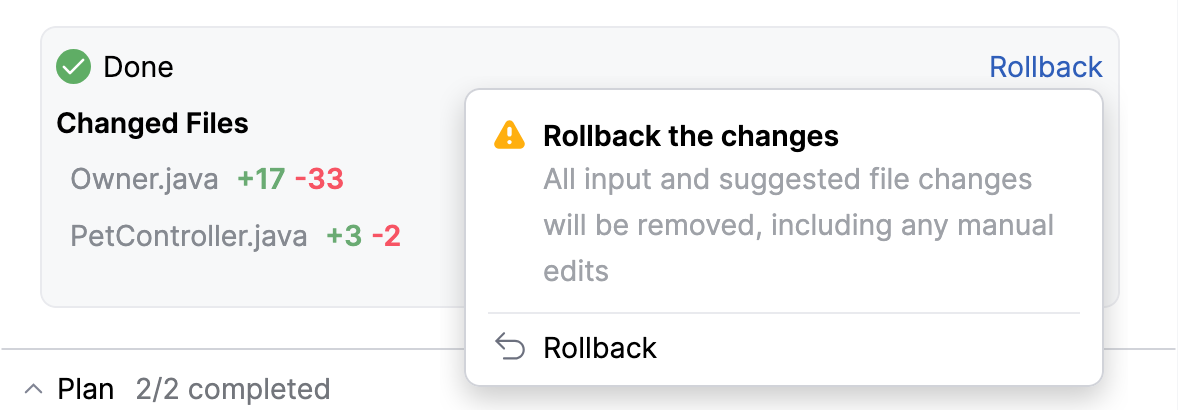
To roll back changes in all files, click Rollback.
Enable use of external tools
You can enable GitHub Copilot to use tools provided by configured Model Context Protocol (MCP) servers, extending its capabilities to perform a wider range of tasks. The available tools can be invoked automatically when the agent considers them necessary, or you can call them manually when writing a request.
To enable GitHub Copilot to use tools:
Make sure the MCP servers you want to expose to the agent are already configured in . For details on adding and configuring MCP servers, refer to Model Context Protocol (MCP).
In the IDE settings (Ctrl+Alt+S), go to .
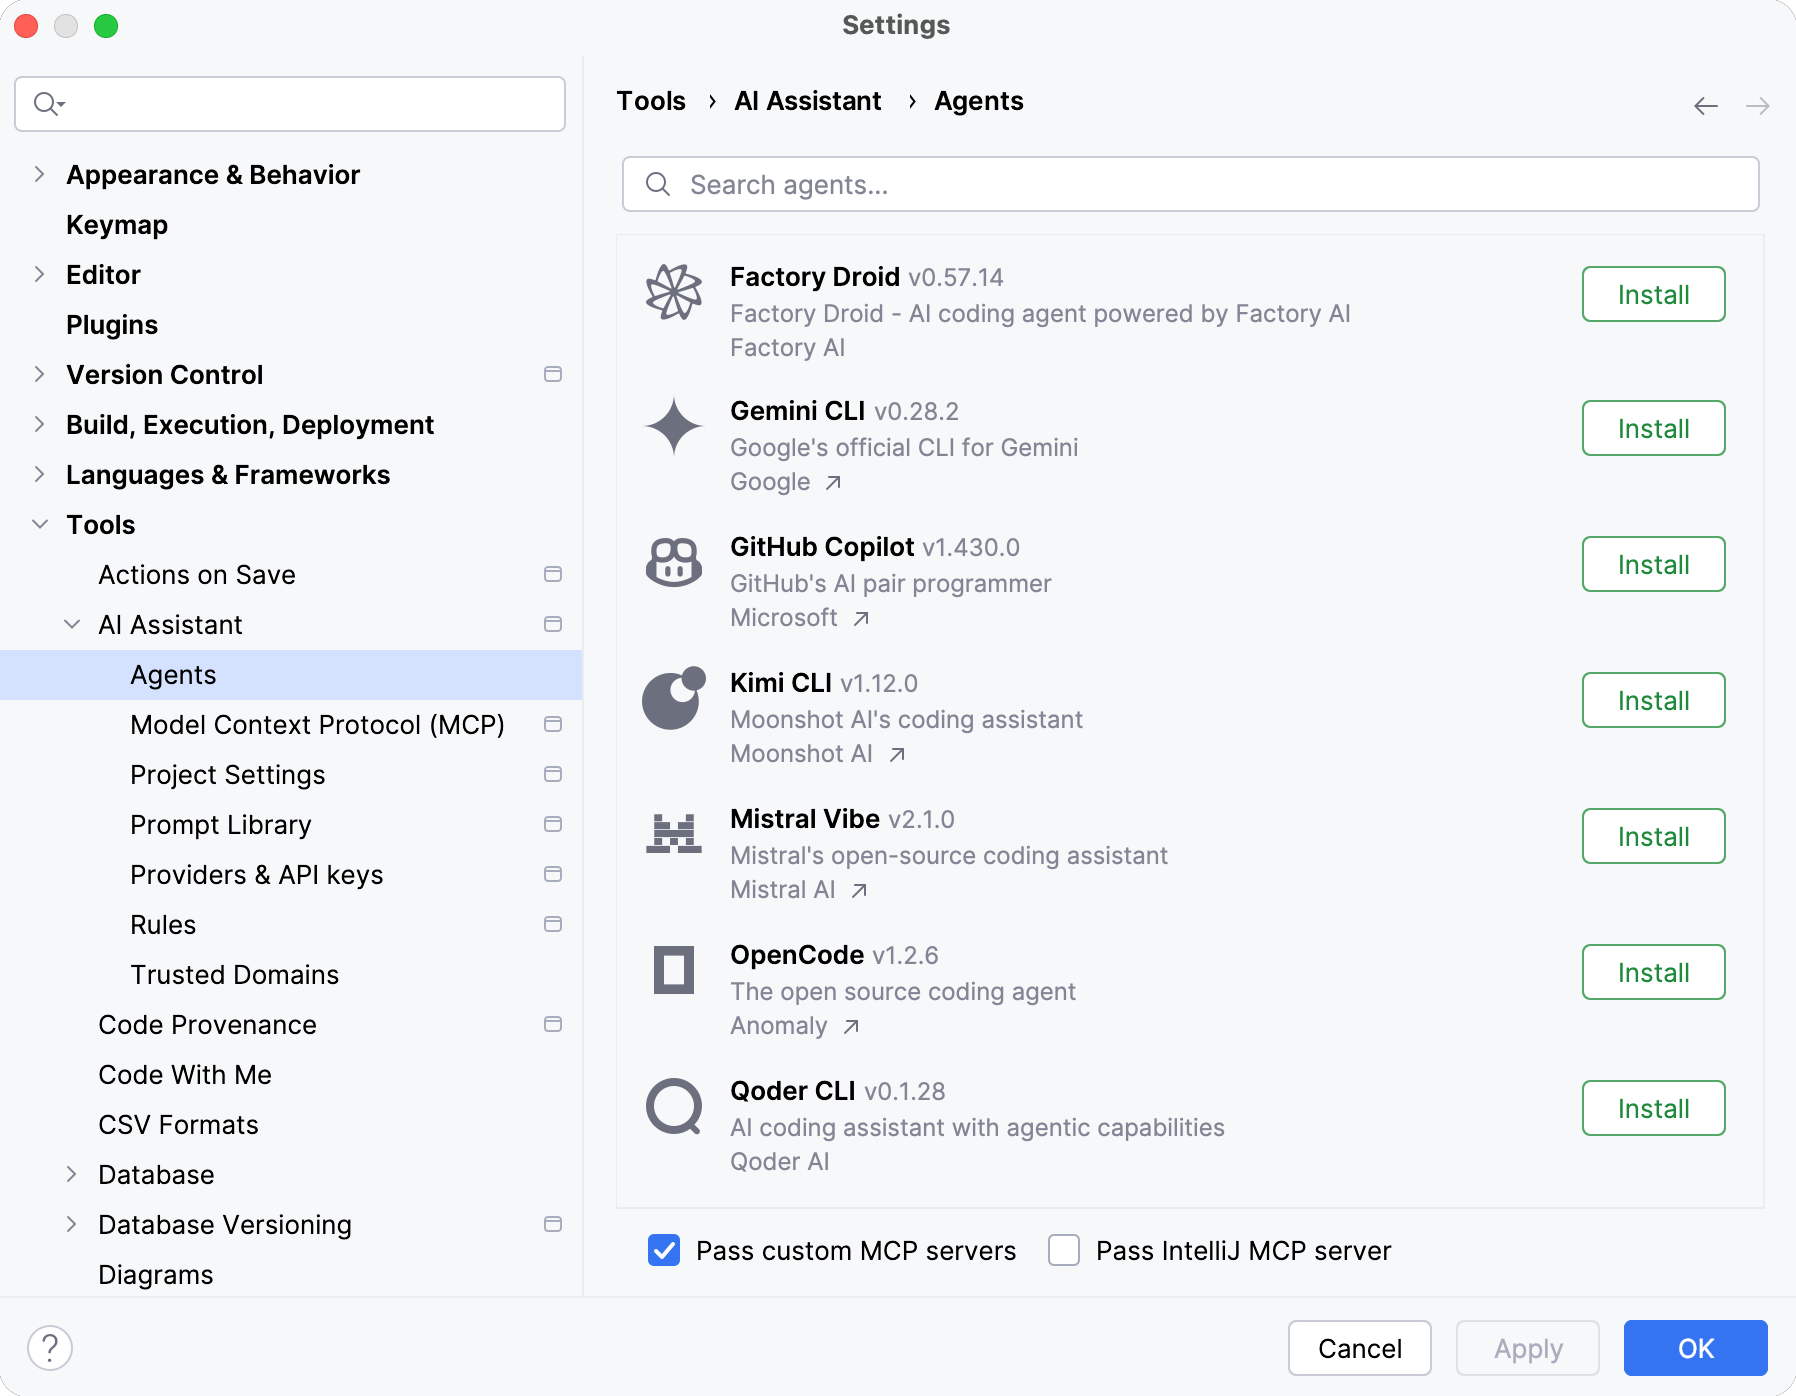
Enable the Pass custom MCP servers setting.
Click OK.
Add instructions
Instructions let you provide persistent, reusable context to the agent. GitHub Copilot adds this context to every task it works on, so you don't have to repeat project-specific instructions in each prompt.
GitHub Copilot reads instructions from the AGENTS.md and CLAUDE.md files in the root project directory, so you can keep them under version control and reuse them across the project.
For more information about instruction files and their format, refer to Agent instructions.
Use /commands
GitHub Copilot supports a subset of /commands that you can type directly in the chat to run actions such as checking the session status, managing the current session, or viewing the agent configuration.
To see the commands available in the current session, type / in the chat input field and select a command from the list.
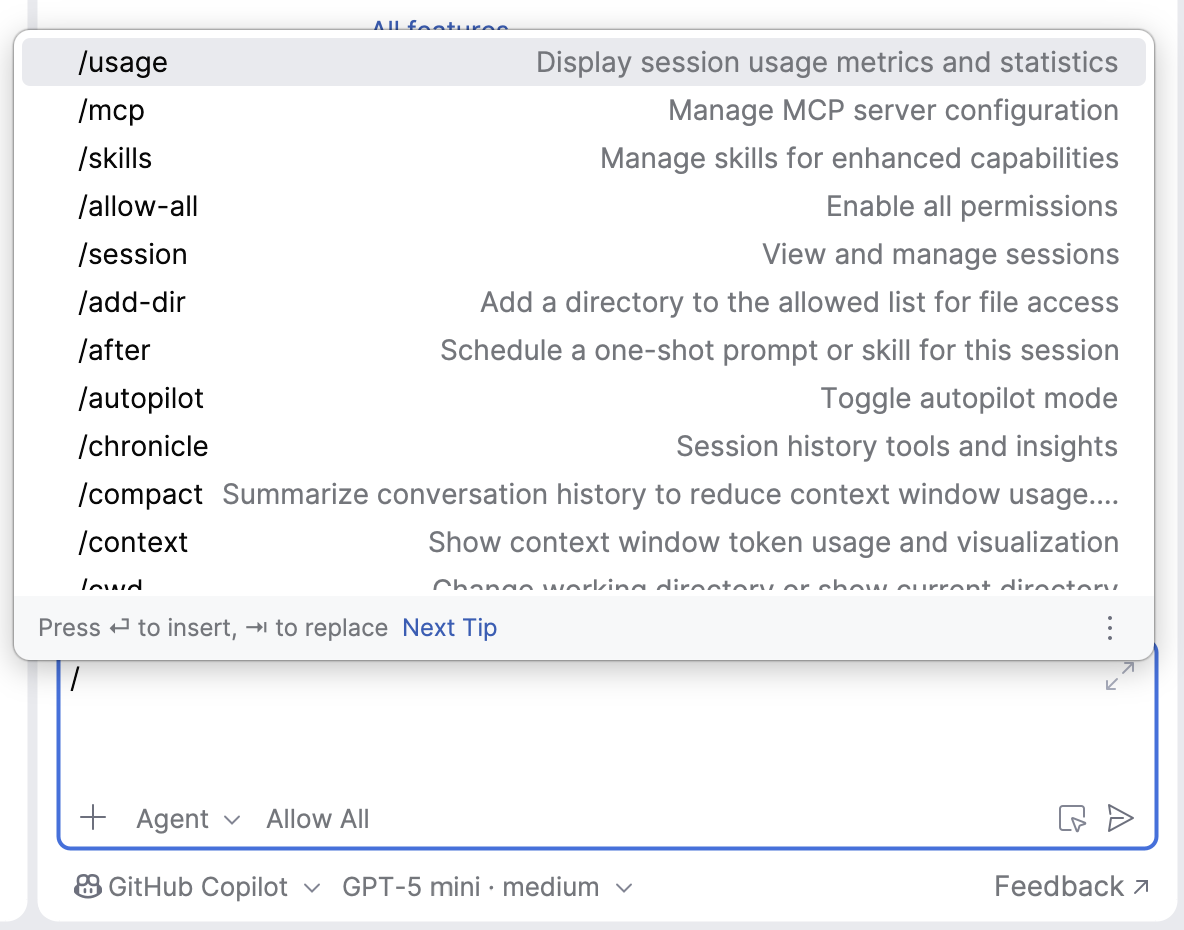
For details on specific commands, refer to the official GitHub Copilot documentation.