Tutorial: Configure CLion on Windows
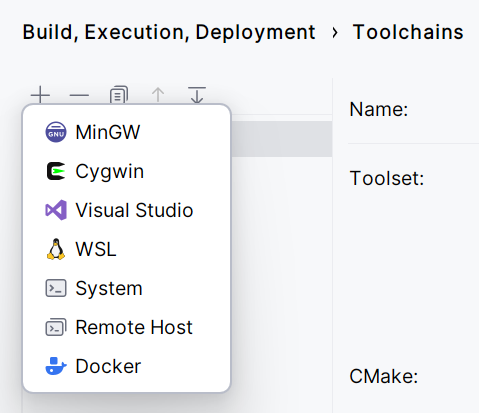
On Windows, CLion toolchains include the build tool, C and C++ compilers, debugger executable, and the environment. You can select one of the pre-defined toolchain setups (MinGW, Cygwin, Microsoft Visual C++, or WSL, Remote Host, Docker) or configure a custom toolchain (System):
Watch this video for an overview of Windows toolchain options:
For more information about Remote Host toolchains, refer to Remote with local sources. If you are working with a Docker container, refer to Docker toolchain.
MinGW
CLion bundles a version of the MinGW toolset for quick setup. The exact version bundled is MinGW-w64 13.1 with languages=c,c++, posix threads, and seh exceptions. You can use this bundled toolchain or switch to a custom MinGW installation.
Install MinGW (optional)
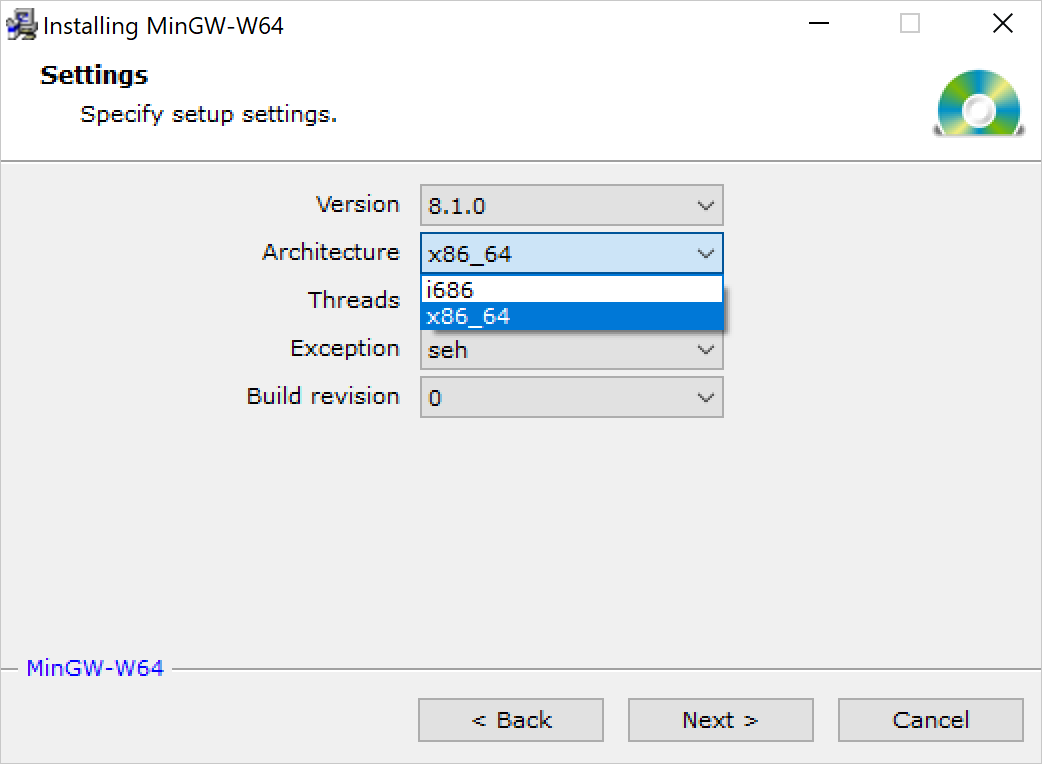
Download and run the MinGW-w64 installer. It provides both 64- and 32-bit options.
In the MinGW-w64 installation wizard, make sure to select the required architecture. Note that the default suggested option is 32-bit.
Wait for installation to finish.
Although MinGW-w64 provides both 64- and 32-bit options, you can also install MinGW, the 32-bit-only version.
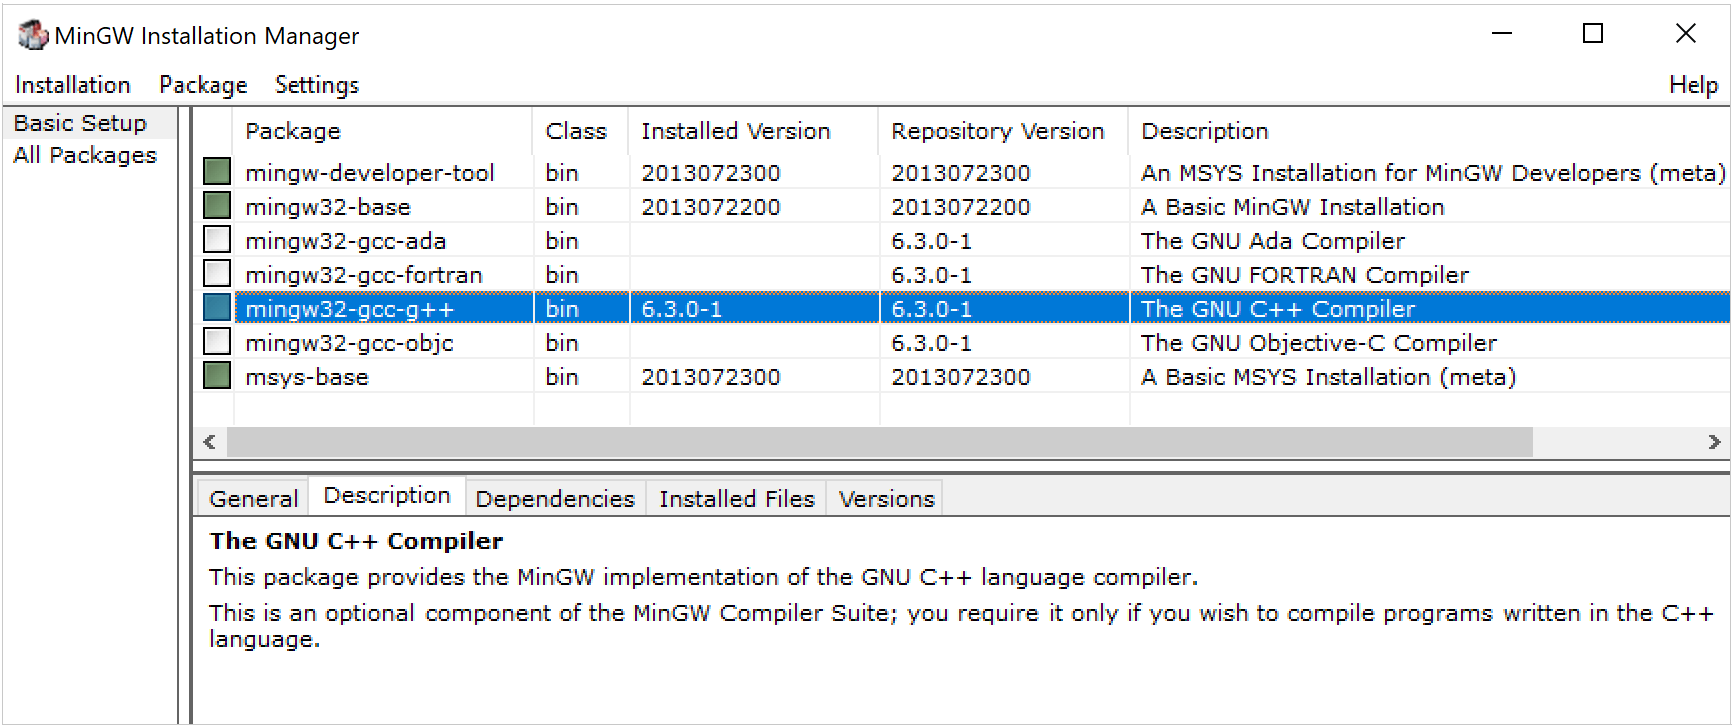
In the MinGW installation wizard, select the following packages from the Basic Setup list: mingw-developer-tool, mingw32-base, mingw32-gcc-g++, mingw32-msys-base.
Wait for installation to finish.
Configure a MinGW toolchain
Go to .
Click
and select MinGW to add a new MinGW toolchain.
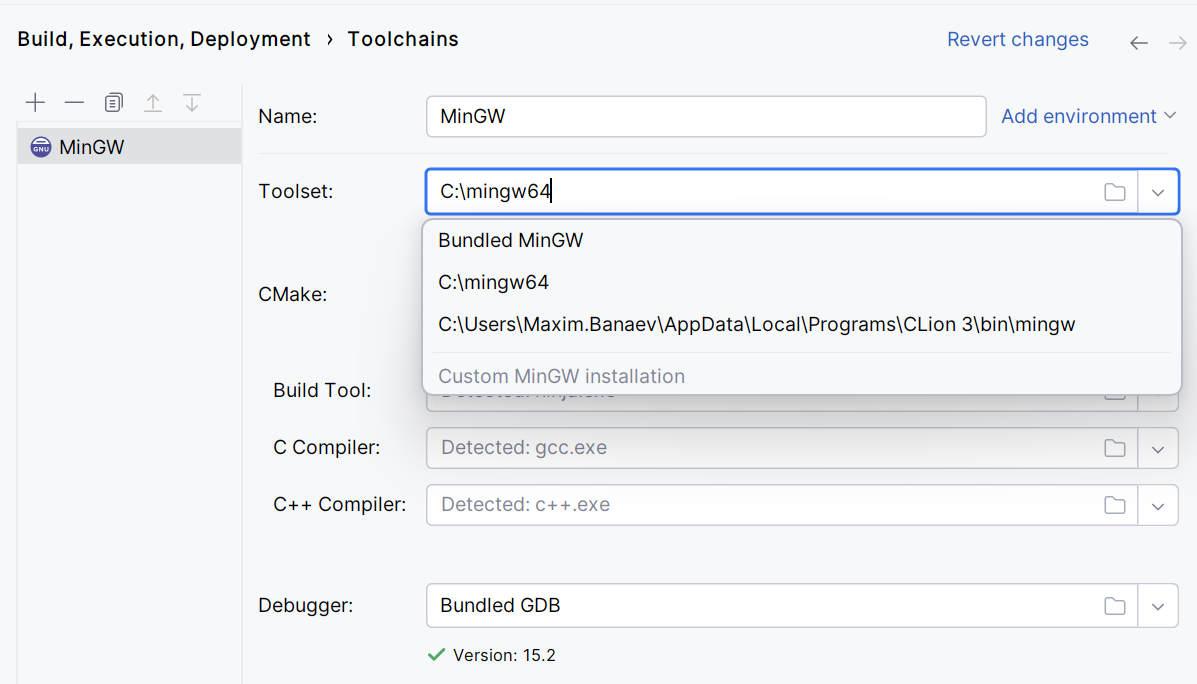
In the Toolset field, you will see Bundled MinGW, which is the default option. If required, open the field to select from the list of other available installations:
Wait until the tools detection finishes.
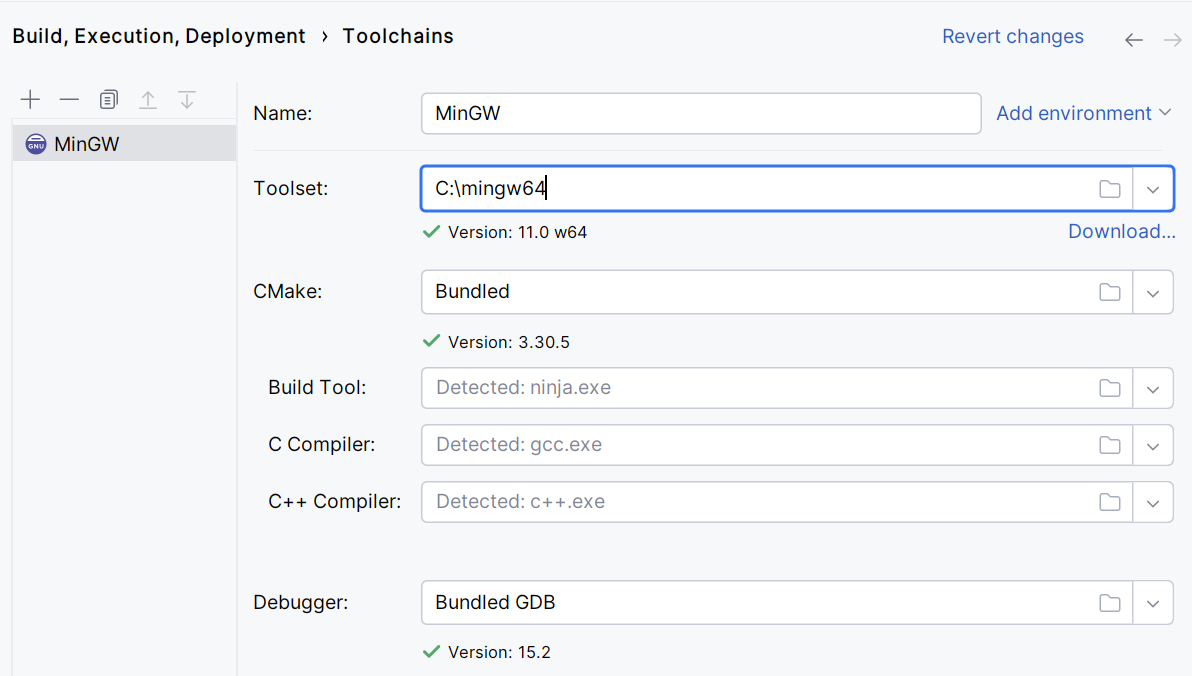
Select the Debugger: you can use either bundled GDB, your MinGW GDB, or a custom GDB binary.
If required, specify the script to initialize the environment.
Click Apply when all the tools are set correctly.
Cygwin
Download the Cygwin installer, version 2.8 or later.
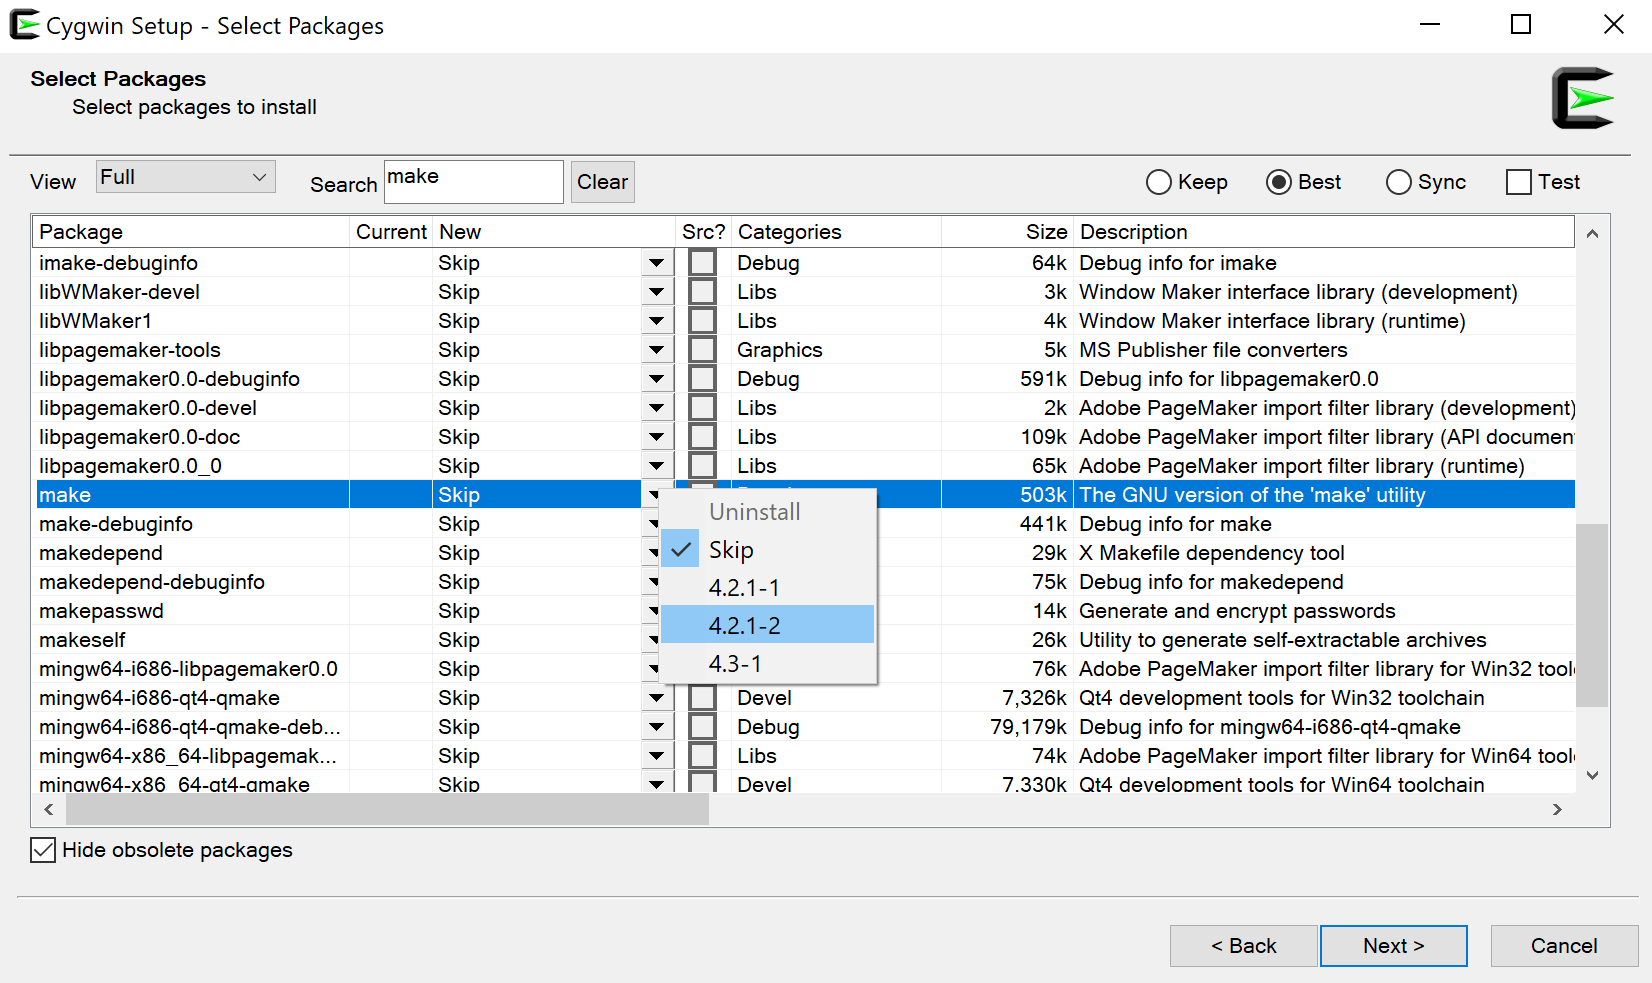
Run the installer and select the following packages:
gcc-g++
gdb
To select a package, type its name in the Search field and set the version in the New column:
Once the installation is finished, open CLion and go to .
Click
and select Cygwin to add a new Cygwin toolchain.
CLion will attempt to detect the Cygwin installation automatically. Check the Toolset field, and specify the path manually if required.
Wait until the tools detection finishes, and click Apply.
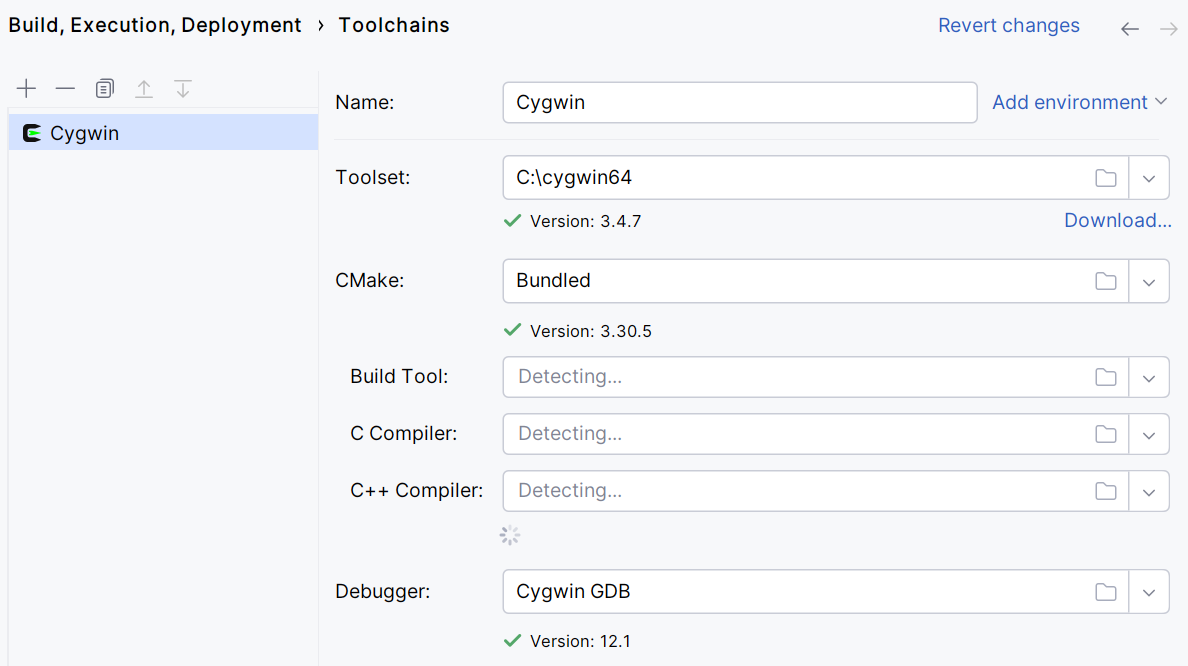
If required, specify the script to initialize the environment.
Windows Subsystem for Linux
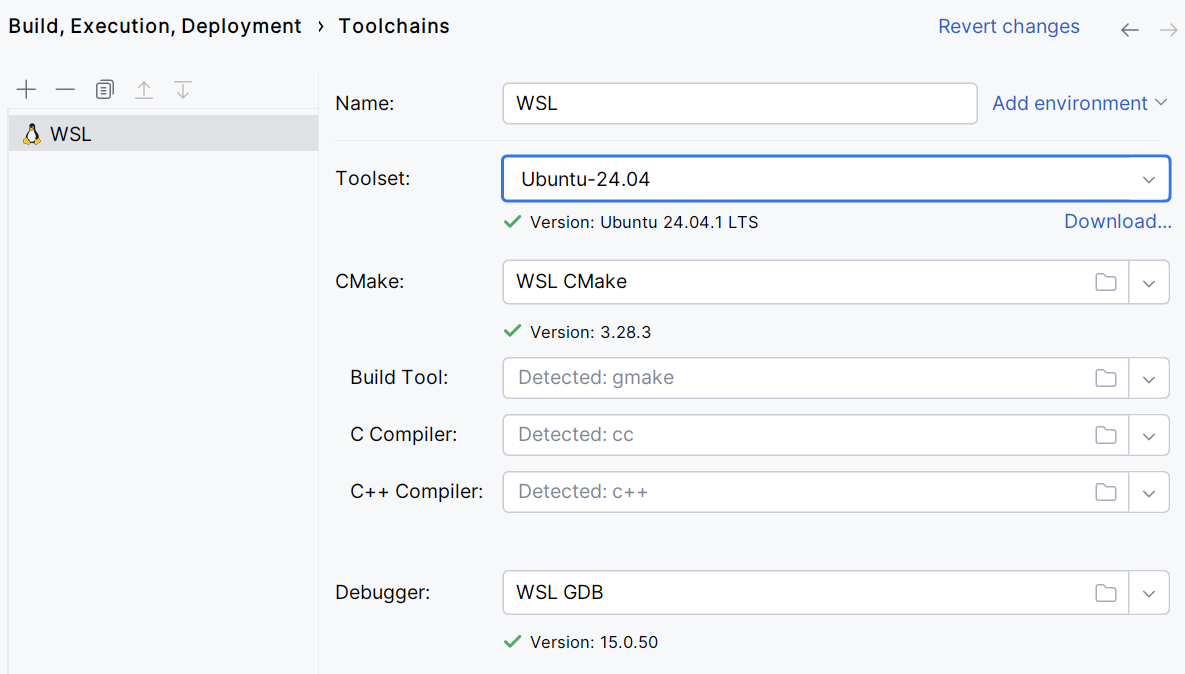
You can use WSL, Windows Subsystem for Linux, as your working environment in CLion on Windows 10 (starting the Fall Creators Update version 1709, build 16299.15).
WSL toolchain enables you to build projects using CMake and compilers from Linux and run/debug on WSL without leavCLionLion running on your Windows machine.
Microsoft Visual C++
Install Visual Studio 2017, 2019, or 2022 on your system.
In CLion, go to .
Click
and select Visual Studio from the list of toolchain templates.
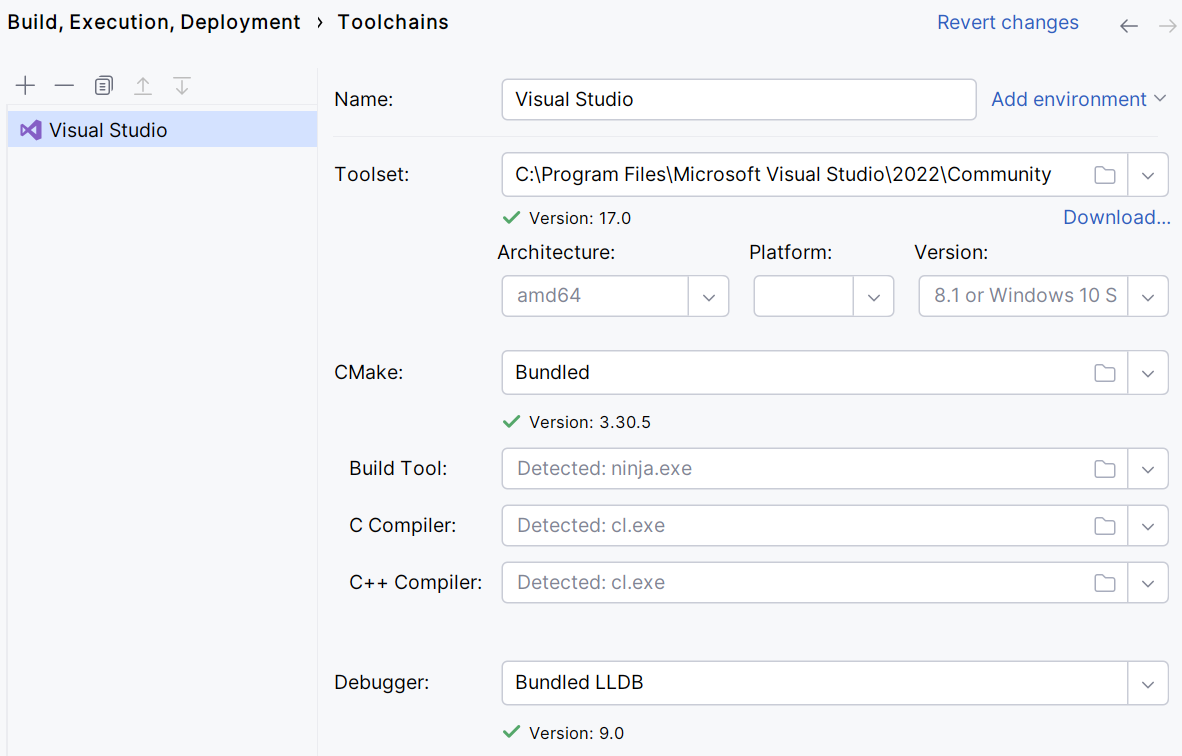
Check the Toolset field. CLion will attempt to automatically detect the installed Visual Studio distribution. If the detection fails, set the path to Visual Studio manually.
If required, specify the Architecture (x86, amd64, x86_arm, or another), Platform (store, uwp, onecore, or leave it blank), and Version. To build your project for the selected architecture, CLion will call the script to configure the environment with the specified parameters.
Wait until the tools are detected:
If required, specify the script to initialize the environment.
MSVC compiler
CLion supports the Microsoft Visual C++ compiler that ships with Visual Studio 2017, 2019, and 2022.
For the case when your code includes MSVC extensions, CLion provides the support for:
__uuidof,__forceinline,__unaligned, and__alignofkeywords;pointer type attributes:
__ptr32,__ptr64,__uptr,__sptr;MSVC built-in data types:
(unsigned) __int8,(unsigned) __int16,(unsigned) __int32,(unsigned) __int64,__wchar_t;additional format specifiers, such as
%I32and%I64;the clang's
-fms-extensionsflag.
Clang-cl compiler
As an alternative compiler, you can use clang-cl - the MSVC-compatible compiler driver for Clang. CLion supports clang-cl version 8.0 and later.
Install clang-cl from the LLVM site or along with the Visual Studio tools.
When installed from the LLVM site, the clang-cl binary can be found at the standard location C:\Program Files\LLVM\bin\clang-cl.exe for the 64-bit version or C:\Program Files (x86)\LLVM\bin\clang-cl.exe for the 32-bit version.
In CLion, go to and select the Visual Studio toolchain that you want to configure, or create a new one.
Point the C Compiler and C++ Compiler fields to clang-cl.exe. CLion will suggest the paths detected automatically.
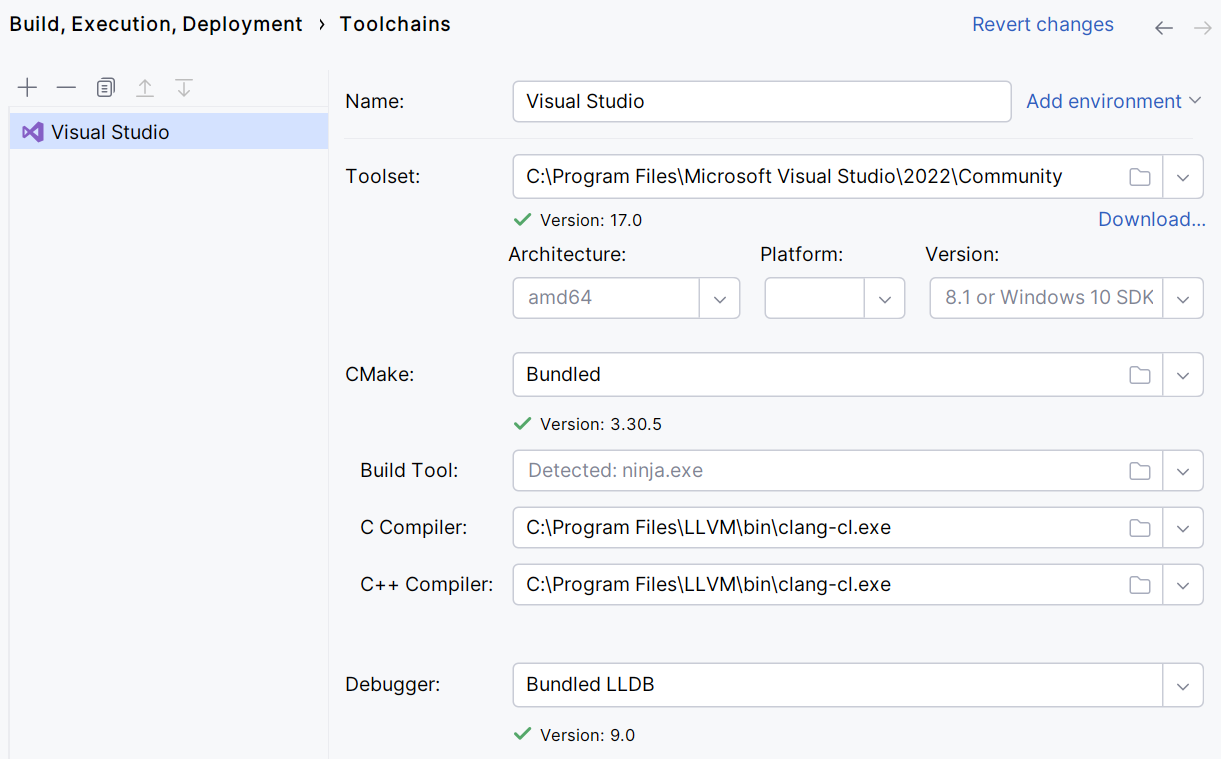
Note that currently the -T clangcl options can't be picked up if the bundled CMake is in use along with the Visual Studio toolchain setup (CPP-18848).
MSVC debugger
The MSVC toolchain debugger is implemented on top of LLDB, and it can work with native visualizers from the Visual Studio installation or from your project.
To enable native visualizers support and set the desired diagnostics level, select the Enable Natvis renderers for LLDB checkbox in :
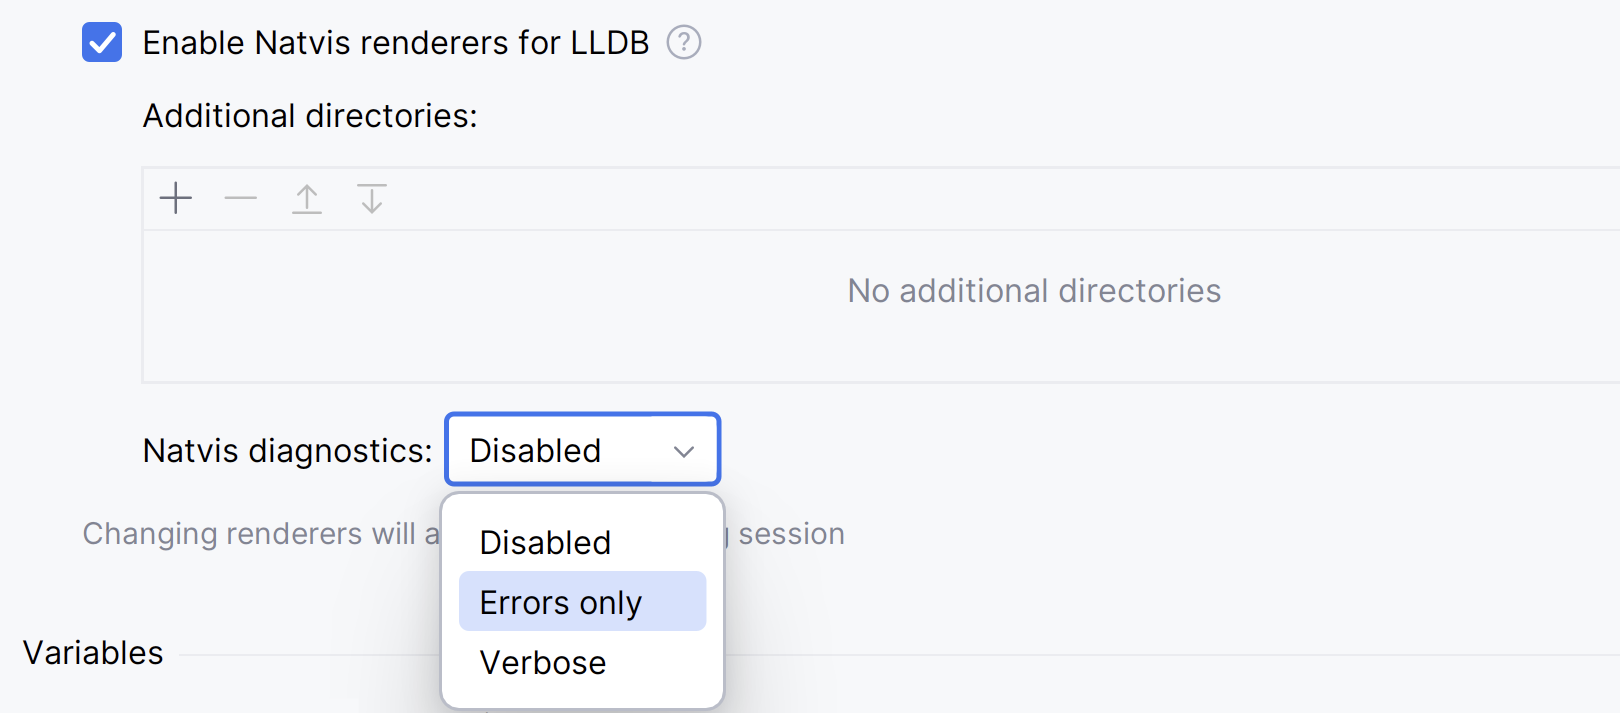
CLion automatically generates one-line summaries for all structures not covered by Natvis and highlights them to increase readability. Also, the built-in formatters provide visualization for wide/Unicode strings (wchar_t, char16_t, char32_t).
By default, CLion will automatically find and load .natvis files added to the project model, belonging to the selected MSBuild or MSVC toolchain, or located in %USERPROFILE%\Documents\Visual Studio Version\Visualizers.
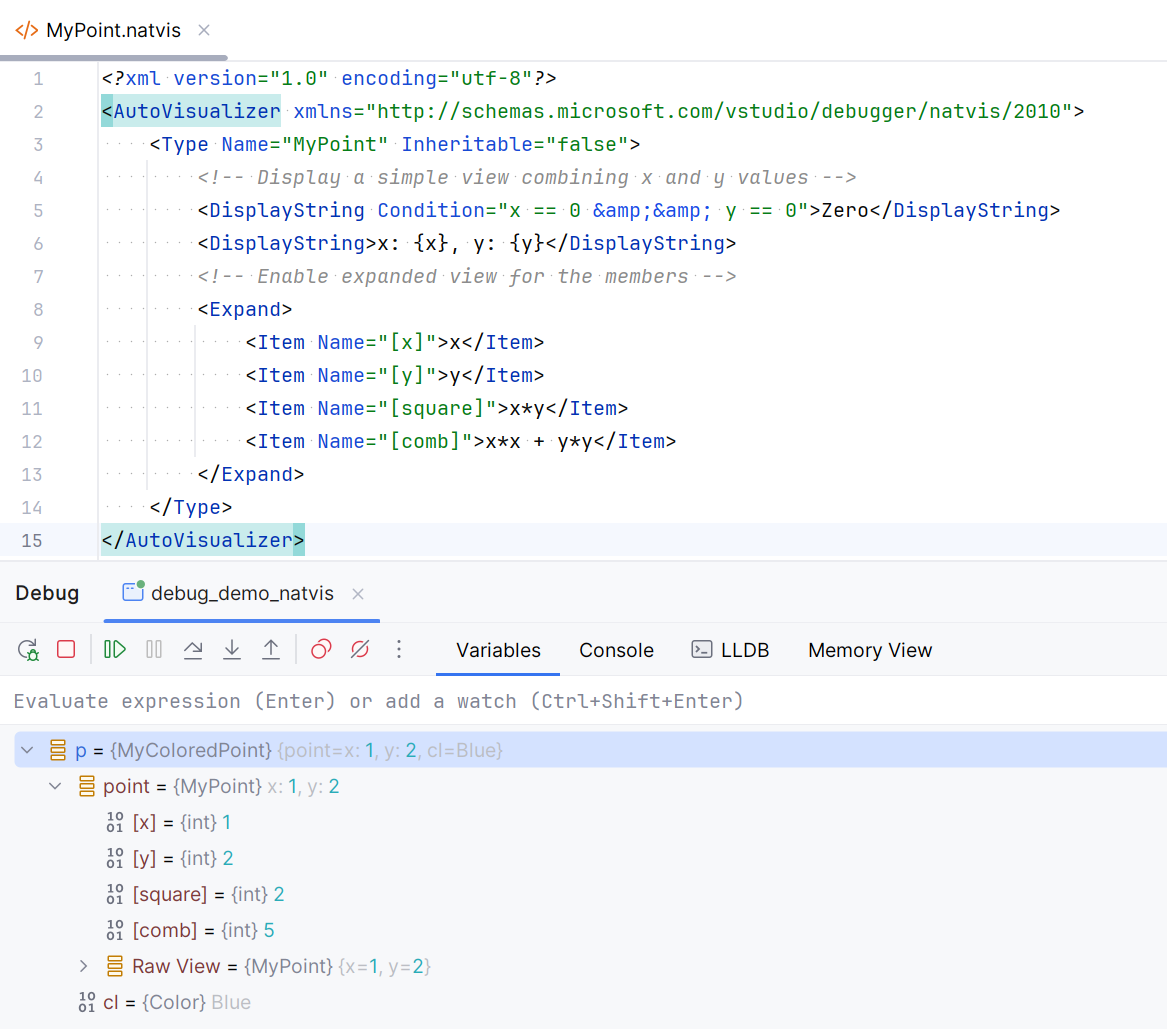
You can also specify a custom location for .natvis files. Go to and add an additional directory with Natvis renderers:
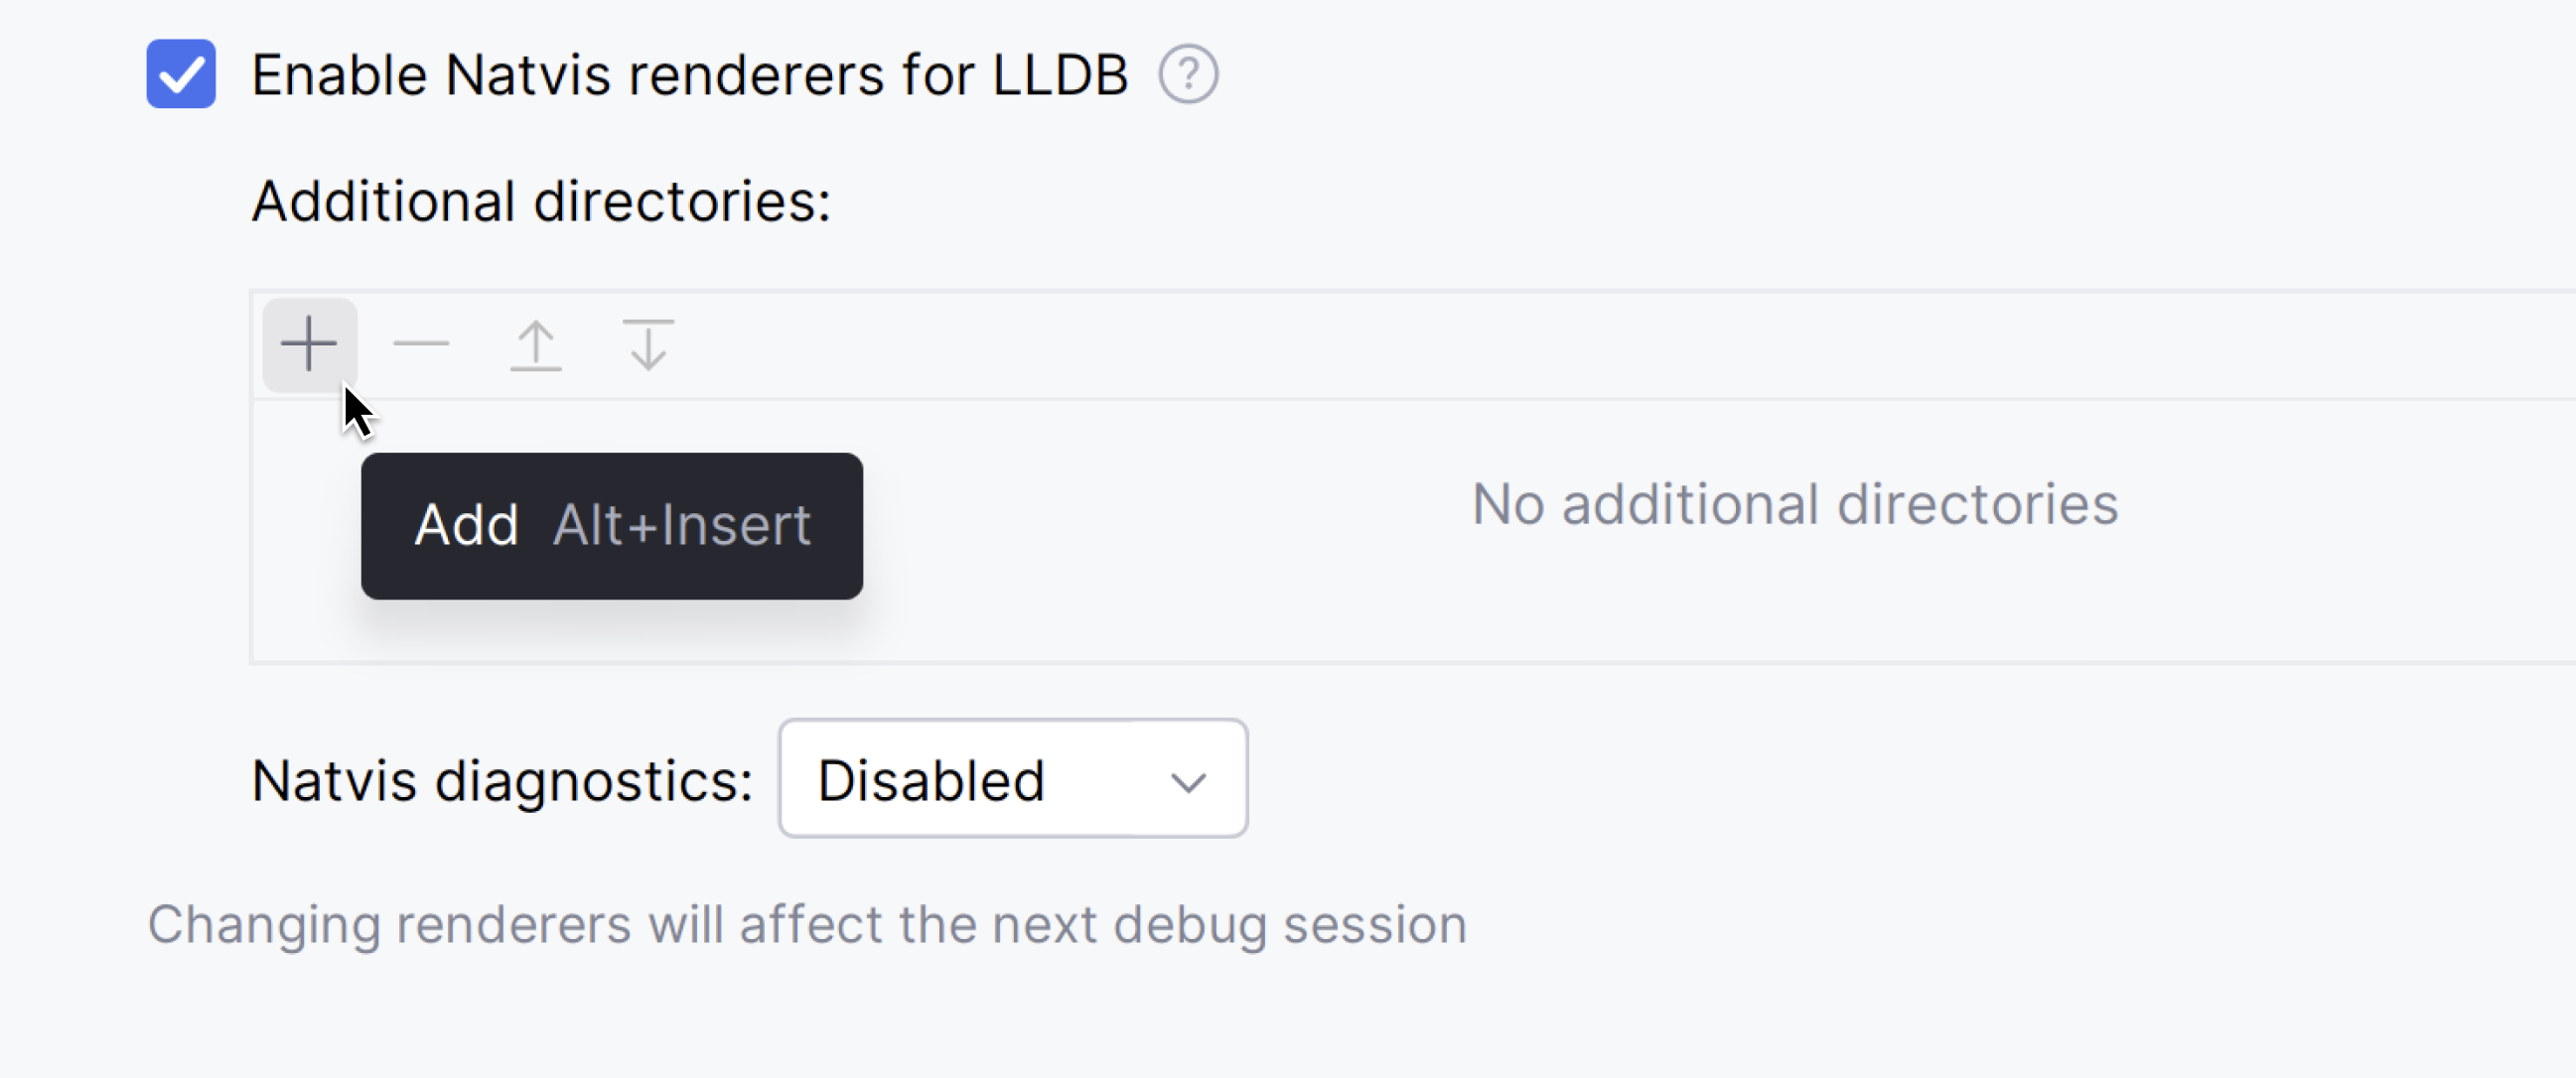
CLion supports most of the Natvis customization features, such as ArrayItems, IndexListItems, LinkedListItems, TreeItems, Inheritable attribute, Format specifiers, and CustomListItems.
When using the MSVC toolchain debugger, you can enable symbol servers support which will help the debugger resolve library symbols correctly. For more information, refer to Use symbol servers when debugging on Windows.
System toolchain
The System toolchain on Windows allows configuring the build tool, compilers, and debugger without selecting a predefined toolset or environment, similarly to Linux and macOS. Use this toolchain option for embedded development cases like using ARM or for other custom setups.
In the main menu, go to .
Click
and select System to add a new System toolchain.
Configure the tools and provide an environment script if required:
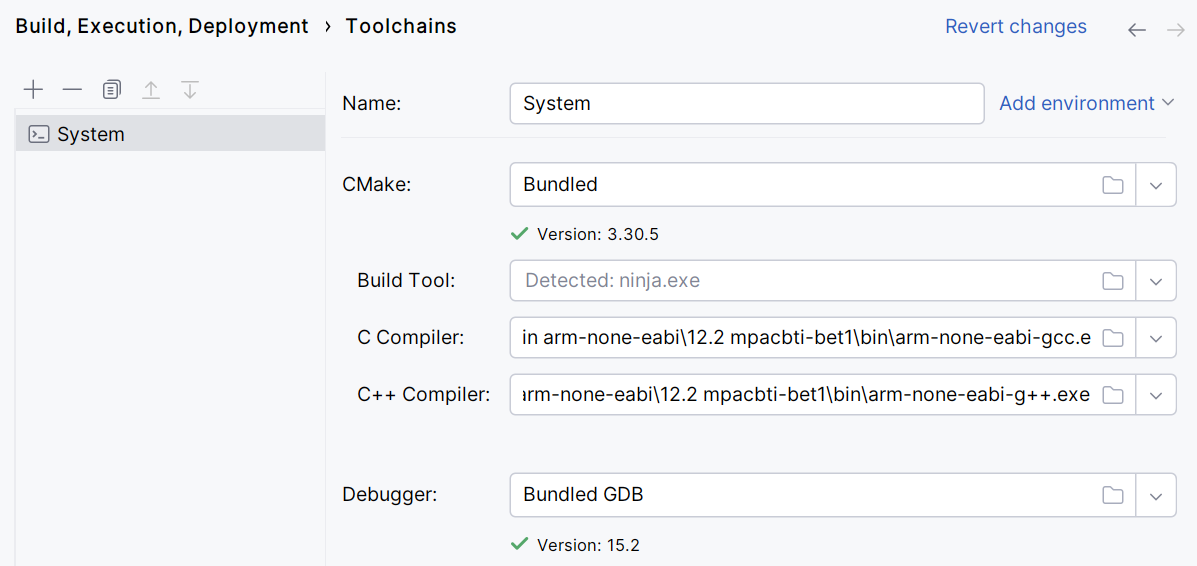
Initializing the toolchain environment via a script
Instead of setting the environment manually, you can point CLion to an environment file — a shell script that initializes the environment for your project. This is helpful, for example, when you need to initialize compiler variables, add custom ones, or modify the PATH.
The following environment files are supported:
bat files — Windows MinGW and MSVC toolchains.
ps1 files — Windows MinGW, Cygwin, and MSVC toolchains.
shell files — Windows Cygwin, Local Linux/macOS, WSL, Docker, and Remote toolchains.
Most frameworks include environment scripts, which you can use right away. See the example of ESP-IDF on macOS. You can also create your own script, for example, when you need to source several environment files: see the example of ESP-IDF on Windows.
In the toolchain settings, click Add environment, then click From file:

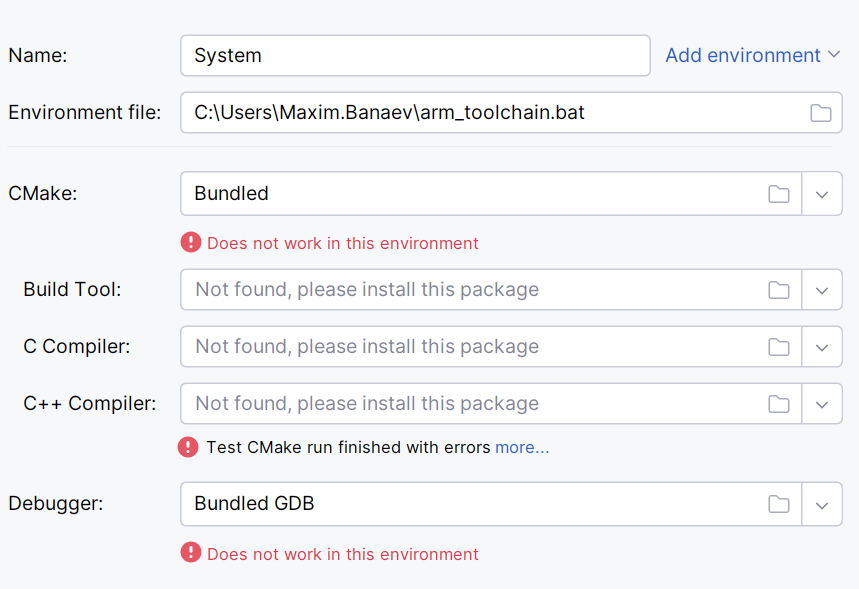
In the Environment file field, specify the path to the script:

You will get notifications in case of script loading issues. CLion also checks the script loading time and terminates the execution if it takes too long.
Set the fallback shell
To source the environment file on Linux (local or remote), WSL, and Docker, CLion invokes
sourceor.in default login shell as set in the$SHELLvariable.If
$SHELLis empty, CLion uses the shell specified in the Fallback shell for sourcing the environment field of the Advanced settings.
Clang compiler on Windows
With CMake 3.15, it has become possible to use the Clang compiler on Windows with the MinGW-w64/MinGW toolchain.
However, the LLVM Clang for Windows is built using Microsoft Visual Studio, and all the built-in macros and include search paths are set up for use with Visual Studio. So if you take Clang from the LLVM repository, it will not work correctly when configured with the MinGW toolchain. One of the possible workarounds is described below.
Set up the Clang compiler for MinGW
Install MSYS2.
In the MSYS terminal, run the following pacman command to download the complete set of packages built with clang:
pacman -S mingw-w64-clang-x86_64-toolchainRun one more command to get the MinGW-w64 GDB debugger:
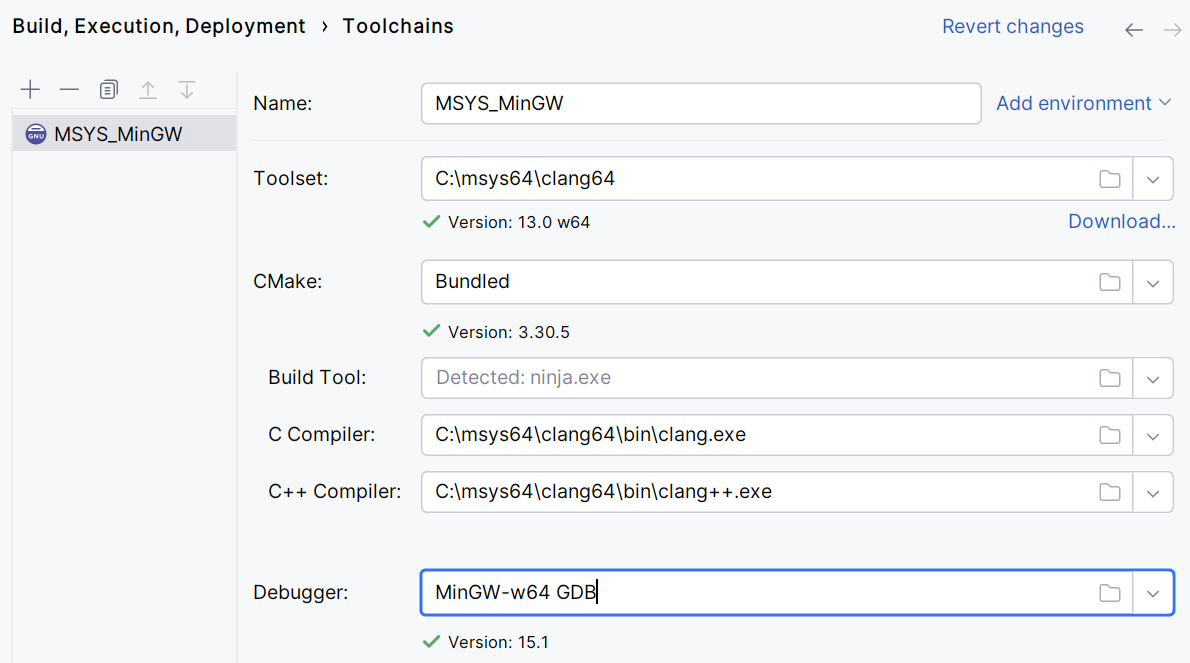
pacman -S mingw-w64-clang-x86_64-gdbGo to and create a MinGW toolchain.
Set the Toolset to C:\msys64\clang64. Set other paths manually in case they are not detected automatically.
GDB on Windows
In the case of MinGW, CLion includes the bundled GDB (version 16.3). For Cygwin, you need to install the GDB package in the Cygwin Package Manager, as described in the Cygwin section of this guide.
You can also switch to a custom GDB binary. In this case, the supported GDB versions are 7.8.x-16.3.
Note that for GDB 8.0 and later, debugger output is redirected to CLion console by default. To enable opening an external console window for application input/output, go to Help | Find Action or press Ctrl+Shift+A, search for Registry, and set the following key: cidr.debugger.gdb.workaround.windows.forceExternalConsole.