Create a Snowflake data source with key pair authentication
Official documentation
For full information about Snowflake, refer to the official documentation.
Key-pair authentication and key-pair rotation at docs.snowflake.com
Before connecting to a Snowflake database with key pair authentication, make sure to generate your key files and provide your public key file to your system administrator first.
Once the key files are ready, you need to create a Snowflake data source in DataGrip and configure it to use it with key pair authentication.
Create a Snowflake data source to use with key pair authenticatoin
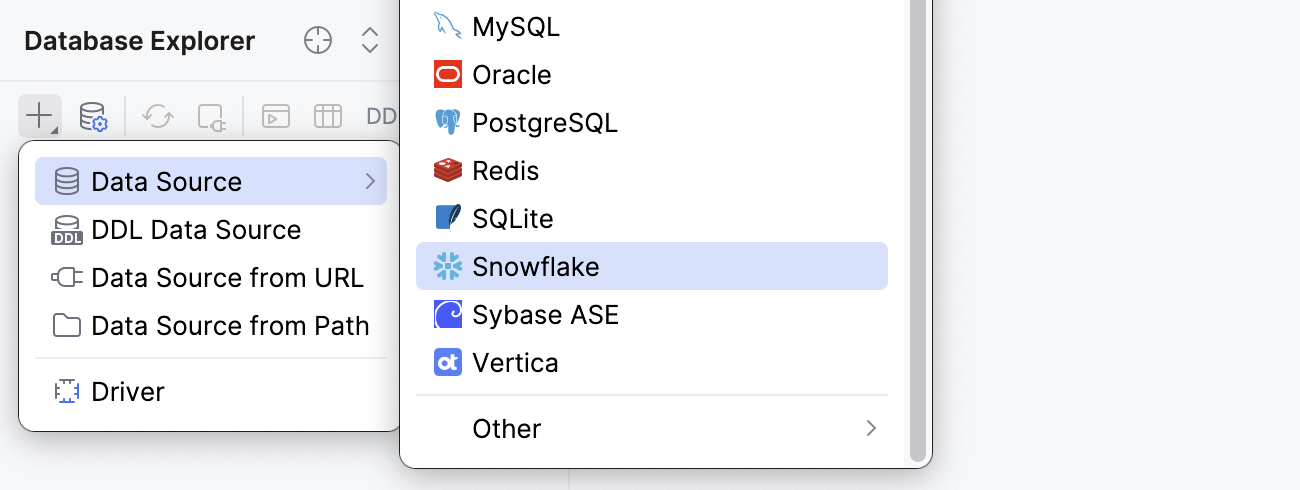
In the Database Explorer (⌘ 1) , click
New on the toolbar and navigate to .

Check if there is a Download missing driver files link at the bottom of the connection settings area. Click this link to download drivers that are required to interact with a database. For a direct download link, refer to the JetBrains JDBC drivers page.

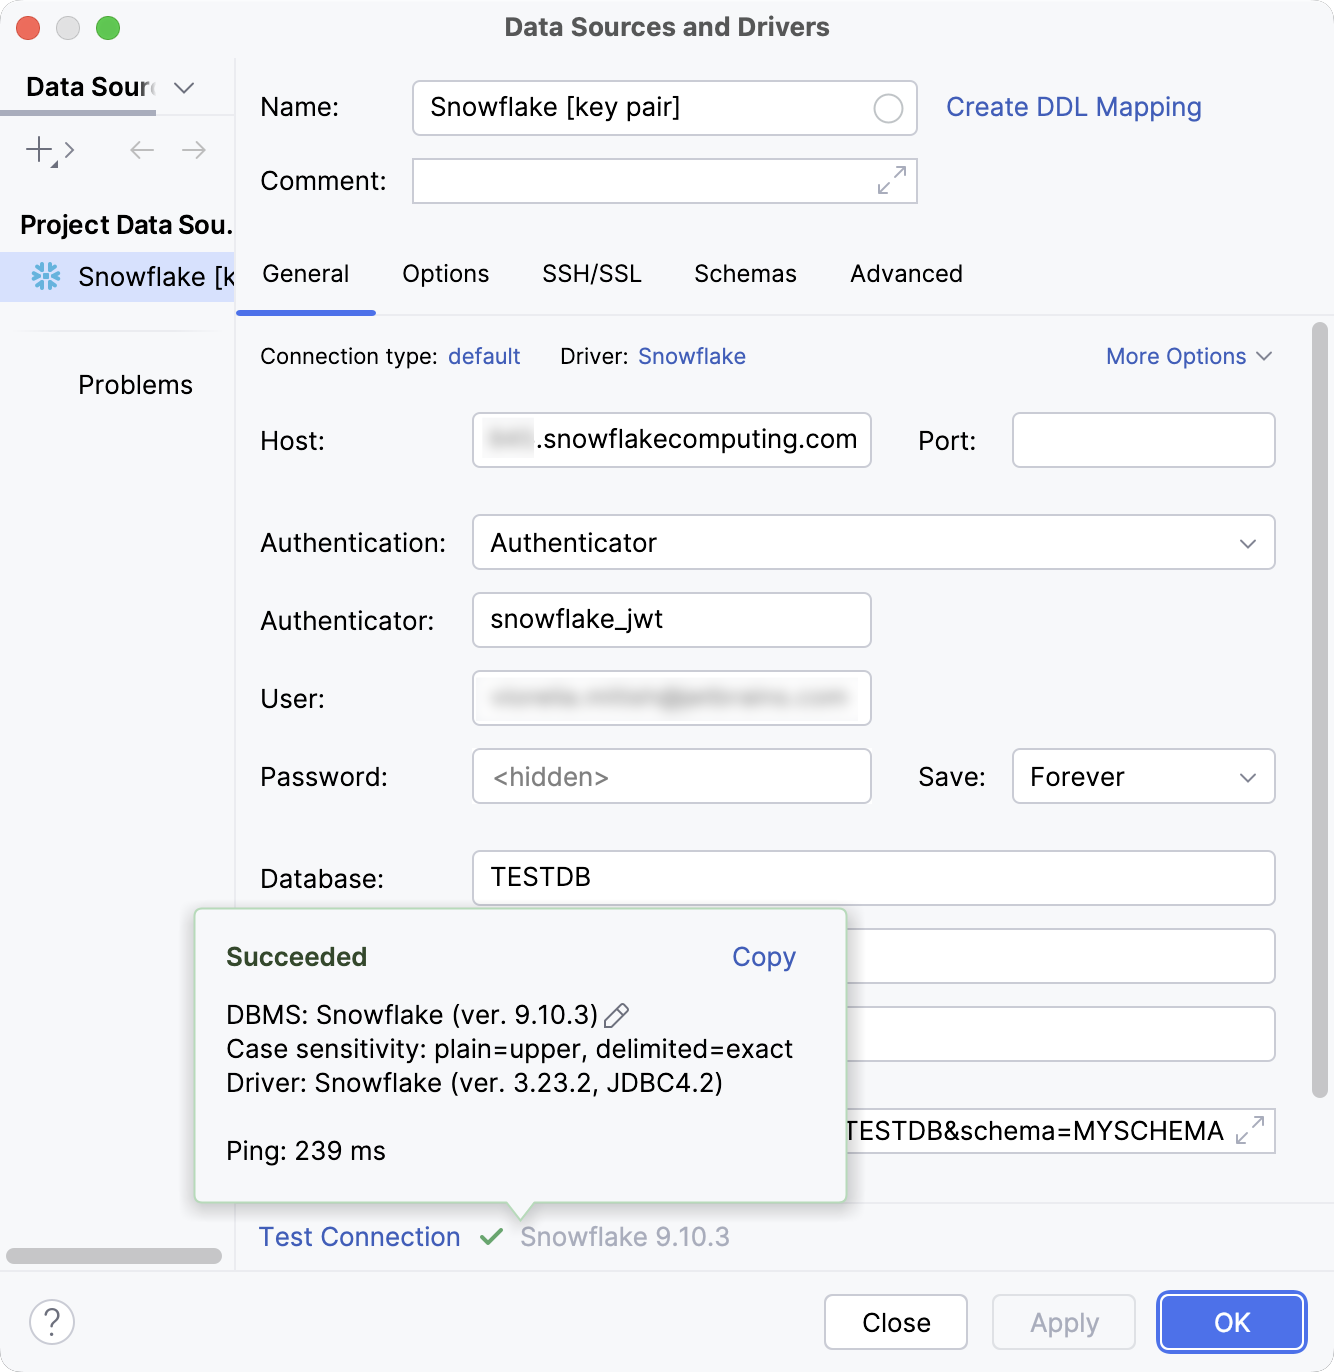
Specify the database connection details.
In the Host field, type the URL to connect to your Snowflake account with. For example,
myorg-myconnection.snowflakecomputing.com.From the Authentication dropdown, select Authenticator.
In the Authenticator field, type
snowflake_jwt.In the User field, type your Snowflake username.
Leave the Password field empty.
In the Database field, type the database name to which you want to connect.
In the Schema field, type the schema name to which you want to connect.
In the Warehouse field, type the name of a compute resources cluster in Snowflake that you want to use.
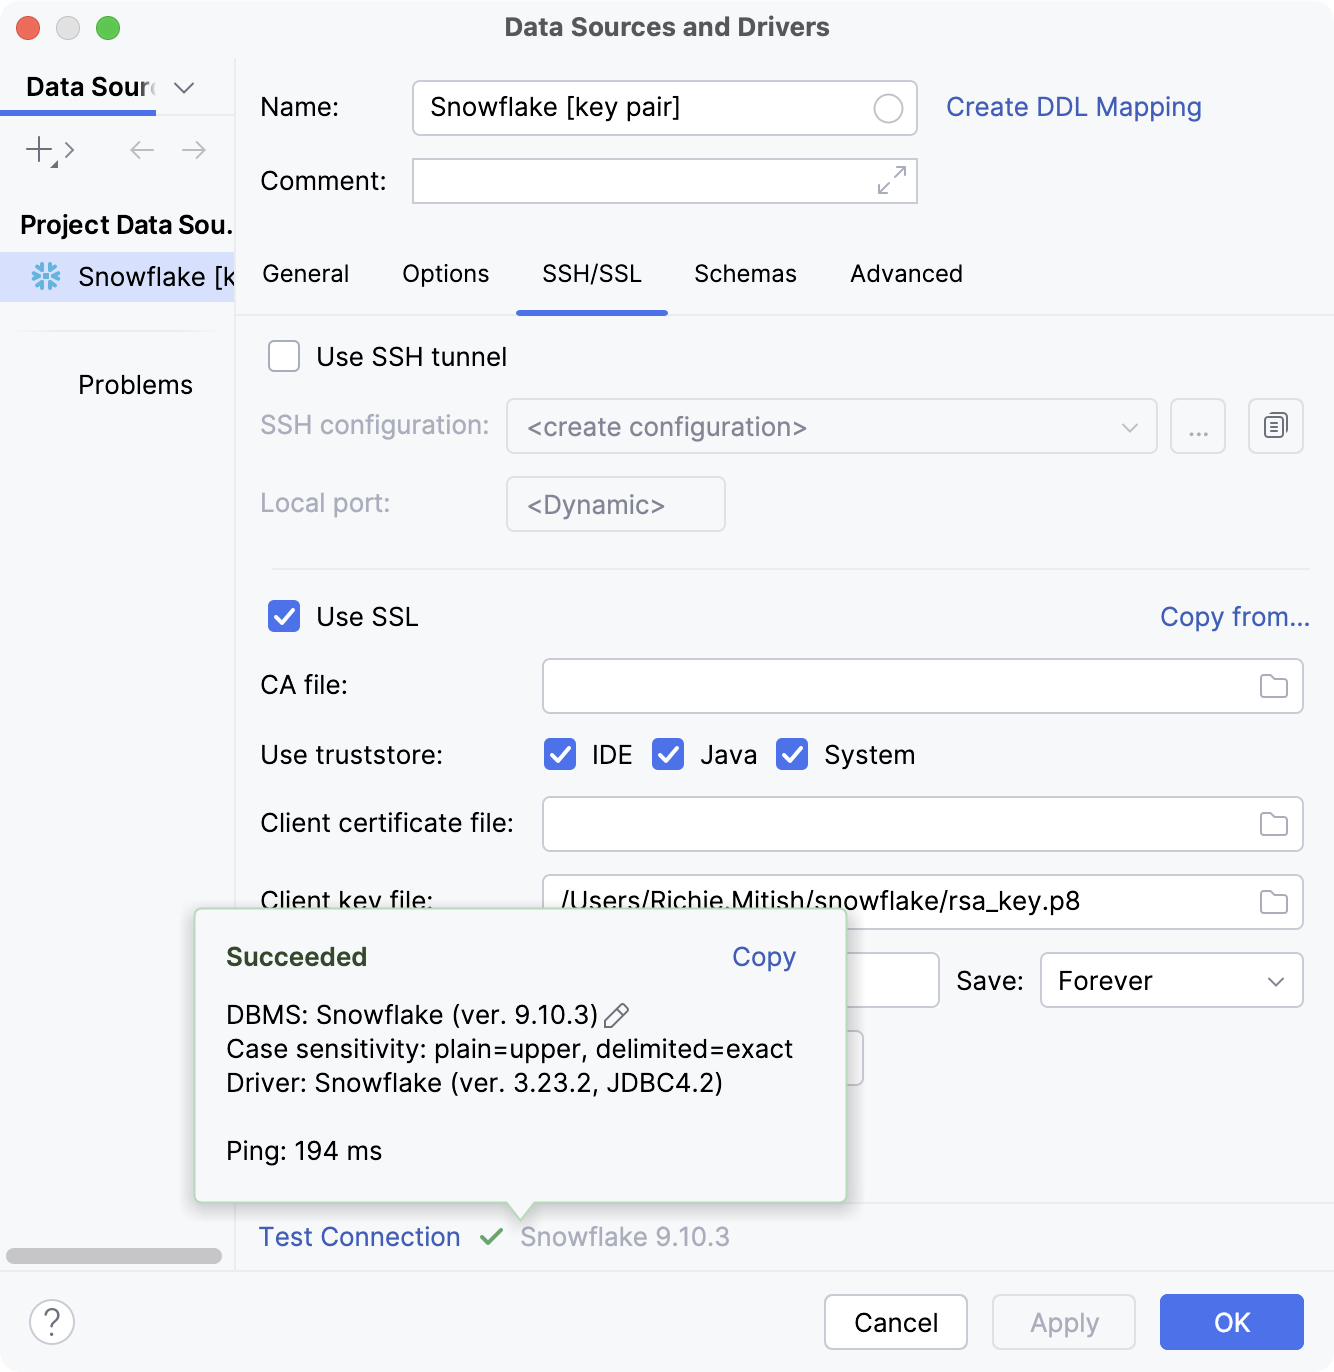
On the SSH/SSL tab of Data Sources and Drivers dialog, select the Use SSL checkbox.
In the Client key file field, click
Browse, navigate to your .p8 private key file, select it and click Open.
DataGrip supports using private key files in WSL on Windows. To do this, specify the WSL path for your private key file. For example,
\\wsl$\Ubuntu\home\myuser\snowflake\rsa_key.p8.For an encrypted private key file, type the passphrase you used when creating it in the Client key password field.
Click the Test Connection link at the bottom of the connection details area to initiate a test connection to your database.

Click OK to save your new data source.
Alternatively to specifying connection details in dedicated fields, type your JDBC URL in the URL field of General tab. The general URL to use is as follows:
Format:
jdbc:snowflake://<organization_name>-<connection_name>.snowflakecomputing.com/?warehouse=<warehouse_name>&db=<database_name>&schema=<schema_name>&user=<snowflake_username>&private_key_file=<path_to_key_file>Example:
jdbc:snowflake://myorg-myconnection.snowflakecomputing.com/?warehouse=AUTH_WH&db=TESTDB&schema=MYSCHEMA&user=MYUSERNAME&private_key_file=/home/myuser/snowflake/rsa_key.p8jdbc:snowflake://myorg-myconnection.snowflakecomputing.com/?warehouse=AUTH_WH&db=TESTDB&schema=MYSCHEMA&user=MYUSERNAME&private_key_file=С:/Users/myuser/snowflake/rsa_key.p8jdbc:snowflake://myorg-myconnection.snowflakecomputing.com/?warehouse=AUTH_WH&db=TESTDB&schema=MYSCHEMA&user=MYUSERNAME&private_key_file=//wsl$/Ubuntu/home/myuser/snowflake/rsa_key.p8jdbc:snowflake://myorg-myconnection.snowflakecomputing.com/?warehouse=AUTH_WH&db=TESTDB&schema=MYSCHEMA&user=MYUSERNAME&private_key_file=/Users/myuser/snowflake/rsa_key.p8
In this case, make sure to enable SSL connection on the SSH/SSL tab of the dialog. Also, provide your passphrase in the corresponding field, if required.
General tab

SSH/SSL tab
