Manage available plugins
Within a profile, you can manage developer access to plugins from the Marketplace and corporate repository by applying rules to specific plugin scopes. Each of the scopes comes with a set of available rule types. You can manage:
All plugins at once
In-house plugins from the corporate plugin repository
Plugins developed by a particular vendor
Specific plugin
Rules are evaluated in order of increasing specificity — from all plugins to a specific plugin. When multiple rules apply to the same plugin, more specific rules override broader ones.
This flexible rule hierarchy allows you to set plugin policies that align with your organization's security standards, compliance requirements, or team-specific workflows.
For example, you can follow a denylist strategy: start by blocking all plugins, then selectively allow access to required or trusted plugins using more specific scopes. Alternatively, you can follow an allowlist strategy: allow access to all plugins and then restrict access to particular plugins as needed by applying Block, Block (Forced), or Disable rules to narrower scopes.
In case there are conflicting rules for the same plugin scope, the blocking rules take precedence.
Rule types per plugin scope
All plugins
Rule type | Description | Supported in dev environment |
|---|---|---|
Block (Forced) | Prevents developers from installing and enabling any plugins, including those from the JetBrains Marketplace and corporate repository. After applying this rule, IDE Provisioner immediately prompts the developer to restart the IDE. The prompt cannot be postponed or dismissed. After the restart, all plugins become inaccessible. | Local |
Block on Restart | Prevents developers from installing and enabling any plugins, including those from the JetBrains Marketplace and corporate repository. After applying this rule, IDE Provisioner prompts the developer to restart the IDE. Unlike prompts for the Block (Forced) rule, this prompt can be postponed. After the restart, all plugins become inaccessible. | Local |
Disable | Disables all installed plugins after the IDE restarts, without uninstalling them. Developers are prompted to restart their IDE to apply the rule; this prompt can be postponed. After the restart, IDE Provisioner disables all plugins but doesn't uninstall them. Developers can re-enable plugins manually. | Local |
Allow | Allows developers to install and enable any plugins from all available sources, including the JetBrains Marketplace and corporate repository. | Local |
Plugins from the corporate repository
Rule type | Description | Supported in dev environment |
|---|---|---|
Block (Forced) | Prevents developers from installing and enabling any plugins from the corporate repository. After applying this rule, IDE Provisioner immediately prompts the developer to restart the IDE. The prompt cannot be postponed or dismissed. After the restart, plugins from the corporate repository become inaccessible. | Local |
Block on Restart | Prevents developers from installing and enabling any plugins from the corporate repository. After applying this rule, After applying this rule, IDE Provisioner prompts the developer to restart the IDE. Unlike prompts for the Block (Forced) rule, this prompt can be postponed. After the restart, plugins from the corporate repository become inaccessible. | Local |
Disable | Disables all plugins from the corporate repository after the IDE restarts. Developers are prompted to restart their IDE to apply the rule; this prompt can be postponed. After the restart, IDE Provisioner disables plugins but doesn't uninstall them. Developers can re-enable plugins manually. | Local |
Allow | Allows developers to install and enable any plugins from the corporate repository. | Local |
Plugins from a specific vendor
Rule type | Description | Supported in dev environment |
|---|---|---|
Block (Forced) | Prevents developers from installing and enabling any plugins developed by a specific vendor. After applying this rule, IDE Provisioner immediately prompts the developer to restart the IDE. The prompt cannot be postponed or dismissed. After the restart, plugins become inaccessible. | Local |
Block on Restart | Prevents developers from installing and enabling any plugins developed by a specific vendor. After applying this rule, IDE Provisioner prompts the developer to restart the IDE. Unlike the Block (Forced) rule prompts, this prompt can be postponed. After the restart, plugins from the specified vendor become inaccessible. | Local |
Disable | Disables all plugins developed by a specific vendor after the IDE restarts. Developers are prompted to restart their IDE to apply the rule; this prompt can be postponed. After the restart, IDE Provisioner disables plugins but doesn't uninstall them. Developers can re-enable plugins manually. | Local |
Allow | Allows developers to install and enable any plugins developed by a specific vendor. | Local |
Specific plugin
Rule type | Description | Supported in dev environment |
|---|---|---|
Block (Forced) | Prevents developers from installing and enabling a specific plugin. After applying this rule, IDE Provisioner immediately prompts the developer to restart the IDE. The prompt cannot be postponed or dismissed. After the IDE restarts, it is impossible to install and enable the plugin. | Local, remote |
Block on Restart | Prevents developers from installing and enabling a specific plugin. After applying this rule, IDE Provisioner prompts the developer to restart the IDE. Unlike the Block (Forced) rule prompts, this prompt can be postponed. After the restart, it is impossible to install or enable the plugin. | Local, remote |
Disable | Disables a specific plugin after the IDE restarts. Developers are prompted to restart their IDE to apply the rule; this prompt can be postponed. After the restart, the plugin is disabled but remains installed. Developers can re-enable the plugin manually. | Local, remote |
Allow | Allows developers to install and enable a specific plugin. | Local |
Enable | For once, automatically enables a specific plugin in the developer IDE. Developers can later disable the plugin manually. | Local |
Enable (Forced) | Automatically enables a specific plugin in the developer IDE. IDE Provisioner immediately prompts the developer to restart the IDE. The prompt cannot be postponed or dismissed. If IDE Provisioner detects that the plugin is disabled, it will automatically re-enable the plugin. | Local |
Auto-install | For once, automatically installs a specific plugin to the developer IDE. Developers can later disable or uninstall the plugin manually. | Local, remote |
Auto-install (Forced) | Automatically installs a specific plugin to the developer IDE. IDE Provisioner immediately prompts the developer to restart the IDE. The prompt cannot be postponed or dismissed. If IDE Provisioner detects that the plugin is not installed in the IDE, it will automatically install and enable the plugin. | Local, remote |
Configure plugin settings
Using profiles, you can configure which plugins are available to developers in your organization. Start by opening the plugin settings and configuring filters to specify the IDEs and tools for which plugins will be managed.
Add filters
On the Profiles page, click the name of the profile you want to edit.
In the Plugins section of the profile, click
.
In the Plugin Settings dialog, use filters to configure in which IDEs IDE Services will install plugins automatically.
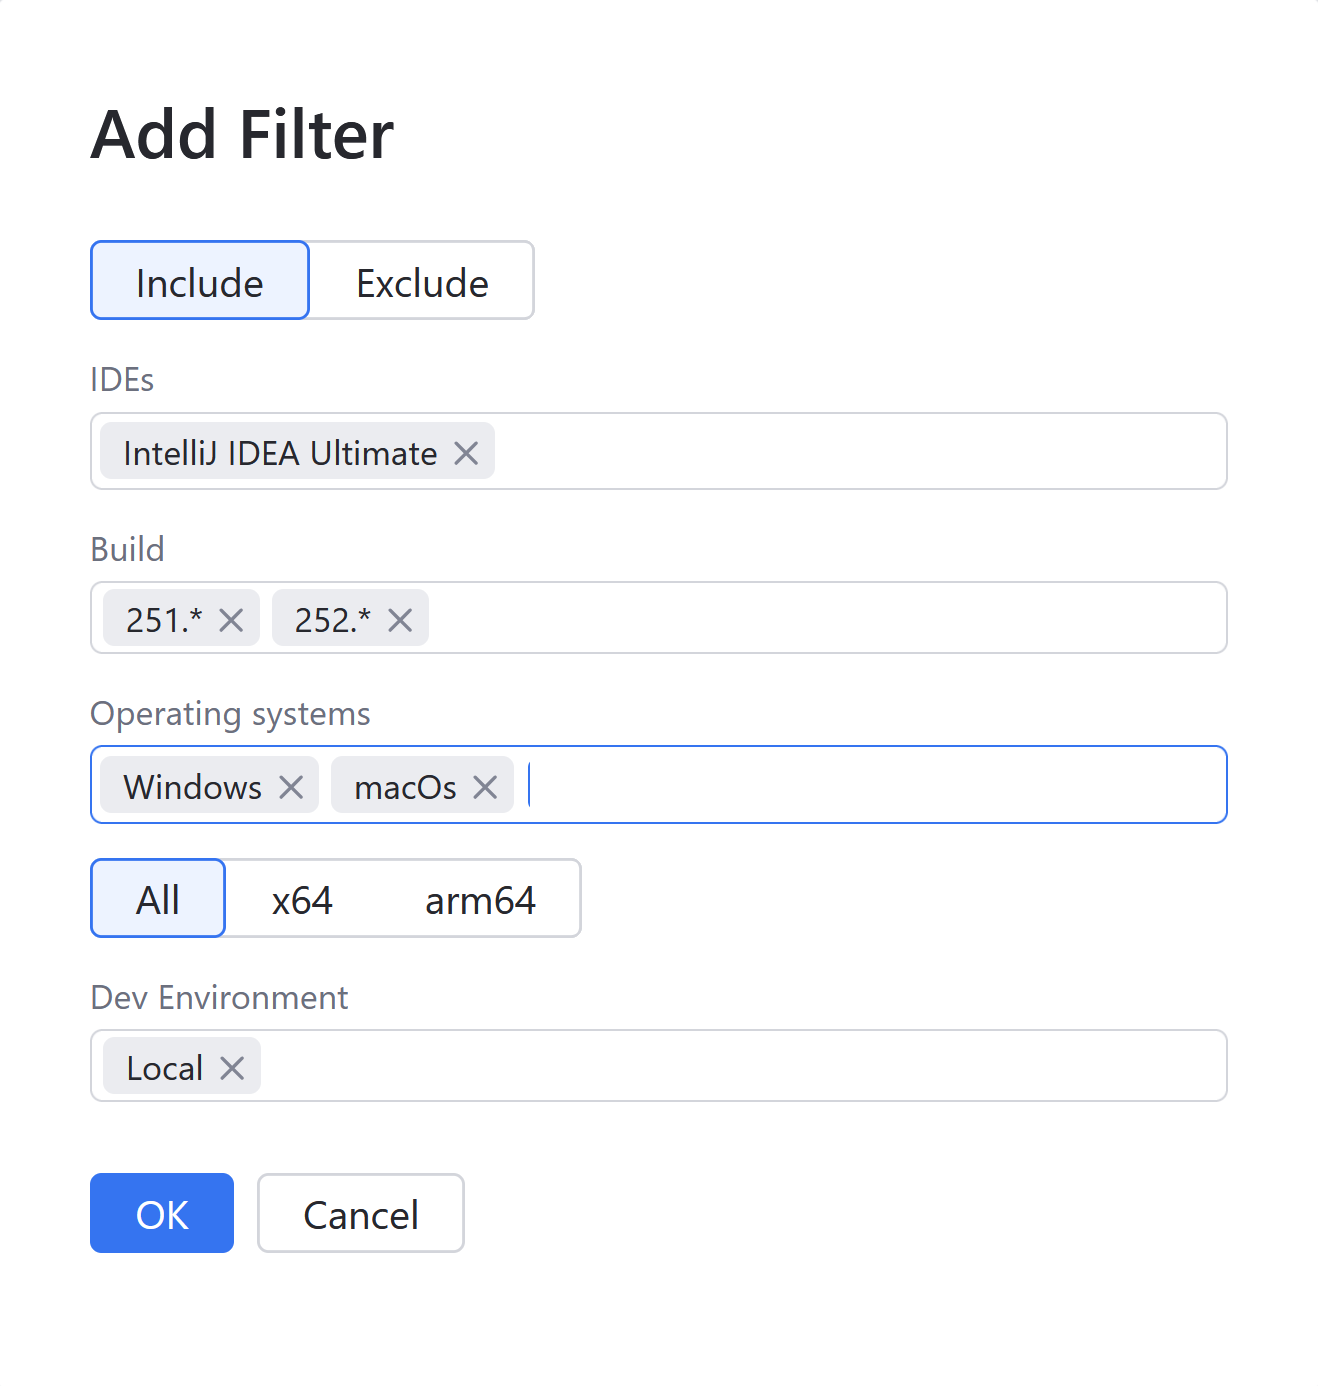
Click Add filter and fill in the following details in the Add Filter dialog:

Type: select one of the filter types. Select the Include type if you want to configure plugins only for the applications specified in the filter. To configure plugins for all applications except for the ones specified, use the Exclude type.
IDE: select one or multiple names of the IDEs to use in your filter. Click the field to see the dropdown with available options.
Build: select one or multiple IDE build versions to use in the filter.
OS: if necessary, select the operating systems to use in the filter.
Architecture: if necessary, select the architectures to use in the filter (All, x64 or arm64).
Dev Environment: choose whether the plugins will be only available for the IDE instances locally installed on developers' machines (Local) or for Remote Development setups (Remote). Leave the field empty to allow for all options.
Read more about the requirements and limitations of the Remote Development support.
Click OK to save the filter.
After configuring filters, continue with adding rules for the necessary plugin scopes.
Add plugin rules
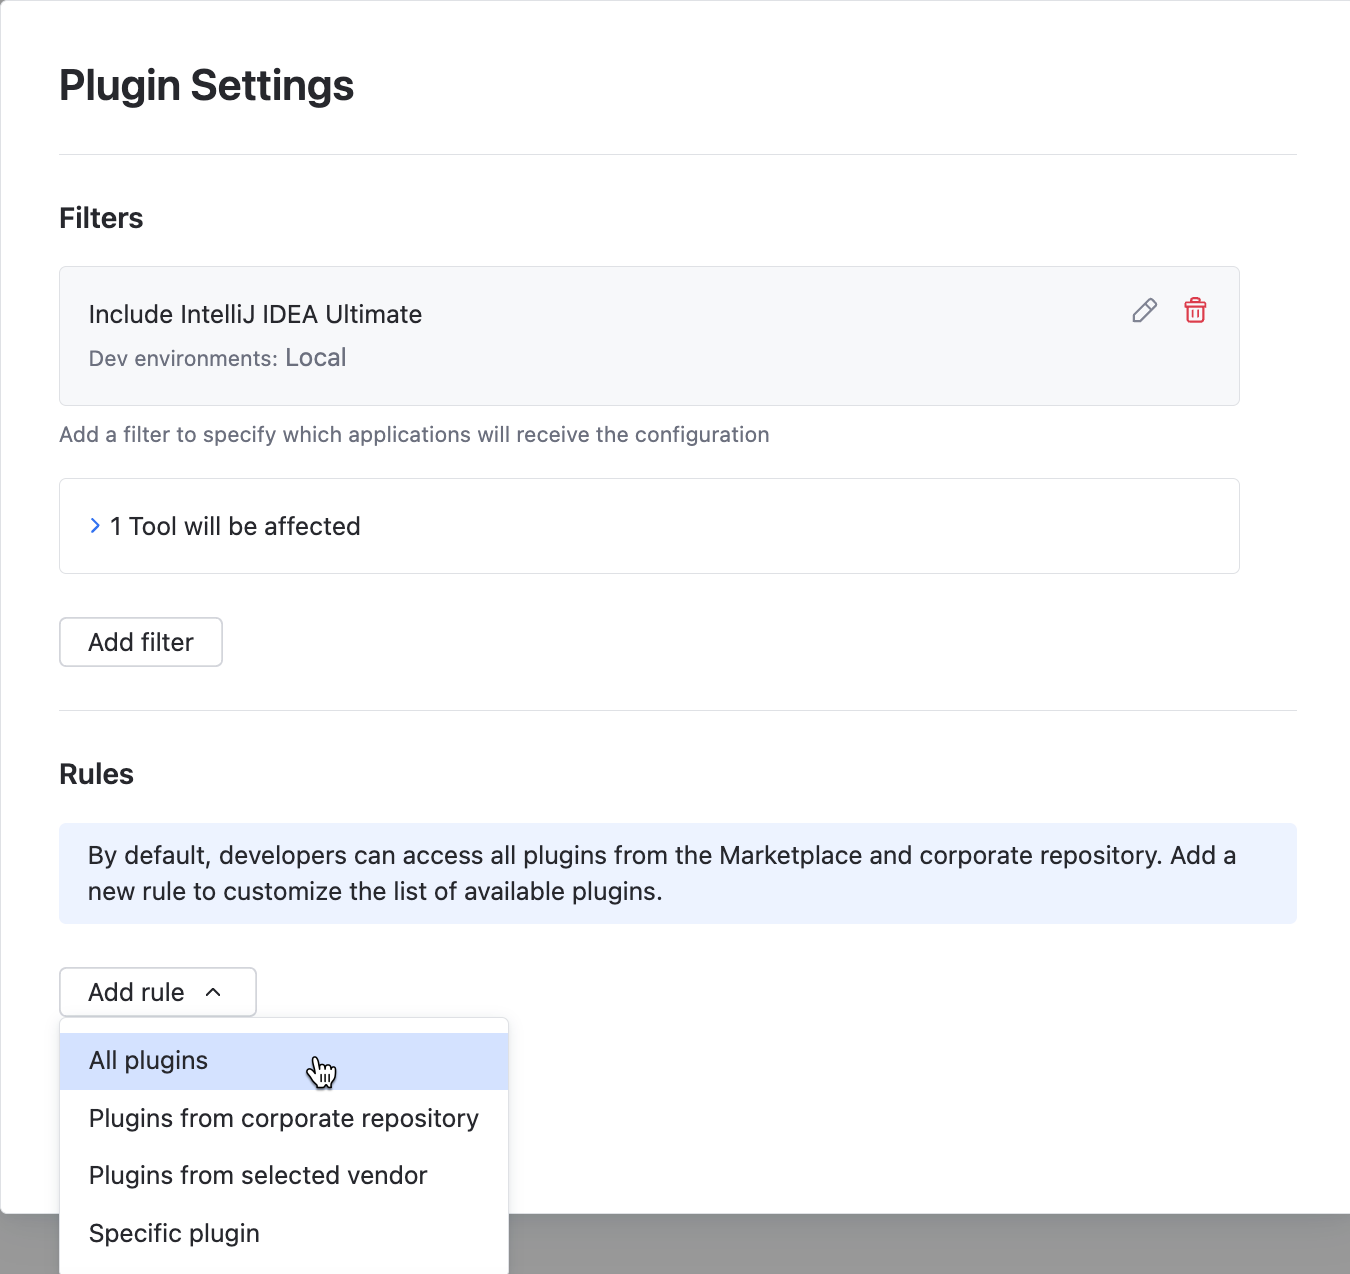
In the Plugin Settings dialog, click Add rule and select the desired plugin scope from the dropdown.

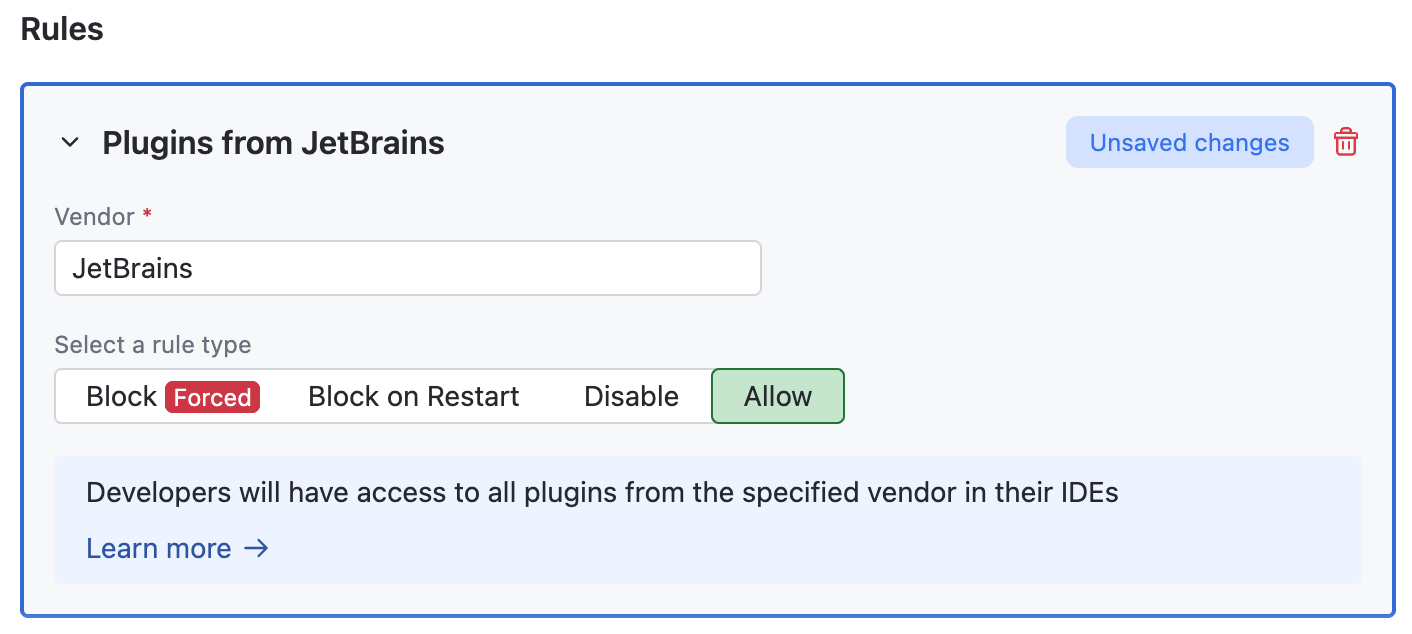
This step is required only when you select the Plugins from selected vendor rule type.
In the Vendor field, specify the name of the vendor whose plugins you want to manage.

This step is required only when you select the Specific plugin rule type.
Select the plugin you want to manage. Depending on the plugin's source, you might need to provide additional details:
Marketplace: select the plugin version you want to manage. You can choose a specific version, all versions, or the latest version.
Corporate repository: specify either the plugin version or channel you want to manage. You can choose a specific version, all versions, or the latest version.
Bundled: no additional details are required.
Select the necessary rule type.
Click Save.