Run, debug, and test Groovy
You can create, import, test, and run Groovy applications as you would any other projects.
Create a Groovy project
In the Project Wizard, select Groovy.
Besides the name of your project and its location, you can select the following options:
Create Git repository: select this option if you want to create a new Git repository for your sources.
Build System: select build system you want to use in your project. For small test-like projects select IntelliJ IDEA. If you want to build with one of the build tools, select Maven or Gradle.
JDK: specify your project SDK.
Groovy SDK: specify the Groovy SDK. IntelliJ IDEA expects the standard Groovy SDK layout which is provided with the official distributions available at http://groovy-lang.org/download.html. Download the SDK, unpack it into any directory and specify this directory as the library home.
Add sample code: select this option to create a file with a simple sample code.
Advanced Settings: use this part of the wizard to add the name of a module, its content root, and its location.
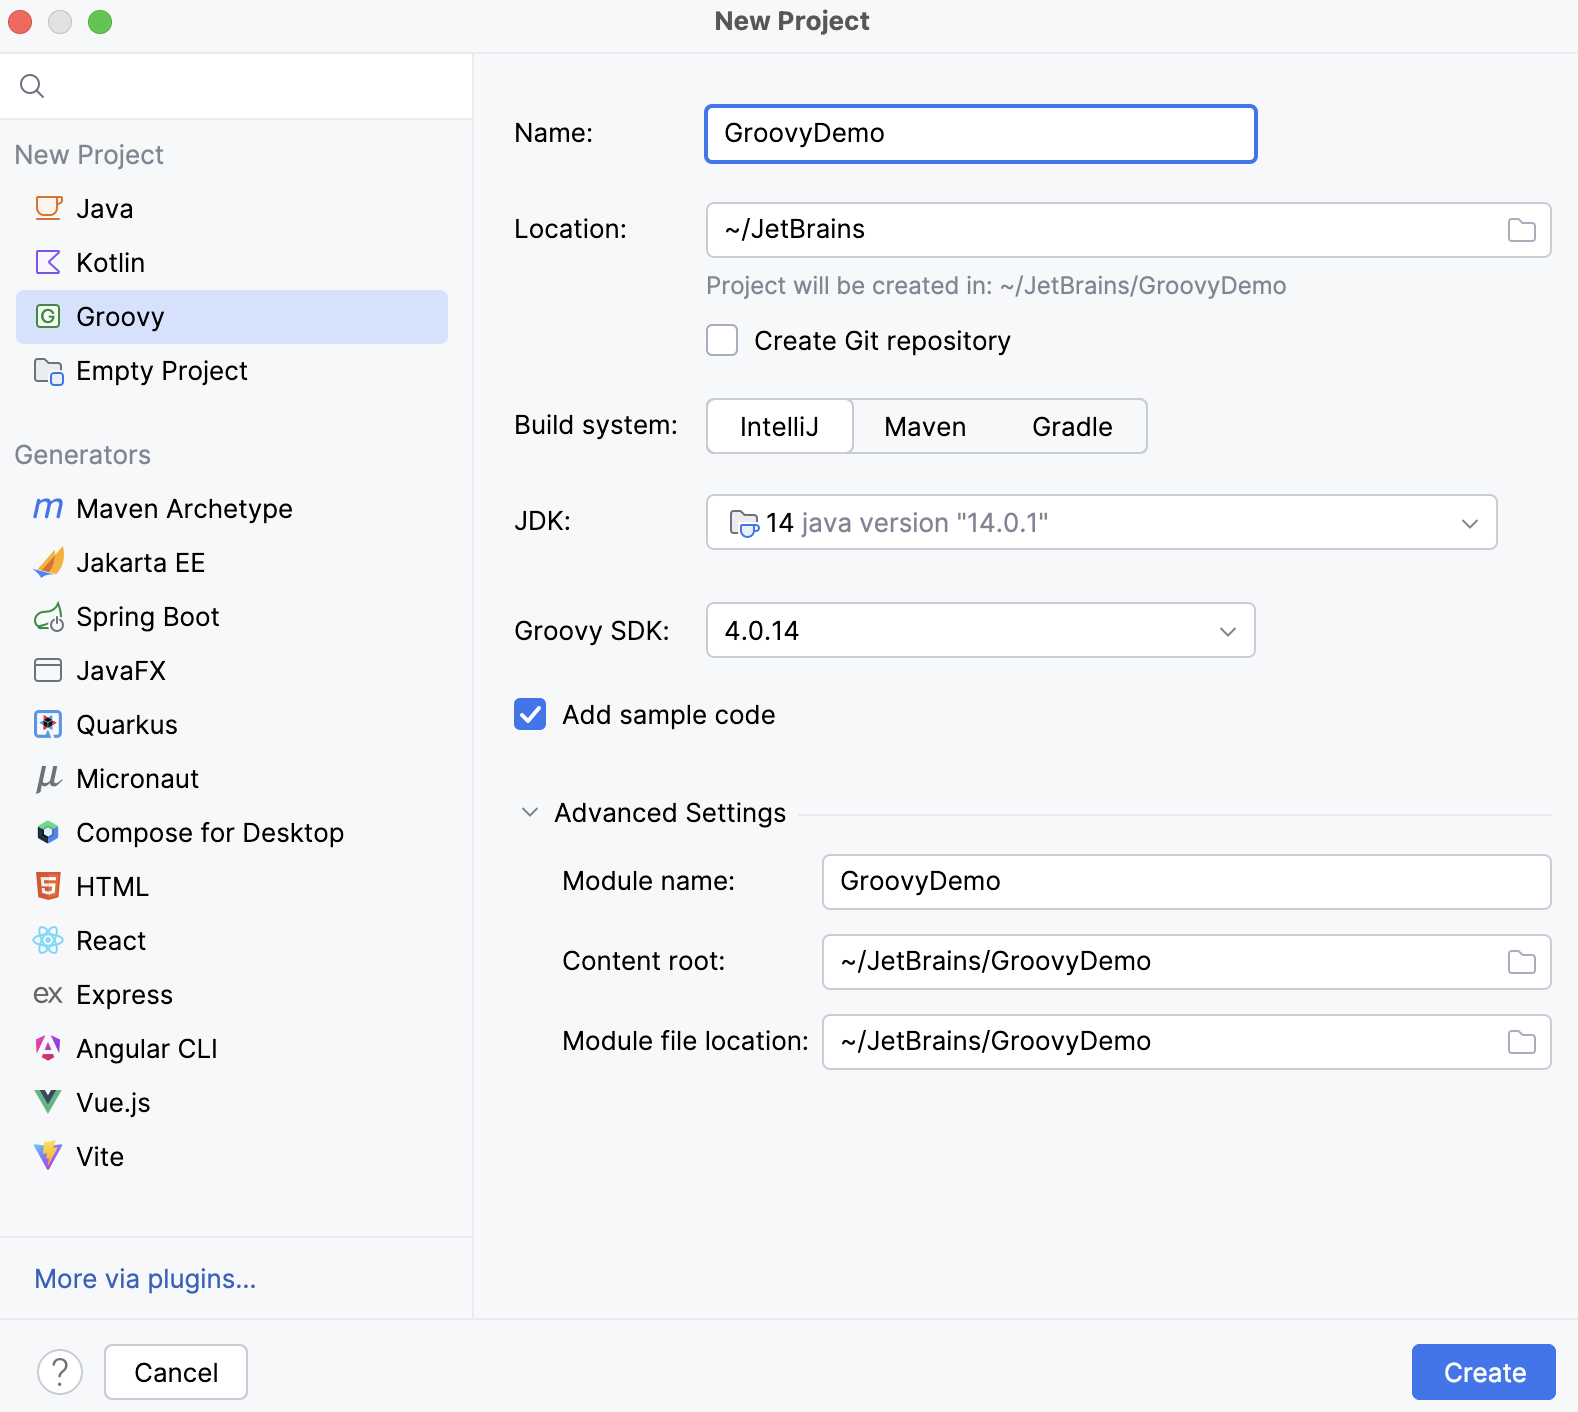
Click Create.
To import a Groovy project, follow the steps from the Import a project with settings section.
Add Groovy support for an existing project
You can add the Groovy framework support for an existing project. However, if you want to add the Groovy support for a Gradle or a Maven project, use their build script files (build.gradle or pom.xml). For more information, refer to the Gradle or Maven documentation.
In the Project tool window Alt+1, select the module to which you want to add the Groovy support.
Press Ctrl+Shift+A and type
Add Framework Support.Once the action is found, click it to open the Add Framework Support dialog.
In the dialog that opens, select Groovy and click OK.
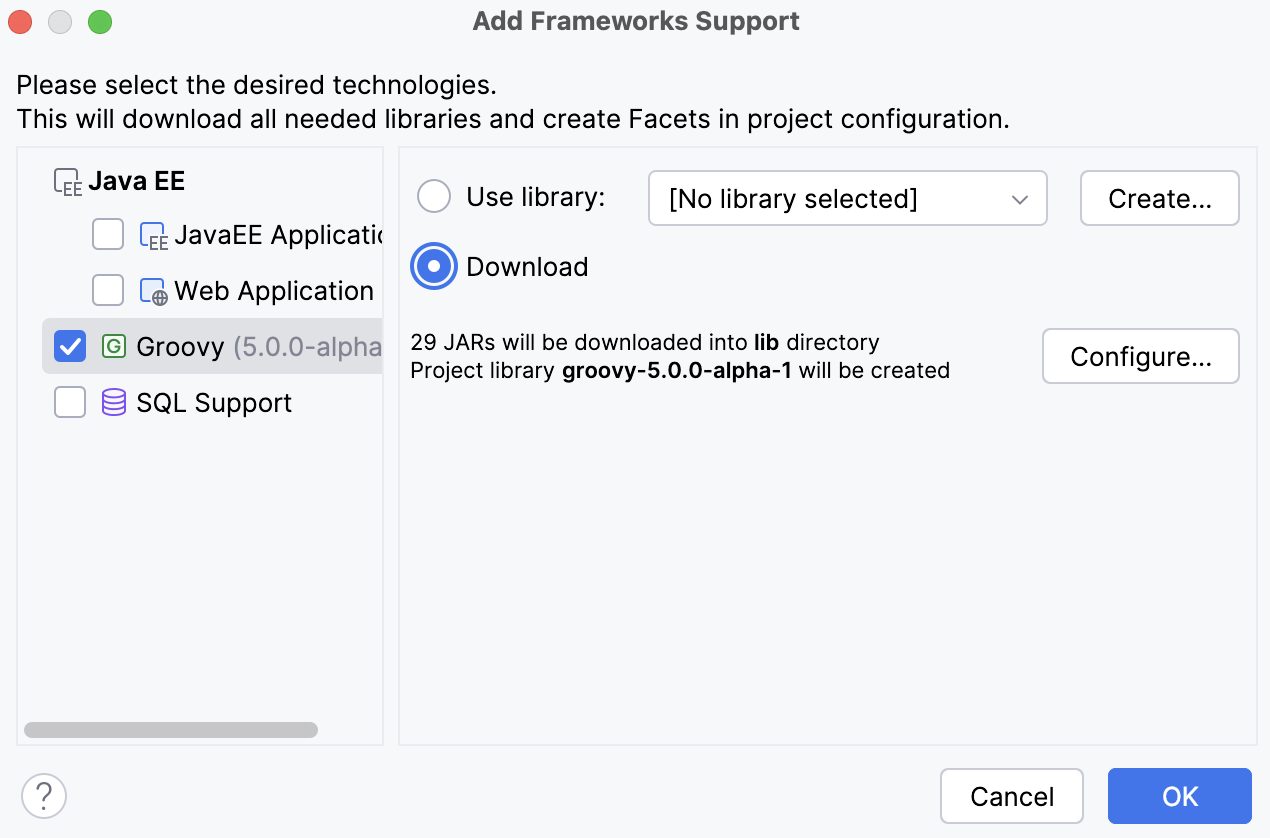
IntelliJ IDEA adds the Groovy SDK to your project, and you can add Groovy classes and Groovy scripts.
Check the version of Groovy in a project
You can check which version of Groovy SDK IntelliJ IDEA uses in a project.
In the main menu, go to File | Project Structure Ctrl+Alt+Shift+S.
In the Project Structure dialog, under , select Global Libraries.
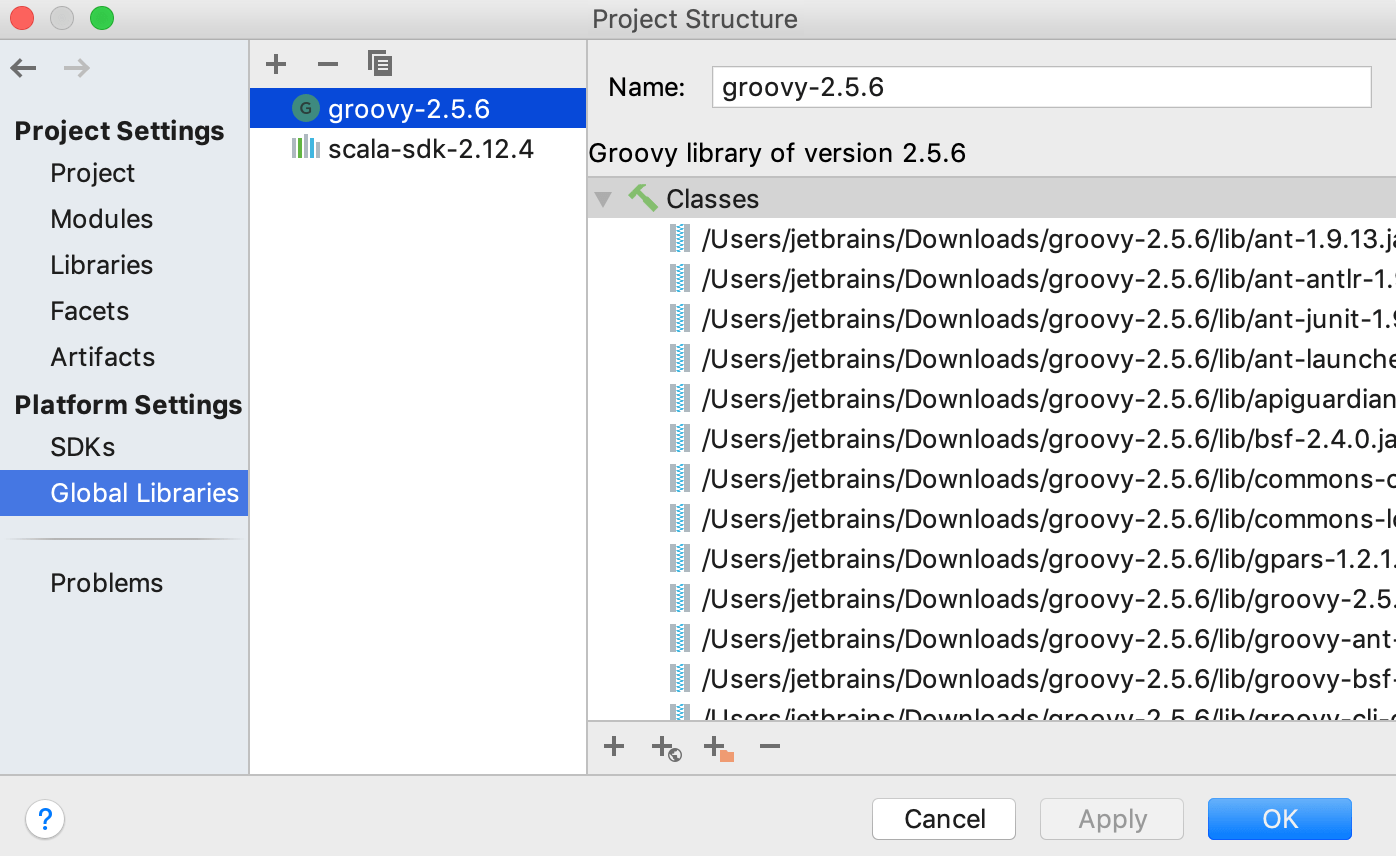
If you need to check what Groovy SDK version is used in a module, select Modules, the module's name and click the Dependencies tab.

Change the existing Groovy SDK version in a project
In the Project Structure Ctrl+Alt+Shift+S dialog, delete Ctrl+Y the existing Groovy SDK version from Global Libraries and from module dependencies (the Modules page).
When the Groovy SDK is removed, IntelliJ IDEA displays a popup suggesting to add the Groovy SDK.
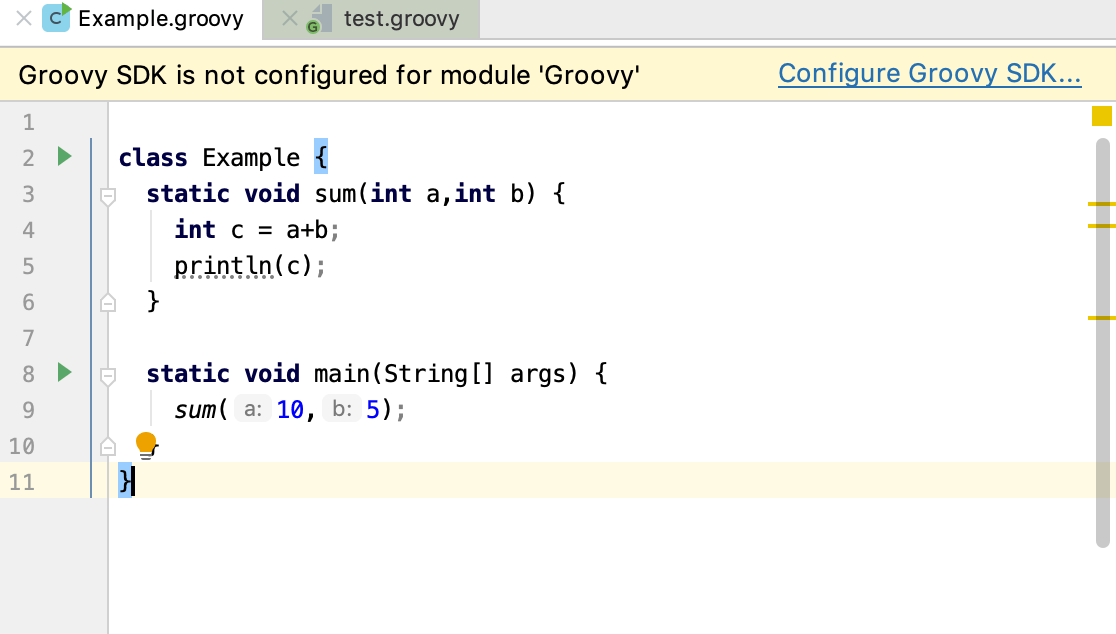
Click the link and set up a new SDK.
If IntelliJ IDEA does not display the popup, in the Project tool window, right-click the name of your project and in the context menu, select Add Framework Support.
In the dialog that opens, from the list of technologies, select Groovy and add a new Groovy library.
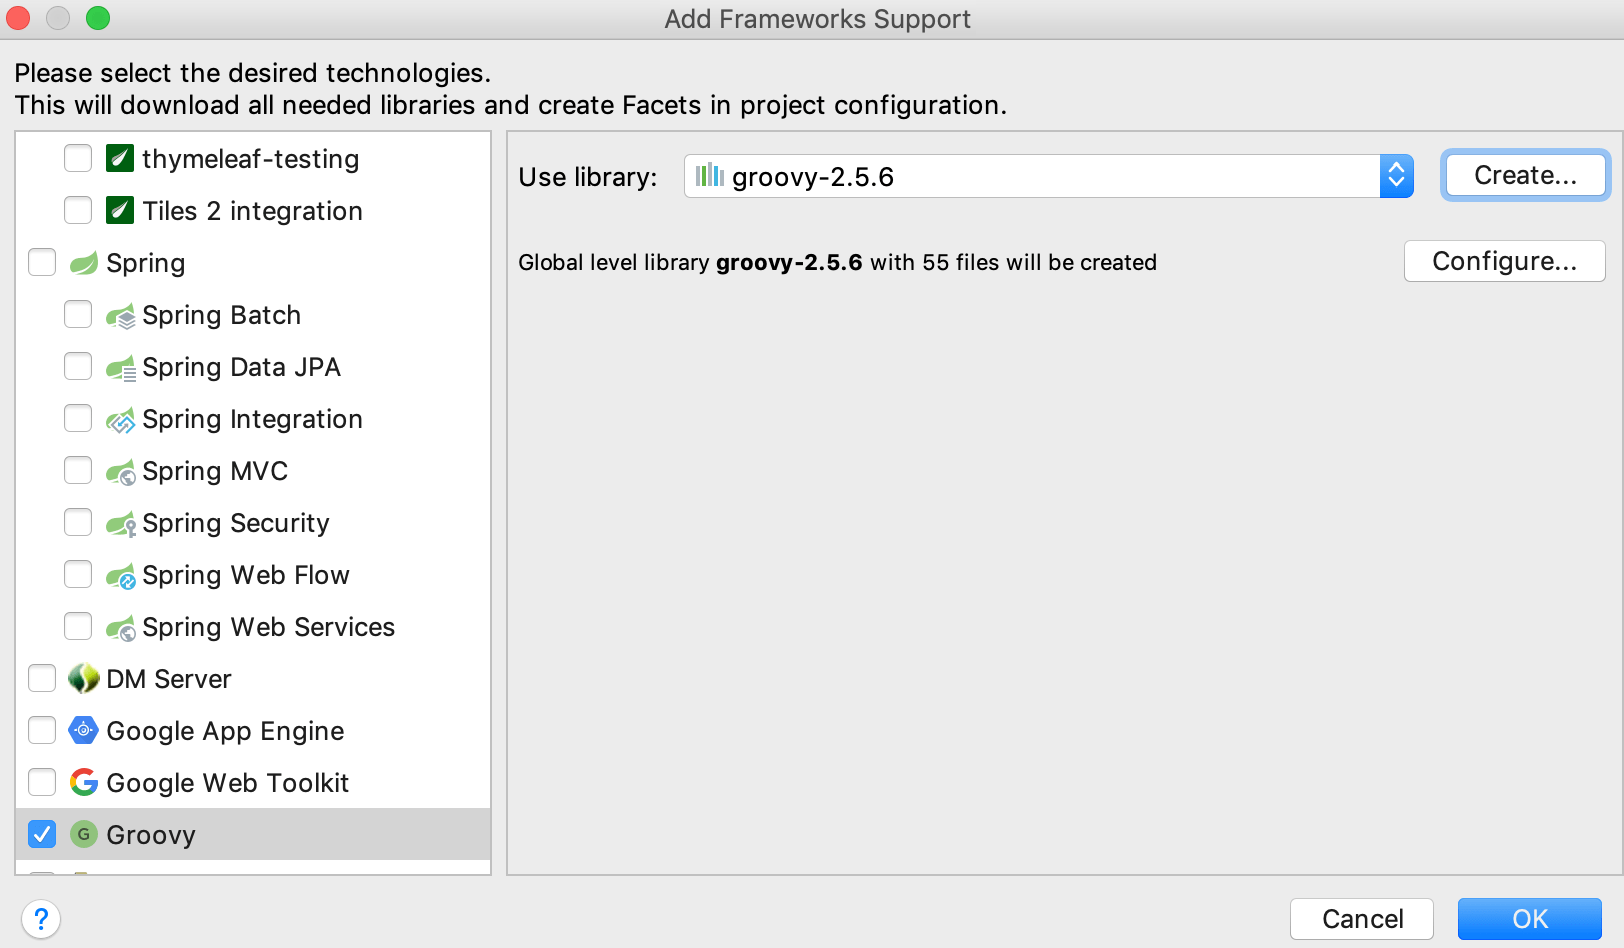
IntelliJ IDEA creates a global-level library.
Run a Groovy application
After you entered code, you can run it through IntelliJ IDEA or use the interactive Groovy console for quick code evaluation.
Open your application in the editor.
Press Shift+F10 to execute the application. Alternatively, in the left gutter of the editor, click the
icon and select Run 'name'.
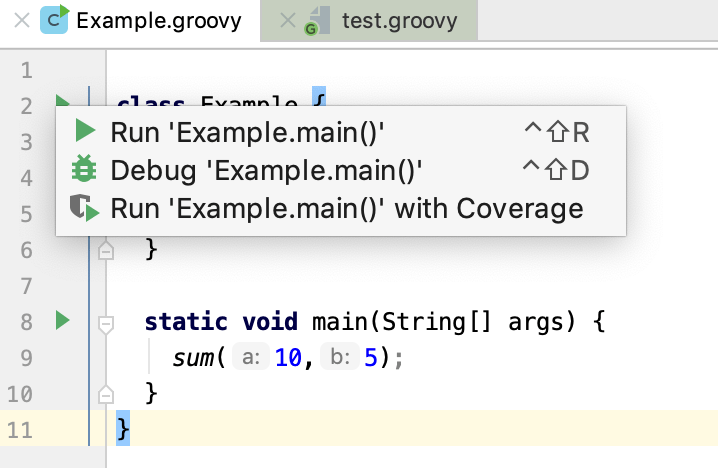
View the result in the Run tool window.

Debug a Groovy application
Open your Groovy application in the editor.
In the left gutter, set your breakpoints for the lines of code you want to debug. The debugger is aware of the Groovy syntax, and you can evaluate an expression on the breakpoint if you need.
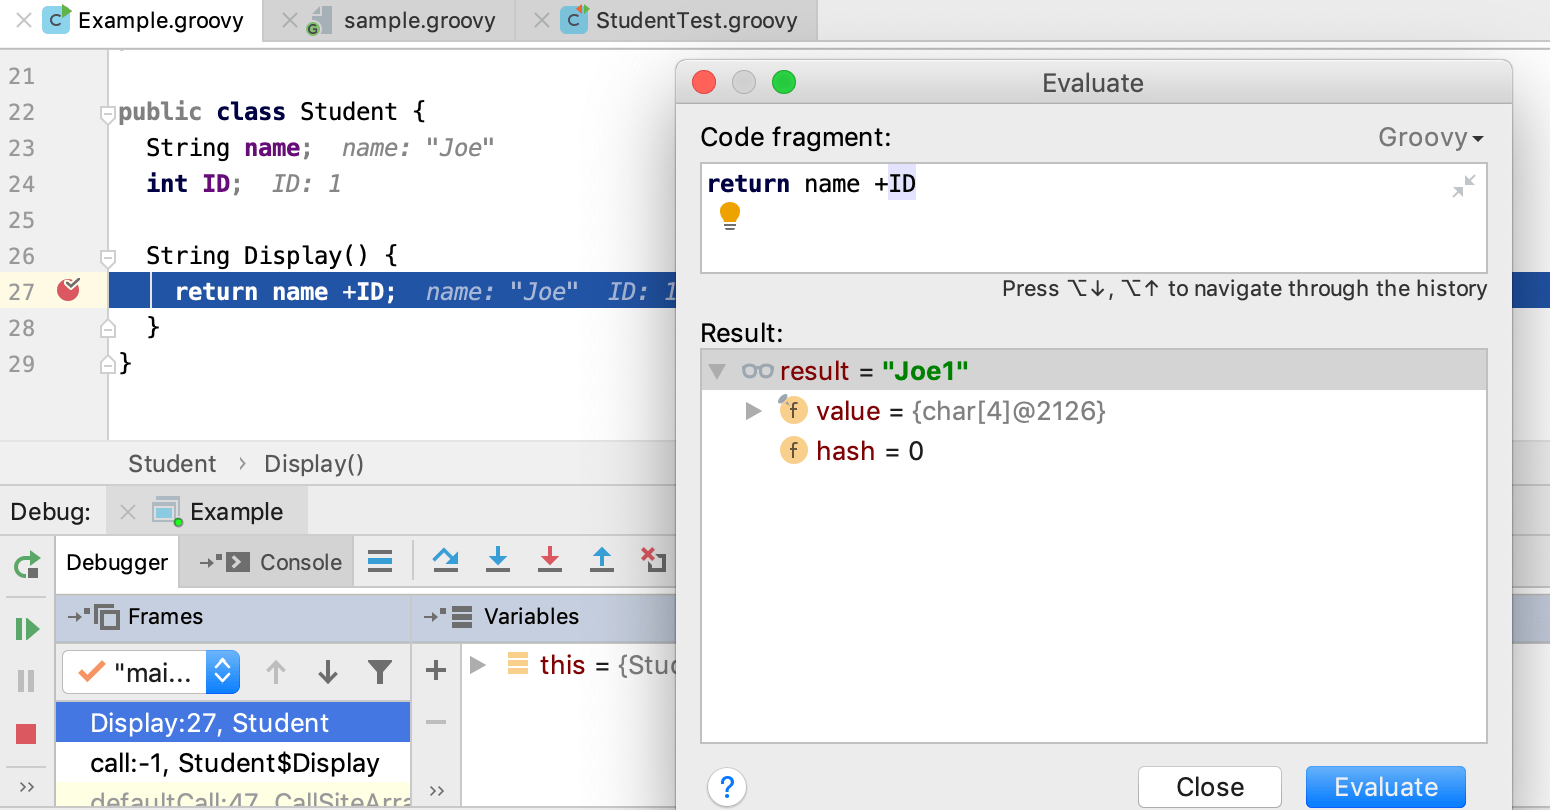
For more information about breakpoints, refer to the Breakpoints section.
If you need, you can access the Run/Debug configurations dialog (Run | Edit Configurations) and adjust the settings, but usually the default settings are enough to successfully start and complete your debugging session.
Press Shift+F9. Alternatively, on the main toolbar, click the
icon to start a debugging process.
Evaluate the results in the Debug tool window.
For more information about using options in the Debug tool window, refer to the Debug code section.
When in the debug mode, you can evaluate any expression by using the Evaluate expression tool, which is accessed by pressing Alt+F8. This tool provides code completion in the same way as in the editor, so it's easy to enter any expression.
Sometimes, you may want to step into a particular method, but not the first one which will be invoked. In this case, use Smart step into by pressing Shift+F7 to choose a particular method.
Test a Groovy application
You can test Groovy applications using JUnit 4 and JUnit 5 testing frameworks.
Open a class in the editor, for which you want to create a test and place the caret within the line containing the class declaration.
Press Ctrl+Shift+T and select Create New Test.
In the dialog that opens, specify your test settings and click OK.
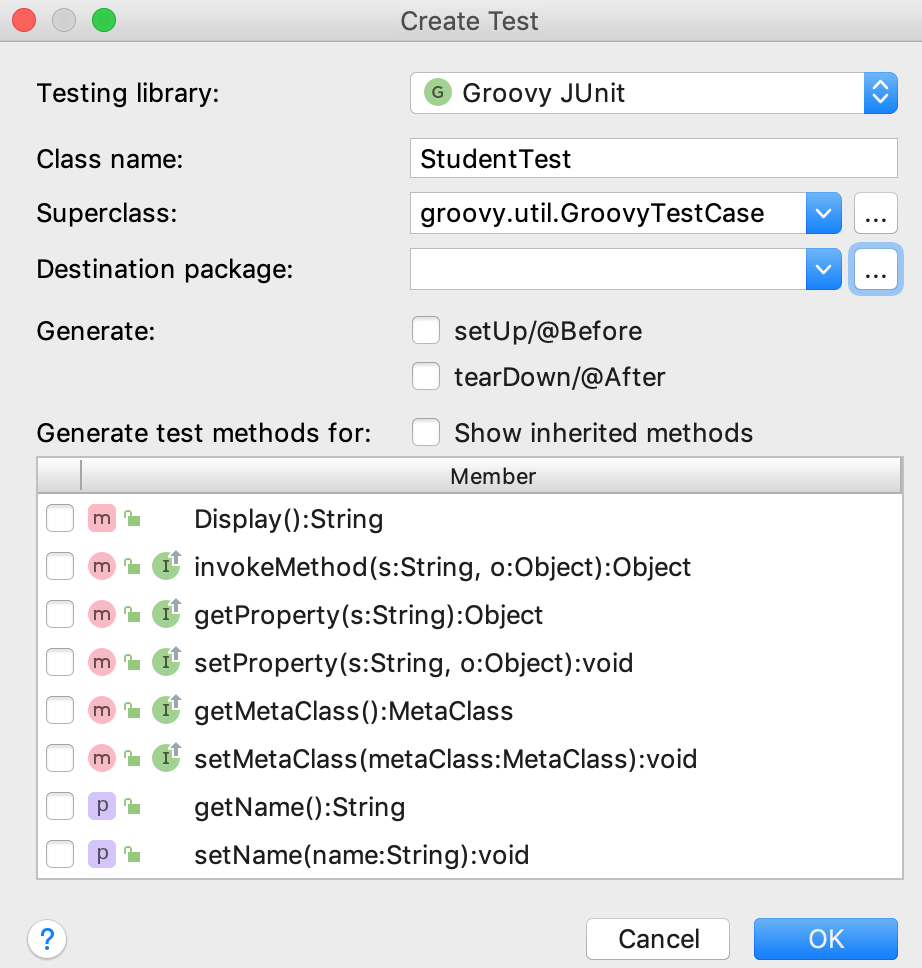
Open the test in the editor, add code and press Ctrl+Shift+F10 or right-click the test class and from the context menu select Run 'test name'.
IntelliJ IDEA creates a run/debug configuration for the test automatically, but if you want to edit settings in your configuration, click from the main menu.
In the Run/Debug Configurations dialog, on the right side, specify settings for the test suite and click OK. The configuration has standard options, and you can find further details in the Run tests section.
On the main toolbar, click the
icon to run the test.
Evaluate the results in the Run tool window.