Maven
IntelliJ IDEA supports a fully functional integration with Maven that helps you automate your building process. You can create a new Maven project, open and sync an existing one, add a Maven support to any existing IntelliJ IDEA project, configure and manage a multi-module project.
You can also create a Maven project and store it in the WSL environment or open it from the WSL file system. For more information, refer to the WSL section.
Create a new Maven project
If no project is currently open in IntelliJ IDEA, click New Project on the Welcome screen. Otherwise, select from the main menu.
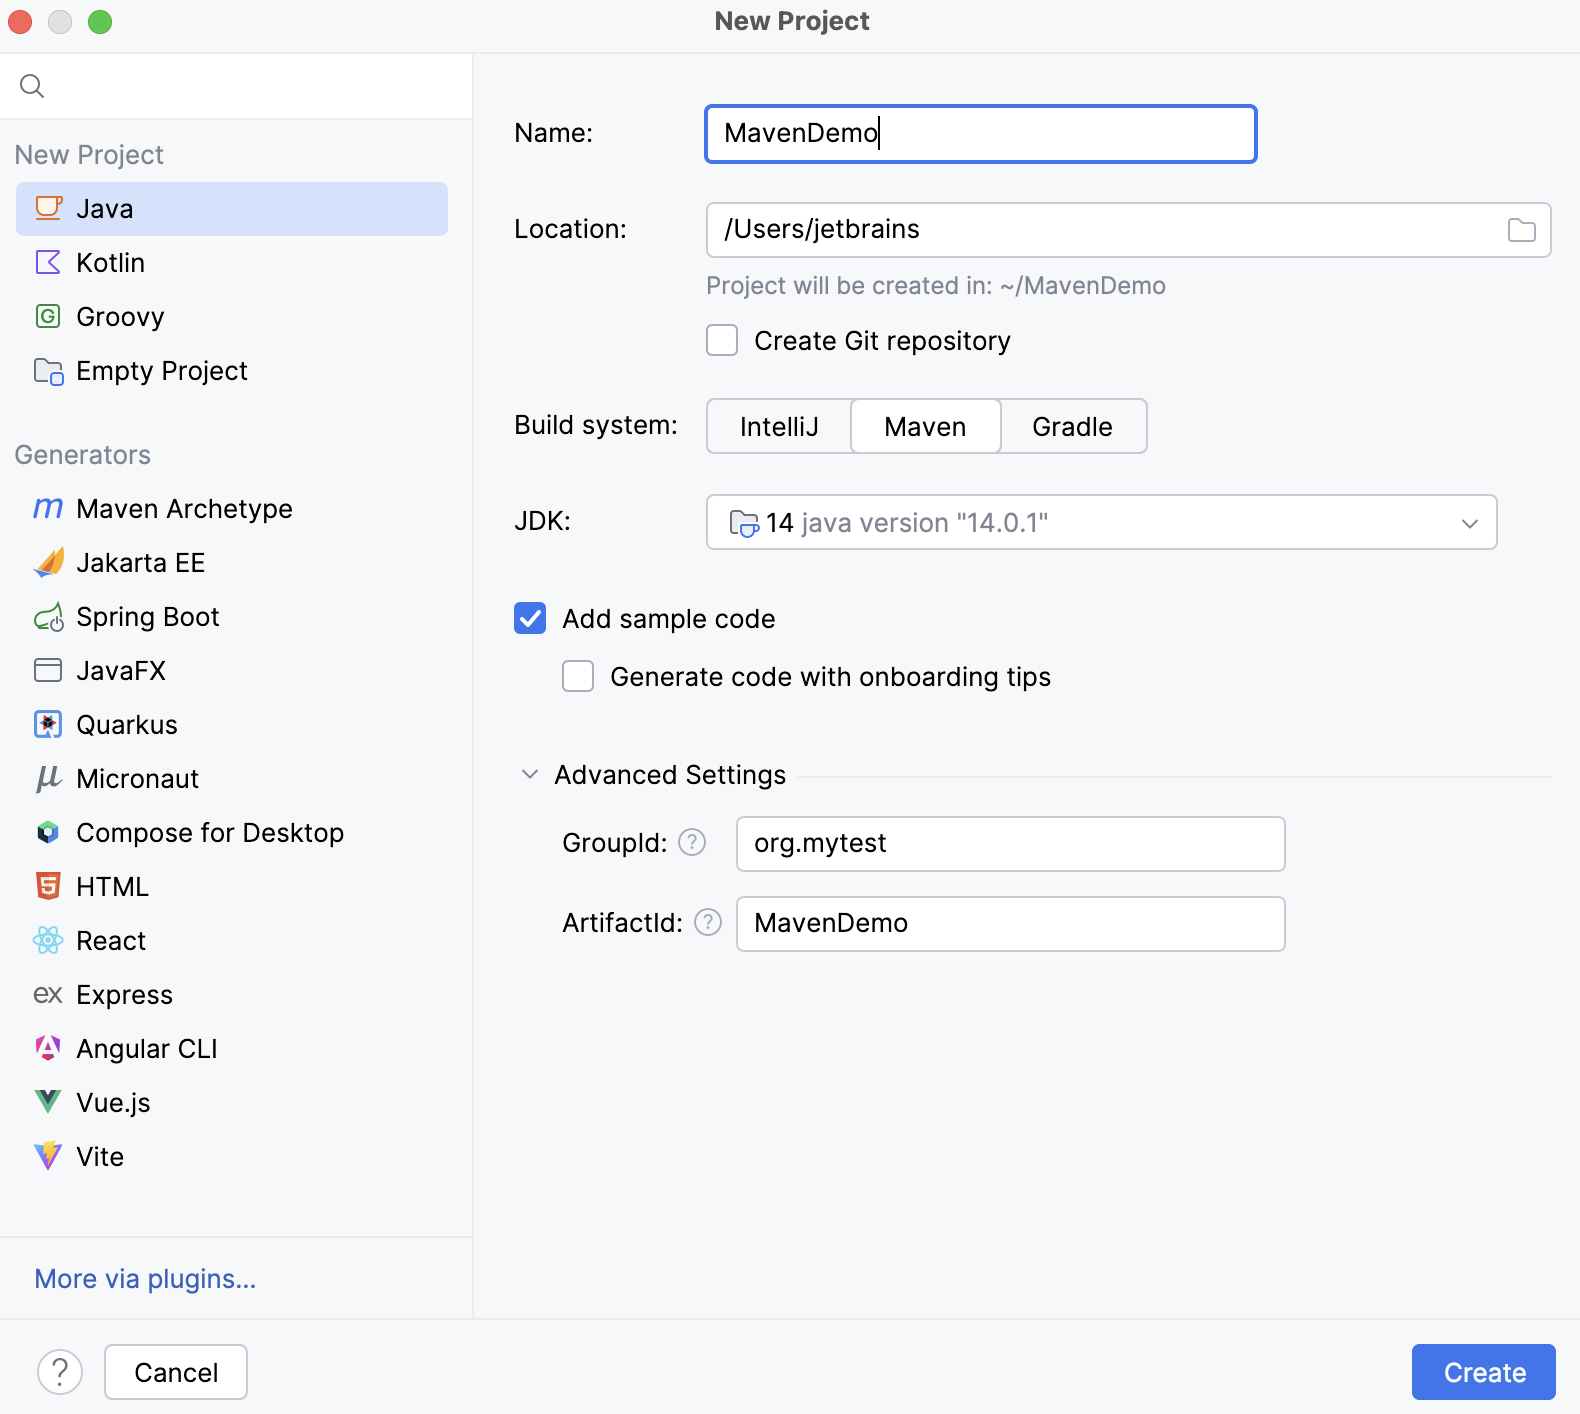
Name the new project and change its location if necessary.
Select Create Git repository to place the new project under version control.
You will be able to do it later at any time.
Select a language that you want to use in your project. Click
if you want to add other languages available via plugins.
Select Maven in the list of Build system.
Specify the project's SDK (JDK) or use the default one.
The selected Add sample code option will create a file with a basic code sample.
In Advanced Settings, specify the following Maven coordinates that are added to the pom.xml file:
GroupId - a package of a new project.
ArtifactId - a name of your project.
For more information about Maven coordinates, refer to Maven naming conventions.
Click Create.
IntelliJ IDEA creates a Maven project with the pom.xml file that includes compiler source and target versions of Java, the dedicated Maven tool window, and all the necessary dependencies to start your work.
Create a new project with Maven archetype
Launch the New Project wizard. If no project is currently opened in IntelliJ IDEA, click New Project on the welcome screen. Otherwise, select from the main menu.
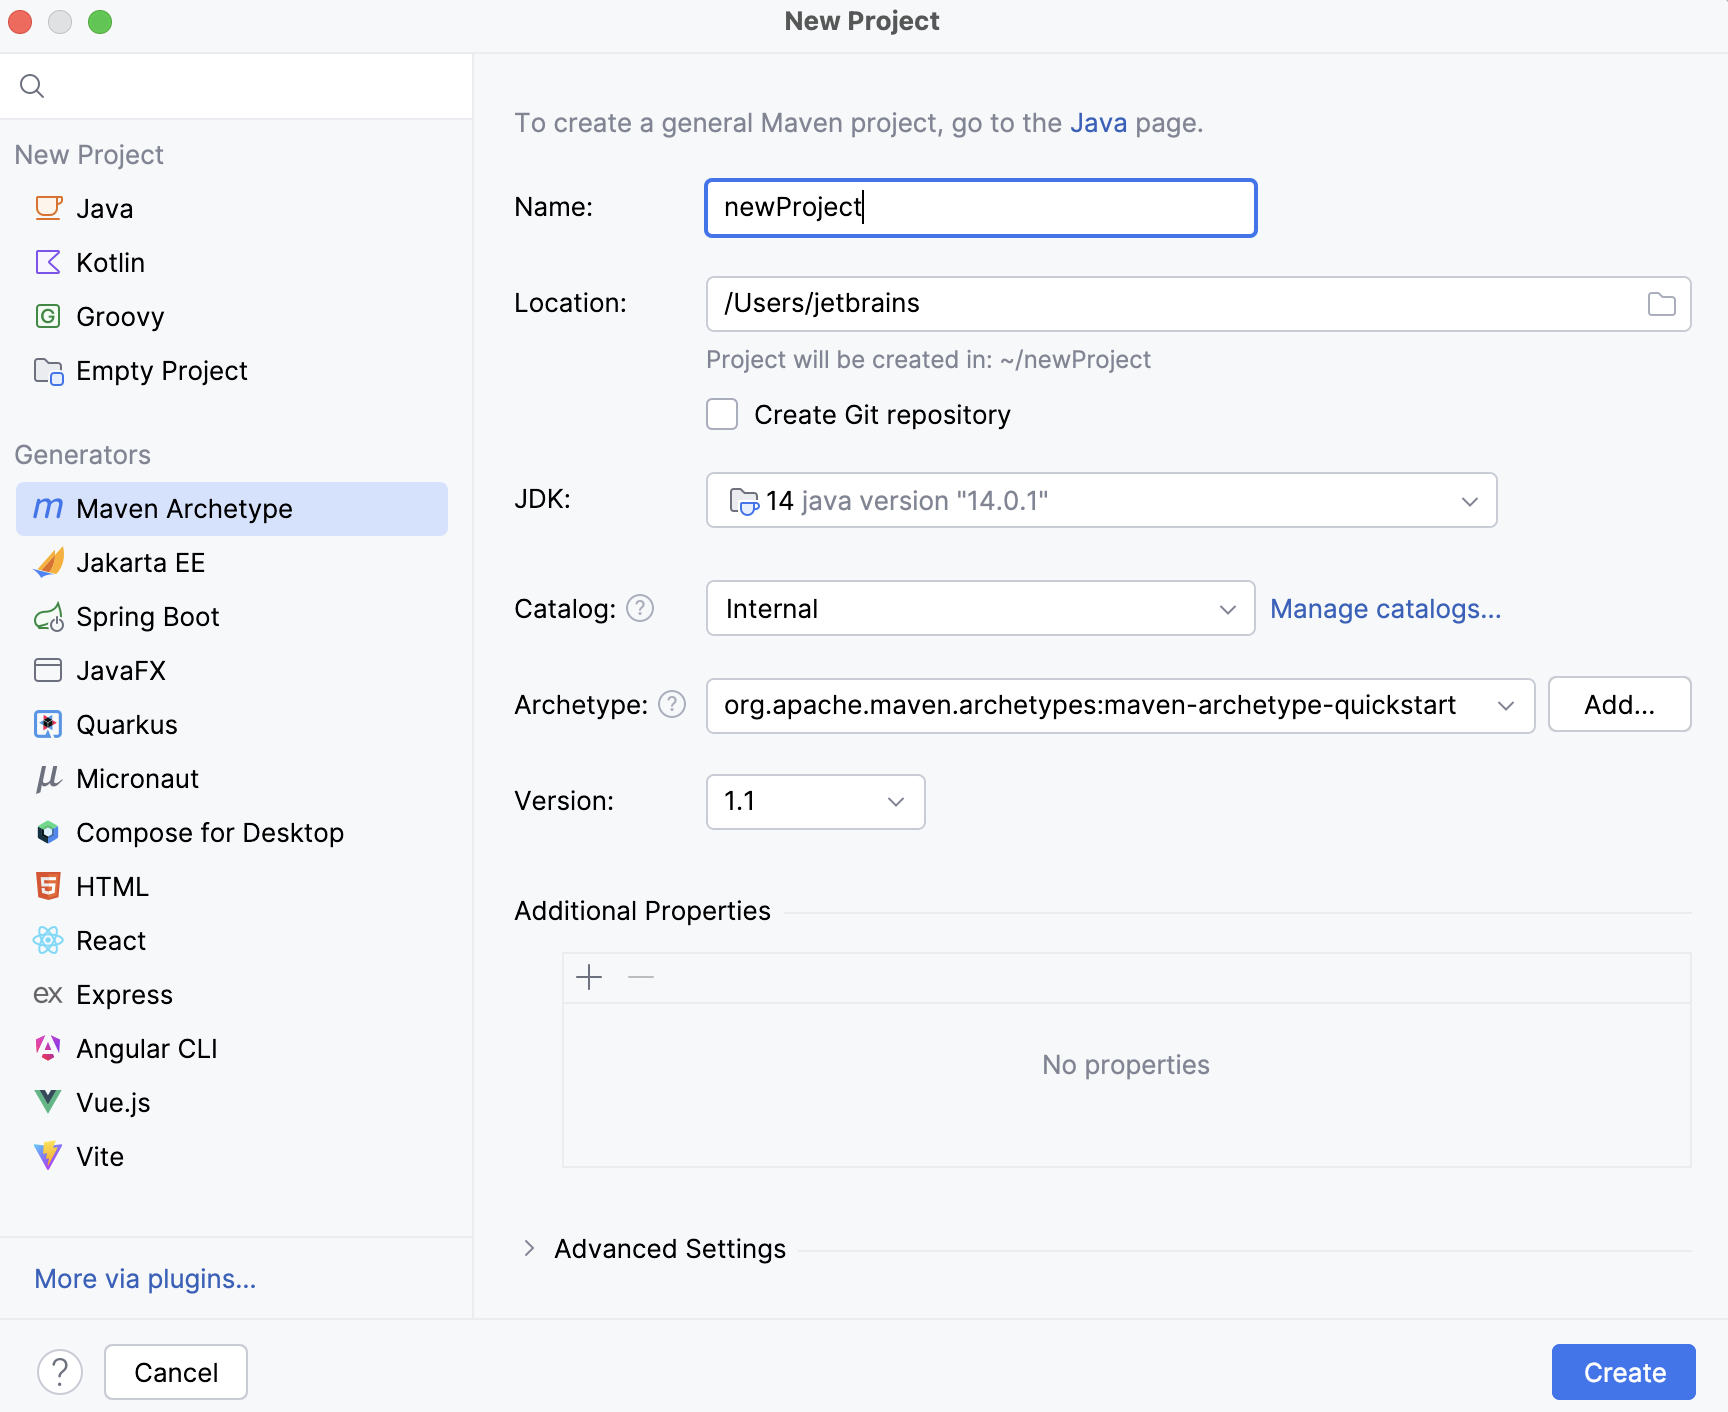
Select Maven Archetype from the options on the left.
Using options on the right, configure your project:
Name: specify the name of your project.
Location: specify the location of your project.
Create Git repository:
Select the Create Git repository to place the new project under version control.
You will be able to do it later at any time.
JDK: specify project's SDK (JDK) or use the default one.
Catalog: specify which Maven repository you want to use in your project.
The internal Maven catalog is a default one. You can also select the local repository that is located in the
.m2directory, or you can select Maven central repository.You can also click Manage Catalogs and add a custom repository if you need.
Archetype: select the needed Maven archetype. Click Add to specify the custom archetype.
Version: the version is specified automatically.
Additional properties: add additional properties
Create a Jakarta EE project with Maven as a build tool
Launch the New Project wizard. If no project is currently opened in IntelliJ IDEA, click New Project on the welcome screen. Otherwise, select from the main menu.
Select Jakarta EE from the list of generators.
Leave the default option Maven as your build tool system.
Select additional libraries and frameworks.
Specify your project's name, location, and artifact coordinates. Click Create.
IntelliJ IDEA creates a Maven project with the dedicated Maven tool window and adds necessary dependencies.
For the more detailed information, refer to Tutorial: Your first Jakarta EE application.
Open an existing Maven project
Go to .
Alternatively, click Open on the welcome screen.
In the dialog that opens, select the pom.xml file of the project you want to open.
Click OK.
In the dialog that opens, click Open as Project.
IntelliJ IDEA opens and syncs the Maven project in the IDE. If you need to adjust importing options when you open the project, refer to the Maven settings. For example, if you have Maven options configured in the maven/config file and want to use them in your project, select the Use settings from .mvn/maven.config option in the Maven setting.
Configure the Maven settings before opening a new project
You can configure IntelliJ IDEA to display Maven settings before you open a new Maven project. (A new Maven project in this case is the existing project that you open in IntelliJ IDEA for the first time.) Since these are application-level settings, they are applied to any new project you open.
On the Welcome screen, select .
Alternatively, go to in the main menu.
In the Settings dialog, select .
In the Maven settings dialog, select the Show settings dialog for new Maven projects.
Click OK to save the changes.
Next time you open a new project, IntelliJ IDEA displays the Maven Settings dialog where you can specify a location of the local Maven repository and a user settings file.

Add a new Maven module to an existing project
You can add a Maven module to the project in which you are already working.
In the Project tool window, right-click the project folder and select . Alternatively, go to in the main menu to open the New Module wizard.
If you used the main menu to add a module, then the process of adding a module is the same as Creating a new Maven project.
If you are adding submodules by right-clicking the root folder then the process of adding a new module is shorter. You need to specify the name of your module in the Name field. The rest of the information is added automatically, and you can use either the default settings or change them according to your preferences.
Configure a multi-module Maven project
You can create a multi-module Maven project in IntelliJ IDEA. The multi-module project is defined by a parent POM file with several submodules.
Create a Maven parent project. IntelliJ IDEA creates a standard Maven layout including an src folder.
In the Project tool window, remove the src folder since you would only need it in the very rare cases. For your general project, you don't need the src folder for the parent POM.
In the Project tool window, right-click your project (or in the main menu, go to File) and select New | Module to add a subproject.
In the New Module wizard following the instructions on how to add a module, specify the necessary information and click Finish.
The src folder is created automatically, and you can open POM and add a packaging that you need. IntelliJ IDEA adds the module to the parent project. IntelliJ IDEA also adds name and the description of the subproject to the parent POM.
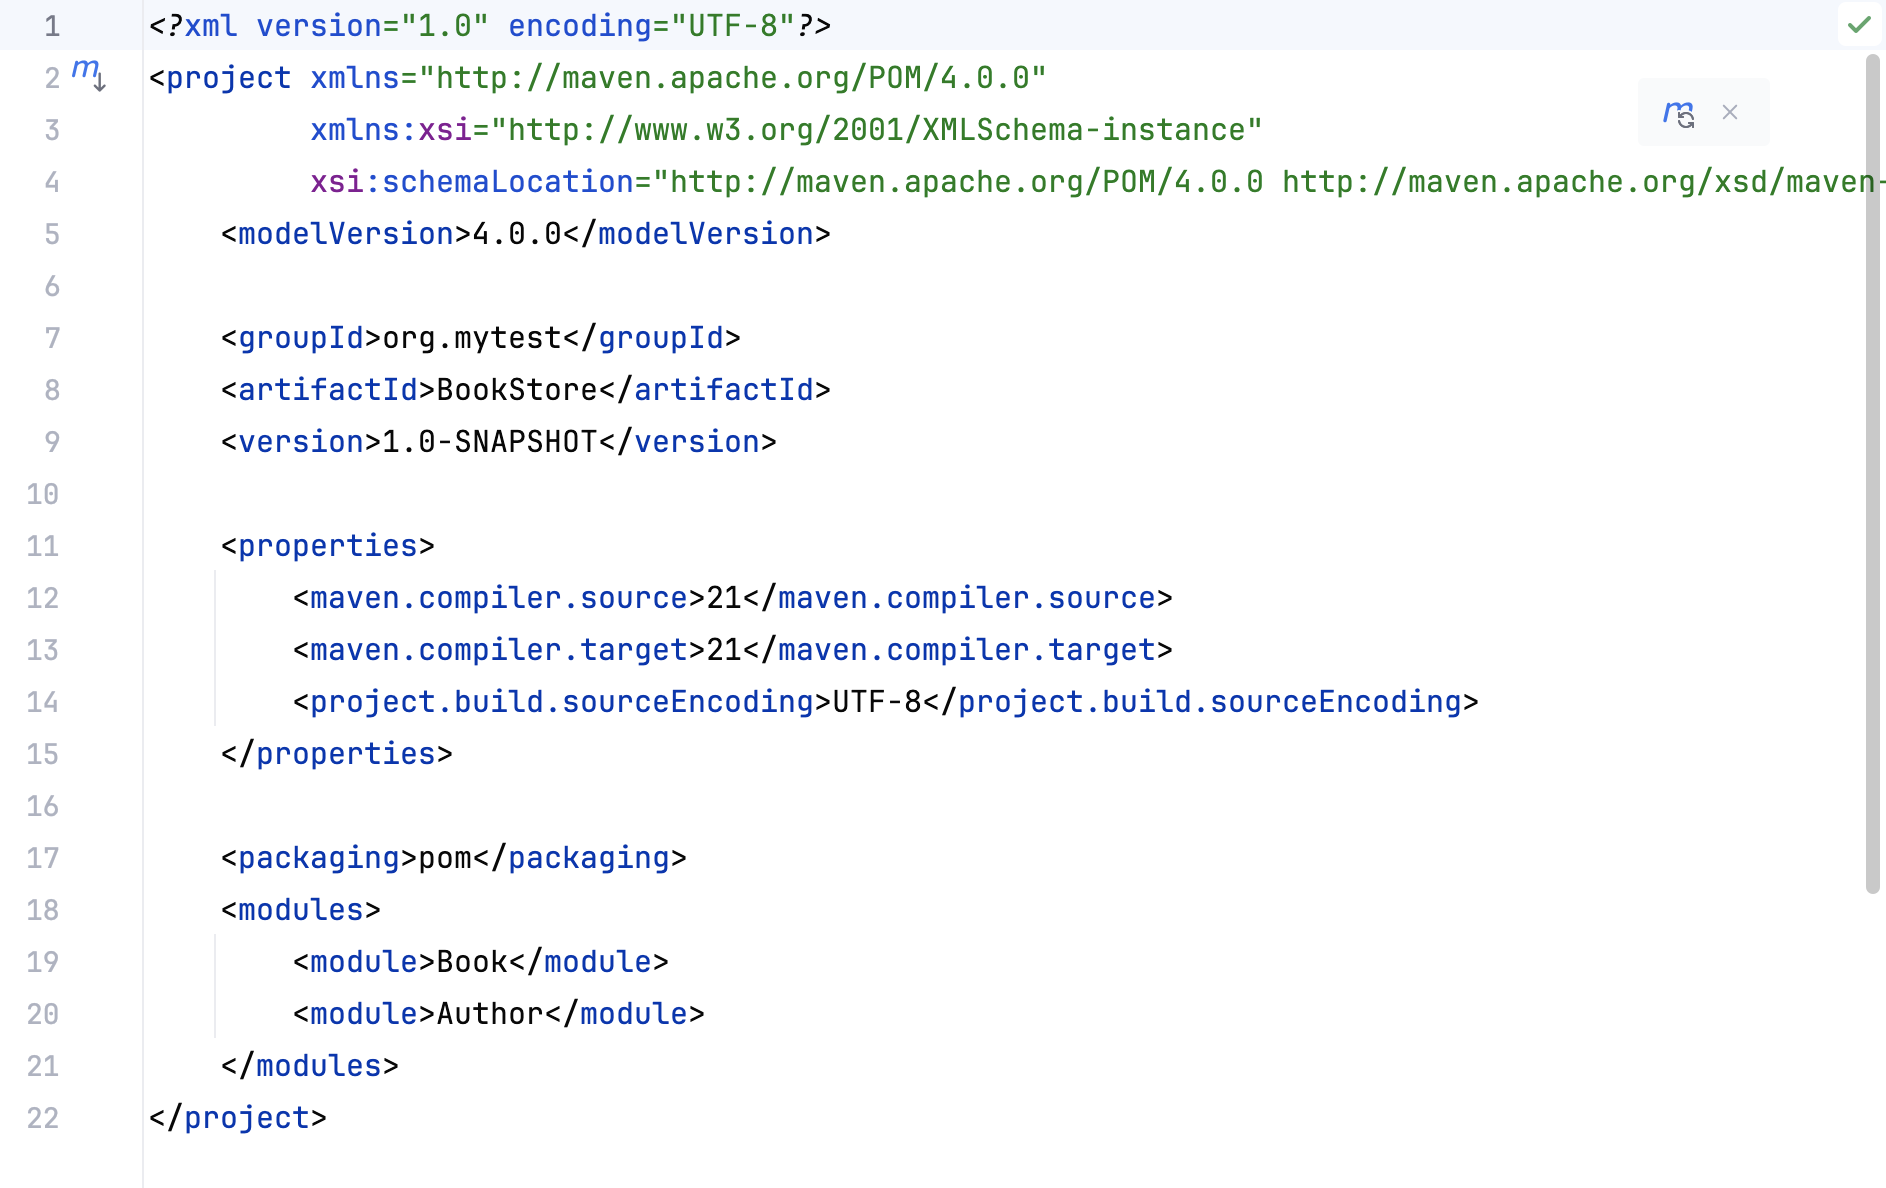
Last, but not least, IntelliJ IDEA adds the description of the parent POM to the subproject's POM.
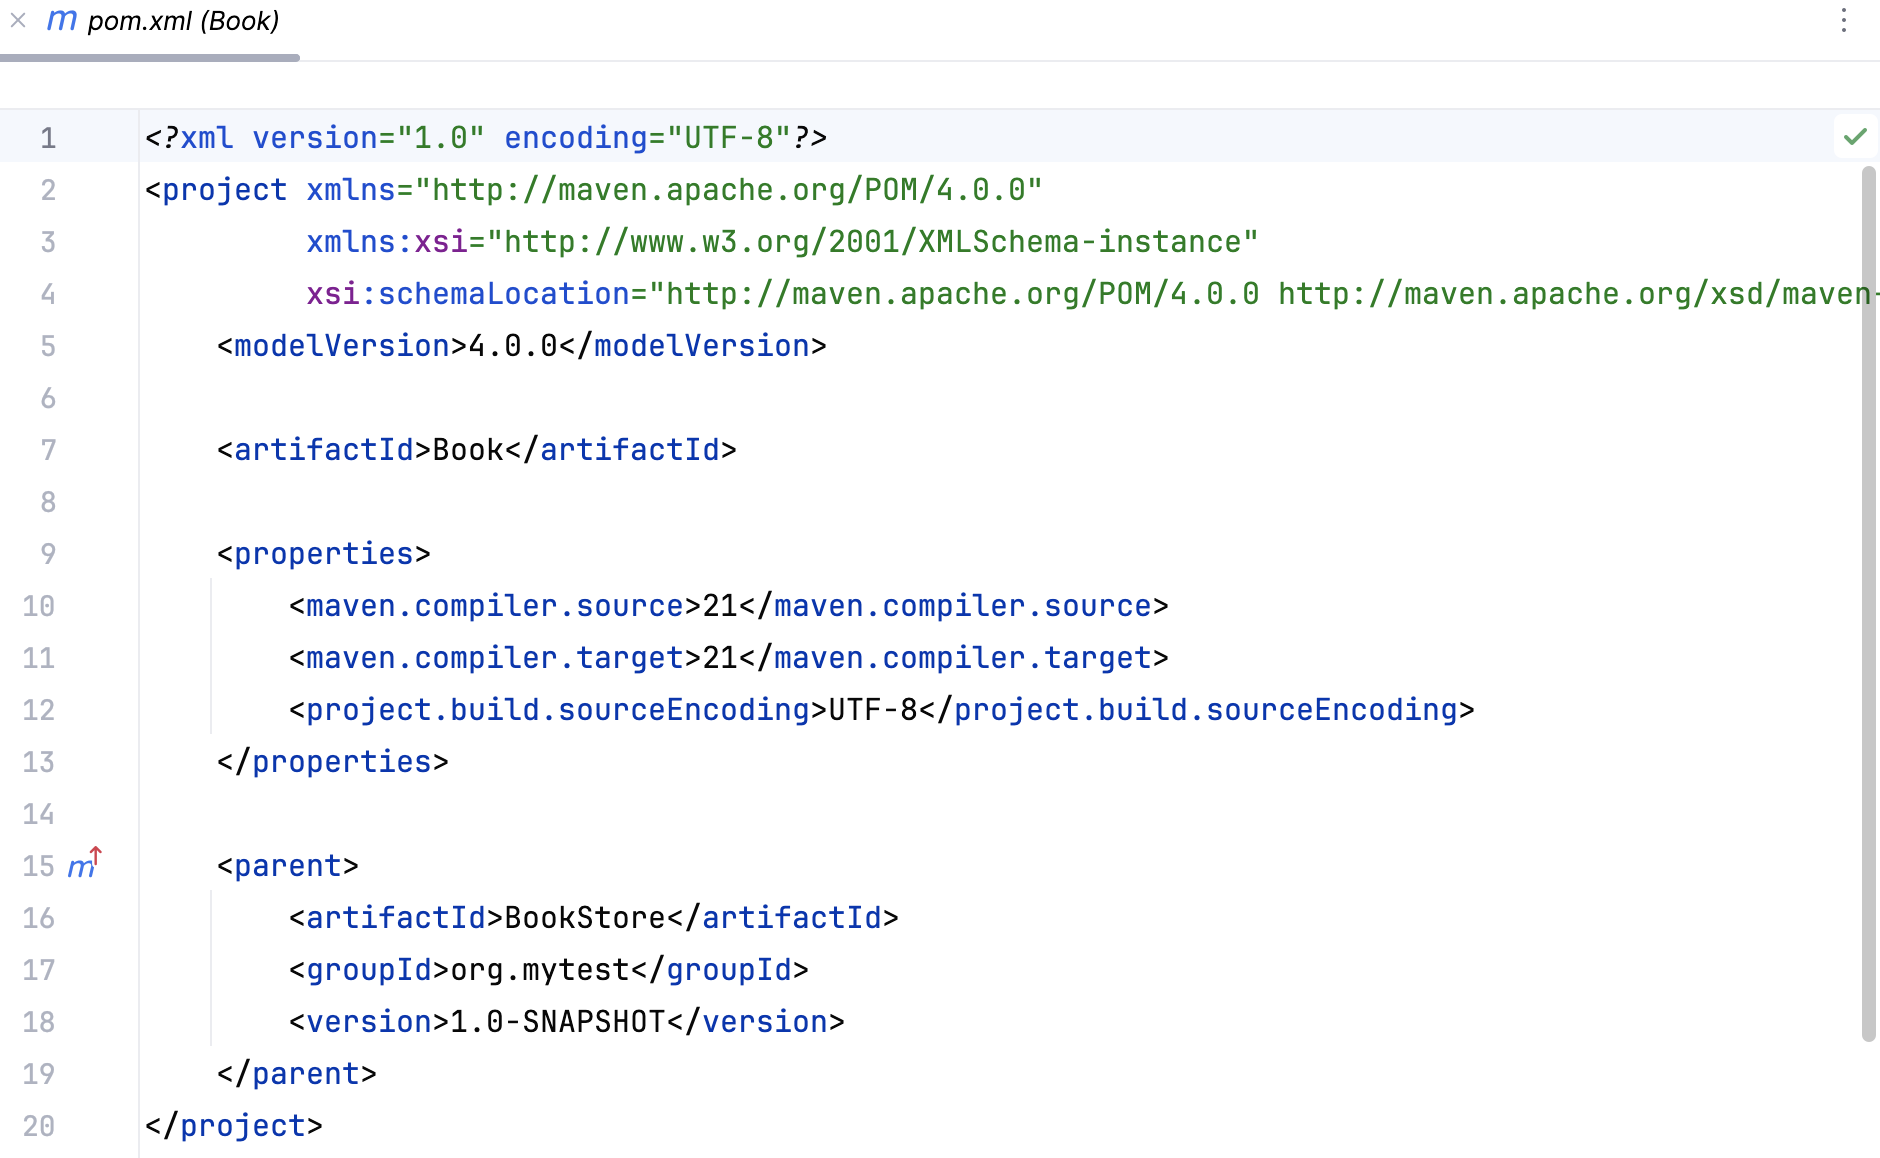
You can click
in the left gutter to quickly open the parent POM from your subproject.
You can also add dependencies to the parent POM that will be inherited by the subprojects.
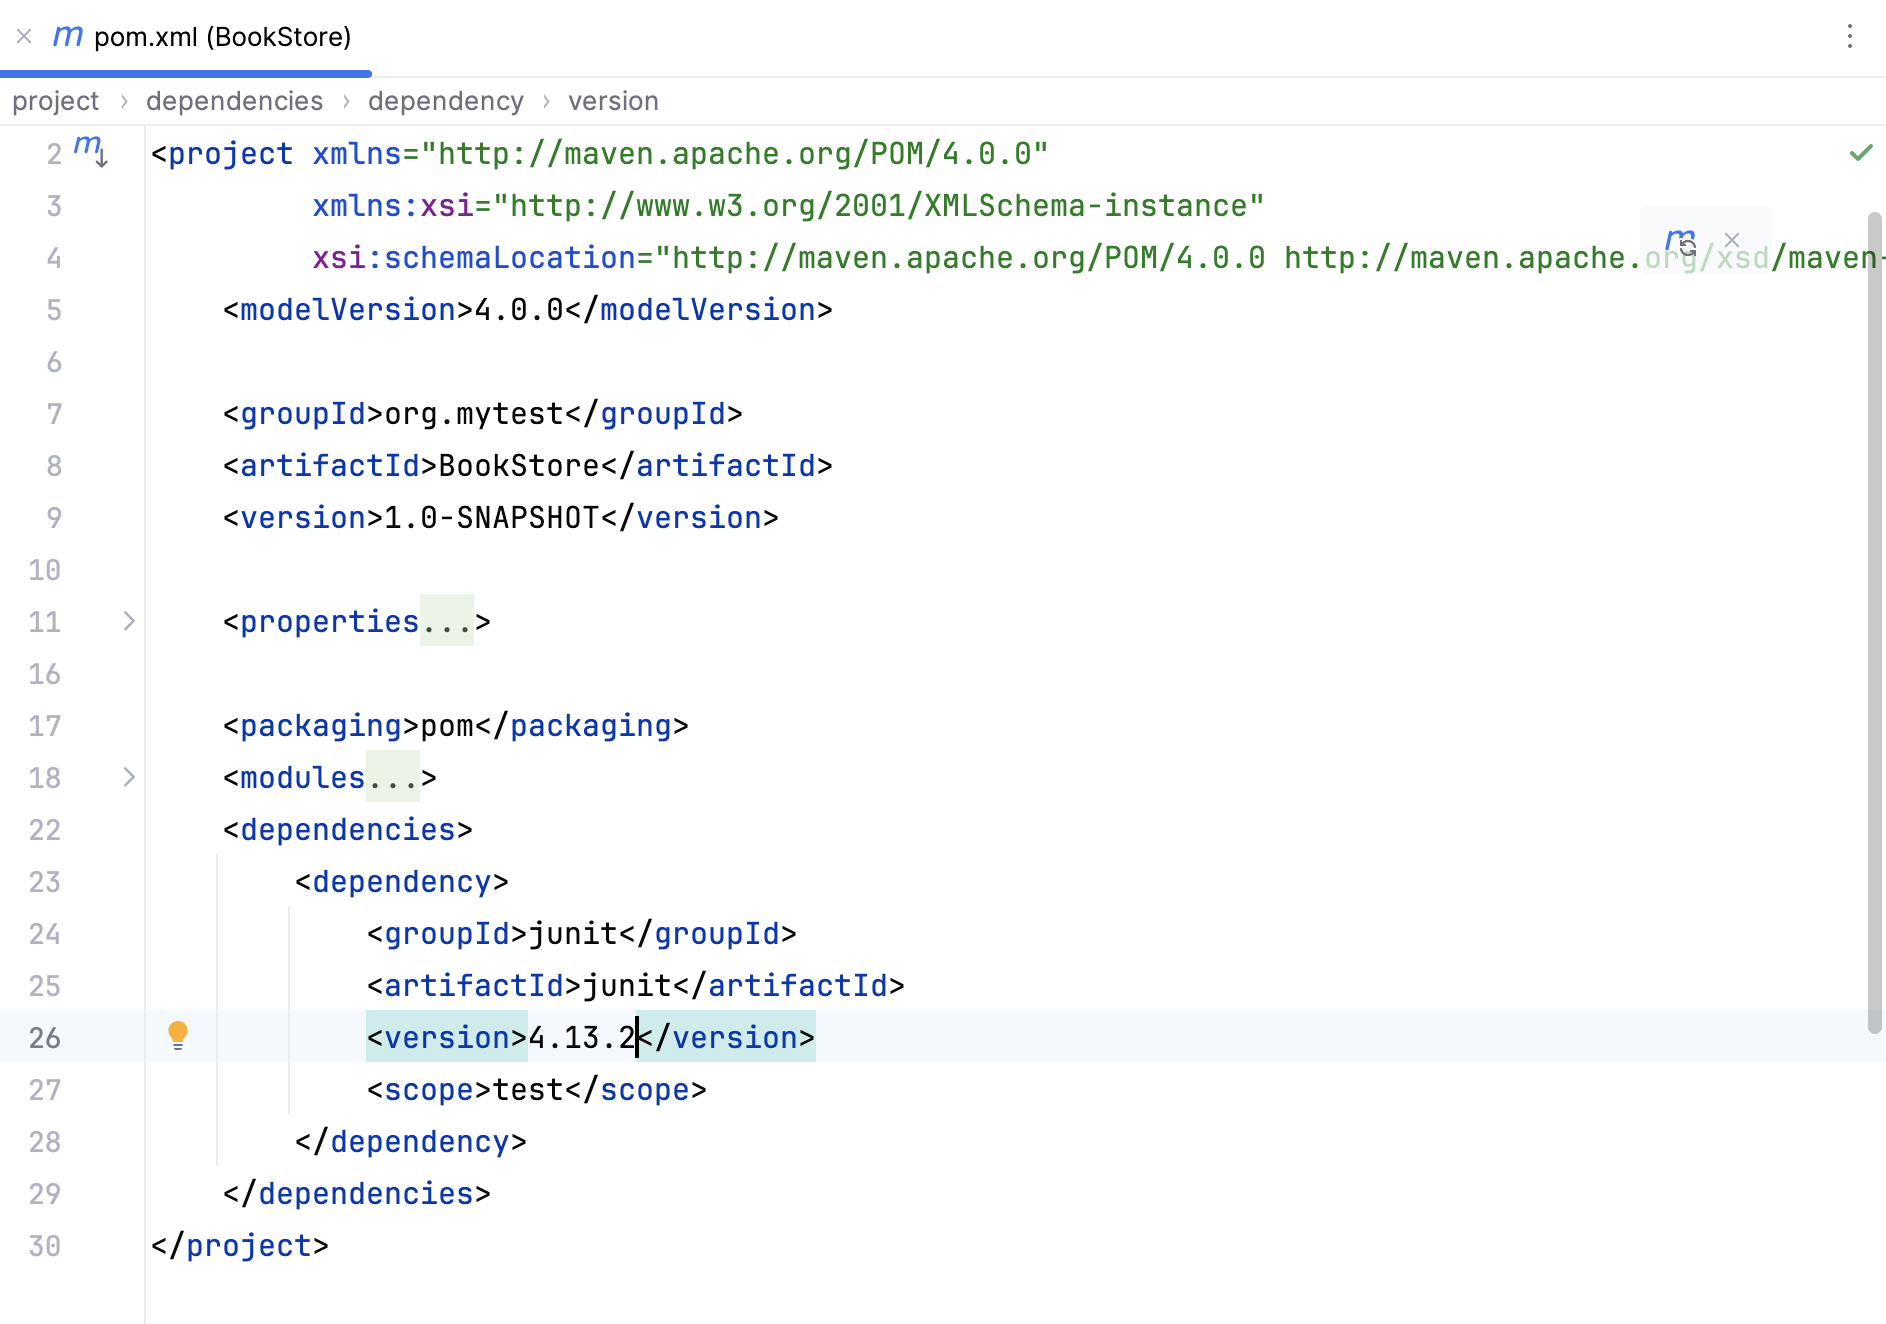
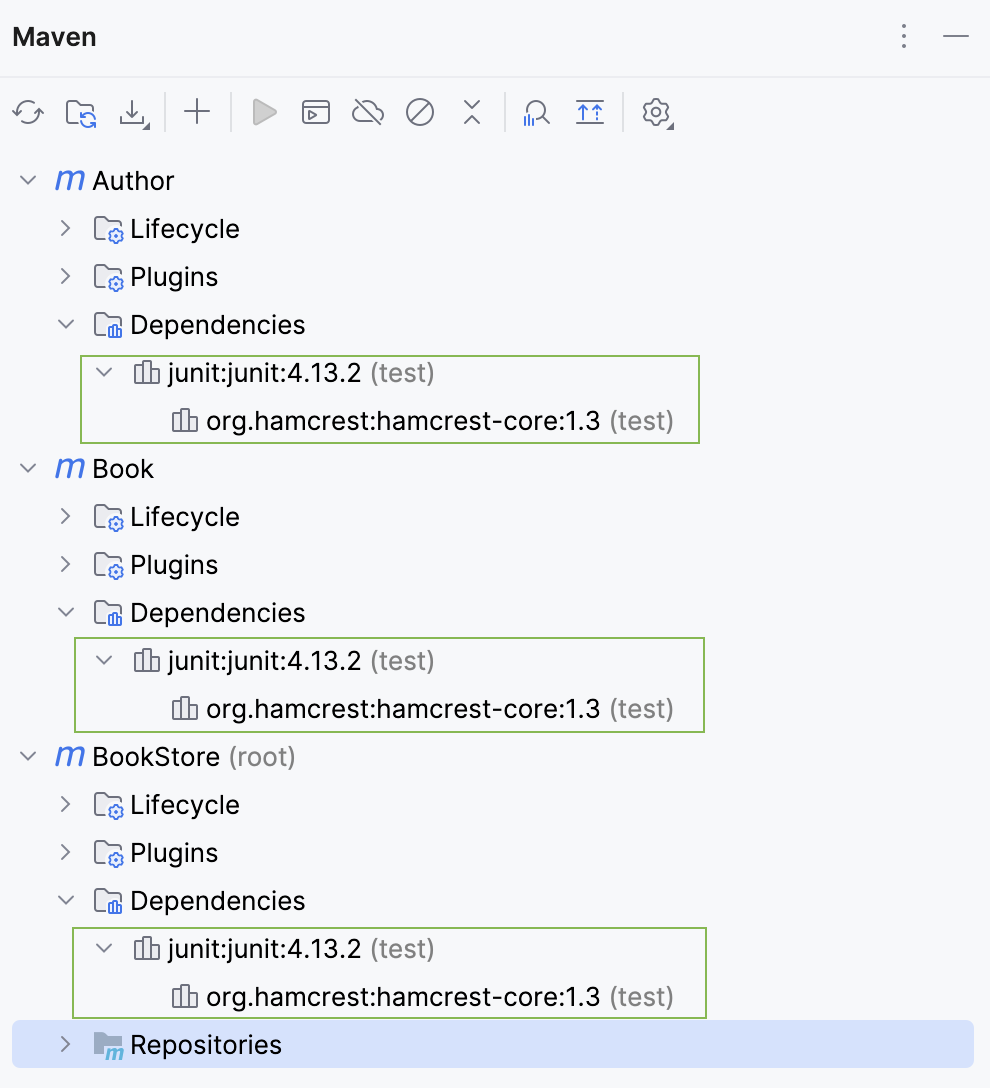
Open Maven tool window to see that all changes made in the parent POM are reflected in subprojects.
Access the Maven settings
Use the Maven settings to configure options such as Maven version, local repository, offline mode, and so on.
In the Settings dialog (Ctrl+Alt+S) , go to .
On the Maven settings page, configure the available options and click OK to save the changes.
Use the Maven wrapper or a custom version of Maven
Press Ctrl+Alt+S to open settings and then select .
On the Maven settings page, in the Maven home path field, specify the location of the Maven custom version installation. For the Maven wrapper, select the use Maven wrapper option from the list. In this case the version of Maven defined in the .mvn/wrapper/maven-wrapper.properties file will be used.
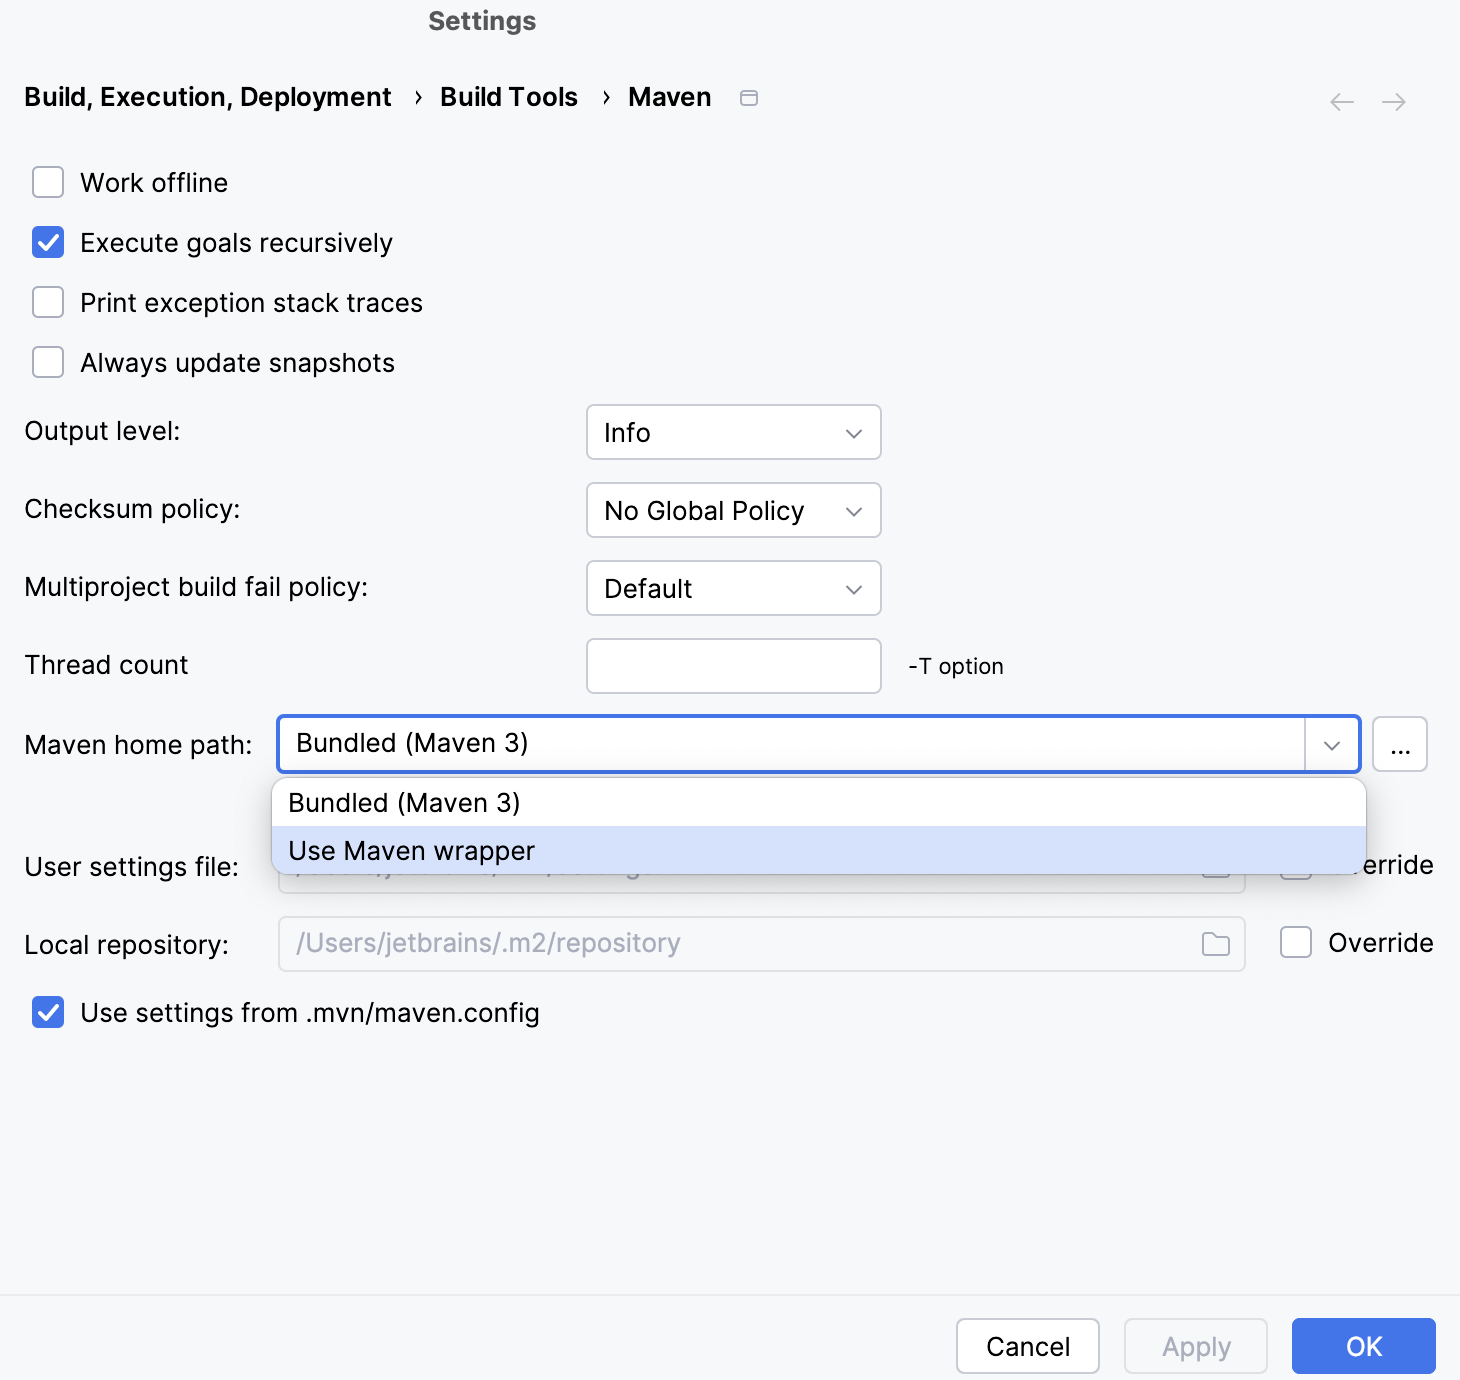
Click OK.
Change the JDK version in a Maven project
There are several places where you can change the JDK version that will affect not only your current project, but the whole application as well.
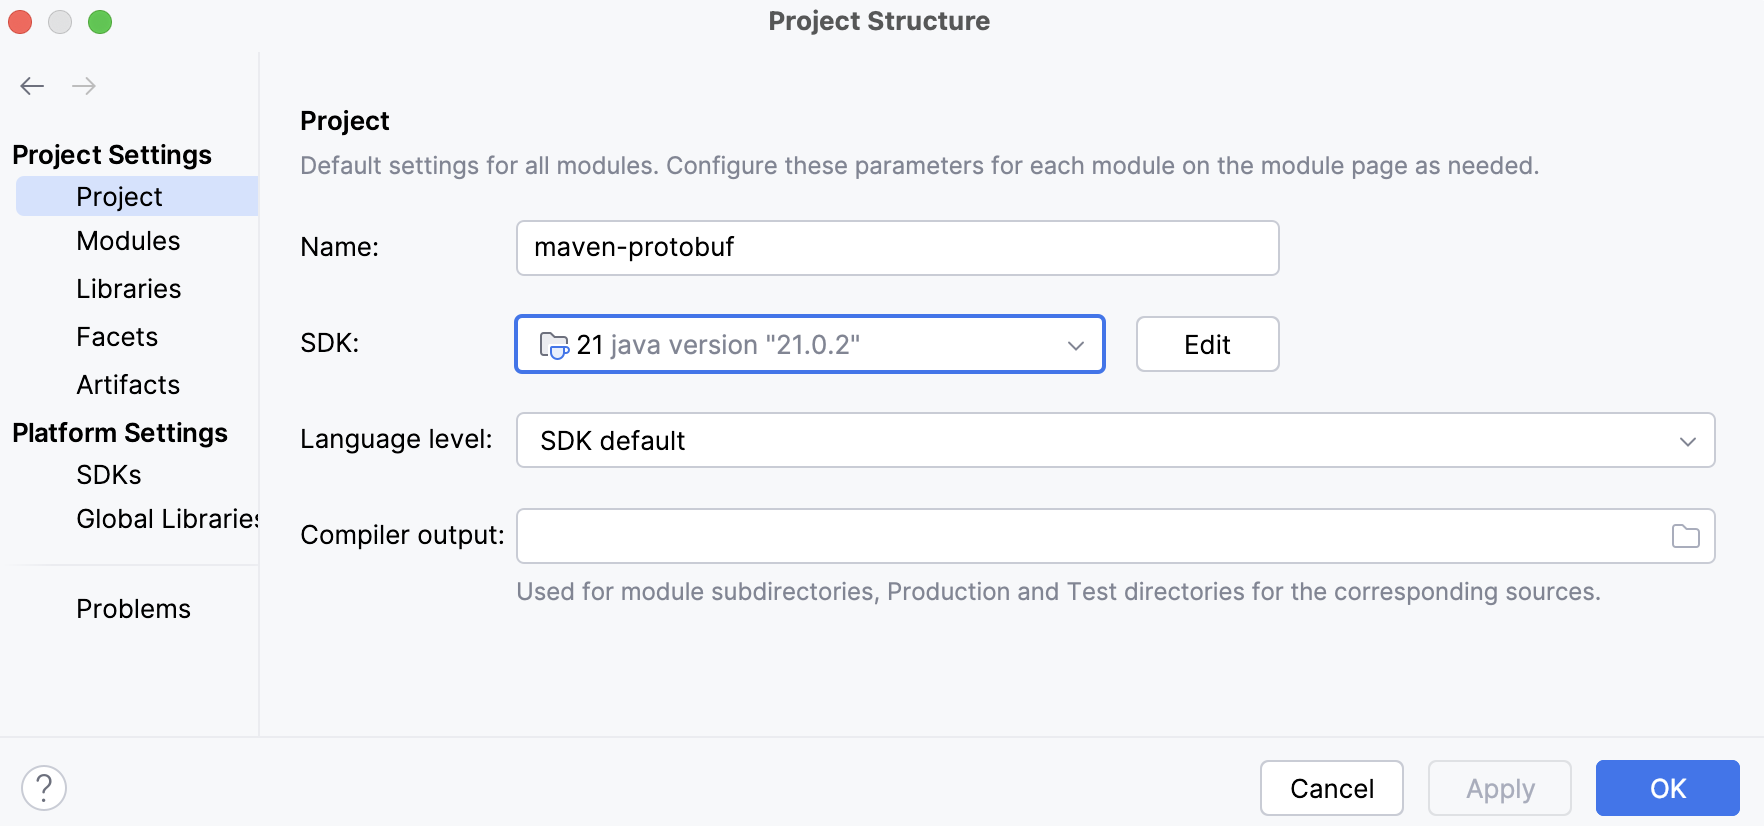
Change the JDK version in the Project Structure
Changing the JDK version in the Project Structure dialog will only affect the current project.
In the main menu, go to Ctrl+Alt+Shift+S.
In the dialog that opens, in Project SDK, specify the JDK version and click OK to save the changes.
Change the JDK version for the Maven runner
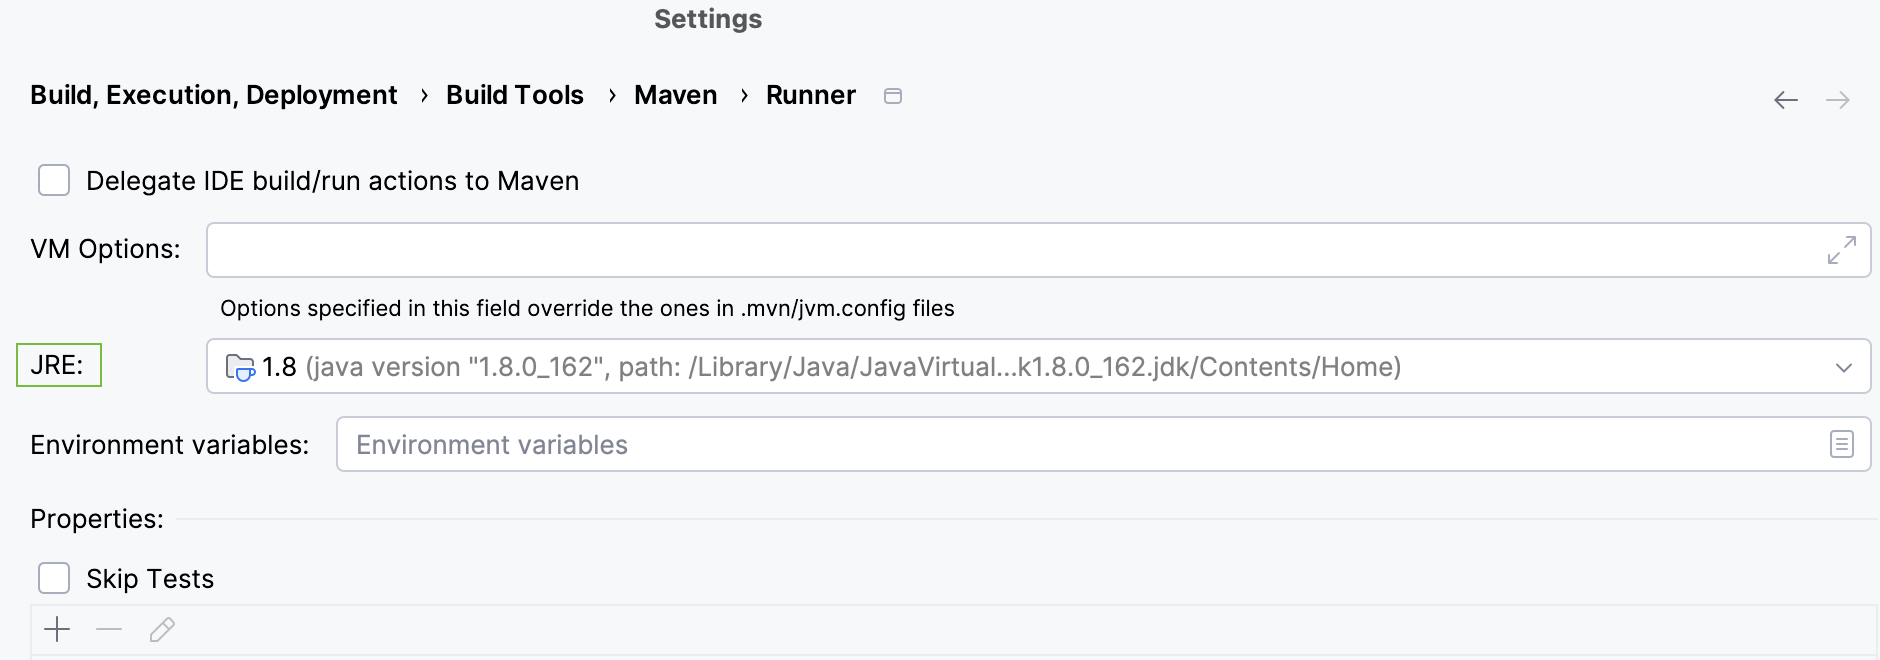
When IntelliJ IDEA runs Maven goals, it will use the JDK version specified for the Maven runner. By default, IntelliJ IDEA uses the project's JDK.
Changing the JDK for the Maven runner will only affect the current project.
In the Settings dialog (Ctrl+Alt+S) , go to .
On the page that opens, in the JRE field, select the JDK version.
Change the JDK version for the Maven importer
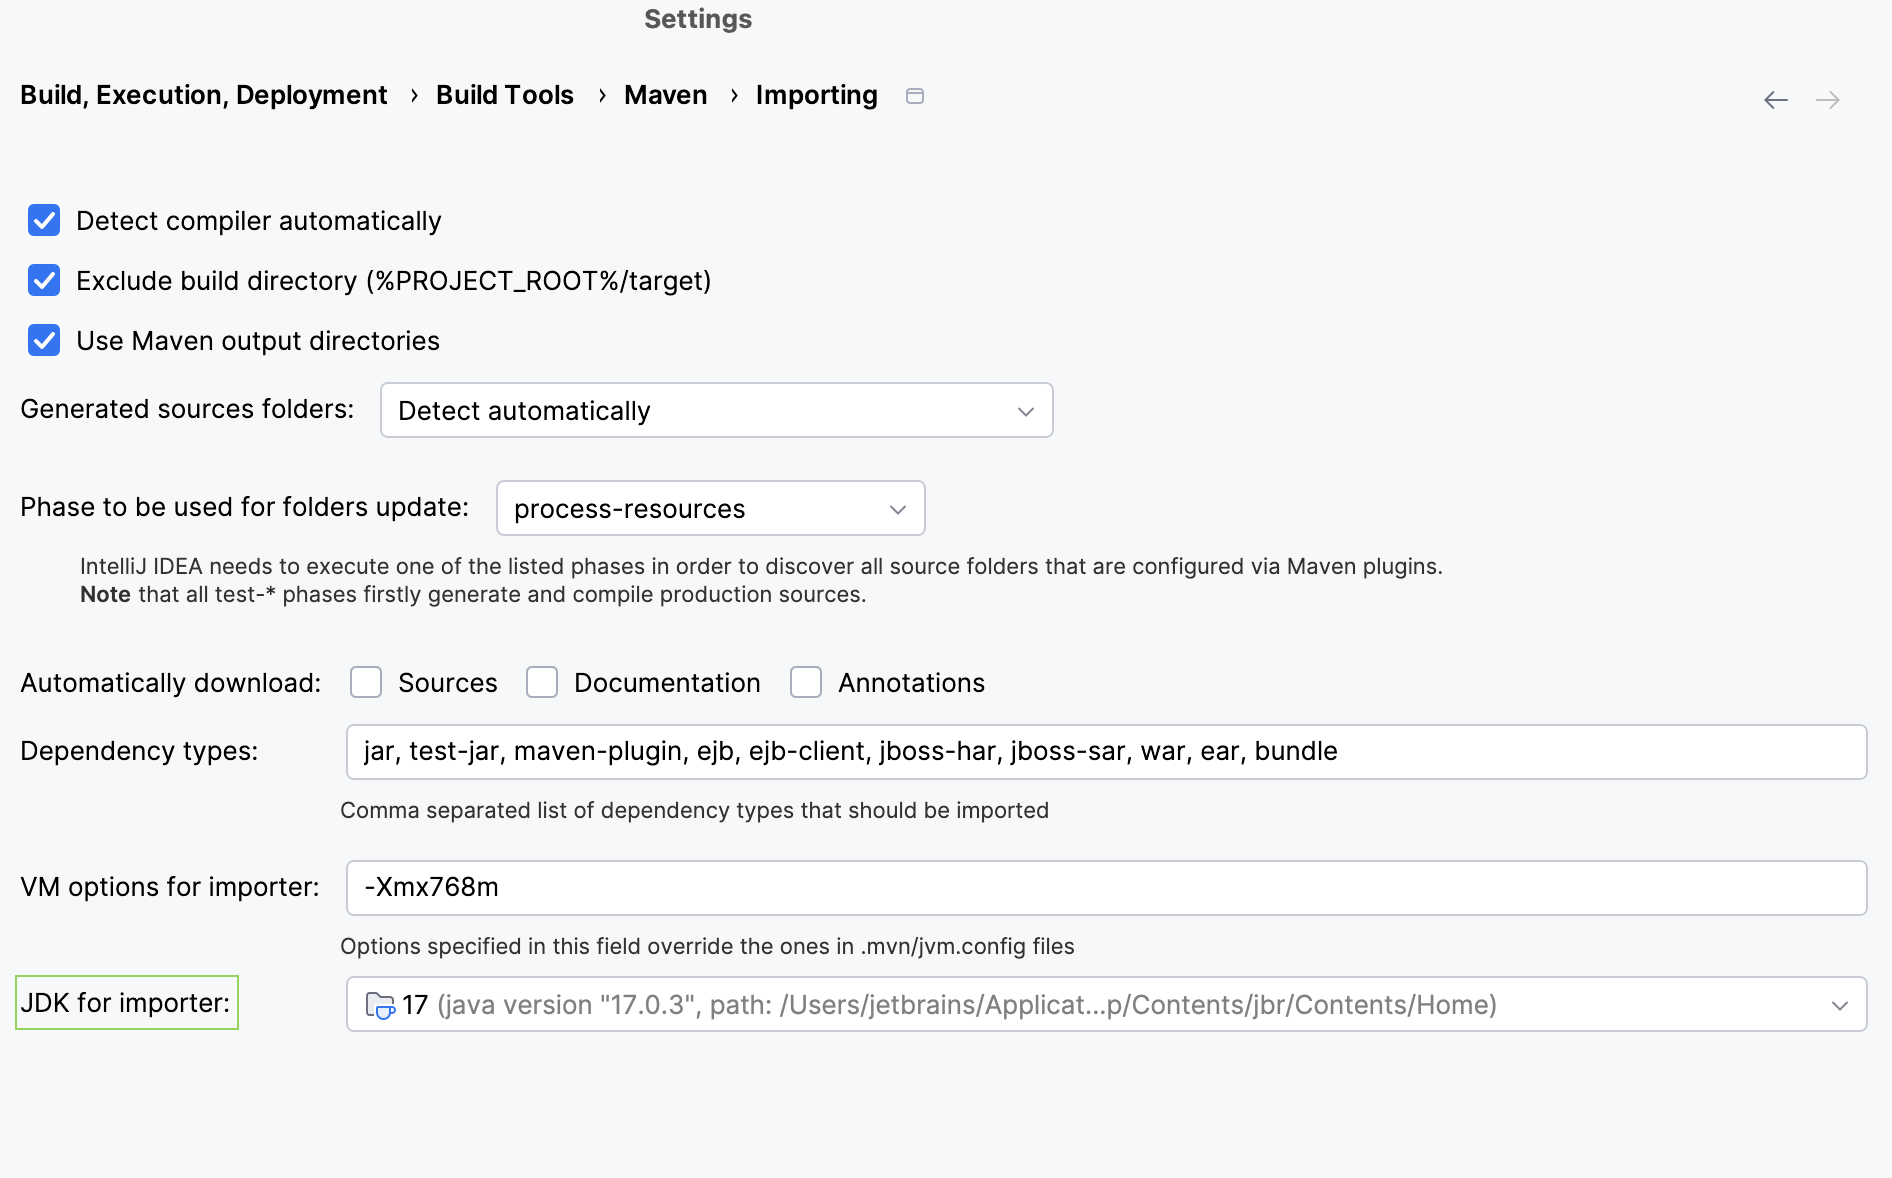
Changing the JDK version for the Maven importer will affect the whole application since it is a part of the Maven global settings. If you want to use the same JDK version as you use in your project for syncing or resolving dependencies, change the JDK version for the importer.
https://maven.apache.org/guides/introduction/introduction-to-dependency-mechanism.html#Dependency_Scope
In the Settings dialog (Ctrl+Alt+S) , go to .
On the page that opens, in the JDK for importer field, select the same JDK version as you used in the Project Structure and click OK to save the changes.
