Configure a Python SDK
To develop Python scripts in IntelliJ IDEA, download and install Python and configure at least one Python SDK. A Python SDK can be specified as a Python interpreter for a Python project.
IntelliJ IDEA supports:
Standard Python interpreters
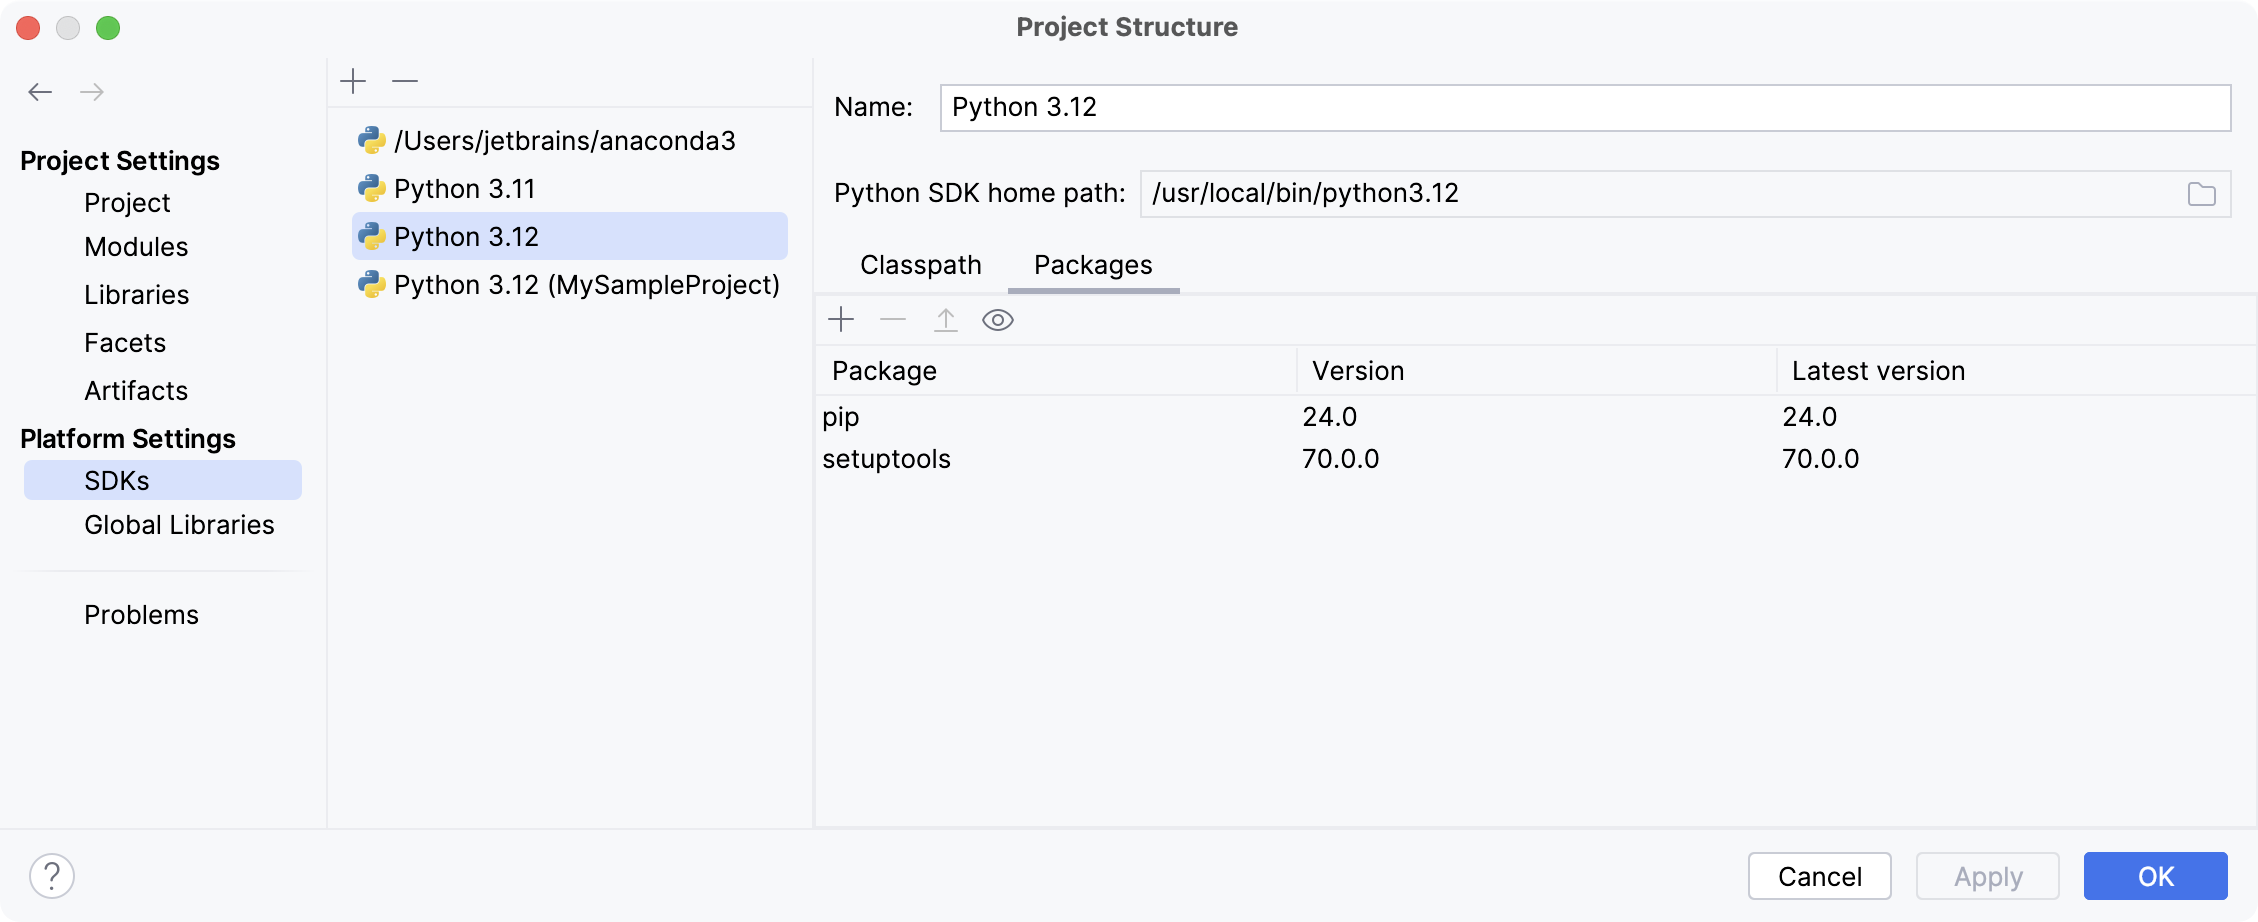
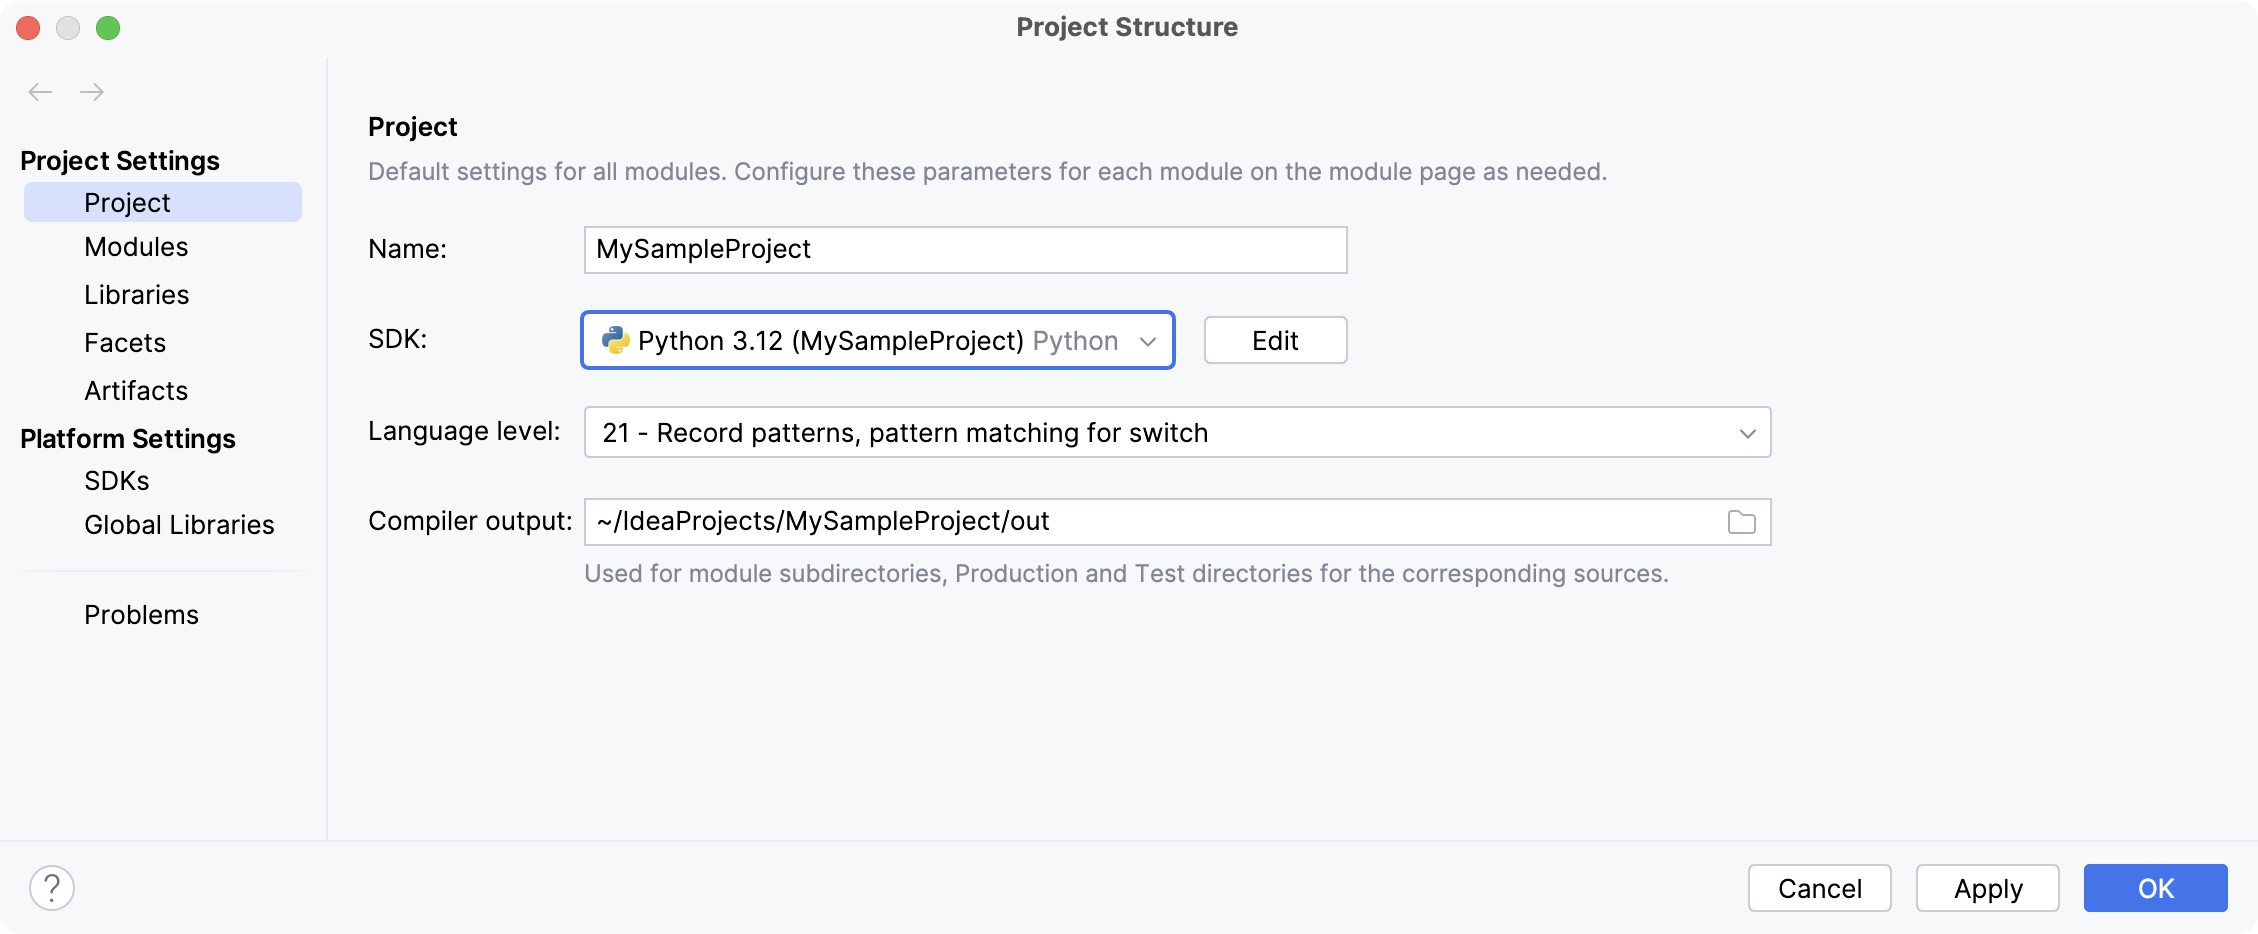
To view the list of available SDKs, choose from the main menu Ctrl+Alt+Shift+S. Python SDKs can be configured on the following levels:
The selected SDK can be used for all Python projects.
The selected SDK will be used for the current project and all its modules.
The selected SDK will be used for the current project module.
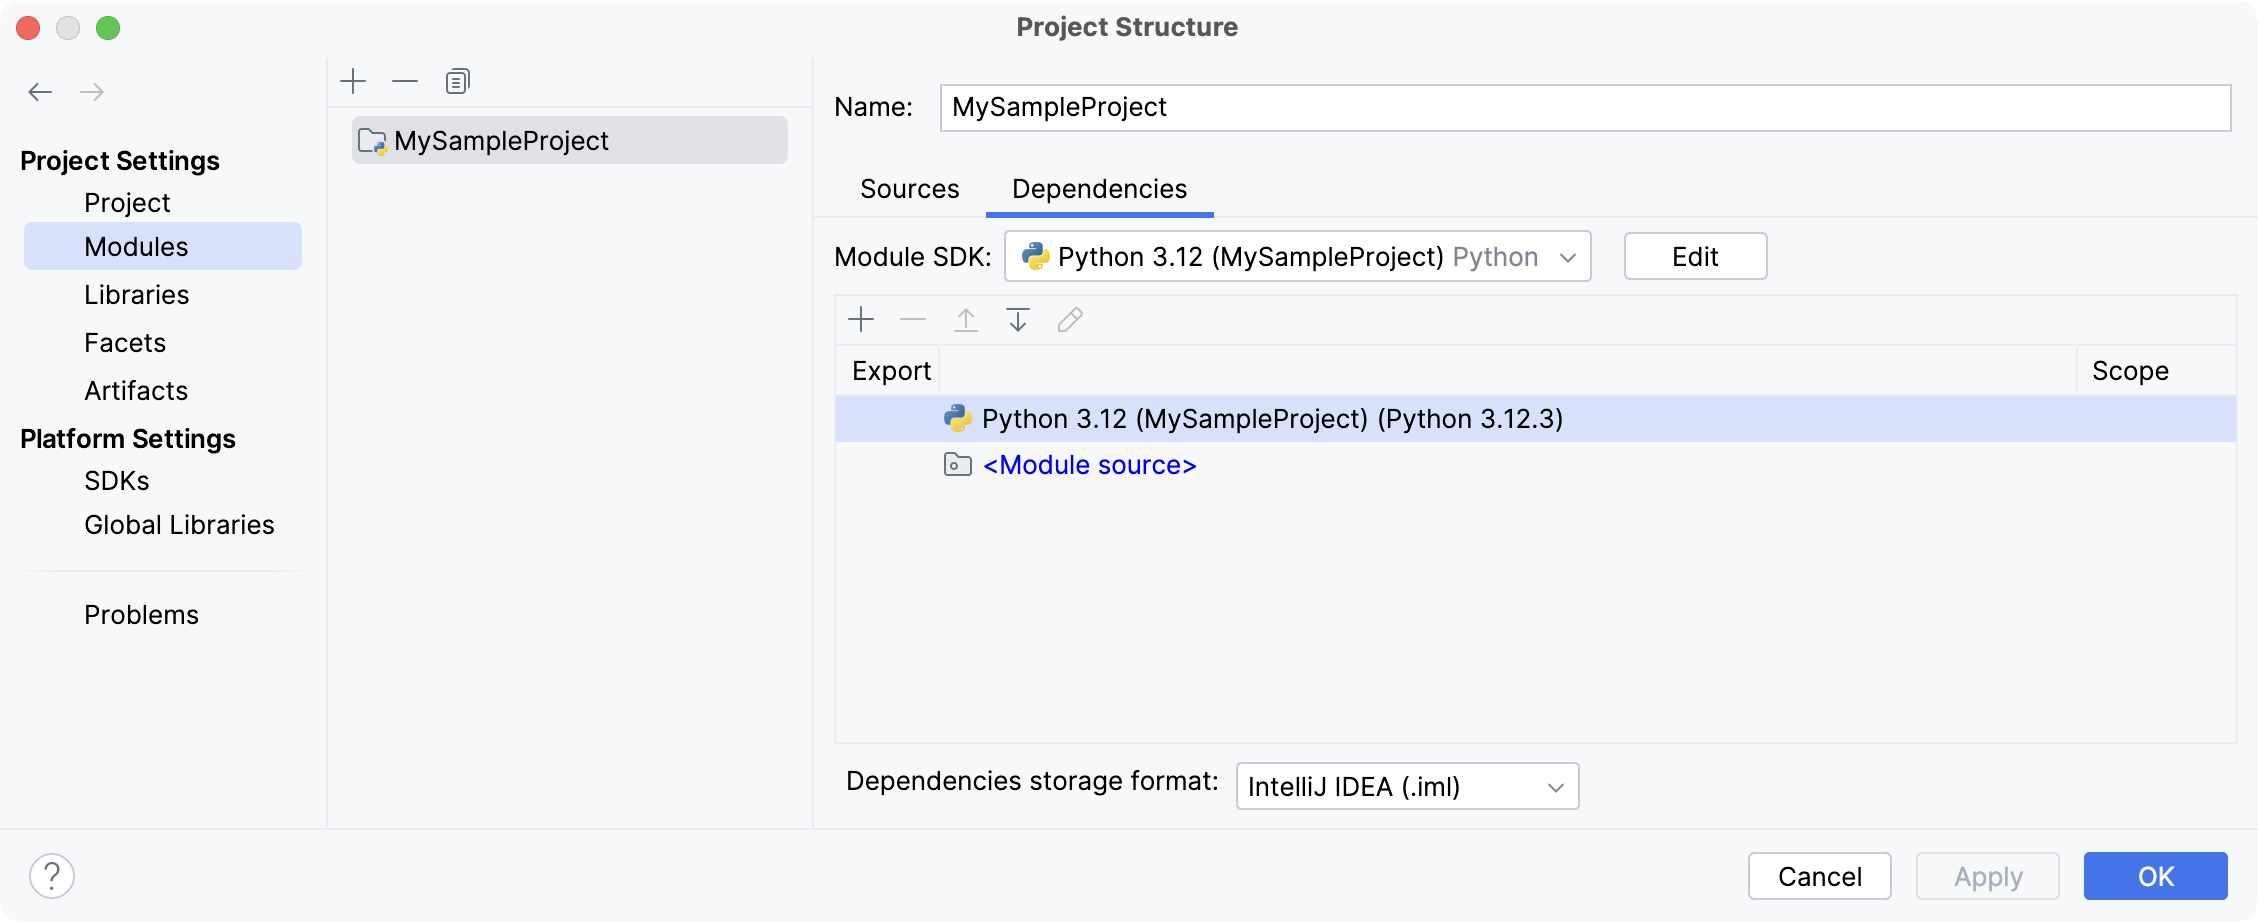
To easily tell them from each other, enter different names in the Name field. For more information about SDK configuration, refer to SDKs.
To add a Python SDK, you must configure a Python interpreter. Regardless of the level, you can configure a local or a remote Python interpreter.
Configure local Python interpreters
To configure a local Python interpreter, adhere to one of the following procedures:
Create a virtualenv environment
Navigate to or press Ctrl+Alt+Shift+S.
In the Project Structure dialog, select SDKs under the Platform Settings section, click
, and choose Add Python SDK from disk... from the popup menu.
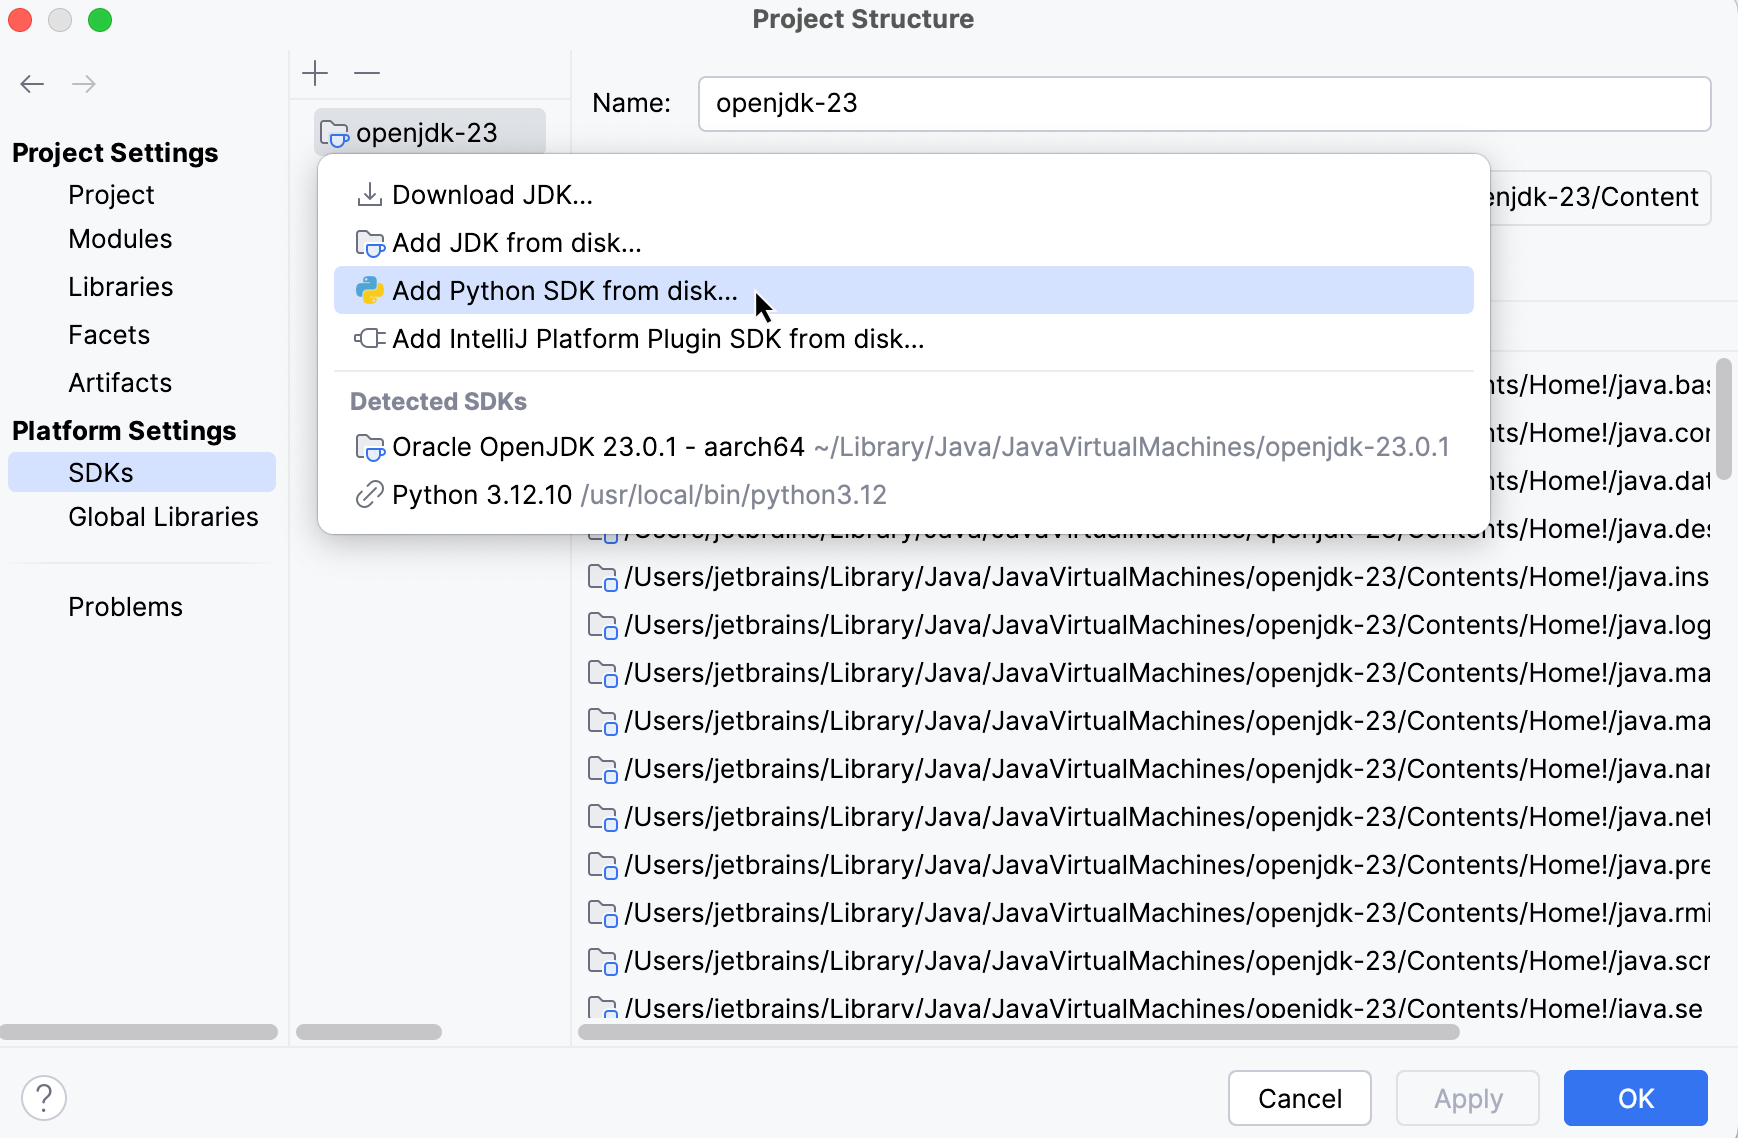
The following actions depend on whether you want to generate a new virtual environment or to use an existing one.
- New virtualenv environment

Select Virtualenv from the list of environment types.
Select the base interpreter from the list, or click
and find the Python executable in your file system.
Specify the location of the new virtual environment in the Location field, or click
and browse for the location in your file system. The directory for the new virtual environment should be empty.
Select the Inherit packages from base interpreter checkbox if you want all packages installed in the global Python on your machine to be added to the virtual environment you're going to create. This checkbox corresponds to the
--system-site-packagesoption of the virtualenv tool.Select the Make available to all projects checkbox if you want to reuse this environment when creating Python interpreters in IntelliJ IDEA.
- Existing virtualenv environment

Select Python from the list of environment types.
Select the required interpreter from the list.
If the required interpreter is not on the list, click
, and then browse for the required Python executable (for example, venv/bin/python on macOS or venv\Scripts\python.exe on Windows).
The selected virtual environment will be reused for the current project.
Click OK to complete the task.
For more information, refer to the PyCharm documentation.
Create a conda environment
Ensure that Anaconda or Miniconda is downloaded and installed on your computer, and you are aware of a path to its executable file.
For more information, refer to the installation instructions.
Navigate to or press Ctrl+Alt+Shift+S.
In the Project Structure dialog, select SDKs under the Platform Settings section, click
, and choose Add Python SDK from disk... from the popup menu.

The following actions depend on whether you want to create a new conda environment or to use an existing one.
- New conda environment
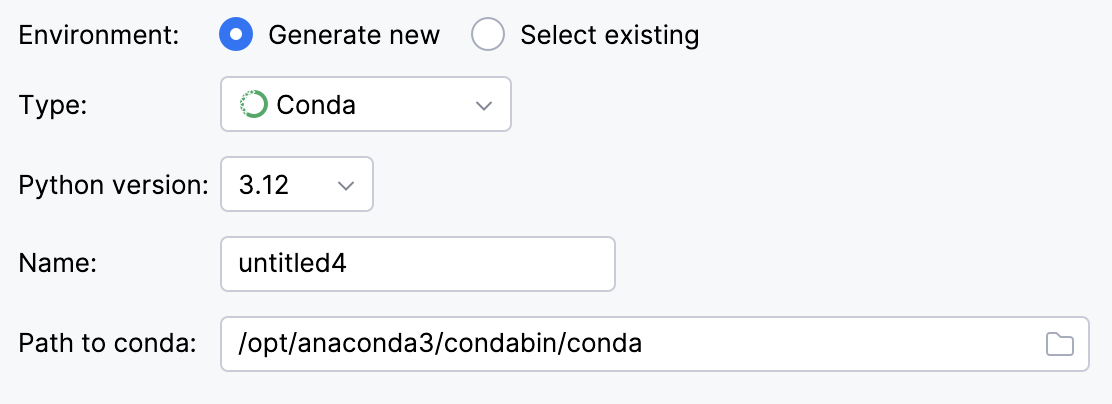
Select Conda from the list of environment types.
Select the Python version from the list.
Specify the environment name.
IntelliJ IDEA will detect a conda installation.
If IntelliJ IDEA did not detect the installation automatically, specify the location of the conda executable, or click
to browse for it.
- Existing conda environment

Select Conda from the list of environment types.
IntelliJ IDEA will detect a conda installation.
If IntelliJ IDEA did not detect the installation automatically, specify the location of the conda executable, or click
to browse for it.
Select the environment from the list.
The selected conda environment will be reused for the current project.
Click OK to complete the task.
For more information, refer to the PyCharm documentation.
Create a pipenv environment
Navigate to or press Ctrl+Alt+Shift+S.
In the Project Structure dialog, select SDKs under the Platform Settings section, click
, and choose Add Python SDK from disk... from the popup menu.

Select Pipenv from the list of environment types.

Select the base interpreter from the list, or click
and find the Python executable in your file system.
If you have added the base binary directory to your
PATHenvironmental variable, you do not need to set any additional options: the path to the pipenv executable will be autodetected.If IntelliJ IDEA does not detect the pipenv executable, click Install pipenv via pip to allow IntelliJ IDEA to install it for you automatically.
Alternatively, follow the pipenv installation procedure to discover the executable path and then specify it in the dialog.
Click OK to complete the task.
When you have set the pipenv virtual environment as a Python interpreter, all available packages are added from the source defined in Pipfile. The packages are installed, removed, and updated in the list of the packages through pipenv rather than through pip.
For more information, refer to the PyCharm documentation.
Create a Poetry environment
Navigate to or press Ctrl+Alt+Shift+S.
In the Project Structure dialog, select SDKs under the Platform Settings section, click
, and choose Add Python SDK from disk... from the popup menu.

The following actions depend on whether you want to create a new Poetry environment or to use an existing one.
- New Poetry environment
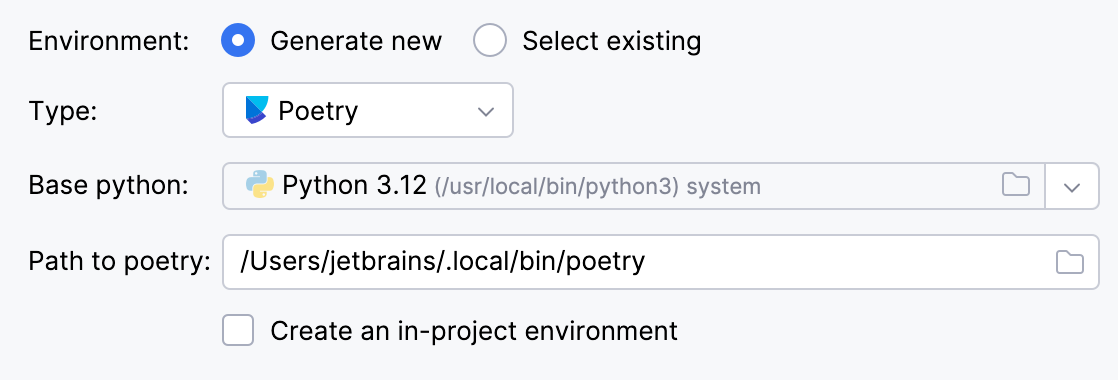
Select Poetry from the list of environment types.
Select the base interpreter from the list or click
and find the Python executable in your file system.
IntelliJ IDEA will detect a Poetry installation.
If IntelliJ IDEA does not detect the Poetry installation, click Install poetry via pip to allow IntelliJ IDEA to install Poetry for you automatically.
Alternatively, specify the location of the Poetry executable, or click
to browse for it.
To create a virtual environment within the project directory, select the Create an in-project environment checkbox.
- Existing Poetry environment

Select Poetry from the list of environment types.
IntelliJ IDEA will detect a Poetry installation.
If IntelliJ IDEA did not detect the installation automatically, specify the location of the executable, or click
to browse for it.
Select the environment from the list.
The selected Poetry environment will be reused for the current project.
Click OK to complete the task.
For more information, refer to the PyCharm documentation.
Create a uv environment
Navigate to or press Ctrl+Alt+Shift+S.
In the Project Structure dialog, select SDKs under the Platform Settings section, click
, and choose Add Python SDK from disk... from the popup menu.

The following actions depend on whether you want to generate a new virtual environment or to use an existing one.
- New uv environment

Select uv from the list of environment types.
Select the base interpreter from the list, or click
and find the Python executable in your file system.
IntelliJ IDEA will detect a uv installation.
If IntelliJ IDEA did not detect the installation automatically, specify the location of the uv executable, or click
to browse for it.
- Existing uv environment

Select uv from the list of environment types.
IntelliJ IDEA will detect a uv installation.
If IntelliJ IDEA did not detect the installation automatically, specify the location of the uv executable, or click
to browse for it.
Select the environment from the list.
The selected uv environment will be reused for the current project.
Click OK to complete the task.
For more information, refer to the PyCharm documentation.
Create a Hatch environment
Navigate to or press Ctrl+Alt+Shift+S.
In the Project Structure dialog, select SDKs under the Platform Settings section, click
, and choose Add Python SDK from disk... from the popup menu.

The following actions depend on whether you want to generate a new virtual environment or to use an existing one.
- New Hatch environment

Select Hatch from the list of environment types.
IntelliJ IDEA will detect a Hatch installation.
If IntelliJ IDEA did not detect the installation automatically, specify the location of the Hatch executable, or click
to browse for it.
Select an environment.
Hatch environments are workspaces designed for various project-specific tasks. If no environment is explicitly selected, Hatch will use the default environment.
Select the base interpreter from the list, or click
and find the Python executable in your file system.
- Existing Hatch environment

Select Hatch from the list of environment types.
IntelliJ IDEA will detect a Hatch installation.
If IntelliJ IDEA did not detect the installation automatically, specify the location of the Hatch executable, or click
to browse for it.
Select the environment from the list.
Click OK to complete the task.
For more information, refer to the PyCharm documentation.
Configure remote Python interpreters
To configure a remote Python interpreter:
Configure a WSL interpreter
Click the Windows button in the lower-left corner of the screen and start typing
System Information. To ensure that your system works well with WSL, upgrade your Windows to the latest available version.Install the Windows Subsystem for Linux and initialize your Linux distribution as described in the WSL Installation Guide.
If your Linux distribution doesn't come with rsync, you need to install it:
sudo apt install rsyncsudo pacman -S rsyncNavigate to or press Ctrl+Alt+Shift+S.
In the Project Structure dialog, select SDKs under the Platform Settings section, click
, and choose Add Python SDK from disk... from the popup menu.

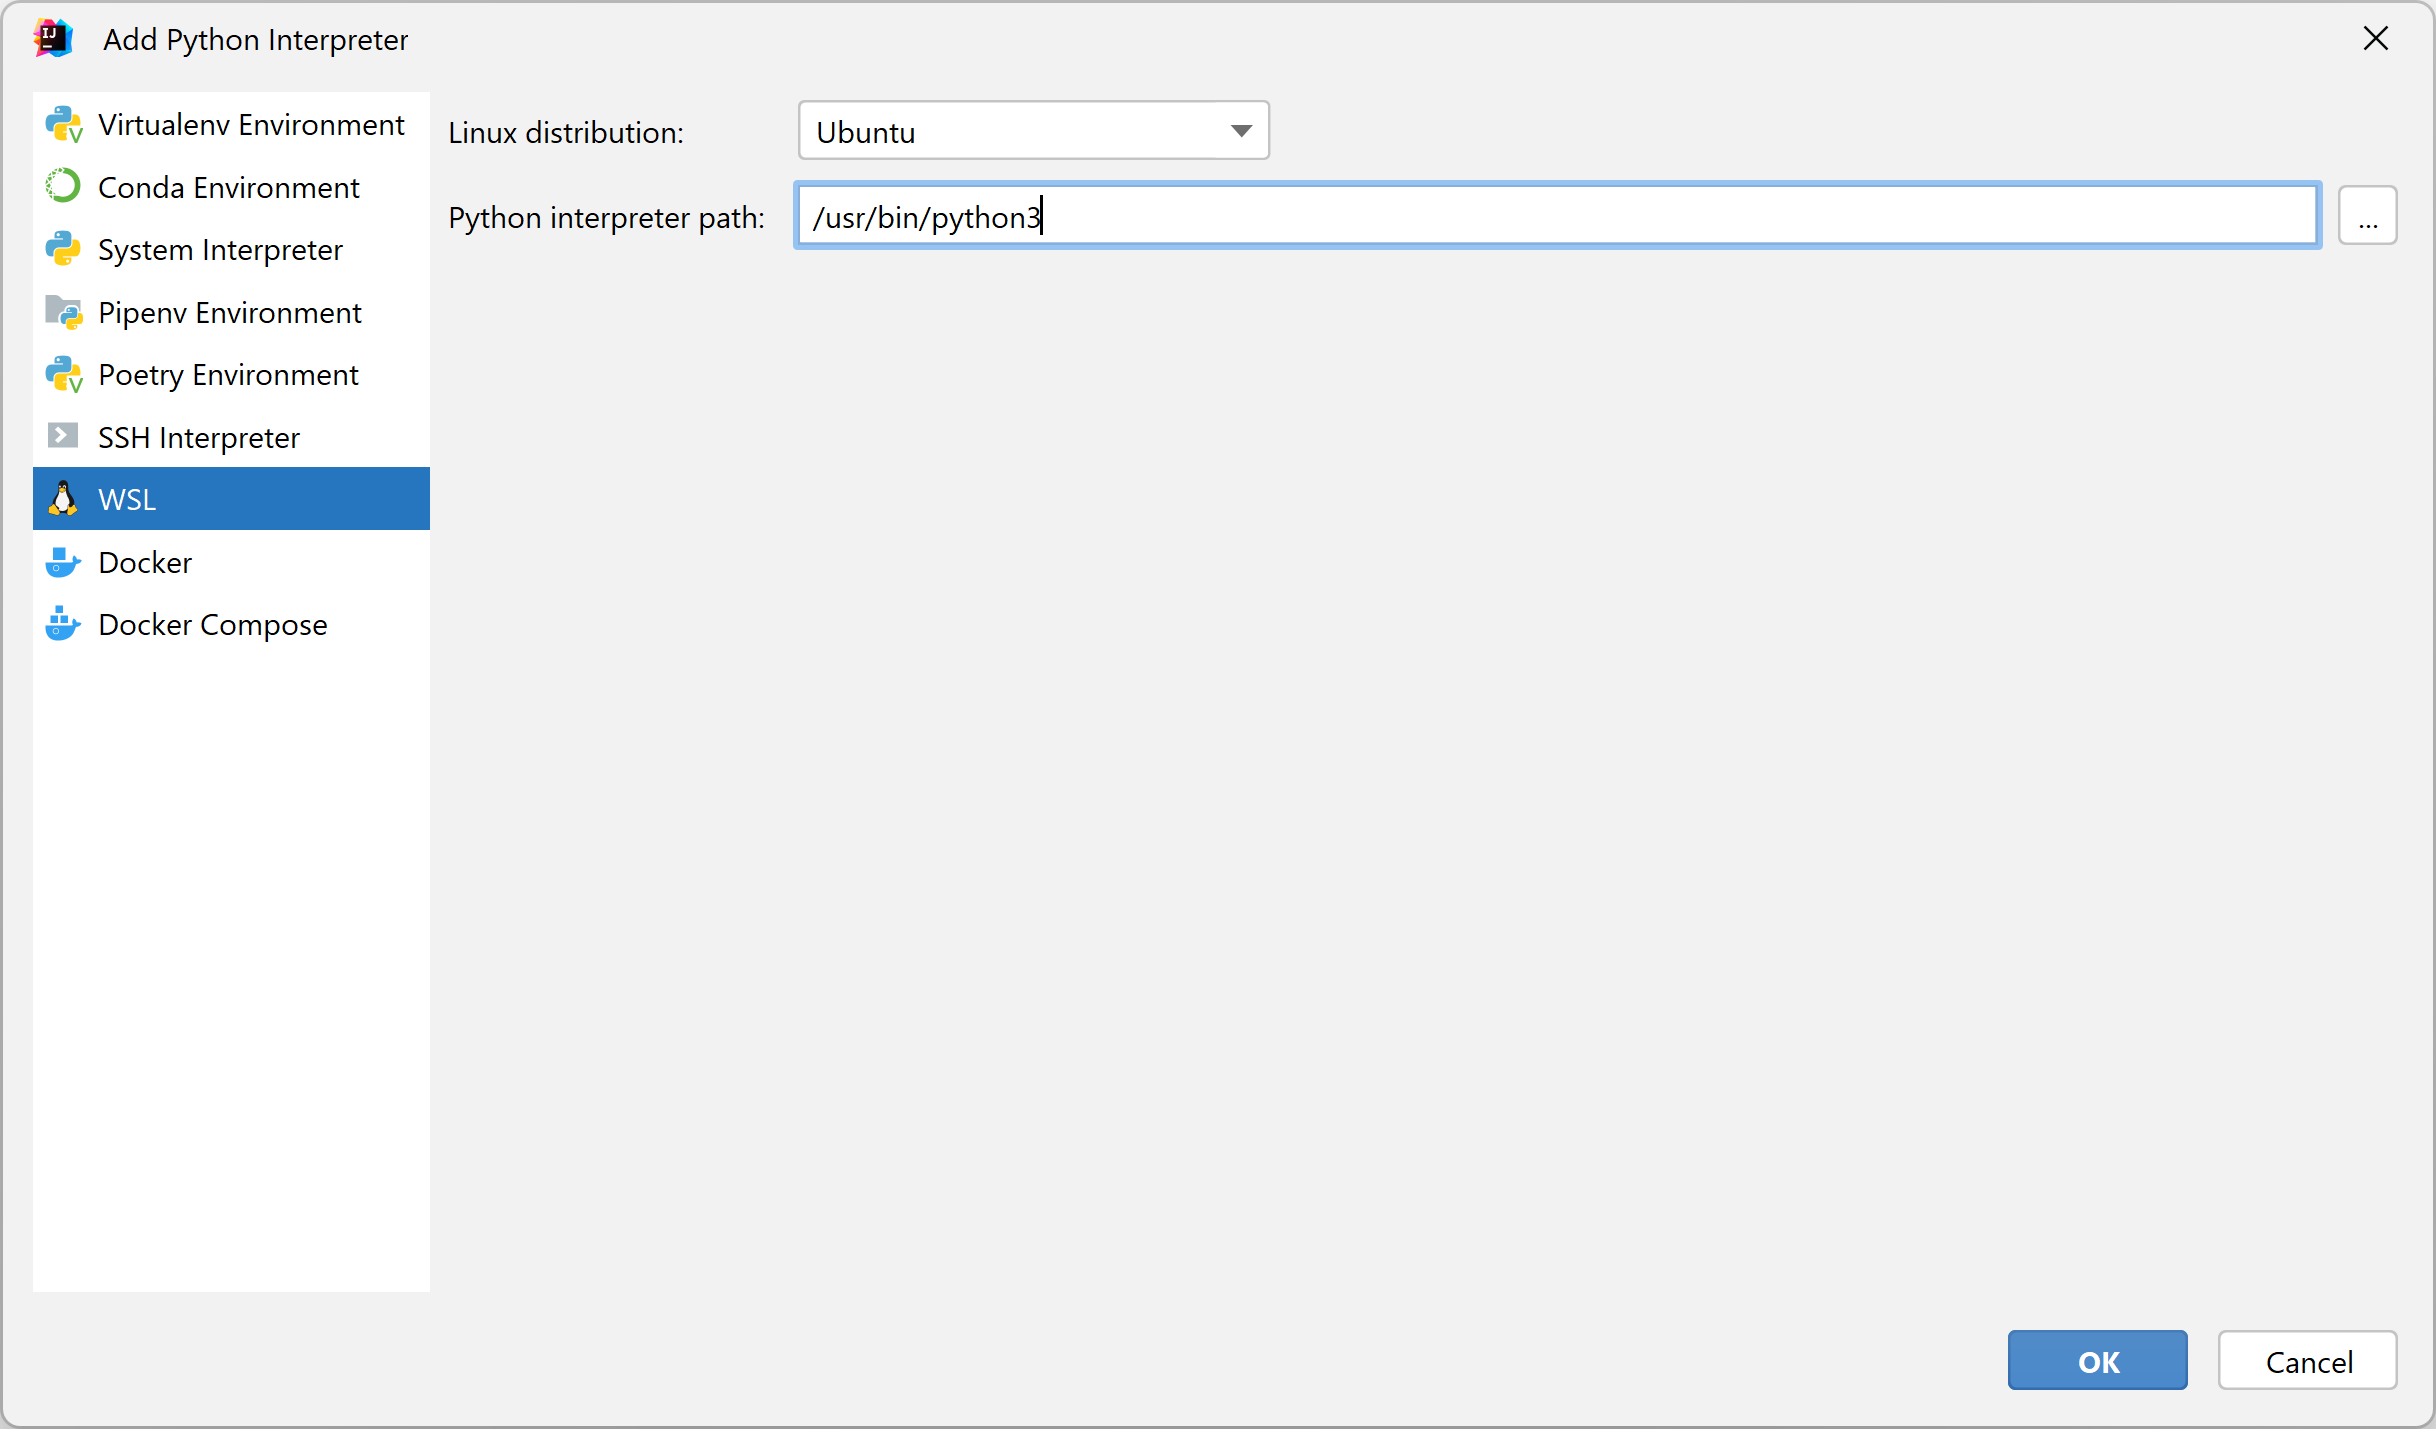
Select WSL from the list of environment types.
Select the Linux distribution with the required Python interpreter.
In Python interpreter path field, specify the path to the Python executable. You can accept the default, type in a different path, or click
to browse.
Click OK.
The configured remote interpreter is added to the list.
Configure an interpreter using SSH
Ensure that there is an SSH server running on a remote host, since IntelliJ IDEA runs remote interpreters via ssh-sessions.
Navigate to or press Ctrl+Alt+Shift+S.
In the Project Structure dialog, select SDKs under the Platform Settings section, click
, and choose Add Python SDK from disk... from the popup menu.

Select New server configuration, then specify server information (host, port, and username).
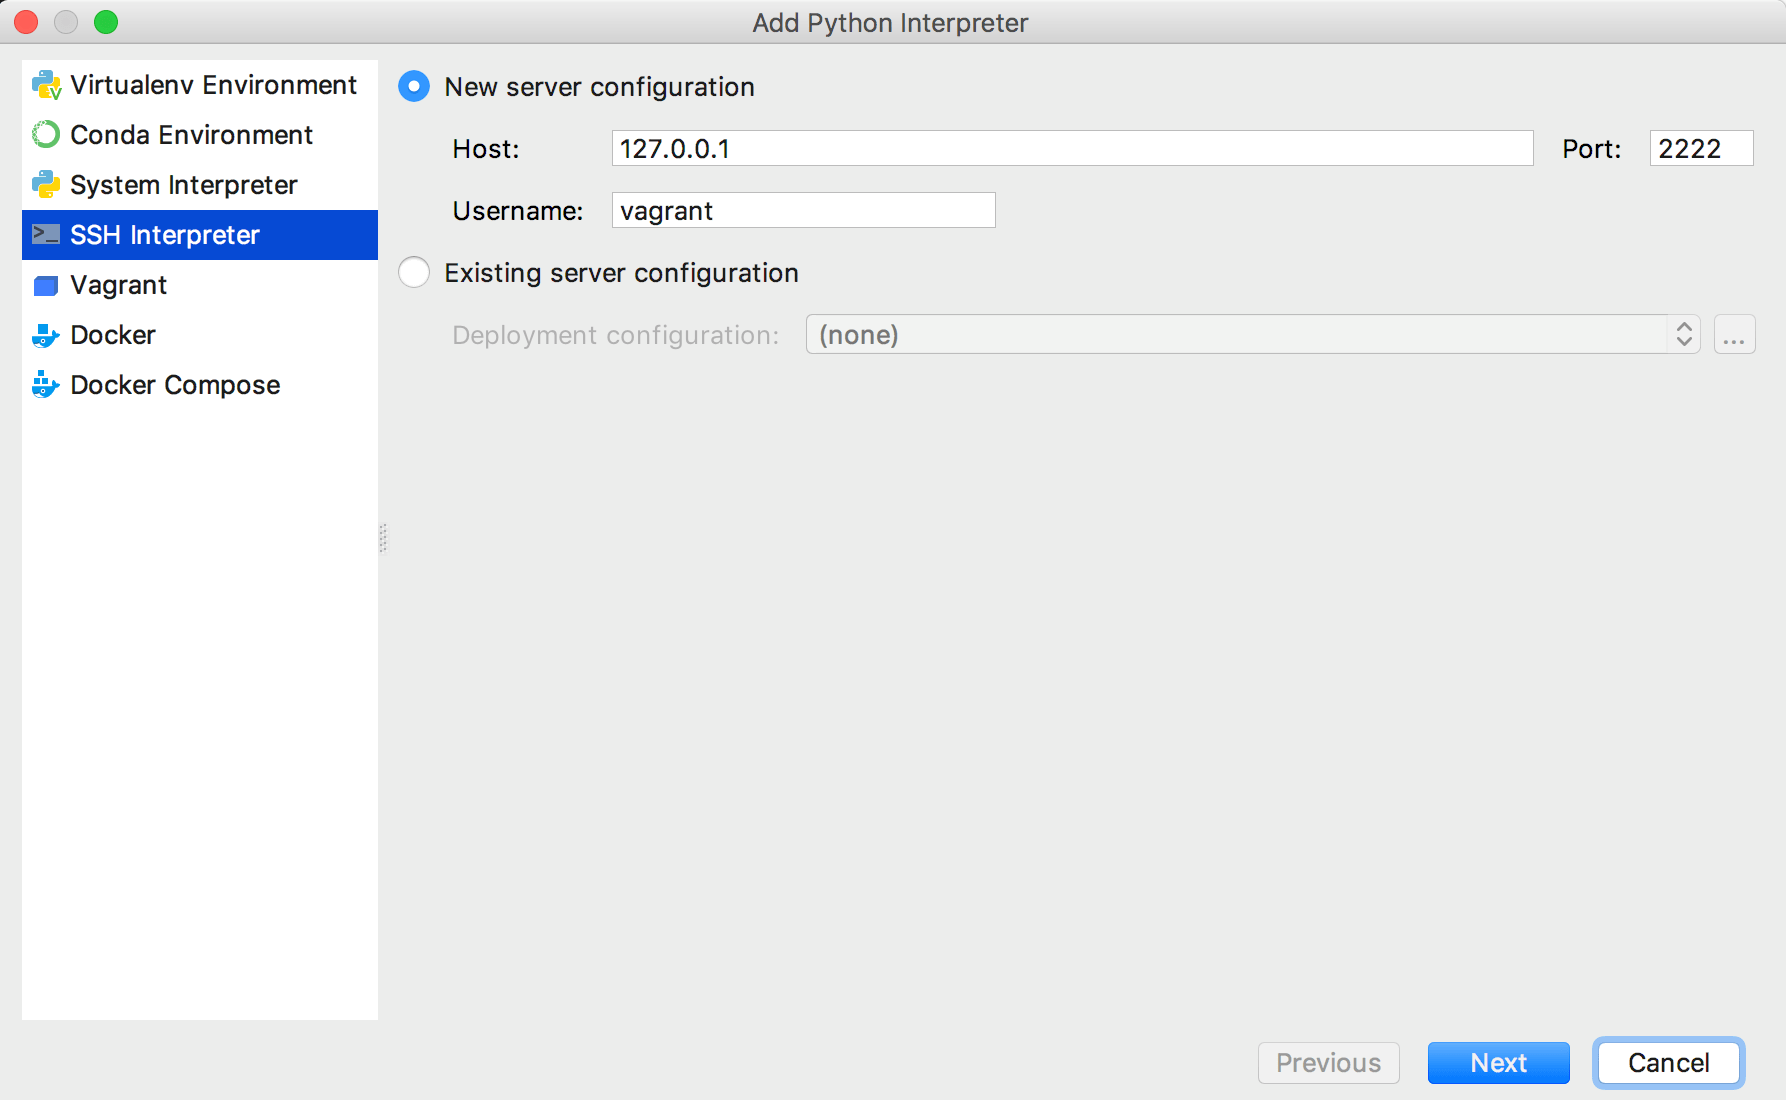
Alternatively, you can select Existing server configuration and choose any available deployment configuration from the list.

If needed, click
to review the Connection settings, Mappings, and Excluded paths for the selected deployment configuration. Click Next to continue configuring an interpreter.
In the next dialog window, provide the authentication details to connect to the target server.
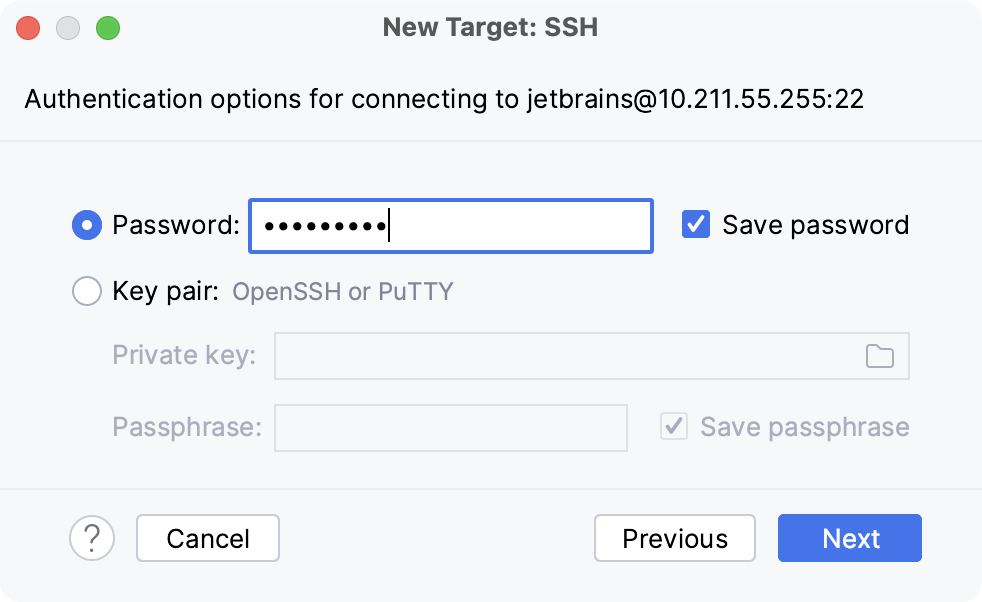
Select Password or Key pair (OpenSSH or PuTTY) and enter your password or passphrase. If Key pair (OpenSSH or PuTTY) is selected, specify:
Private key: location of the file with a private key
Passphrase: similar to a password, it serves to encrypt the private key.
Click Next to proceed.
In the next dialog window, verify the path to the desired Python interpreter. You can accept the default, or specify a different one. You have to configure the path mappings between your local project and the server. To do that, click
next to the Sync folders field and enter the path to the local project folder and the path to the folder on the remote server.
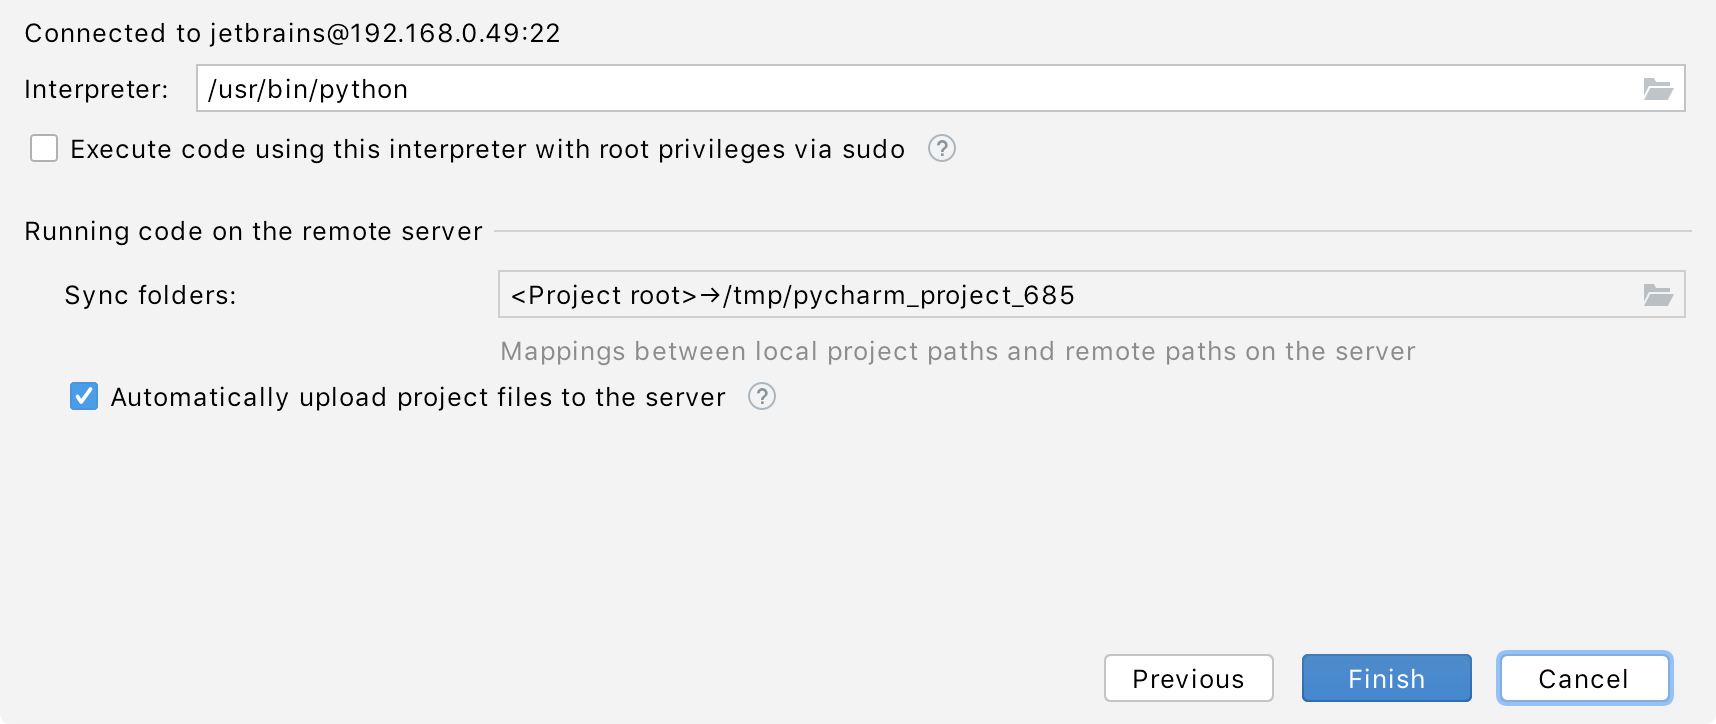
You can also select the checkbox to enable automatic upload of the local changes to the remote server.
Click OK.
The configured remote interpreter is added to the list.
Configure an interpreter using Docker
Make sure that the following prerequisites are met:
Docker is installed, as described in the Docker documentation.
You have stable Internet connection, so that IntelliJ IDEA can download and run
busybox:latest(the latest version of the BusyBox Docker Official Image). Once you have successfully configured an interpreter using Docker, you can go offline.
Navigate to or press Ctrl+Alt+Shift+S.
In the Project Structure dialog, select SDKs under the Platform Settings section, click
, and choose Add Python SDK from disk... from the popup menu.

Select Docker from the list of environment types.
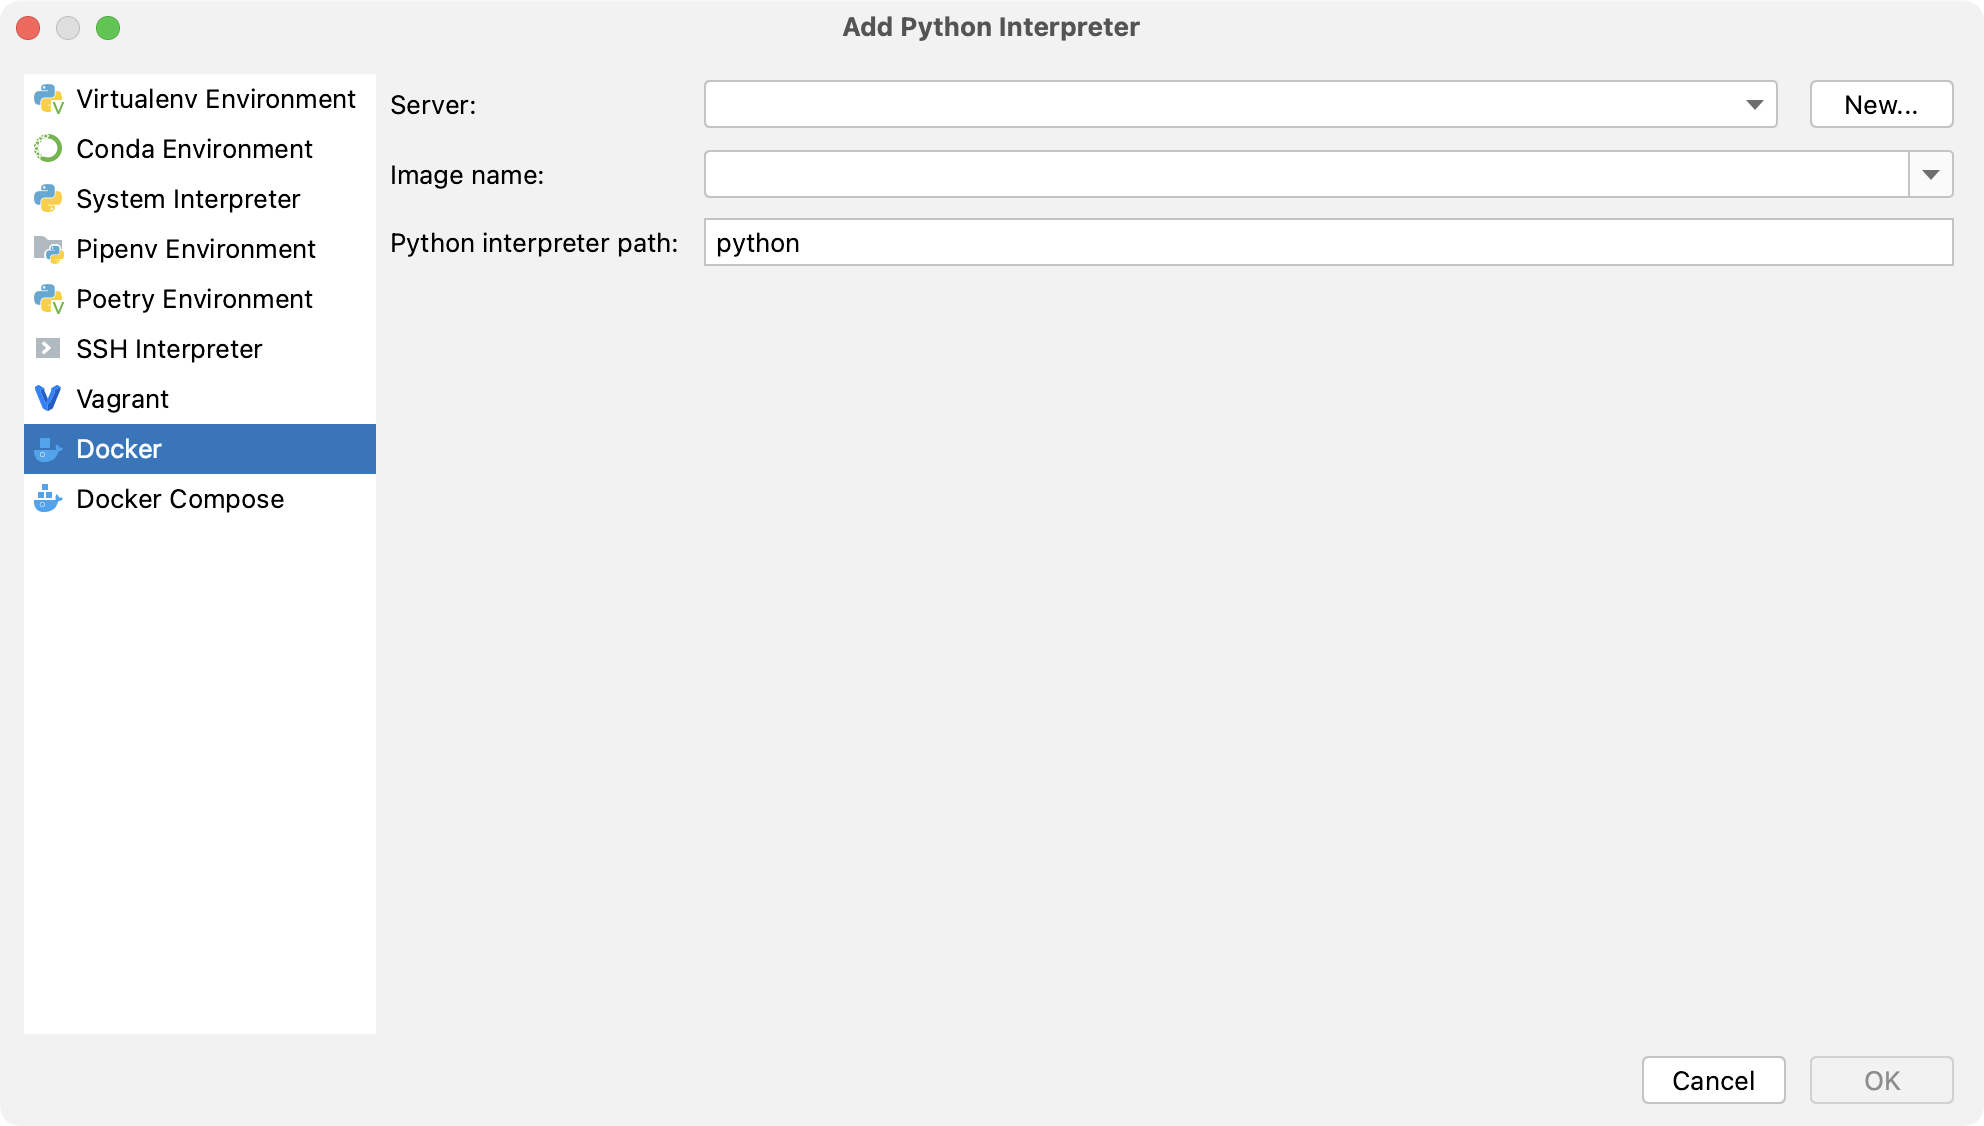
Select an existing Docker configuration in the Docker server dropdown.
Alternatively, click New and perform the following steps to create a new Docker configuration:
- Create a Docker configuration
Click
to add a Docker configuration and specify how to connect to the Docker daemon.
The connection settings depend on your Docker version and operating system. For more information, refer to Docker connection settings.
The Connection successful message should appear at the bottom of the dialog.

For more information about mapping local paths to the virtual machine running the Docker daemon when using Docker on Windows or macOS, refer to Virtual machine path mappings for Windows and macOS hosts. You will not be able to use volumes and bind mounts for directories outside of the mapped local path.
This table is not available on a Linux host, where Docker runs natively and you can mount any directory to the container.
Specify the image and the path to the Python executable:
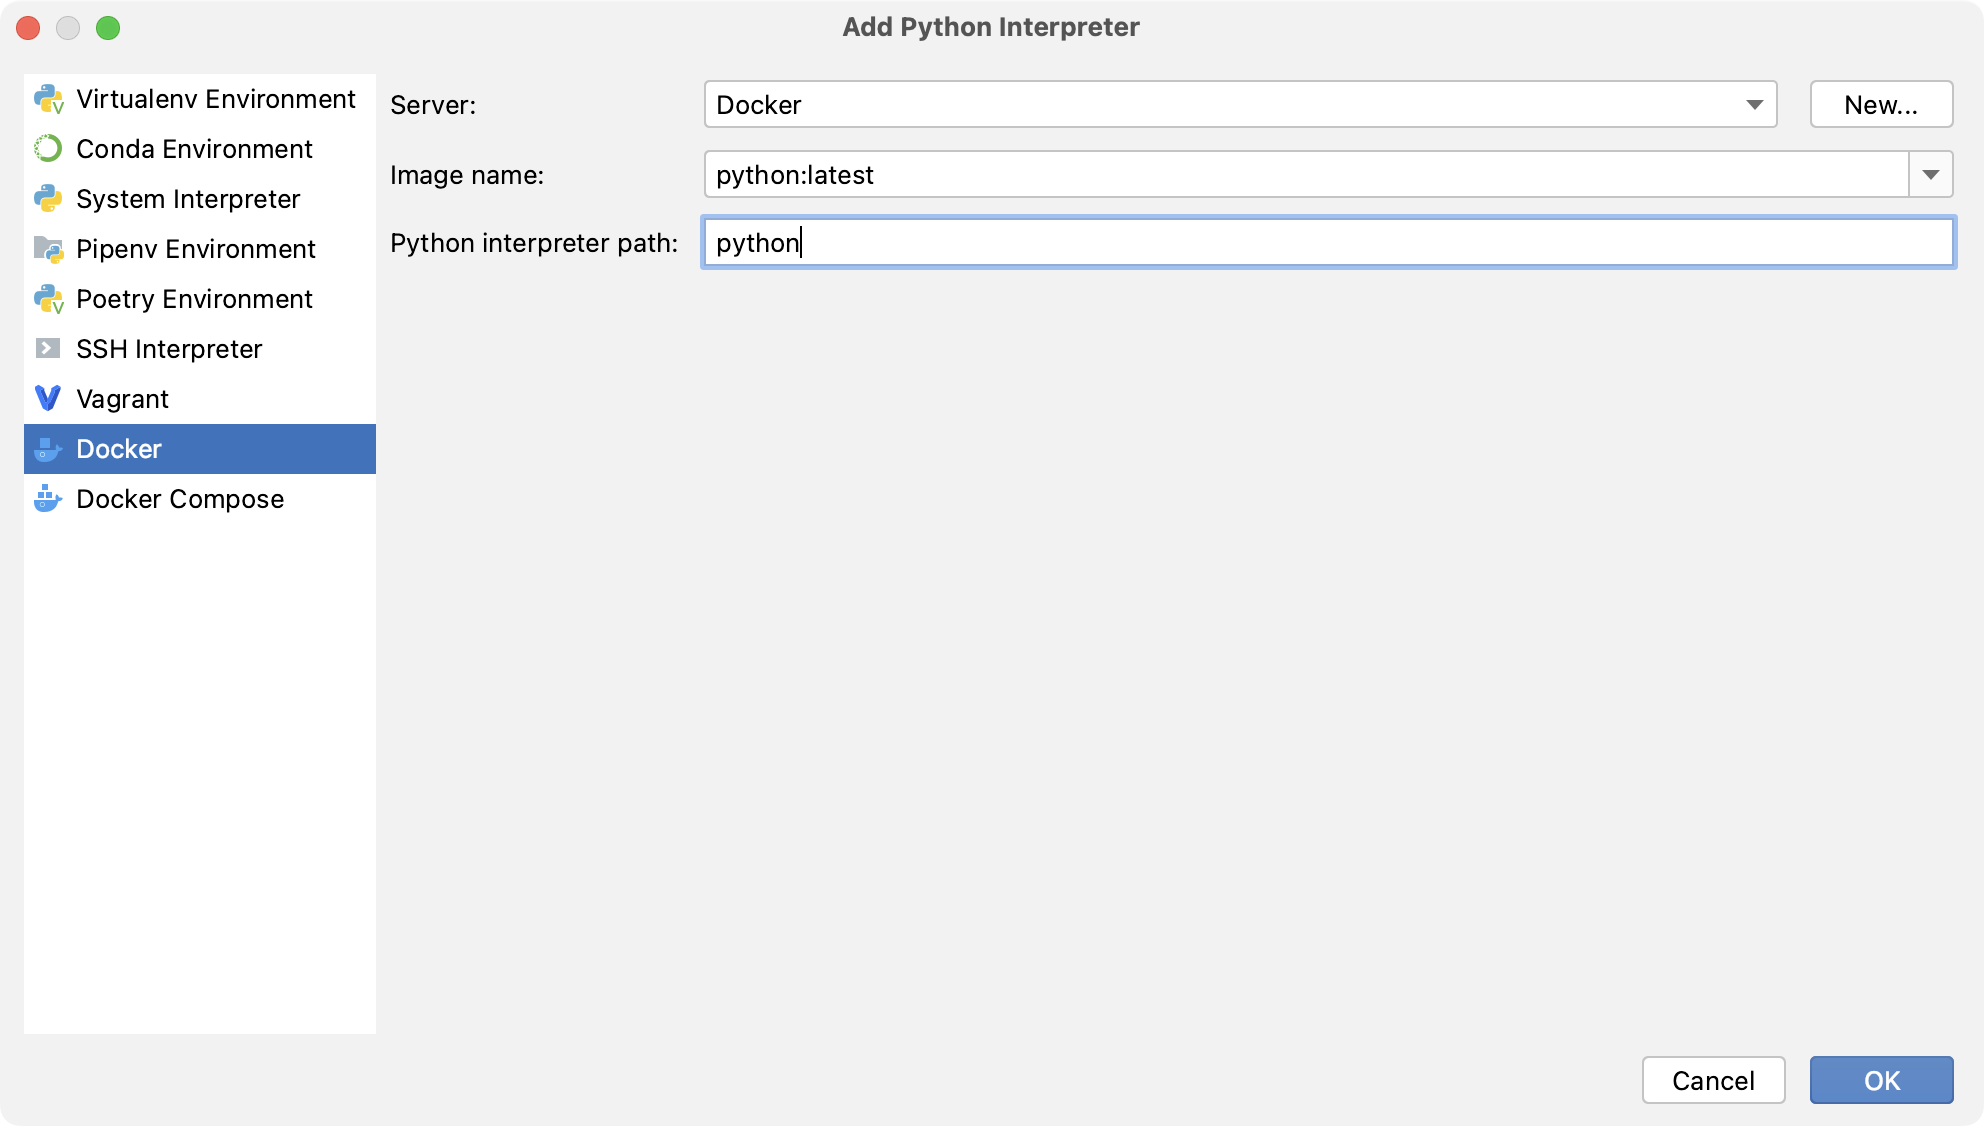
Click OK.
The configured remote interpreter is added to the list.
Configure an interpreter using Docker Compose
Make sure that the following prerequisites are met:
Docker is installed, as described in the Docker documentation.
You have stable Internet connection, so that IntelliJ IDEA can download and run
busybox:latest(the latest version of the BusyBox Docker Official Image). Once you have successfully configured an interpreter using Docker, you can go offline.
Navigate to or press Ctrl+Alt+Shift+S.
In the Project Structure dialog, select SDKs under the Platform Settings section, click
, and choose Add Python SDK from disk... from the popup menu.

Select Docker Compose from the list of environment types.
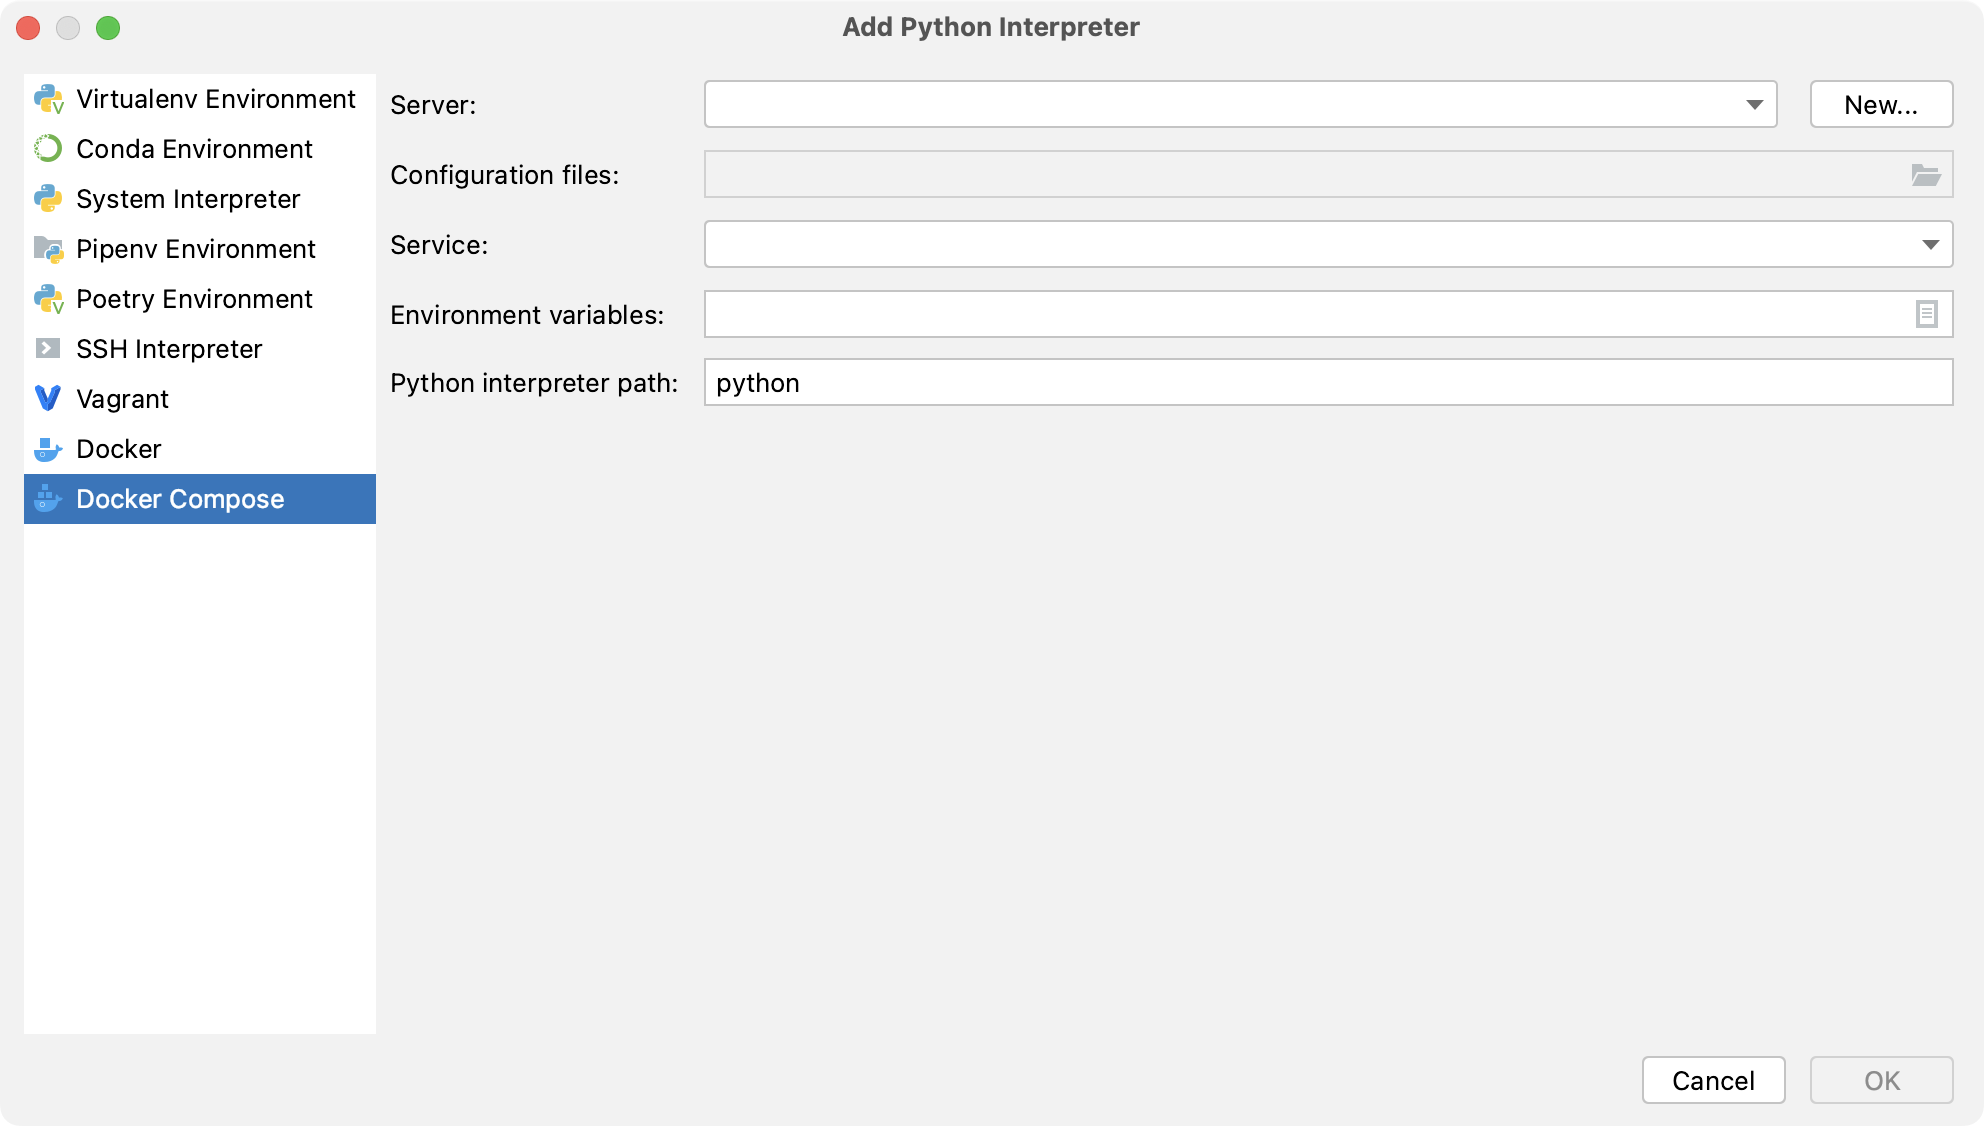
Select Docker configuration in the Server dropdown.
Specify the docker-compose.yml file in Configuration files and select the service.
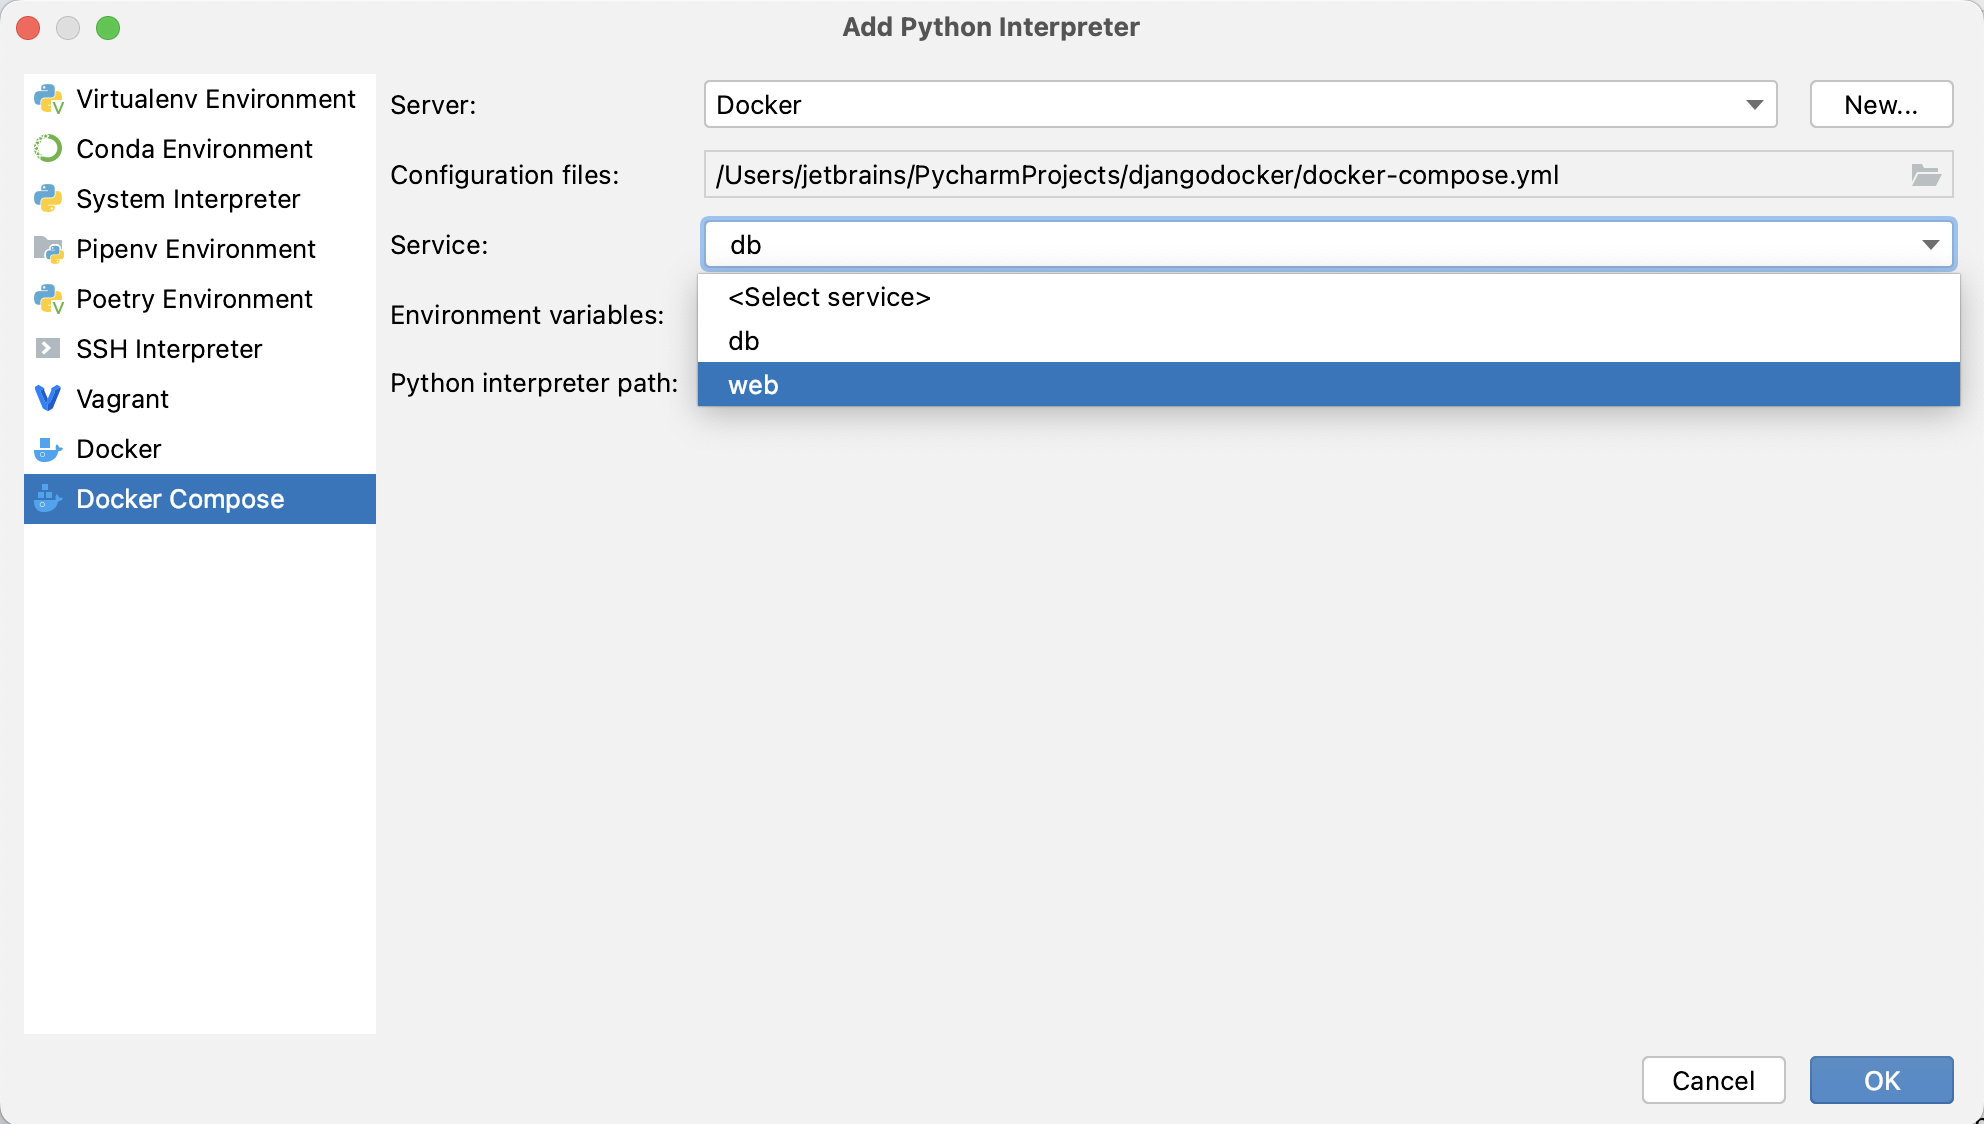
Optionally, specify environment variables and edit the Compose project name.
Finally, specify the path to the Python executable:
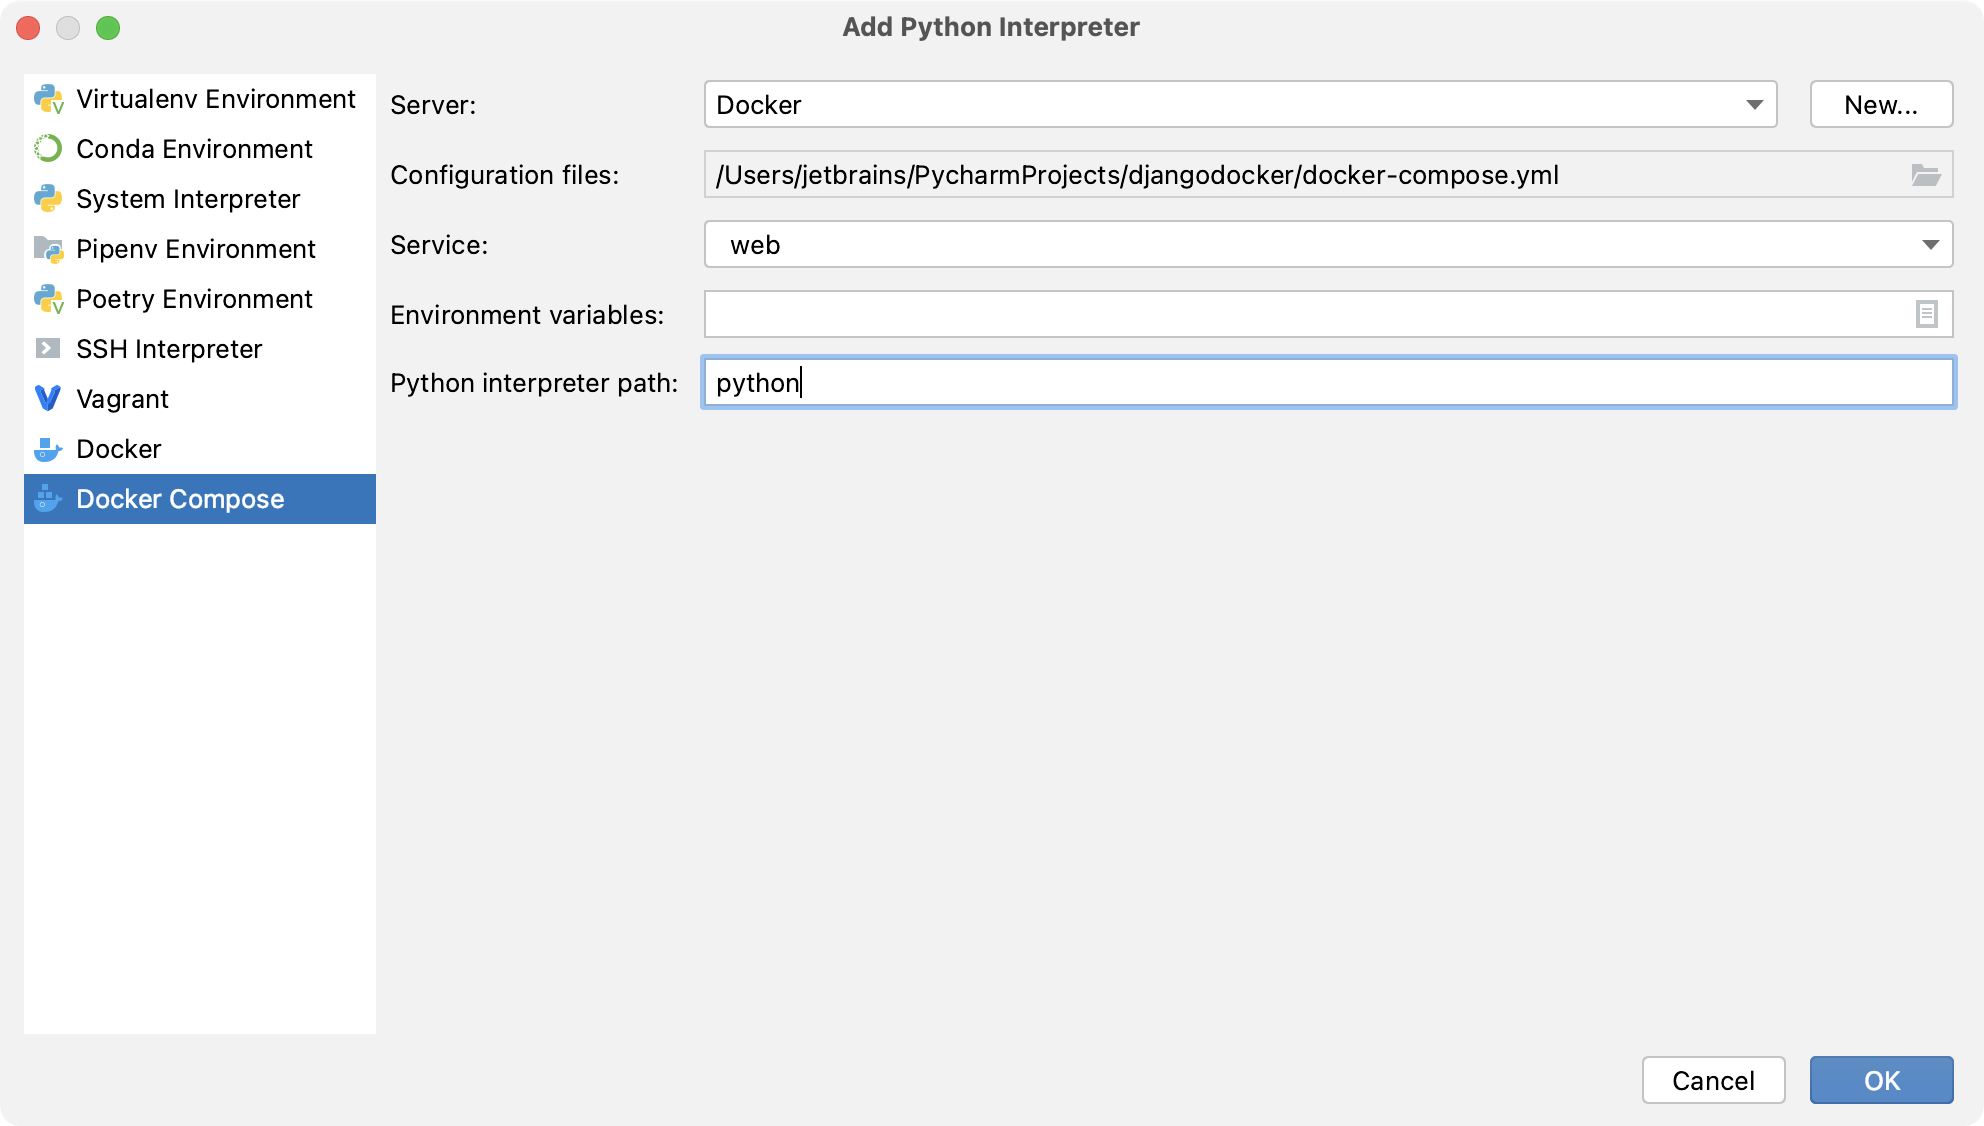
Click OK.
The configured remote interpreter is added to the list.
For more information about remote Python interpreters, refer to the PyCharm documentation.
Remove Python interpreters
If you no longer need a Python interpreter for a project, you can remove it from the project settings.
Navigate to or press Ctrl+Alt+Shift+S.
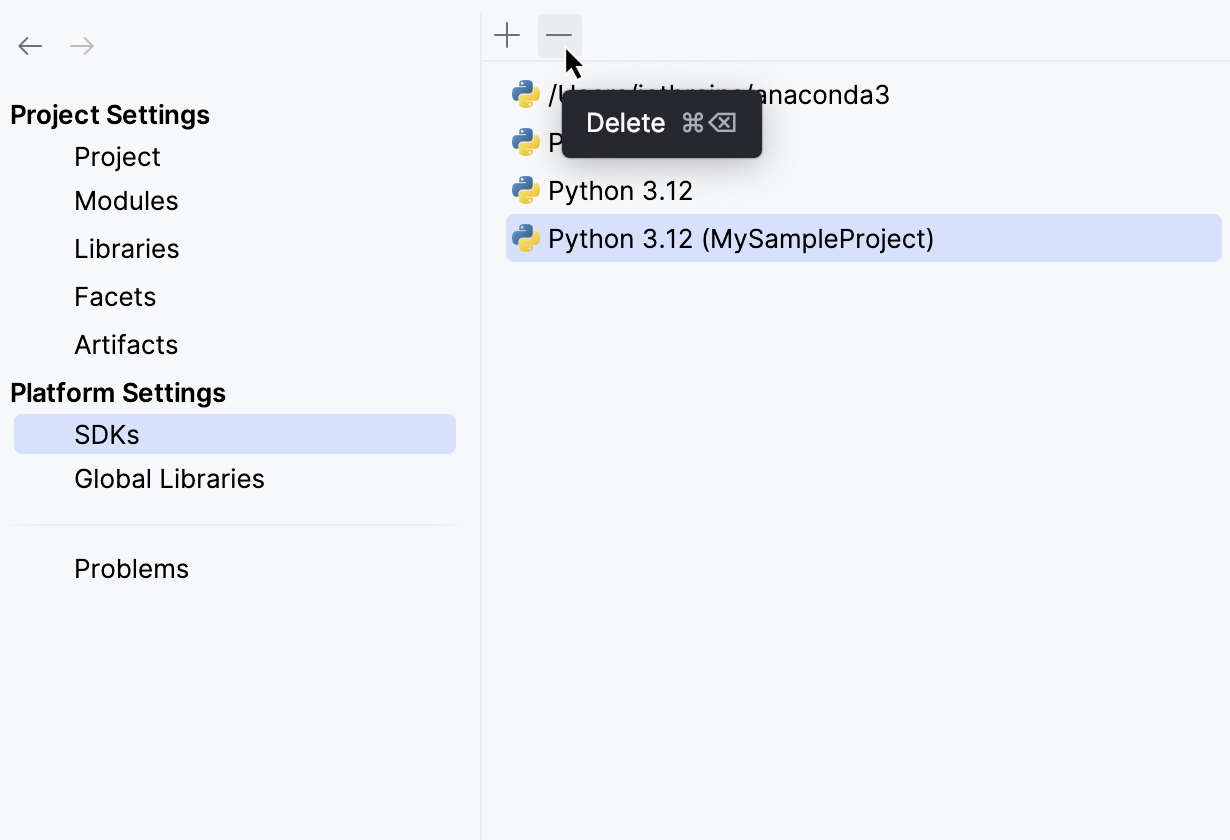
In the Project Structure dialog, click SDKs node under Platform Settings.
Choose the interpreter that you want to remove and click
.
Manage interpreter paths
IntelliJ IDEA makes it possible to add paths to the selected interpreter. These paths will be added to the environment variable PYTHONPATH. IntelliJ IDEA will index these paths and resolve the objects of the code (for example, imports of packages).
View interpreter paths
Navigate to or press Ctrl+Alt+Shift+S.
In the Project Structure dialog, click SDKs node under Platform Settings.
Select the interpreter.
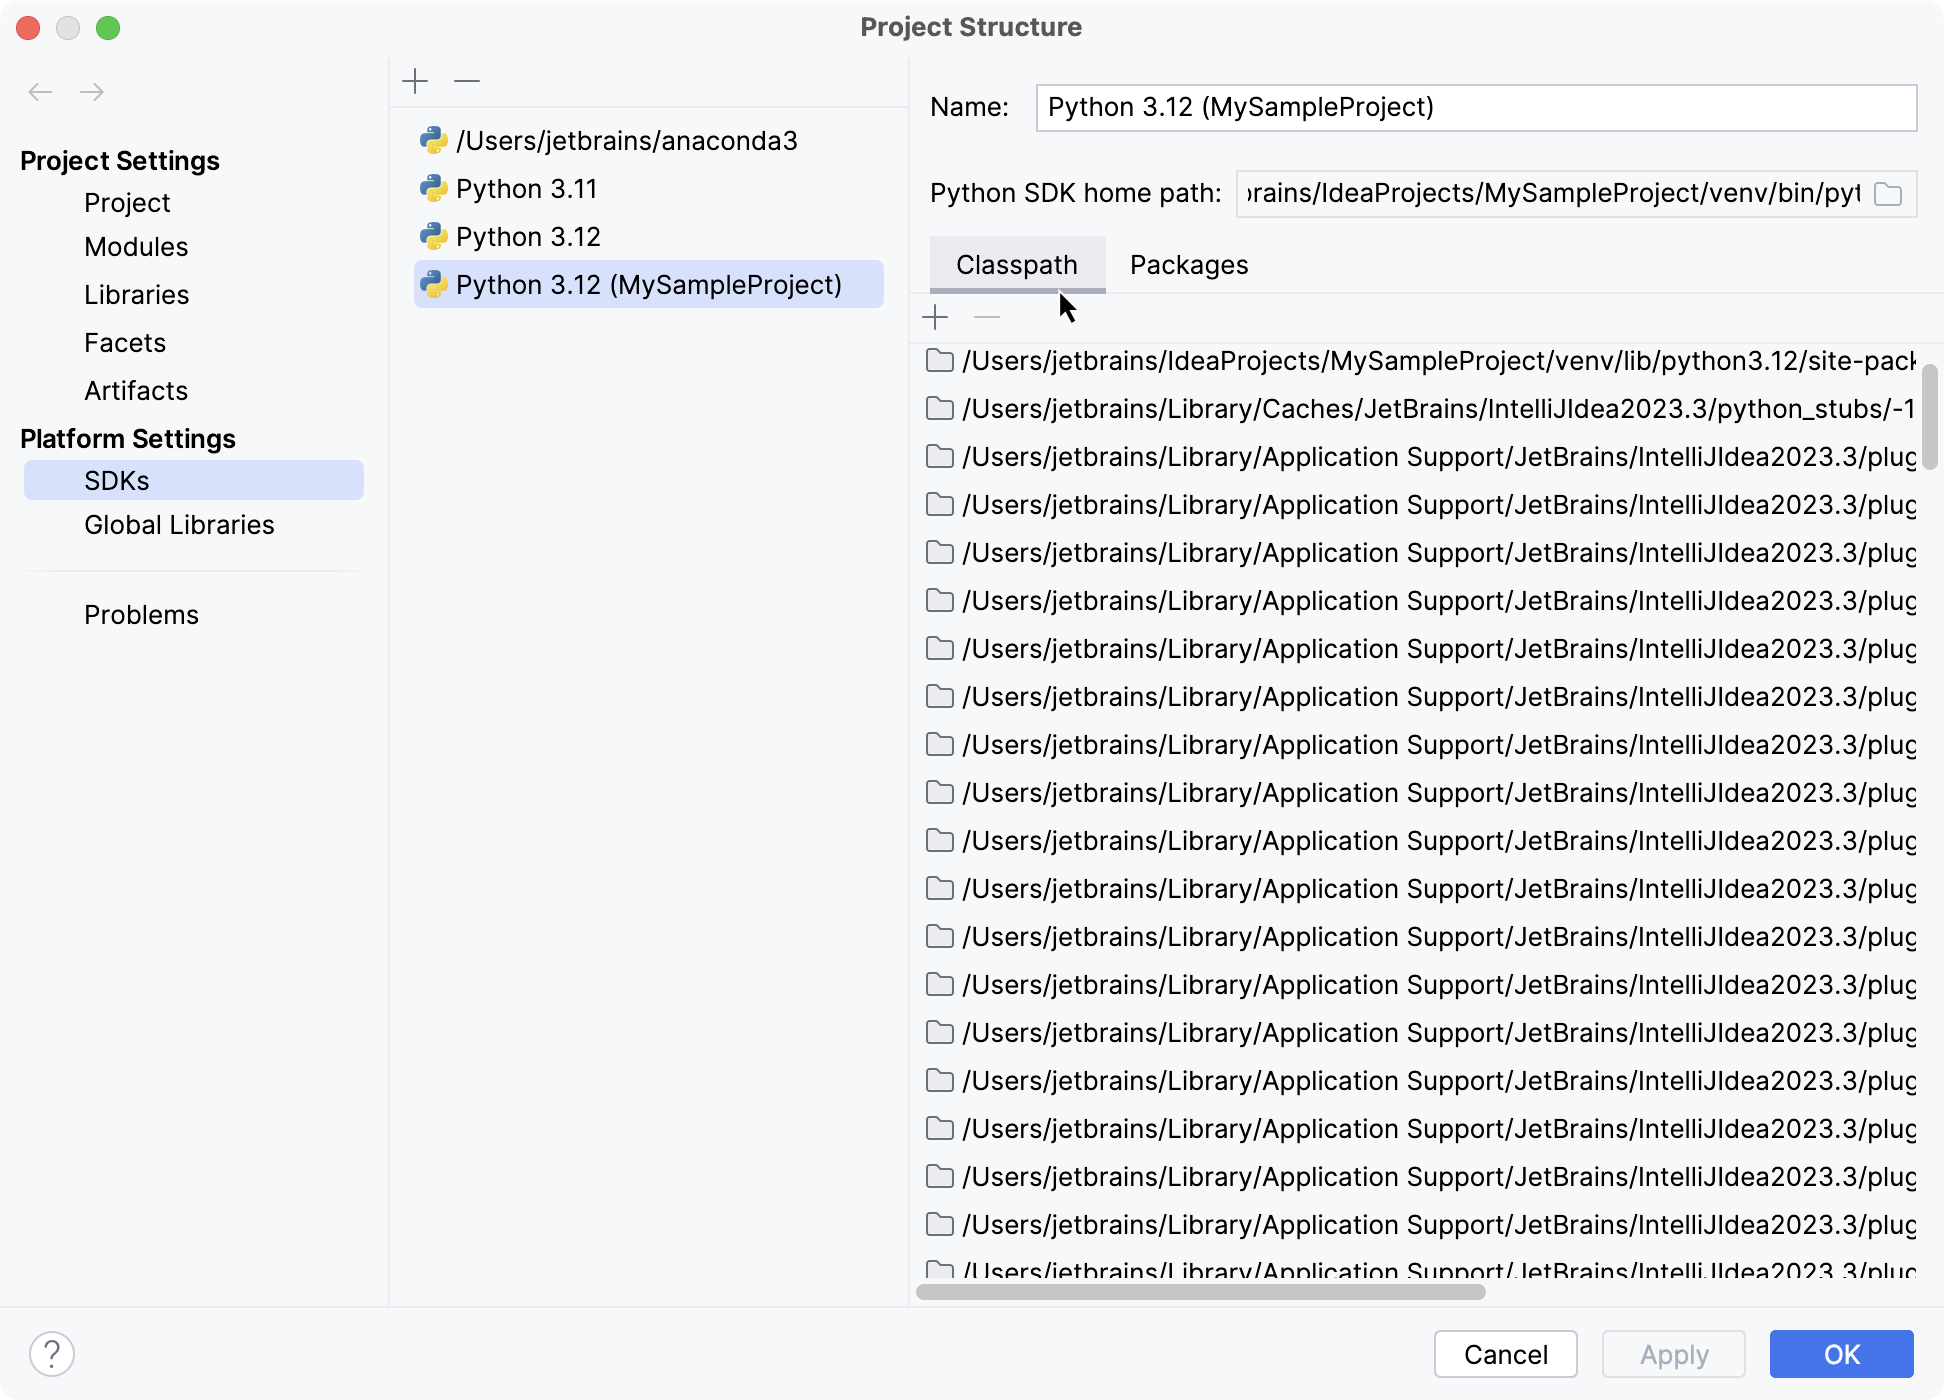
View the interpreter paths in the Classpath tab:
Add an interpreter path
In the Classpath tab, click
.
Specify the path in the dialog that opens. Note that to add a path to a particular Python version you need to download it from https://www.python.org/ and install it on your machine.
Delete interpreter paths
Select the paths to be deleted in the Classpath tab.
Click
.