OpenAPI
An OpenAPI Specification (OAS) is a description format for REST APIs. Swagger is a set of tools based on this specification for writing, documenting, and consuming REST APIs. For more information, refer to Swagger documentation.
IntelliJ IDEA provides coding assistance for OpenAPI definitions in YAML and JSON files, and integration with Swagger Codegen for generating server stubs, client libraries (SDKs), and documentation based on your OpenAPI specification.
You can use the Endpoints tool window to see all endpoints defined in your OpenAPI specifications.

Additionally, you can create HTTP requests to defined endpoints right from an OpenAPI Specification and execute them via the built-in HTTP Client.
Create an OpenAPI specification
IntelliJ IDEA recognizes a dedicated OpenAPI Specification file type with relevant coding assistance. These are regular YAML or JSON files with the definition of the OpenAPI specification version.
Create an OpenAPI Specification manually
In the Project tool window, press Alt+Insert and select OpenAPI Specification from the context menu.
Specify a name for the file and select the specification version and file format.

In an OpenAPI specification opened in the editor, use the ![]() gutter icons to quickly add specification sections.
gutter icons to quickly add specification sections.
You can disable the ![]() gutter icon in the IDE settings, under using the Gutter icons for quick specification edits checkbox.
gutter icon in the IDE settings, under using the Gutter icons for quick specification edits checkbox.
Depending on the format and version, the new OpenAPI specification file contains the following template:
If you start with an empty YAML or JSON file, you can type opnp or swag and press Tab to insert the corresponding live template.
Generate an OpenAPI Specification based on URL mapping
If you have a REST controller with URL mapping in your source code, you can quickly generate an OpenAPI Specification from the controller code.
Click
 next to a controller path.
Select Generate OpenAPI draft.

The generated file is saved under .
The action is also available in the Endpoints tool window where you can also generate an OpenAPI specification for the entire module.
Reference a definition from a separate file
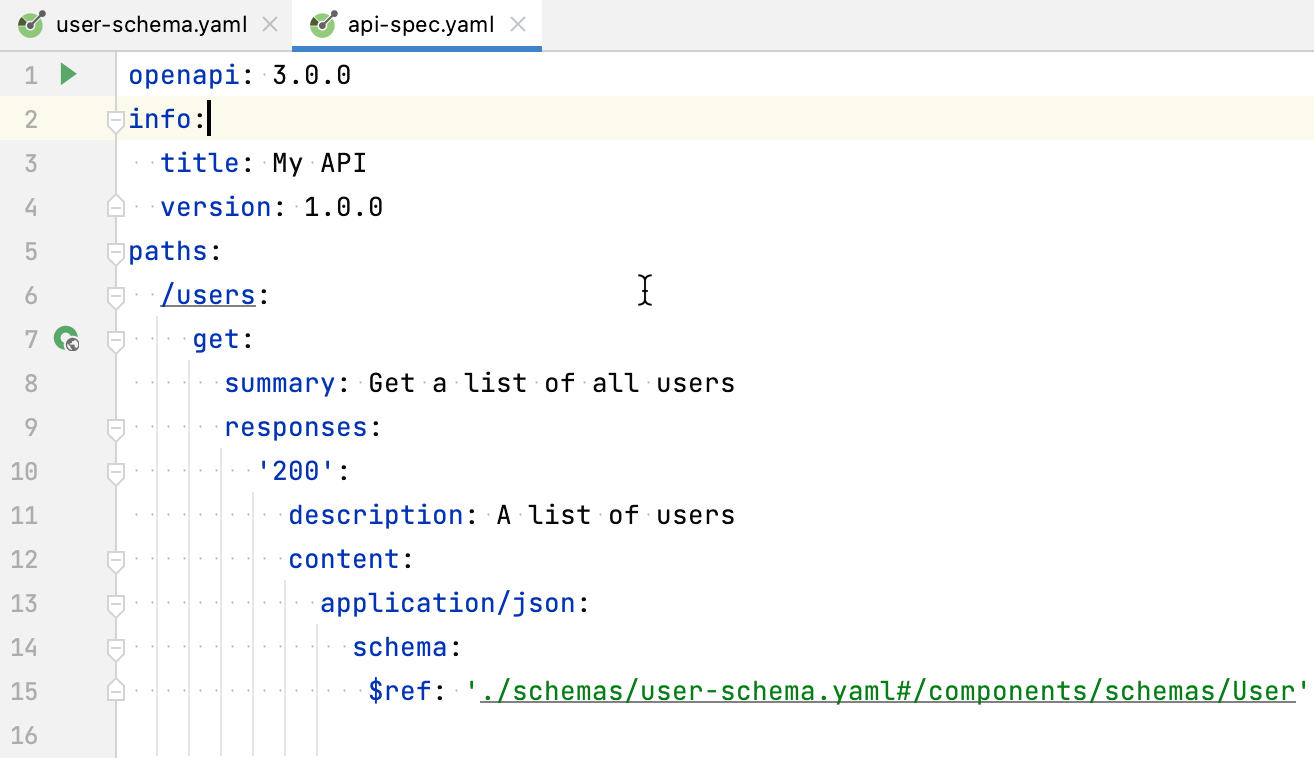
With OpenAPI 3.0, you can reference a definition hosted on any location using the $ref keyword. IntelliJ IDEA provides you with path completion, validation, and quick navigation. For completion, IntelliJ IDEA understands the context of the current file and of external files, and suggests using pointers to relevant elements.
Enter the
$refkeyword.Start typing the path to the external definition.
You can press Ctrl+B to quickly navigate to the file and element you refer to.
Preview an OpenAPI specification
You can preview an OpenAPI specification using the integrated Swagger UI or Redoc UI. When an OpenAPI specification file is opened in the editor, use ![]() and
and ![]() in the top-right corner to show or hide the preview.
in the top-right corner to show or hide the preview.
To switch between Swagger UI and Redoc UI, hover over the preview area and click ![]() .
.


Split editor and preview horizontally
By default, the editor and the preview are split vertically (side by side), which is convenient for wide monitors. You can also split it horizontally, so that the preview is displayed in the lower part of the editor, which is more convenient for portrait displays.
In the top-right corner of the editor, click
 to open the Editor Preview pane.
Click
 to split the editor and the preview horizontally.
Add a remote OpenAPI specification
Endpoint URLs that you define in OpenAPI specifications in your project are available for code completion. If you are writing client code for an external specification, there is no need to add it as a file to your project for auto-completing endpoint URLs. You can add a link to the relevant remote specification.
In the Settings dialog (Ctrl+Alt+S) , select .
Click
 in the Remote Specifications list and specify the URL of an OpenAPI specification file or find an OpenAPI specification on SwaggerHub.

Use ![]() to reload specifications that were modified.
to reload specifications that were modified.
To add private OpenAPI specifications, provide your API key.
To add OpenAPI specifications from a self-hosted SwaggerHub On-Premise instance, specify the URL of your instance.
Compare OpenAPI specifications
When there is a newer specification version, you probably want to compare it against the older version to make sure that they are compatible. One way is to look at the diff Ctrl+D and compare lines that changed. However, not all changes are critical for compatibility. IntelliJ IDEA can compare the structure of OpenAPI specifications and create a summary of changed paths, parameters, responses, and any other elements that may break the compatibility.
In the Project tool window, select two OpenAPI specification files, right-click them and select Compare OpenAPI Specifications.
This generates a Markdown file with a summary of modified specification elements. The file opens in the editor with a preview panel that makes it easy to navigate the changes. It shows the changes in the file that you selected second compared to the first one.
Generate code from an OpenAPI specification
When you have a valid OpenAPI specification open, IntelliJ IDEA suggests generating code from it:

Click ![]() in the gutter and select Run 'openapi file'. IntelliJ IDEA generates source code files in the specified location and shows a notification with options to open the files or import them into your project as a separate module.
in the gutter and select Run 'openapi file'. IntelliJ IDEA generates source code files in the specified location and shows a notification with options to open the files or import them into your project as a separate module.
Swagger Codegen run configuration
IntelliJ IDEA creates a OpenAPI/Swagger Code Generator run configuration when you run code generation for the first time for a particular file. To modify the run configuration, open and select the necessary configuration, or click ![]() in the gutter and select Modify Run Configuration.
in the gutter and select Modify Run Configuration.
You can configure the following common options at the top of the OpenAPI/Swagger Code Generator run configuration:
General parameteres
Item | Description |
|---|---|
Name | Specify a name for the run configuration to quickly identify it among others when editing or running. |
Store as project file | Save the file with the run configuration settings to share it with other team members. The default location is .idea/runConfigurations. However, if you do not want to share the .idea directory, you can save the configuration to any other directory within the project. By default, it is disabled, and IntelliJ IDEA stores run configuration settings in .idea/workspace.xml. |
Code Generation Settings
Item | Description |
|---|---|
Output Directory | Path to the directory for the generated files. |
Code Generator | Type of code generator:
|
Language | The target language of the generated code. |
Modify options
If some of the settings are hidden, click Modify options to show them.
Item | Description |
|---|---|
Specification Path | Path to the OpenAPI specification. |
JRE | Java runtime to use for running Swagger Codegen |
Custom Templates Path | Path to a directory with your Mustache templates. |
Generation Parameters
Provide configuration parameters depending on the target language. For more information, refer to the swagger-codegen/README.md.
Test your OpenAPI specification in the HTTP client
When working with OpenAPI Specification files, you can create HTTP requests to the specified endpoints and execute them via the built-in HTTP client.
Create an HTTP request to an endpoint
In an OpenAPI specification file, click
 in the editor gutter next to the endpoint definition.
Alternatively, open , right-click an endpoint, and select Generate Request in HTTP Client.
IntelliJ IDEA will create a new HTTP request and save it in the generated-requests.http scratch file.
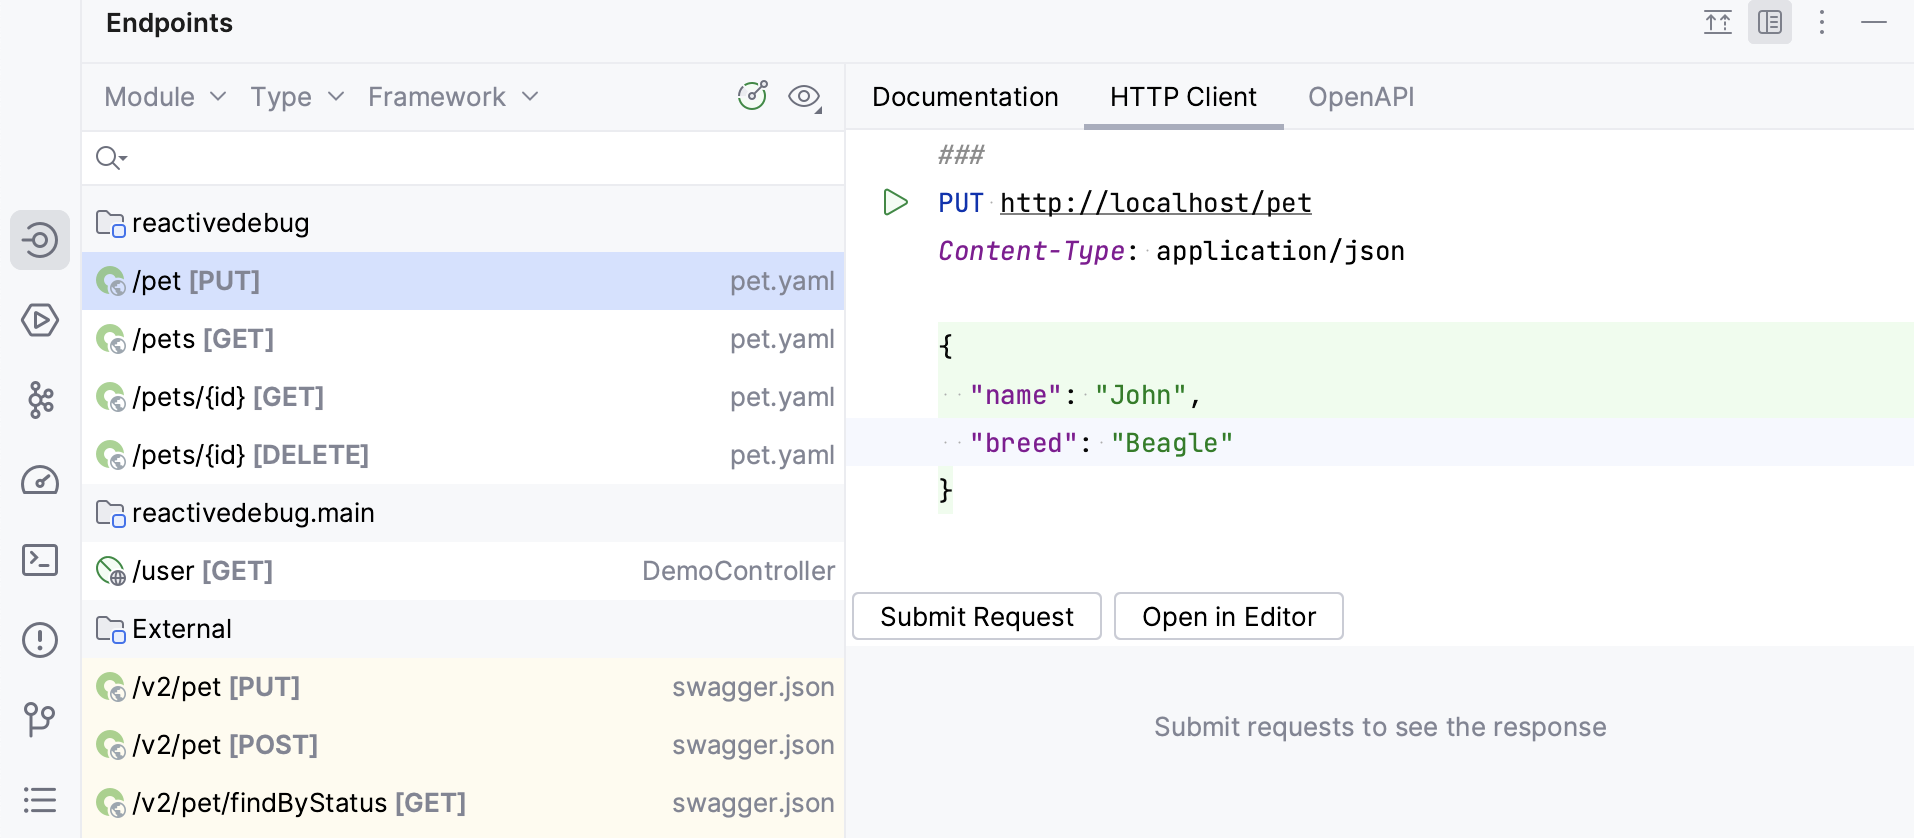
If you want to quickly send a request to an endpoint and do not want to save it, you can use the HTTP Client tab in the Endpoints tool window.
IntelliJ IDEA provides completion for the request URL and for the request body (in JSON format) based on the available OpenAPI specifications. This applies not only to local, but also to remote specifications (add them in the IDE settings to enable completion).
Rename an endpoint and its usages
Use the Rename refactoring to rename the defined endpoint and its usages in HTTP requests simultaneously.
Do any of the following:
In an OpenAPI specification file, place the caret at the endpoint's definition you want to rename.
In an HTTP request file, place the caret at the URL path segment you want to rename.
Select from the main menu or the context menu, or press Shift+F6.
In the Rename dialog that opens, specify the new endpoint's name.
Preview and apply changes.
IntelliJ IDEA will rename the endpoint and its usages.