CocoaPods
AppCode comes with the support for CocoaPods — a dependency manager for Swift and Objective-C projects. In AppCode, you can easily install and update pods and create and edit a Podfile.
See how to use CocoaPods in a project in the Use CocoaPods in your project tutorial.
Before you start
To be able to work with CocoaPods, you need to specify the path to the Ruby SDK and install the CocoaPods gem.
Specify the Ruby SDK
Select from the main menu. Alternatively, in the Preference dialog Ctrl+Alt+S, go to .
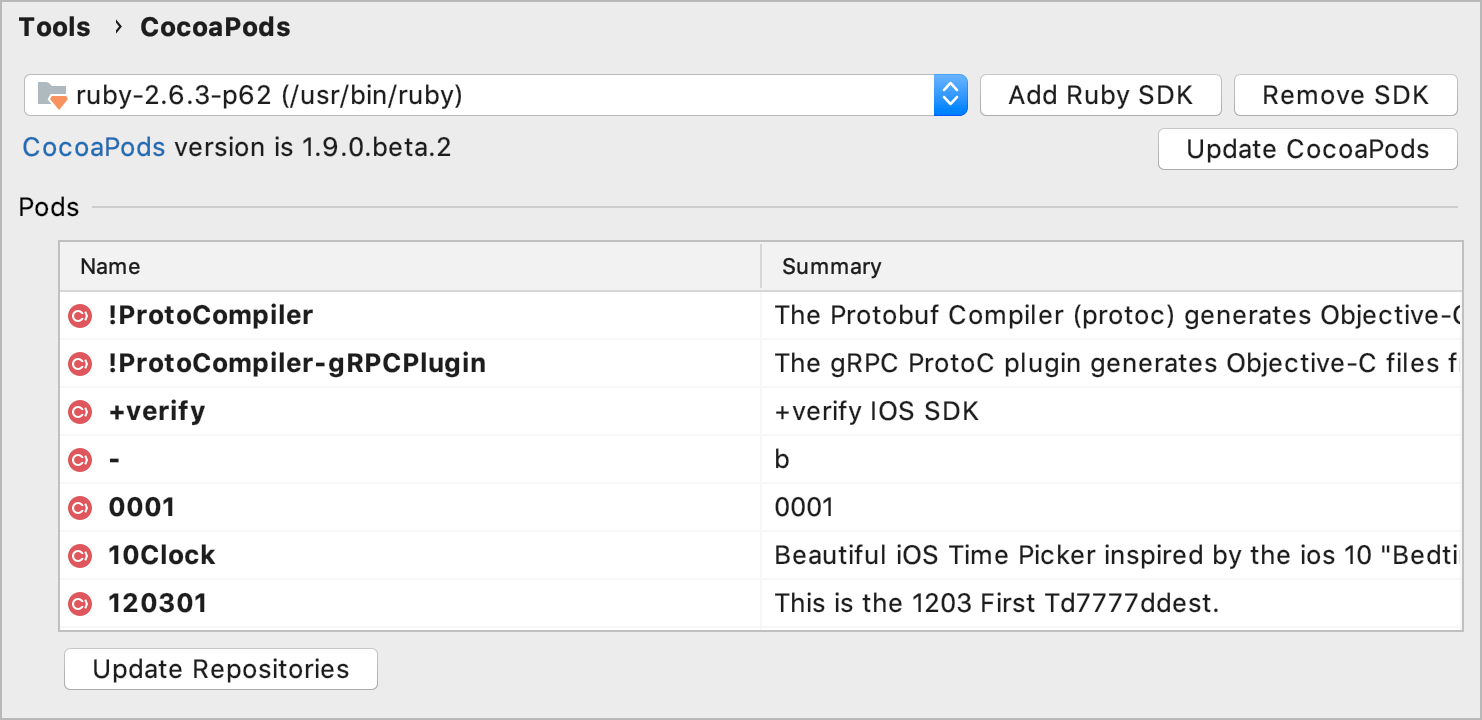
In the Preferences dialog, click Add Ruby SDK, and specify the path to the Ruby SDK that will be used with CocoaPods, by default, /usr/bin/ruby:

Install CocoaPods gem
Do one of the following:
Click Install CocoaPods in the Preferences dialog.
Select from the main menu.
After the CocoaPods gem is installed, the list of pods is displayed on the page of the Preferences dialog:

Install pods
Dependencies used in your project should be listed in a text file named Podfile located in the same directory with the .xcodeproj file.
Create a Podfile
If there is no Podfile in your project, you can create it in AppCode:
From the main menu, select Tools | CocoaPods | Create CocoaPods Podfile.
AppCode will create a Podfile with initial content in the Xcode project directory.
Edit a Podfile
To open the existing Podfile for editing:
From the main menu, select Tools | CocoaPods | Edit Podfile.
The Podfile will be opened in the editor. You can use AppCode's code completion and inspections while editing the Podfile.
Install pods
Open the Podfile by selecting from the main menu.
Type the name of the pod(s) that you need to install under the corresponding target(s). For example:
project 'iOSConferences.xcodeproj' target 'iOSConferences' do use_frameworks! pod 'Yams' endRead more about the Podfile syntax here.
After you type the pod name, the
The pods are not installedmessage appears:
To install the pods, do one of the following:
Place the caret at the code line where you add the pod, press Alt+Enter, select Install, and press Enter.
Click Install pods in the top-left corner of the editor window.
From the main menu, select .
Podfile coding assistance
While working on a Podfile content, you can take advantage of the following coding assistance features:
Syntax highlighting and error detection.
Completion of:
key functions names (pod, target, podspec, and so on.)
pod arguments (names and versions of available pods)
target argument (names of available targets)
platform arguments (names and versions of available platforms).
On-the-fly inspections. AppCode warns you whenever it detects that:
pods defined in the Podfile but not installed
pods installed but not defined in the Podfile
installed version of the pod differs from the version described in the Podfile
unknown pods
unknown or invalid pod version in the Podfile
locally installed pod versions don't match the description in the Manifest.lock file
new version of a pod is available.