Manage Jupyter notebook servers
In PyCharm, you can execute code cells using the following server types:
Managed server – a Jupyter server that is automatically launched by PyCharm for the current project. It will be terminated when you close PyCharm.
External server – any Jupyter server that you connect to by specifying its URL and token. It can run on either your local or remote machines.
Add Managed Jupyter server
Go to
Alternatively, right-click the project directory and select from the context menu.
In the window that opens, click
Add Configuration or press Alt+Insert and select IDE-Managed Server.
For more information on configuring Managed Servers, refer to Set up a Managed Server.
Click OK if you want the newly created server to be automatically selected for your current notebook.
Add External Jupyter server
Go to
Alternatively, right-click the project directory and select from the context menu.
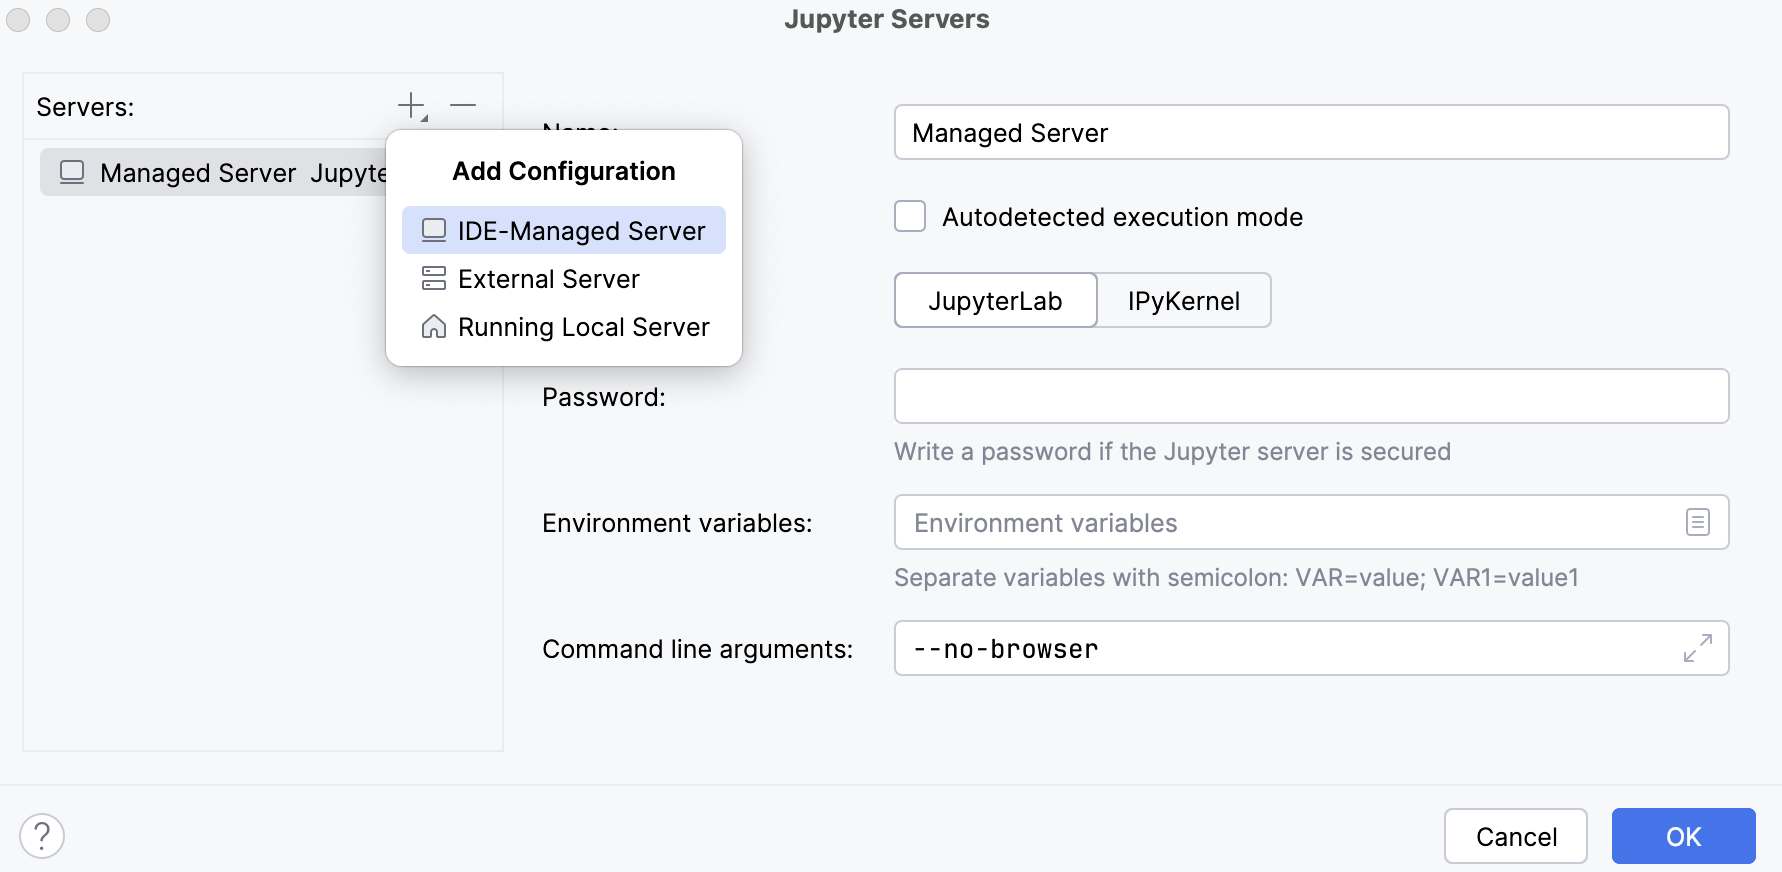
In the window that opens, click
Add Configuration or press Alt+Insert and select External Server.
For more information on configuring external servers, refer to Set up an External Server.
Click OK if you want the newly created server to be automatically selected for your current notebook.
Set up a Managed Server
Click the list of servers on the Jupyter notebook toolbar and select Configure Jupyter Server from the context menu.
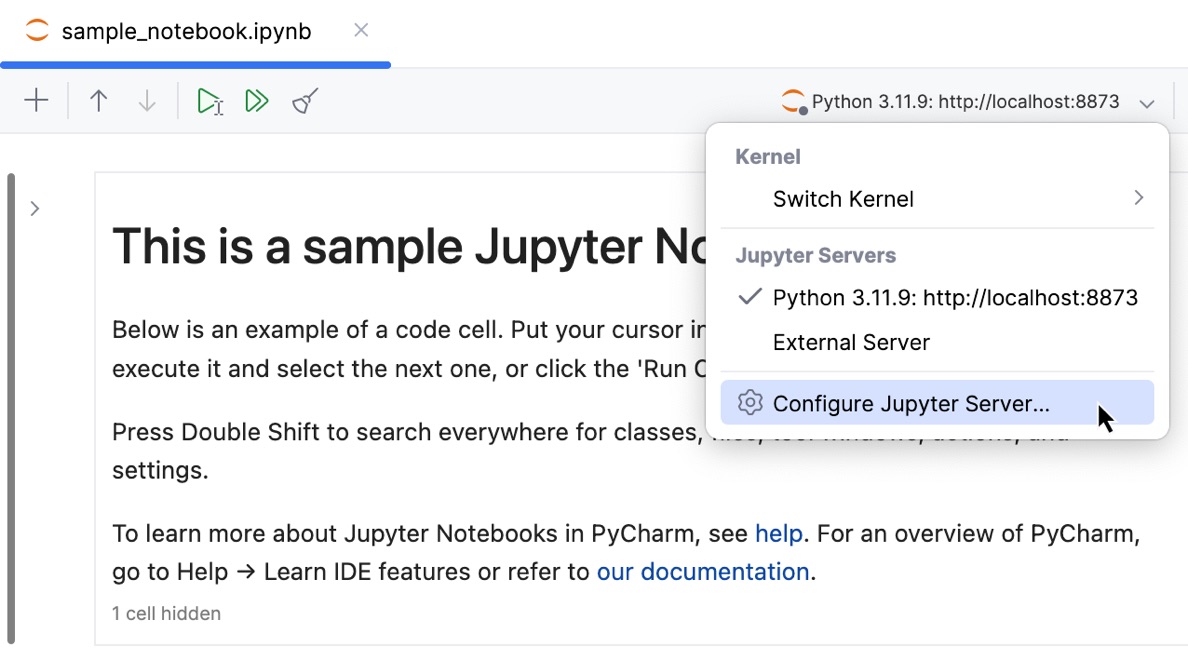
In the window that opens, select Managed Server.
Managed Server automatically selects the execution method for Jupyter Notebooks. To configure the server settings manually, clear the checkbox.
Select the Execution mode:
Set the server settings using the Command line arguments field.
Set Environment variables and assign values to them.
Jupyter servers can be secured either with a token (included in the URL) or a user-defined password. If the Jupyter server is secured with a password, enter it in the Password field.
For more information, refer to Security in the Jupyter notebook server.
IPython kernel is ready to use, and no additional setup is required.
Click OK to apply the changes and close the window.
Set up an External Server
Click the list of servers on the Jupyter notebook toolbar and select Configure Jupyter Server from the context menu.

Alternatively, right-click the server in the Project view Alt+1 and select from the context menu.
In the window that opens, choose the external server that you want to configure.
In the Name field, set the name for your external server.
In the Server URL field, specify the address to establish a connection to an external Jupyter server. The target URL should contain a server name or its address and the access token.
To automatically detect available Jupyter instances on the local machine, click Discover local servers. If a server is found, the URL and token will be filled in automatically.
Under Type, select the required server type.
Use this option to connect to a standard Jupyter Notebook or JupyterLab instance, running locally or on a remote machine.
Provide the required authentication token or password.

Use this option to connect to a JupyterHub instance.
Provide one of the following:
Your username, password, and the URL of the hub, if authentication is done by using login credentials.
Direct URL to a running Jupyter notebook server that includes the access token if token-based authentication is used.
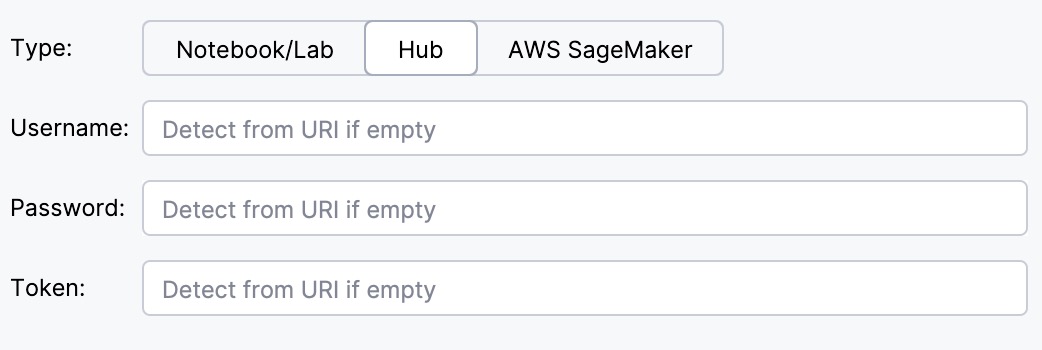
Use this option to connect to an AWS SageMaker instance or another cloud solution.
No token is required, you can use the presigned URL directly.

If the server requires a proxy connection, select the Use IDE Proxy checkbox.
Refer to the HTTP proxy page to configure the corresponding settings.
Click Test connection to verify the setup.
Click OK to apply the changes and close the window.
Manage external server files
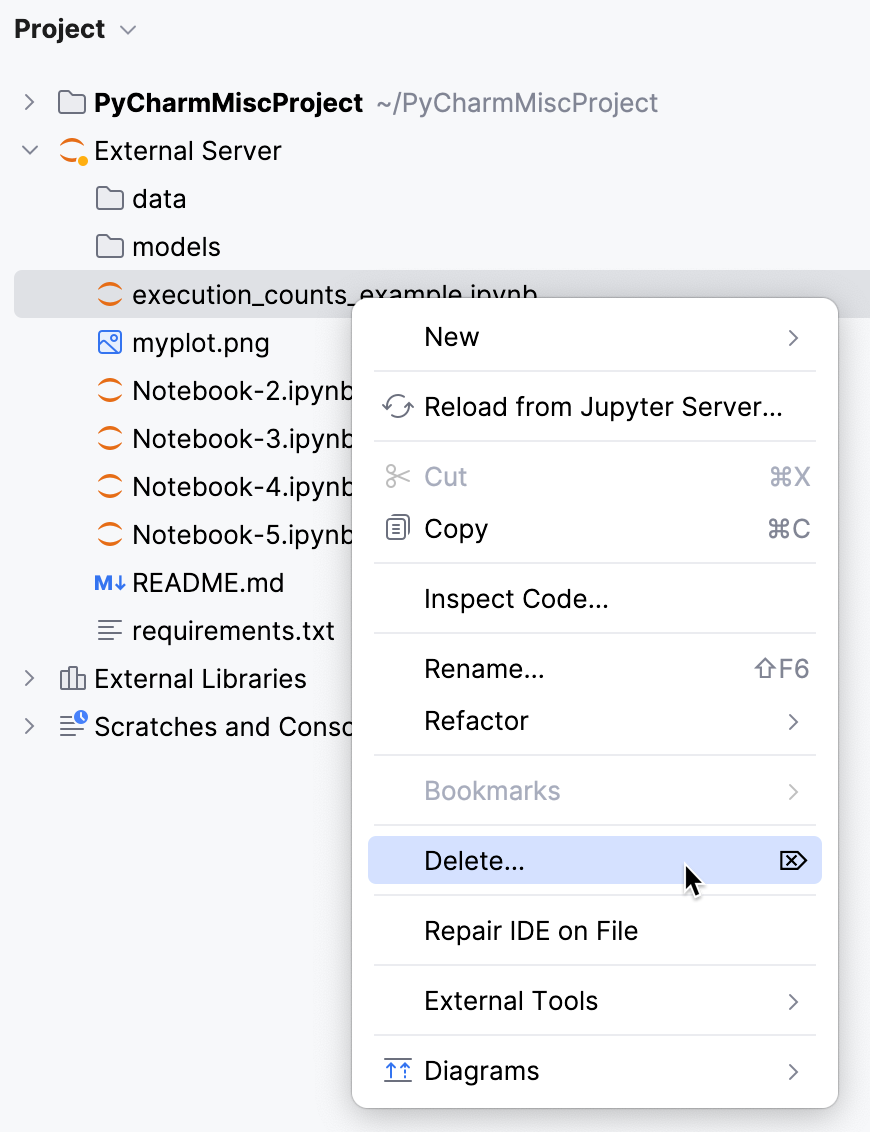
When an external Jupyter server is connected, its files appear in the Project View. You can create, open, edit, and delete files from the external Jupyter server as if they were part of your local project. For example:
To add a file, right-click the External Server directory or a package within it and select New from the context menu. Select the required file type.
For more information, refer to Create new files.

To delete a file, right-click it in the External Server directory and select Delete Delete from the context menu.
Remove a Jupyter server
Go to .
In the window that opens, select the server you want to remove and click
Remove Configuration or press Delete.
Alternatively, to remove an external server, right-click the server in the Project view Alt+1 and select Delete from the context menu.
Launch a local Jupyter server
Click the list of servers on the Jupyter notebook toolbar and select the server that you want to launch from the context menu.
To run a Jupyter server, execute any code cell. When you initiate cell execution, PyCharm launches a Jupyter server on the local host using any available port (by default, it is the 8888 port). You can switch to the Jupyter Server tool window to preview the server's configuration details.

Stop the Jupyter server
To stop any running server, switch to the Jupyter Server tool window and click Stop Jupyter server. Preview the status in the Server Log window.

Once you have shut down the server, the current session is terminated. When you start the server next time, execution results for all previous sessions and all notebooks will be lost.
Kernel actions
Restart kernel
You might want to refresh your calculations without shutting down the entire server and affecting any other notebooks. To restart the currently running kernel, click on the Jupyter notebook toolbar. You can then view the kernel status in the Server Log window:

Shutdown kernel
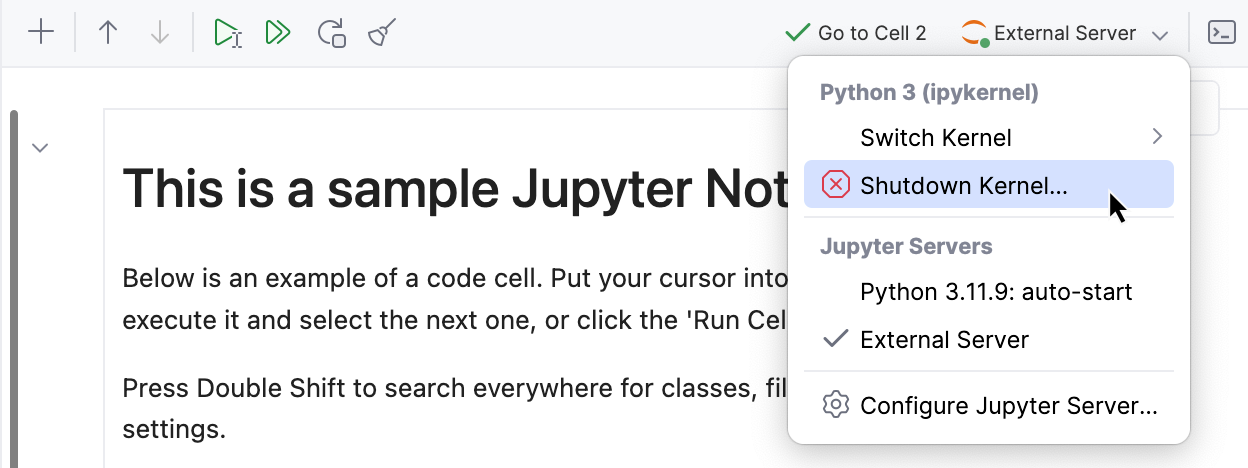
To completely stop a running kernel, open the list of servers on the Jupyter notebook toolbar and select Shutdown Kernel from the context menu. This action will terminate the current kernel session.
Switch kernel
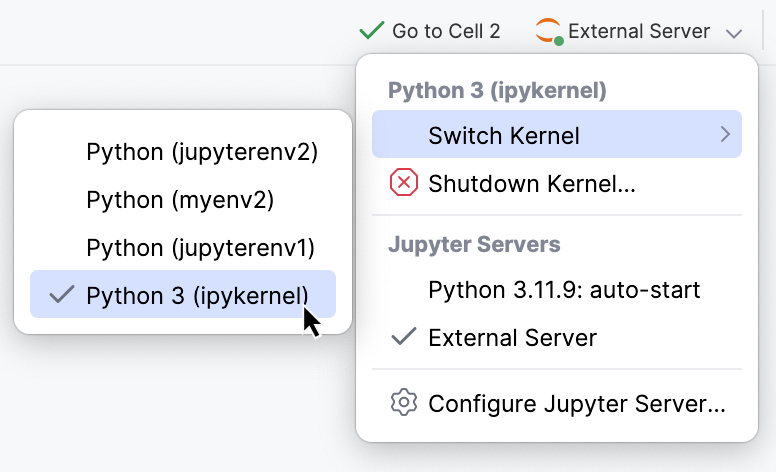
If you have at least two kernels available, and you need to switch to a different kernel, open the list of servers on the Jupyter notebook toolbar. Select Switch Kernel from the context menu and choose the required kernel from the dropdown list.
Connect kernel to server
After selecting a remote Jupyter server and opening a notebook, the kernel list becomes available automatically after the first cell is run.
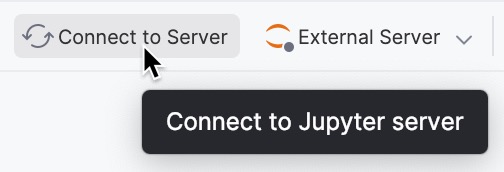
However, you can manually connect to the server before running any cells. After adding the external server, click the Connect to Server button on the Jupyter notebook toolbar. This will establish the connection between the kernel and the Jupyter server.
