Creating and applying live templates (Code Snippets)
What this tutorial is about?
PyCharm comes with quite a bit of the various live templates... There are several pre-defined live template for Python. This tutorial aims to walk you through creating a live template for a Python class declaration, and using this live template.
Python programming is out of scope of this tutorial. For more information, refer to the Python documentation.
The basics and usage of live templates are also not discussed here. You can find all the necessary information about the types, abbreviations, variables and storage of the live templates in the section Live templates.
Prerequisites
Make sure that you are working with PyCharm version 2.7 or later. If you still do not have PyCharm, download it from this page. To install PyCharm, follow the instructions, depending on your platform.
This tutorial has been created using PyCharm Pro version 2016.1.
Creating a live template of your own
1. Creating a stub live template
Open the Settings dialog (
 on the main toolbar, or Ctrl+Alt+S), expand the Editor node, and click Live Templates
:

Click
 . First, choose Template Group... and specify its name (in our case, it is
 user). The created group gets the focus.Click
again. This time, choose Live Template. The new template appears in the group that holds the focus, namely user.
What happens next?
First, under the group
user, there is a stub live template that by now is called<abbreviation>.Second, the fields for entering the template abbreviation, description, body text, and context appear:

2. Defining template abbreviation and context
So, let's enter the template abbreviation. In our example, we'll type the word class in the field Abbreviation, and then enter description (which is optional, but nevertheless...).
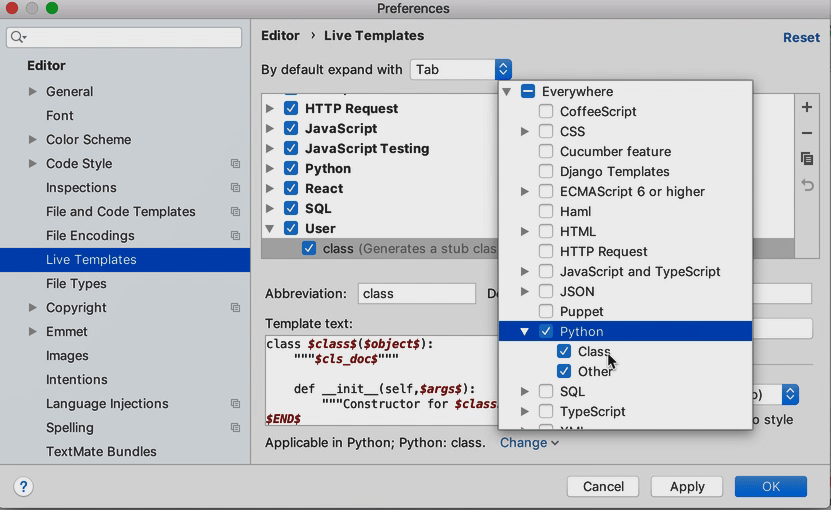
Next, let's select the context where the new template will apply. By now, you see that the context is not defined - so click the link Define, and select the context (in our case, this is Python). In the future, when the context is already defined, the link changes to Change.

The expansion key will be Tab, as specified by default.
3. Defining template text
Type the following code in the field Template text:
The portions of a template text enclosed in $ signs are the template variables. You can easily tell them from the entire template text, since they stand out with color:

These template variables are void yet, so let's define them first... All, except one (wait a bit to learn why).
4. Editing template variables
Click the button Edit variables:

In the dialog Edit template variables, you see the list of all (but one!) variables:

For the variable $object$, let's define its default value object, and click OK:

Side note about $END$
You have already noticed that the template variable $END$ was not suggested for editing. This is because the template variable $END$ is predefined, and thus NOT EDITABLE. It always stands for the position of the caret after the template expansion and filling in all the required fields. So in our case, the caret will rest at the end of the new class declaration.
5. Memorising the new live template
You only have to click OK In the Settings dialog (Ctrl+Alt+S) . The new live template (or a code snippet) that expands into a stub Python class is ready. Let's just put it to a test...
Using a live template of your own
First, create a Python file (Alt+Insert - Python file), and call it sample.py.
The new Python file opens for editing. Next, let's create a class declaration in it. To do that, type the template abbreviation class.
Wow... our new live template is now in the suggestion list - you can tell it by description that we've typed just in case:

Press Tab to choose this option.
As expected, the abbreviation expands into a stub Python class. The red line marks the next entry point: when you type in the class name (variable class), it will be entered in this particular location.
Note, by the way, that the variable class has been used more than once - in the class declaration, in the comment for the class constructor . In this case, the field for class has been filled in automatically.
Having typed the class name, press Enter, and see that the red line (frame) moves to the next field. Thus, you have to fill in all the required fields, and press Enter at the end.

Example of sharing a template between different IDEs
Once created the user template in PyCharm you can reuse it for working with Python scripts in another IDE, for example, IntelliJ IDEA. All you need is to export PyCharm Live Template configuration and import it in IntelliJ IDEA.
