Configure a uv environment
The uv tool makes Python development easier, reducing setup tasks for new projects and helping manage existing ones.
To use uv in PyCharm, you need to install it on your machine and create a specific Python environment.
When you select uv while creating a new Python project, PyCharm automatically generates a pyproject.toml file. This file specifies required packages, scripts, plugins, and URLs. See the pyproject guide to learn more about its structure and format.
Create a uv environment
Do one of the following:
Click the Python Interpreter selector and choose Add New Interpreter.
Press Ctrl+Alt+S to open Settings and navigate to .
Click the Python Interpreter selector and choose Interpreter Settings. Click the Add Interpreter link next to the list of the available interpreters.
Click the Add Interpreter link next to the list of available interpreters and select Add Local Interpreter.
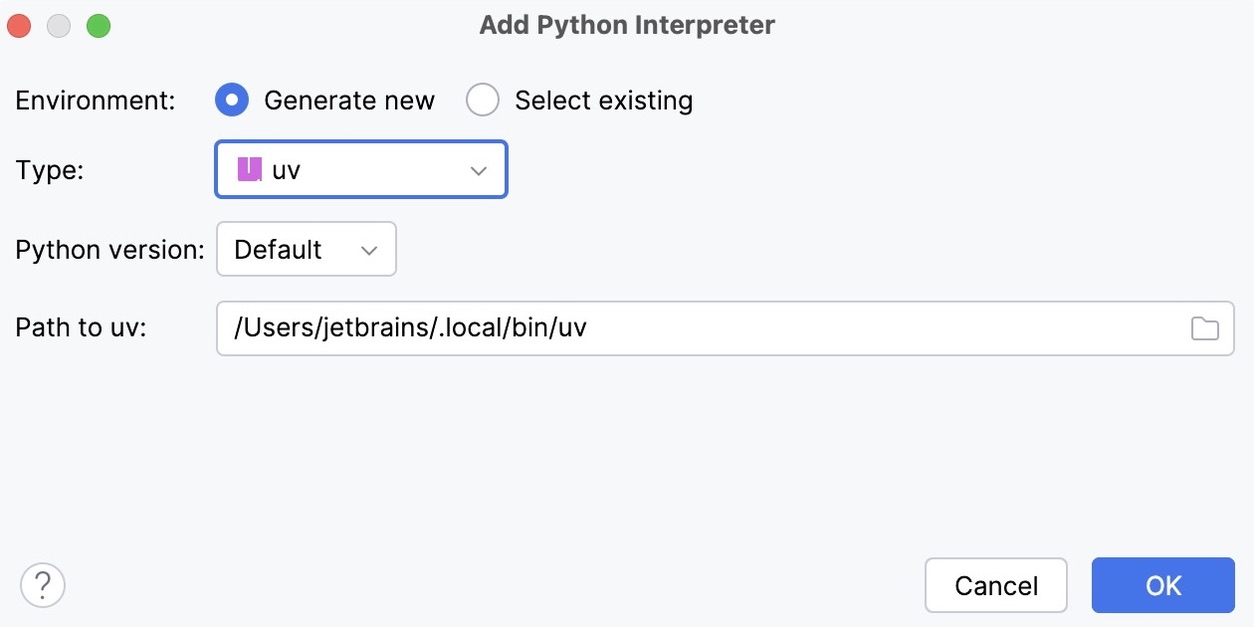
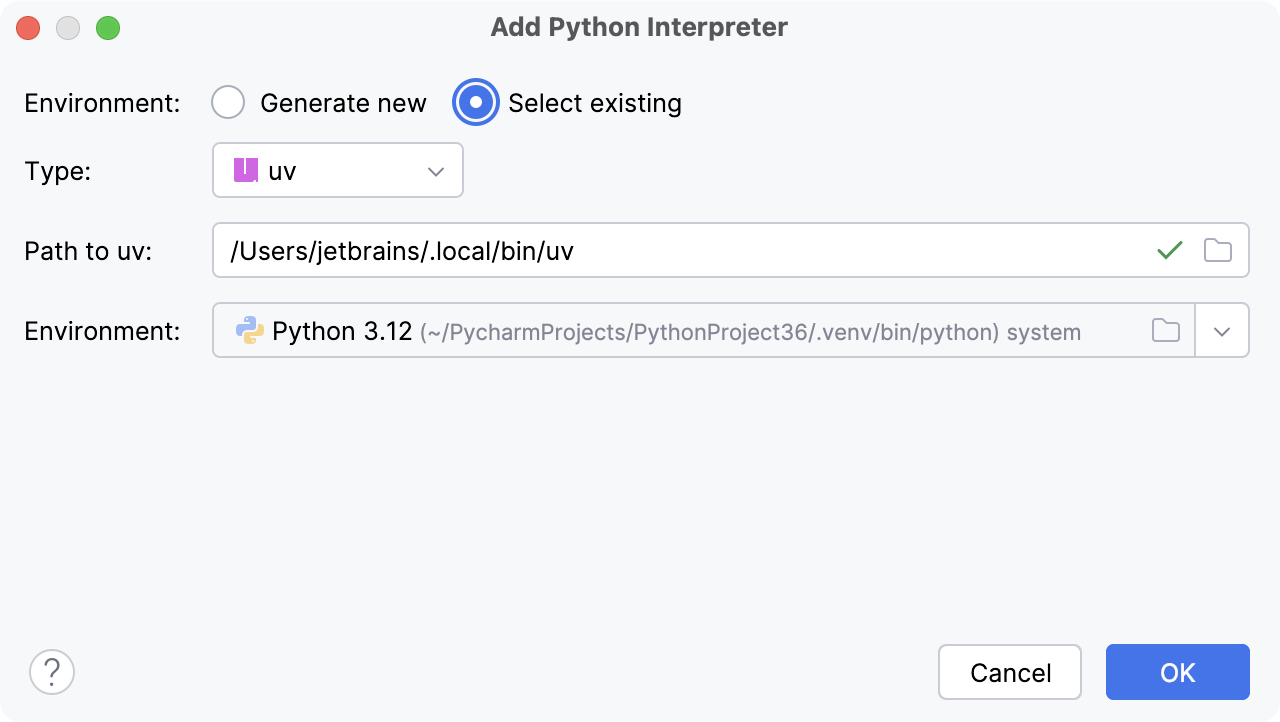
The following actions depend on whether you want to generate a new virtual environment or to use an existing one.
- New uv environment

Select uv from the list of environment types.
Select the Python version from the list.
PyCharm will detect a uv installation.
If PyCharm did not detect the installation automatically, specify the location of the uv executable, or click
to browse for it.
- Existing uv environment

Select uv from the list of environment types.
PyCharm will detect a uv installation.
If PyCharm did not detect the installation automatically, specify the location of the uv executable, or click
to browse for it.
Select the environment from the list.
The selected uv environment will be reused for the current project.
Click OK to complete the task.
After you configure a uv environment, you can use terminal or uv Run/Debug configurations to run your project.
For any of the configured Python interpreters (but Docker-based), you can: