Create files from templates
ReSharper enables you to create classes, interfaces, structs and other files based on file templates. Once created, a new file is added to your project and opens in the editor. The file contains source code specified in the template.
Create a new file from template
Do one of the following:
In the Solution Explorer, select a node where you want to create a new file from template.
Place the caret at a code file open in the editor. In this case, the new file will be created and placed next to the current file.
Press Alt+Control+Insert or choose in the main menu .
Choose Class, Interface, Struct, and so on, or a custom item (if available) in the quick access list.
If you want to use a custom file template that was not added to the quick access list, select More.
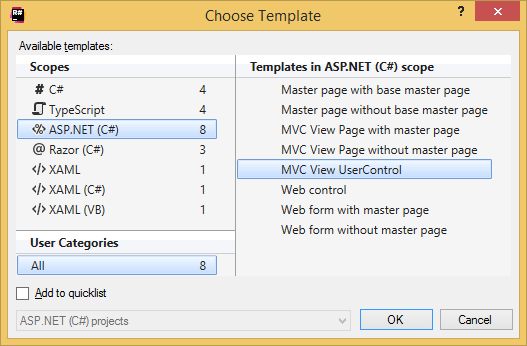
If you have chosen More, the Choose Template dialog appears where you can select the desired template. To optionally add a template into the quick access list, select its entry in the dialog and tick the Add to quicklist checkbox in the lower part of the dialog before clicking OK.

In the Create: [name of template] dialog that appears, specify the name for the new file and click OK.
The newly created file is added to the selected place and opens in the editor
(in case of multi-file template, several files will be created and opened) .
If the template has editable parameters (that is, requires user input), ReSharper deploys a hot spot session in the editor and sets the input position at the first parameter. Then you can do the following:
If ReSharper suggests some values for the current parameter, use Up and Down arrow keys to navigate through the list of suggested values, or just type in a desired value.
Press Tab or Enter to accept the value and move to the input position of the next parameter. If this is the last parameter, the hot spot session completes and the caret moves to the end position defined for the session.
Press Shift+Tab to move the input focus to the input position of the previous parameter.
Press Esc to exit the hot spot session. In this case, all session parameters will be initialized with default values.
This feature is supported in the following languages and technologies:
The instructions and examples given here address the use of the feature in C#. For more information about other languages, refer to corresponding topics in the Languages and frameworks section.