Refactorings for CSS
Refactorings for CSS styles help you quickly move CSS styles to and between stylesheets and HTML files or create a new stylesheet on the fly and move existing styles there. You can also rename CSS classes and their usages in a few clicks.
Perform a refactoring
Place the caret at a symbol, select a code fragment that you want to refactor, or select an item in a tool window.
Do one of the following:
From the main menu, choose , and then select a desired refactoring. The list of refactorings available in this menu depends on the current context. If ReSharper cannot suggest any refactorings for the context, the entire menu is disabled.
In the editor, File Structure window, or other ReSharper window, right-click the item you want to transform, choose Refactor from the context menu, and then select the required refactoring.
From the main menu, choose , or press Control+Shift+R to display the list of applicable refactorings, then select one of them. You can also choose Refactor This in the context menu of a selection.
Use default keyboard shortcuts assigned to specific refactorings, or assign custom shortcuts to your favorite refactoring commands.
If the selected refactoring requires user input, the refactoring wizard opens. Note that the wizard's dialogs are not modal, so you can edit the code while the wizard is open.
To roll back refactoring actions, the wizard provides the option To enable Undo, open all files with changes for editing. If you select this option, ReSharper opens all modified files in new editor tabs and enables you to roll the refactoring back. In this case, you will need to save the changes yourself. If this option is not selected, ReSharper saves modified files automatically, without opening them.
If a refactoring operation would cause code conflicts (such as duplicate names, visibility conflicts, and so on), the wizard displays the list of conflicts on the last step, before you apply the refactoring. For some conflicts, the wizard can also suggest quick-fixes. For more information, refer to Resolve conflicts in refactorings.
Some refactorings are available immediately after you modify code in the editor. For more information, refer to Inplace refactorings
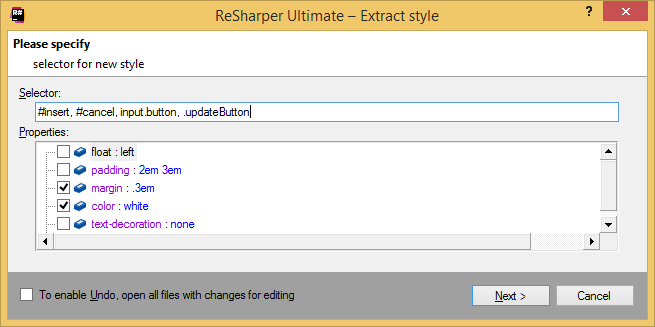
Extract Style
This refactoring allows you to create a CSS rule-set from existing rules defined in another rule-set in a CSS file or in a style attribute in HTML. You can invoke this refactoring when your caret is anywhere in a CSS rule-set in a CSS file or in a style tag in an HTML file, as well as in a style attribute in an HTML file. In the Extract style dialog that opens, use check-boxes to specify style declarations you are going to extract (optionally, you can select desired declarations before invoking the refactoring). If necessary, modify selector(s) for the new rule-set.

After applying the refactoring, the extracted rule-set is created in the same file. If you are extracting inline style rules from the HTML style attribute, the extracted rule-set is placed in a style tag. If you want to place the extracted rule-set in another file, use the Move refactoring afterwards.
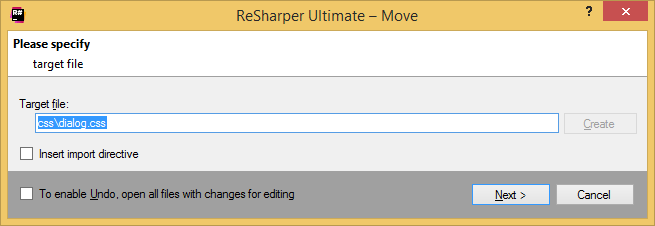
Move
This refactoring lets you move a CSS rule-set to another file. You can invoke this refactoring when your caret is anywhere in a CSS rule-set in a CSS file or in a style tag in an HTML file. In the Move dialog that opens, specify the target file or type the name of a new CSS file and click Create. If necessary, select Insert import directive to add the @import with the URL of the file where the rule-set is moved.

Click Next to finish the refactoring.
You can also invoke this refactoring with the dedicated shortcut F6.
Rename
The Rename refactoring, which is also available in CSS, allows you to rename a class selector or an ID selector no matter where you invoke the refactoring, at a declaration or a usage, in a CSS file or a markup file.
In the Rename dialog that opens, specify a new name for the class or ID and click Next. By default, ReSharper finds all usages of the renamed item and displays them on the next page of the refactoring wizard. If necessary, you can clear check-boxes next to usages you do not want to rename.
You can also invoke this refactoring with the dedicated shortcut F2.