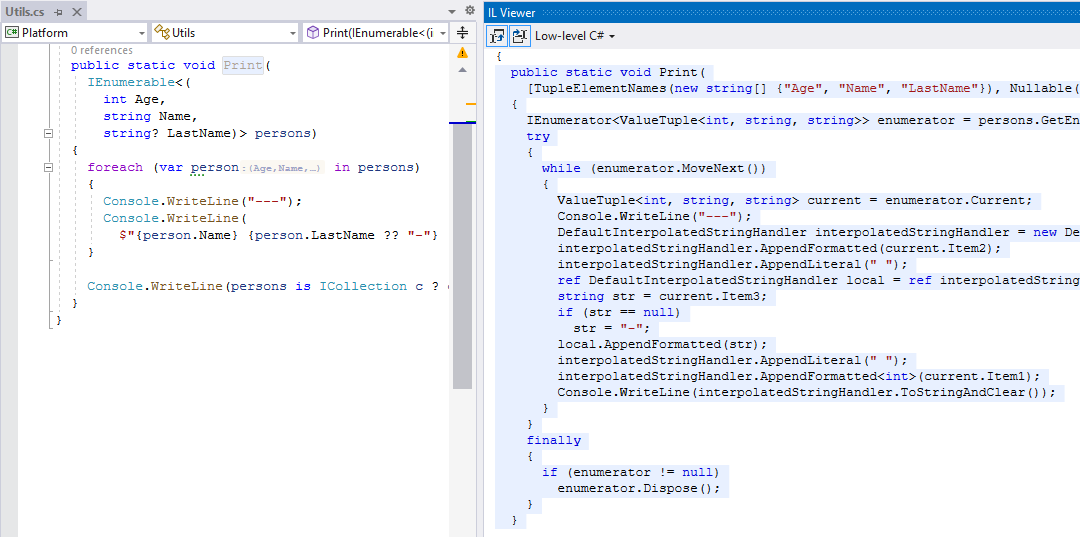
View high-level and low-level C# code
The more features for simplifying source code appear in new C# versions, the more compiler-generated code is produced under the hood. ReSharper allows you to study the differences having both the original version in the editor and C# with different levels of syntax sugar in the IL Viewer window simultaneously with proper synchronization.
View low-level or high-level C# for a document
If you want to see low-level C# of your source code, make sure that the corresponding project is built.
Do one of the following:
Choose from the main menu.
Right-click anywhere in the editor and choose
Invoke Navigate To Control+Shift+G and choose Low-level C# Code.
Select Low-level C# or High-level C# on the IL Viewer toolbar if you want to change code presentation.
In the example below, you can see a lot of differences between the original and the low-level C#.

Here are some differences and use cases for the Low-Level C# and High-Level C# presets.
Low-Level C#
High-level compiler transformations are off and compiler-generated code is shown. This allows you to see what code is produced for different syntax-sugar features.
For example, you can see lambdas and iterators in the editor and compare them with corresponding generated nested classes, state machines, and captured local variables in the IL Viewer.
High-level C#
Here are some use cases for the High-Level C# view:
Some tool for code generation (such as Fody) is used in the build process . In this case, you can switch to High-Level C# in the IL Viewer and see what was added or changed by this tool.
The editor displays Metadata view of a decompiled class (method signatures without bodies). In this case, High-Level C# in the IL Viewer will display decompiled bodies of the methods.