Export data in JetBrains Rider
JetBrains Rider has an engine to export and import data in various formats. You can select a predefined format or create your own.
For more information about export and import operations, see the corresponding section.
Export directions
You can export or copy to the clipboard any result set, table, or view.
Export to a file
To export data to a file, perform one of the following actions:
Right-click a result set, a table, or a view, select Export Data.
Right-click a query and select Export Data to &File.
On the toolbar, click the Export Data icon (
 ) and select Export to File.
In the Export Data dialog, click Export to File.
Export to a clipboard
Select data in the result set or in the editor and press Ctrl+C.
On the toolbar, click the Export Data icon (
) and select Copy To Clipboard.
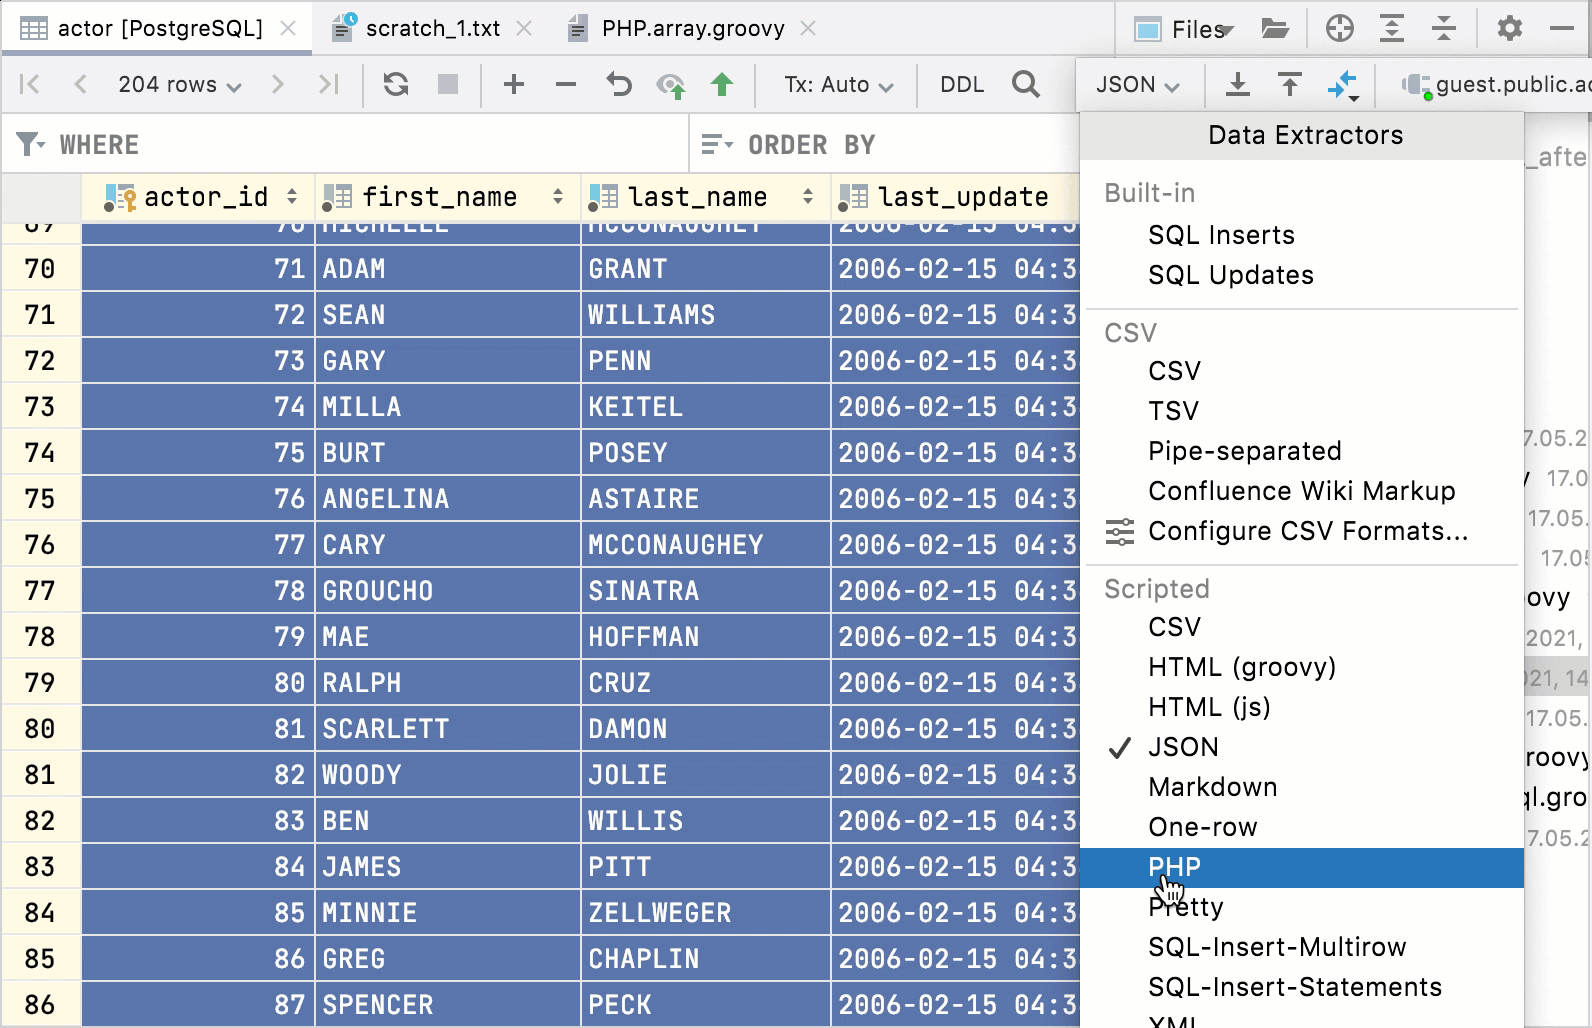
Built-in extractors
You can select a built-in export format from the list near the Export Data icon (![]() ). There are several built-in formats. You can export data as a set of INSERT or UPDATE statements. Also, you can select text formats like CSV, JSON, HTML, Markdown, and other formats (for more information about export options, see Import/Export options.
). There are several built-in formats. You can export data as a set of INSERT or UPDATE statements. Also, you can select text formats like CSV, JSON, HTML, Markdown, and other formats (for more information about export options, see Import/Export options.
Before JetBrains Rider 2020.1, if you select the default extractor from the list, you set this extractor as default for the whole IDE. Beginning from JetBrains Rider 2020.1, you set the extractor for a single table. If you open a different table, the extractor defaults to CSV.

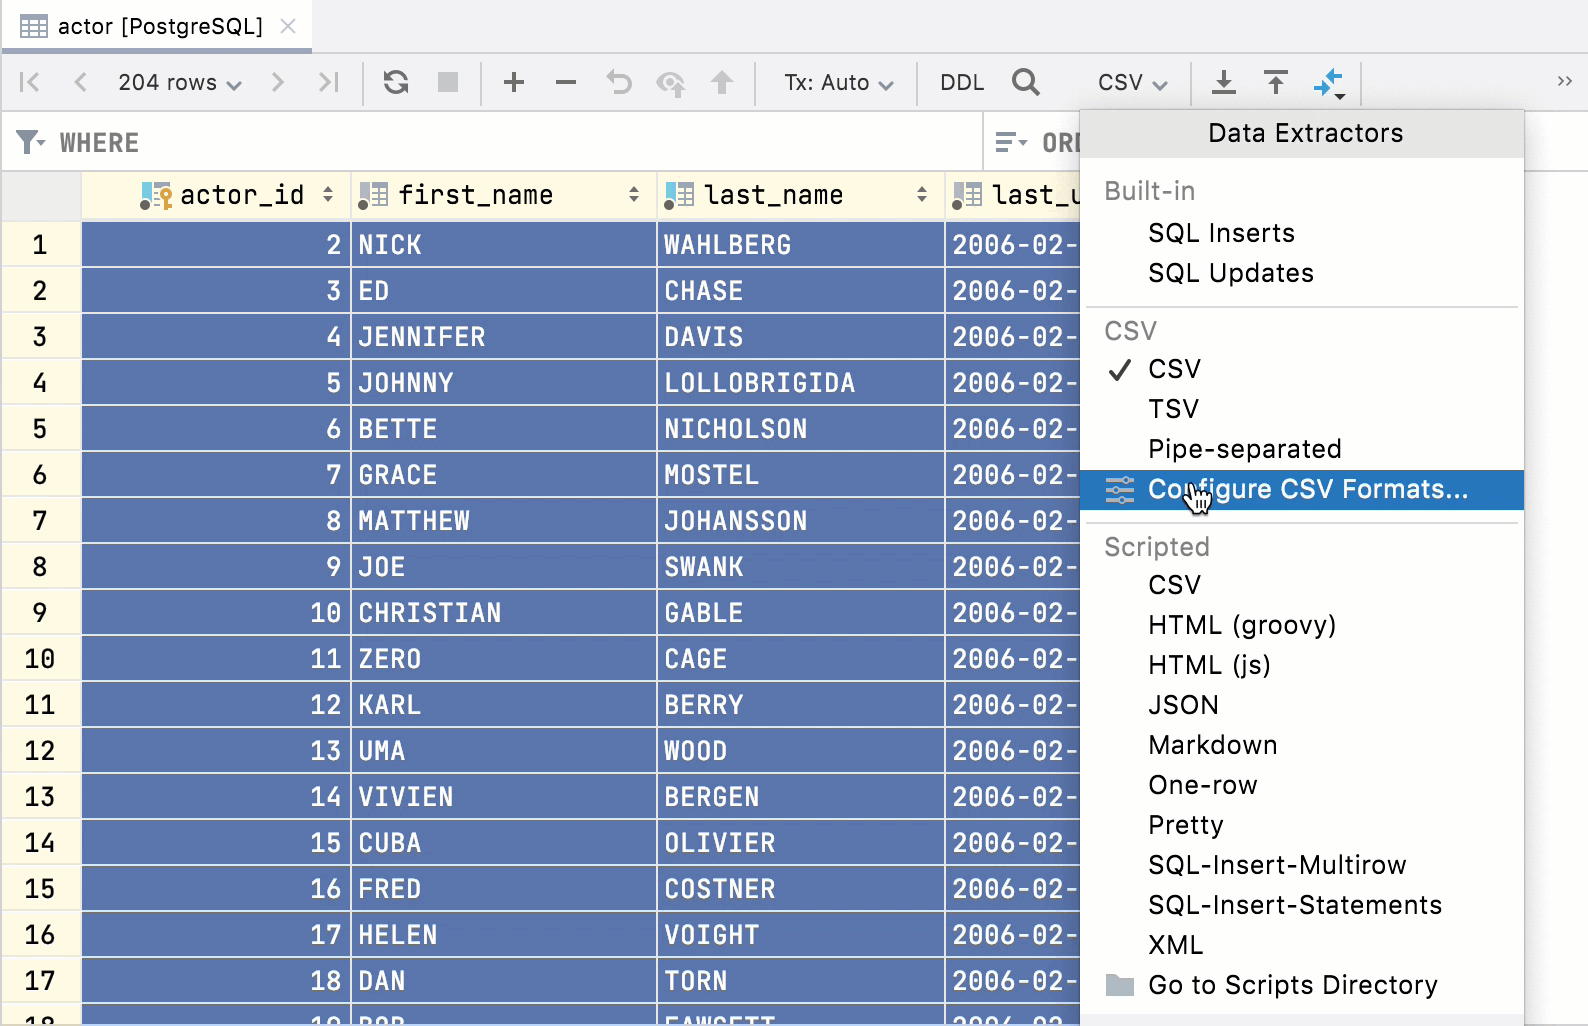
From the list of data extractors, select Configure CSV formats.
In the CSV Formats dialog, click the Add Format icon
 .
.Specify a name of a new format (for example, Confluence Wiki Markup).
Define settings of the format: set separators for rows and headers, define text for NULL values, specify quotation. Click OK.
When the format is created, you can select it in the drop-down list near the Export Data icon (
).
In the Project tool window (), navigate to .
Right-click the extractors node and select .
Type the filename (for example,
PHP.array.groovy), where:PHP: the name that is used in the extractor menu.
array: output of the extractor.
groovy: the extension of the script.
Type or paste the code of the extractor in a new file. You can use code of other extractors in the extractors folder to write your extractor. Also, you can try the following extractors:
TSV-Icelandic-Groovy.tsv.groovy on GitHub: copy tab-separated query results and to paste them to Excel as comma-separated.
Dbunit Dataset Export in Groovy on GitHub: an extractor for Dbunit export.
Table-Text-Groovy.txt.groovy and Fixed-length-fields.txt.groovy: extractors that generate a txt file with fixed length columns.
PHP-Array.groovy: an extractor to PHP array.
Markdown-JavaScript.markdown.js: an extractor to Markdown.
Select the extractor from the list of extractors.
Consider the following example of adding the PHP-array extractor in DataGrip.