Add new items to Cargo projects
RustRover makes it easy to add new files, crates, modules, and directories to your Rust projects.

Create a new Rust file
In the Project tool window (Alt+1), select the node in which you want to create the file, click
 on the toolbar, and select .
Alternatively, select the necessary node, press Alt+Insert, and select Rust File.
In the dialog that opens:
Specify the file name
Choose an option based on the preferred visibility and file hierarchy:
Attach to module – will include the file in the current module and keep its default visibility – private.
Attach to module as public – will include the file in the current module with public visibility.
Don't attach to module – will add the file without including it in any module.
If you choose to attach the file to the module, RustRover will add the file declaration to the module's target (
main.rsorlib .rs). If RustRover fails to identify the appropriate target, the file won’t be attached.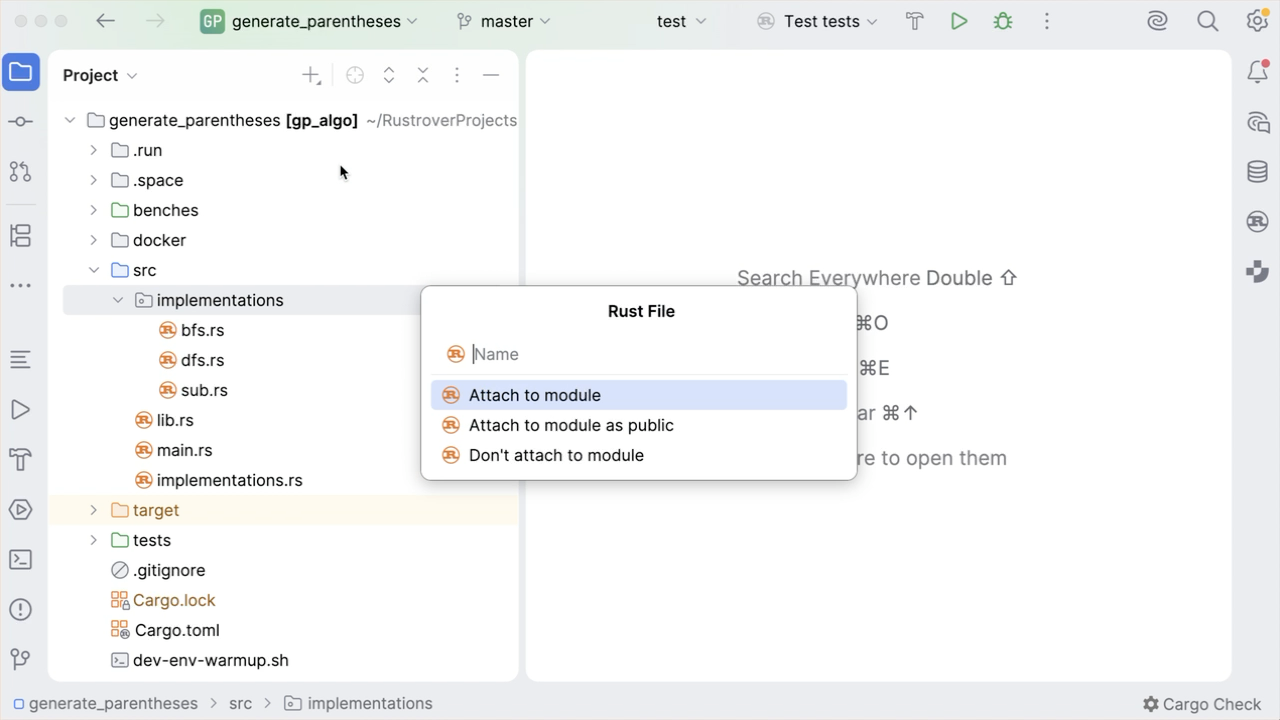
If you open a Rust file that is not attached to any module, RustRover will display a banner suggesting to attach it to the current module's target.

Create a module
In the Project tool window (Alt+1), select the parent module (directory or file), click
on the toolbar, and select .Alternatively, select the necessary node, press Alt+Insert, and select Rust Module.
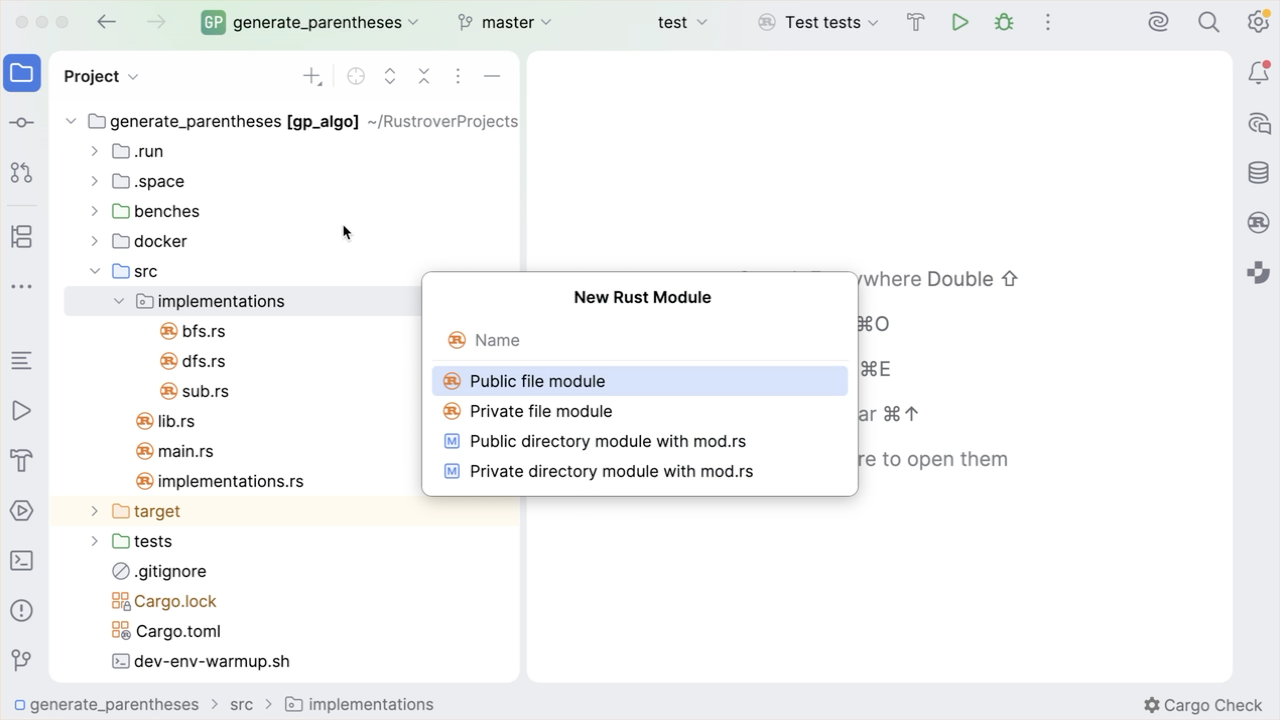
In the dialog that opens, specify the module name and select the necessary option:
Public file module
Private file module
Public directory module with mod.rs
Private directory module with mod.rs
RustRover will automatically add the necessary definition to the parent module.
Create a Cargo crate
In the Project tool window (Alt+1), select the node in which you want to create the crate, click
on the toolbar, and select .Alternatively, select the necessary node, press Alt+Insert, and select Cargo Crate.
Name the new crate and select its type (Binary or Library).

RustRover will create the new binary / library crate under the selected node.
Create a file of an arbitrary type
In the Project tool window (Alt+1) , right-click the node in which you want to create a new file and click .
Alternatively, select the node and click
 on the toolbar or press Alt+Insert. Then select File.
Name the new file and specify its extension, for example: File.js, and press Enter.
Create a scratch file
Go to or press Ctrl+Alt+Shift+Insert.
Alternatively, in the Project tool window (Alt+1), click
on the toolbar and select .Select the language of the scratch file.
Scratch files of the same type are automatically numbered and added to the Scratches and Consoles directory of the Project view.
Create a new directory
In the Project tool window (Alt+1) , right-click the node in which you want to create a new directory and select .
Alternatively, select the node and click
on the toolbar or press Alt+Insert. Then select Directory.Name the new directory and press Enter.
