User Guide
This section focuses on daily TeamCity operations: running builds, investigating problems, configuring notifications, and more.
Authorization
Your organization provides a URL to access TeamCity. Depending on authorization modules configured by your server administrator, you can log in via a regular username/login pair, or using 3rd-party services (GitHub, Google, Bitbucket Server, and others).
TeamCity Overview
Major TeamCity elements are:
A build step is an essential building block that executes a predefined set of commands. This can be a single command (like
mvn testorgradle clean build) or a series of operations (such as a custom Python or Bash script). Build steps run fully, with no partial execution.A build configuration is a sequence of build steps executed in a specific order.
A project is the largest TeamCity entity a user can create. A project child subprojects, standalone build configurations and pipelines.
A pipeline is a lightweight, user-friendly alternative to a traditional build chain. Each pipeline contains one or more jobs, with each job running a sequence of build steps.
A job is a single element of a pipeline that represents a sequence of build steps executed linearly one by one.
These elements are set up by project admins and typically cannot be edited by regular developers.
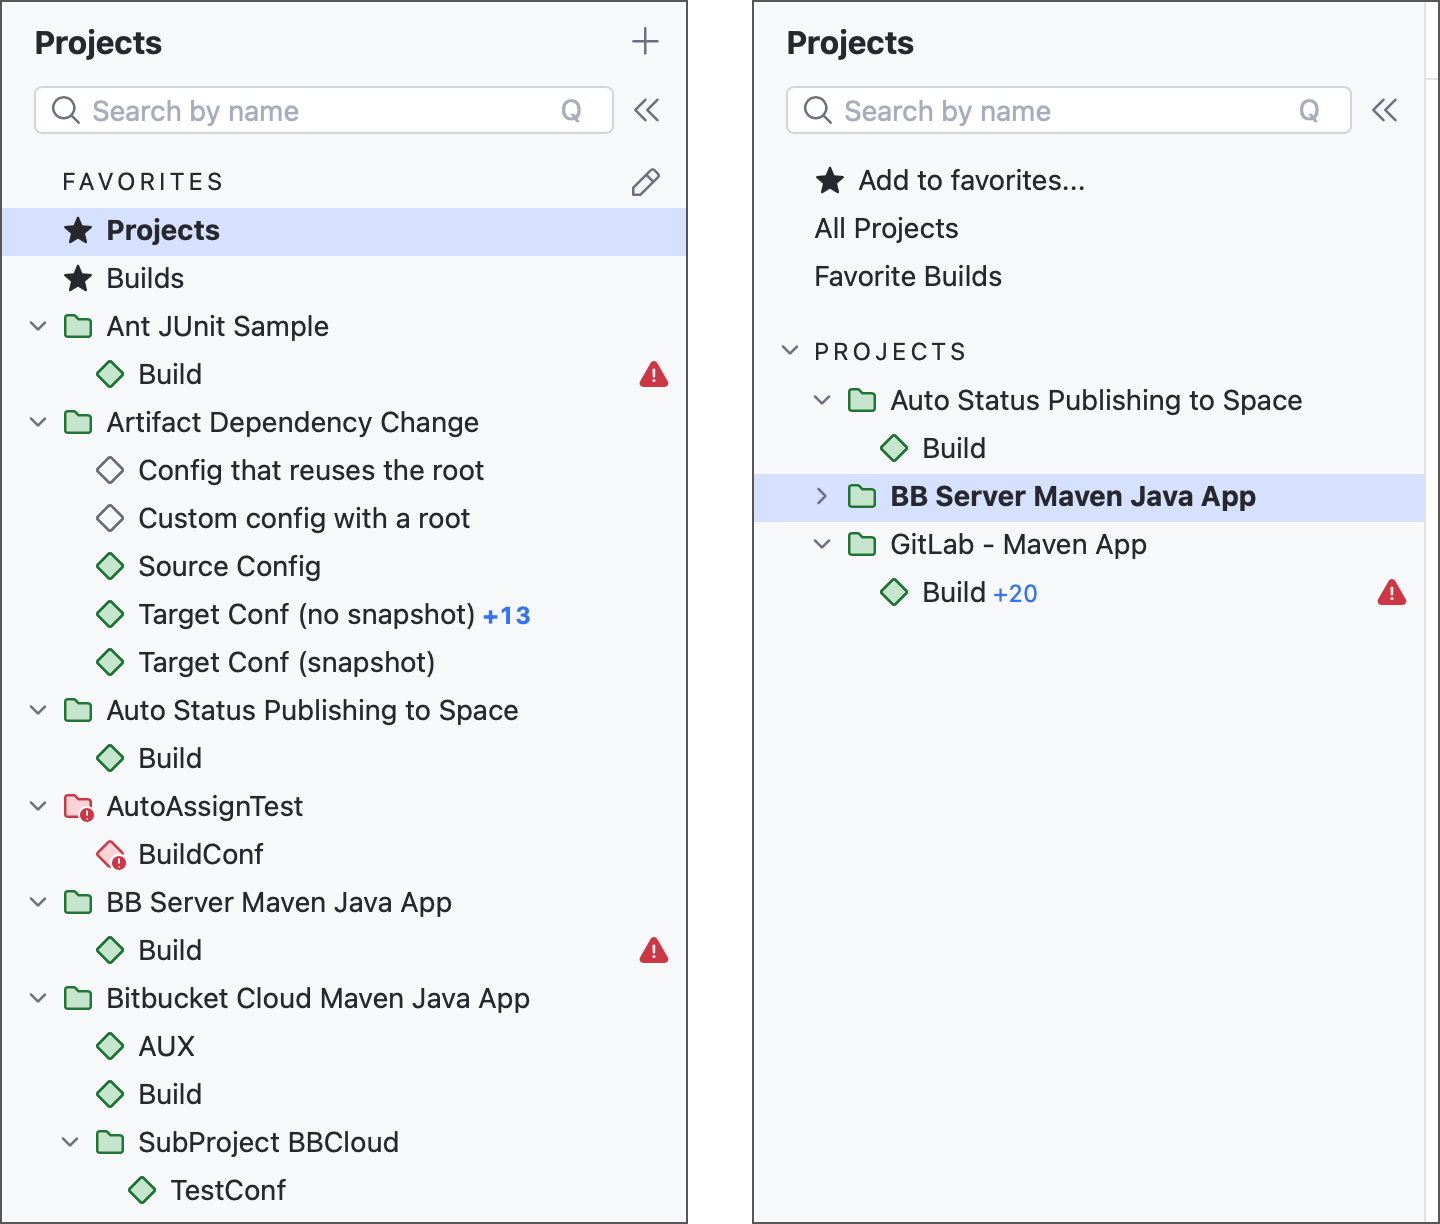
TeamCity user permissions are project-based. If you were assigned as a regular developer to a specific project, you can see only this project (with its subprojects). Other projects that exist on the same server are not shown to you. The figure below illustrates the list of the projects on a TeamCity server, as seen by a server administrator (left) and project developer assigned to three projects (right).
Find Projects and Builds
The figure below illustrates main UI elements that allow you to locate projects and builds.
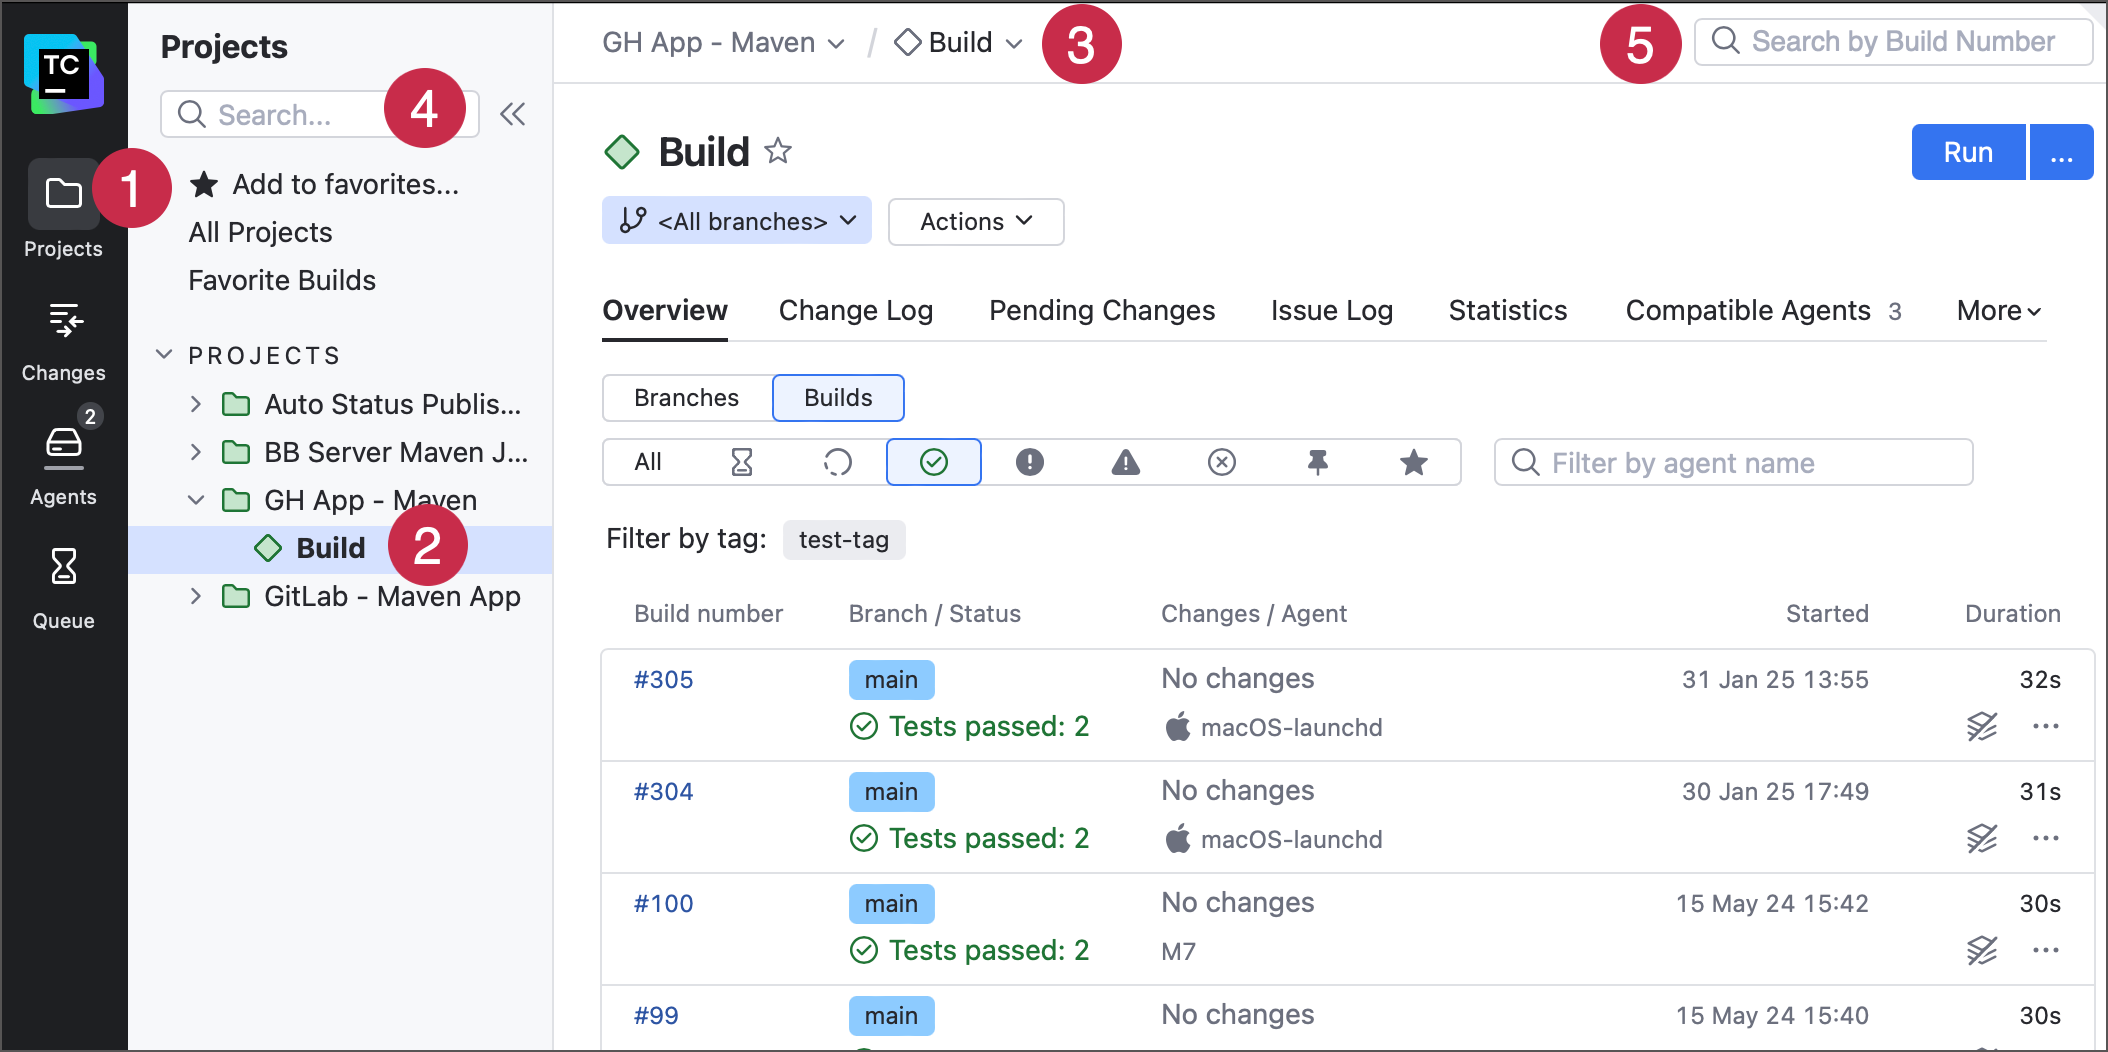
Projects Overview (1) — The main page lists all available projects. Clicking on a project reveals its build configurations (2). You can star projects and builds to add them to your favorites.
Breadcrumbs (3) — Displays the path of the currently viewed configuration or project.
Search bars — Allow you to filter the list of configurations and projects (4) and find specific builds (5).
The drop-down menu below the configuration name allows you to view builds of specific branch only (by default, <All branches> is selected).
The Branches/Builds toggle of the main configuration page allows you to choose how to view builds: as a flat list or grouped by branches. A default branch is highlighted with a slightly darker background.
Icons and Colors
A build's success or failure affects its color and the colors of its parent configuration and project. Color-coded icons provide a bird's eye view of the build farm, enabling you to instantly spot problematic projects.
TeamCity object icons have three distinctive colors:
- Gray

Build: not yet started (queued) or cancelled.
Configuration: either the selected branch has no builds, or the default branch doesn't (for the side navigation tree and <All branches> view).
Project: neither of the project configurations have builds.
- Green

Build: successfully finished or running without any issues.
Configuration: the last build for a selected or default branch was successful.
Project: all of its configurations are green.
- Red

Build: failed or still running but encountered a problem.
Configuration: the last build for a selected or default branch failed.
Project: at least one of its configurations is red.
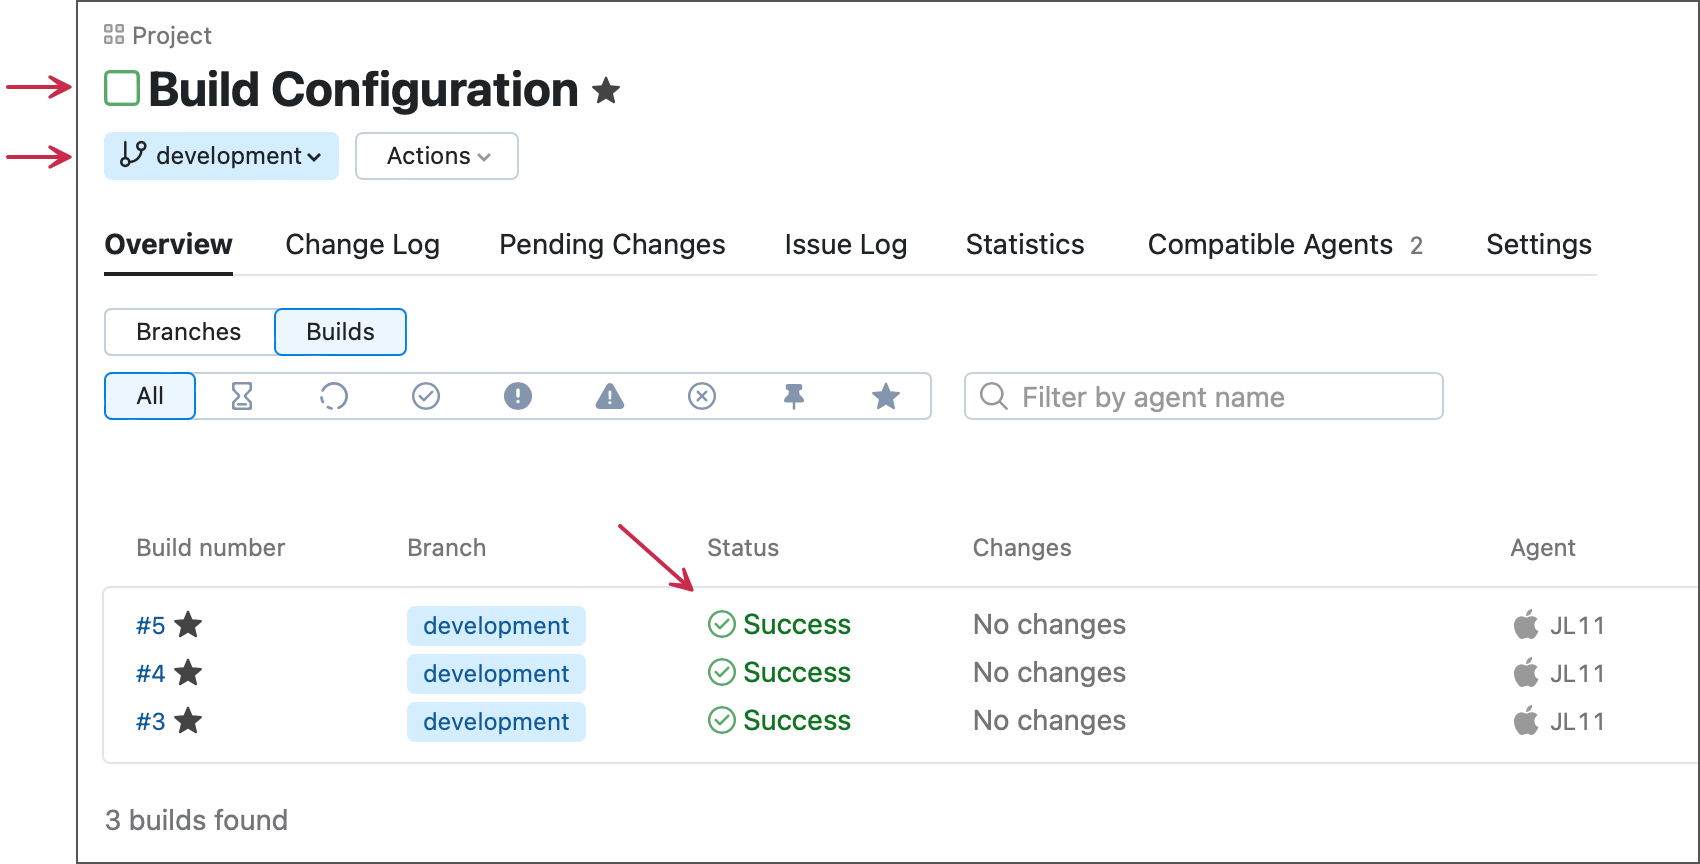
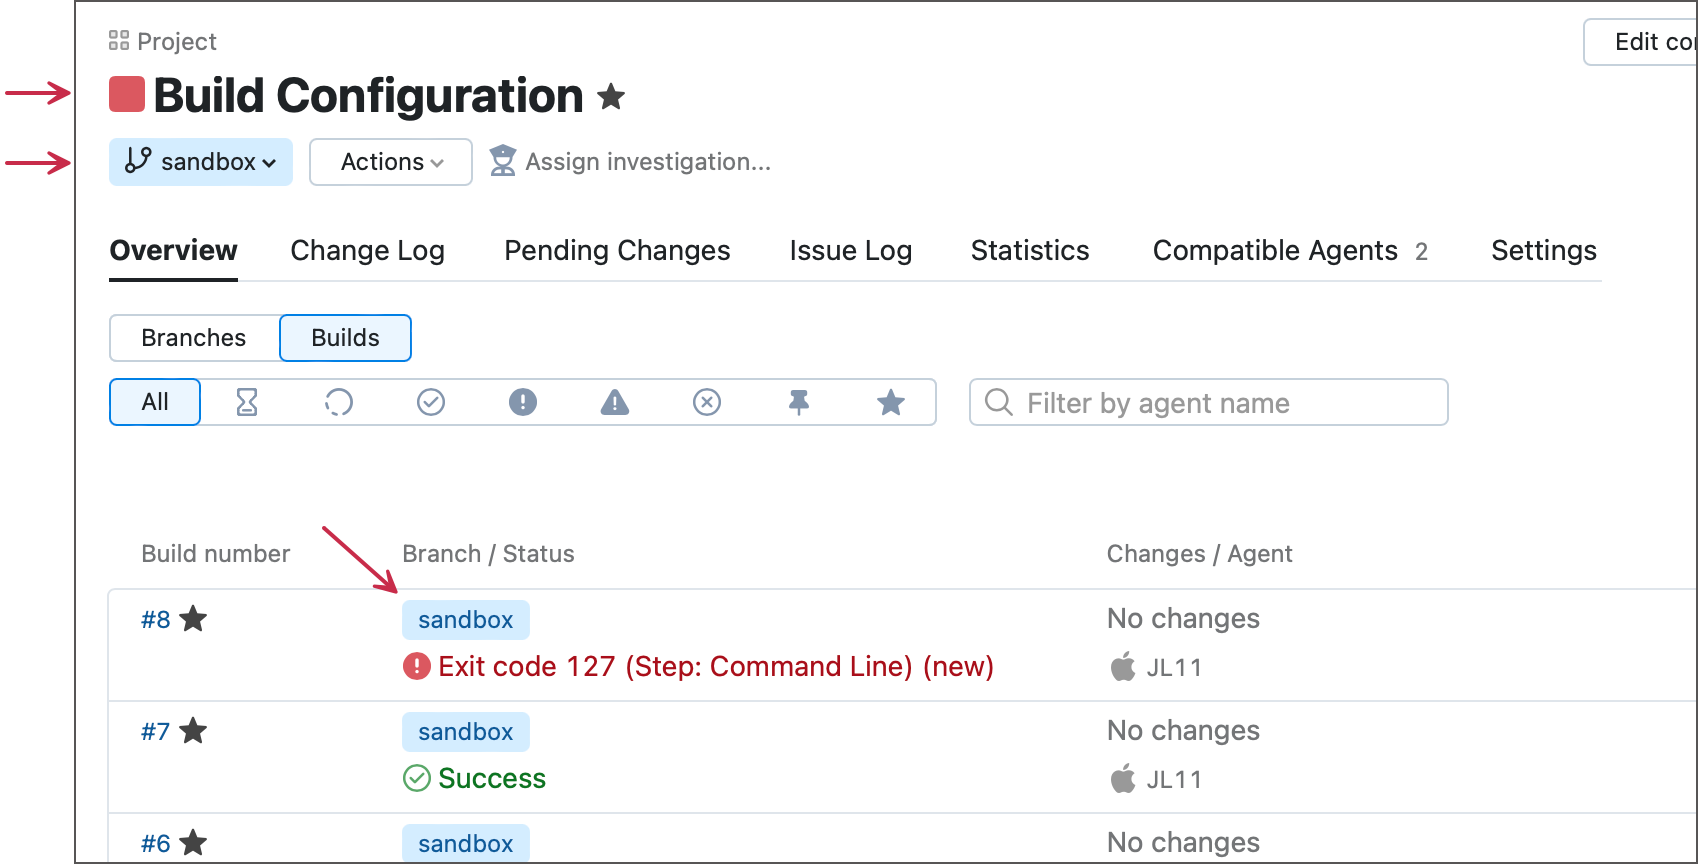
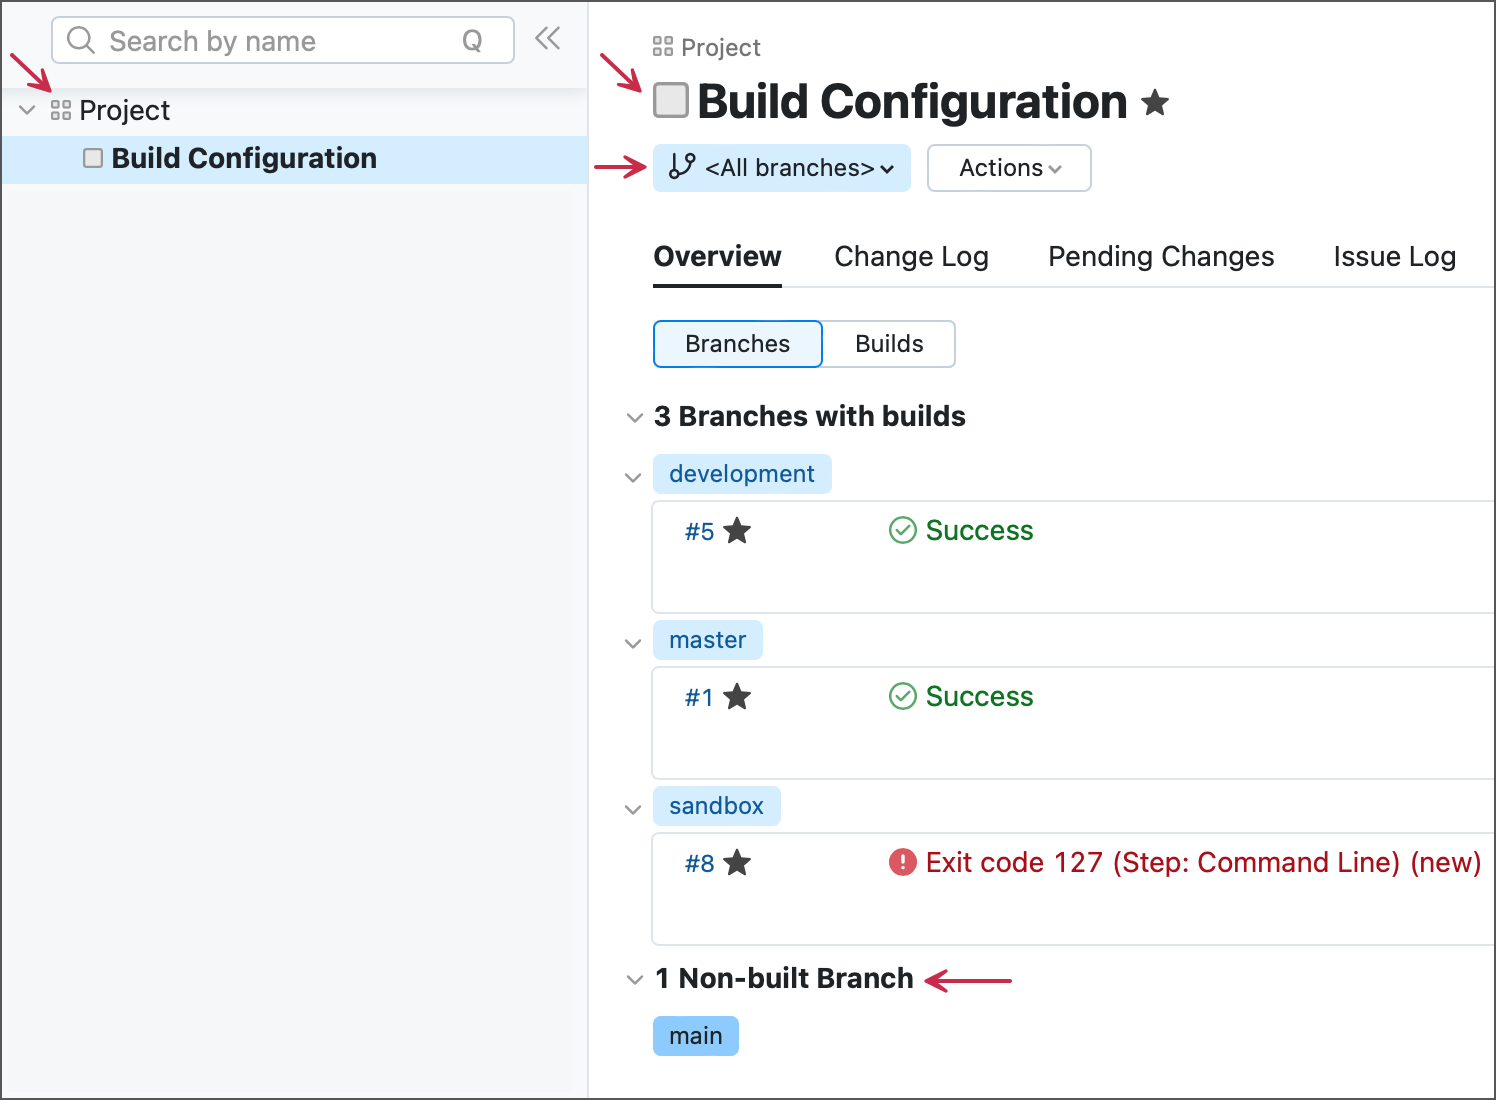
The following images illustrate the same configuration with builds in three different branches: "main" (default branch), "development", and "sandbox".
The last "development" branch build was successful. If this branch is selected, the configuration icon is green.
The last "sandbox" branch build failed. If this branch is selected, the configuration icon is red.
The default "main" branch has no builds, so configuration icons in both side navigation tree and <All branches> view are gray. The same "unknown" status applies to the entire project, since this is its only configuration.
Related articles: Build State, Change State
Run a New Build
Depending on configuration triggers, new builds can start automatically. TeamCity offers various triggers to start new builds based on different events, such as time-based triggers for scheduled builds, change-based triggers for new commits, triggers that launch builds upon the completion of other configurations, and so on.
This section outlines how to trigger builds manually.
Default Builds
To start a new build with default settings:
Open a required configuration.
(optional) Select a required branch in the drop-down menu below a configuration name.
Click Run in the top right corner of a screen. If you skipped step #2, TeamCity will run a build for the configuration's default branch.
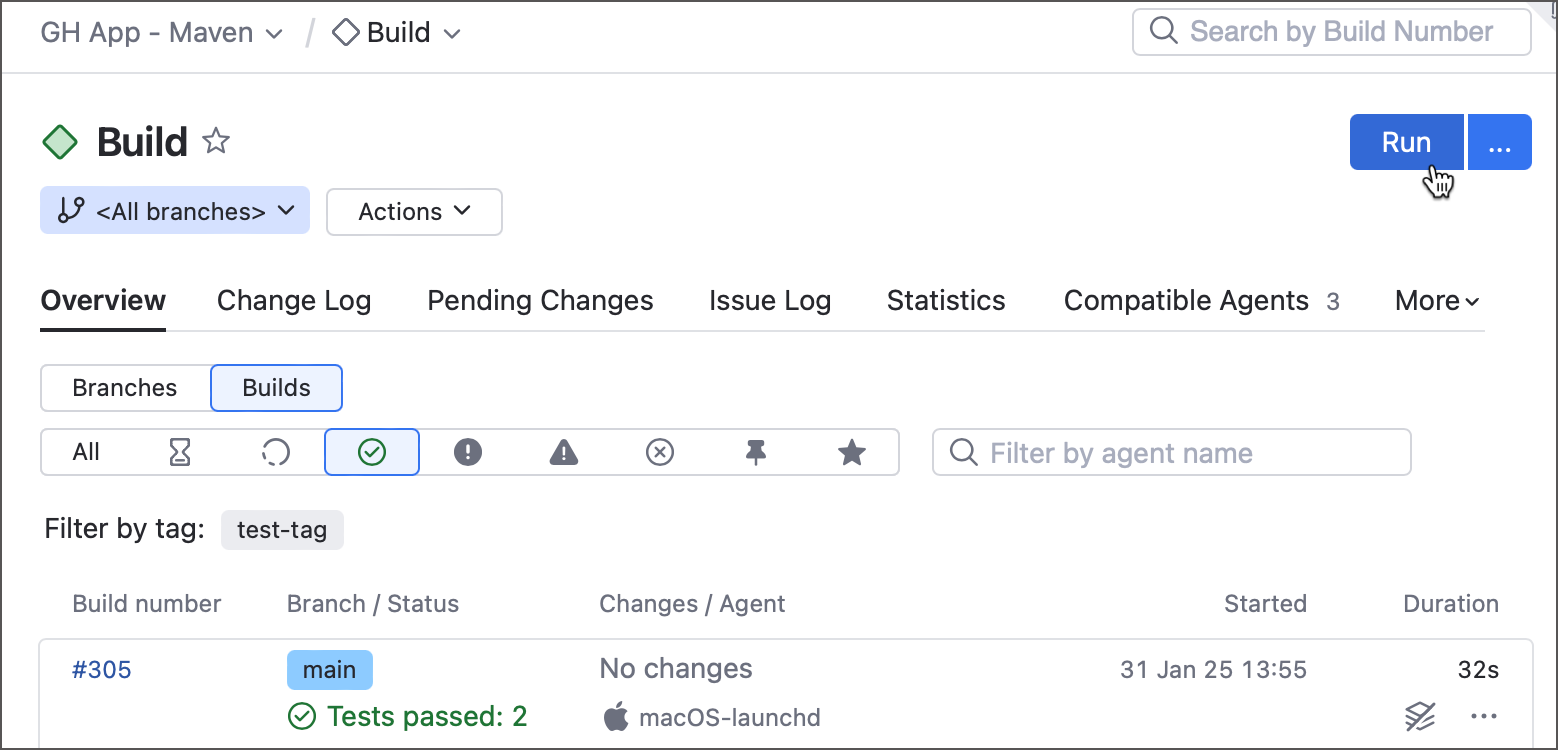
If any of the agents eligible to run this build is immediately available, the build will start right away. Otherwise, it will be queued.
Custom Builds
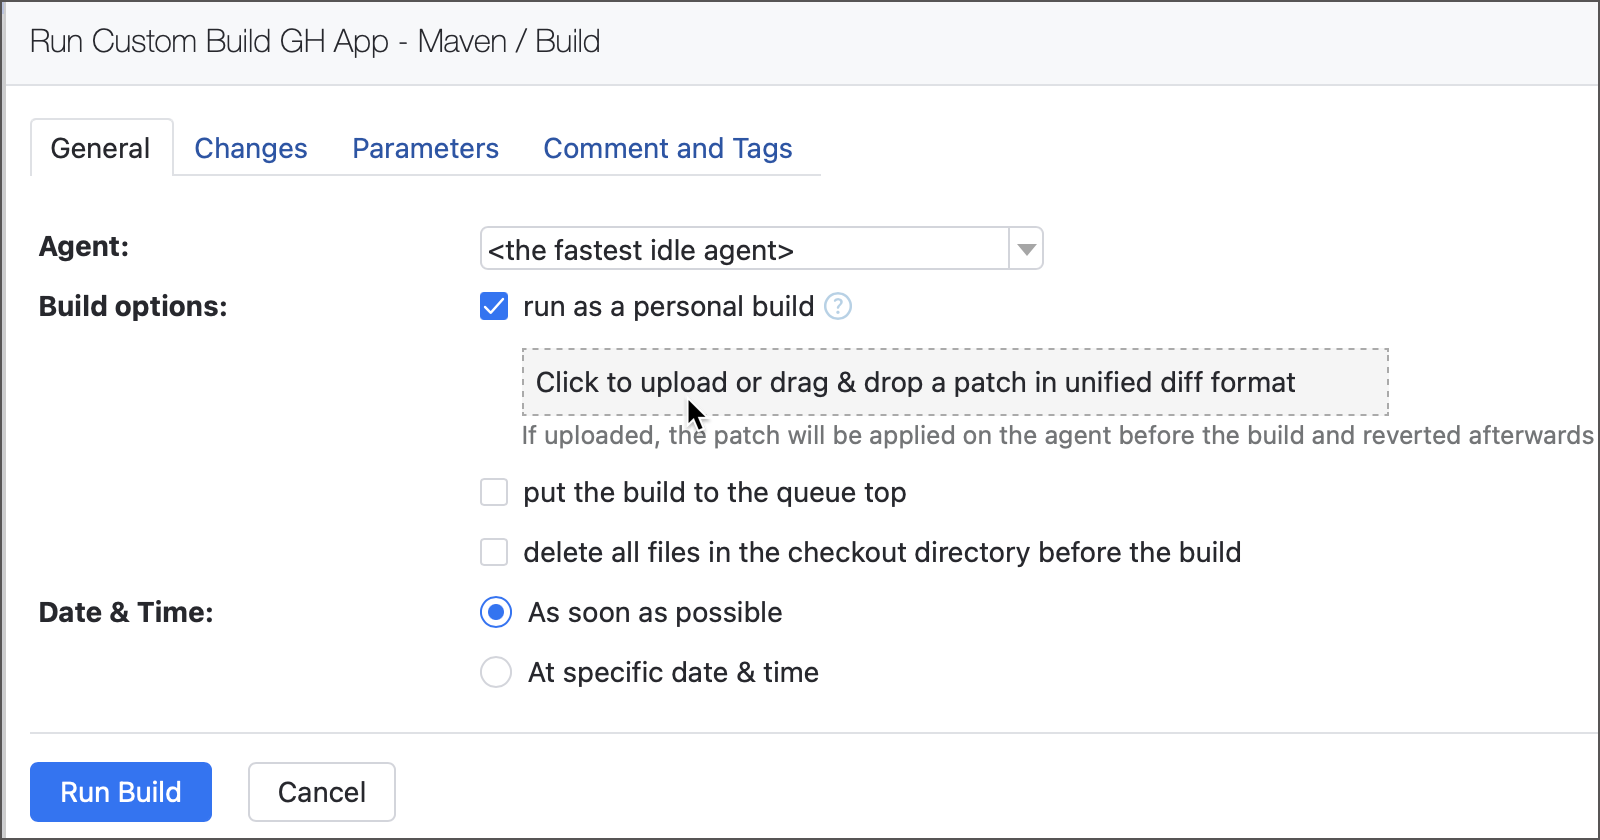
The ellipsis button (...) next to Run invokes the Run Custom Build dialog that allows you to trigger builds with custom settings: modified parameters, elevated build queue priority, specific changelist, and so on.
For configurations that use parameters with unspecified values, this dialog pops up whenever you click the Run button.
Related article: Running Custom Build
Personal Builds
A personal build is a build out of the common build sequence which typically uses the changes not yet committed into the version control. Personal builds are usually initiated from one of the supported IDEs via the Remote Run procedure.
You can also start a personal build from the Run Custom Build dialog and upload a patch with changes directly to the server.
Personal builds are marked with a corresponding icon and are visible only to users who initiated them. To view personal builds of other TeamCity users, enable the Show all personal builds option under User Profile | General | UI settings.

Related article: Running Personal Build
View Build Results
In TeamCity, all information about a build, whether it is queued, running or finished, is accumulated on its Build Results page. To view build results, choose any configuration to view its build history and click a required build number.
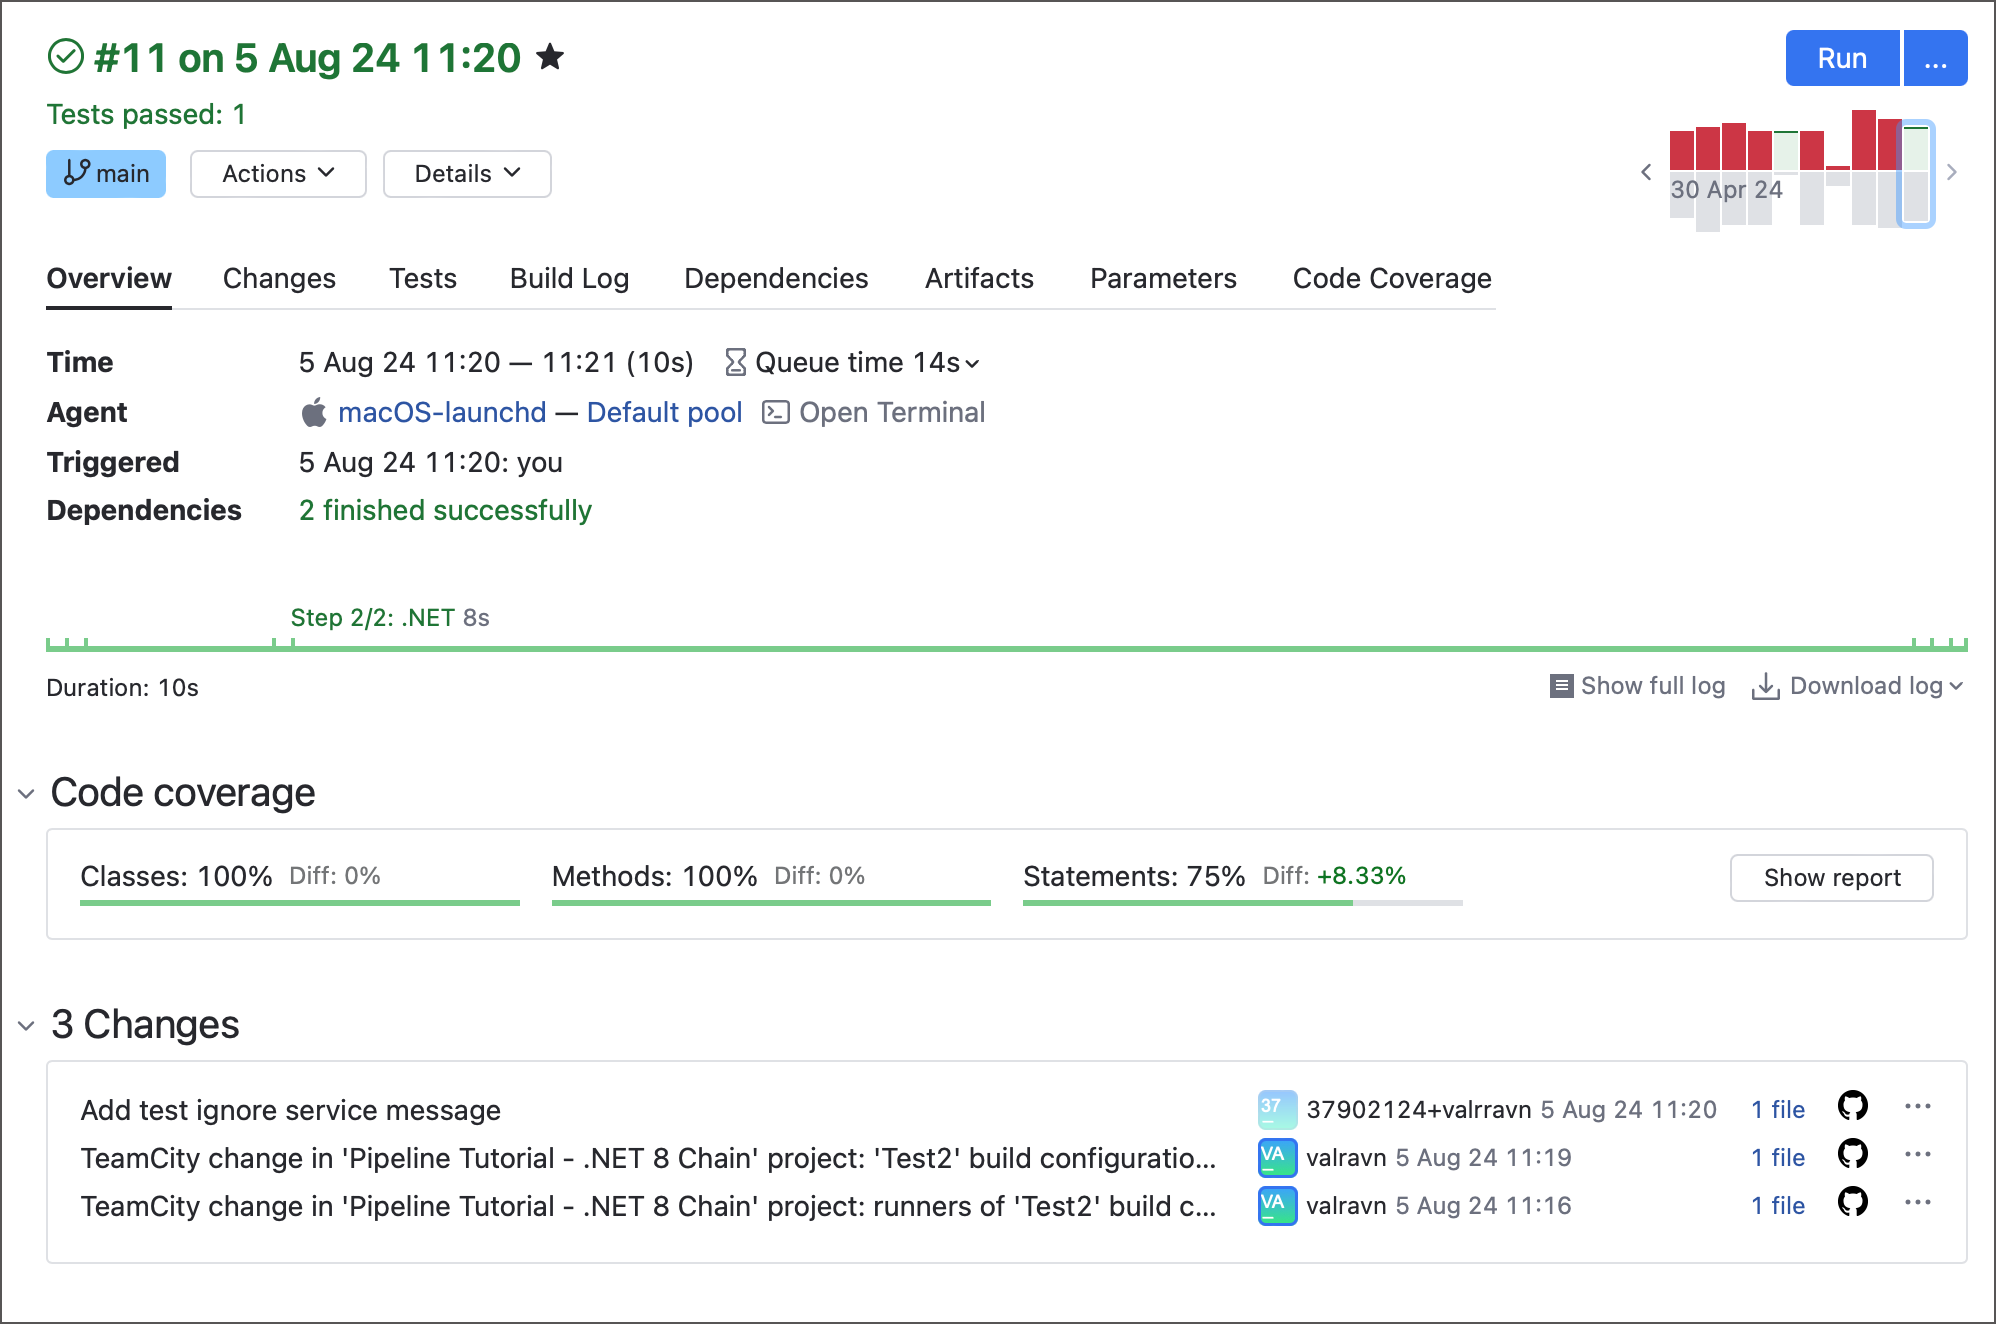
This page includes several static tabs (Overview, Changes, Build Log, Artifacts, and others), as well as contextual tabs whose visibility depends on specific configuration features. For example, the Dependencies tab is shown only for builds whose parent configurations belong to a build chain.
Related article: Build Results Page
Working with Build Failures
Build log — The primary tool for diagnosing build failures. Examine the log for error messages and stack traces.
Tests — Check the "Tests" tab for failing tests, which can often point to the source of the problem.
Changes — Review the changes included in the build to see if any recent code modifications might be responsible for the failure.
Investigations and Mutes
Every build problem or test failure in TeamCity can be investigated as a separate incident. See the following article for more information: Working with Build and Test Failures.
Build problems and failed tests can be muted to allow builds finish successfully even when they encounter these problems. Note users with the default project developer role cannot mute issues, only project administrators are allowed to do this.
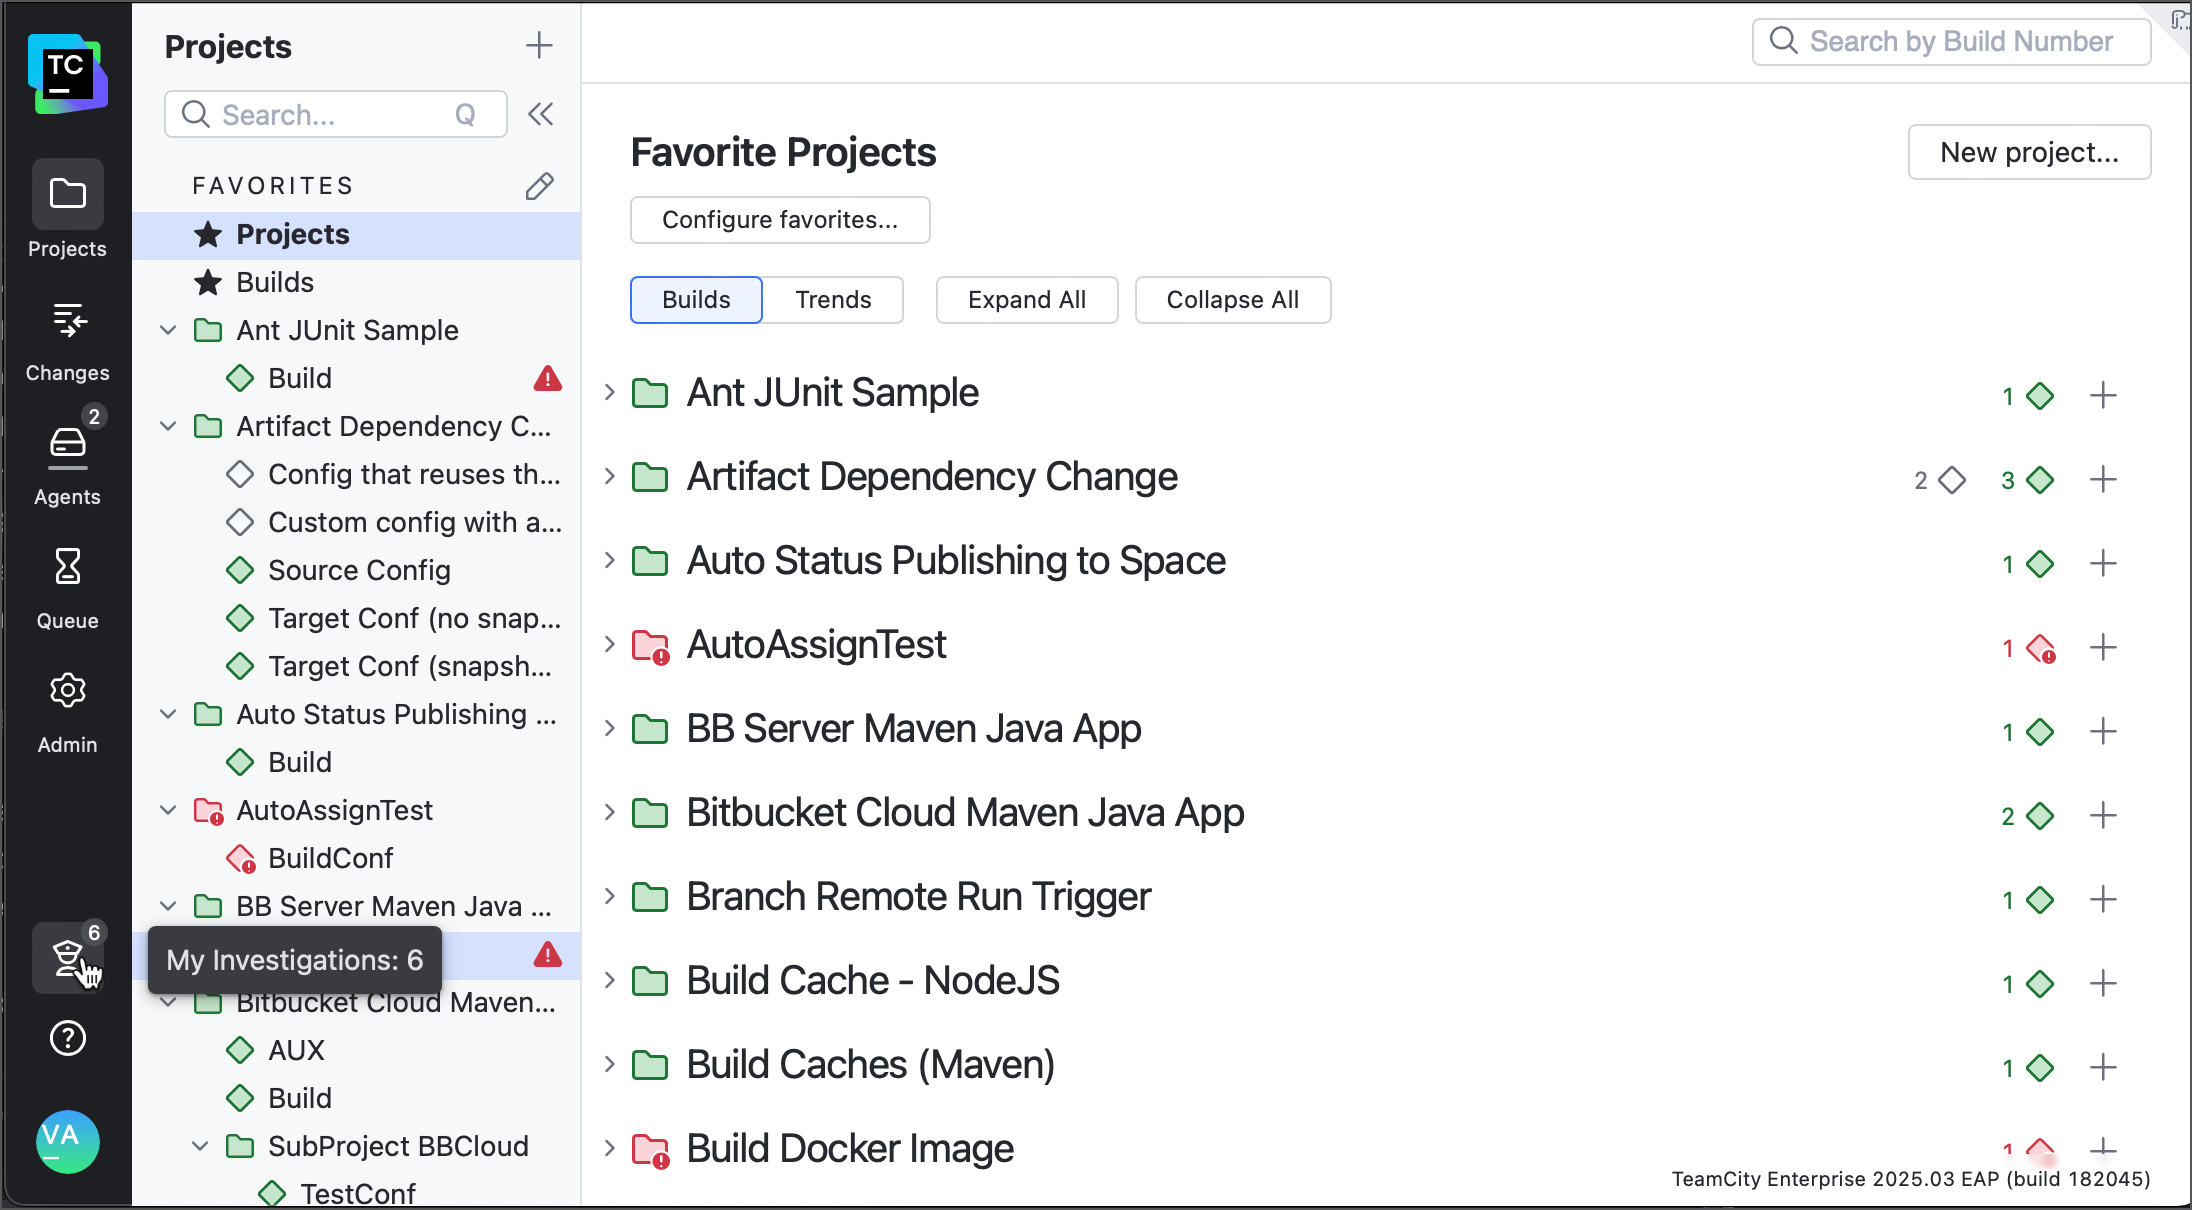
To view currently active investigations assigned to you, click the My investigations button on a sidebar.
Notifications
You can configure TeamCity to notify you about build events via email or other methods. This allows you to stay informed about the status of important builds without constantly checking the UI. Check with your TeamCity administrator about setting up notifications.
This guide covers the essential features of TeamCity for end-users. By following these steps, you can effectively monitor builds, investigate failures, and utilize build results. If you have further questions, please consult your team's TeamCity administrator or refer to the full TeamCity documentation.