Manage SLA Policies
On the SLA Policies page of the project settings, you can create, update, and delete SLA policies, or attach SLA policies from other projects. You can also activate and deactivate SLA policies attached to your project, and move them up and down the list to change the order in which they apply to tickets.
This article describes how to perform all these operations with SLA policies in a project.
Create an SLA Policy
You can set up one or more SLA policies for your helpdesk project.
YouTrack supports two types of SLA policies:
SLA policies configured in the YouTrack UI.
You can create such policies using a construction form in the project settings.
SLA policies coded with JavaScript.
When you need a deeper level of customization for your SLA policy, you can script it in JavaScript.
This overview only showcases SLA policies configured in the YouTrack UI. For more information about custom JavaScript-based SLA policies, see JavaScript SLA Policies.
To create an SLA policy in a project:
From the main navigation menu, select
Projects.
Click the name of the helpdesk project you want to configure.
In the Project Settings section of the project navigation menu, select SLA Policies.
Click the New policy button.
The New policy dialog opens.
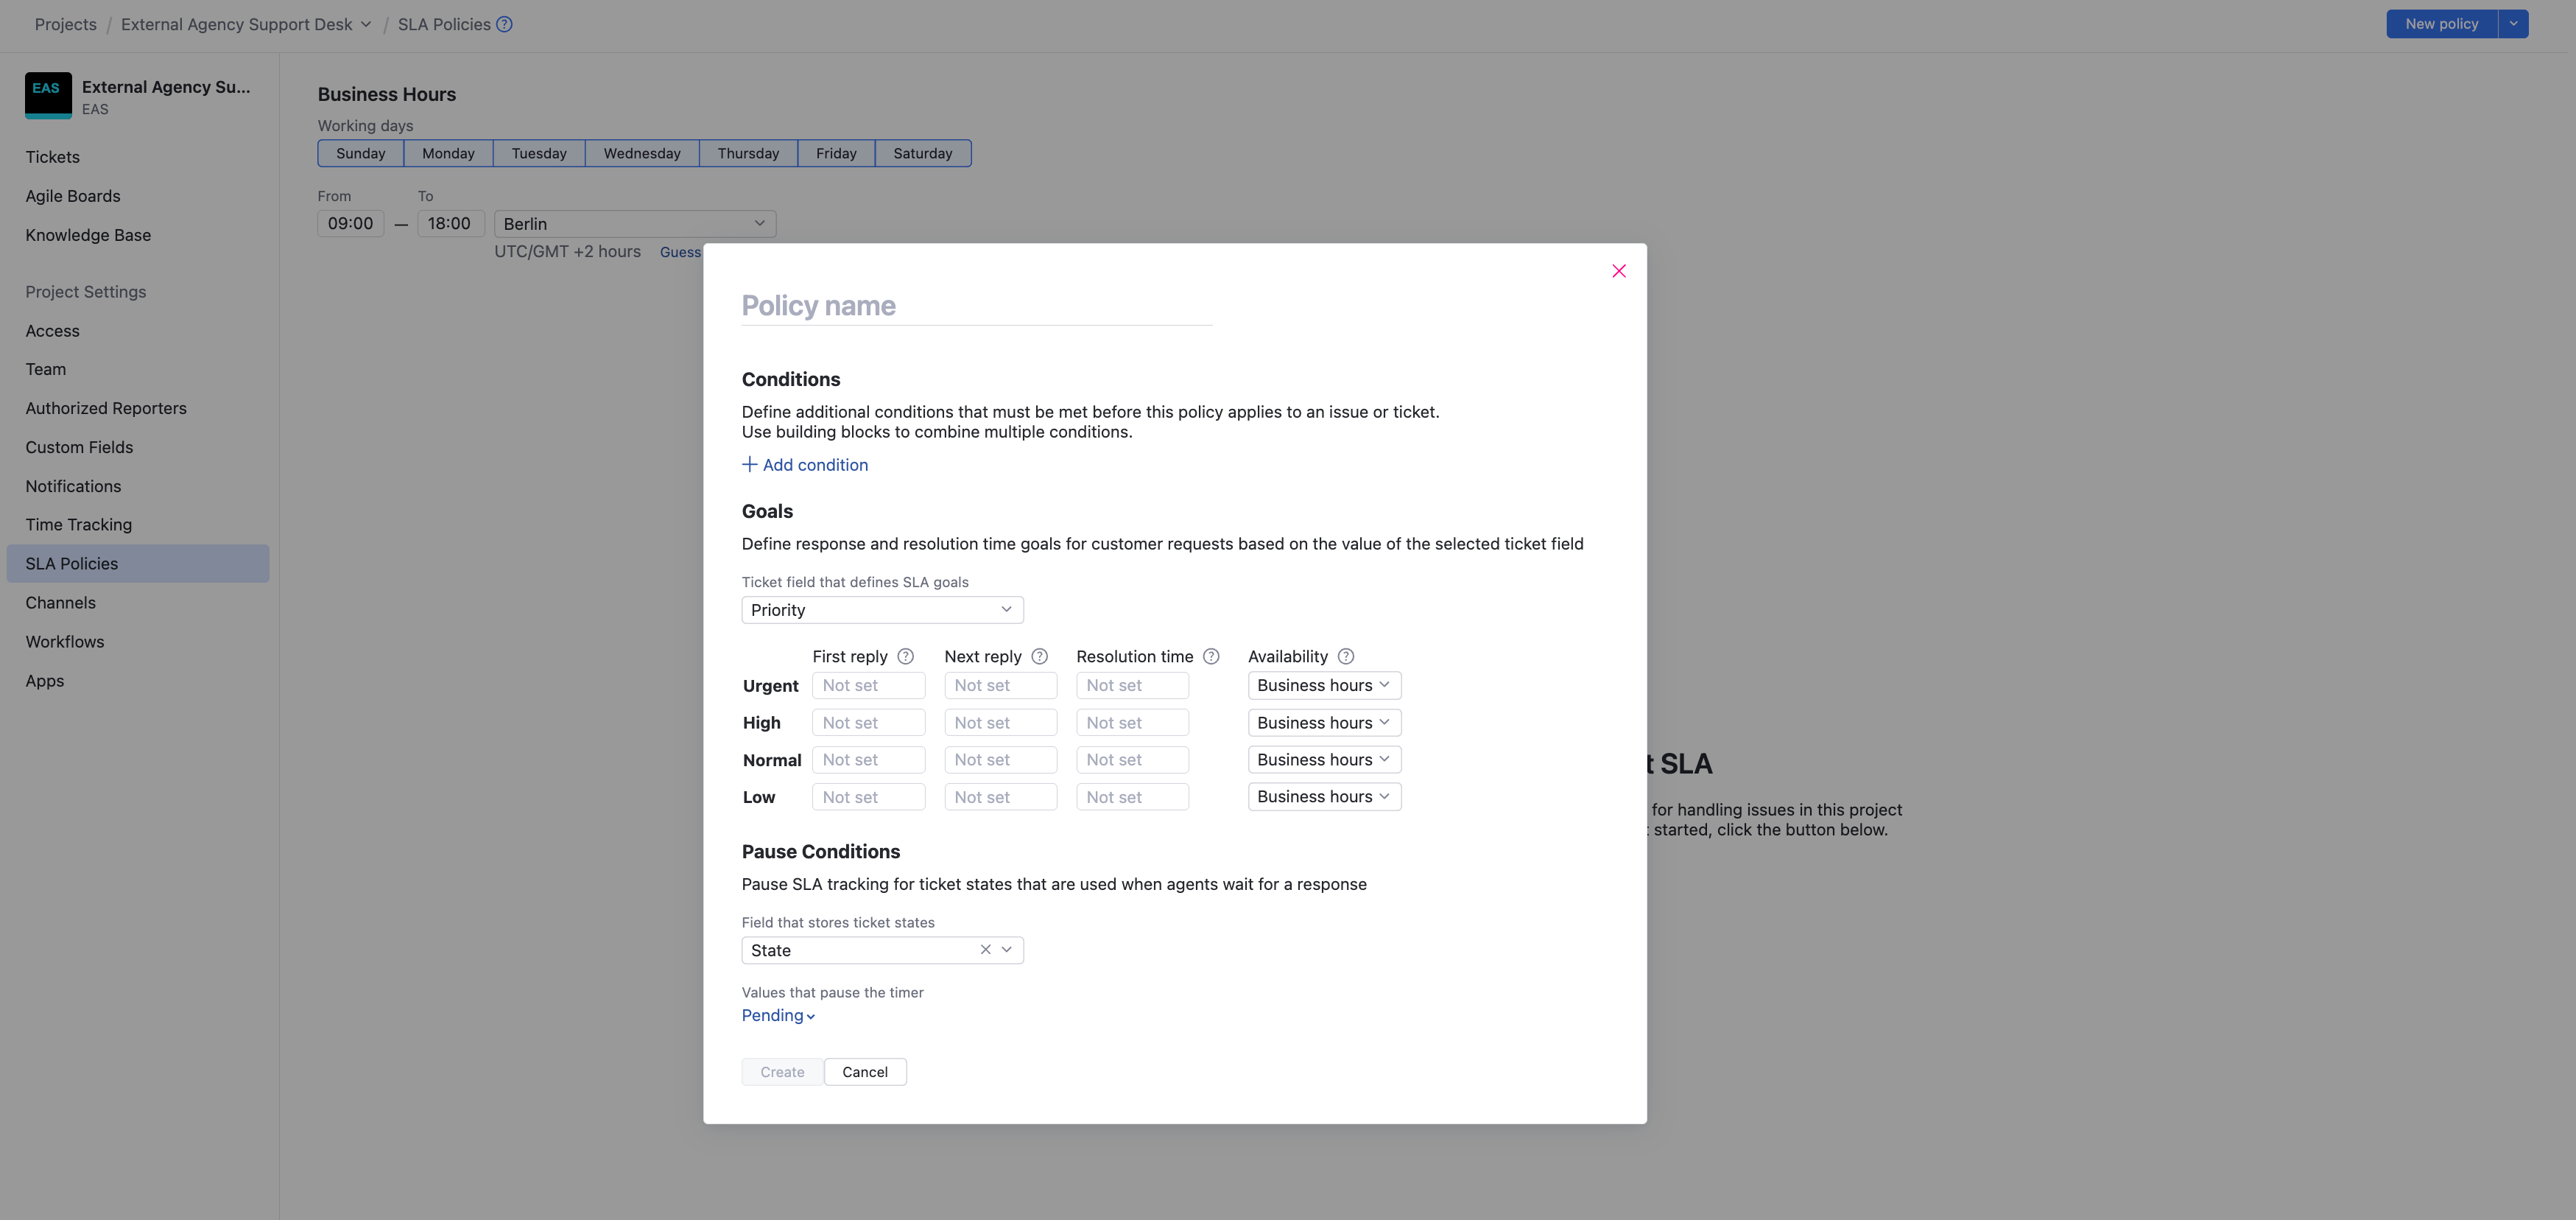
Set the policy name.
In the Conditions section, define additional conditions that must be met before this policy applies to a ticket. Use building blocks to combine multiple conditions.
For reference on building blocks and conditions, see Building Blocks and Conditions.
In the Goals section, select the custom field that will define your time goals for this SLA policy.
For each value of the custom field, configure the following options:
Option
Description
First reply
The time between ticket creation and the first public comment from an agent.
Next reply
The time between the oldest unanswered customer comment and the next public comment from an agent.
Resolution time
The time between ticket creation and resolution. This metric doesn't include the time ticket spends in the states that pause the timer.
Availability
The time frame when the service is available.
In this section of the policy settings, you can provide only those time goals that are relevant to your SLA and leave others empty.
In the Pause Conditions section, select the custom field to define the ticket state.
An additional dropdown appears.
Select the states that will pause the SLA tracking for tickets.
If you use the default State custom field for the ticket state, the Pending value is a good candidate for pausing the SLA. The Pending state is set to a ticket when the helpdesk staff is waiting for input from the customer, so the timer needs to be paused.
When done, click the Create button.
The SLA policy appears in the list of policies.
Toggle the Active option to enable the SLA policy for your helpdesk project.
If the project doesn't have custom fields for the First reply, Next reply, and Resolution time values, the requires setup label appears next to the SLA name.
If your project already has all required custom fields, the SLA becomes active immediately.
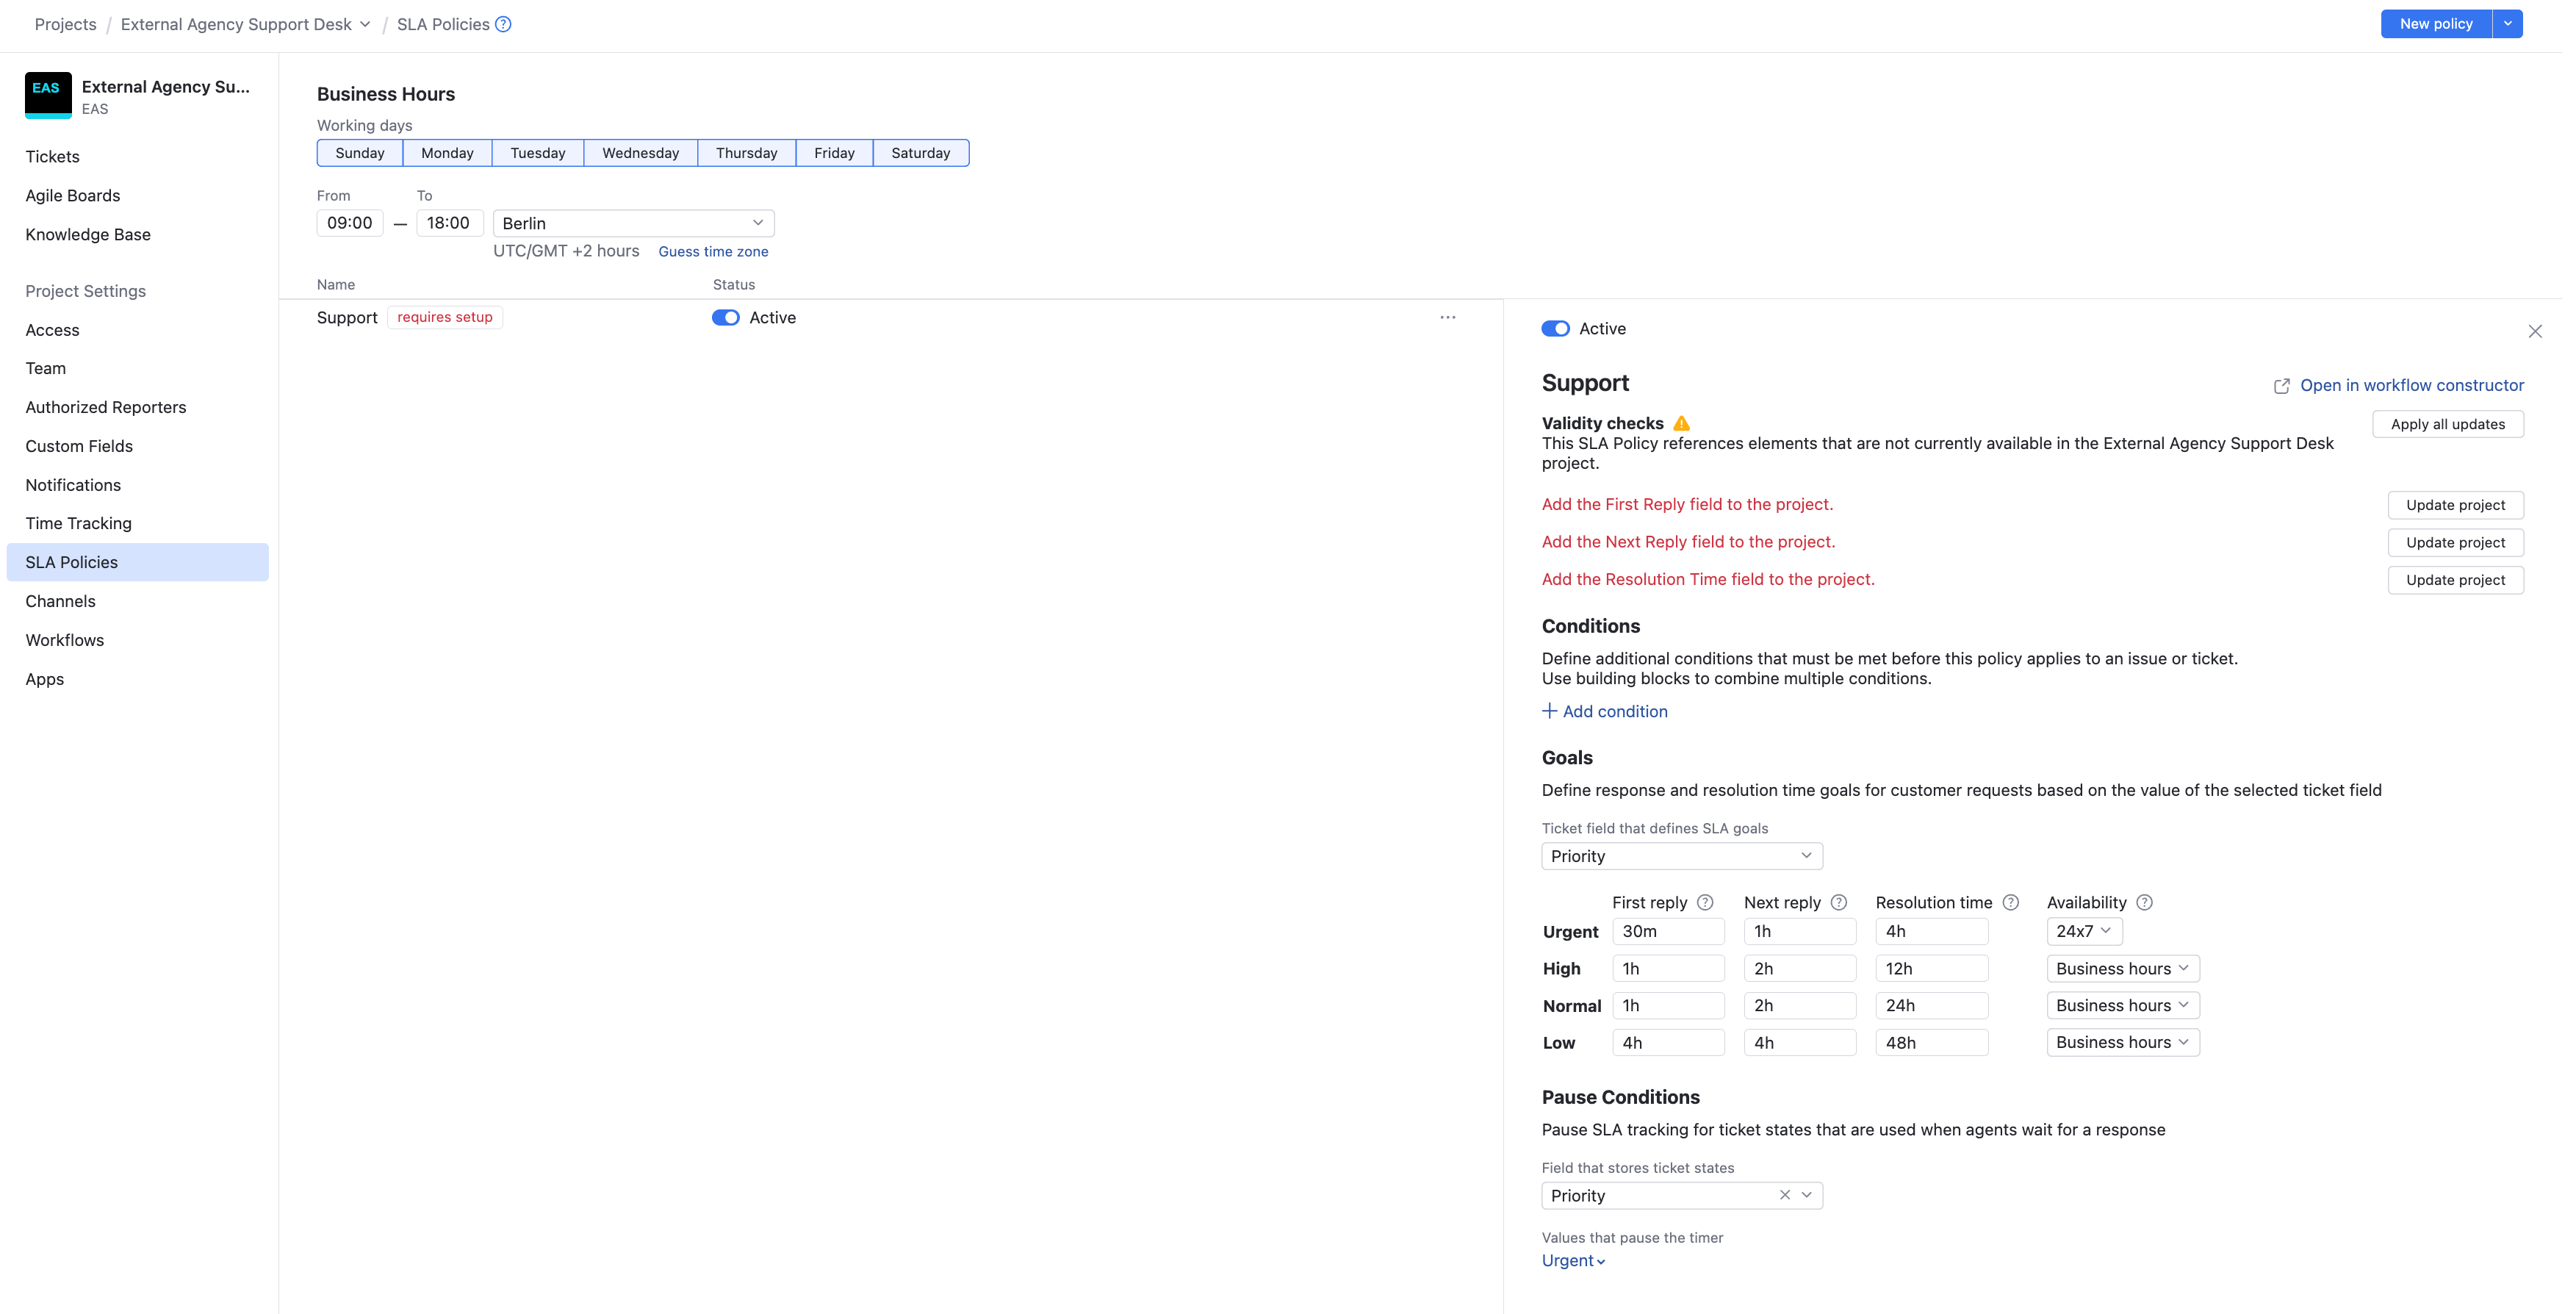
To finish the SLA setup, apply the custom field updates suggested in the details panel.
To add the suggested custom fields to the project one by one, click the Update project button for each field. To apply all updates and add all required custom fields at once, click the Apply all updates button.
To confirm the custom field updates, click the Apply button.
Custom fields First reply, Next reply, and Resolution time are attached to your project.
The SLA policy is configured and active in this project.
That's it, and you're ready to incorporate the SLA into your flow! YouTrack will help your staff comply with the SLA and handle requests within the specified time frame.
To learn how an SLA policy in YouTrack works, see SLA Policy in Action.
For details about creating JavaScript-based policies, see JavaScript SLA Policies.
Add an SLA Policy from Another Project
You can reuse the same SLA policy between different projects.
To add an SLA policy from another project:
From the main navigation menu, select
Projects.
Click the name of the helpdesk project you want to configure.
In the Project Settings section of the project navigation menu, select SLA Policies.
Expand the dropdown to the right of the New policy button
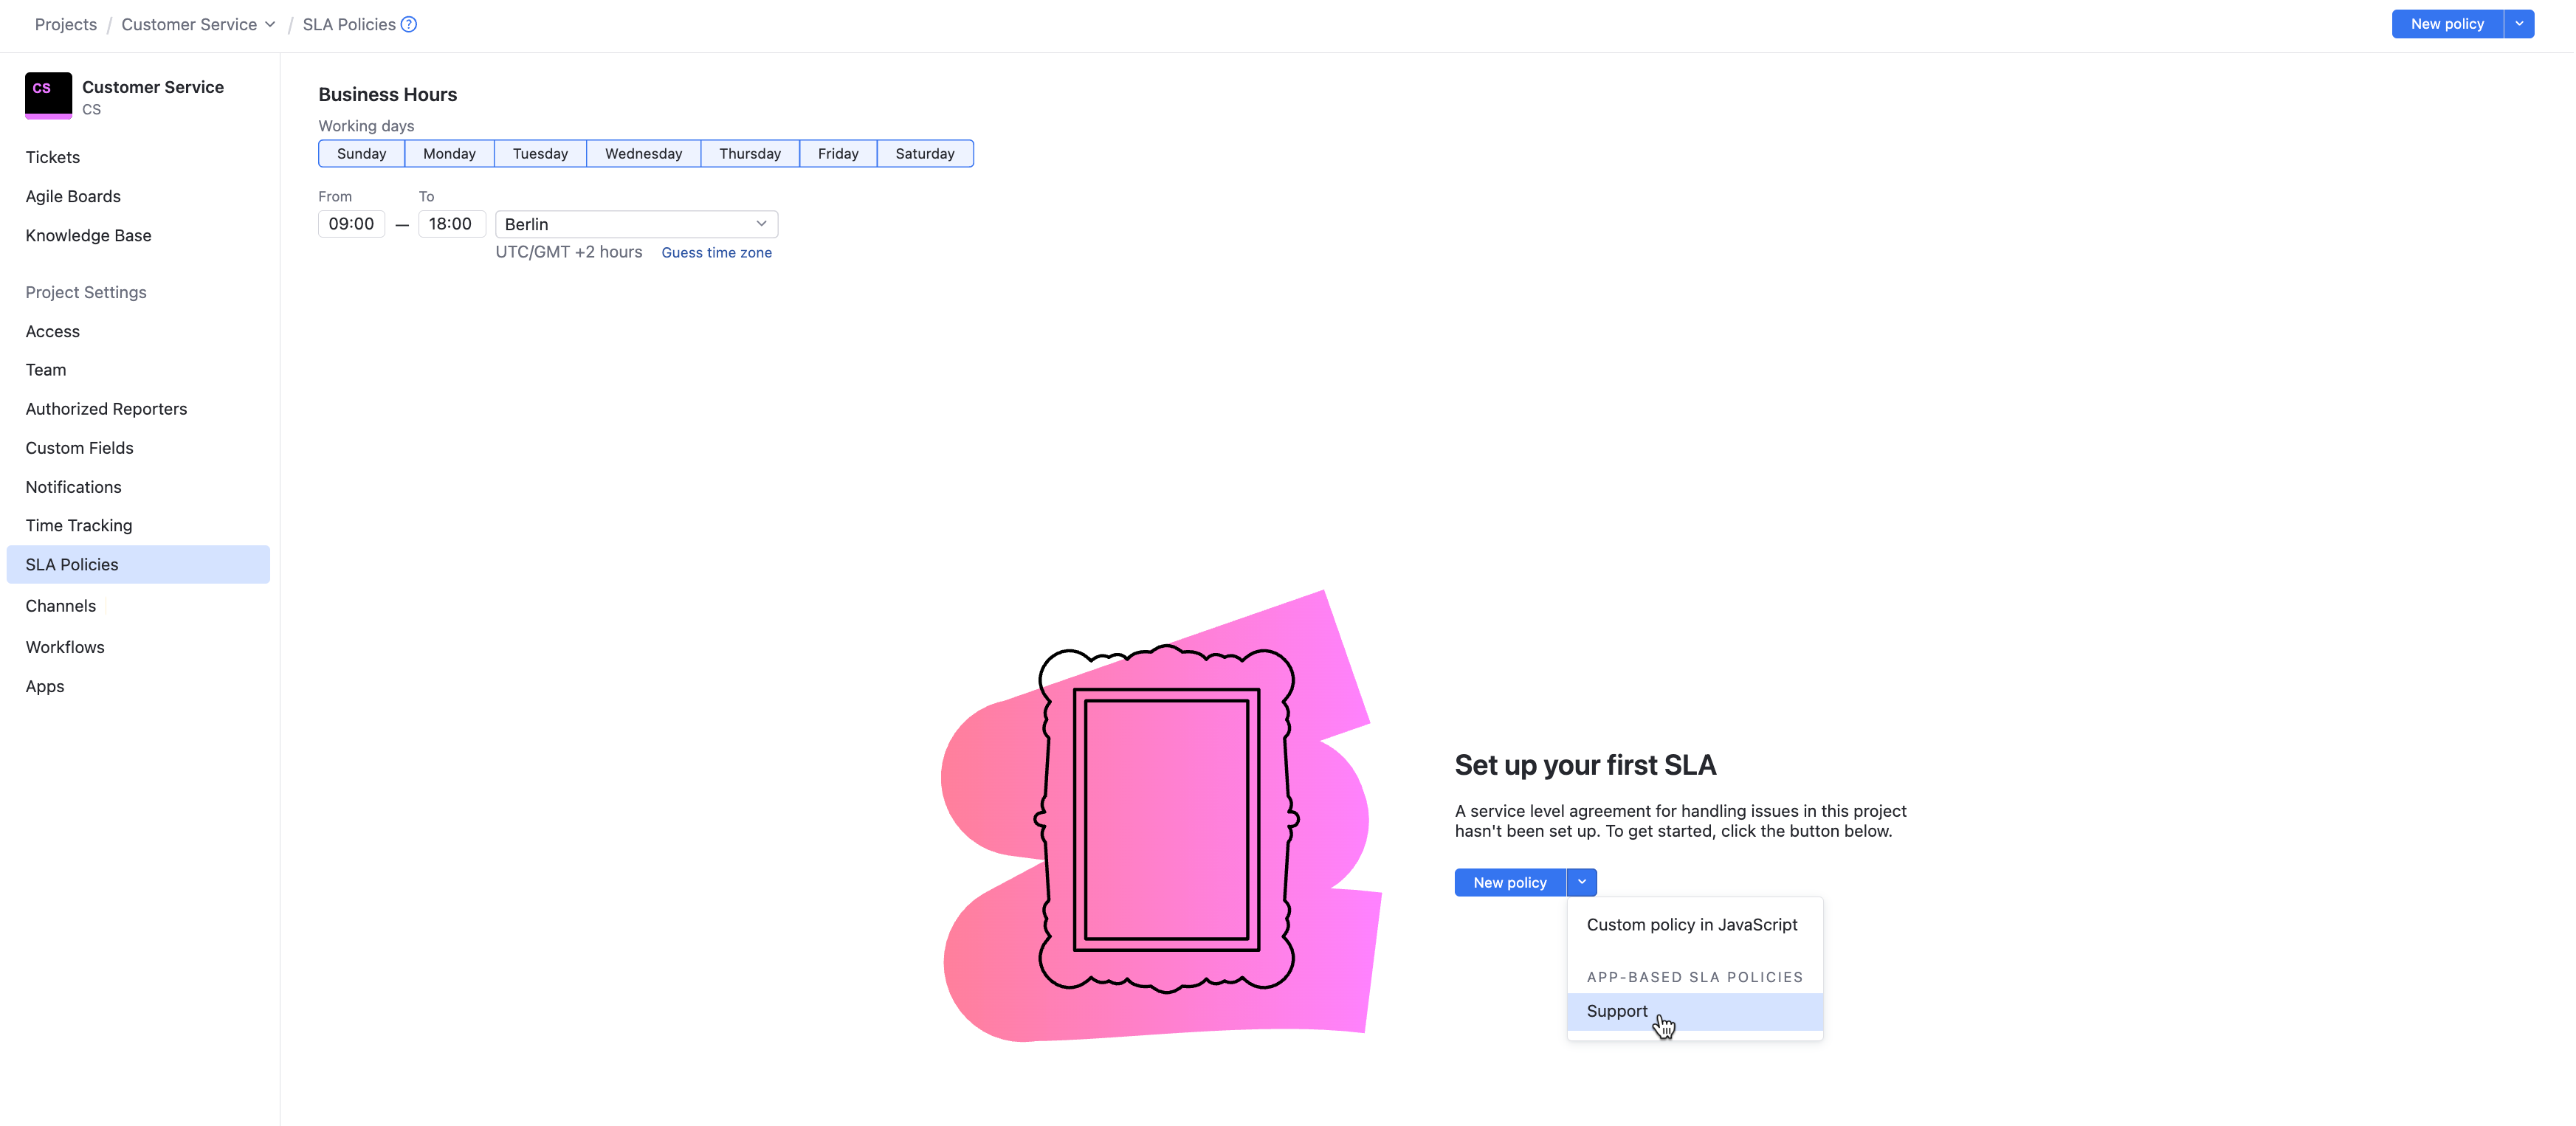
Select the SLA policy from the dropdown.
The SLA policy is added to the current project and is already active. If it requires setup, proceed to edit the SLA policy.
Edit an SLA Policy
You can edit an SLA policy on the SLA Policies page or using the Workflow Constructor.
To edit an SLA policy:
From the main navigation menu, select
Projects.
Click the name of the helpdesk project you want to configure.
In the Project Settings section of the project navigation menu, select SLA Policies.
From the list of SLA policies, click the SLA policy you want to edit.
The Details panel for the selected SLA policy opens.

Update the settings of the SLA policy in place.
Alternatively, click the Open in Workflow Constructor button and update the policy in the Workflow Constructor. To learn how to work with the Workflow Constructor, see Workflow Constructor.
When done, click Save.
The SLA policy is updated, and the updates apply to the tickets immediately.
Remove an SLA Policy
When the time goals for replies have changed for the service you provide, you can remove an SLA policy from a project.
To remove an SLA policy:
From the main navigation menu, select
Projects.
Click the name of the helpdesk project you want to configure.
In the Project Settings section of the project navigation menu, select SLA Policies.
In the list of SLA policies, locate the SLA policy you want to edit.
The Details panel for the selected SLA policy opens.
To the right of the policy name, click the
Show more button.
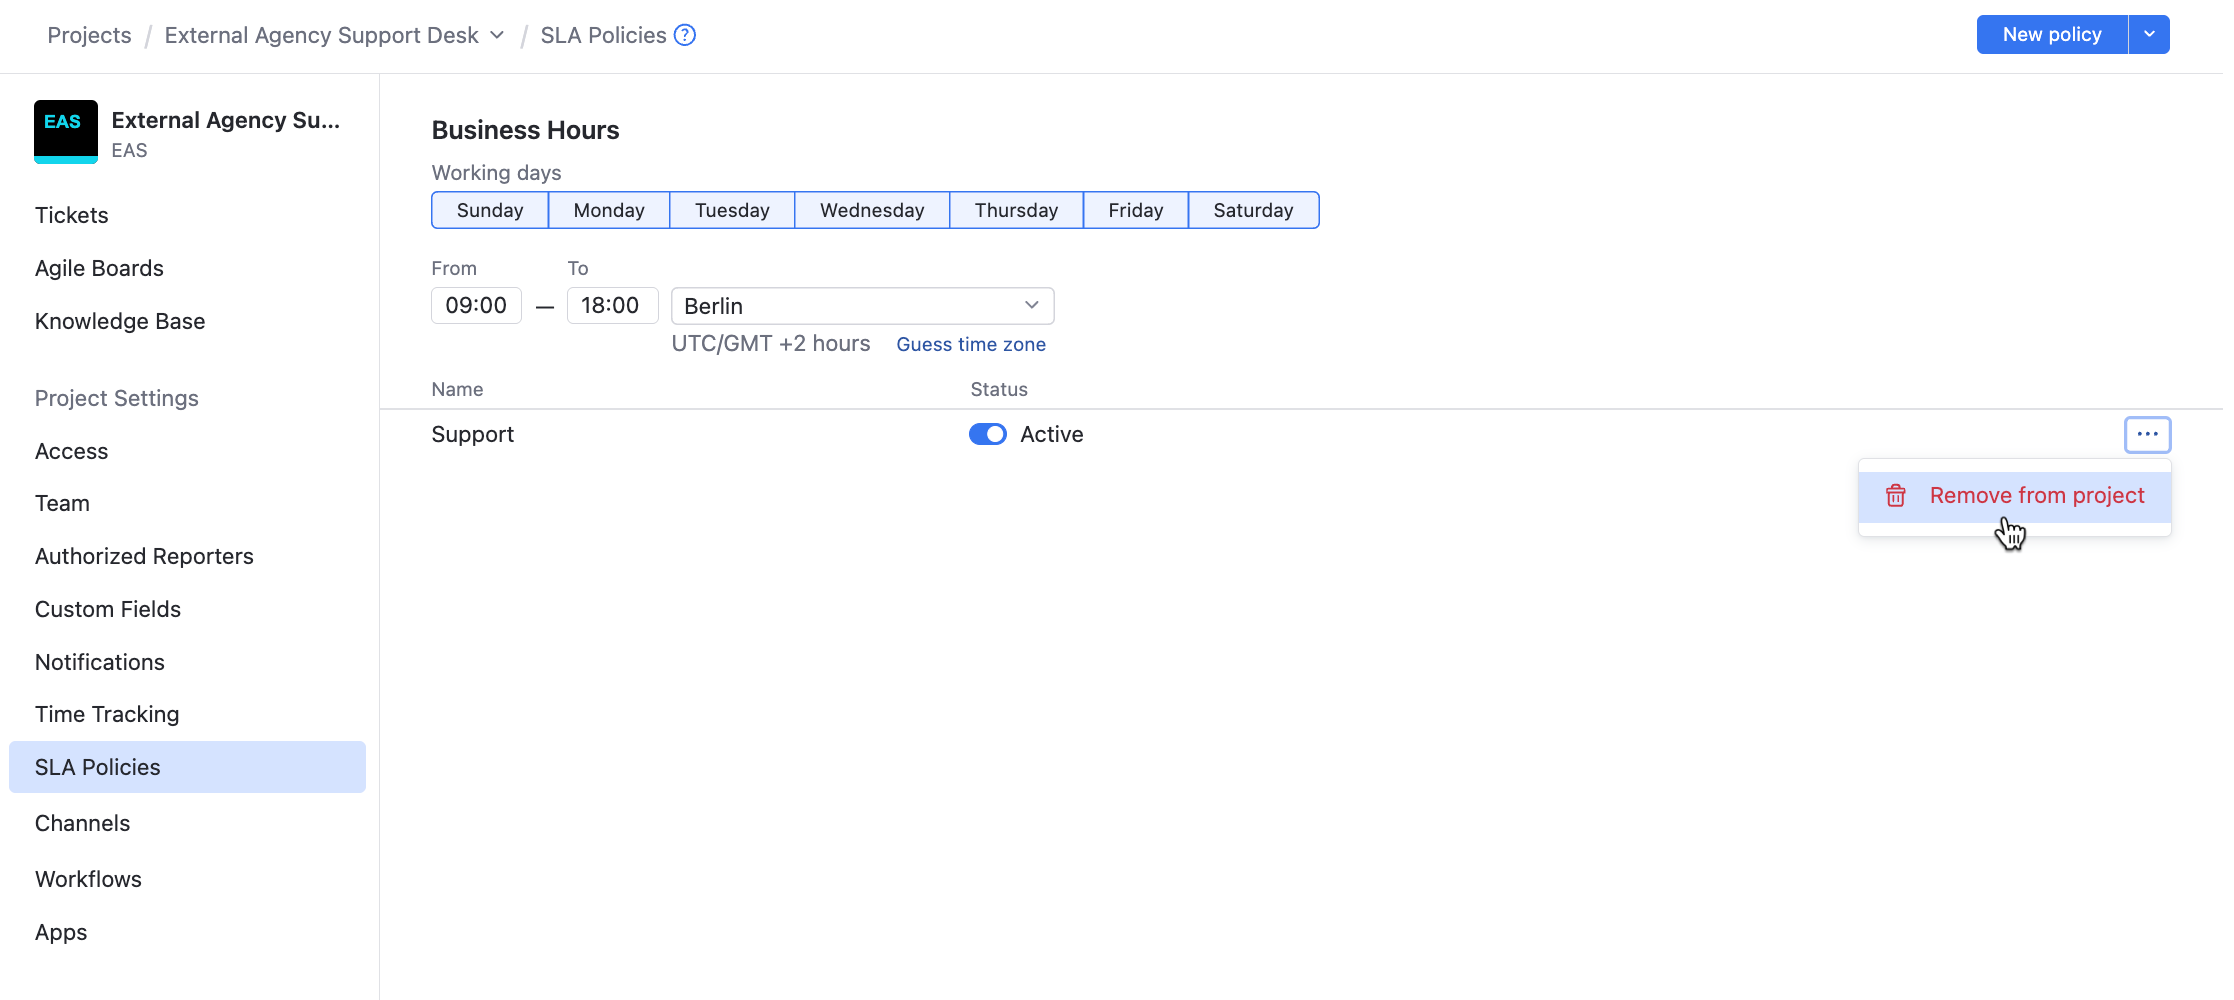
Click the Remove from project button.
Confirm removing the policy from the project.
The SLA policy is removed from the project.
SLA Policy Settings
Here, you view all the configuration options available for an SLA policy. These options are available when you create or edit an SLA policy in the project settings.
Conditions
In the Conditions section of the settings, you can add one or more conditions and link them to one another using building blocks. Each block represents a condition that must be met before this SLA policy applies to a ticket.
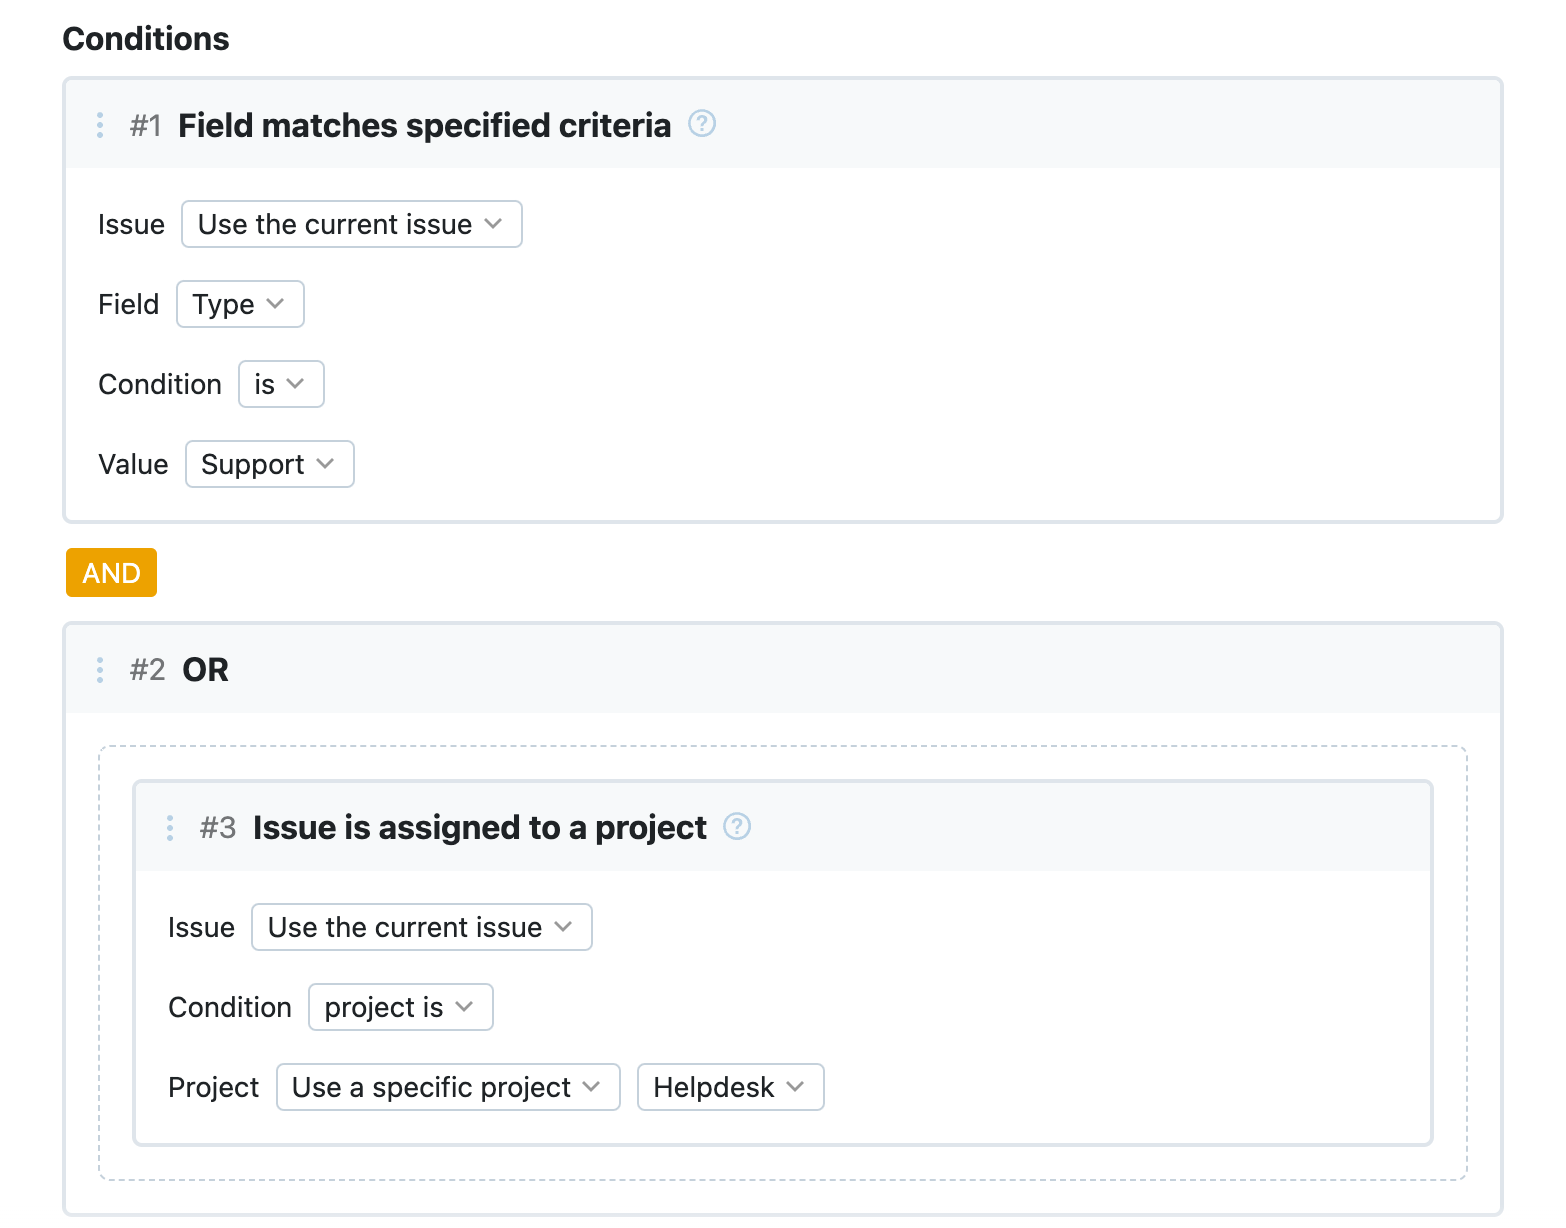
When adding multiple conditions, each condition automatically connects to the existing ones with a logical AND operator. This means that this SLA policy applies to a ticket only when every condition in the Conditions block is met.
You can combine conditions in different ways using building blocks. To learn more, see Building Blocks.
For the full reference on available condition blocks, see Conditions.
For the full reference on available building blocks that link conditions, see Building Blocks.
Goals
In the Goals section of the settings, you define the time goals for the replies from agents to customers. You need to select the custom field that will define goals for this SLA policy, and then configure the particular goals for each custom field value.

For each value of the custom field that defines your goals, configure the following options:
Option | Description |
|---|---|
First reply | The time between ticket creation and the first public comment from an agent. |
Next reply | The time between the oldest unanswered customer comment and the next public comment from an agent. |
Resolution time | The time between ticket creation and resolution. This metric does not include the time the ticket spends in the Pending state. |
Availability | The time frame when the service is available. |
In this section of the policy settings, you can provide only those time goals that are relevant to your SLA and leave others empty.
Pause Conditions
In the Pause Conditions section, select the custom field that will be used for defining the ticket state. You can select any custom field of type state or enum.

When you've selected the state custom field, an additional dropdown appears.
Select the states that will pause the SLA tracking for tickets.
If you use the default State custom field for the ticket state, the Pending value is a good candidate for pausing the SLA. The Pending state is set to a ticket when the helpdesk staff is waiting for input from the customer, so the timer needs to be paused.
Available Actions for SLA Policies
When you select an SLA policy from the list, the following actions are available:

Action | Description |
|---|---|
Active | Toggles the status for the current SLA policy. When an SLA policy is active, it can be applied to new tickets if they match the conditions. |
Drag to reorder | When you have several SLA policies in one project, you can drag and reorder them in the list. Use the Drag to reorder control to the left of the SLA policy name in the list to reorder policies. When deciding which policy to apply to a particular ticket, YouTrack considers the position of the policy on the list. This means that with each ticket, YouTrack will go through the list of SLA policies from top to bottom and apply the first SLA policy that this ticket matches. |