New Issue View
The page that you use to report an issue is stripped down to include only what you need to create an issue in YouTrack. To access this page, click the New issue button in the application header. Alternatively, you can click the New issue icon in the header for the list of issue drafts in the left sidebar.
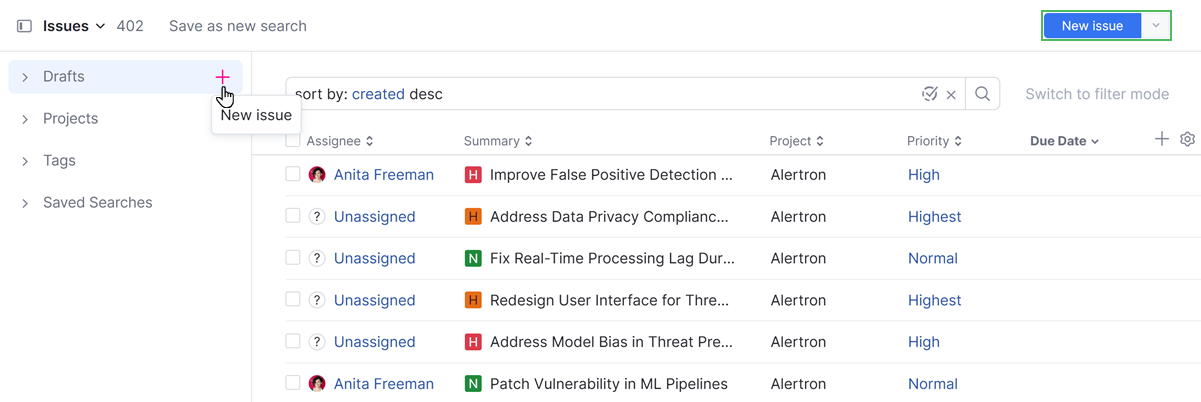
When you start to report a new issue, the form opens as a dialog. To open the form in its own page, click the View in full page link at the bottom of the form.
Project Selector
For new issues, the project that the issue is assigned to when reported is shown at the top of the field panel.
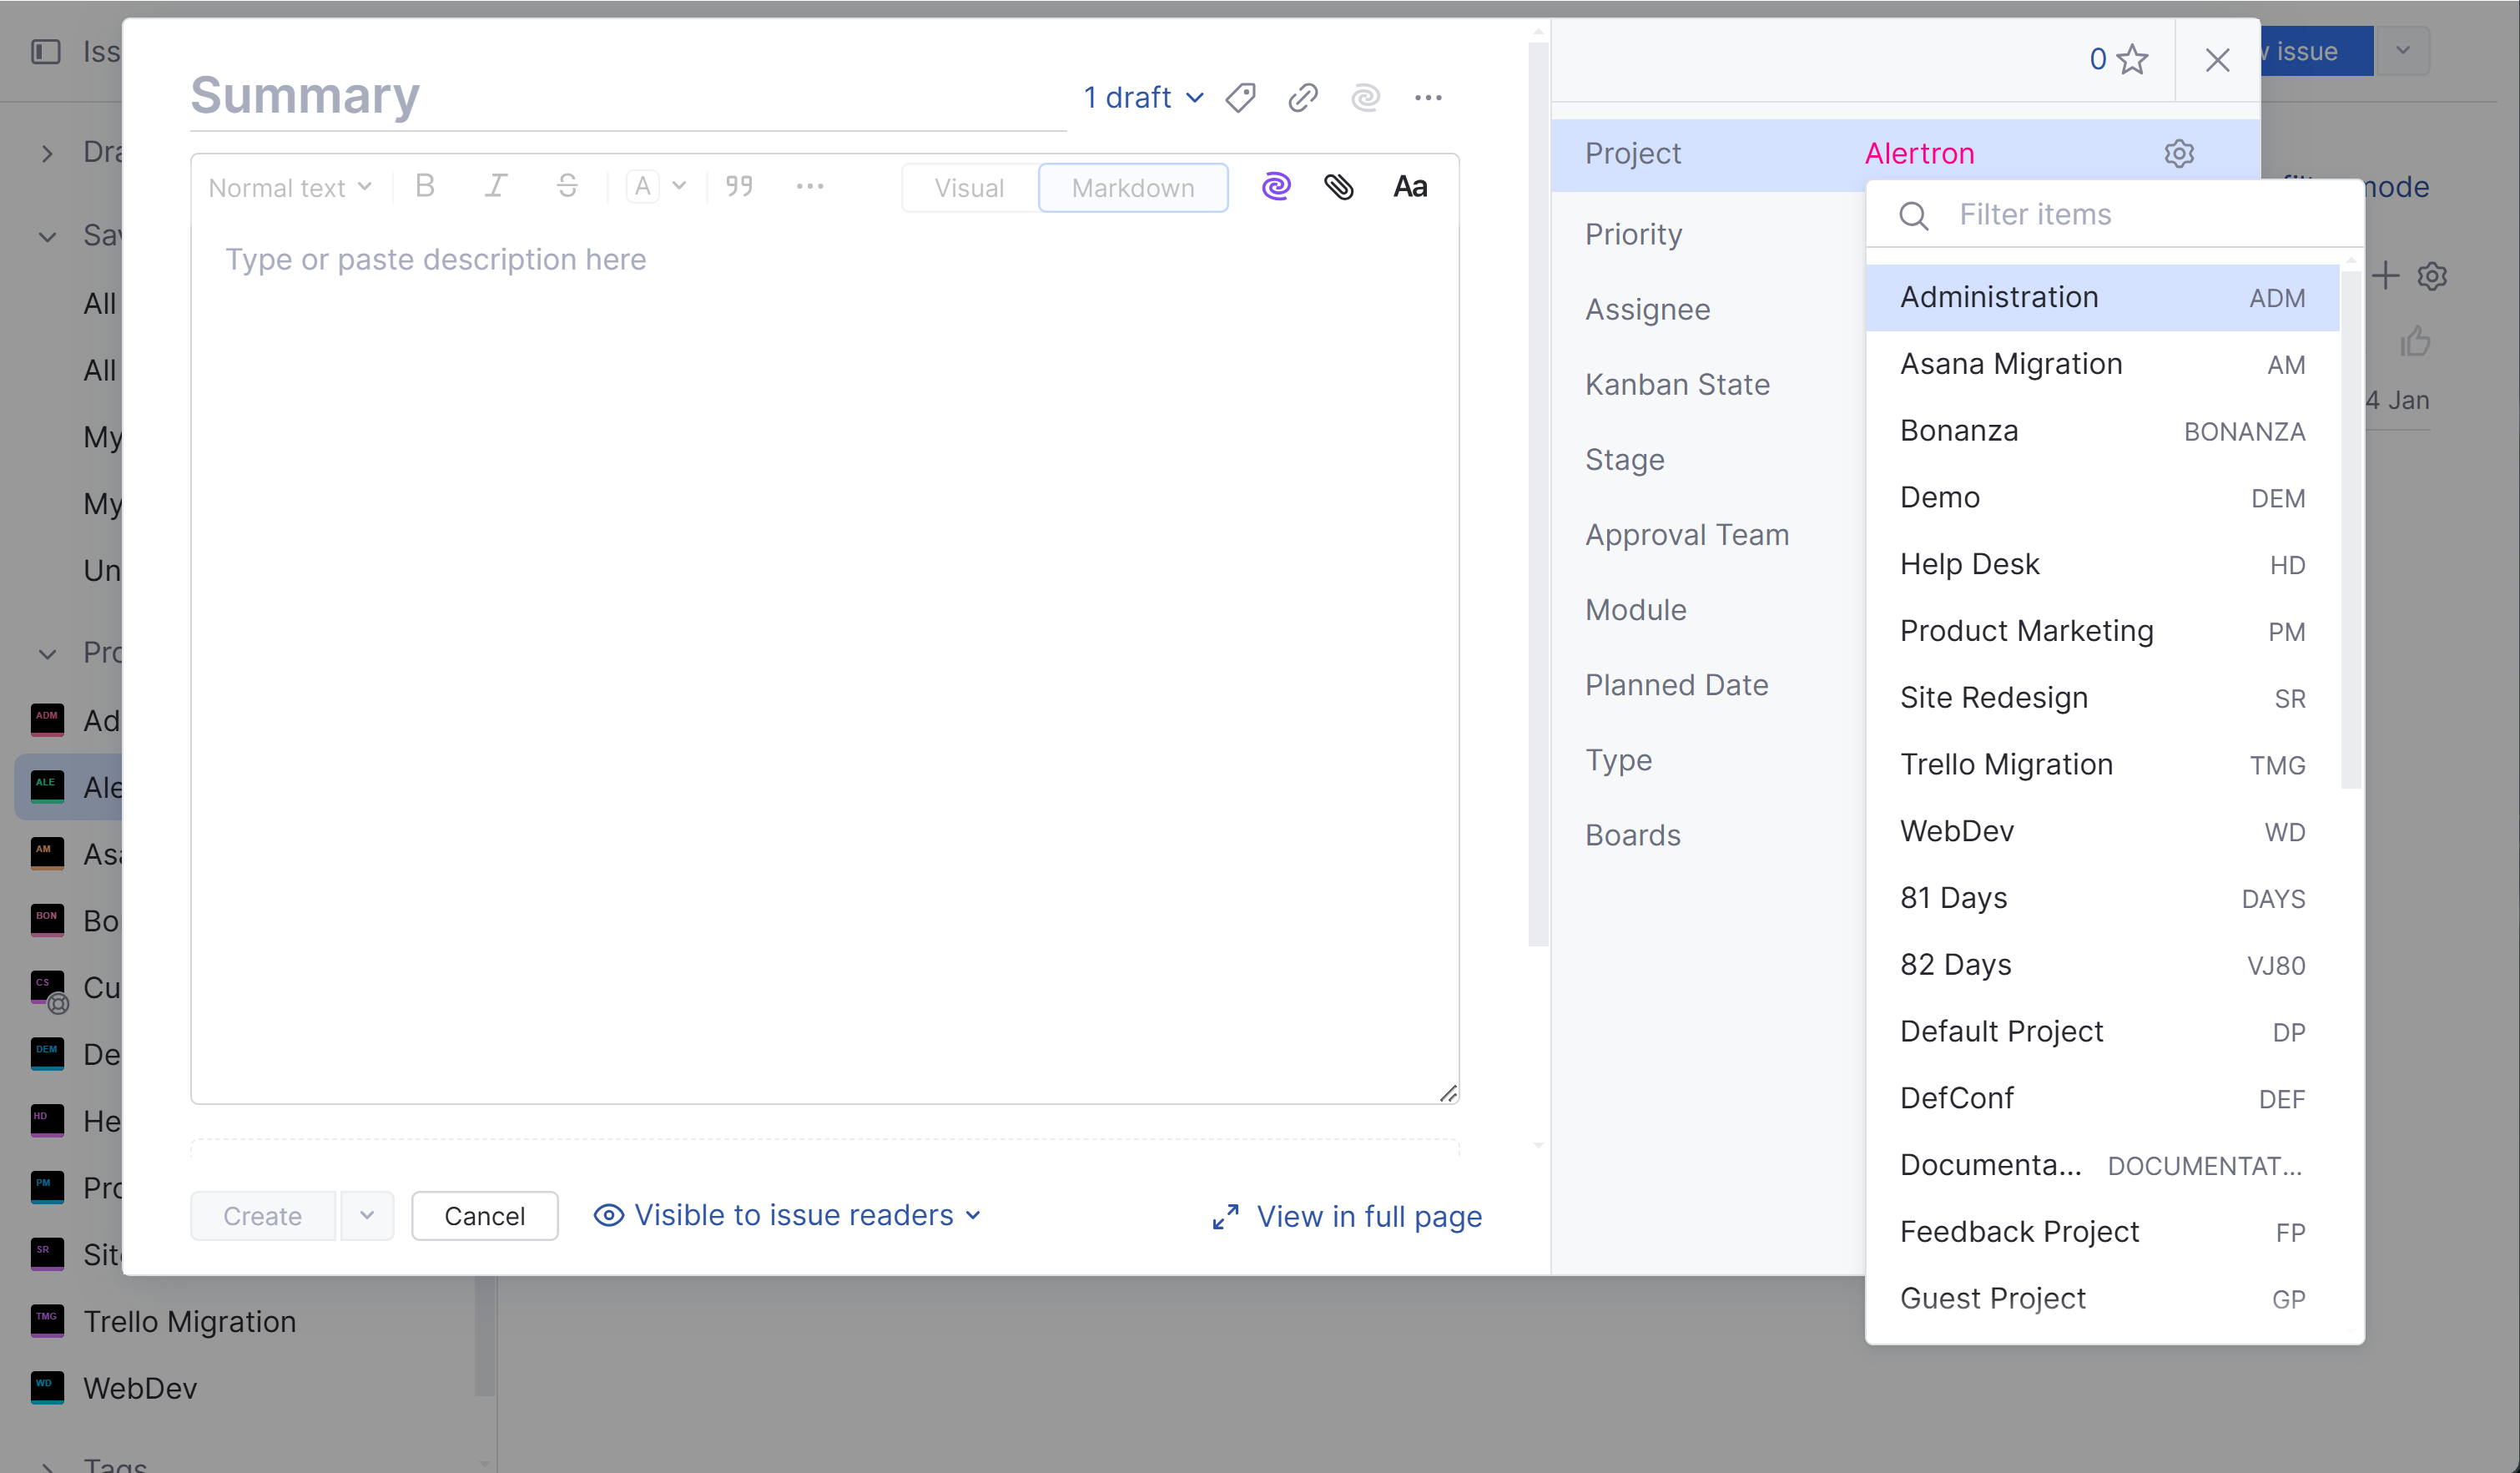
Many of the attributes that are assigned to issues in YouTrack are defined at the project level. If you only have access to one project, the value for this field is set automatically. Otherwise, the project in which you have most recently created an issue is selected for you.
The following factors affect the order of the projects that are shown in the list.
If you are using a project as your search context, this project is used as the default value for new issues. For more information, see Search Context for Projects.
Next, you see the projects that you have marked as favorites in the Projects list.
After your favorite projects, all other projects are listed in alphabetical order.
Every issue belongs to one project — you can never select an empty value. As you change this value, the set of available custom fields can change as well.
Toolbar
The toolbar provides access to the same actions that are supported in the view for single issues.

The following actions are available:
Action | Description |
|---|---|
Drafts | Opens the list of unreported issue drafts. This option is available when you have at least one draft. To learn more, see Draft Management. |
Add tag | Adds a tag to the issue draft. Select an existing tag from the list. Enter a value in the input field to filter the list of tags. |
Add links | Opens the Add links controls. These controls let you add links to the issue while it's still in draft stage. To learn more about linking issues, see Link Issues. |
AI Assistant | Lets you access the option to generate a new issue summary with the help of the AI Assistant. This option becomes available when you enter an issue description. To learn more, see AI Assistance in Issues. |
Show more | Opens a list of additional actions. This menu also provides access to custom commands that are supported by workflows. For details, see Show More Menu. |
Show More Menu
The following actions are available from the Show more menu:

Control | Description |
|---|---|
Open command dialog | Opens the Apply Command dialog that lets you update the issue draft using the keyboard-centric command syntax. To learn more about commands, see Commands. |
Repeat last command | Open the Apply Command dialog with the most recent command in the input field. |
Attach files | Opens a dialog that lets you locate and attach a file from your local directory. |
Attach files privately | Opens the Attach Files Privately dialog. Here, you have the option to restrict the visibility for all files to specific groups and/or users. Use this option for files that contain sensitive information. |
Copy issue template URL | Generates a URL with the data that you've already entered in the fields of the issue draft and copies this URL to the clipboard. Use this option when you want to create several issues with the same basic set of attributes or standardize issue reporting for a group of users. To learn more, see Work with Issue Templates. |
Custom actions | The items at the bottom of the Show more menu are custom actions that are supported by workflows. The set of actions that are available in each issue is determined by the workflows that are attached to the current project. For more information, see Action Rules. |
Draft Management
The New Issue page lets you access a list of unreported issue drafts.

The Drafts menu in the sidebar lets you perform any of the following actions:
Click the issue summary to load a draft in the new issue form.
Click the
Delete draft icon to permanently delete an issue draft. This icon only appears when mousing over a draft.
Click the
Delete all drafts icon at the top of the menu to discard all issue drafts.
Click the
New issue icon at the top of the menu to load an empty form. Any input that is currently stored in the form when you perform this action is saved as a new draft and added to the list.
The sidebar is only visible in full page view. In modal and full page view, you can access the list of drafts from the toolbar.
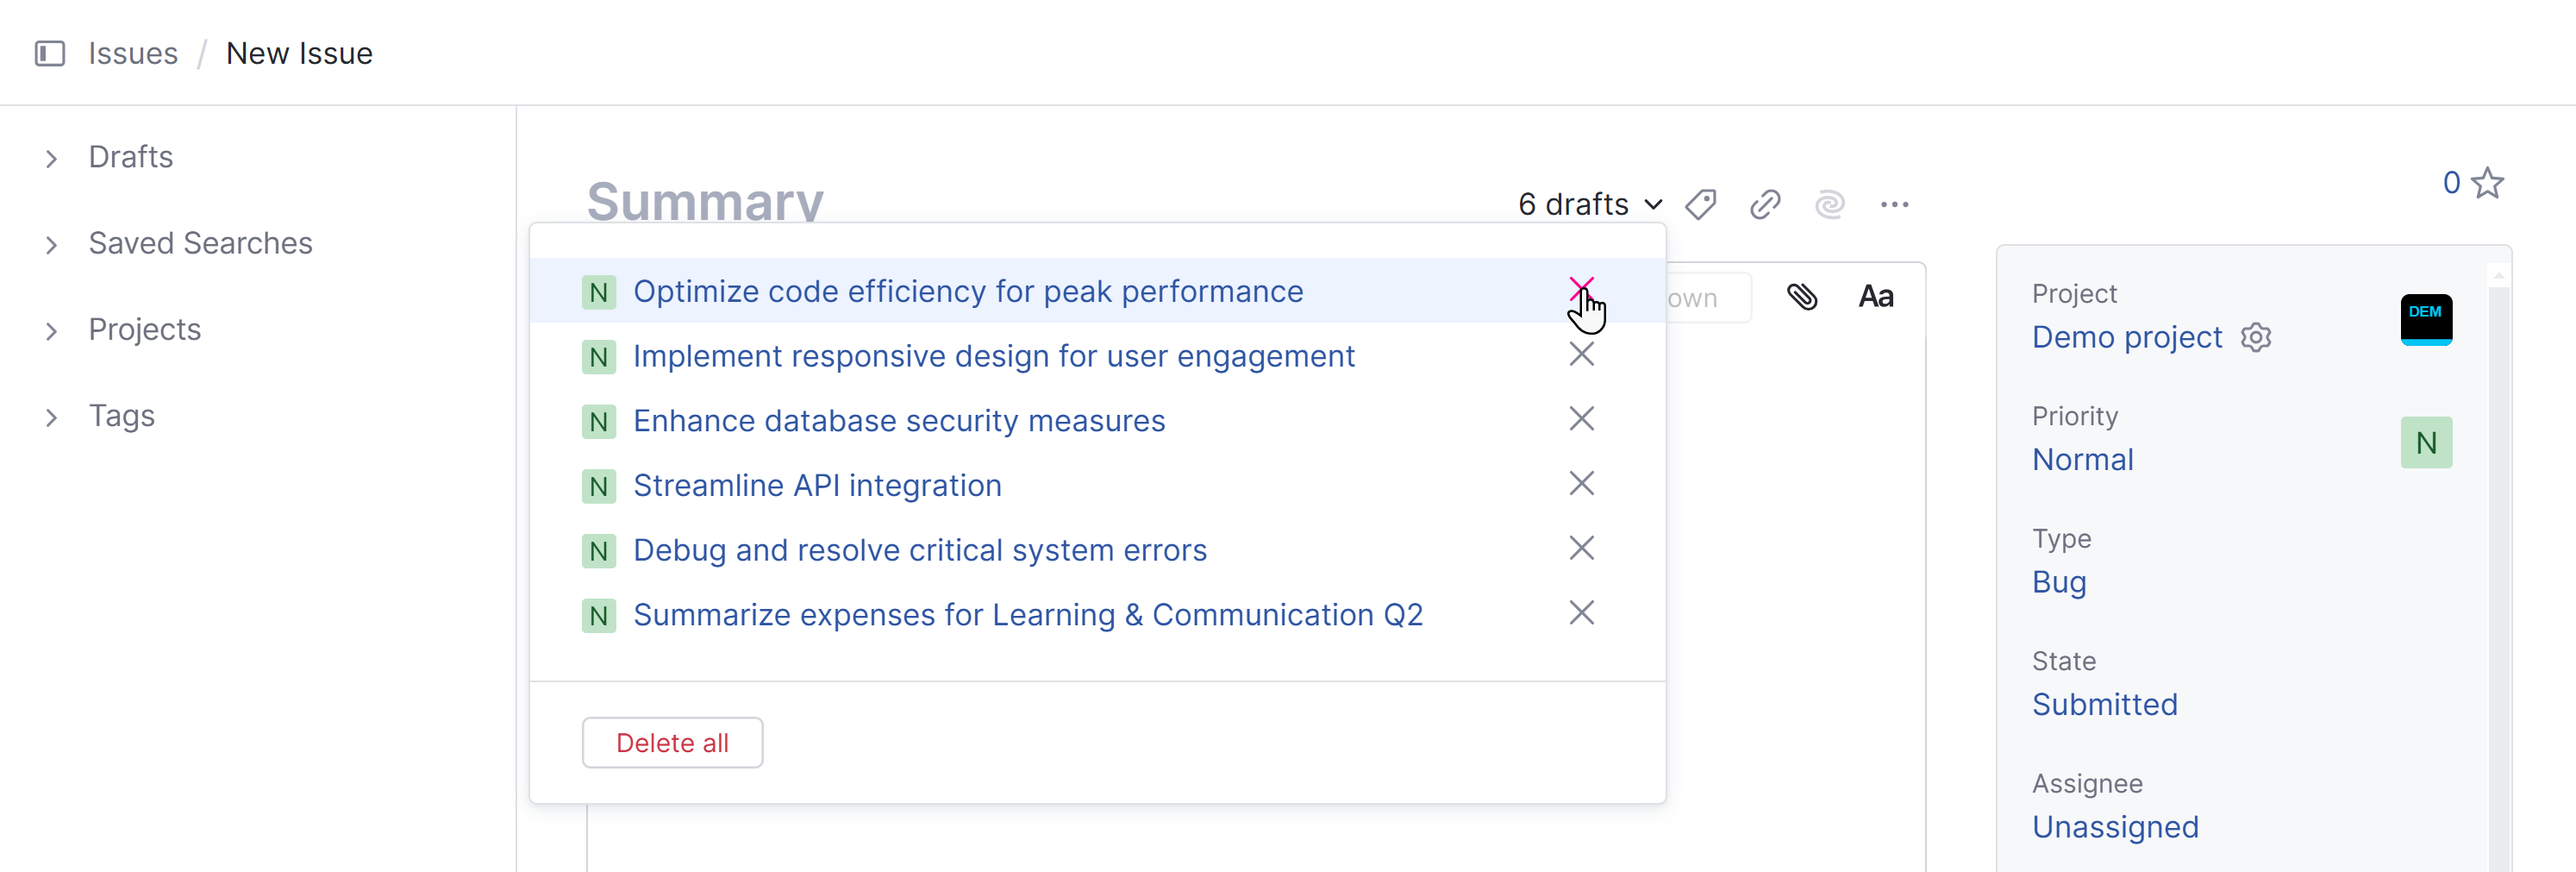
From the Drafts drop-down list, you can perform the following actions:
Click the Remove draft option to delete the draft and remove it from the list.
Click the Delete all button to remove all unreported drafts and start from scratch.
For more information, see Load Issue Drafts.
Issue Summary
Every issue must include a summary.
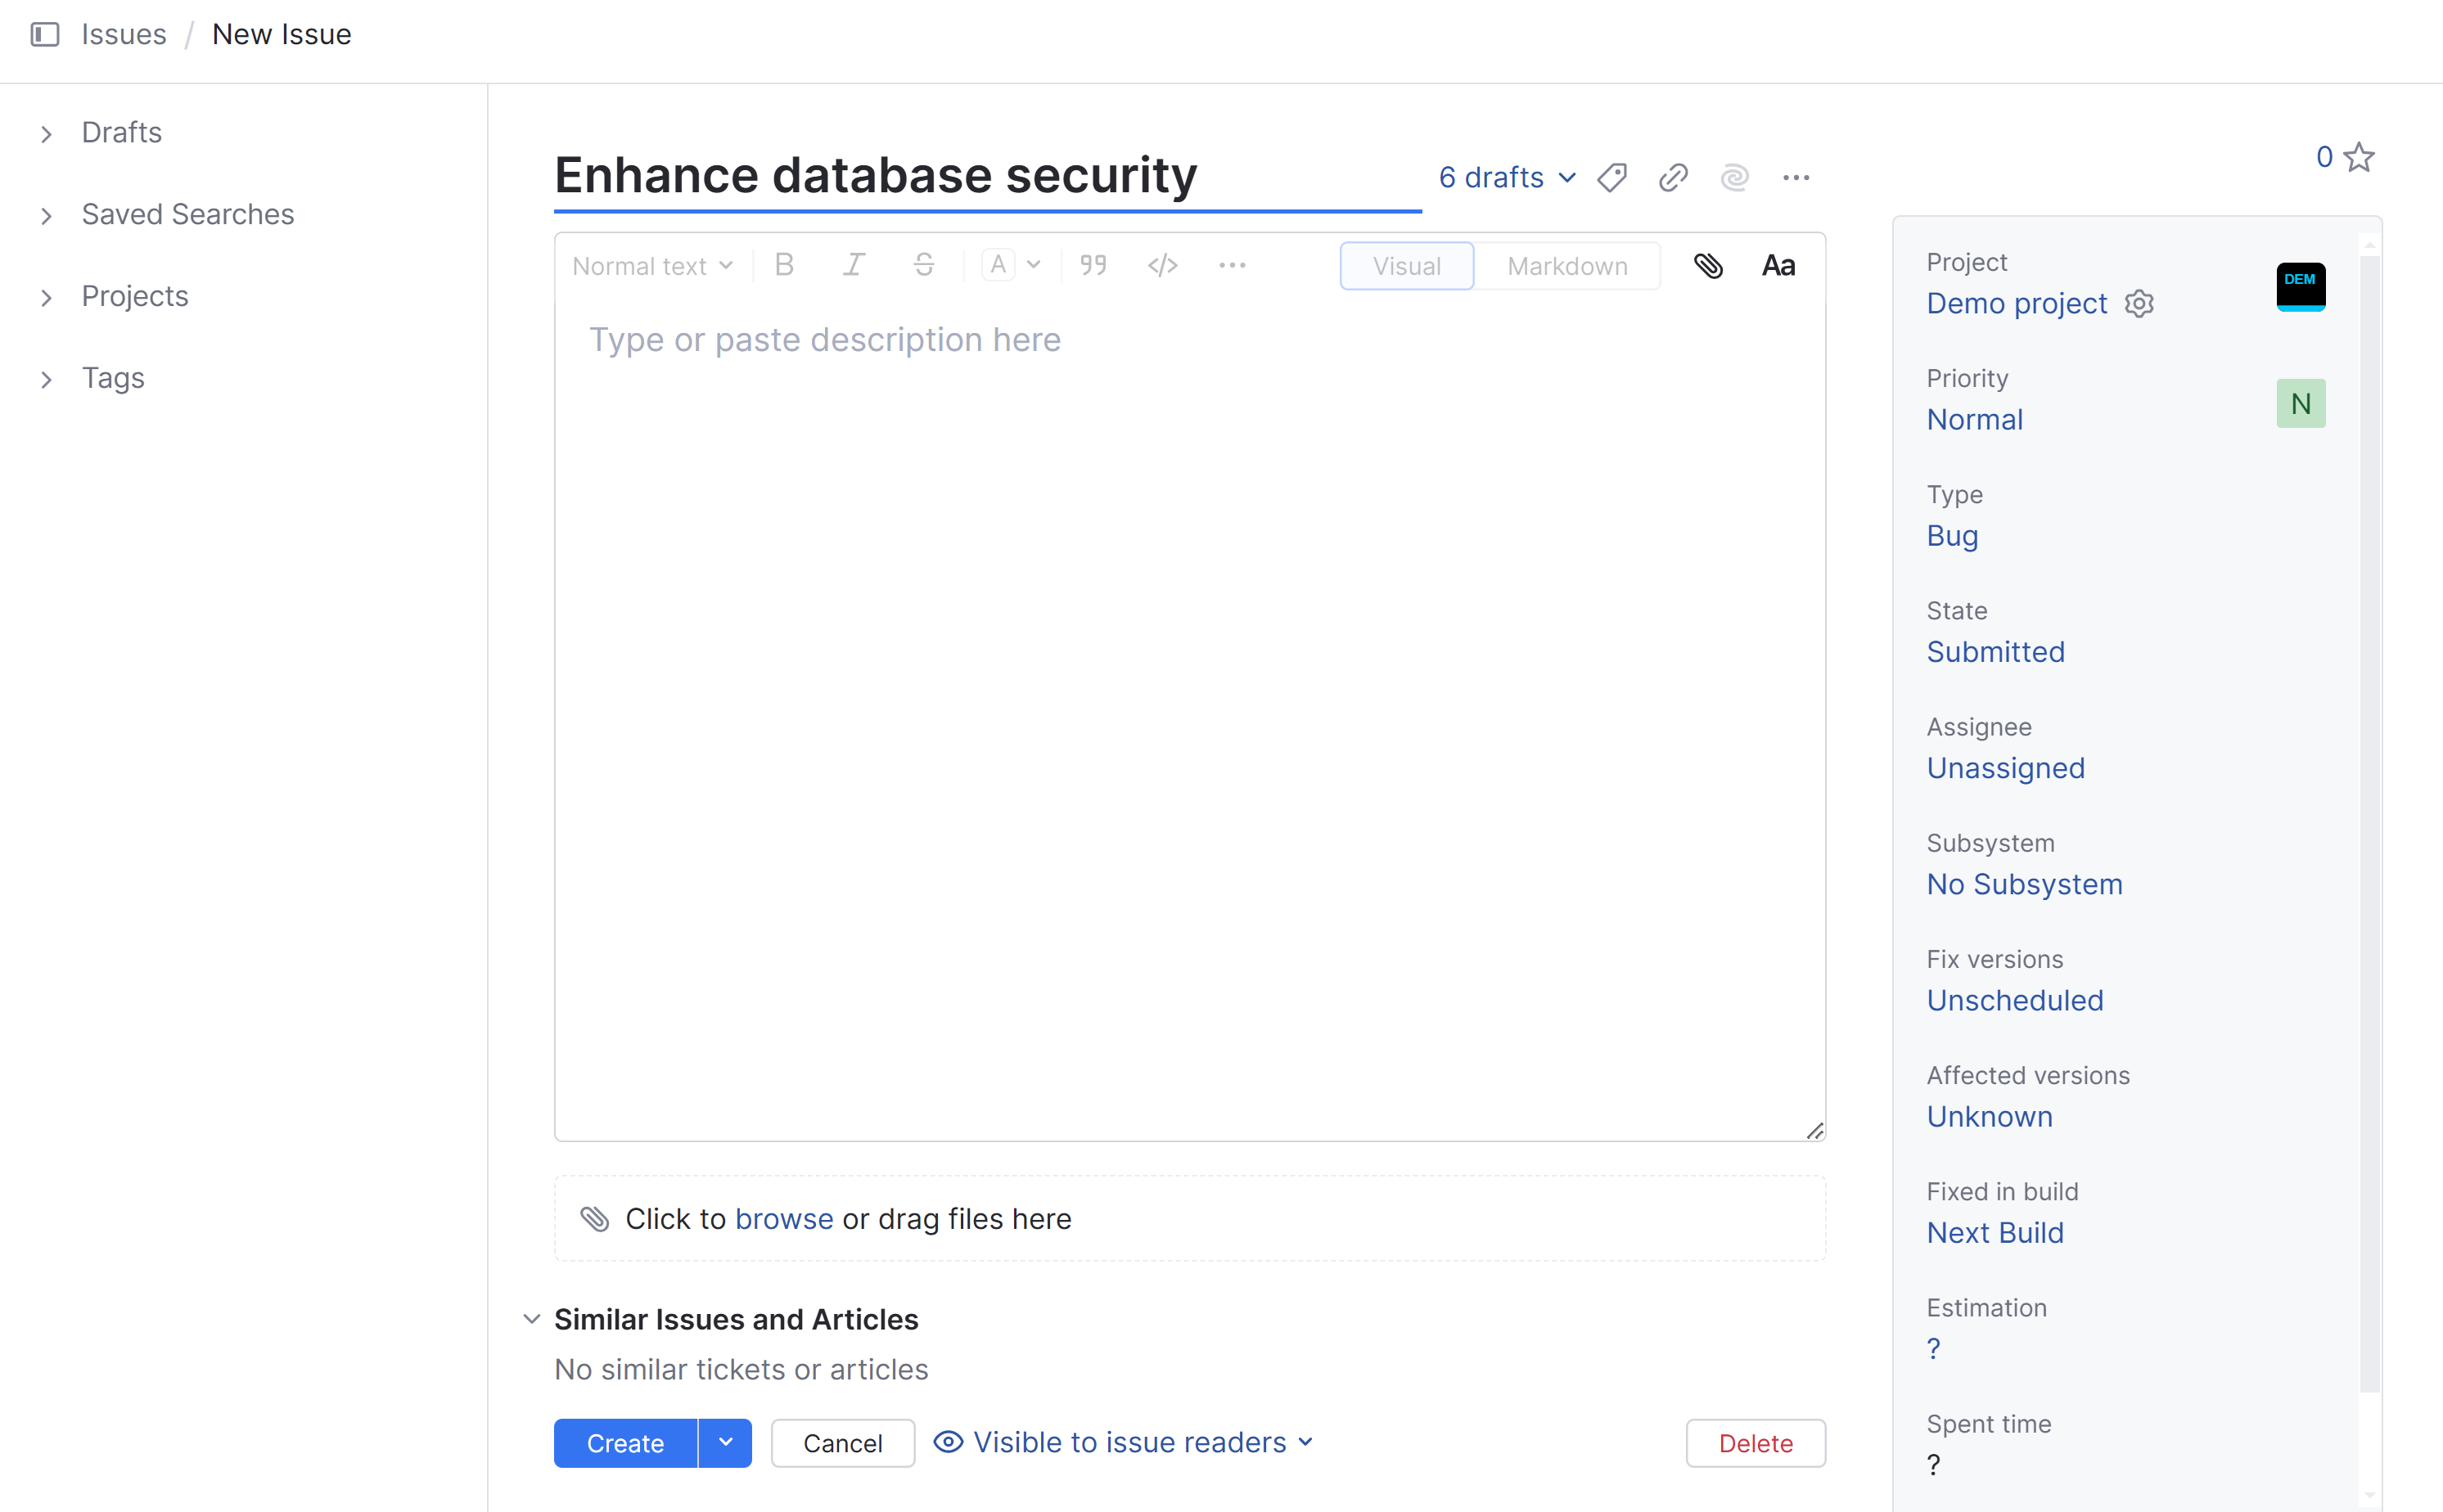
As you type, YouTrack starts searching for other issues with similar text in the summary. These issues are shown below in the Similar issues section of the page. For more information, see Similar Issues.
Issue Description
Below the summary is an input field for the issue description. If the issue summary is descriptive enough, you can skip it — the description is not mandatory. However, when the issue is more complex, it often helps to solve an issue faster when you describe it in more detail.
As you type, the list of similar issues is updated to show other issues with matching text in the issue description. If you're formatting text in Markdown mode, the Preview section of the page shows you how the content will be formatted in the issue when you create it.
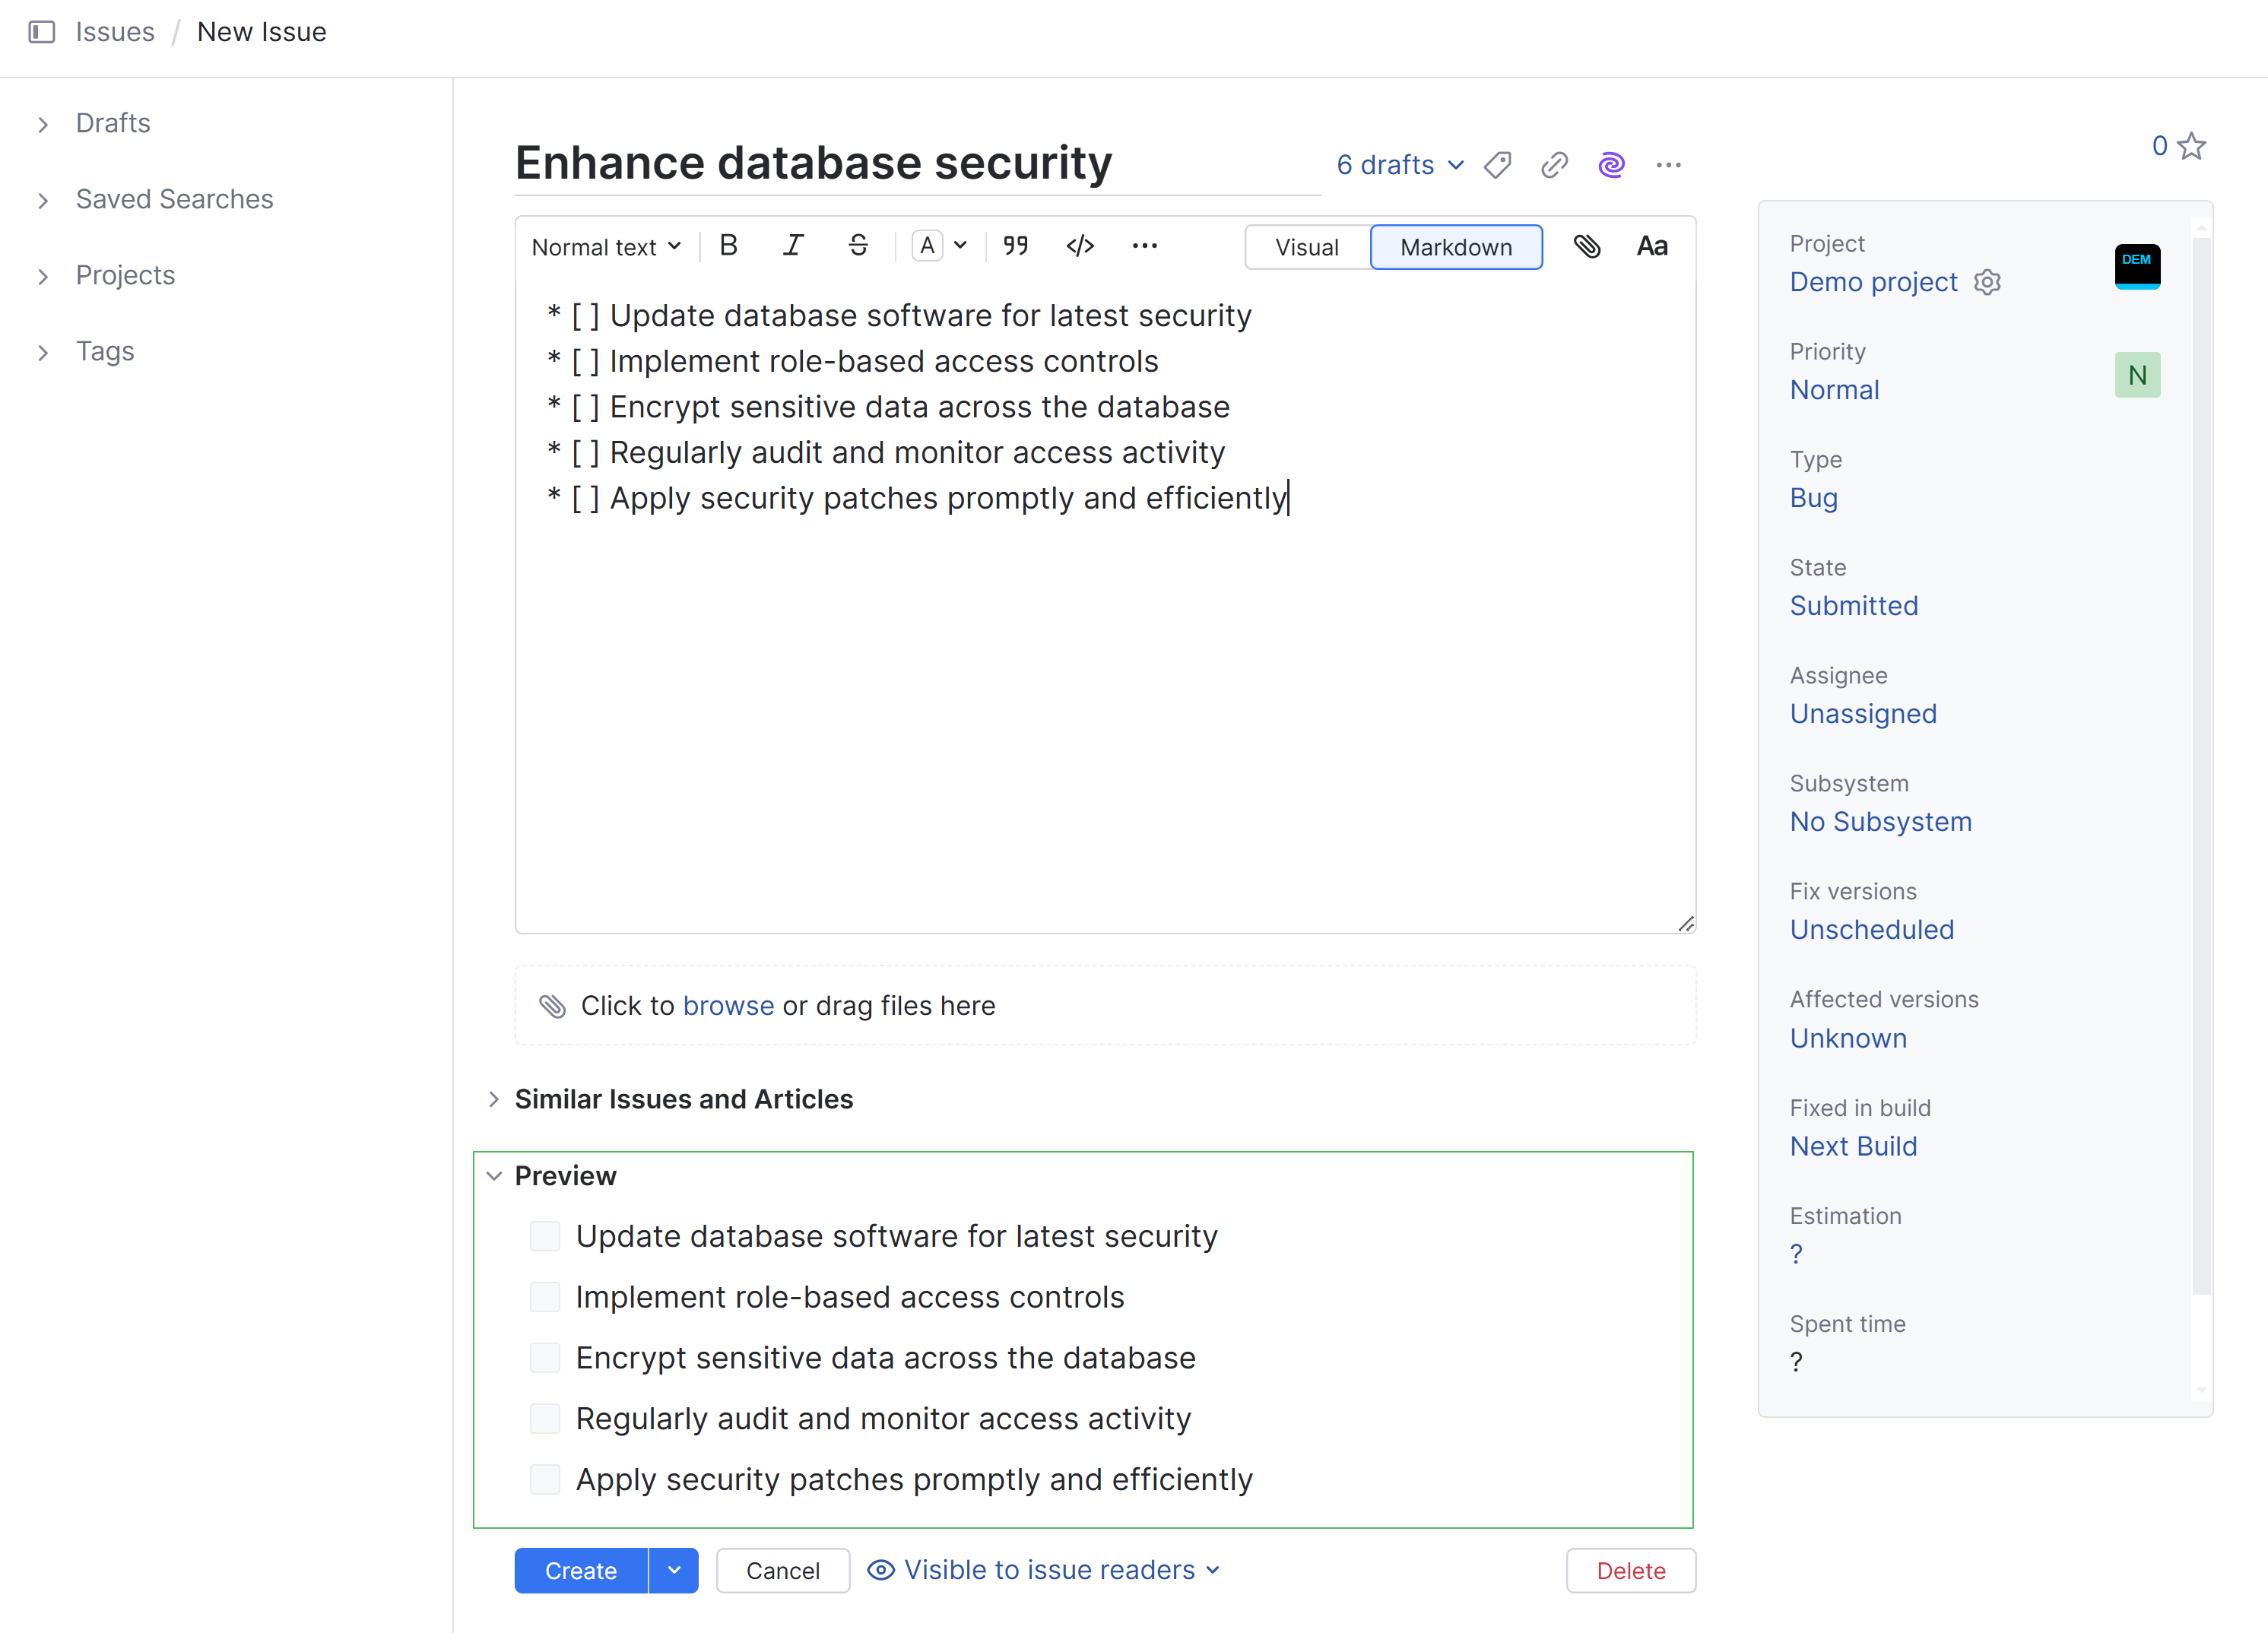
The rich text editor lets you format the issue description text in Visual or Markdown mode.
To learn more about formatting text in YouTrack, see Rich Text Editor.
For a complete list of formatting options in Markdown, see Markdown Syntax.
Formatted Text Fields
The new issue view supports a special type of custom field for storing text. These fields store a string of characters that you can format in Visual or Markdown mode.
Fields with this type are not shown in the sidebar with other custom fields. Instead, they appear just below the issue description.
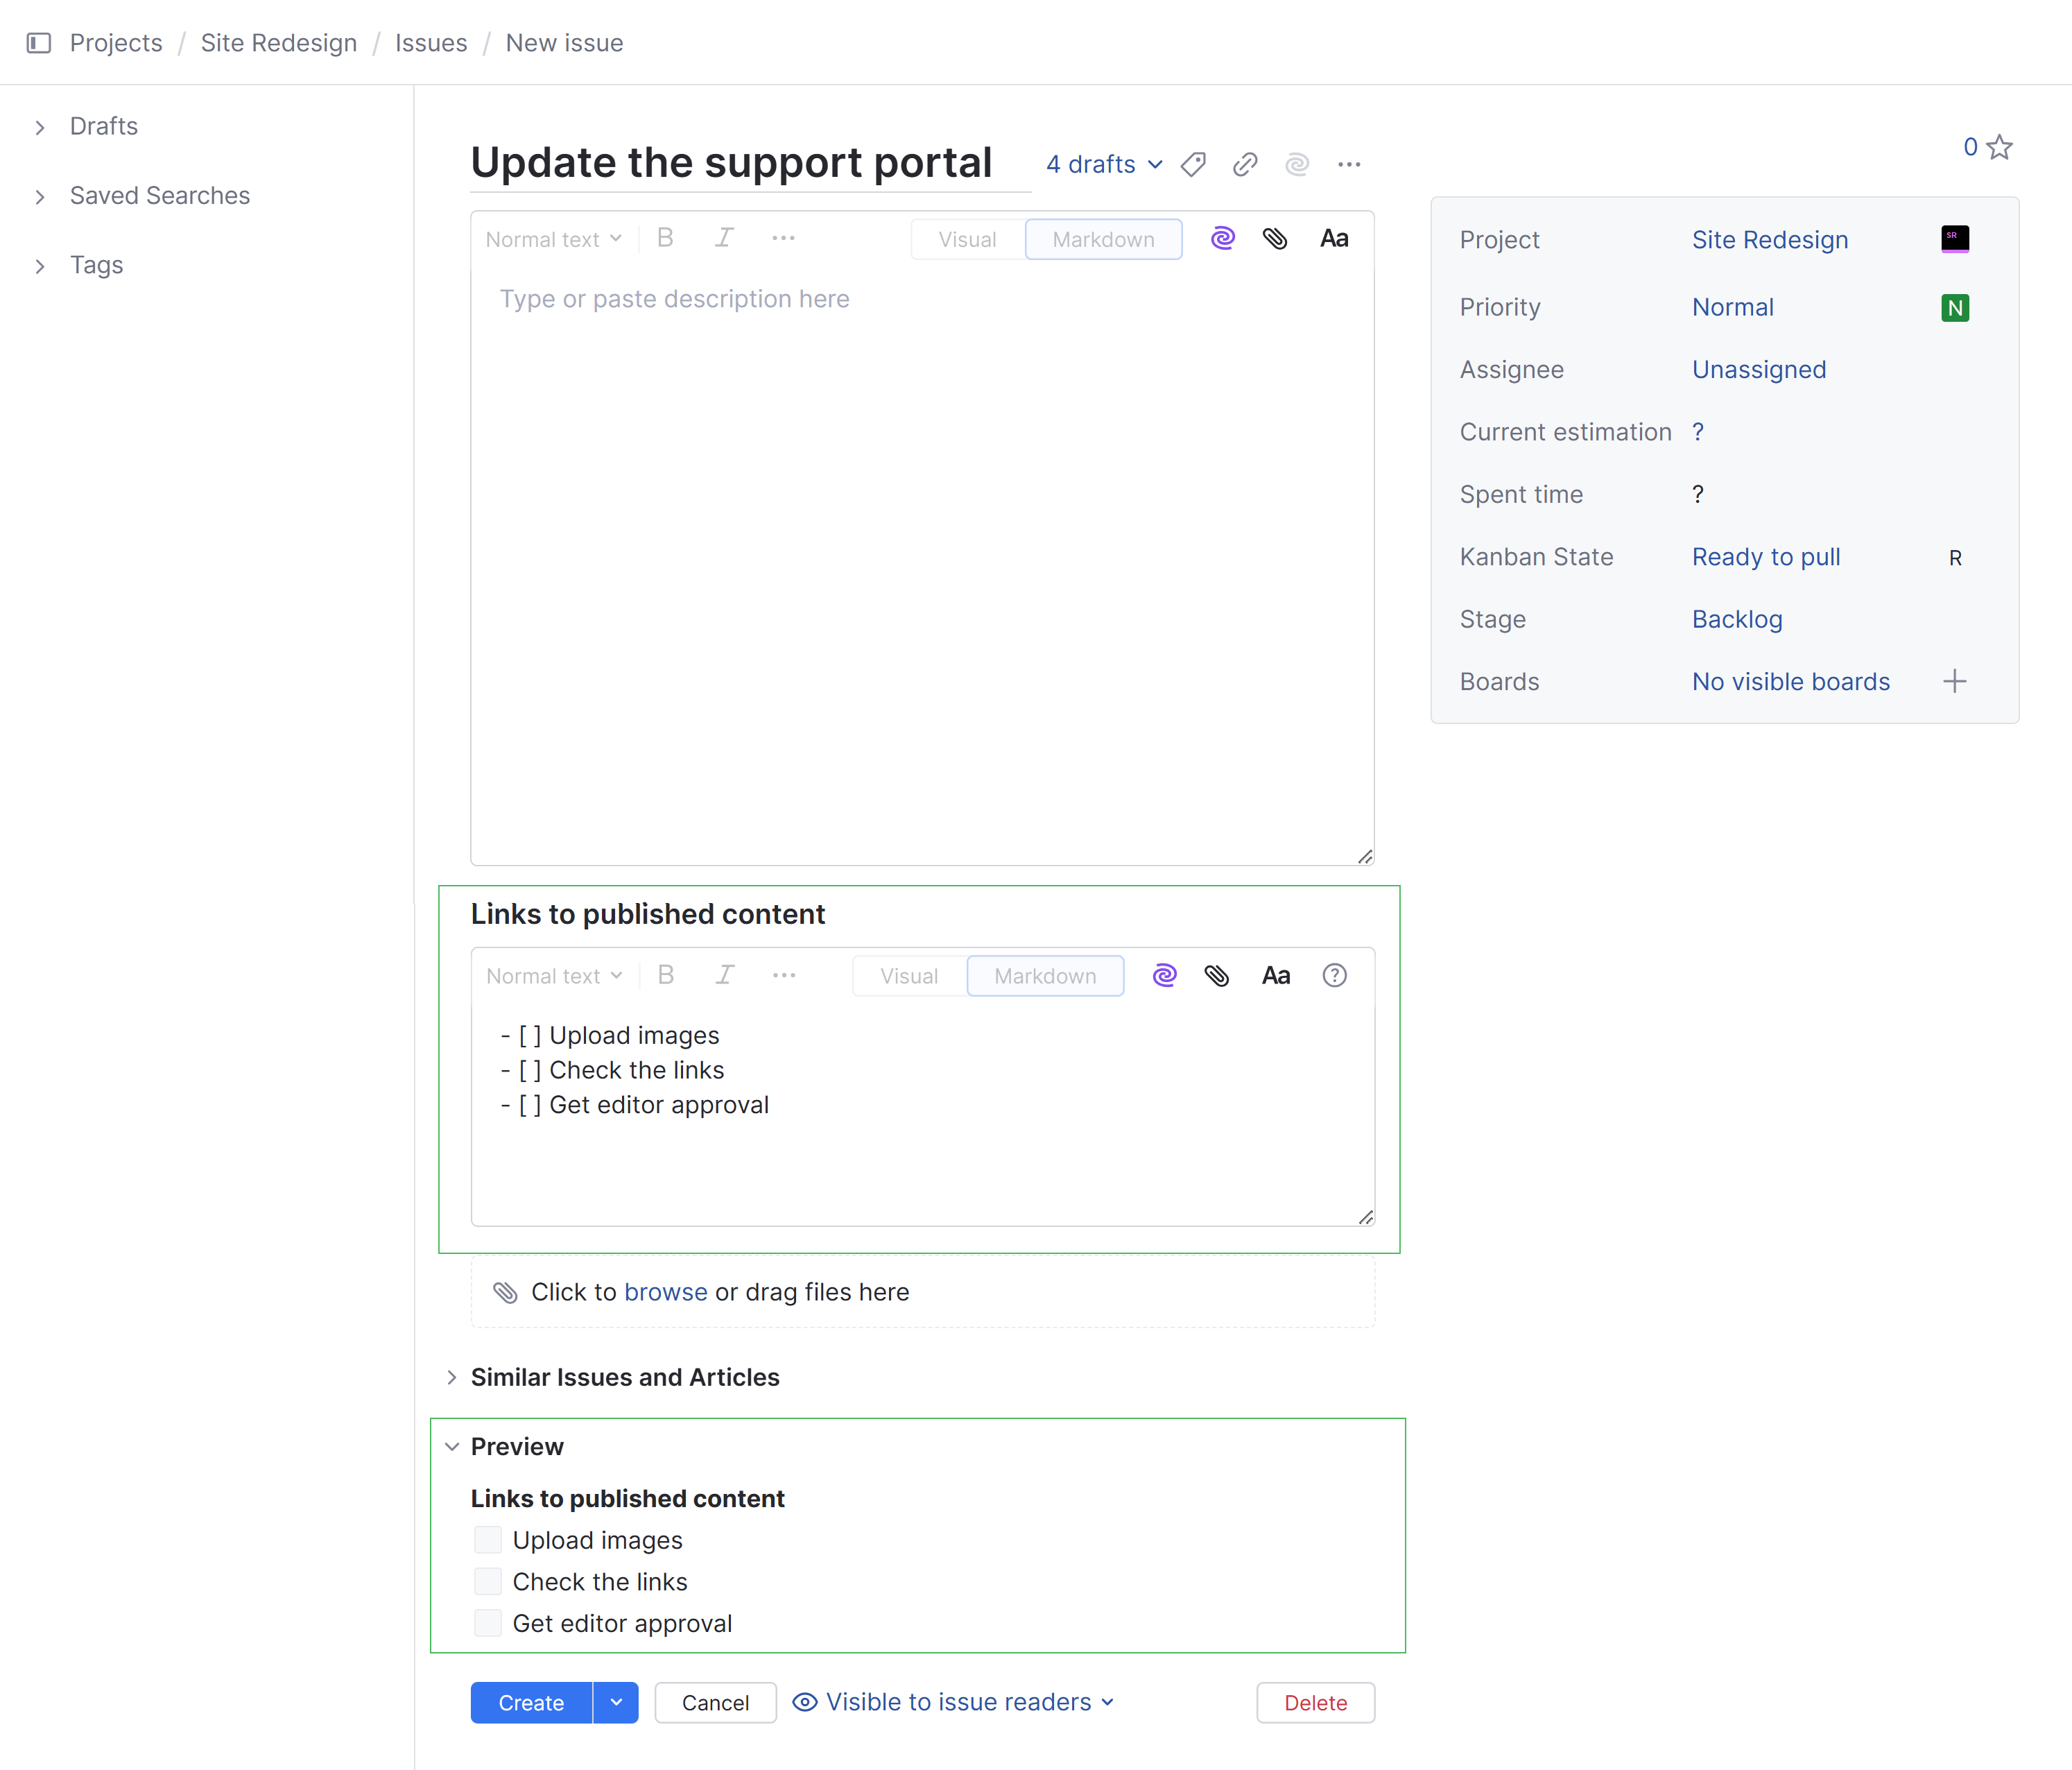
The ability to add and edit content in these fields is supported by a rich text editor. The editor lets you format text in Visual or Markdown mode. When editing in Markdown mode, a preview of the formatted input is shown below the field.
To learn more about formatting text in YouTrack, see Rich Text Editor.
For a complete list of formatting options in Markdown, see Markdown Syntax.
Issue Links
If the issue that you want to create is somehow related to other issues that already exist in YouTrack, you can add links to your issue draft.
Click the Add links option in the toolbar, then add links to one or more target issues.
The panel for issue links will either appear directly below the issue summary or below the issue description, depending on the option that is stored in the Workspace settings of your YouTrack profile.
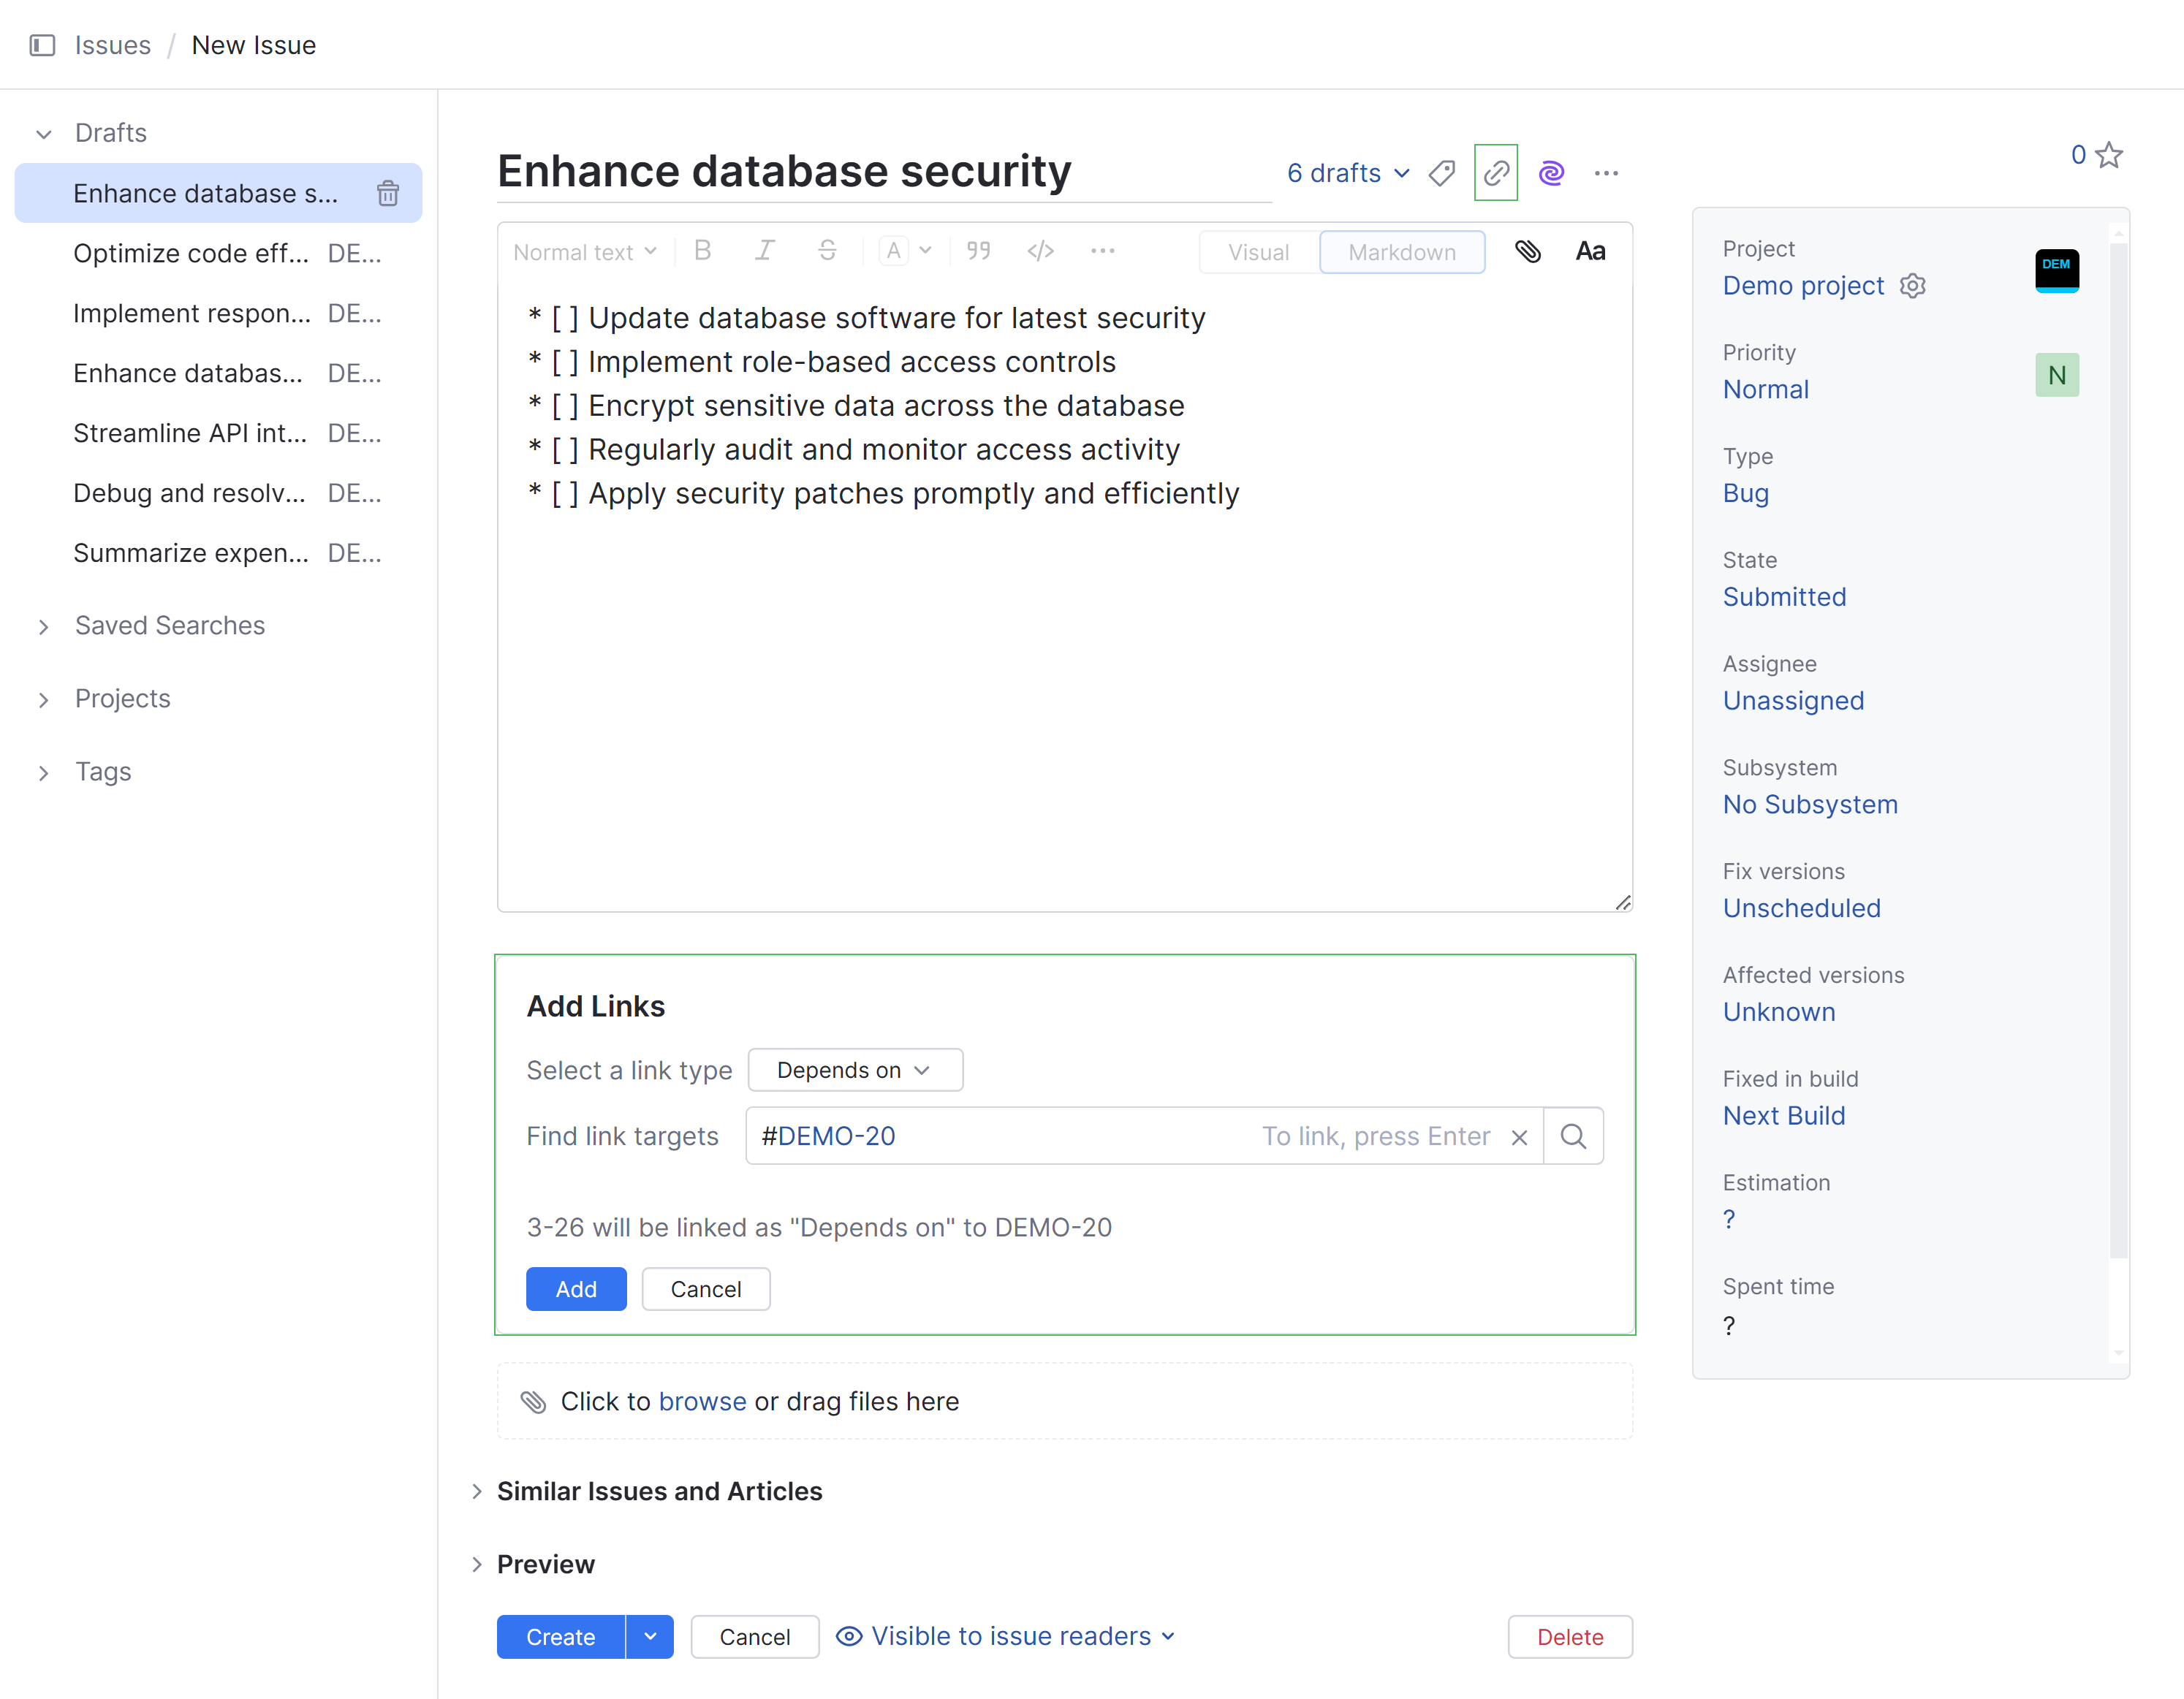
To learn more about linking issues in YouTrack, see Link Issues.
Attachments
The form for reporting new issues has a drop zone for adding files as attachments.
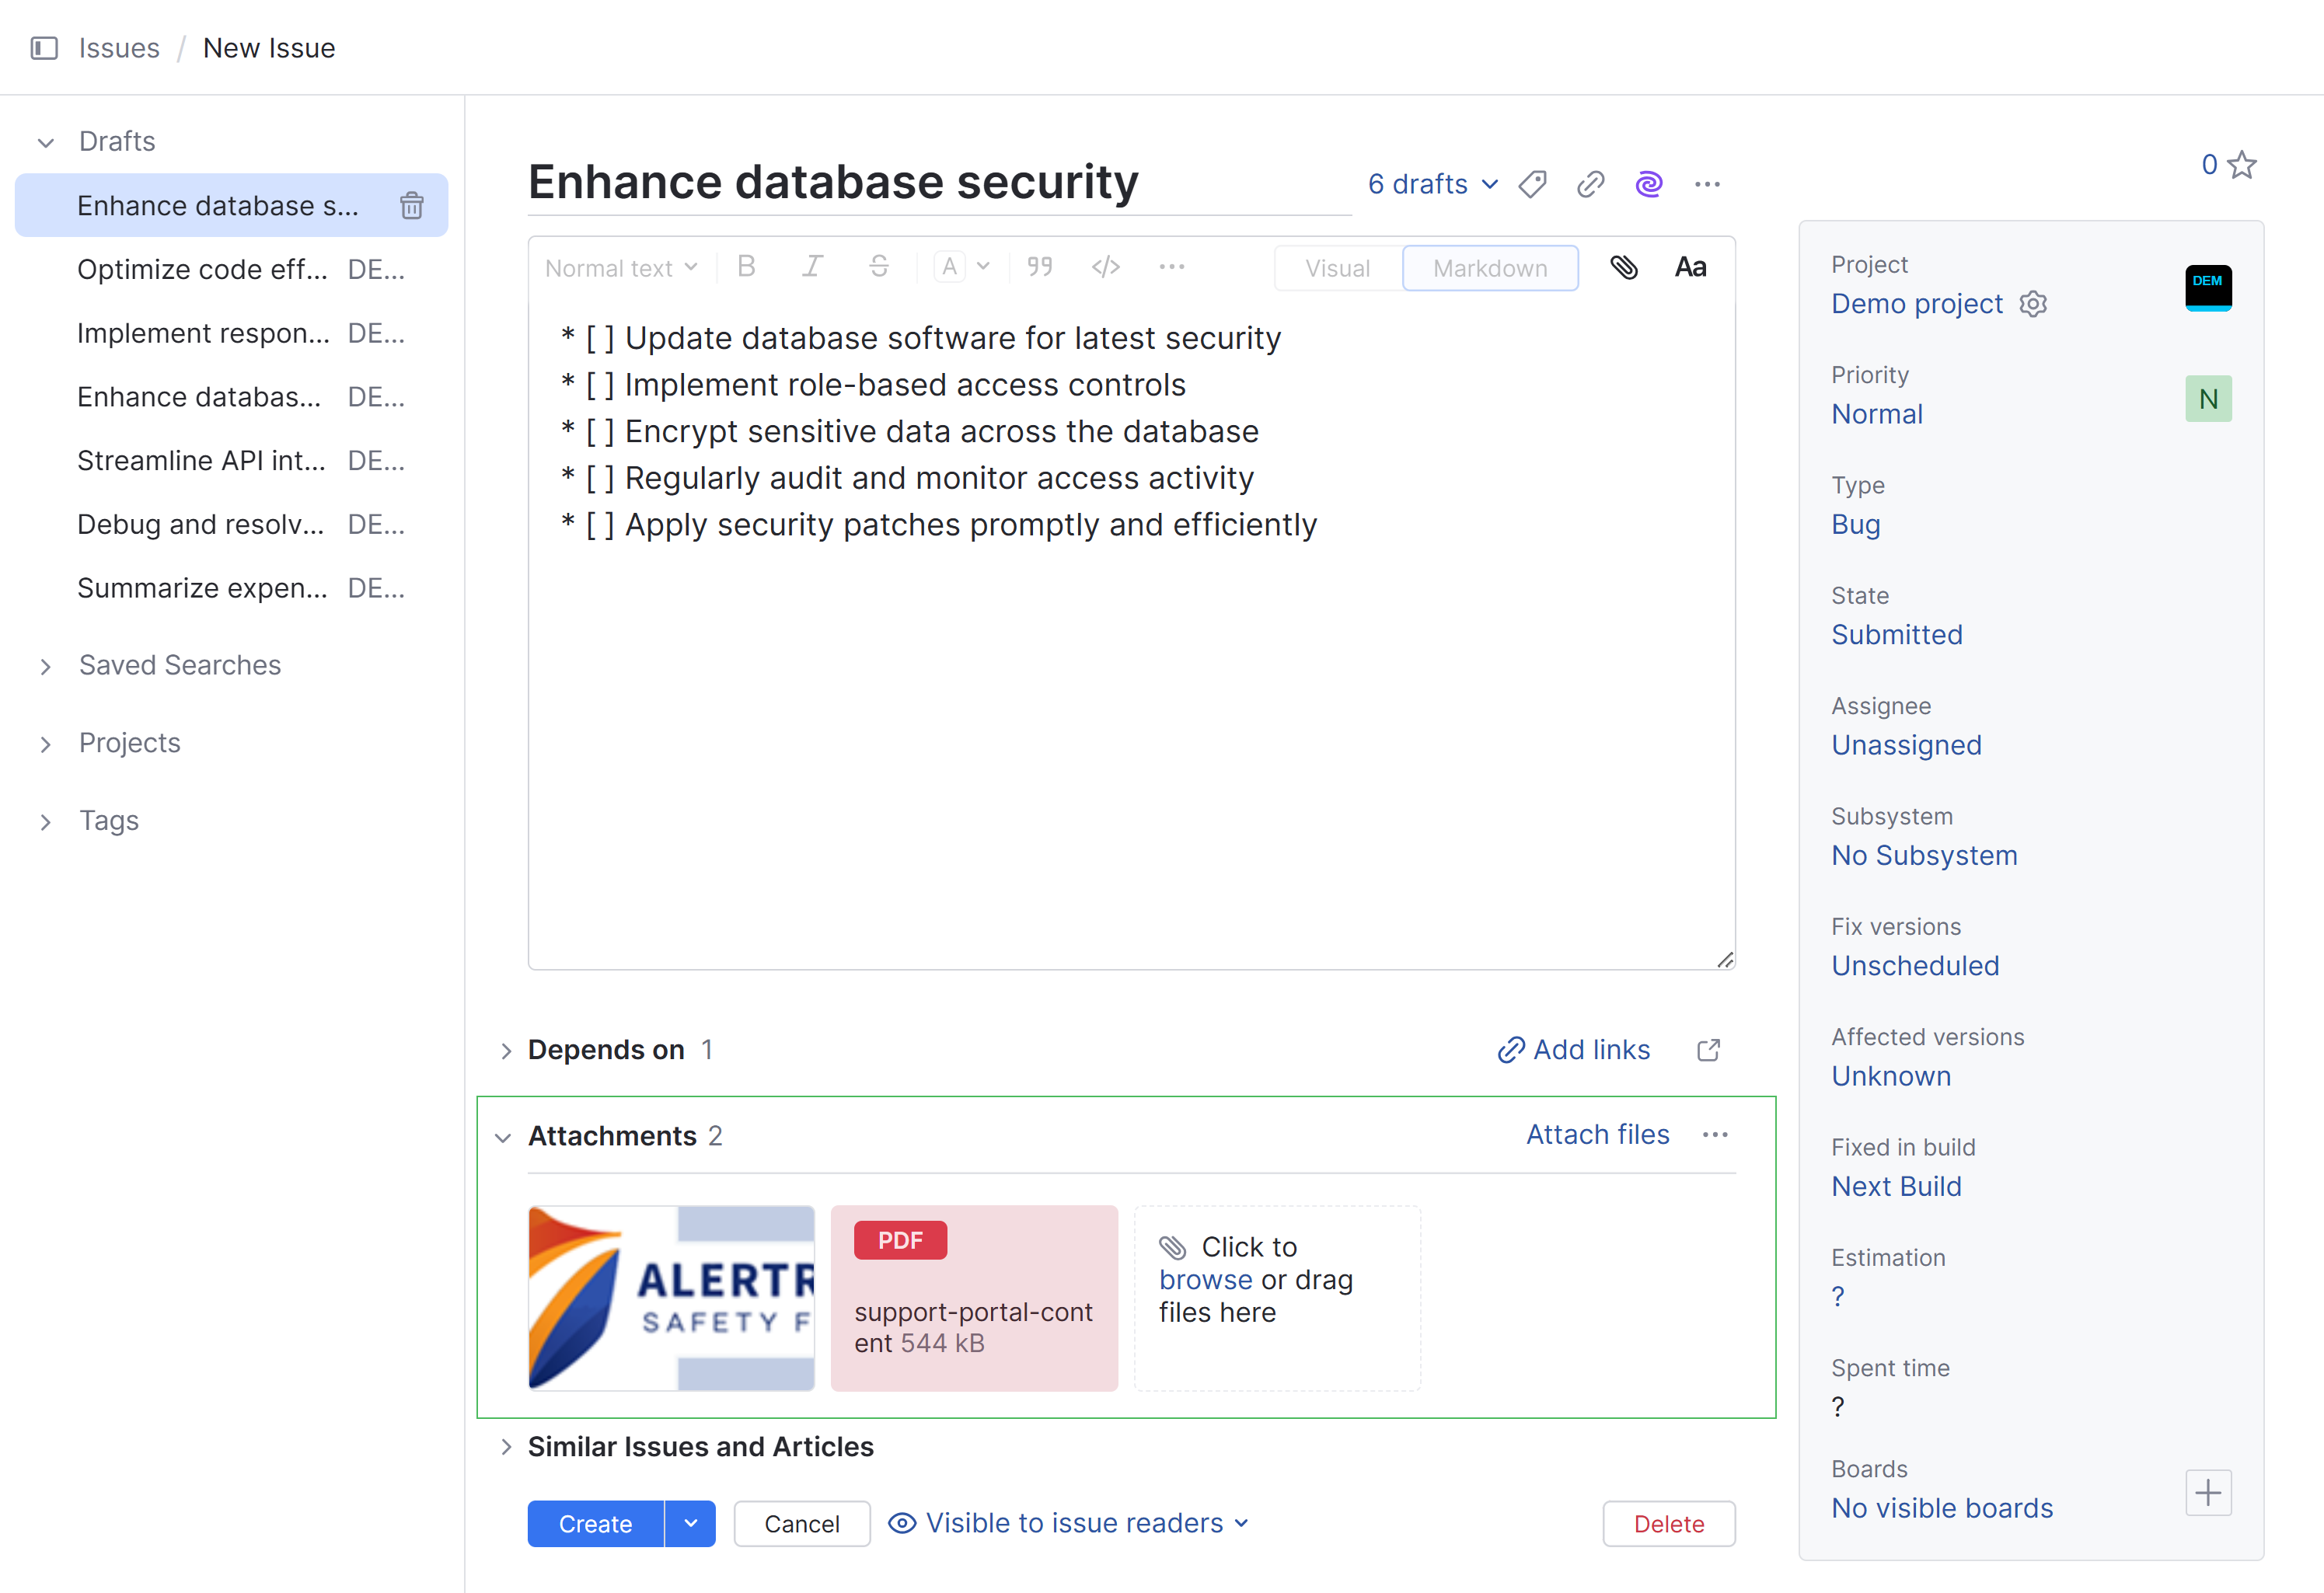
Click the drop zone to select and attach files from your local directory.
Drag files to the drop zone.
Drag files to the issue description to reference them inline in the issue. Inline attachments also appear in the attachments section.
Use the paste command for your operating system to attach an image from the clipboard.
Once you have attached one or more files, an Attachment options icon appears. You can select to view attachments as thumbnails or in list view. The menu also gives you sorting options for the attachments.
To learn more about attachments, see Attach Files.
Issue Visibility
Below the Attachments section is a menu that lets you set the visibility for the new issue.
The issue is usually marked as visible to issue readers. This means that any member of this group who has the Read Issue permission in the selected project can view this issue.
If the owner of the project has defined a specific group to be used as the default visibility setting for new issues in the current project, this group will be selected automatically. To learn more about default visibility options, see Manage Visibility.
To restrict the visibility of a new issue to specific users and groups, select these users and groups from the list.
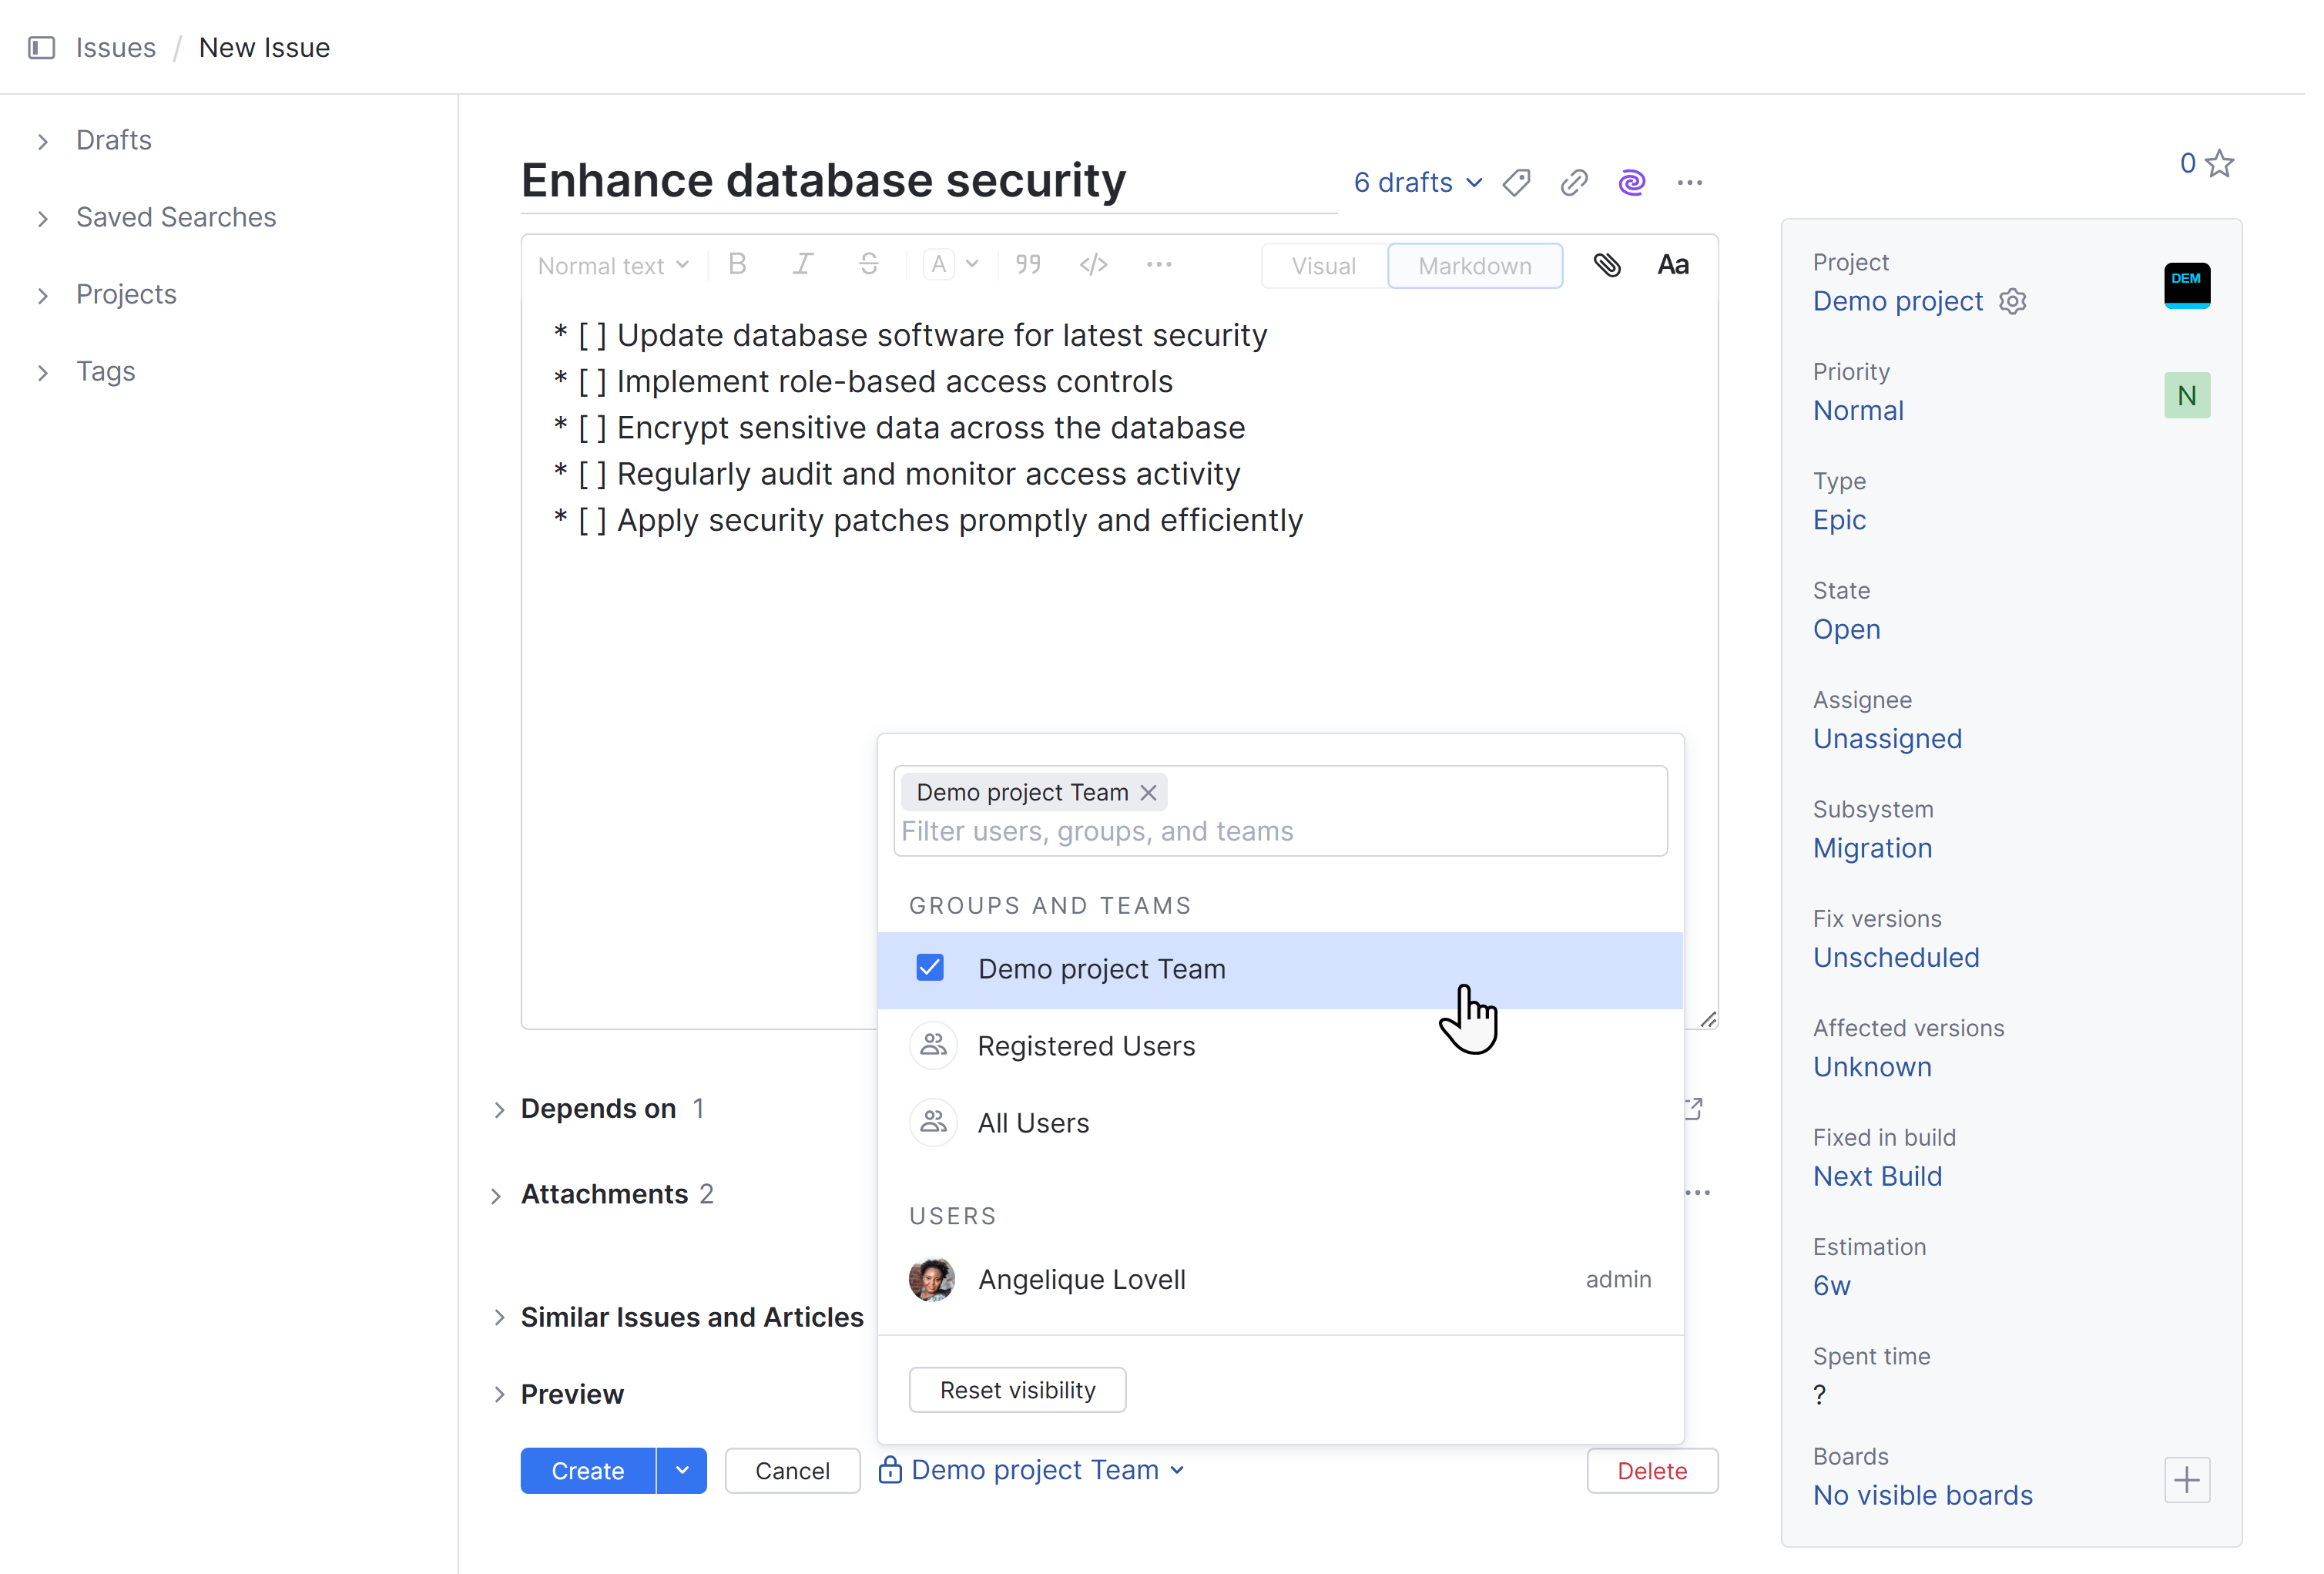
To learn more about issue visibility, see Set Issue, Comment, and Attachment Visibility.
Similar Issues
The New Issue page contains a section that shows issues that might be similar to the issue you are currently reporting. Maybe another user encountered the same problem and has already created an issue to fix it. In this case, you might add your comment to an existing issue and avoid creating a duplicate.
As you enter the issue summary, YouTrack searches for other issues with similar text.
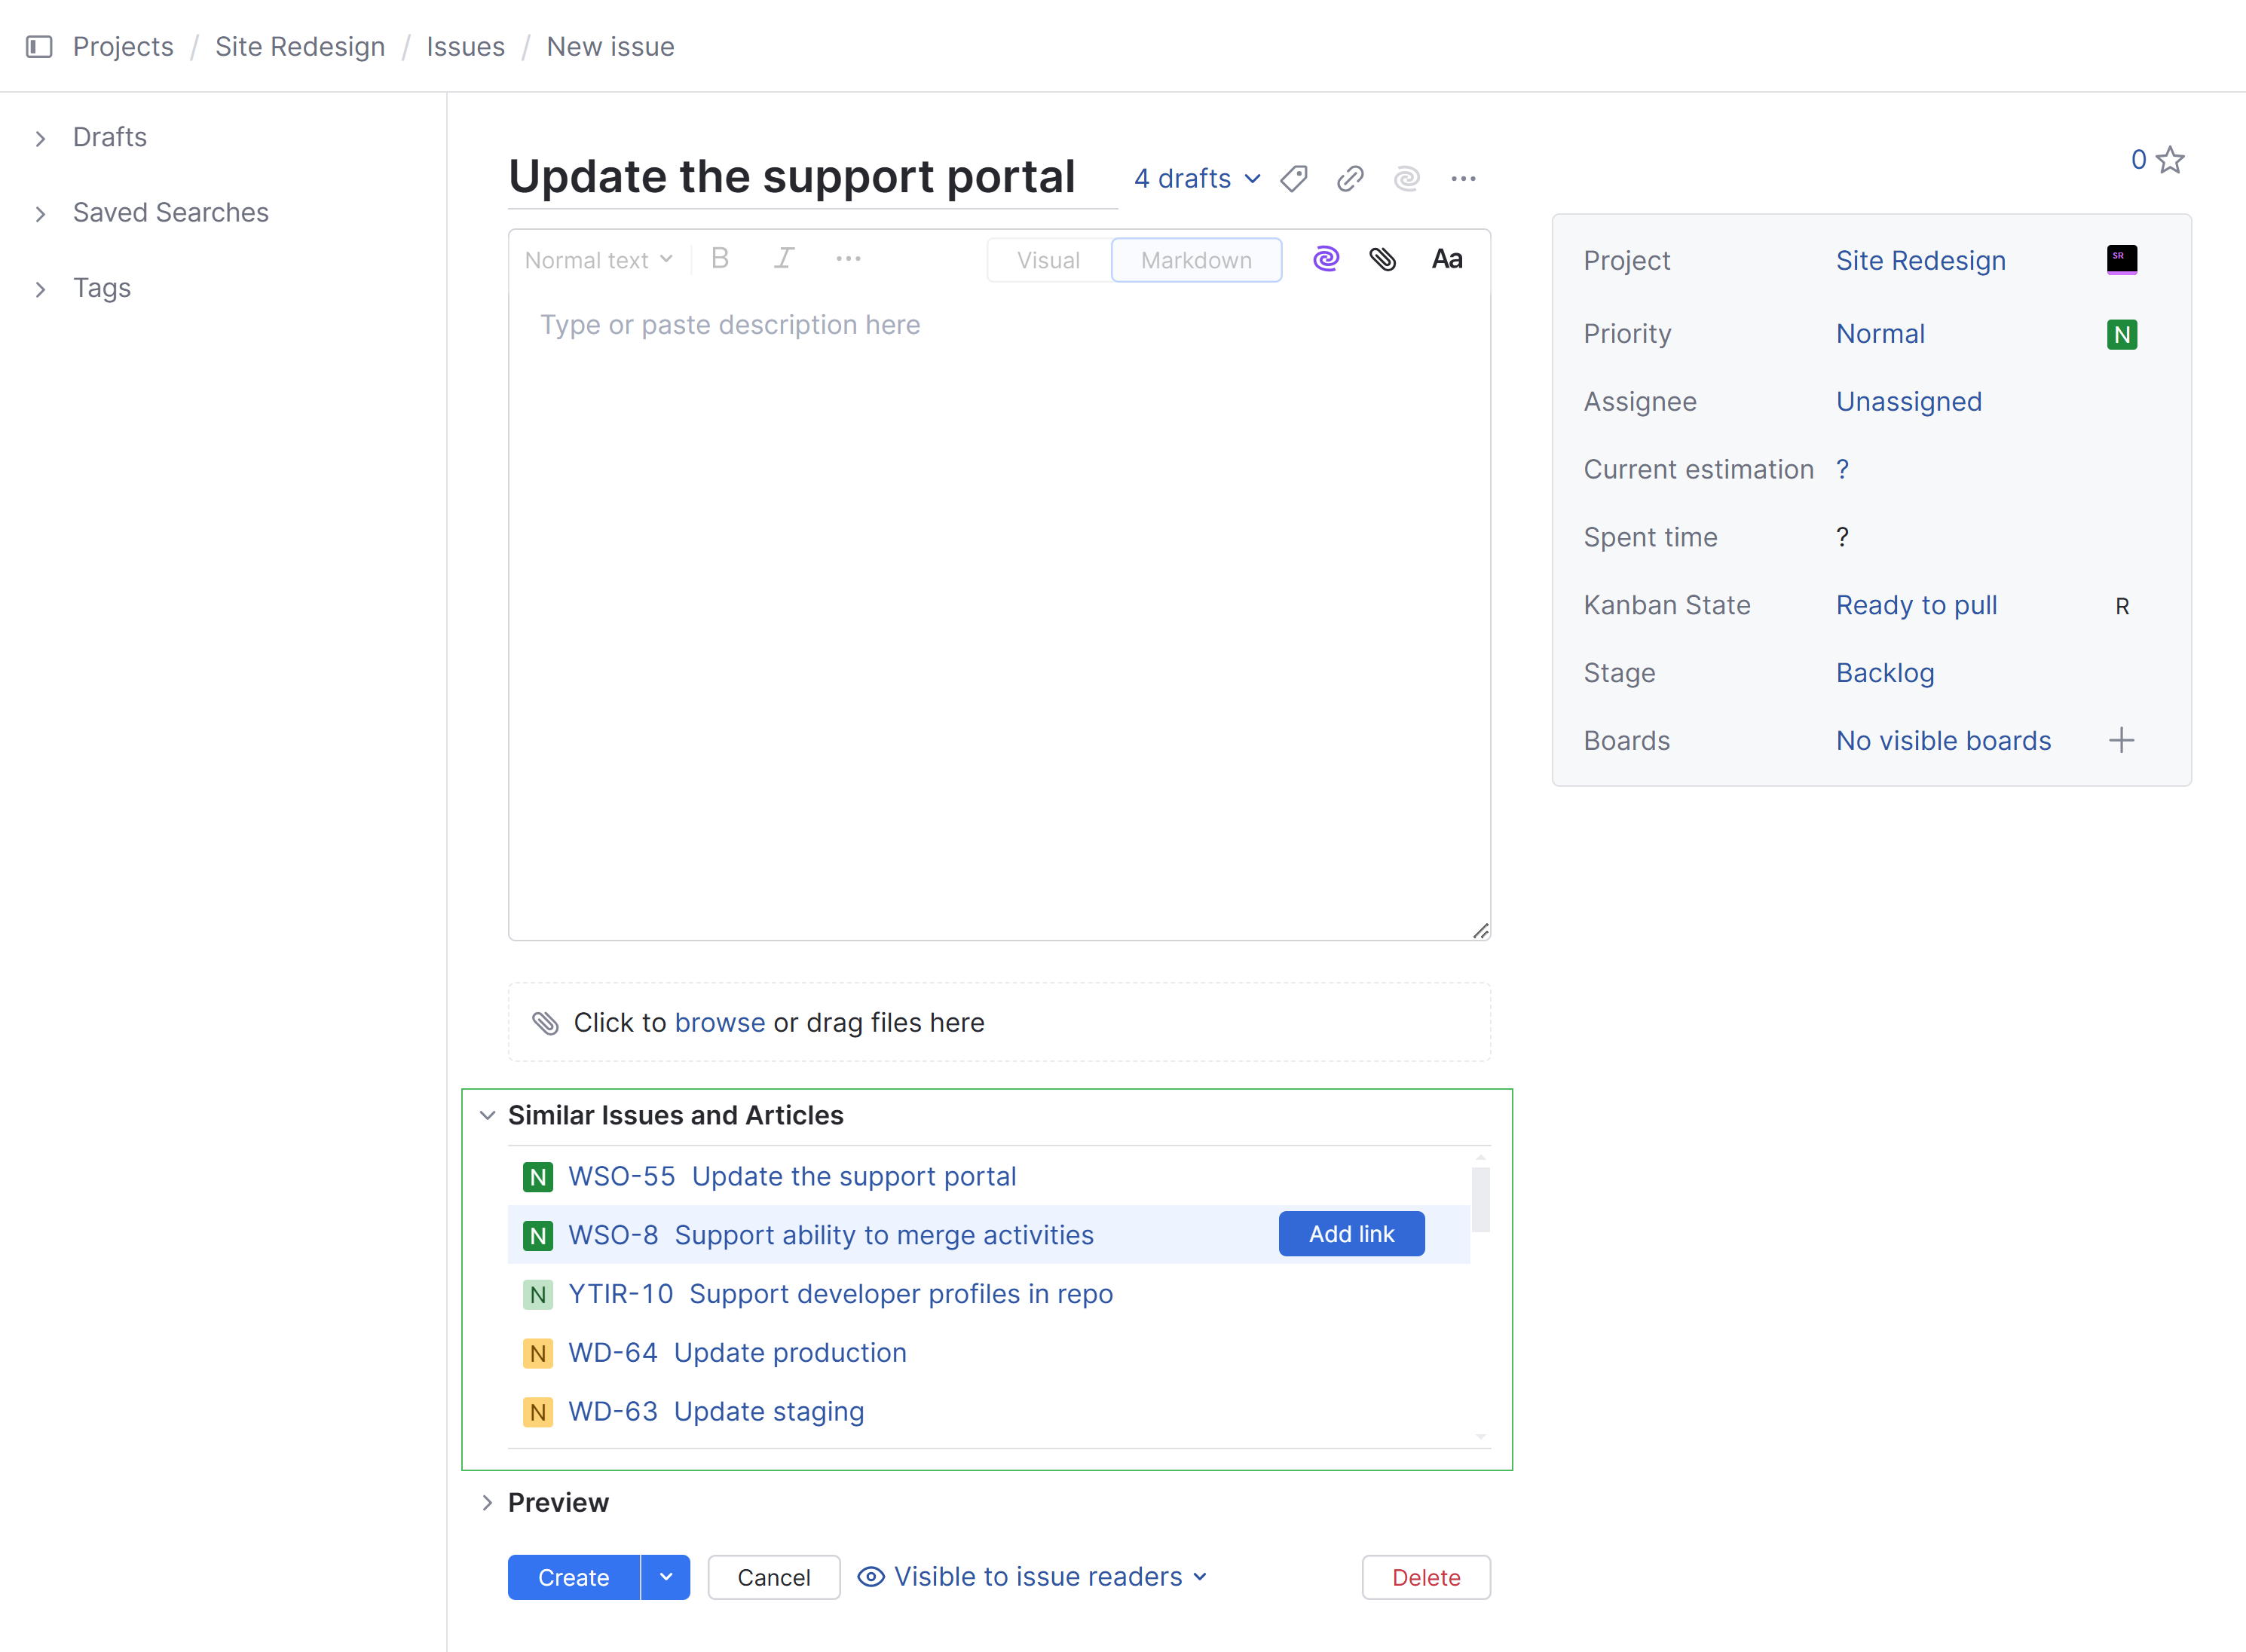
The list of similar issues is restricted show a maximum of five issues in a scrollable list. This ensures that the list doesn't hide the section of the page that displays the issue preview.
You can add the
Star tag and votes to similar issues without leaving the page.
For more information, see Find Similar Issues and Articles.
Custom Fields
The side panel contains a list of custom fields that are attached to the current project. Many fields are configured to use a default value. Fields can also be configured to require input for new issues.
The first issue field that is shown in this panel selects the project that the issue belongs to.
Every issue belongs to a single project — you never have the option to select an empty value.
The set of custom fields can vary from project to project. If you move the issue to another project, the set of available fields may change as well.
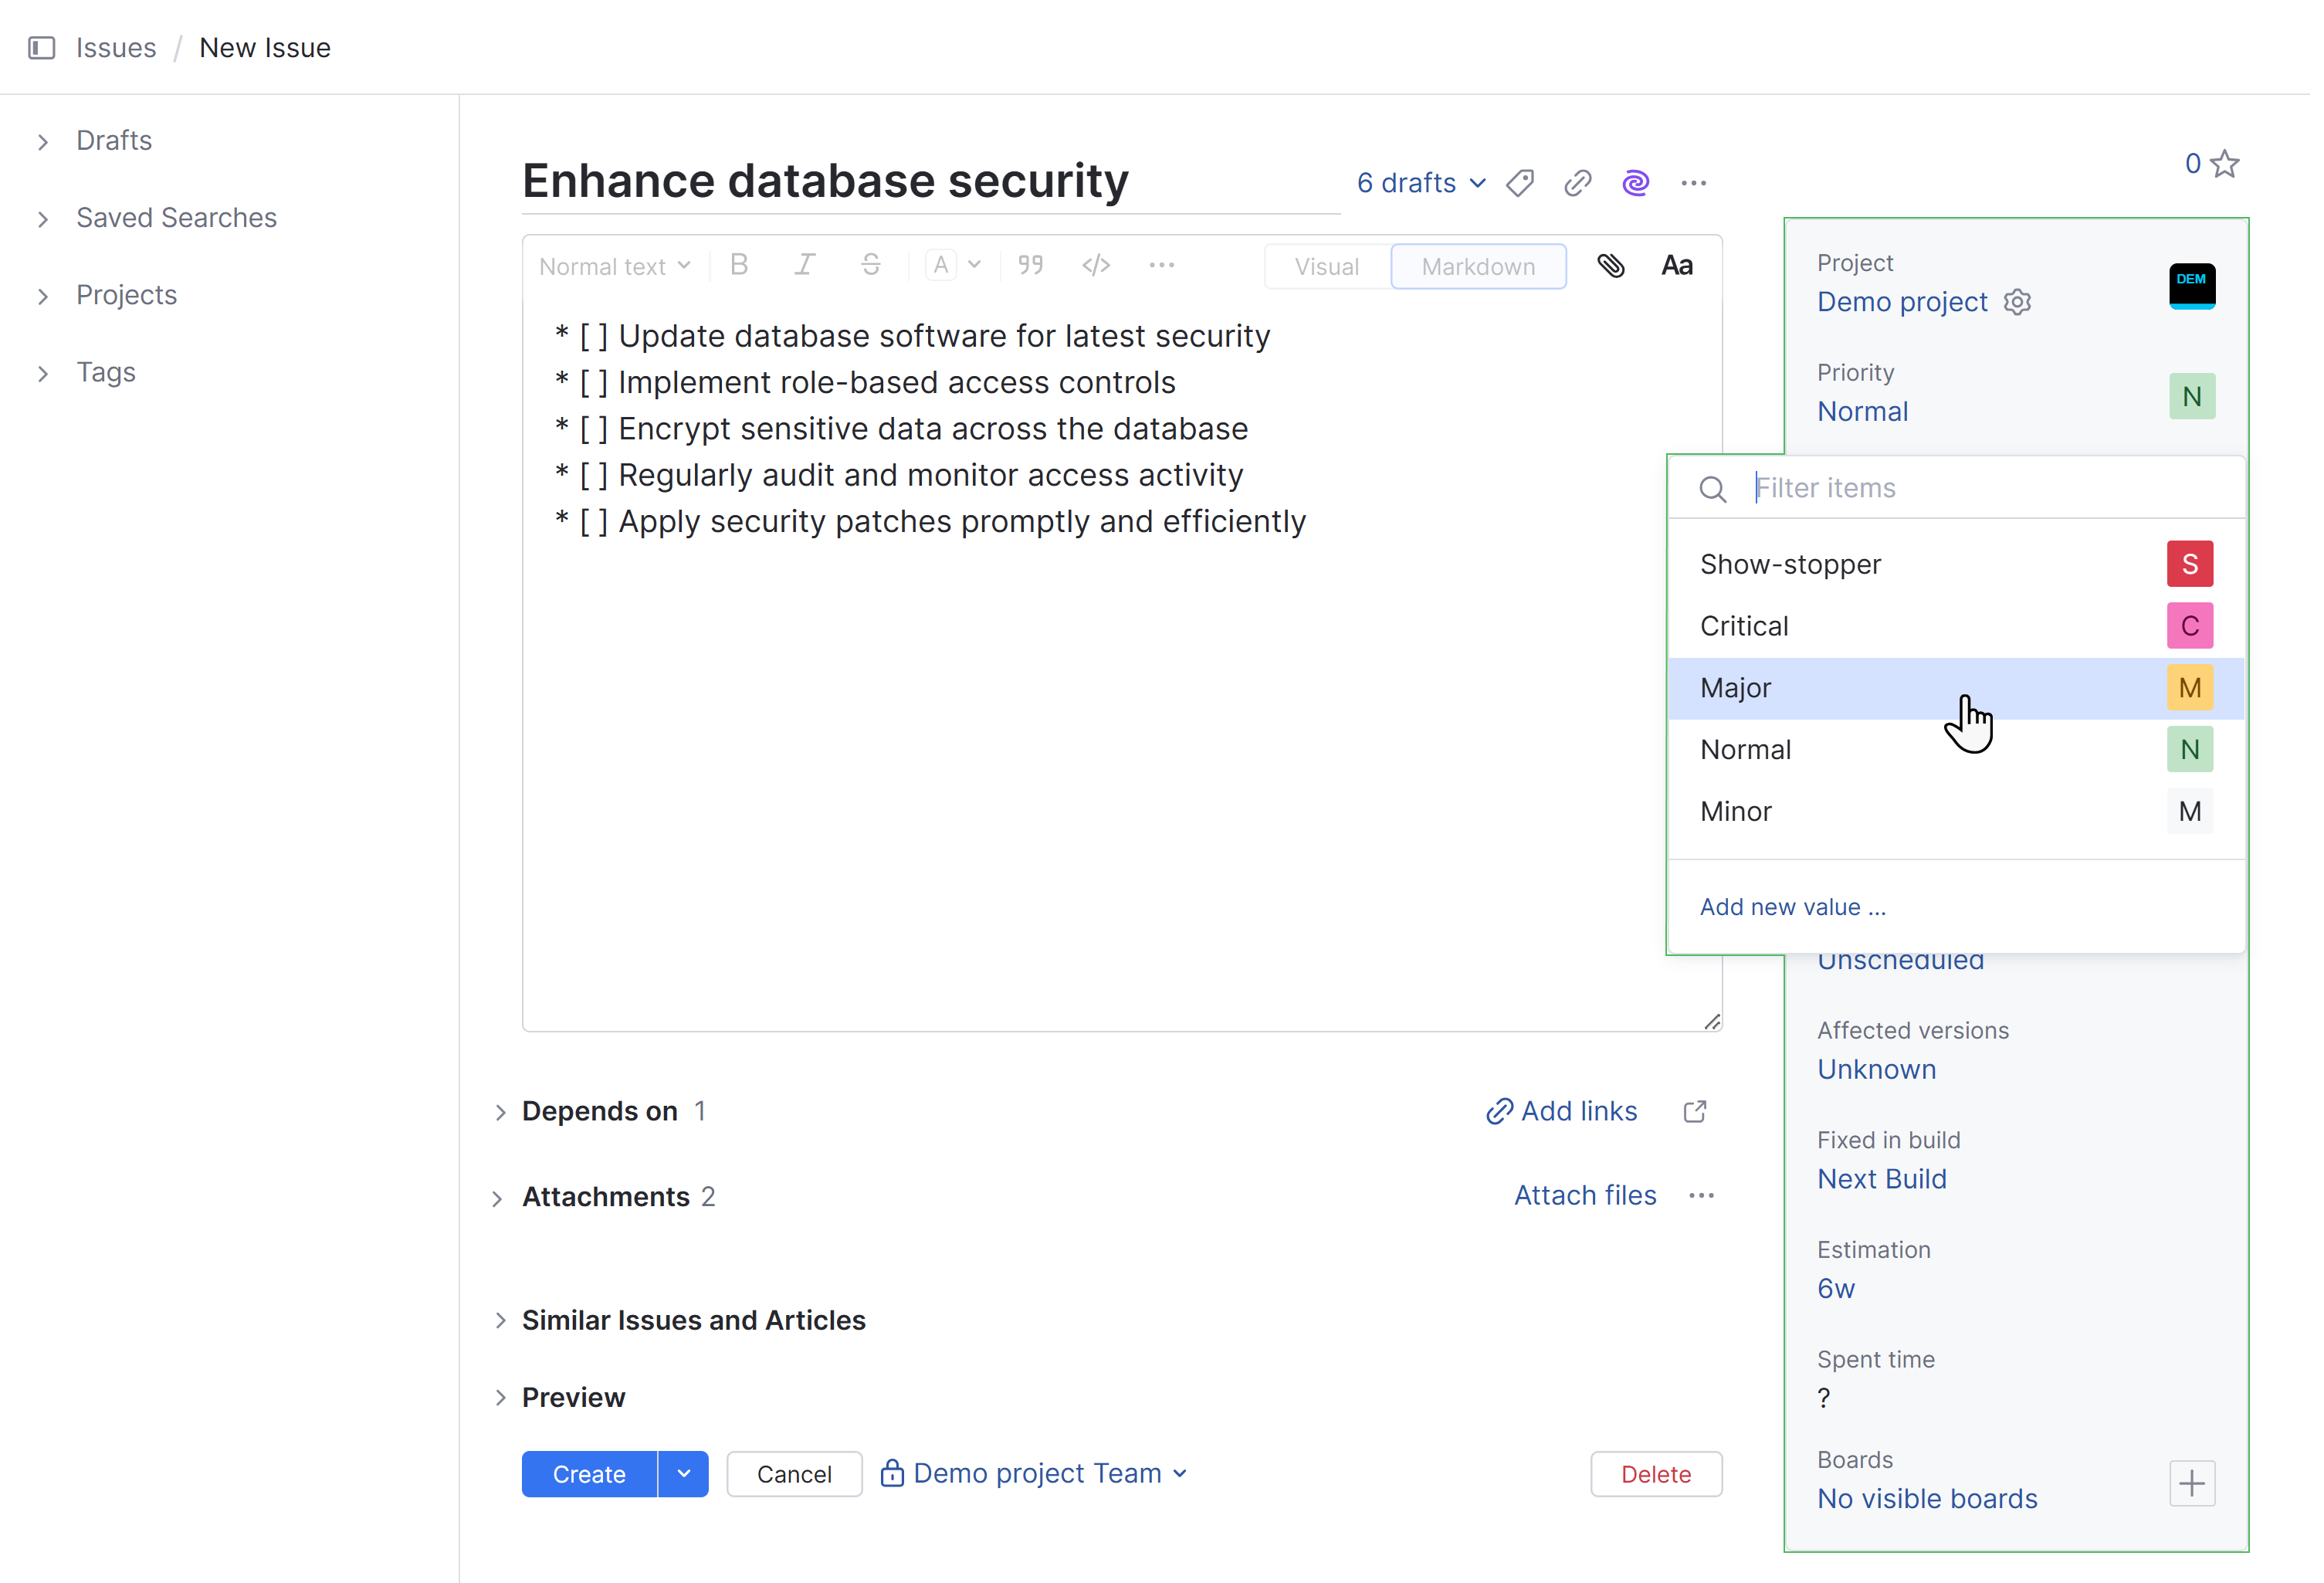
To set or change the values for custom fields, click the field and choose one or more values from the list or enter a value.
You can drag the edge of the fields panel to resize it. Double-click the resizing control to expand or collapse the panel.
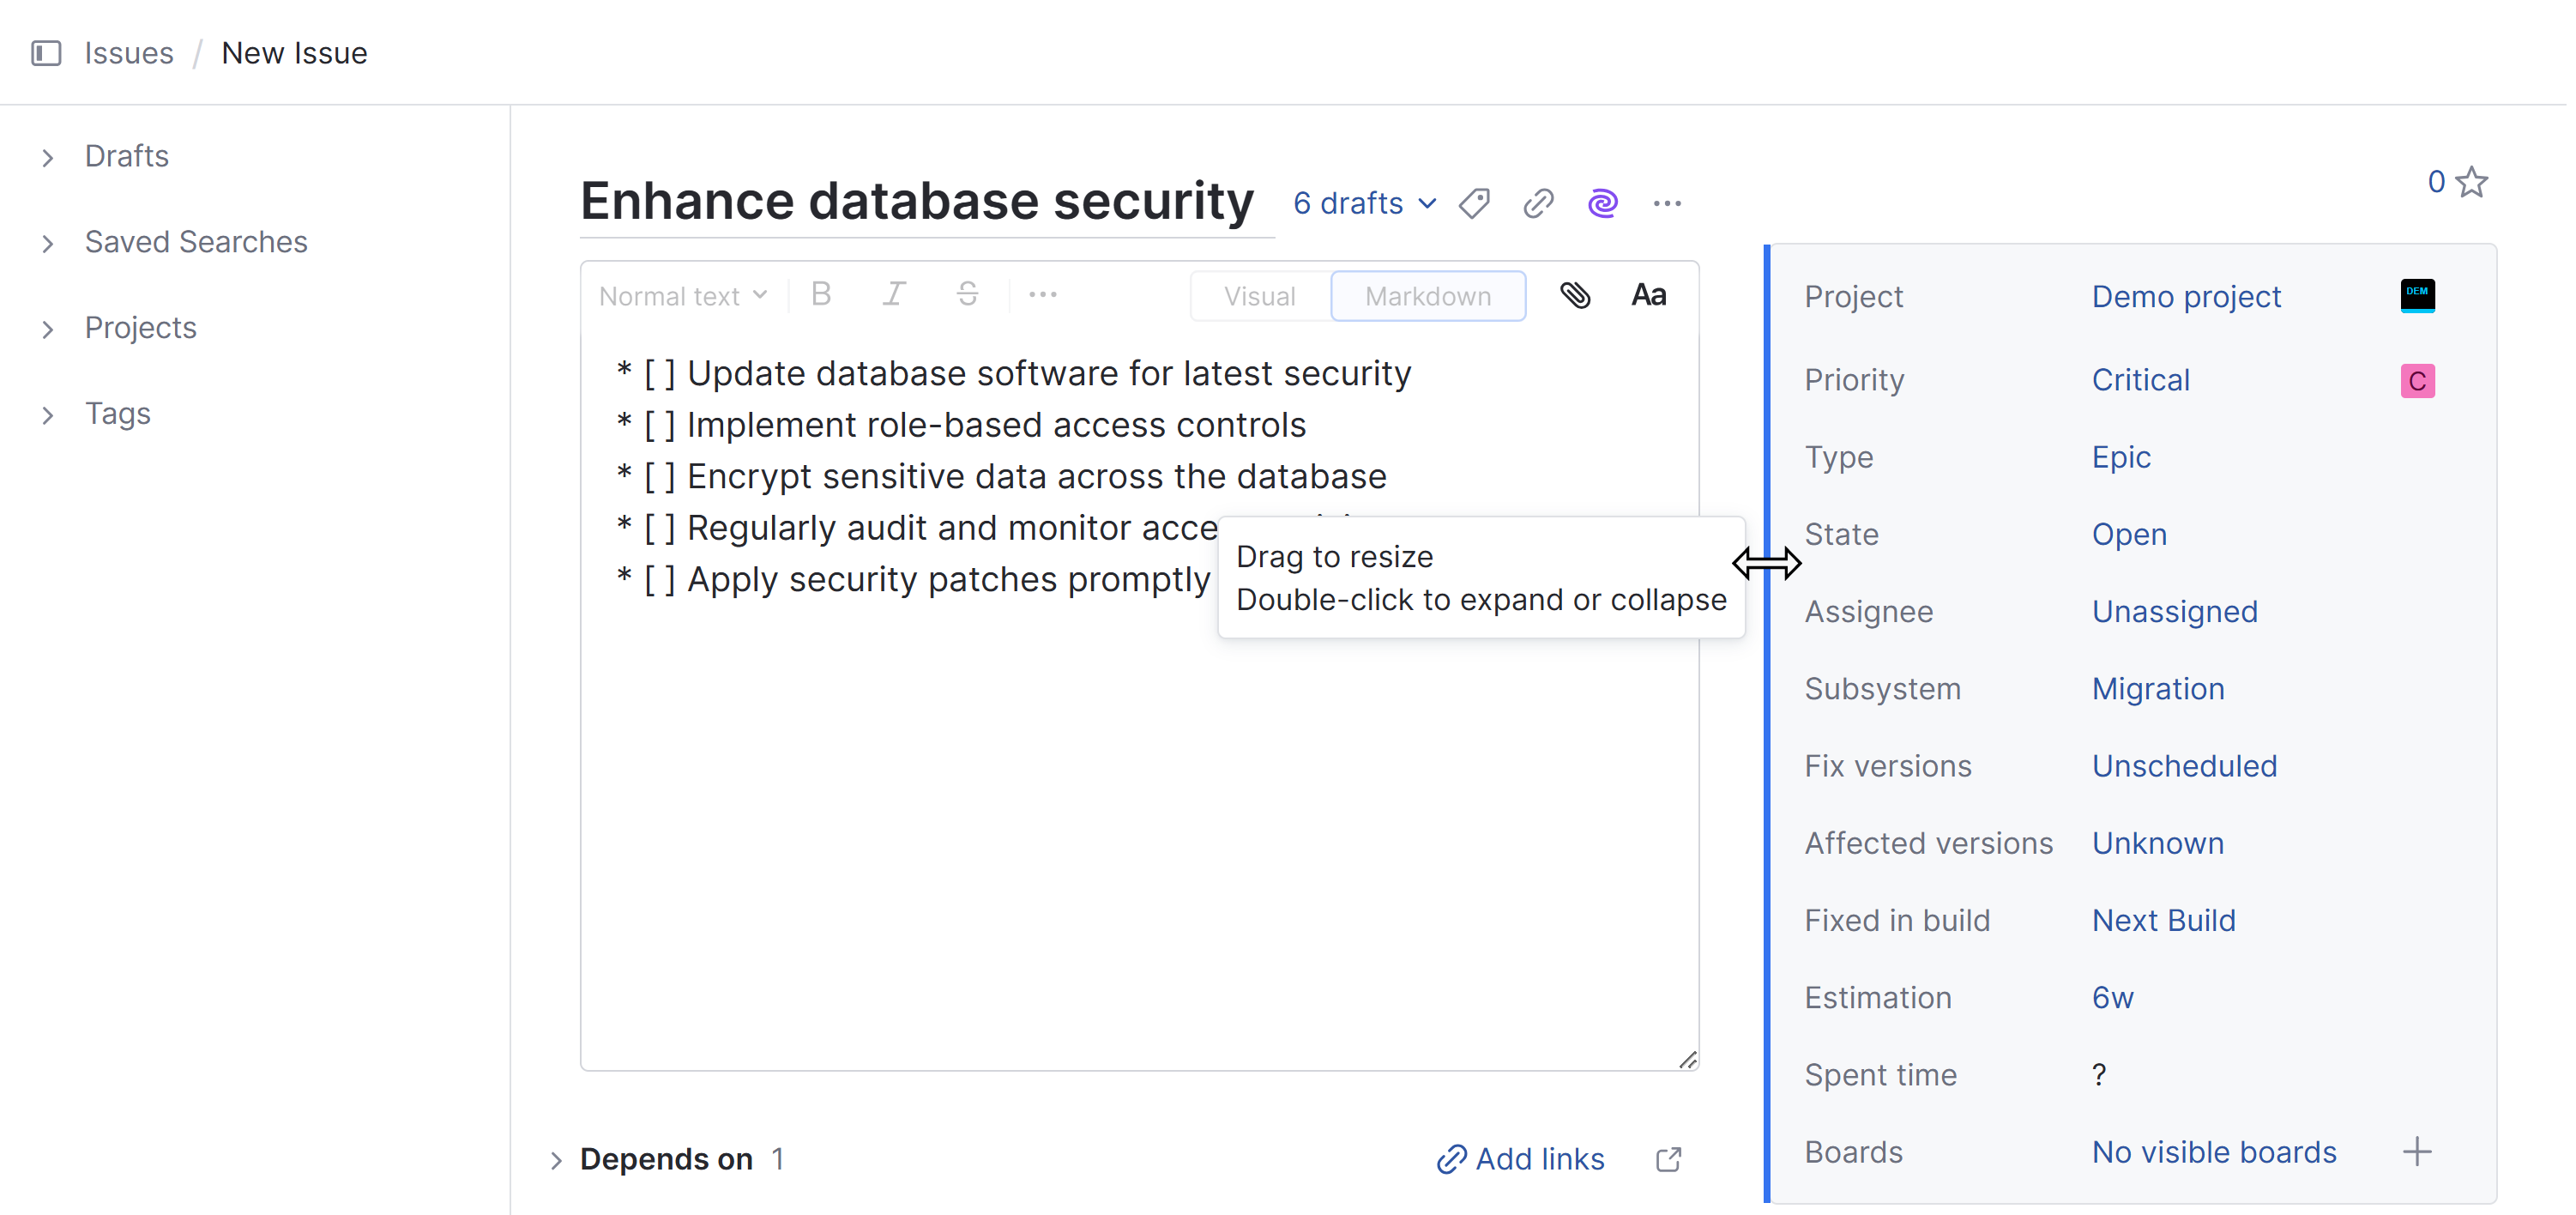
An option in your user profile lets you decide whether this panel is shown on the left or right side of the page. For more information, see Settings.
Watchers
Above the panel for custom fields is a set of controls for Watchers.
Click the
Star icon to add yourself to the list of watchers. This also adds the Star tag to the issue for your account.
If you have the Add Watchers permission in the project, you can click the counter to the left from the star icon to add users to the list of watchers.
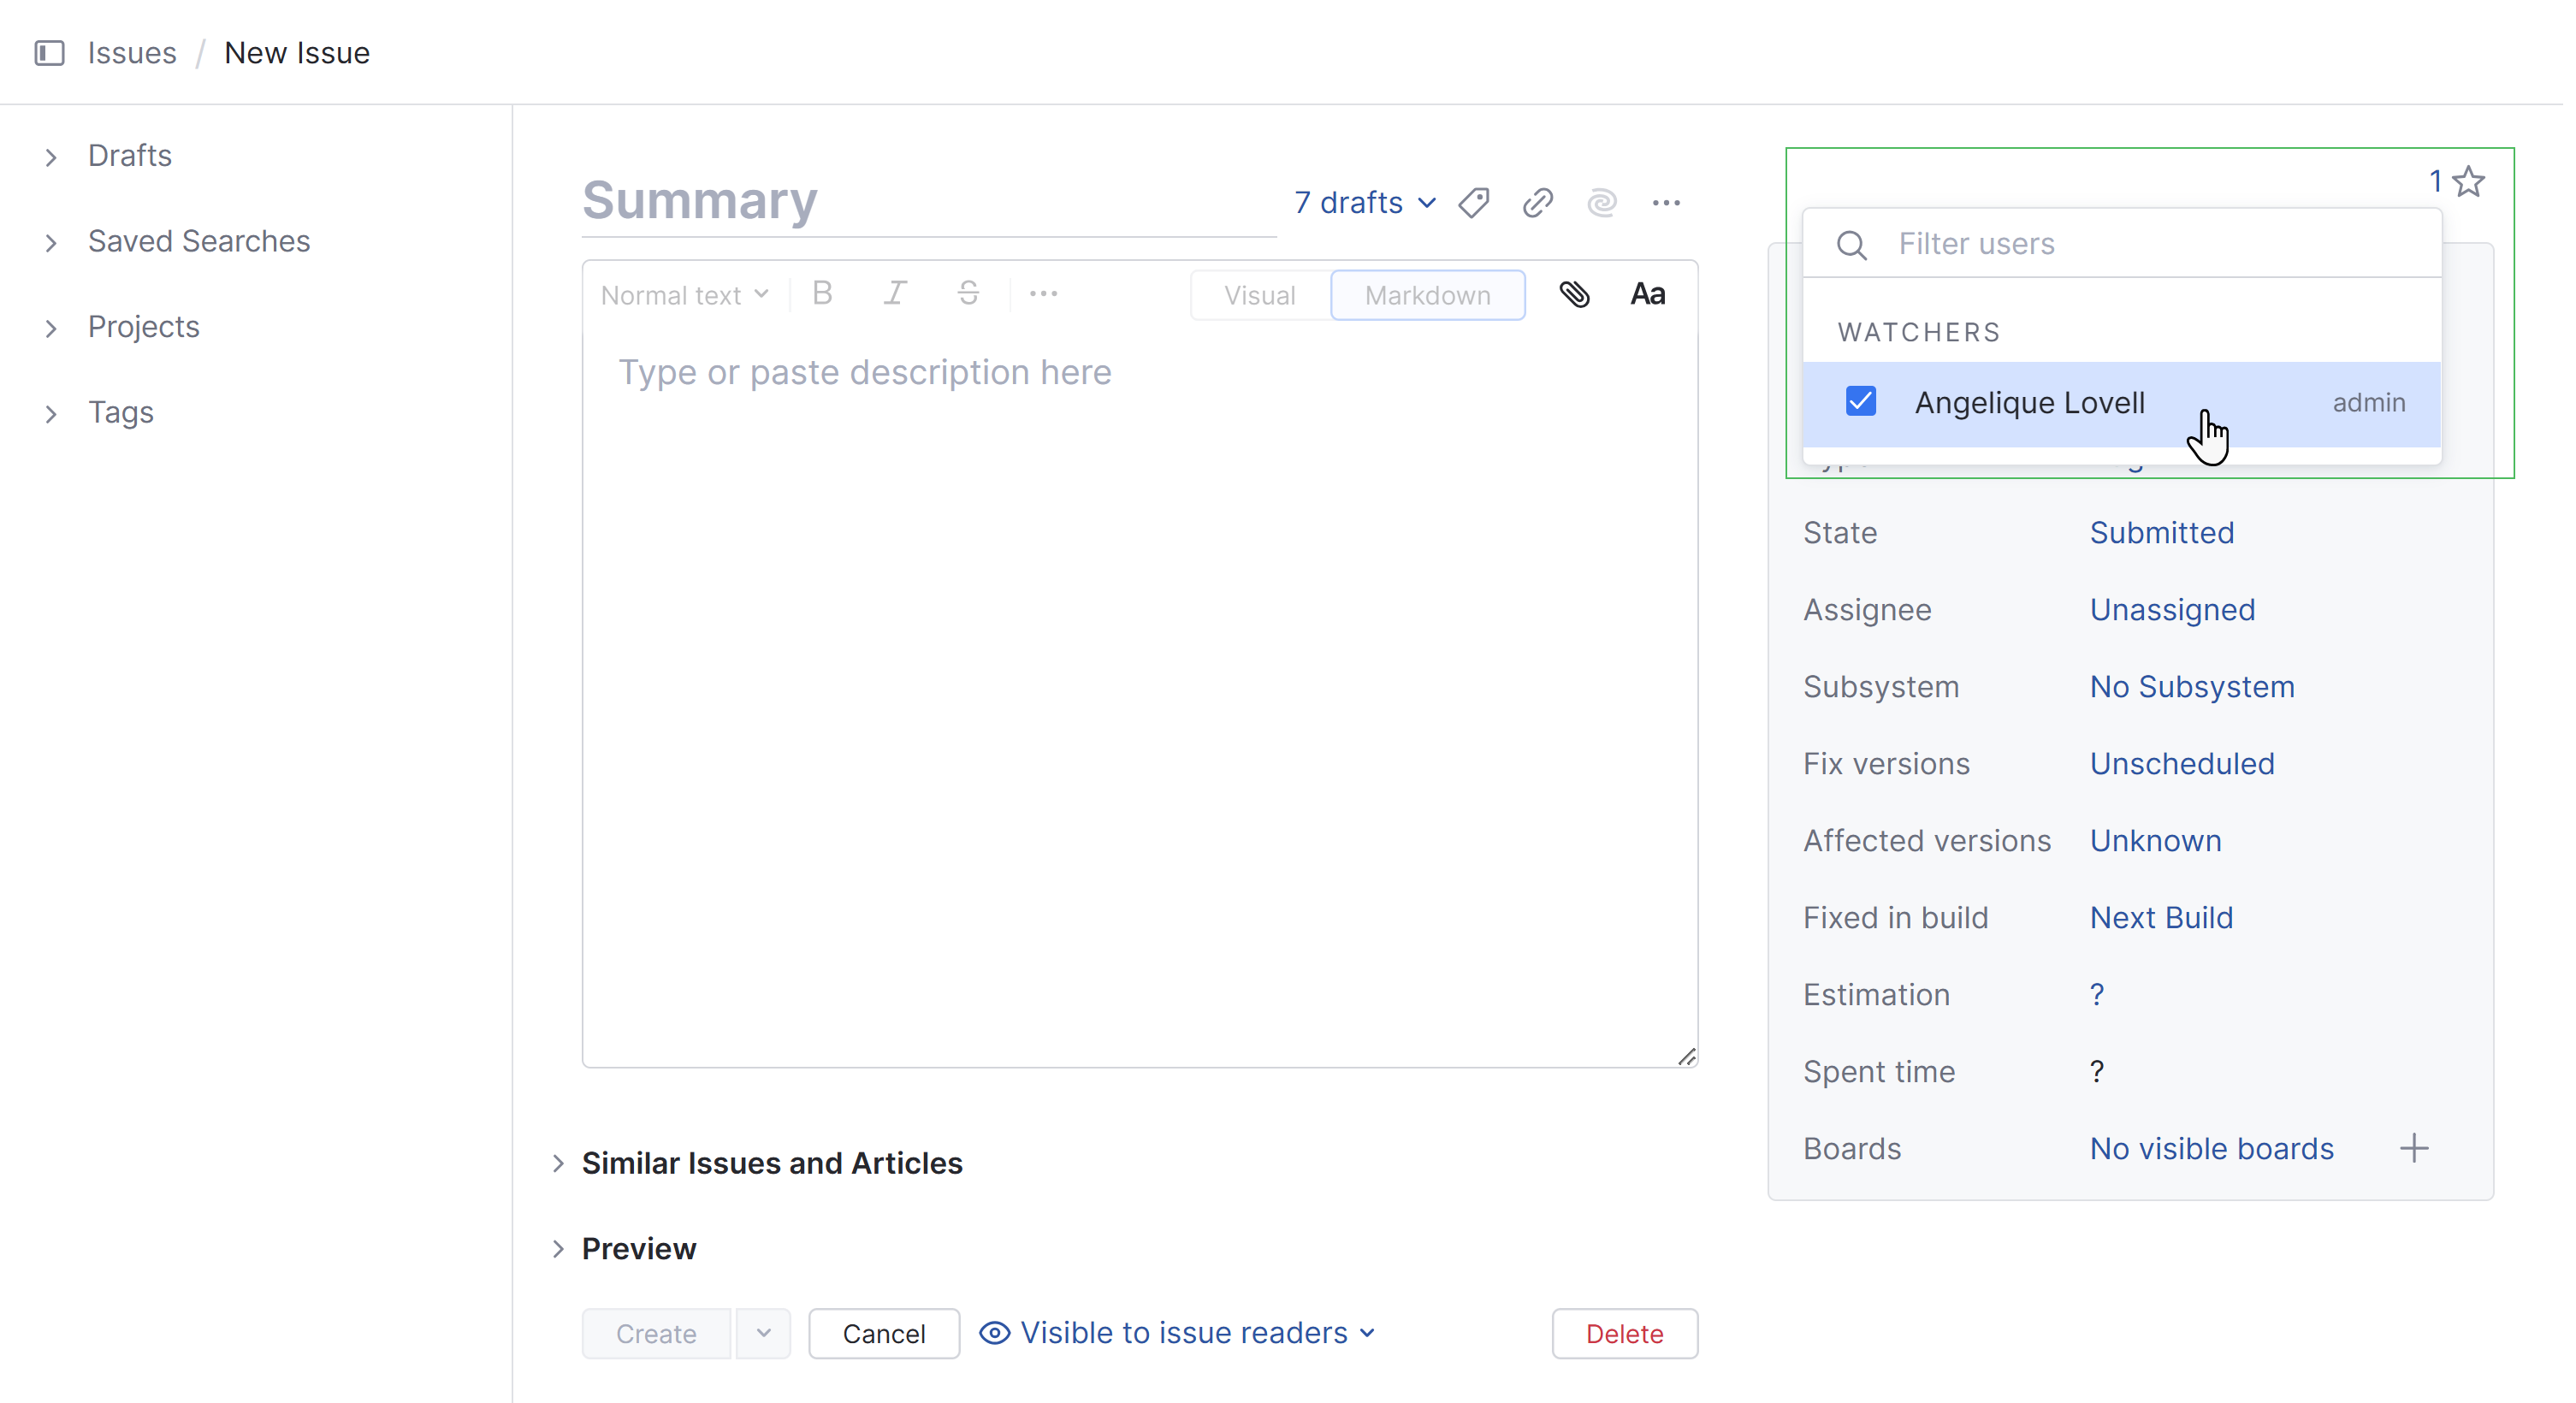
For more information, see Watch Issues.
Boards
At the bottom of the field list is a set of controls for Boards.
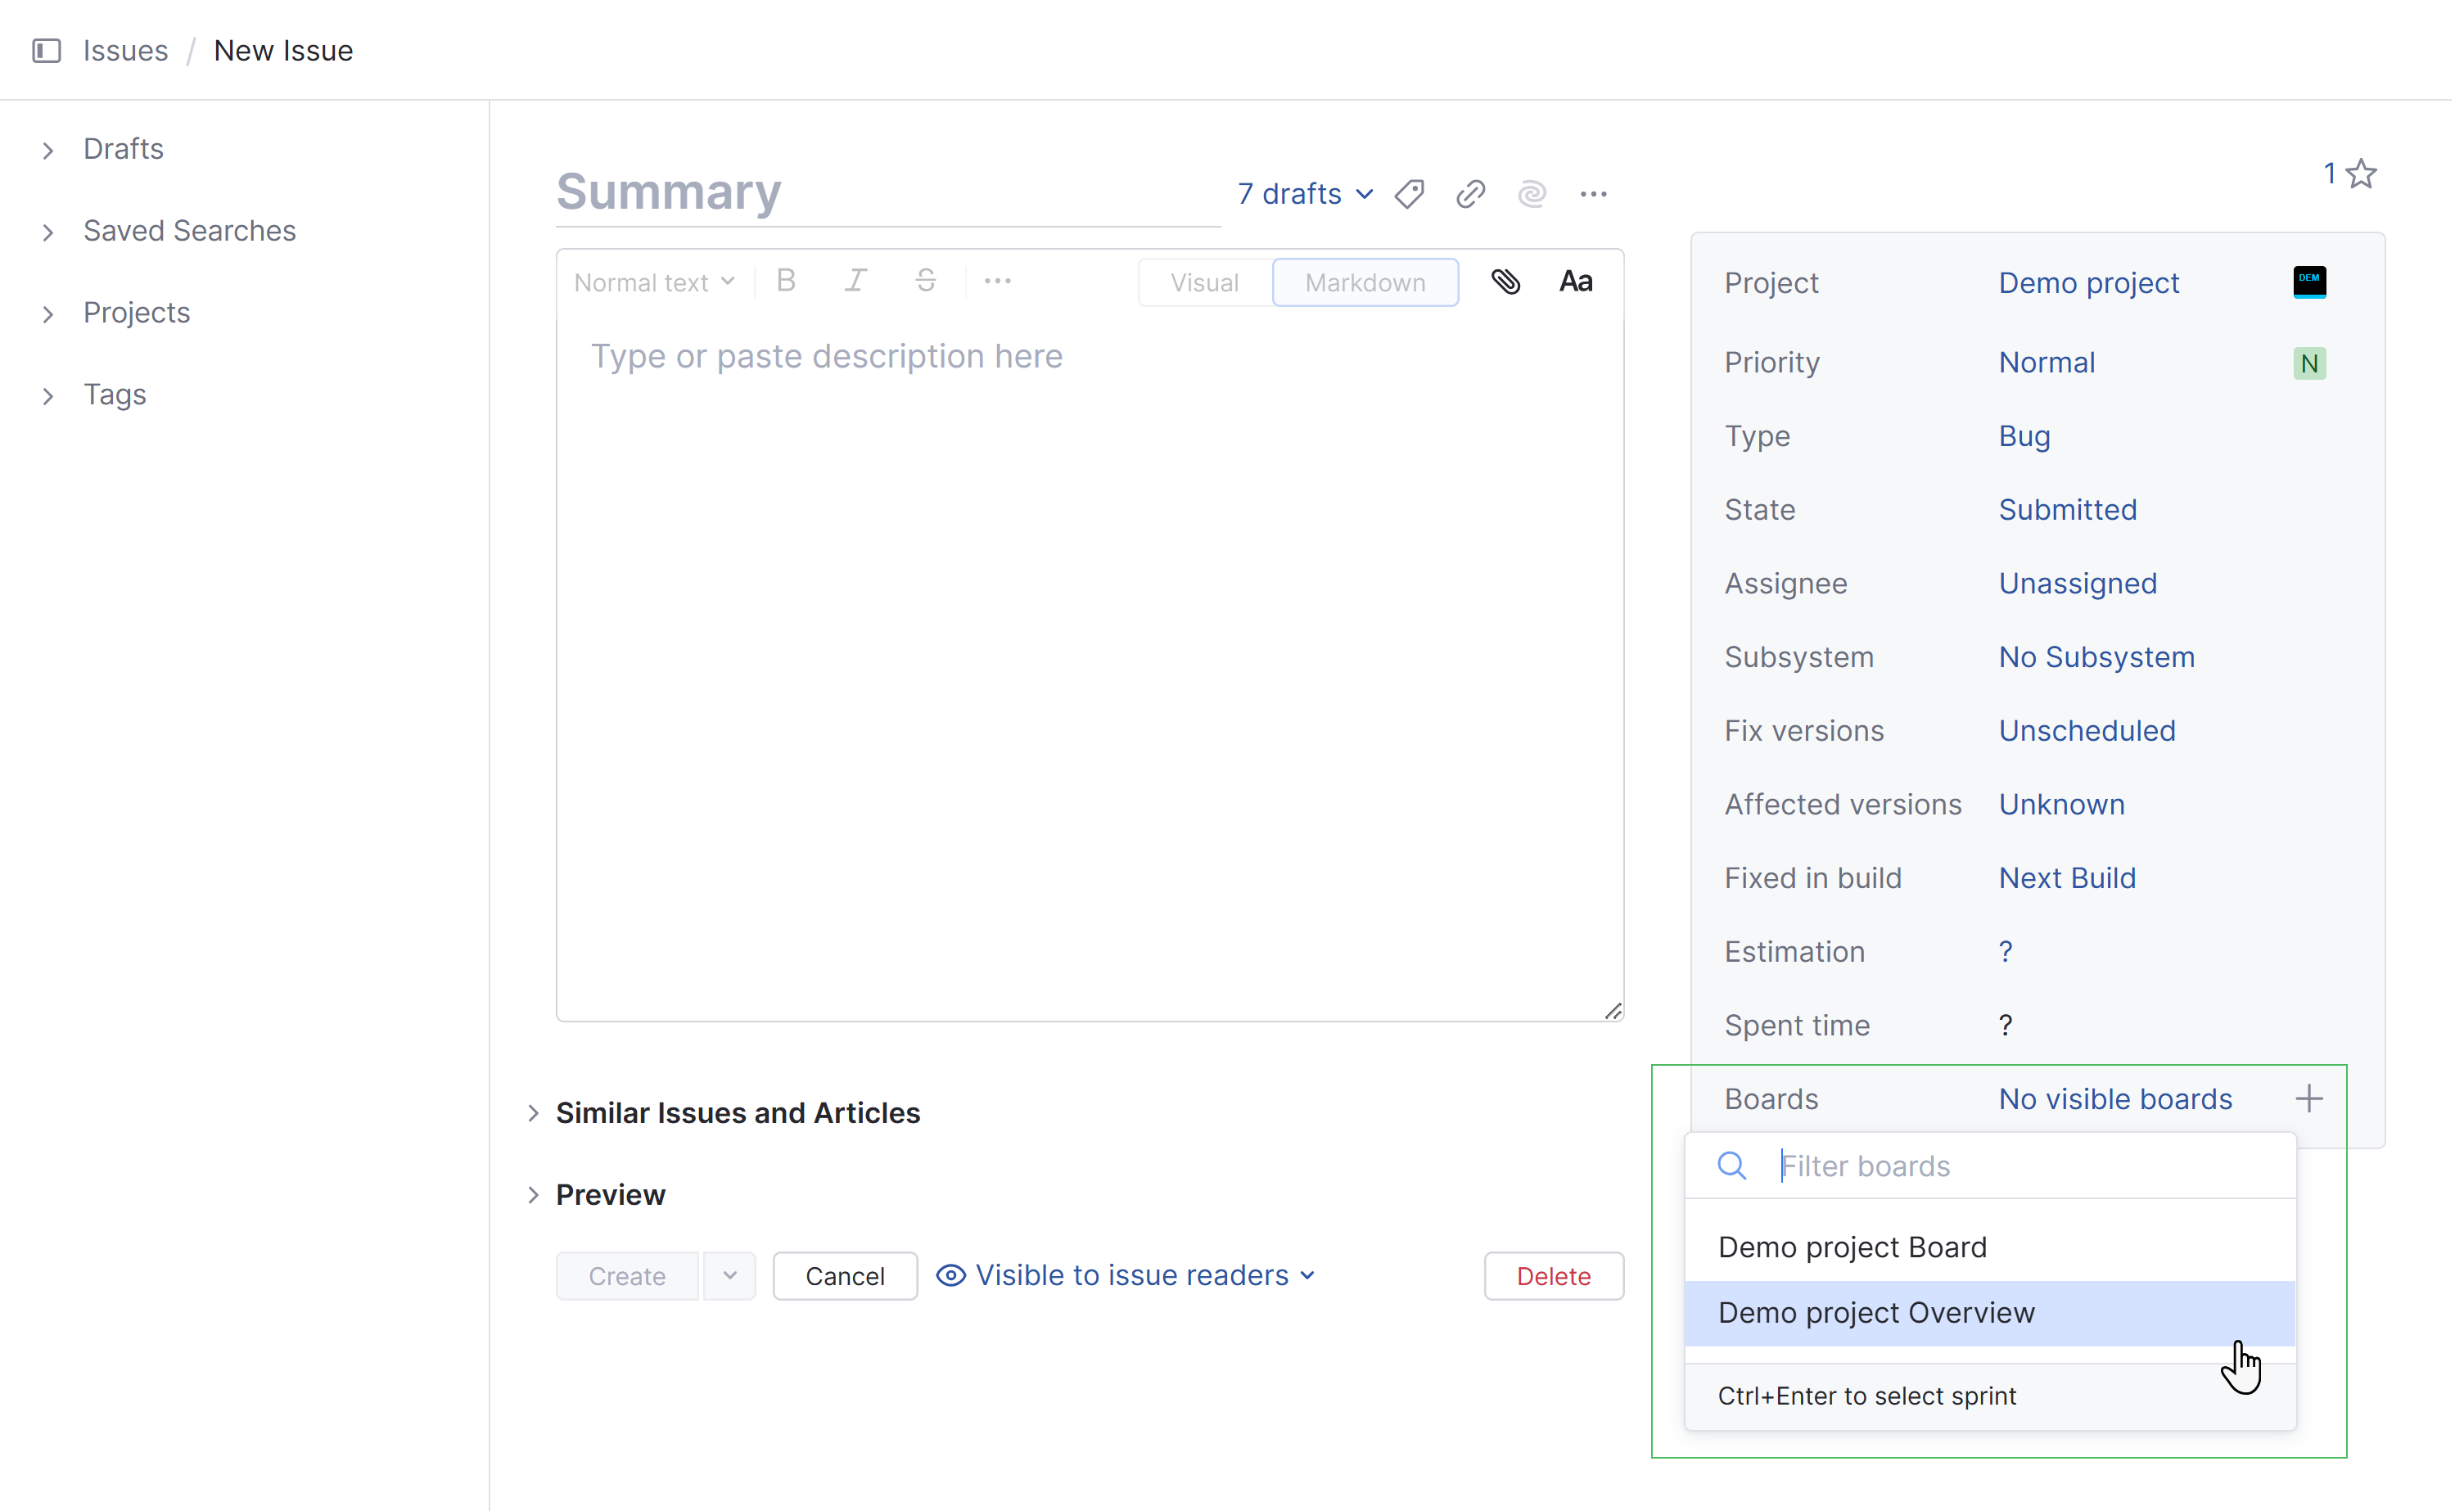
Here, you see a list of agile boards where the issue will be added once created. These boards are configured to use a filter to add issues automatically. The current issue matches the filter query on each of these boards.
To add the issue to a new board, click the Boards section and select a new board. For boards with sprints, you have the option to assign the issue to a specific sprint as well.
To remove the issue from a board, click the
Remove icon next to the name of the corresponding board.
Actions for New Issues
There are three action buttons at the bottom of the page for reporting new issues. These actions let you decide what you want to happen next.
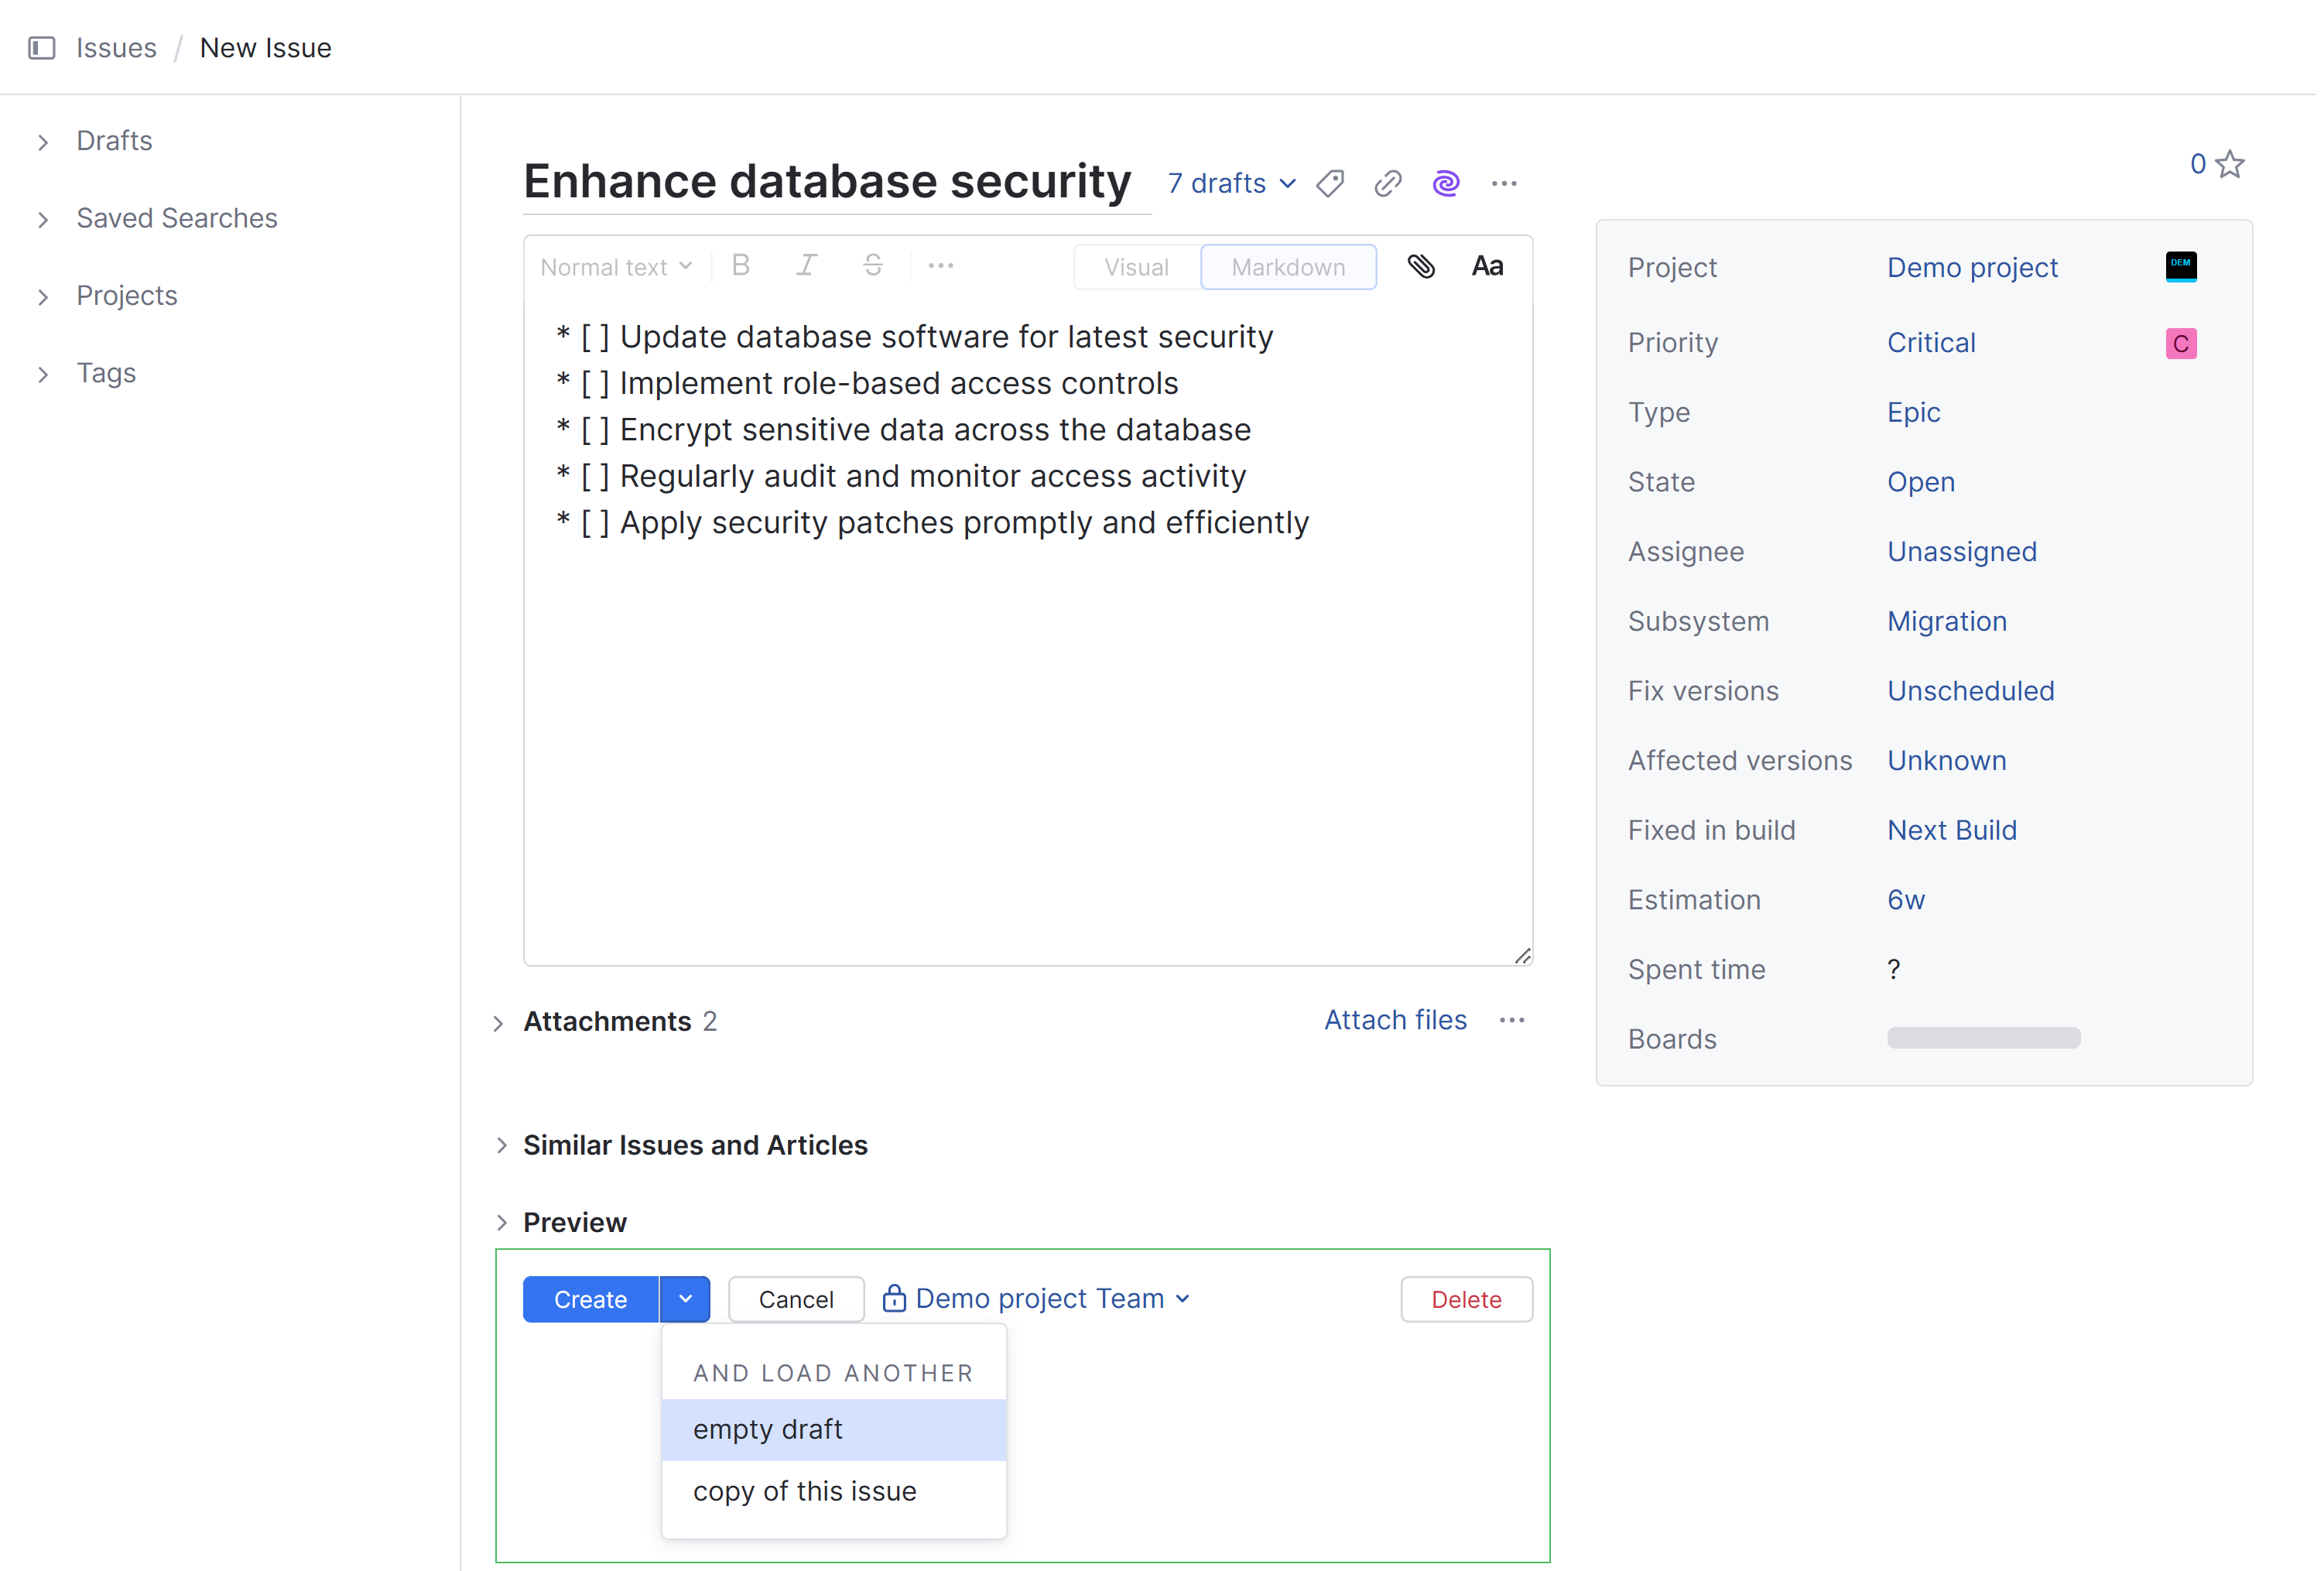
Action | Description |
|---|---|
Create | Reports the current issue in the selected project. This button has two options that let you choose what happens after you report the current issue. These options let you:
|
Cancel | Closes the current issue without reporting it to the project. The issue is saved to your list of drafts. The same action is performed when you close the browser tab or window without clicking the Create button. |
Delete | Closes the current issue without reporting it to the project or saving it to your list of drafts. |
Issue Templates
Another option on the New Issue page lets you generate an issue template without reporting the issue. Use this option when you want to create several issues with the same basic set of attributes or standardize issue reporting for a group of users.
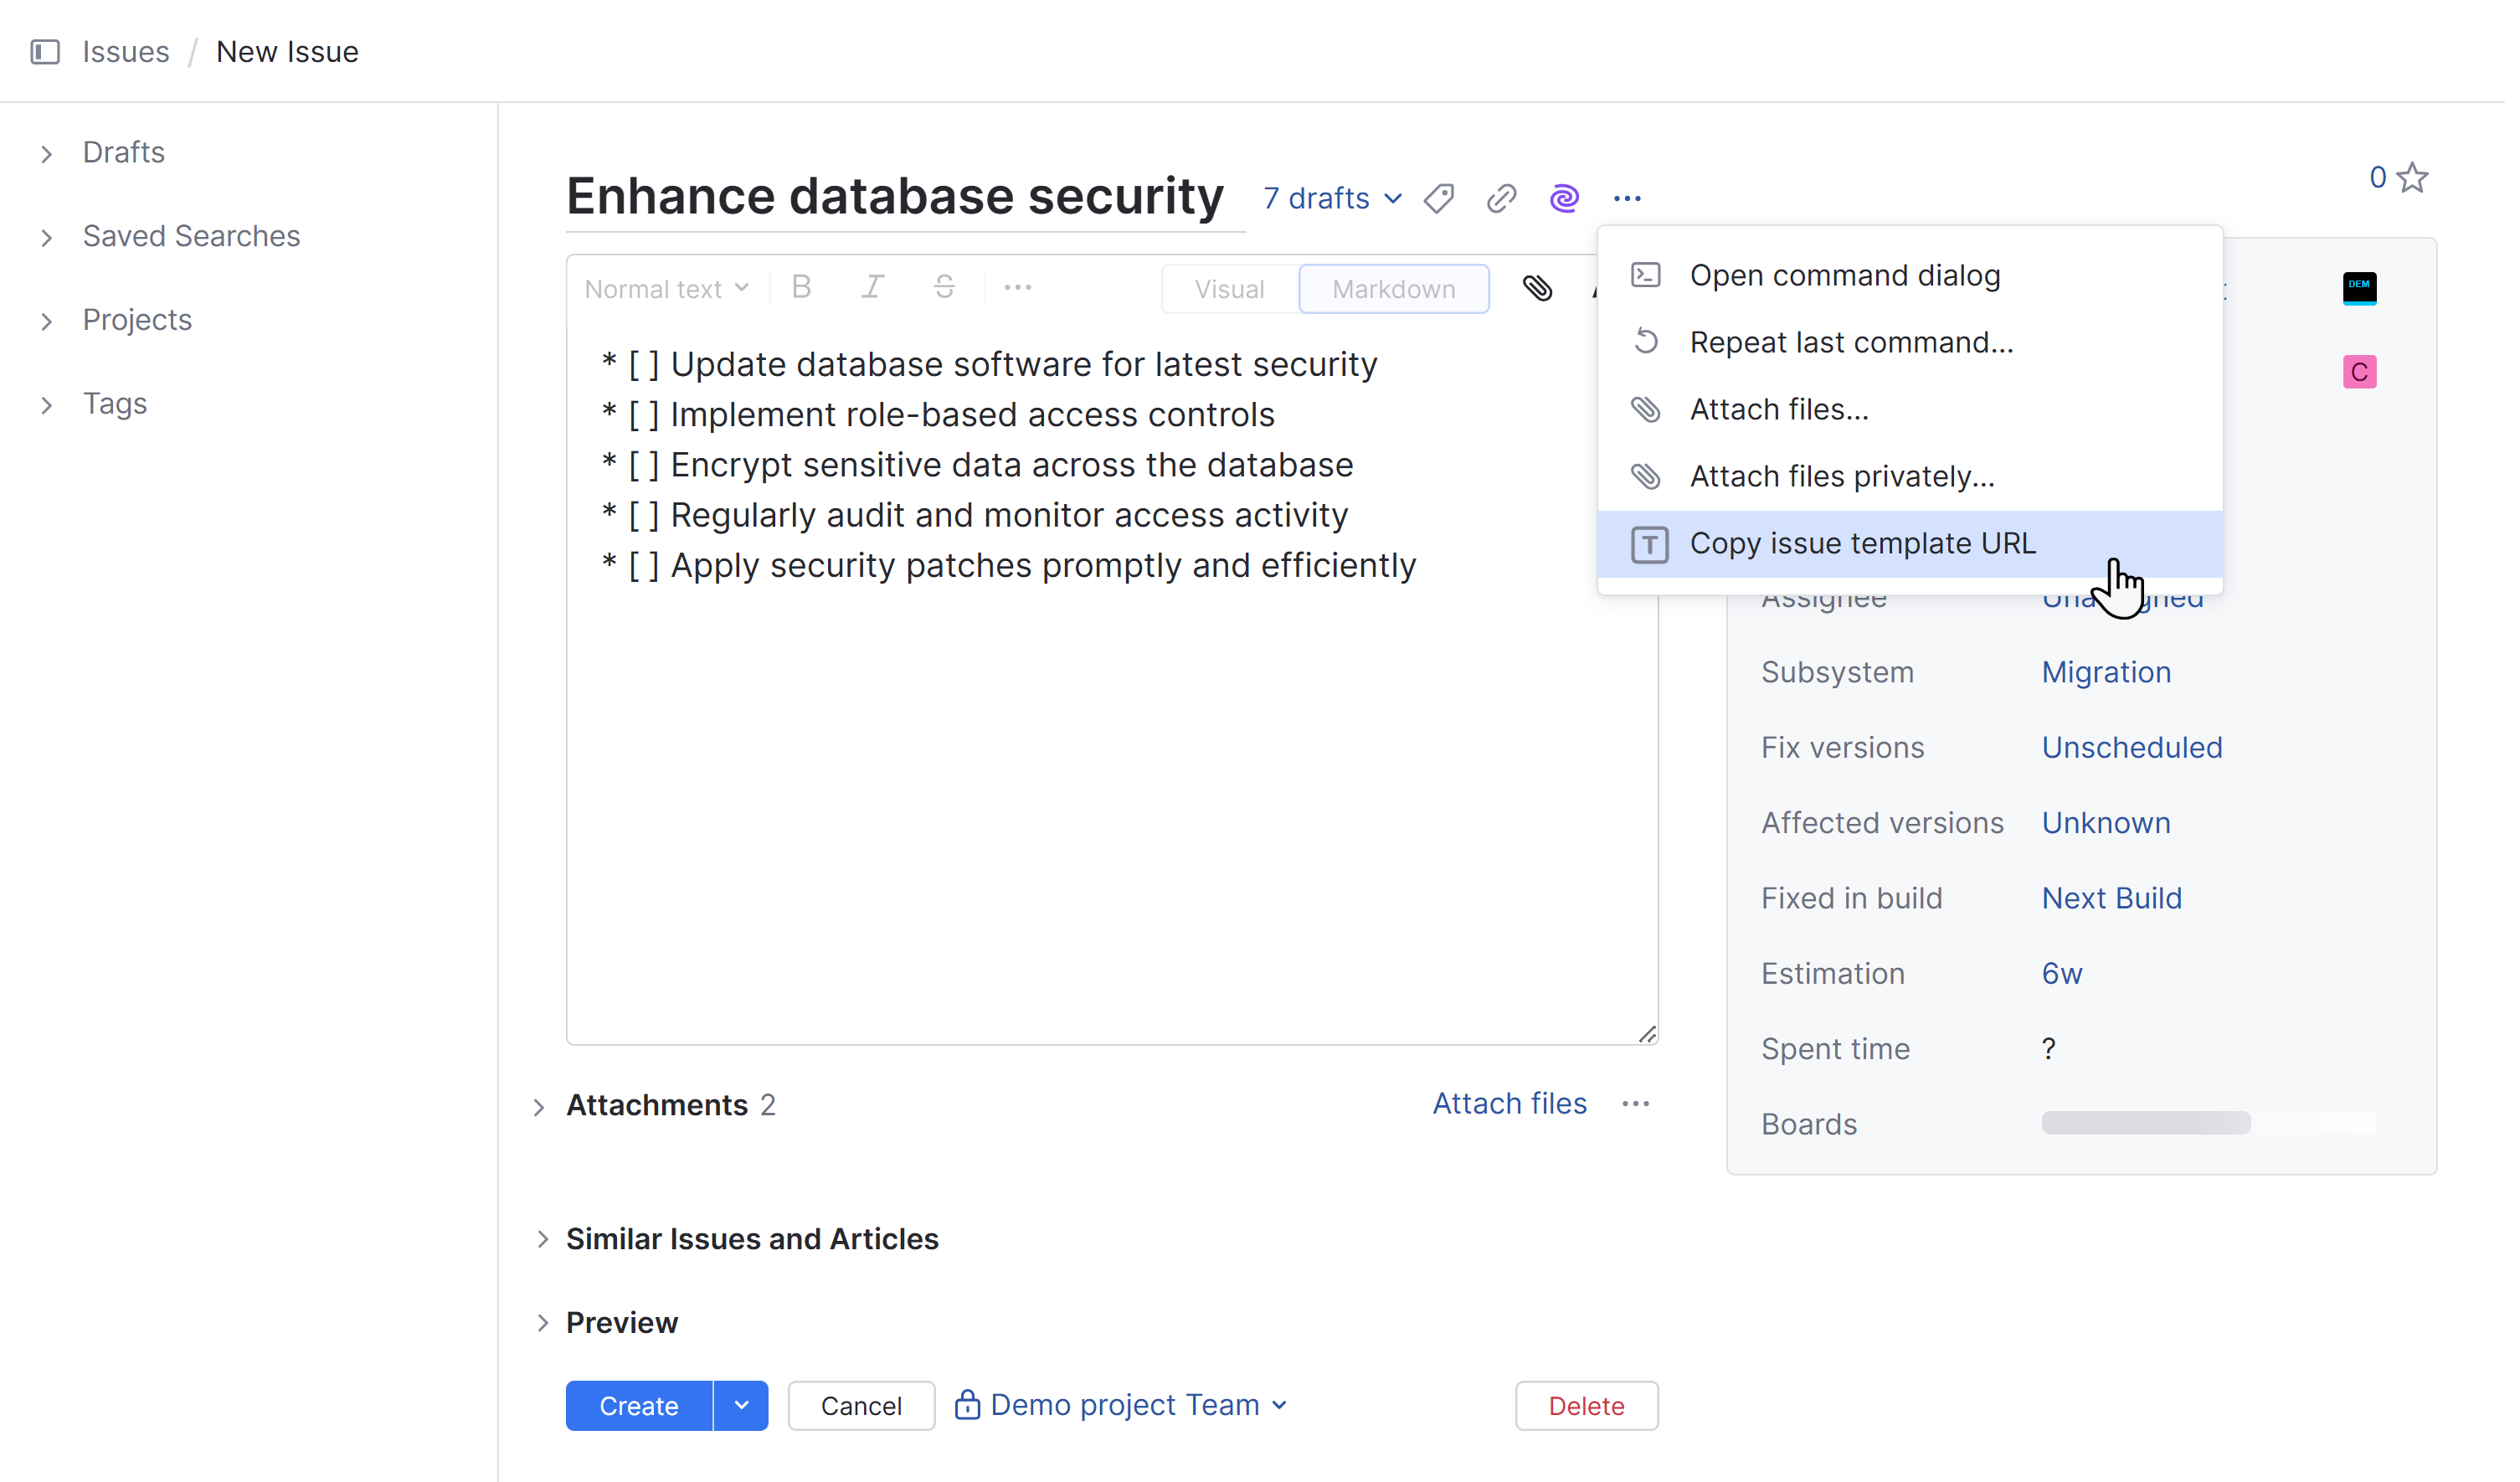
To learn more about issue templates, see Work with Issue Templates.