JetBrains Air Help

Projects

A project groups the resources a team needs to work on the same codebase, so you set them up once instead of each person repeating the work:

  • Environments: configure a cloud environment once – the repository, VM size, environment variables, startup script, etc. – and every member runs cloud tasks with the same setup.

  • Automations: create automations for recurring work around the codebase, such as code reviews or bug fixing. They can reuse the project's environments and are available only to its members.

  • Connectors: connect an MCP server once – through an organization or service account – and every task and automation in the project uses its tools.

  • Members: add your team to the project so they reuse its environments and see automation results without setting up anything themselves.

Open the Projects page in the web version of JetBrains Air, next to Tasks and Automations. Select a project in the left panel to open its page.
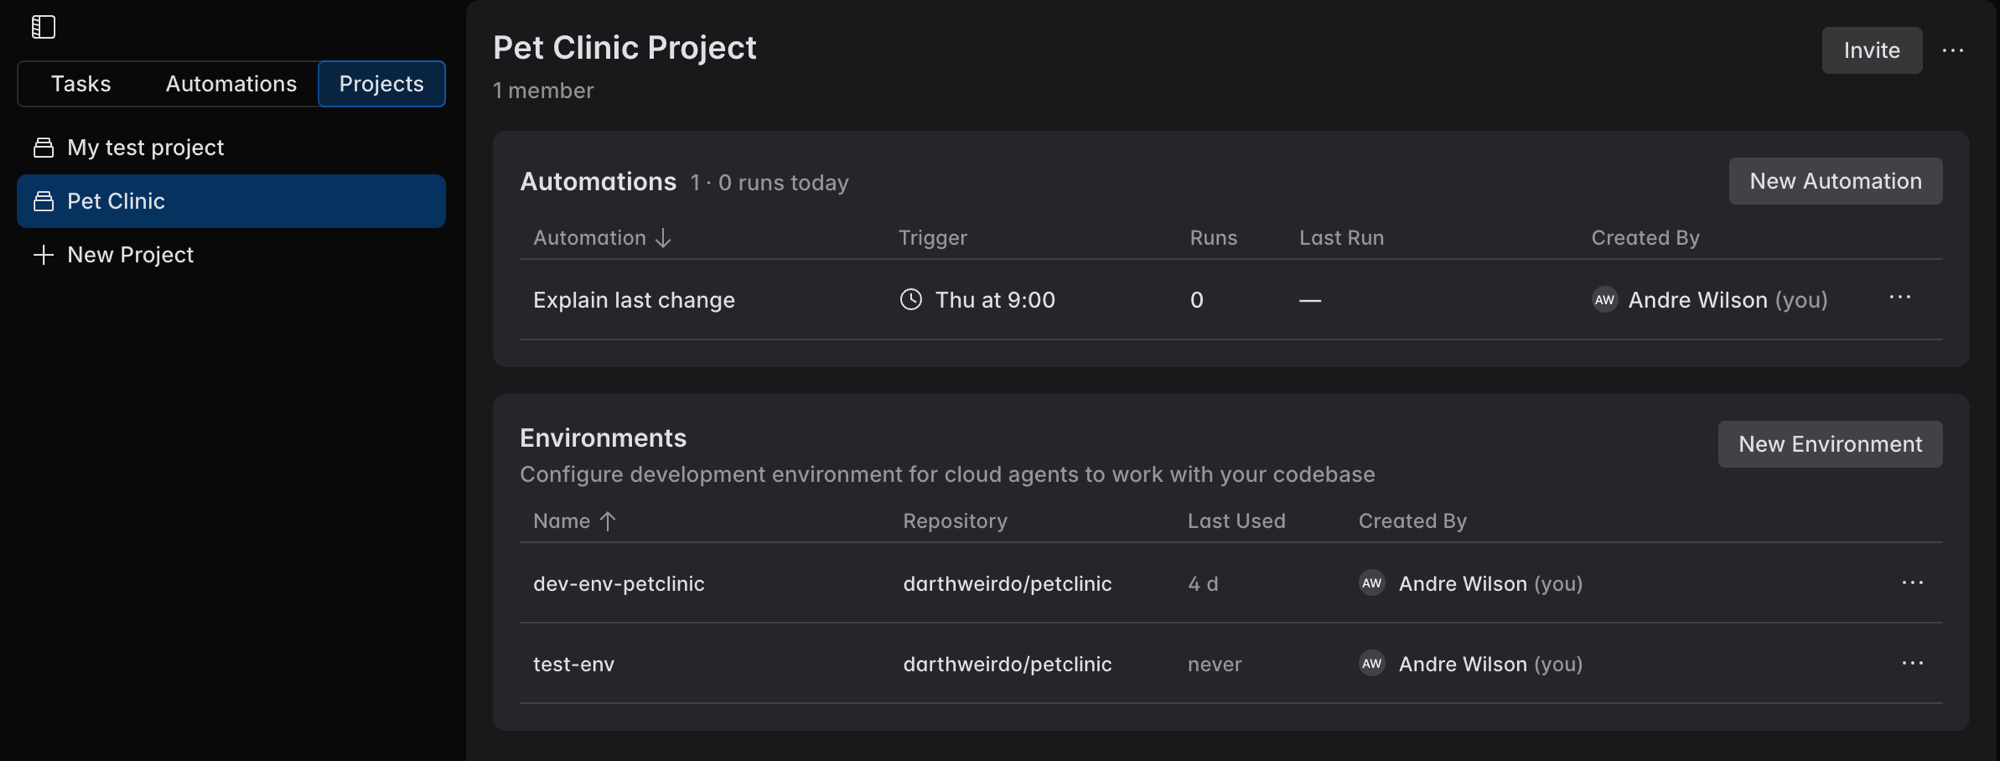
The Projects page open from the Projects tab next to Tasks and Automations, with the project list on the left and the selected project's automations and environments on the right, plus an Invite button in the top-right corner

Create a project

Create a project

  1. Open the web version of JetBrains Air at https://air.jetbrains.cloud.

  2. Open the Projects page.

  3. Click New Project.

  4. Enter a Name and, optionally, a Description.

  5. Under Members, add the users you want to include in the project. Learn more about project roles

  6. Under Environments, add the environment configurations you want the project members to share. Learn more about environment configurations

  7. Under Connectors, add the MCP server connectors the project's tasks and automations should use. Learn more about project connectors

  8. Under Automations, add the automations you want to share with the project. Learn more about project automations

  9. Click Save.

You become the admin of the project you create. Next, add members and create the environment configurations they will share.

Project roles

Every member of a project has one of two roles. The person who creates a project becomes its admin.

Role

What the role can do

Admin

Rename the project, invite and remove members, change member roles, and create, edit, and share the project's automations and environment configurations. An admin can also delete the project.

Member

Run cloud tasks using the project's environment configurations and use its automations. A member cannot change the project, its configurations, or its automations, but can leave the project.

Project service account

When you create a project, JetBrains Air automatically creates a service account for it in JetBrains Central Console, named after the project.

  • The project's AI credits belong to this account.

  • Projects' automations run under its service account instead of under the user who created or started them, and consume the account's AI credits.

  • The service account gets the same default AI credit limit as a regular organization user.

Organization administrators can view and manage it in JetBrains Central Console under AI Governance | Access | Service accounts. For details, see Service accounts in the JetBrains Central Console documentation.

Manage project members

Project admins manage who belongs to the project and what each member can do.

Invite a member

  1. On the Projects page, select the project.

  2. Click Invite to open the Invite Members dialog.

  3. Start typing a name or email in Search names and emails, then select the user.

  4. In the role selector, choose Member or Admin.

  5. Click Add.

After you click Add, the member receives an invitation email with a link to the project. JetBrains Air sends the invitation to the email address of the member's JetBrains Account, as registered in JetBrains Central Console. The member opens the link to go straight to the project in the web version of JetBrains Air.

Change a member's role

  1. On the Projects page, select the project.

  2. Click in the top-right corner, then select Edit to open project settings.

  3. In the Members section, open the role selector next to the member's name and choose Admin or Member.

Remove a member

  1. On the Projects page, select the project.

  2. Click in the top-right corner, then select Edit to open project settings.

  3. In the Members section, open the role selector next to the member's name and select Remove.

Leave a project

  1. On the Projects page, select the project.

  2. Click in the top-right corner, then select Edit to open project settings.

  3. Click Leave Project.

Add environments to a project

An environment configuration captures what a codebase needs to build and run – the VM size, internet access, and the variables and secrets tasks rely on. Set it up once at the project level, and every member runs cloud tasks against the same environment. Project admins create and edit these configurations; members run tasks against them but can't change them.

Create an environment configuration in a project

  1. On the Projects page, select the project.

  2. Under Environments, click New Environment.

  3. Configure the environment as described in Create an environment configuration, then save it.

  4. If the configuration uses personal secrets, tell project members which personal secrets to create.

Share a project's environment

An environment configuration you create from the project page belongs to the project and is automatically shared with everyone in it. You are its Owner, and every other project member gets Can view access to run cloud tasks with the configuration.

The Share Environment dialog for a project environment

If needed, click Share to share the configuration with people outside the project – other users, service accounts, or user groups – or to change a project member's access to Can edit or Can view.

For details, see Share an environment configuration.

Add automations to a project

A project can own automations that handle recurring work around its codebase – automatic code reviews, bug fixing, or flows tied to issue tracking. A project automation reuses the project's environment configurations, is available only to its members, and runs on the project's AI credits instead of the credits of the person who created it – see Project service account.

Create an automation in a project

  1. On the Projects page, select the project.

  2. Under Automations, click New Automation.

  3. Configure the automation as described in Create an automation, then save it. The automation belongs to the project, so you don't need to set the Project field yourself.

You can also share an automation you already created within a project. Open automation settings and select the required project in the Project field. You can change the project at any time or choose None to make the automation personal again. For details, see Assign an automation to a project.

Add connectors to a project

A project can have its own connectors – managed connections to MCP servers that give the agent access to external tools. A project connector is available to every cloud task and automation in the project, so you set it up once instead of each member configuring the same MCP server. Project admins add and remove connectors; members use them without any setup.

Add a connector to a project

  1. Open the Projects page, select the project.

  2. Under Connectors click Add Connector.

    The Connectors section on a project page, with an Add Connector button and connected Browser and AWS services, one showing a menu with the Disconnect option
  3. Choose the service, click Connect, and follow the provider's authorization flow. Sign in with the shared account you want the project to use.

To remove a connector, click next to it and select Disconnect. The project's tasks and automations then lose access to that MCP server's tools.

Delete a project

An admin can delete a project. On the Projects page, select the project, click in the top-right corner, and select Edit to open project settings, then click Delete.

29 July 2026