Configure a database connection
Procedure overview
Configure the parameters of a new database connection using the interface provided for the selected database type. Read the procedures below to do the following:
Configure connection parameters based on the selected database type
(Optional) Configure SSH tunneling
(Optional) Configure database introspection scope
(Optional) Configure JDBC driver optional parameters
Procedures
Open the New database connection dialog
The procedure depends on whether you want to create a new database connection in workspace resources or in a notebook.
In the sidebar on the Home page, select the workspace where you want to create a database connection.
In the workspace resources, select
Data and switch to the Databases tab.

Click
New database connection at the top right.
Open the Attached data tool from the left-hand sidebar.
Switch to the Databases tab. You will see the list of all database connections available from the respective workspace.
Click
New database.
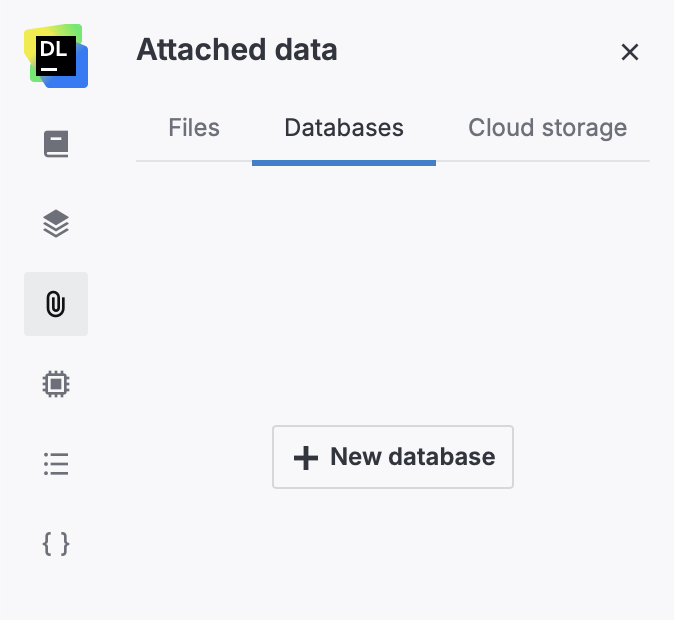
Configure a connection using database-specific interface
This procedure describes the general workflow for all supported database types. For specific procedures, refer to the topics under this article.
Make sure your database instance is configured to accept incoming connections from the following IP address:
63.33.83.29In the New database connection dialog, select a database type.
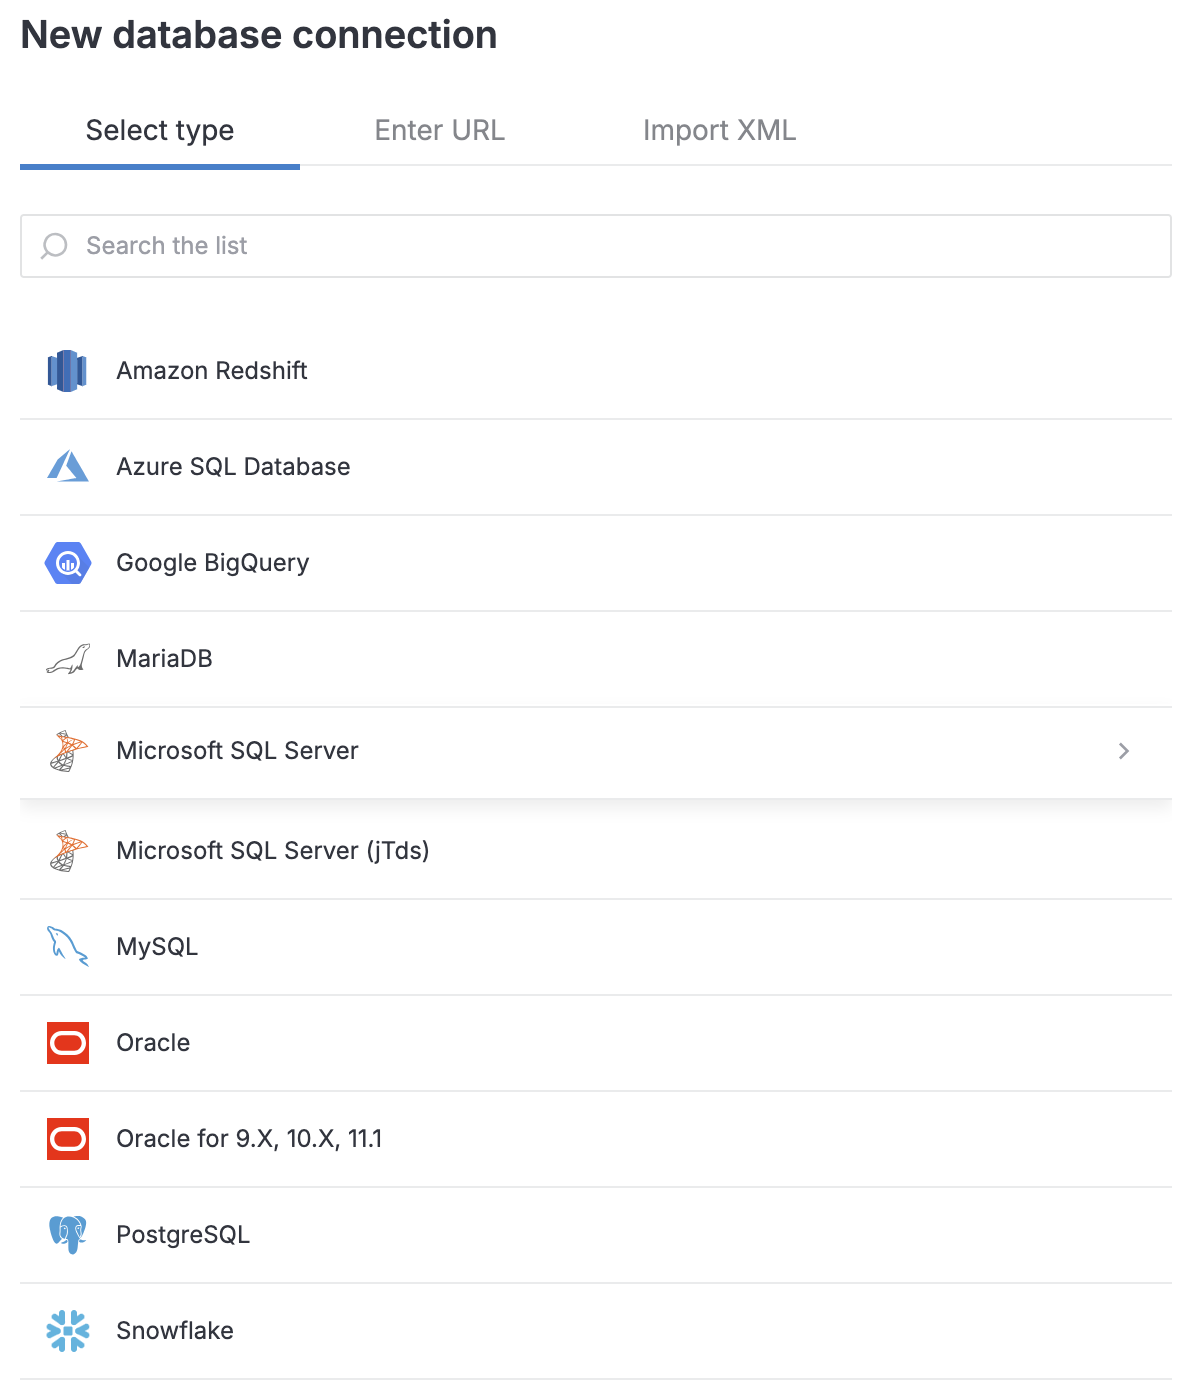
You will be forwarded to the General tab of the New [database_type_name] connection dialog.
On the General tab, fill in the fields to provide details required for the selected database type.
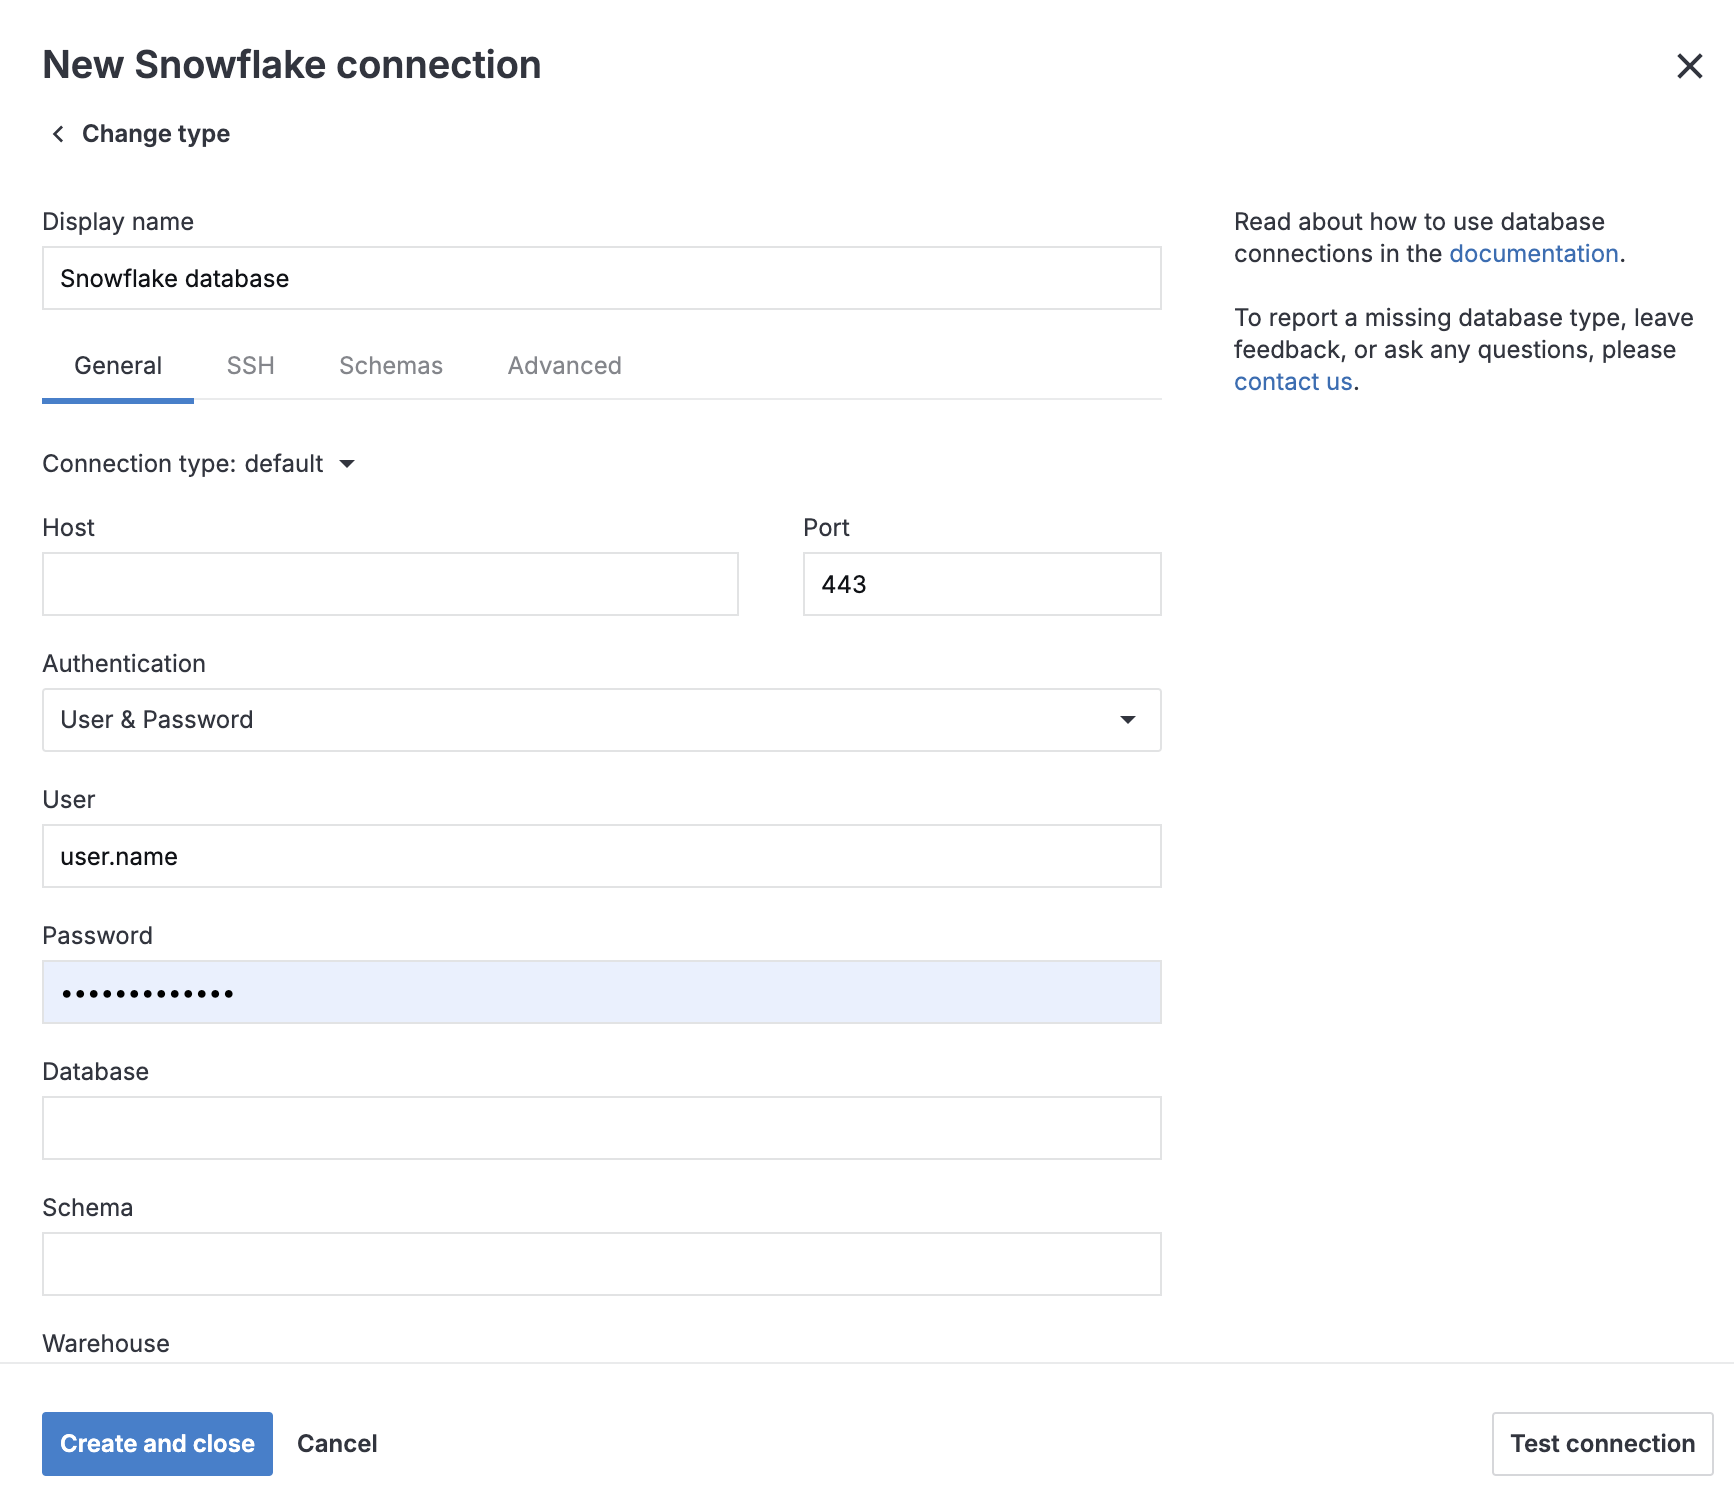
(Optional) To configure SSH tunneling for your new connection, perform this procedure.
(Optional) To configure the database introspection scope, perform this procedure.
(Optional) To configure additional parameters for your connection, perform this procedure.
Click the Test connection button at the bottom of the dialog.
Once successfully tested, click the Create and close button.
Use the legacy connection method
If you encounter issues with connectivity, OAuth authorization, or custom JDBC options when connecting to PostgreSQL, Amazon Redshift, MySQL, MariaDB, Microsoft SQL Server, or Snowflake, you can try to switch to the legacy connection method.
To use it, go to the Advanced tab in the New database connection or Edit database connection dialog, and select Use legacy connection method.
Enable SSH tunneling
Datalore can create an SSH tunnel based on the parameters you configure in the New [database_type] connection dialog. This procedure is an optional step of configuring a database connection in the New database connection dialog.
Switch to the SSH tab of the New [database_type] connection dialog.
Select the SSH checkbox.
Provide your connection details in the Host, Port, and User fields.
Use one of the two authentication types:
To use password-based authentication, fill in the Password field.
To use a key pair:
Expand the Authentication type list and select Key pair.
Under Key pair, expand the list and select one of the key pairs you created for this workspace.
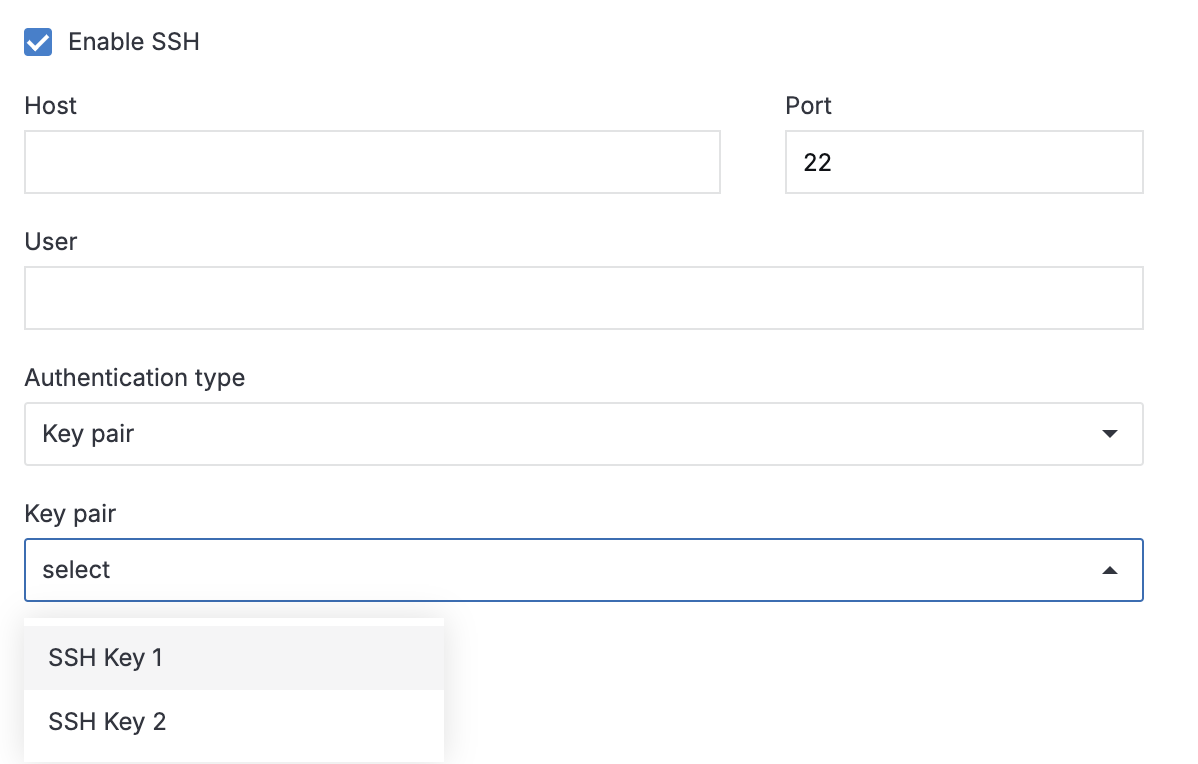
Click the Create and close button to finish your work in the dialog, or switch to another tab to continue configuring the connection.
Configure database introspection scope
This procedure is an optional step of configuring a database connection in the New database connection dialog.
Switch to the Schemas tab of the New [database_type] connection dialog.
Select or deselect schemas for introspection.
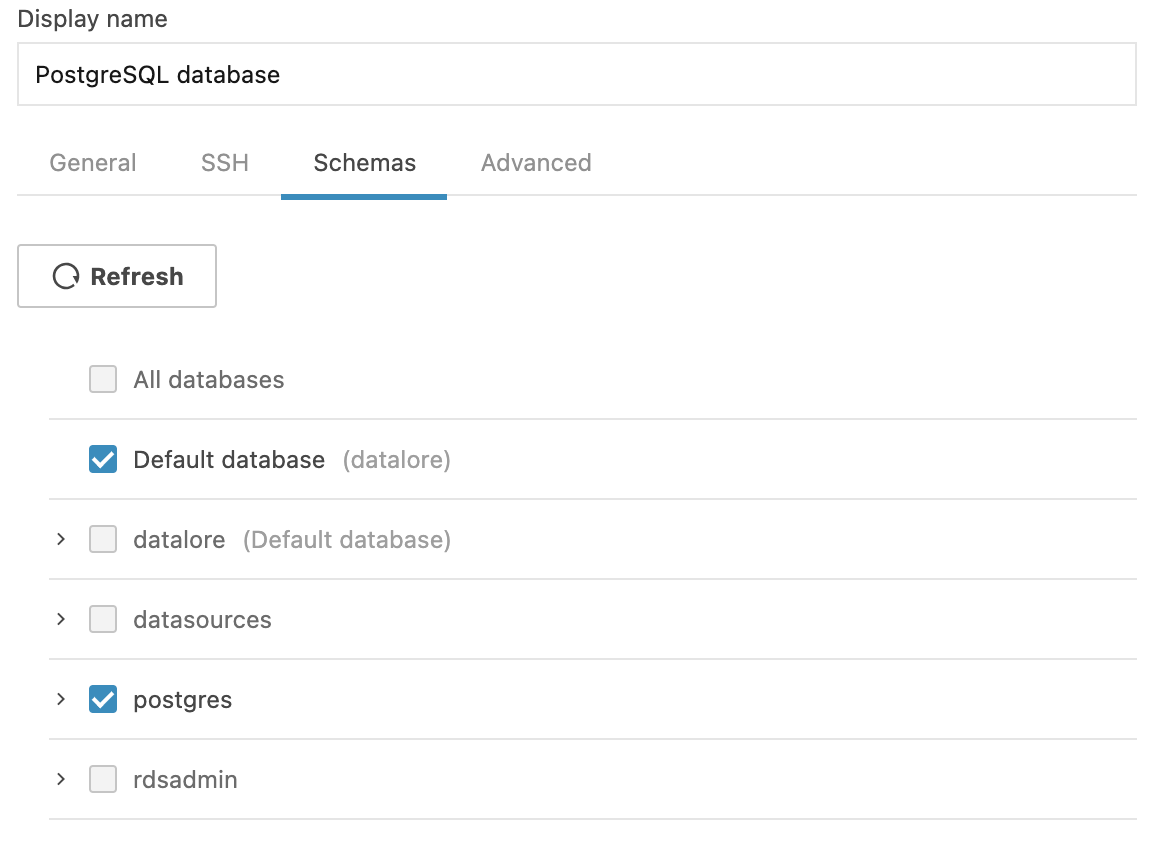
Click Create and close to finish your work in the dialog, or switch to another tab to continue creating the connection.
Manage additional parameters for your connection
Use the Advanced tab of the database connection dialog to manage additional parameters. For example, you can manage your JDBC driver custom options here or specify your VM options.
Switch to the Advanced tab of the dialog.
Do one of the following:
Specify VM options
Enter the values in the VM options field.
Add a parameter
Click Add key-value pair. Repeat the previous step for each parameter required for your connection.

Click Create and close to finish your work in the dialog, or switch to another tab to continue creating the connection.
Attach the connection to a notebook
Open the notebook you want to attach the connection to.
If the notebook is not running, start it by clicking .
In the sidebar, select Attached data and switch to the Databases tab.
Enable the toggle in your database connection.
If the notebook is not running, start it by clicking .
In the sidebar, select Attached data and switch to the Databases tab.
Enable the toggle in your database connection.
Next steps
If OAuth authentication was used for this connection, report users and notebook collaborators may be required to provide their credentials to access the database.
To retrieve and process data from the connected database, use Query data with SQL cells.
Learn how to manage and delete database connections in a workspace and in a notebook.
Keywords
database, database connection, attach data, data sources, configure connection