Schedule notebook runs
Use scheduling to run your notebooks at selected intervals (hourly, daily, weekly, or monthly). With this feature, you can have your data processed and reports updated regularly.
Set up a schedule for notebook runs
Follow the instruction below to schedule runs for your notebook.
Open the notebook in the editor.
Select to open the schedule dialog.
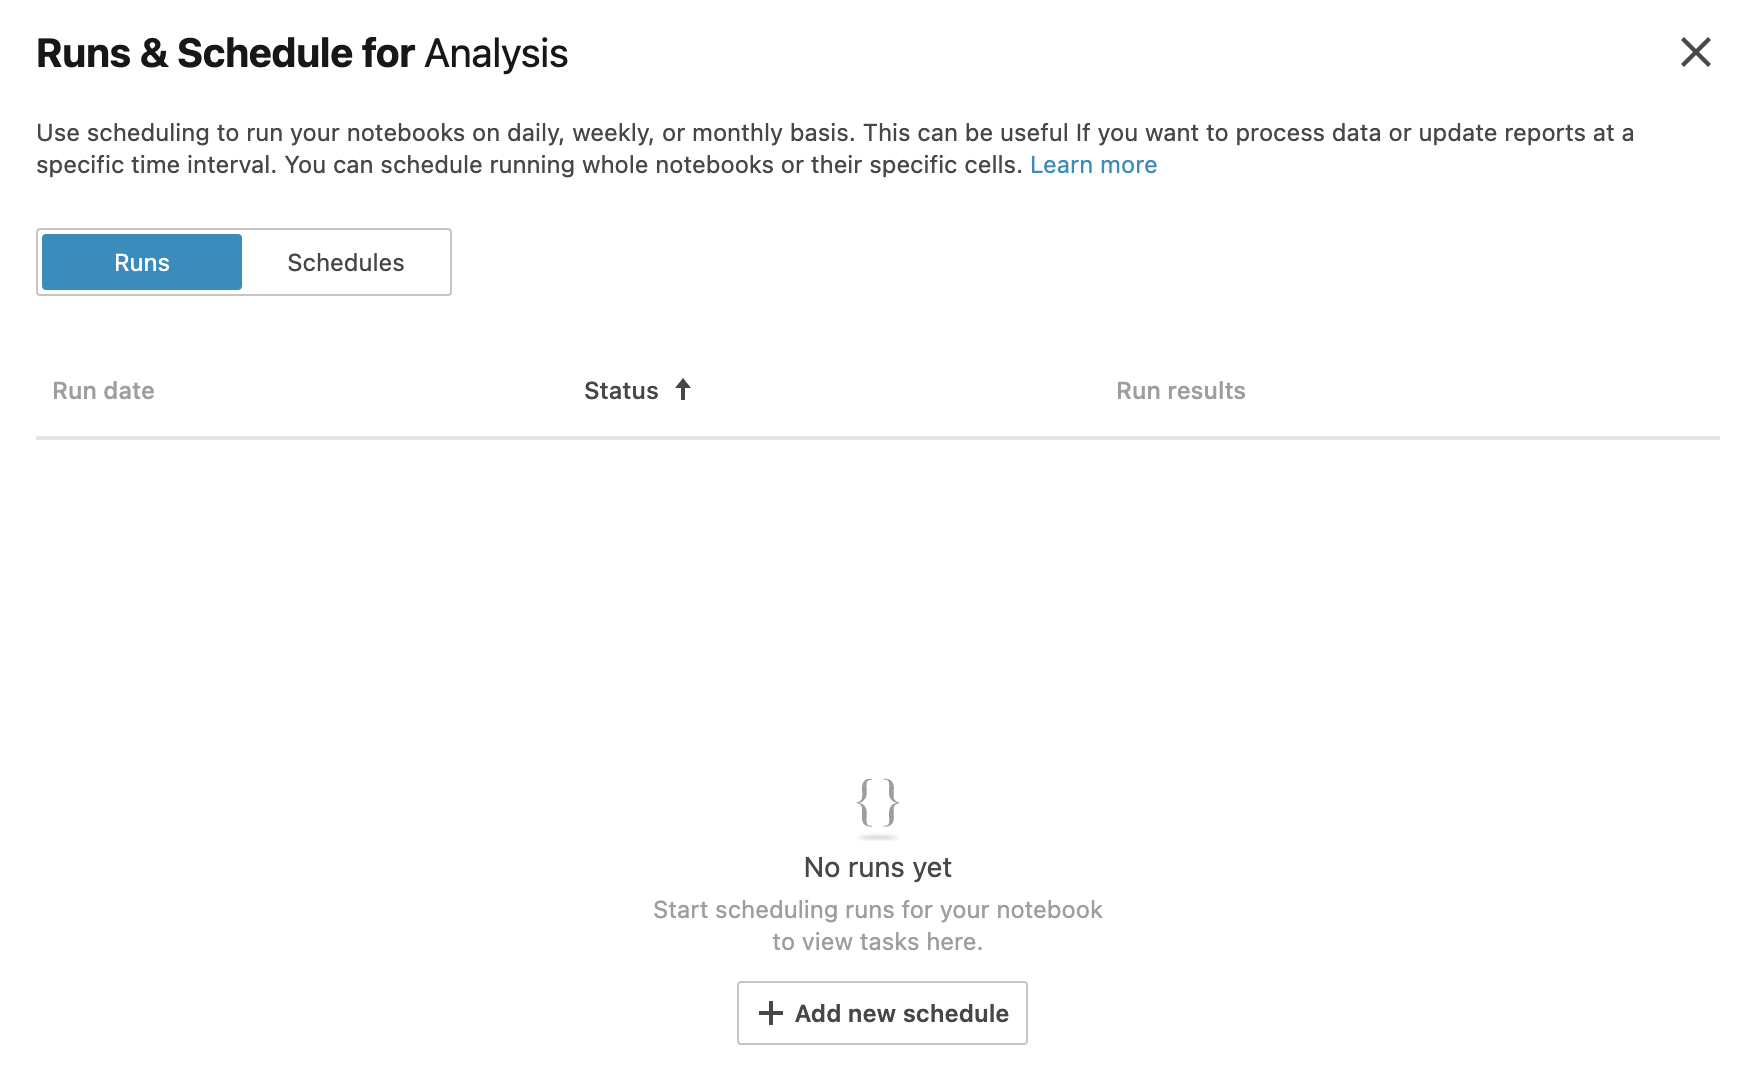
Click Add new schedule.
In the Create schedule for [notebook_name], select a time interval and configure it:
If Hourly is selected, set the minute mark in Minutes.
If Daily is selected, set the exact time in Time and select a time zone.
If Weekly is selected, select a day from the Weekday list, set the exact time, and select a time zone.
If Monthly is selected, specify the day of the month in Day, set the exact time, and select a time zone.
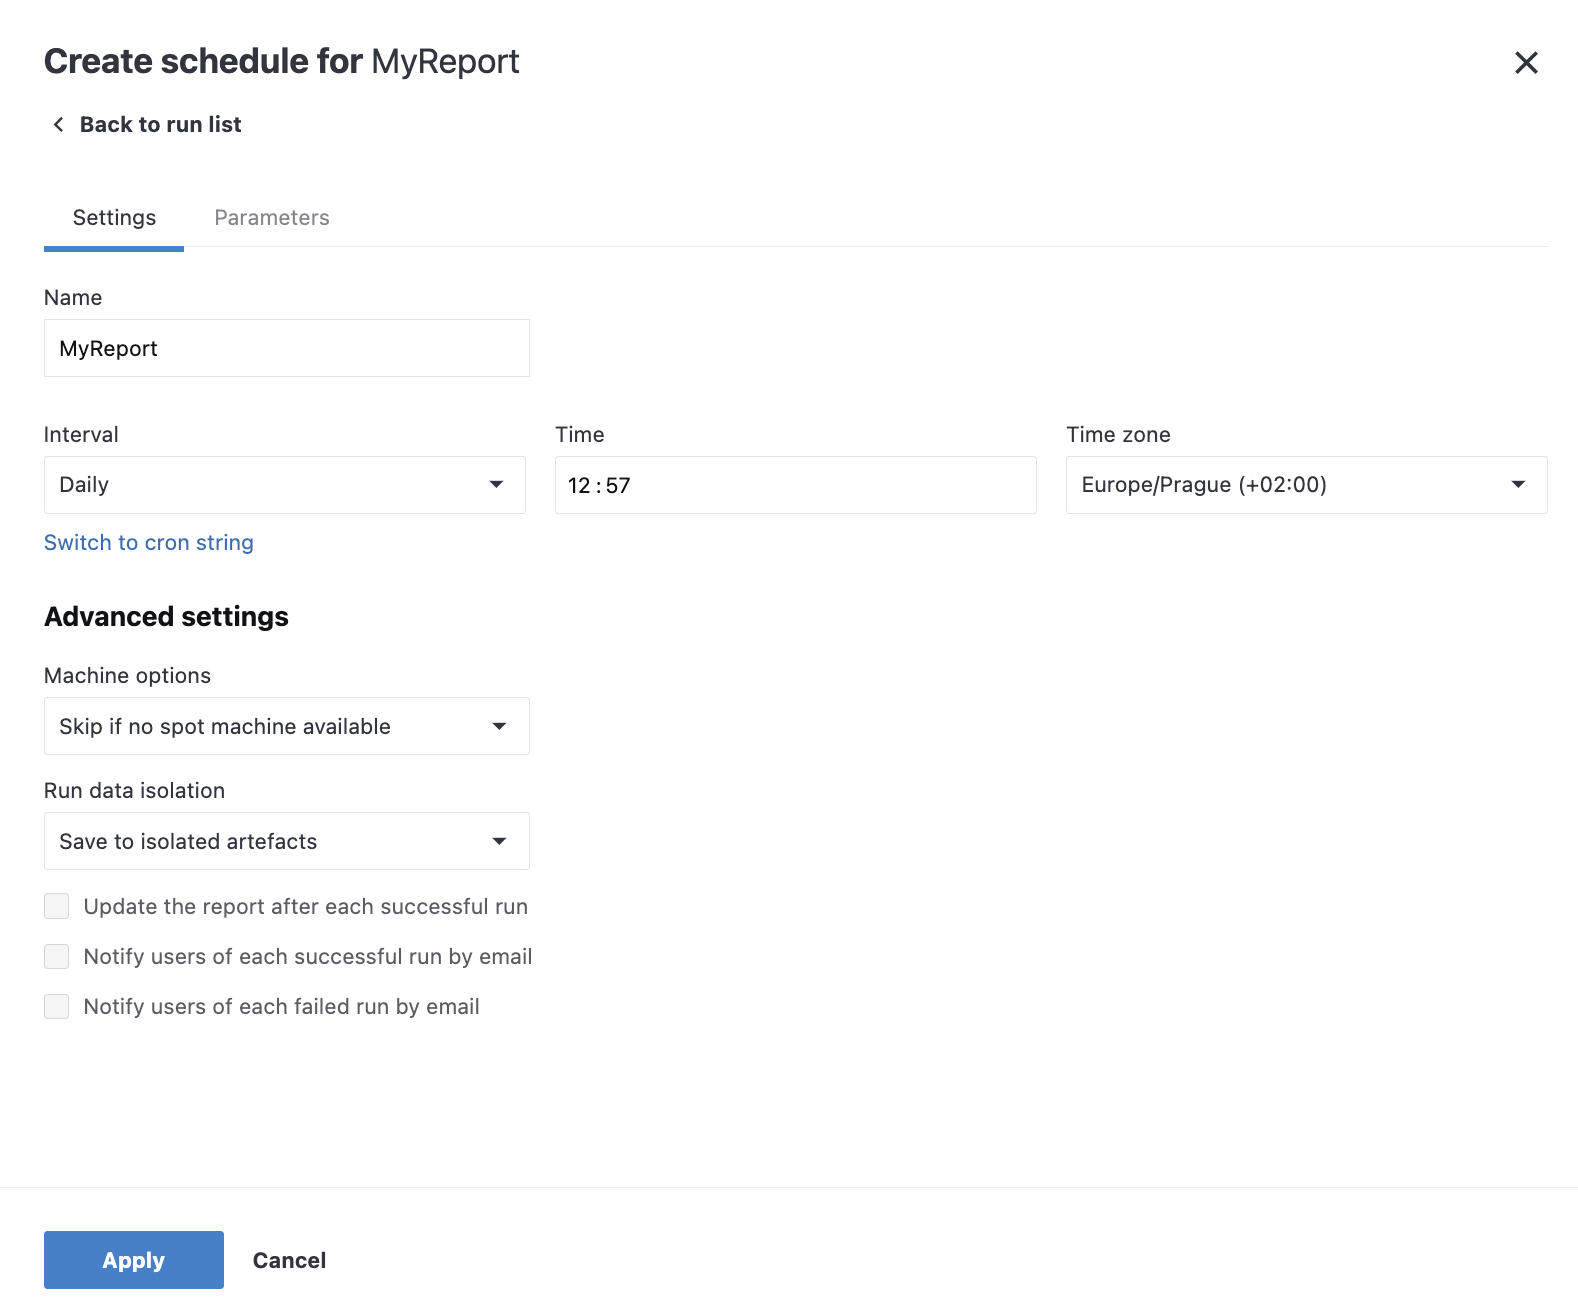
(Optional) Alternatively, you can click Switch to cron string to set up the time interval using cron expressions.
Under Advanced settings, select one or more of the following options:
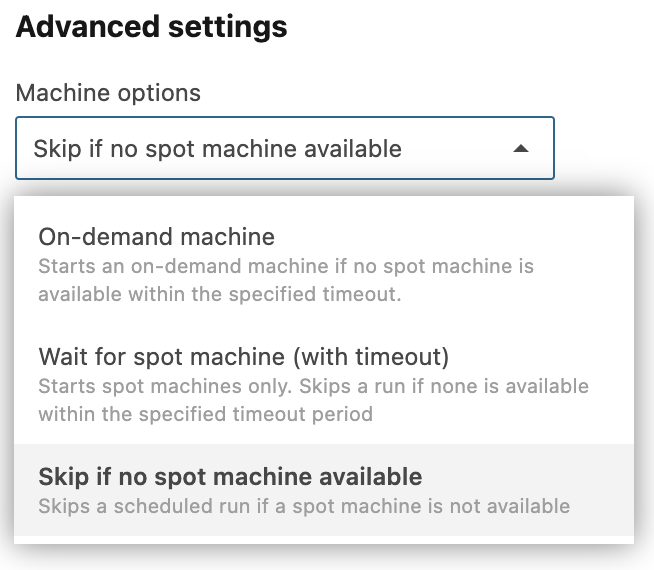
Under Machine options, choose a behavior for situations when no spot machine is available. The default option is skipping the run. Alternatively, you can choose to wait for an available spot machine within a specified timeout or use an on-demand machine (if you have Datalore credits). Find more details on spot and on-demand machines in Choose CPU and GPU machines.
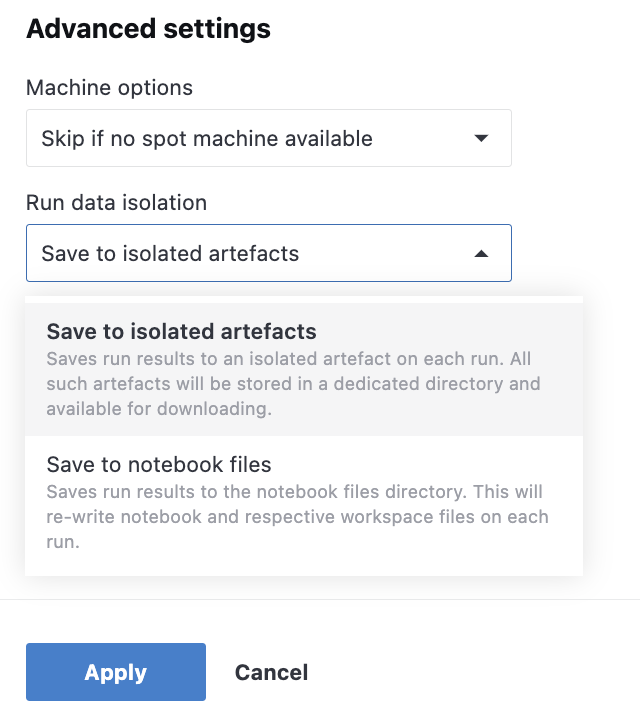
Under Run data isolation, choose how you want run data to be saved.
The default option Save to isolated artefacts saves run results to isolated artefacts, which are stored in a dedicated directory and available for downloading.
Select Save to notebooks files if you want run results to be saved to the notebook files directory. Keep in mind that with this option selected, the files of the notebook and the respective workspace will be re-written on each run.
Update the report after each successful run (available for already published reports)
Notify users of each successful run by email. You can choose from the list of invited collaborators.
Notify users of each failed run by email. You can choose from the list of invited collaborators.
(Optional) Provide parameters for your schedule based on the variables used in the Make your output interactive:
Switch to the Parameters tab.
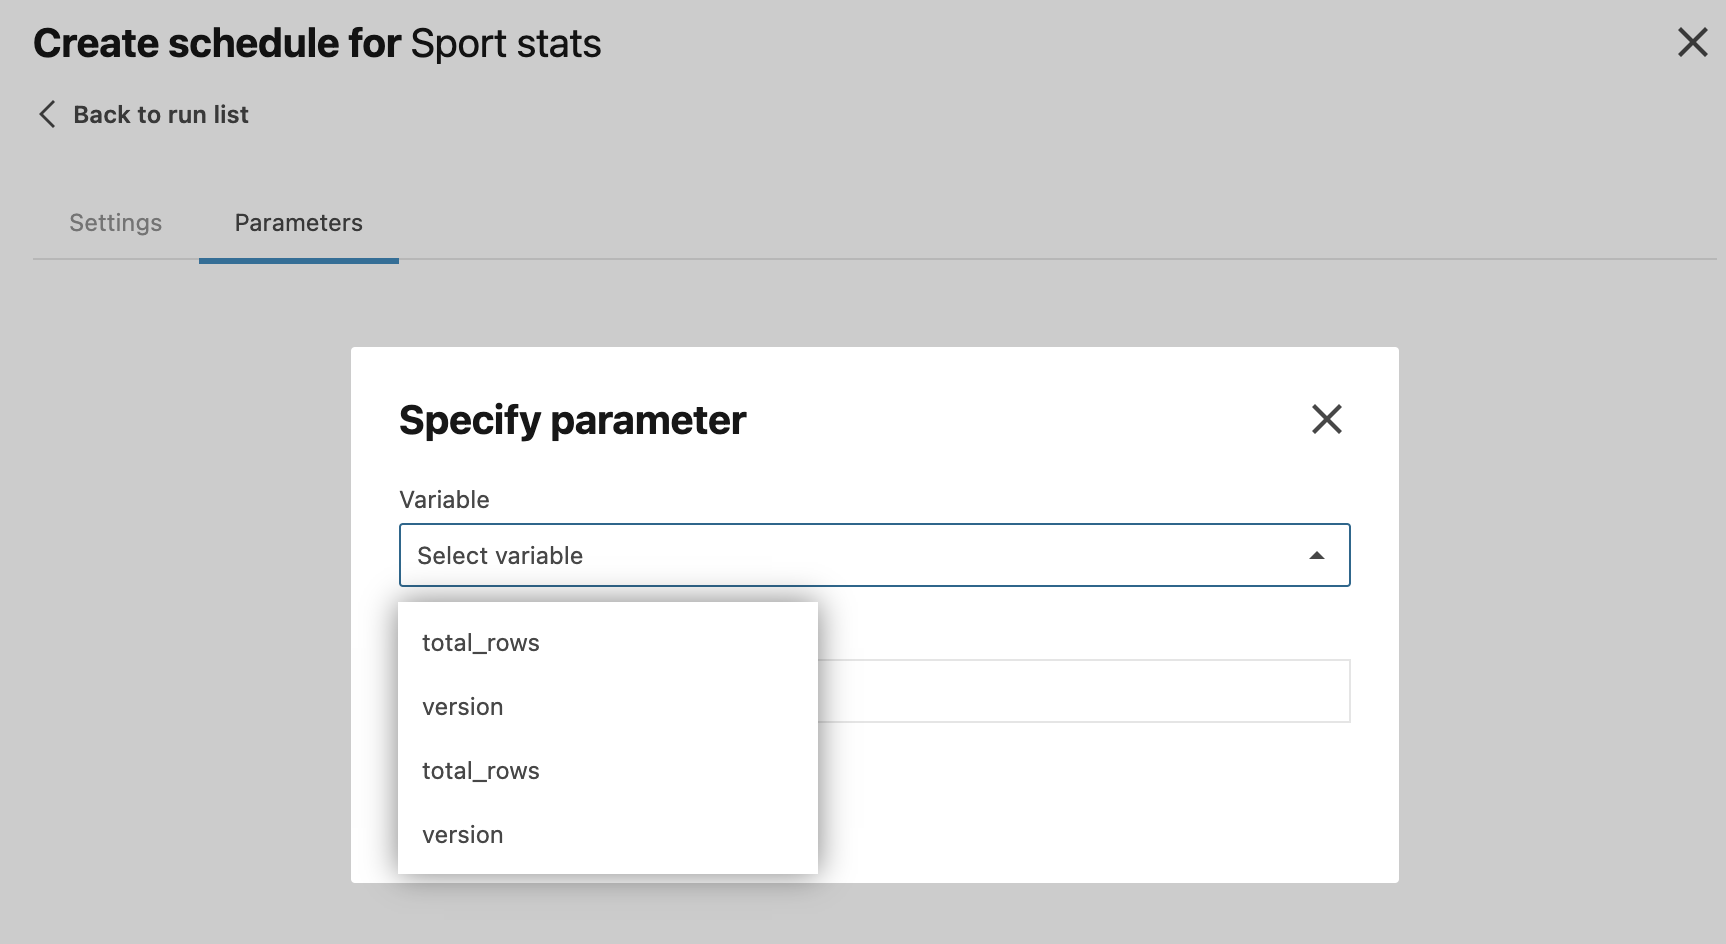
Click the Add new parameter. You will see the Specify parameter dialog.
Click Select variable to expand the dropdown. This list contains all the variables used in the interactive controls for this notebook.
Select a variable and provide a value. Depending on the interactive control using this value, you can either enter a value or select one of the provided options.
Click Specify to add the parameter and close the dialog.
(Optional) Repeat the steps above to add another parameter.
Click Apply to save the created schedule.
View or manage scheduled runs
Open the Run & Schedule for [notebook_name] notebook dialog:
From the Home page: select the workspace, go to from the left-hand side menu, and select the notebook that you want to view.
From the editor: open the notebook that you want to view and go to .
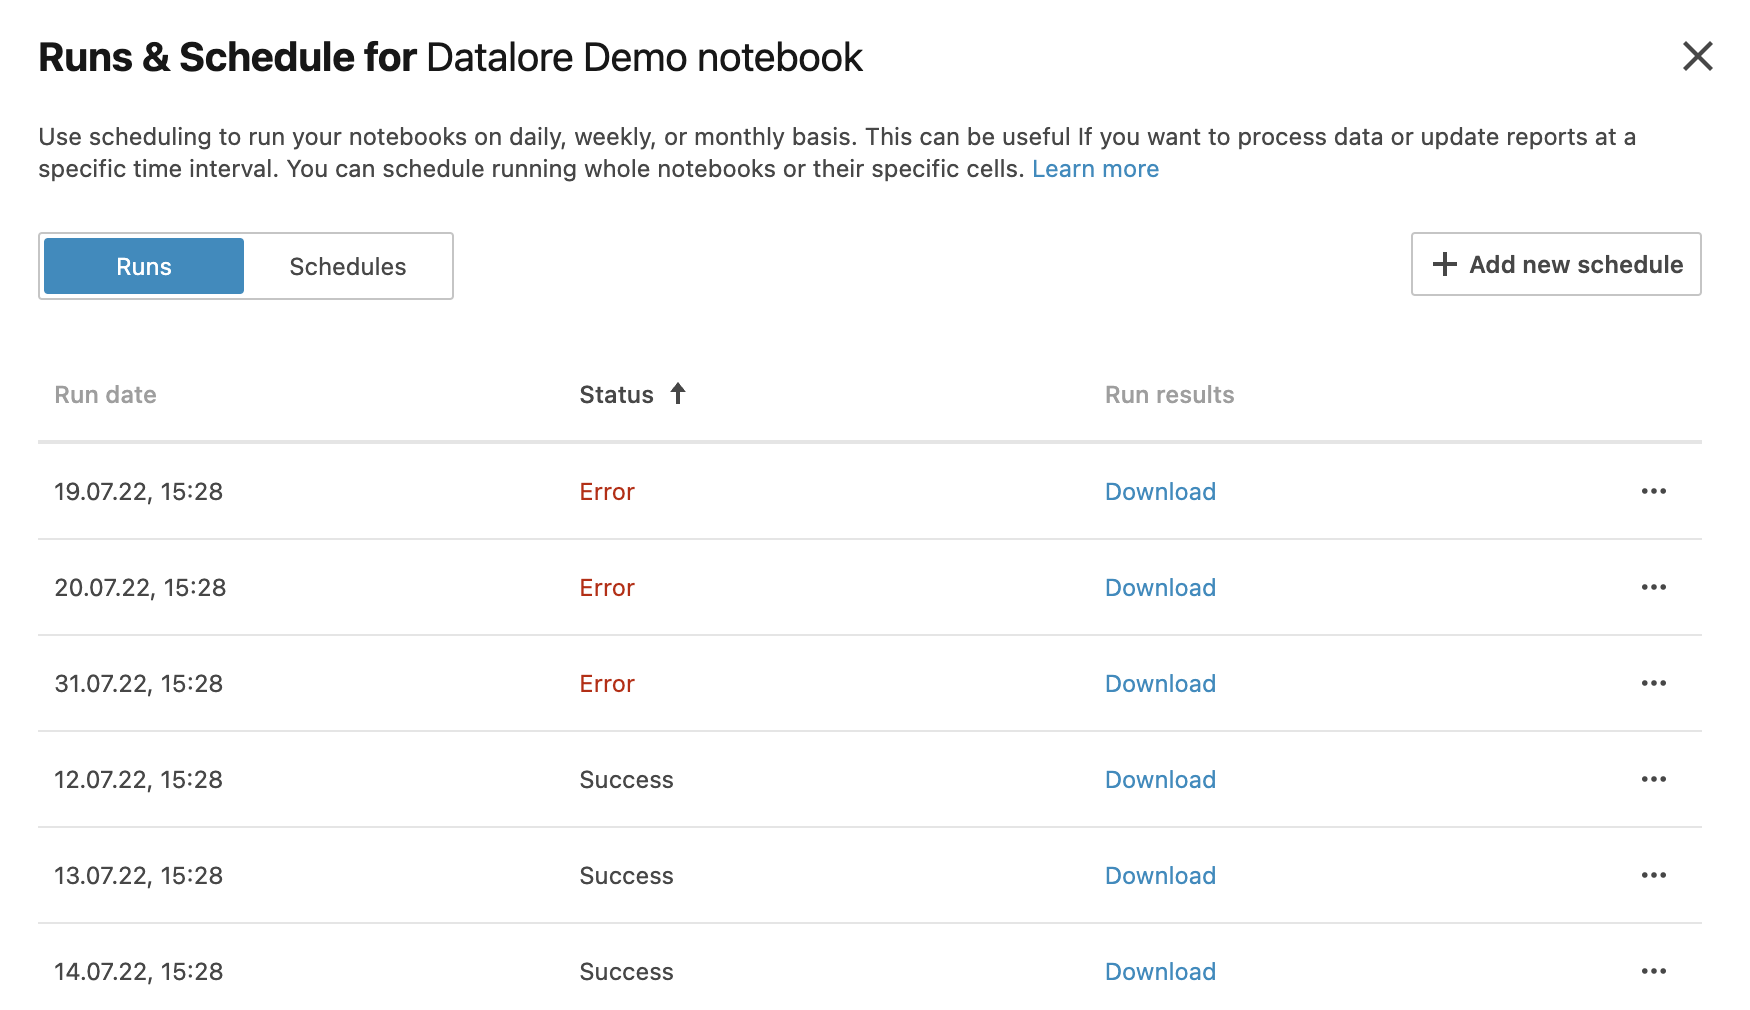
You can do the following:
To sort run records by run date or status, click the respective column header.
To view errors in failed runs, hover over Error for the respective run.
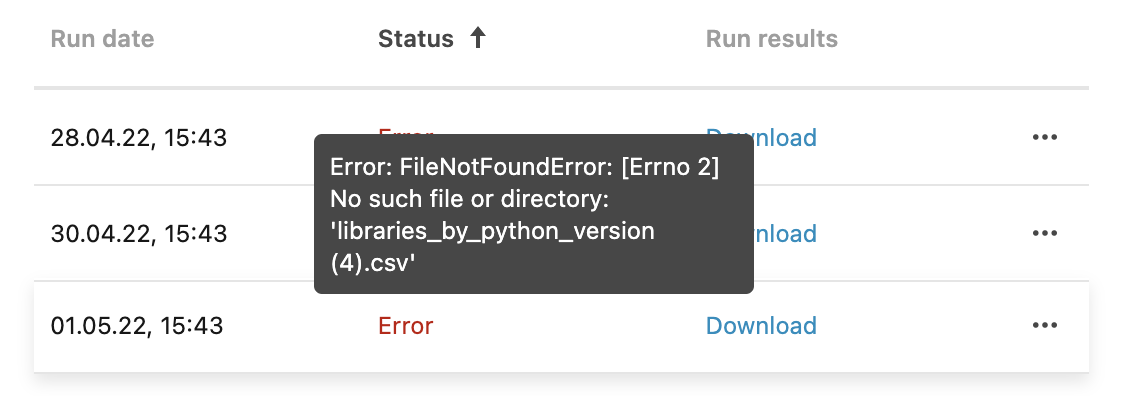
To view the static representation of a run in Datalore, click the ellipsis for the respective run and select View run.

To delete a run, click the ellipsis for the respective record and select Delete run. This will stop the respective computation immediately without waiting for it to finish.
To delete all runs, right-click any run in the list and select Delete all from the menu.
To get a .zip file with run artefacts, click Download in the Run results column. The downloaded file contains the notebook version that was run and the attachments (files generated by code).
Manage schedules
To edit a schedule, do the following:
Open the Run & Schedule for [notebook_name] notebook dialog as instructed in the procedure above.
Switch to the Schedules tab. You will see the list of the schedules created for this notebook.
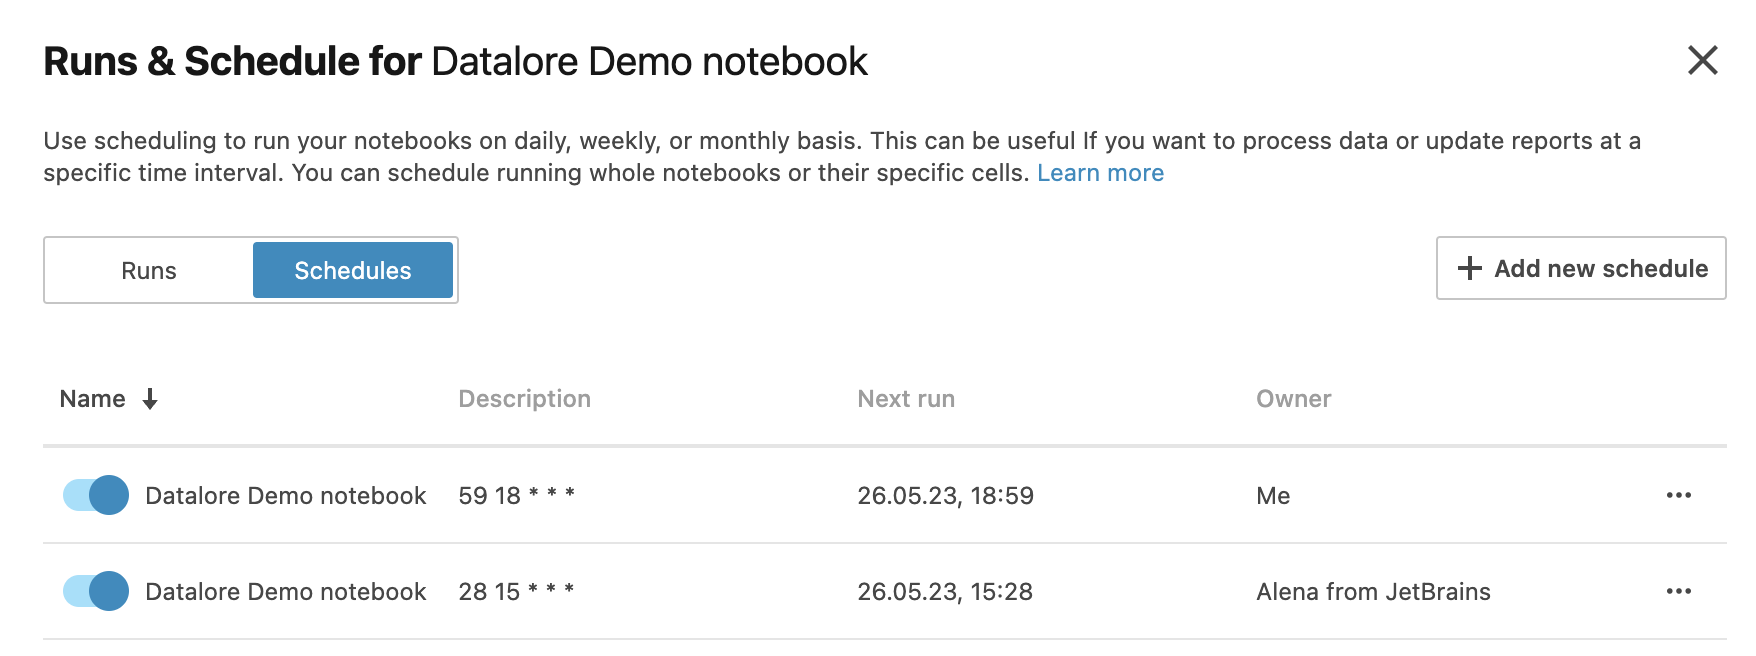
To turn off a schedule, use the toggle next to the schedule name.
To edit a schedule, click the respective item on the list to open the Change schedule for [notebook_title] notebook dialog, make the required changes, and click the Apply button.
To delete a schedule, click the ellipsis for the respective item on the list and select Delete run from the popup menu.
Stop a scheduled run
You can explicitly stop the machine for a scheduled run.
Click the avatar in the upper right corner and select Running machines.
Click Stop for the computation created for the scheduled run that you want to stop.

A popup message box will notify you that Datalore stopped the respective computation.
Turn off all schedules for a notebook
On the Home page, select Scheduled notebooks on the left-hand side menu.
On the list, click the ellipsis in the row containing the required notebook.
Select Turn off all schedules from the popup menu.

Keywords
execute code, run code, scheduled execution, execution schedule, running schedule, notebook schedule