Create and configure a dbt project
Before you start
Make sure that the following prerequisites are met:
You are working with PyCharm version 2024.1.1 or later. If you still do not have PyCharm, download it from this page. To install PyCharm, follow the instructions, depending on your platform.
You have access to a data platform.
Enable the dbt plugin
This functionality relies on the dbt plugin, which is bundled and enabled in PyCharm by default. If the relevant features are not available, make sure that you did not disable the plugin.
Press Ctrl+Alt+S to open settings and then select .
Open the Installed tab, find the dbt plugin, and select the checkbox next to the plugin name.
Create a dbt project
To create a project, do one of the following:
Go to .
On the Welcome screen, click New Project.
In the New Project dialog, select the dbt project type.
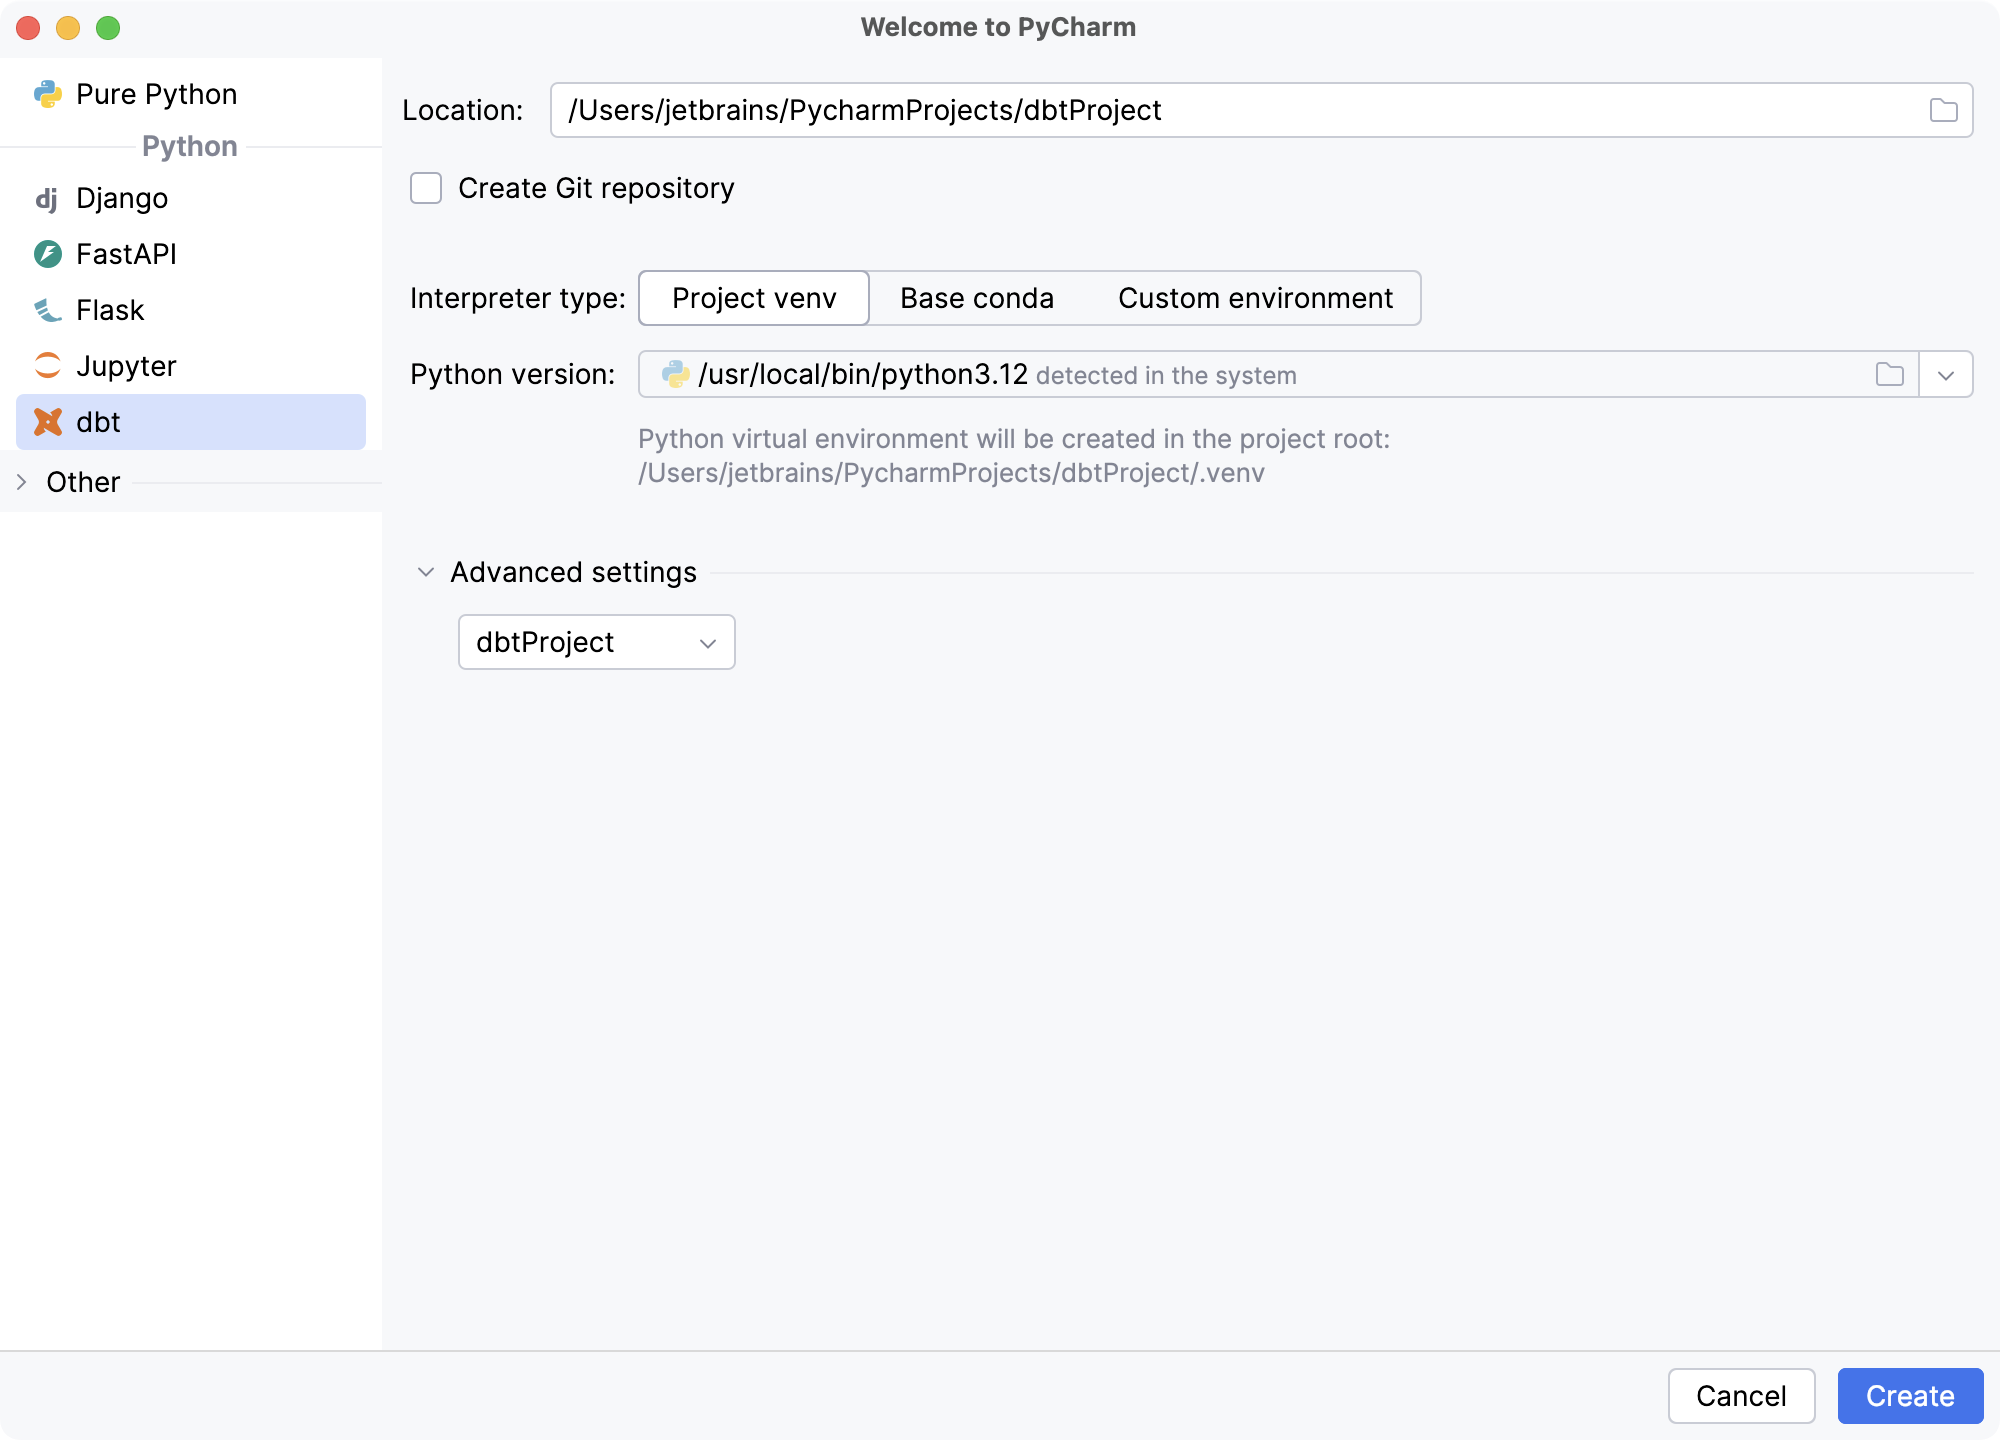
Specify the project name in the Name field.
Choose the project location. Click
in the Location field and specify the directory for your project.
Python best practice is to create a dedicated environment for each project. In most cases, the default Project venv will do the job, and you won't need to configure anything.
Still, you can switch to Custom environment to be able to use an existing environment, select other environment types, specify the environment location, and modify other options.
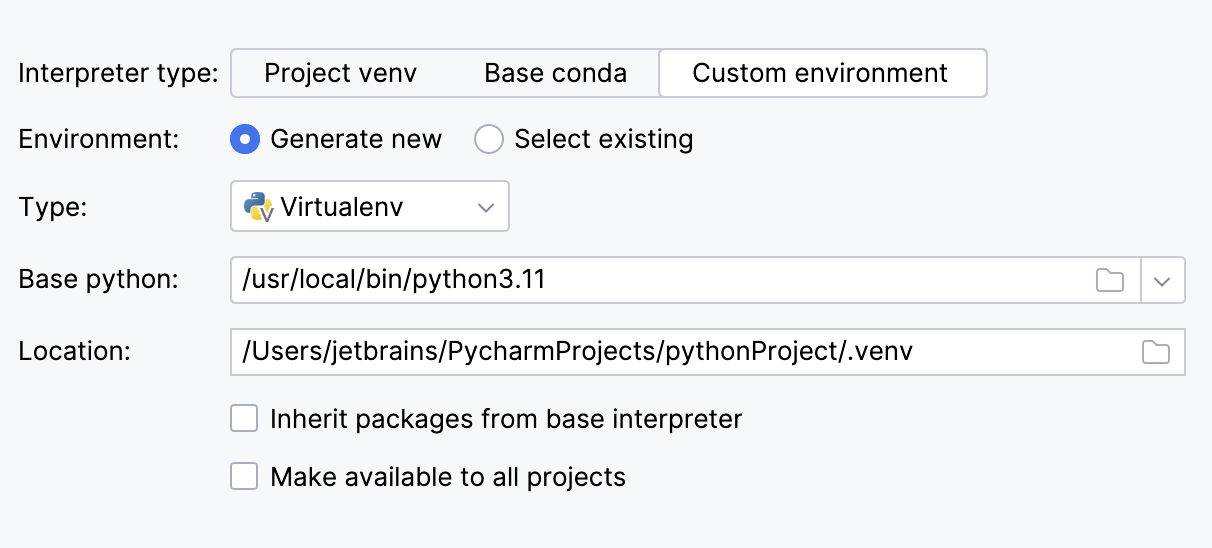
For more information, refer to Configure a Python interpreter.
To work with dbt, you will need a profiles.yml file that contains the connection settings for your data platform.
Select your profile's name in the Profile to load field if you already have profiles.yml file or select Create New.
Click Create.
Explore project structure
The newly created project contains dbt-specific files and directories.
The structure of the project is visible in the Project tool window (Alt+1):
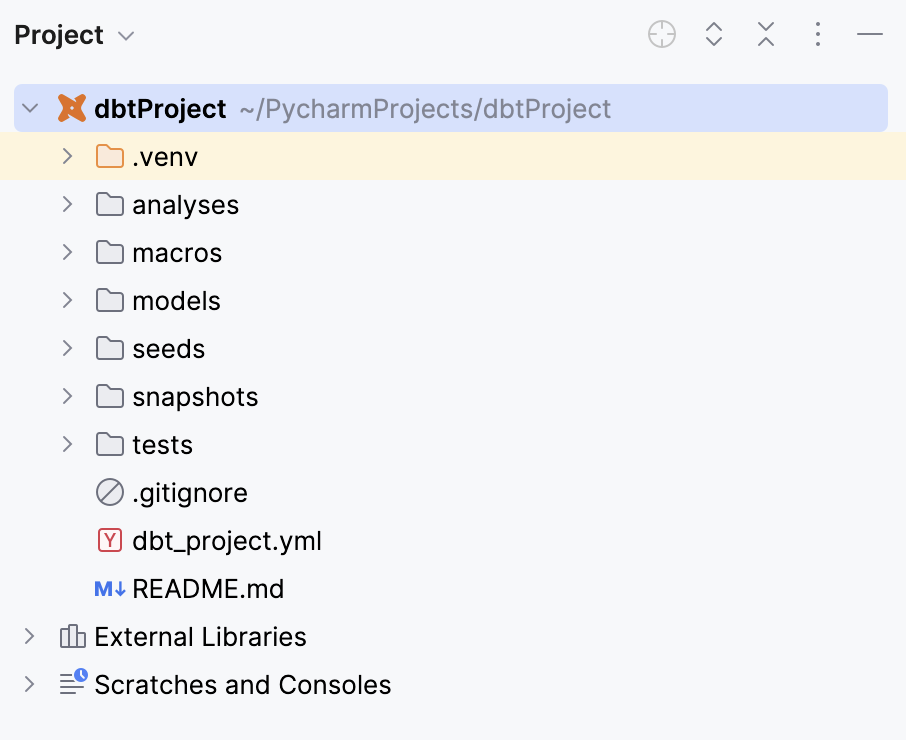
analyses directory is used for storing ad-hoc SQL queries or analyses that aren't part of the main data transformation logic. These queries are often used for exploratory analysis or one-time investigations.
macros directory is where you can store SQL files that define reusable snippets of SQL code called macros. Macros can be used to encapsulate commonly used SQL patterns, making your code more modular and easier to maintain.
models directory is one of the most important directories in a dbt project. It's where you define your dbt models, which are SQL files containing the logic for transforming and shaping your data. Models are the core building blocks of a dbt project.
seeds directory, is where you can store seed data in a dbt project. Seeds are static datasets that you manually create and manage. Unlike source tables, which dbt typically reads directly from a data warehouse, seeds are user-defined tables that you provide as input to your dbt models.
snapshots directory is used for creating incremental models or snapshots of the data. Snapshots are useful when you want to capture changes in the data over time.
tests directory is where you define tests for your dbt models. Tests help ensure the quality of data transformations by checking for expected outcomes, such as verifying that certain columns are not null or that a column is unique.
dbt_project.yml is the main configuration file for your dbt project. It contains settings such as your project name, source configurations, and target configurations.
README.md file provides an introductory welcome and a list of useful resources.
These directories and files collectively provide a structured environment for developing, testing, and documenting your data transformations using dbt.
Configure profiles.yml file
When you run a dbt command, dbt reads the dbt_project.yml file to identify the project's name, and then looks for a profile with the same name within the profiles.yml file.
Create a profiles.yml file in your home directory (~/.dbt), and configure it with the necessary information to connect to your data warehouse:
Configure data source
Depending on a database vendor, you need to configure a corresponding data source to use it to connect to your data platform.
Navigate to .
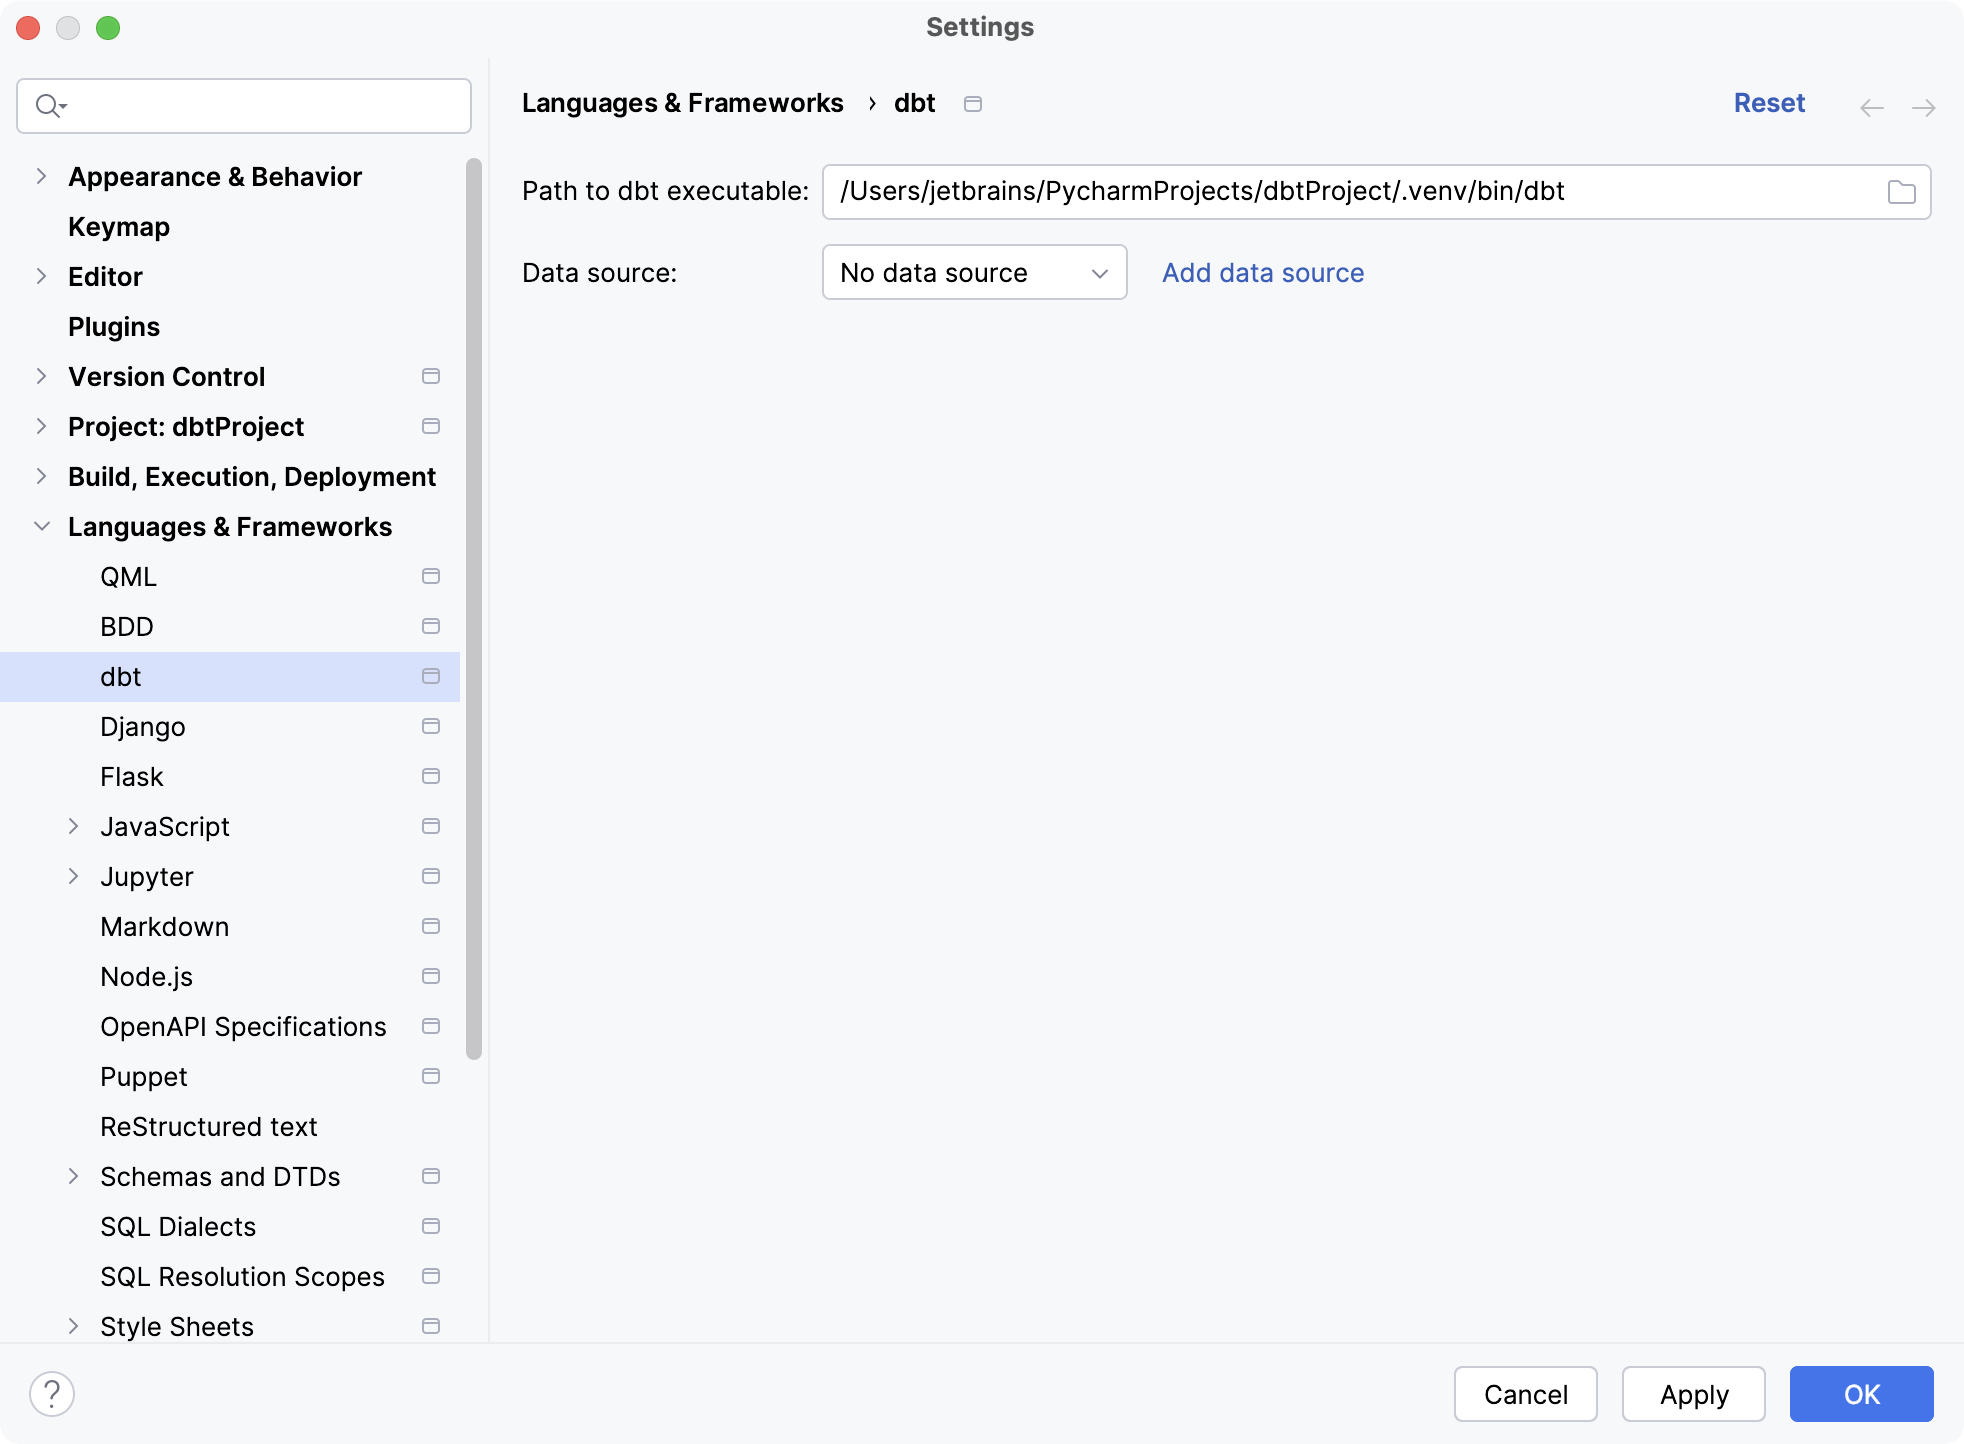
Click Add data source.
Select Data Source and choose the database vendor.
Configure the connection settings in the Data Sources and Drivers dialog.
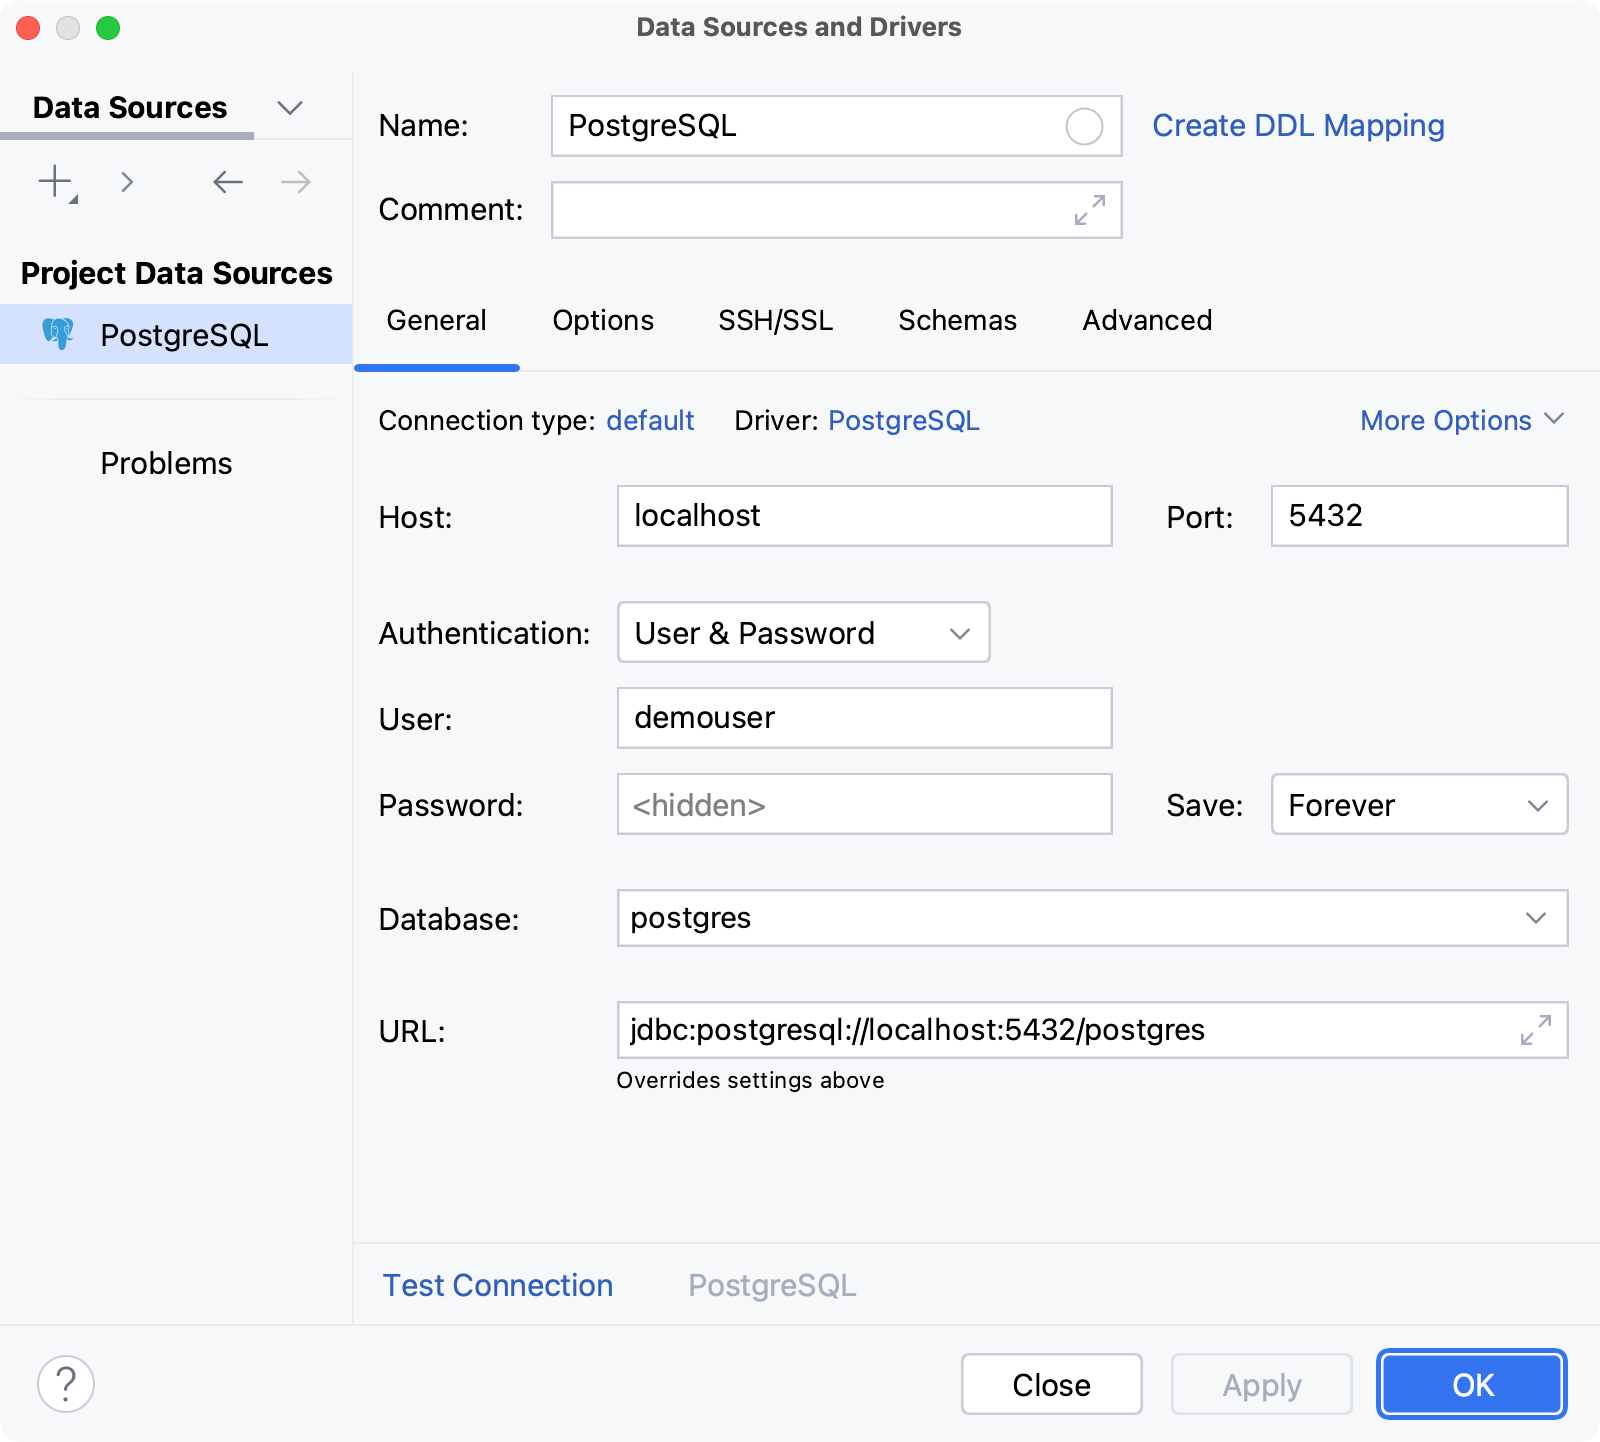
Click OK.
Check warehouse connection
To check the connection to your warehouse, run dbt debug command.
Possible error | Solution |
|---|---|
| Create and configure the profiles.yml file. If you already have profiles.yml file, add the new profile for the project you are working with to the file. |
| Install and upgrade adapter for your data platform. For example, to install postgres adapter, run |