Create and complete Azure DevOps pull requests
Azure DevOps pull requests let teams review code before merging it into a target branch. When you create a pull request, you notify your team about the changes you want to merge and give reviewers a chance to examine, discuss, and approve them.
As a pull request author, you can manage the full pull request lifecycle directly within JetBrains Rider:
Create a pull request.
Create a pull request
Before creating a pull request, make sure that you have created a local branch, commited all your work into that branch, and pushed that branch to the remote Azure DevOps repository.
Do one of the following:
Select from the main menu.
Click
 Create Pull Request on the toolbar of the Azure Pull Requests tool window.
A new tab opens with a pull request draft.
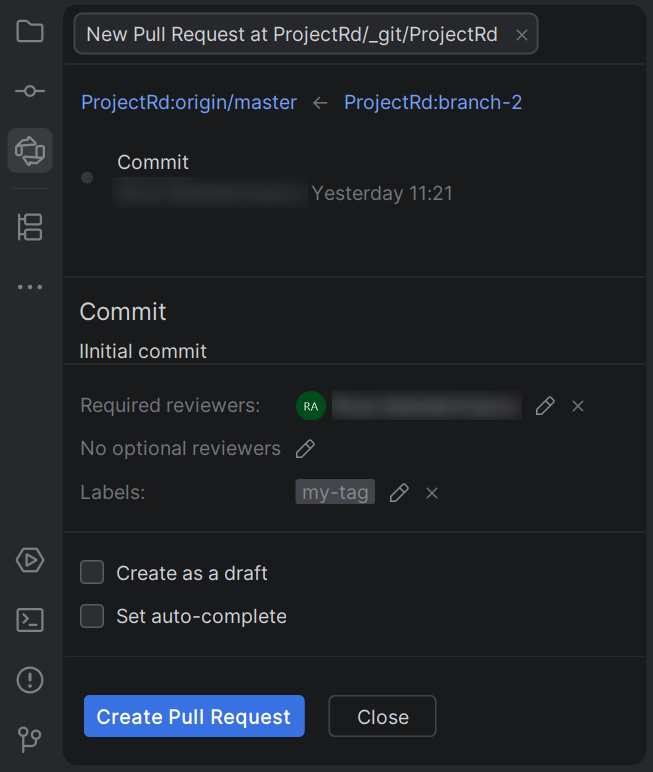
Click the name of the target branch on the left and specify the branch that will receive the updates.
Click the name of the source branch on the right and specify the branch with the changes you want to merge.
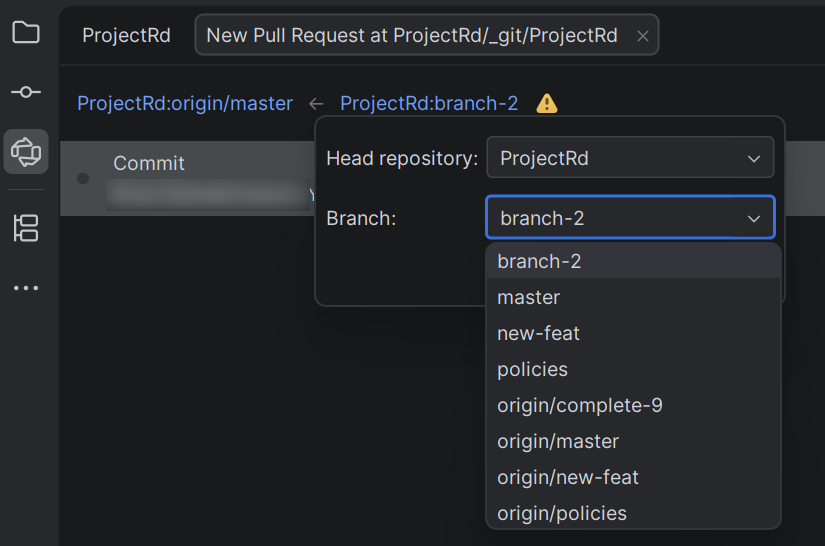
If the source branch is not pushed to the remote repository, JetBrains Rider will display a warning icon next to it. But you can go on with the request, JetBrains Rider will suggest pushing that branch later.
By default, the pull request title is taken from the commit message, but you can change it. Specify the commit description, reviewers, and any other necessary options.
Click Create Pull Request.
View details of a pull request
After creating a pull request, you can find it in the Azure Pull Requests tool window.
In the main menu, go to .
Use the filters at the top of the tool window to narrow down the list of pull requests.
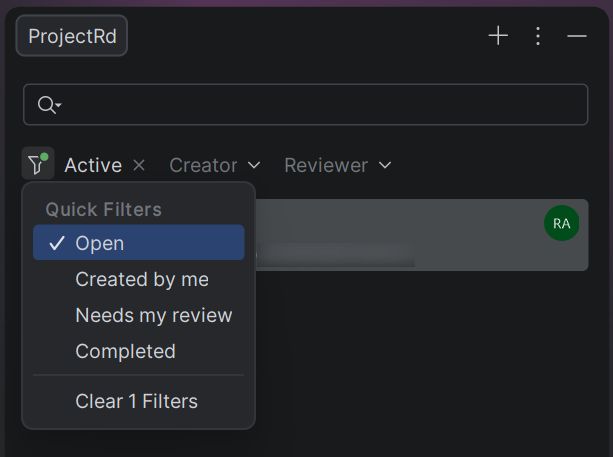
Double-click a pull request to open its details. It opens in a new tab, so you can switch between multiple pull requests in the Azure Pull Requests tool window.
The details view shows the pull request description, reviewers, and the list of changed files.