Create and Manage Channels
Create a new channel
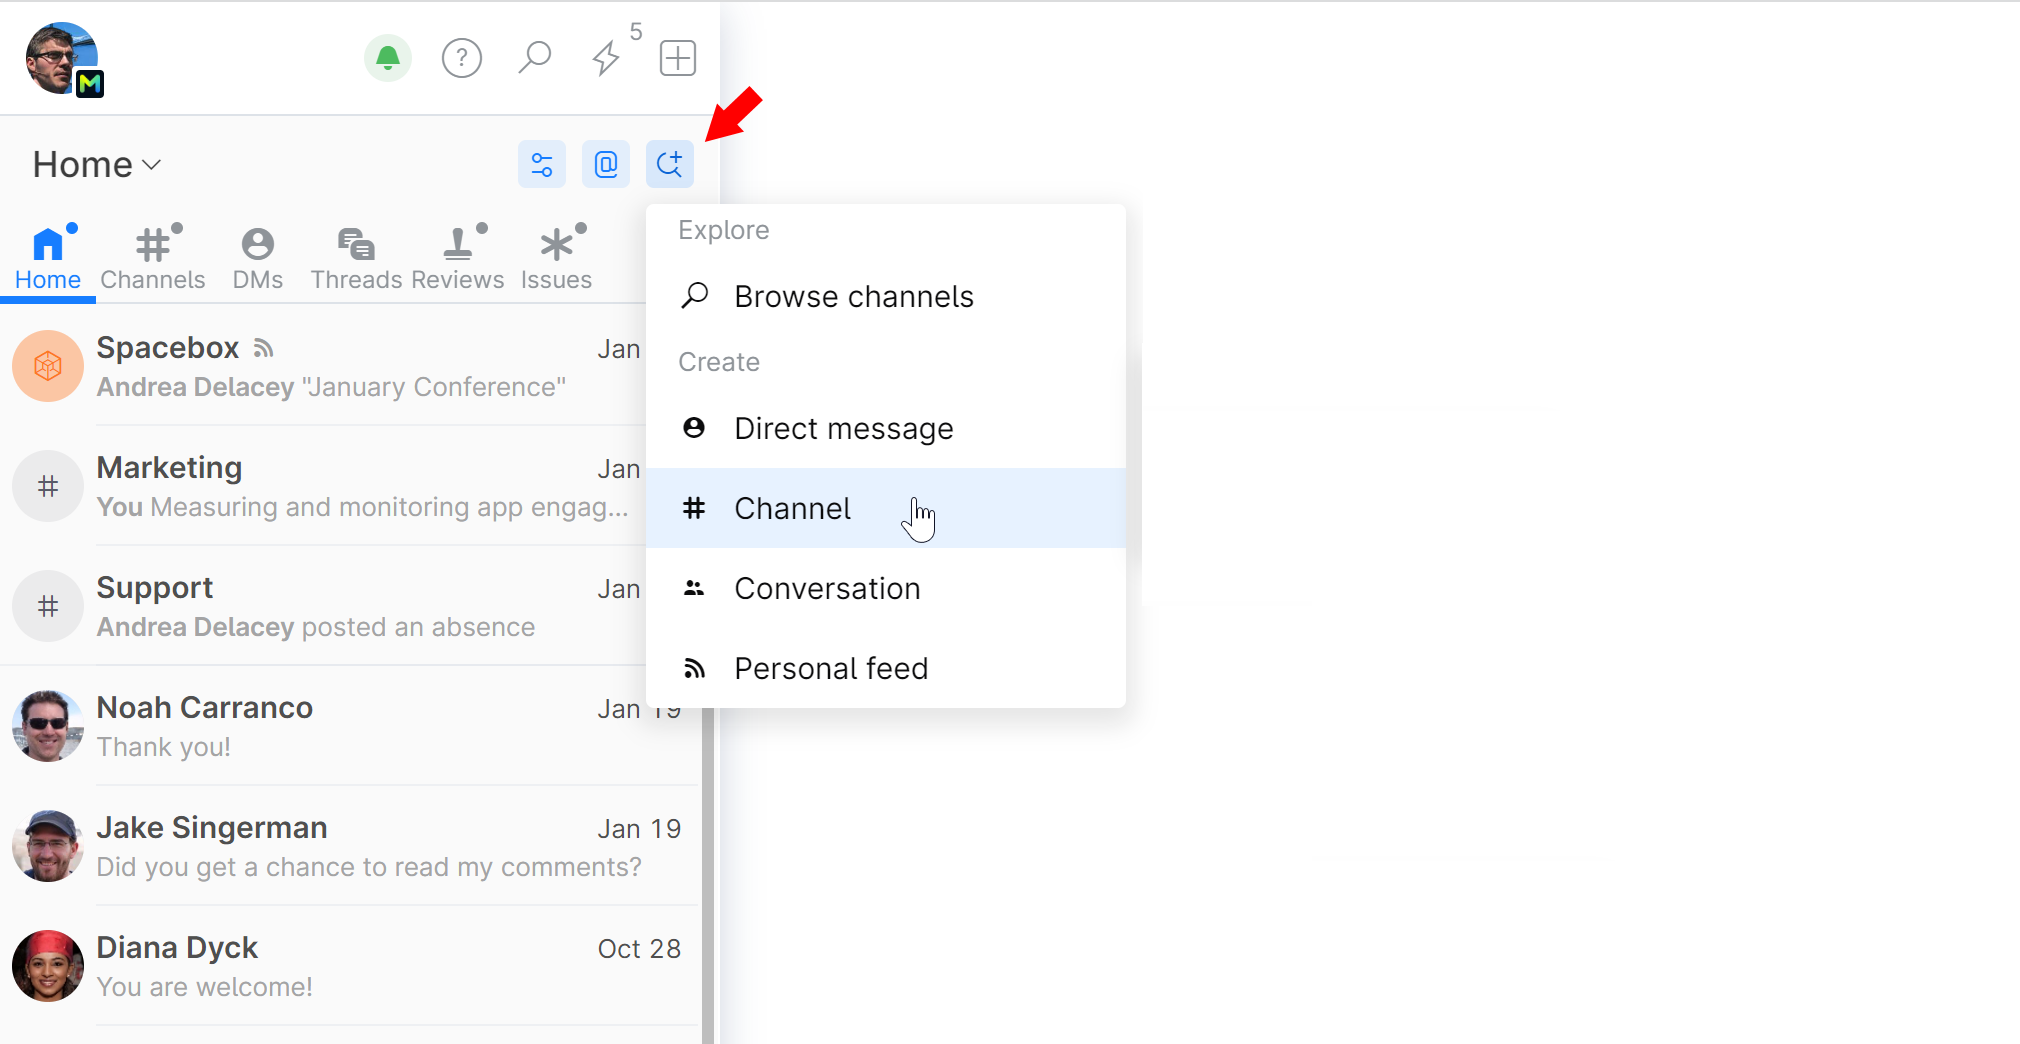
Click
 on top of the contact list and choose Channel:
Give the channel a name and description (optional).
Make the channel public or private.
Private channels can be only accessed by its participants.
Public channels are open to all organization members.
Note that even though named public, channels are not exposed to general public. Only registered and logged organization members will be able to access Space channels.
Add subscribers (participants) to the channel (you can add people and teams). The channel will appear in the contact list of the people you add. If the channel is private, only subscribers will be able to view and access it.
Click Create to save your settings and create the channel.
Manage an existing channel
Find and open the channel.
If you are subscribed to the channel, you can:
If you are the channel owner (you created this channel), click
 to open the menu:
You can:
Rename channel — rename the channel.
Archive channel — block sending new messages to the channel.
Change to a private channel — convert a public channel to private. All current channel subscribers will become participants of the private channel. Messages history of this channel will not be accessible to non-participants.
Delete channel — permanently delete the channel.
You can also click
 to:
to:Subscribe this channel to various events (automatically post updates on certain events to this channel)
Delete channel — permanently delete the channel.
Add subscribers to a channel
Find and open the channel.
Click the Subscribers icon to open the dialog:

Choose people or teams you want to add:

When you are adding a team, future team members will be added to the channel automatically.
Subscribe channels to various events
To provide all channel participants with updates on certain events, you can have notifications about these events delivered to the channel.
For example, if you want to update everyone in the #Marketing channel on new issues created in some marketing-related project, you can subscribe that channel to the Issue created event from that project.
To subscribe a channel:
Open the channel and click the Channel info icon:

Go to the Subscriptions tab and click Add subscription:

Give the subscription an informative name that would reflect its settings.
Choose the source of events from the drop-down list, e.g. Absences, Blogs, Issues, etc.
Apply filters to narrow down the source to specific entities. For example, if your source is Issues, you can choose a specific project to get updates from about issues.
Choose the events you want the channel to be notified about, e.g. choose Created to send notification when a new issue is created.
Click Save.

Subscription authorization
Notifications from some events you subscribe the channel to may contain private information that will be exposed to all channel participants. That's why subscriptions require explicit authorization.
Subscriptions to global events should be authorized by the System Administrator or by a member with administrative permissions for the events in question.
If you have the required permissions yourself, the authorization will be granted automatically without contacting the administrator. If you don't have such permissions, the subscription you're adding will have a Pending status until authorized by a member who does:

Subscriptions to project events always require authorization from the project administrator.


