Create or Add a Document
There are two ways to create any document in a project (a text document, blog post draft, or checklist):
Create a document draft in your private Documents folder where no one can see it while you're working on it, except for people you explicitly share it with. When the document is ready, you can copy or move it to the project, making it publicly available.
For further instructions, see My Documents
Create a document right from a project. In this case the document becomes public the moment you create it, and everyone with the viewing permission determined by the project settings will be able to see the contents of the document while you are working on it.
Create a text document in a project
Navigate to your project.
On the project sidebar, choose Documents.
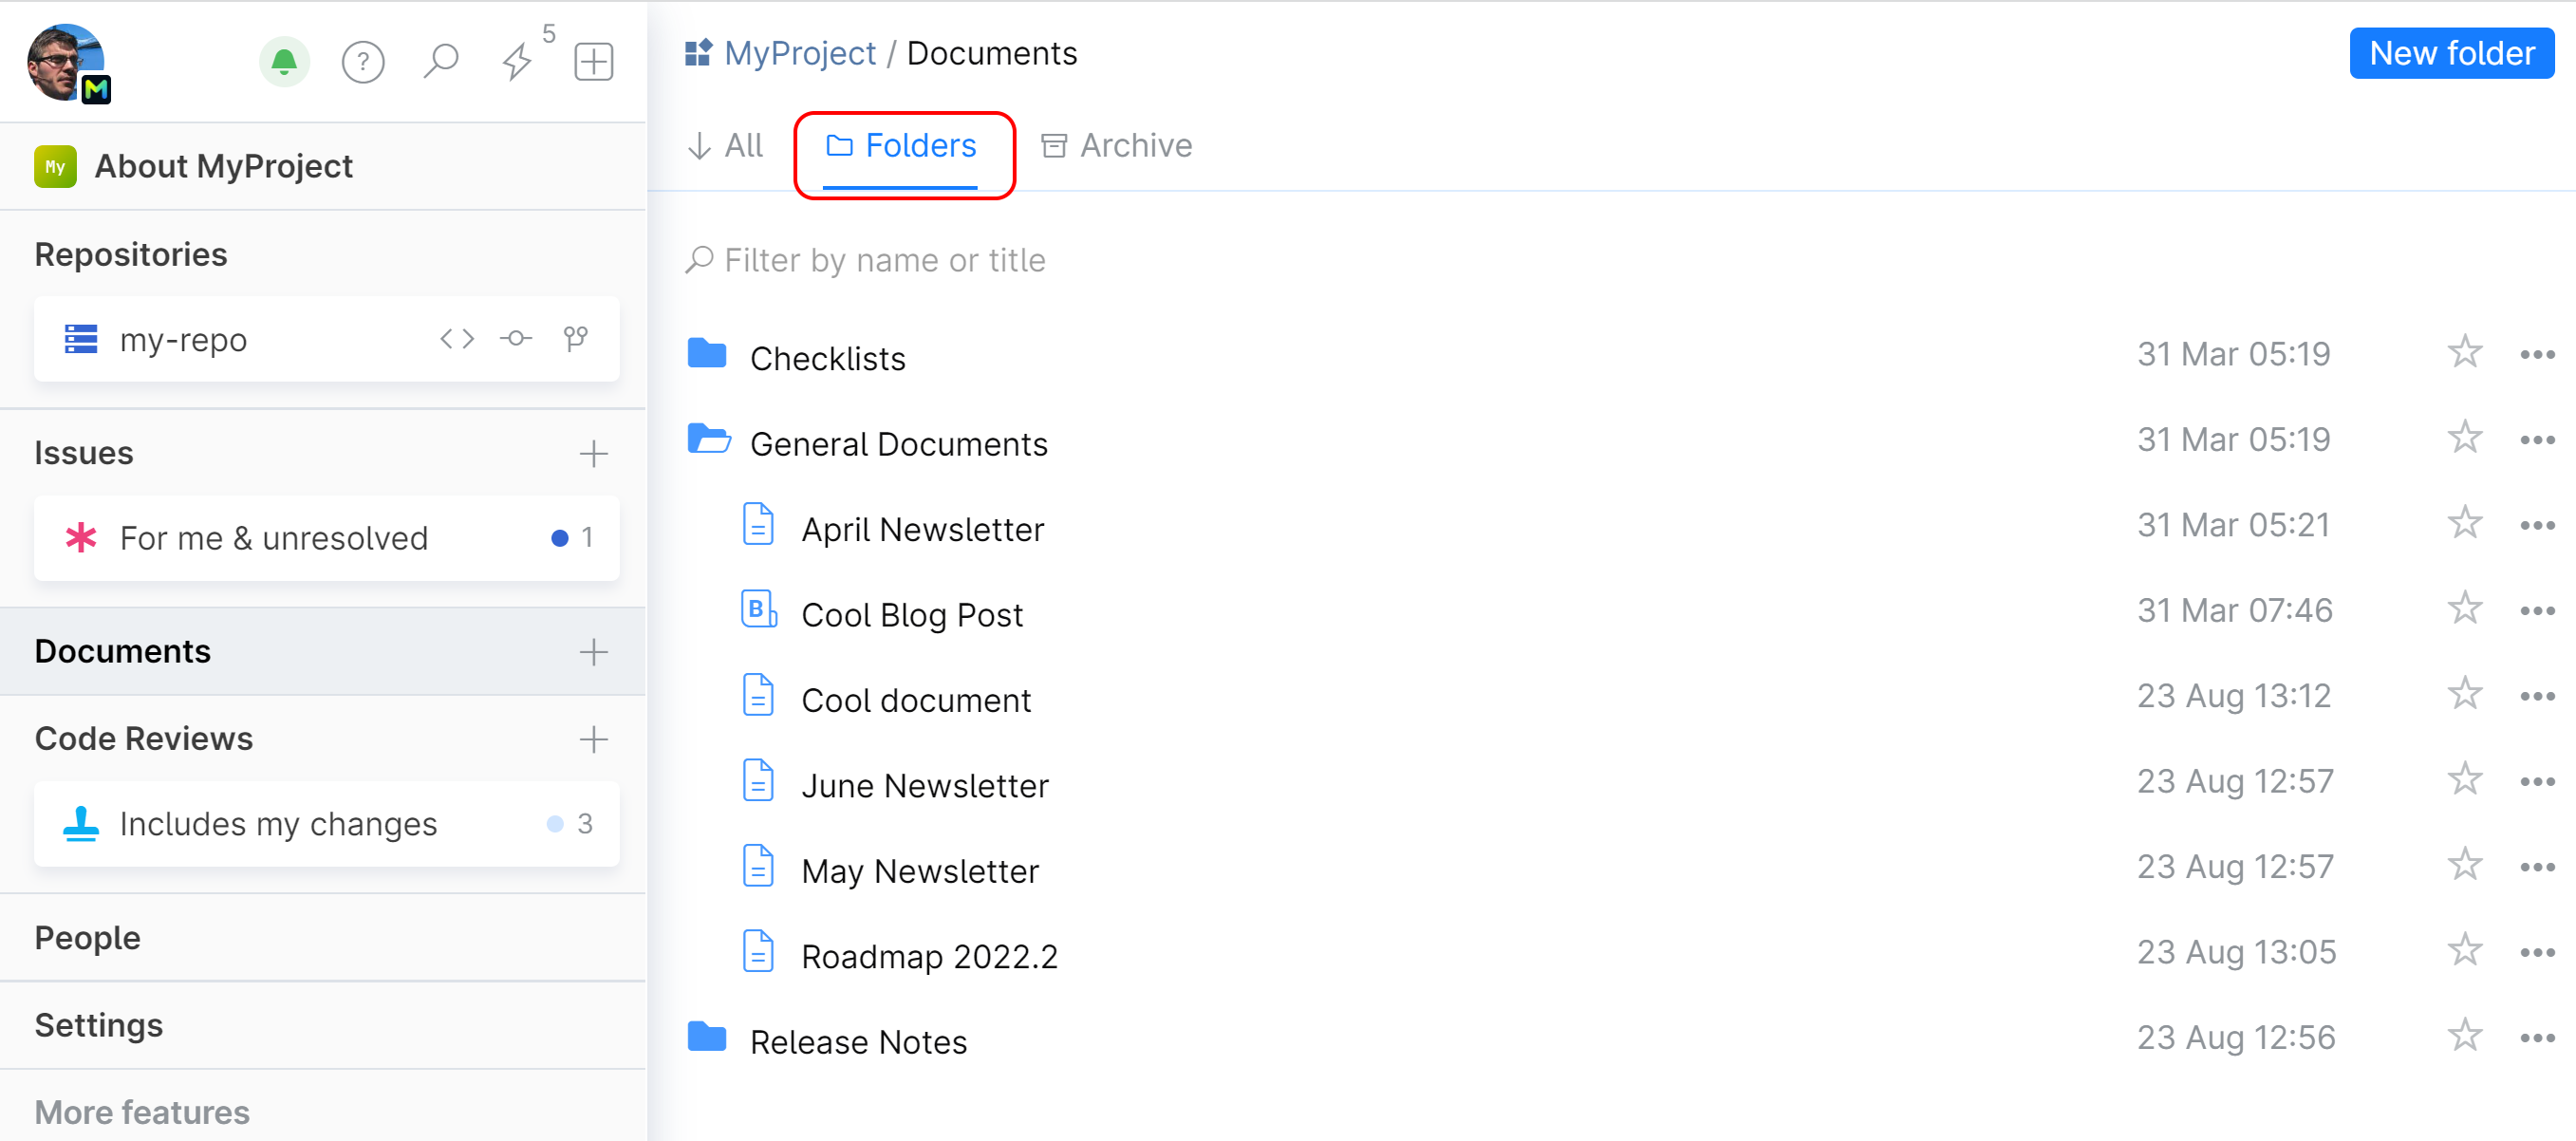
On your project's Documents page, navigate to the Folders tab and open the folder where you want your new document located:

In the top right corner, click New and choose Text document:

Specify the document title. Your document is created!

Now you can add some content to it using the built-in editors: Rich Text or Markdown.
Add and edit you document contents. Learn how to edit your document in different modes, add images and graphs, configure grammar correction and autocomplete.
You work is automatically saved as you type. You can leave the page at anytime and access it later to continue working on it.
You can also view the history of changes and roll back to an earlier version.
Create a blog post draft in a project
Blog post draft is a text document which includes additional settings for publishing in Blog later on.
On your project's Documents page, navigate to the Folders tab and open the folder where you want your new document located.
In the top right corner, click New and choose Blog post draft.
Specify the document title. Your document is created!
Add and edit contents. Learn how to edit your document in different modes, add images and graphs, configure grammar correction and autocomplete.
Click Edit blog settings:

Specify target audience.
You can optionally add a scheduled event with a poll to your blog post.

You or other project members can publish the blog post to the Blog at any time. Open the document, click Draft and choose Publish to blog:

Create a checklist in a project
On your project's Documents page, navigate to the Folders tab and open the folder where you want your new checklist located.
In the top right corner, click New and choose Checklist:

See Project Checklists for detailed instructions and more information.