WSL
WSL (WSL 2) – Windows Subsystem for Linux – is a compatibility layer for running Linux binary executables natively on Windows 10 and later. Currently, it supports several Linux distributions, such as Ubuntu, OpenSUSE, and SLES.
With WSL toolchain set up for your project, you can build using a toolchain from Linux, and run/debug on WSL, without leaving WebStorm running on your Windows machine.
Configure WSL
Download and install a WSL distribution (for instance, Ubuntu) from Microsoft Store.
For this step, be sure to use at least Windows 10 or later with the latest “Fall Creators Update” (minimum version 1709, build 16299.15). See the official guide Install the Windows Subsystem for Linux for instructions.
To work with WSL 2, your Windows version should be 10 build 18917 or later. Follow these instructions to switch the distributive.
Run the Linux distribution.
Upon the first launch, the system may prompt you to enable the Windows optional feature. In this case, you need to do the following:
Open Windows PowerShell as Administrator and run
Enable-WindowsOptionalFeature -Online -FeatureName Microsoft-Windows-Subsystem-LinuxRestart your computer.
Install Node.js and npm
Inside the Linux (Ubuntu) installation, make sure nvm, Node,js, and npm are installed. For the detailed installation instructions, refer to Install Node.js on Windows Subsystem for Linux.
Open your command-line shell or the embedded Terminal (Alt+F12).
Install
cURL:sudo apt-get install curlInstall
nvm:curl -o- https://raw.githubusercontent.com/nvm-sh/nvm/master/install.sh | bashInstall Node.js by running one of the following commands:
nvm install --ltsto install the stable Long Term Service Node.js versionnvm install nodeto install or the current release version
You can create a project and store it in the WSL environment, open one from the WSL file system, and develop your projects further in WSL.
Create a new project in the WSL file system
Install and run WebStorm locally on Windows as you normally would.
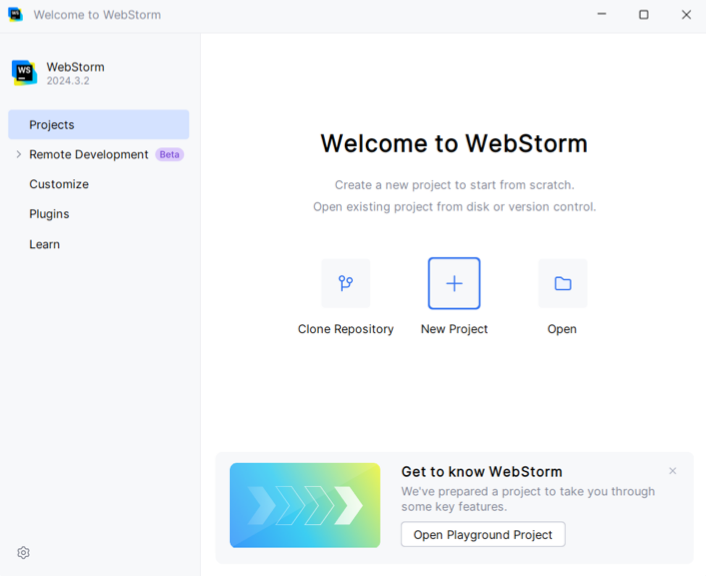
On the welcome screen, click New Project.
In the dialog that opens:
Select the project type from the list in the left pane.
In the right pane, specify the project name and location. The project location for WSL will show the absolute path starting with \\wsl$ to the WSL file system.

Most often, WebStorm asks you to specify the location of Node.js. Select Download from the list if you have no Node.js yet. Alternatively, select Add to configure a WSL Node.js interpreter.
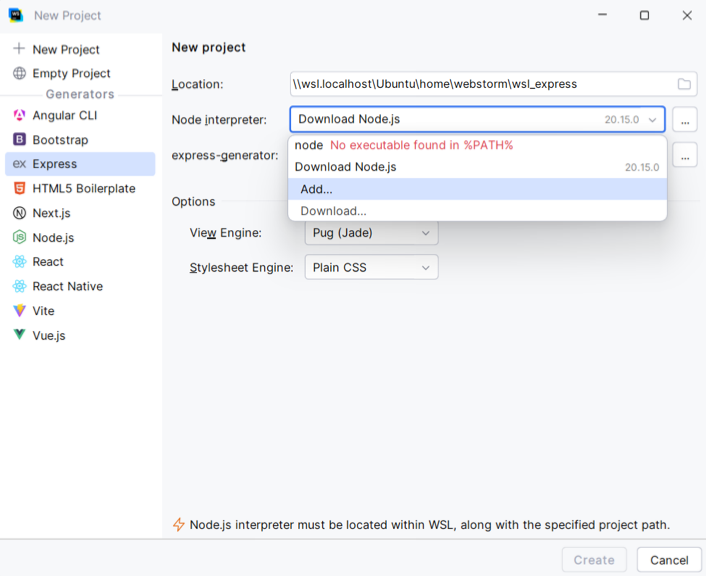
Then select Add WSL from the popup.

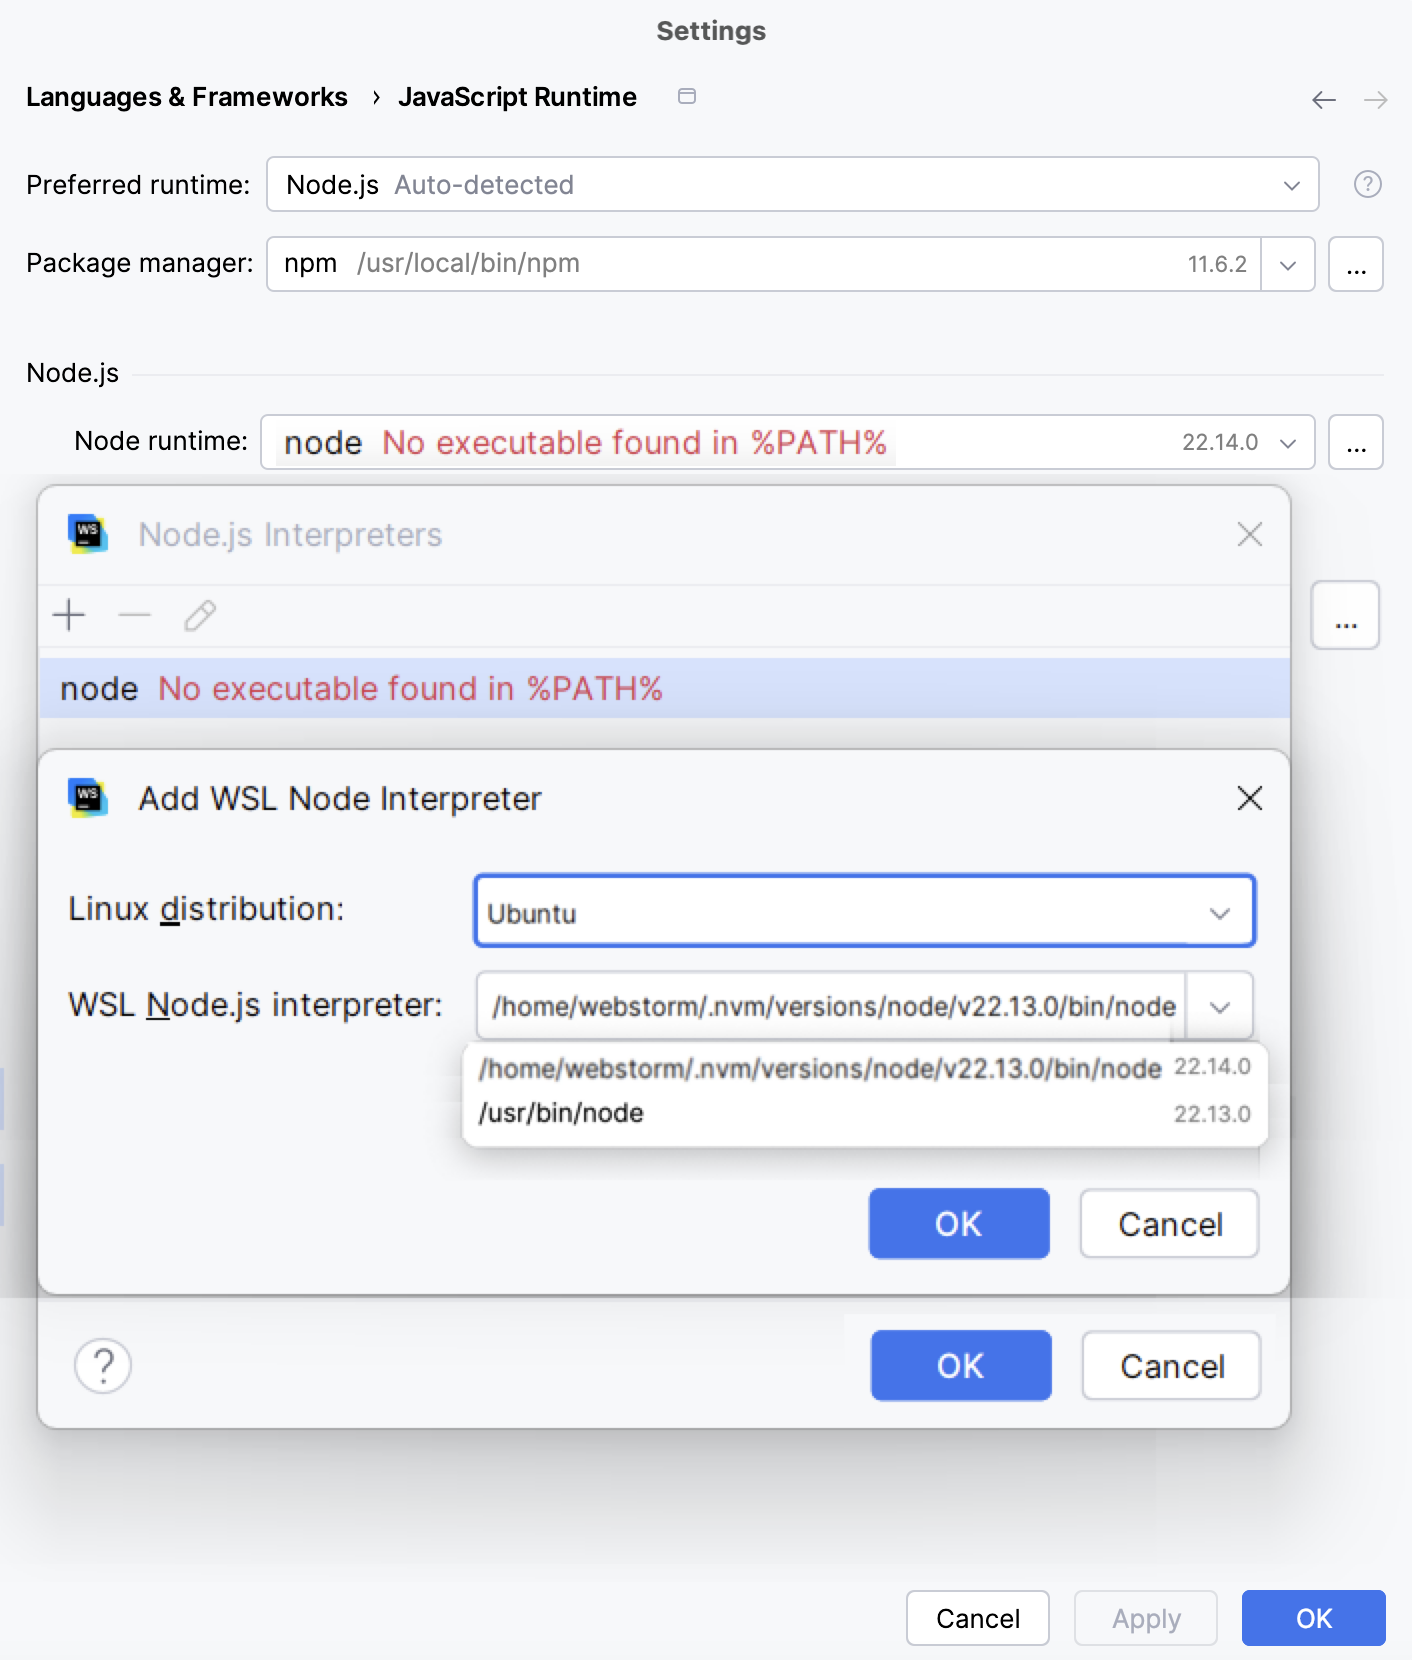
In the Add WSL Node Runtime dialog that opens, specify the currently used Linux distribution and the path to Node.js.
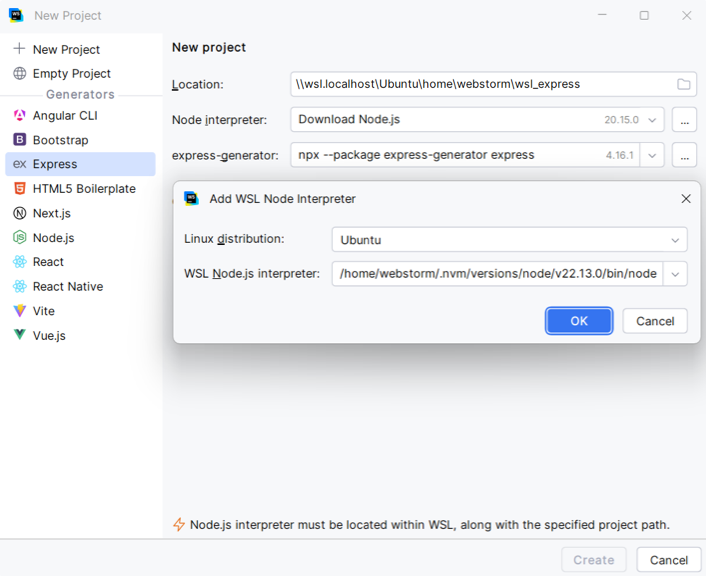
Fill in the other fields in the right pane. The set of the fields depends on the selected project type. See the corresponding articles under Languages and frameworks for details.
Click Create.
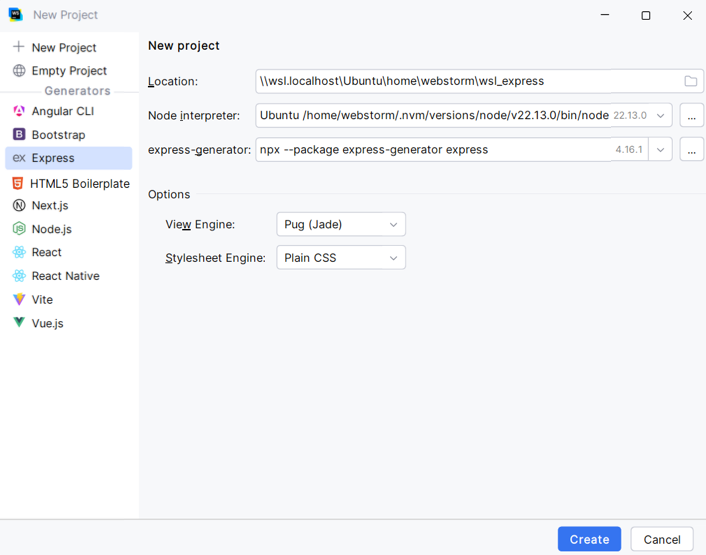
WebStorm creates a project located in WSL and you can develop and build your project inside the WSL environment without leaving the IDE.
Open a project stored in the WSL file system
In WebStorm, you can directly open a project stored in the WSL file system and work with it like with any other project.
Click Open on the Welcome screen or select from the main menu.
In the Select Path dialog that opens, select the folder in the WSL file system that contains the project to open, or type the path to the project location manually.
The path syntax is
\\wsl.localhost\DistributionNamewhereDistributionNameis the name of your Linux distribution such as Ubuntu, Debian, Arch, and so on.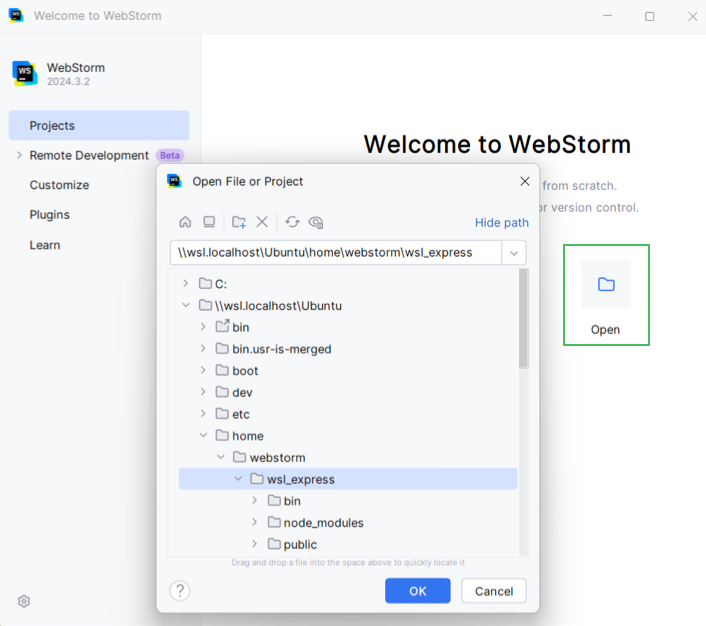
Configure a WSL-based Node.js runtime
You can set a Node.js installation as the default runtime for the current project, or you can configure and use this Node.js version in a Node.js Run/Debug configuration.
In the Settings dialog (Ctrl+Alt+S) , go to .
Click
next to the Node runtime field, in the Node.js Runtimes dialog that opens, click
, and then select Add WSL from the list.
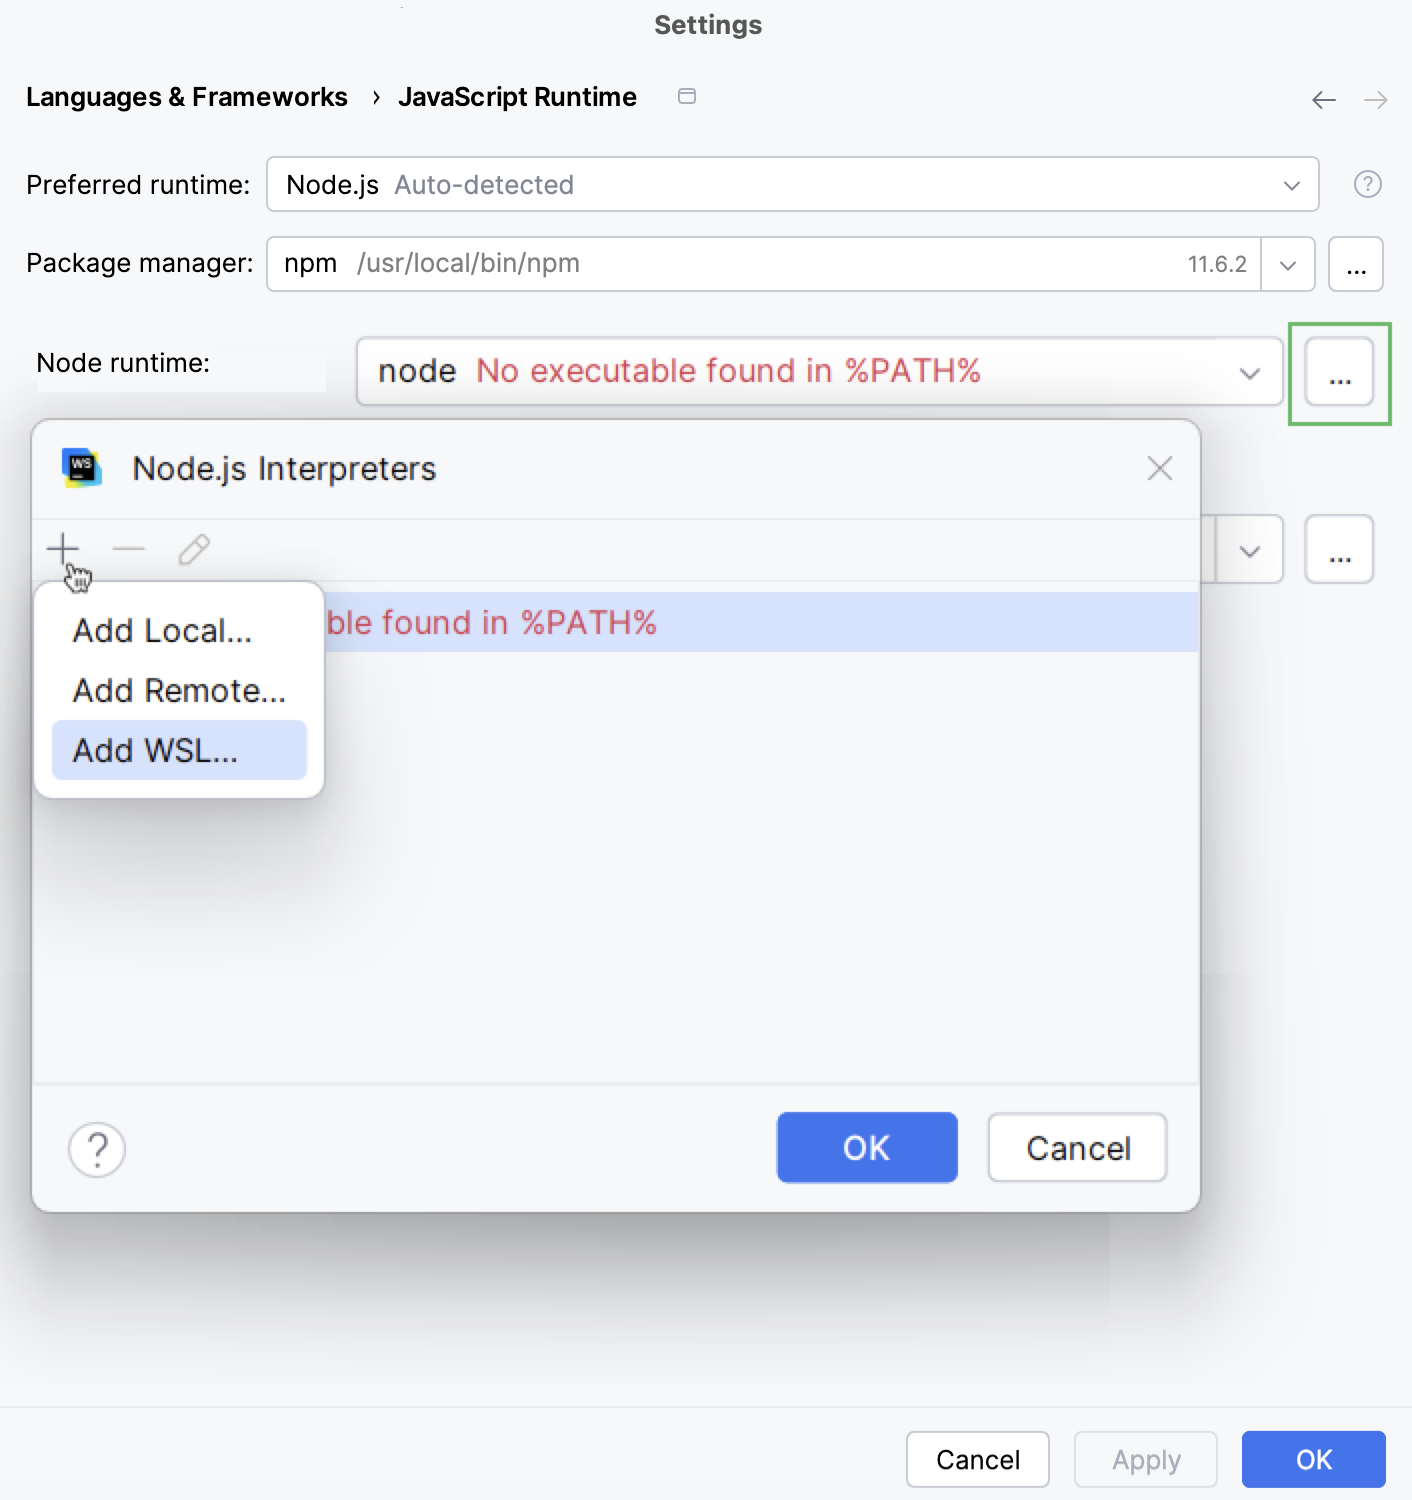
In the Add WSL Node Runtime dialog that opens, select the Linux distribution you’re using and specify the path to Node.js.
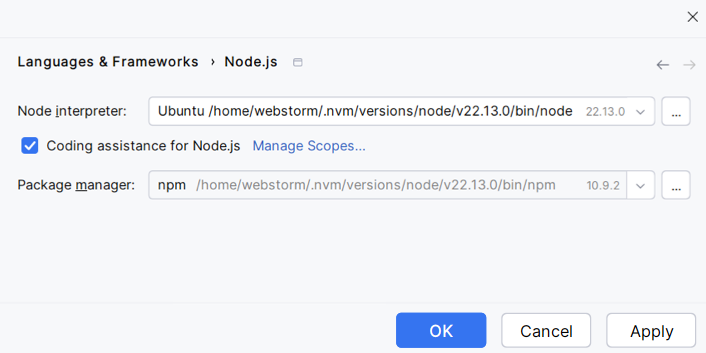
The configured Node.js installation is added to the list and is set as the default for the current project.
Run and debug your project
When you run or debug your application, it is run in WSL. If you open the run configuration, note that WebStorm refers to WSL as local machine.
Create a run/debug configuration of the appropriate type, depending on the type of your application. To do that, go to . Then in the Run/Debug Configurations dialog, click
on the toolbar and select the required run/debug configuration type. In the dialog that opens, fill in the fields as necessary or accept the predefined values.
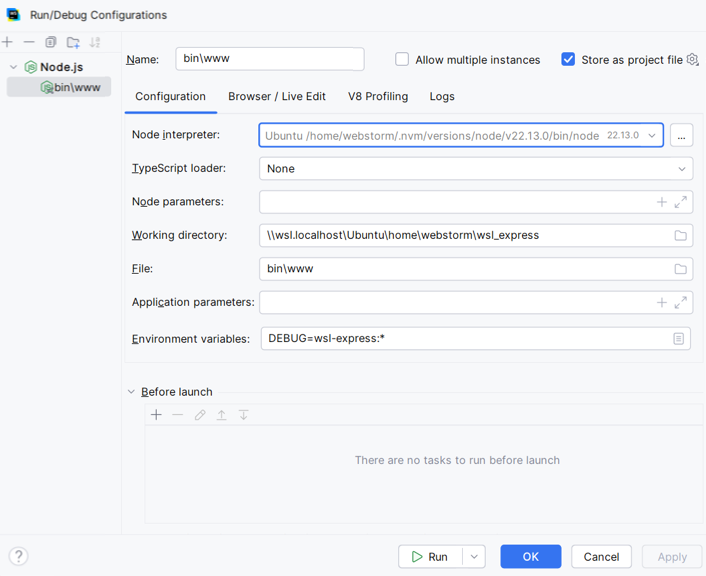
To run your application, from the Run widget select the newly created run/debug configuration, and click
next to it.
To debug your application, set the breakpoints where necessary, from the Run widget select the newly created run/debug configuration, and click
next to it.
