Manage your workspace
Adding directories and projects to the workspace
Add an existing directory or project
Do one of the following:
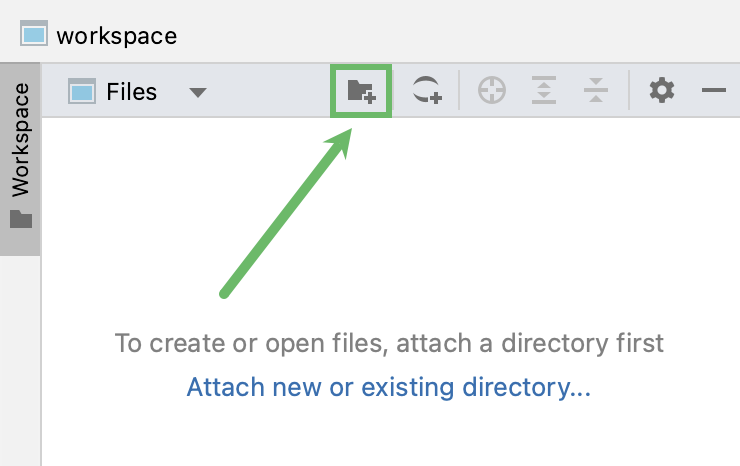
Click the Attach new of existing directory link in the Workspace tool window.
Select from the main menu.
Click
in the toolbar of the Workspace tool window.

Find the desired directory in your file system. To add a project, select the project directory.
Add a new directory
Do one of the following:
Go to
Right-click anywhere in the Workspace tool window and select from the context menu
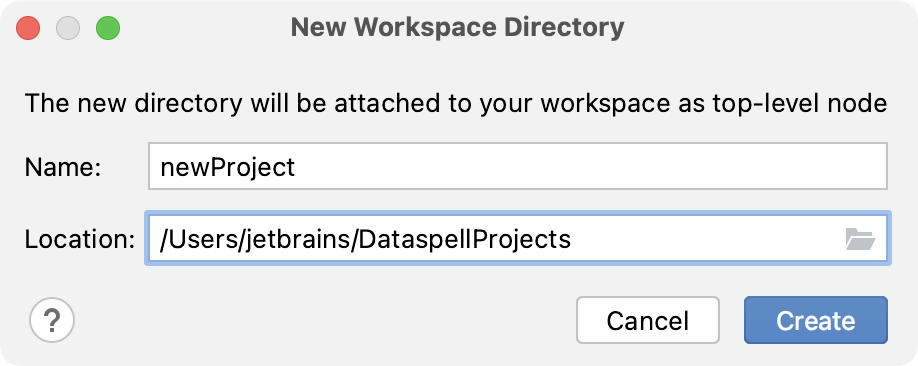
Specify the directory name and location:

For more information about creating a new project, refer to Create a project.
Add a Git repository
Do one of the following:
Go to .
Right-click the workspace tree or a directory and select from the context menu
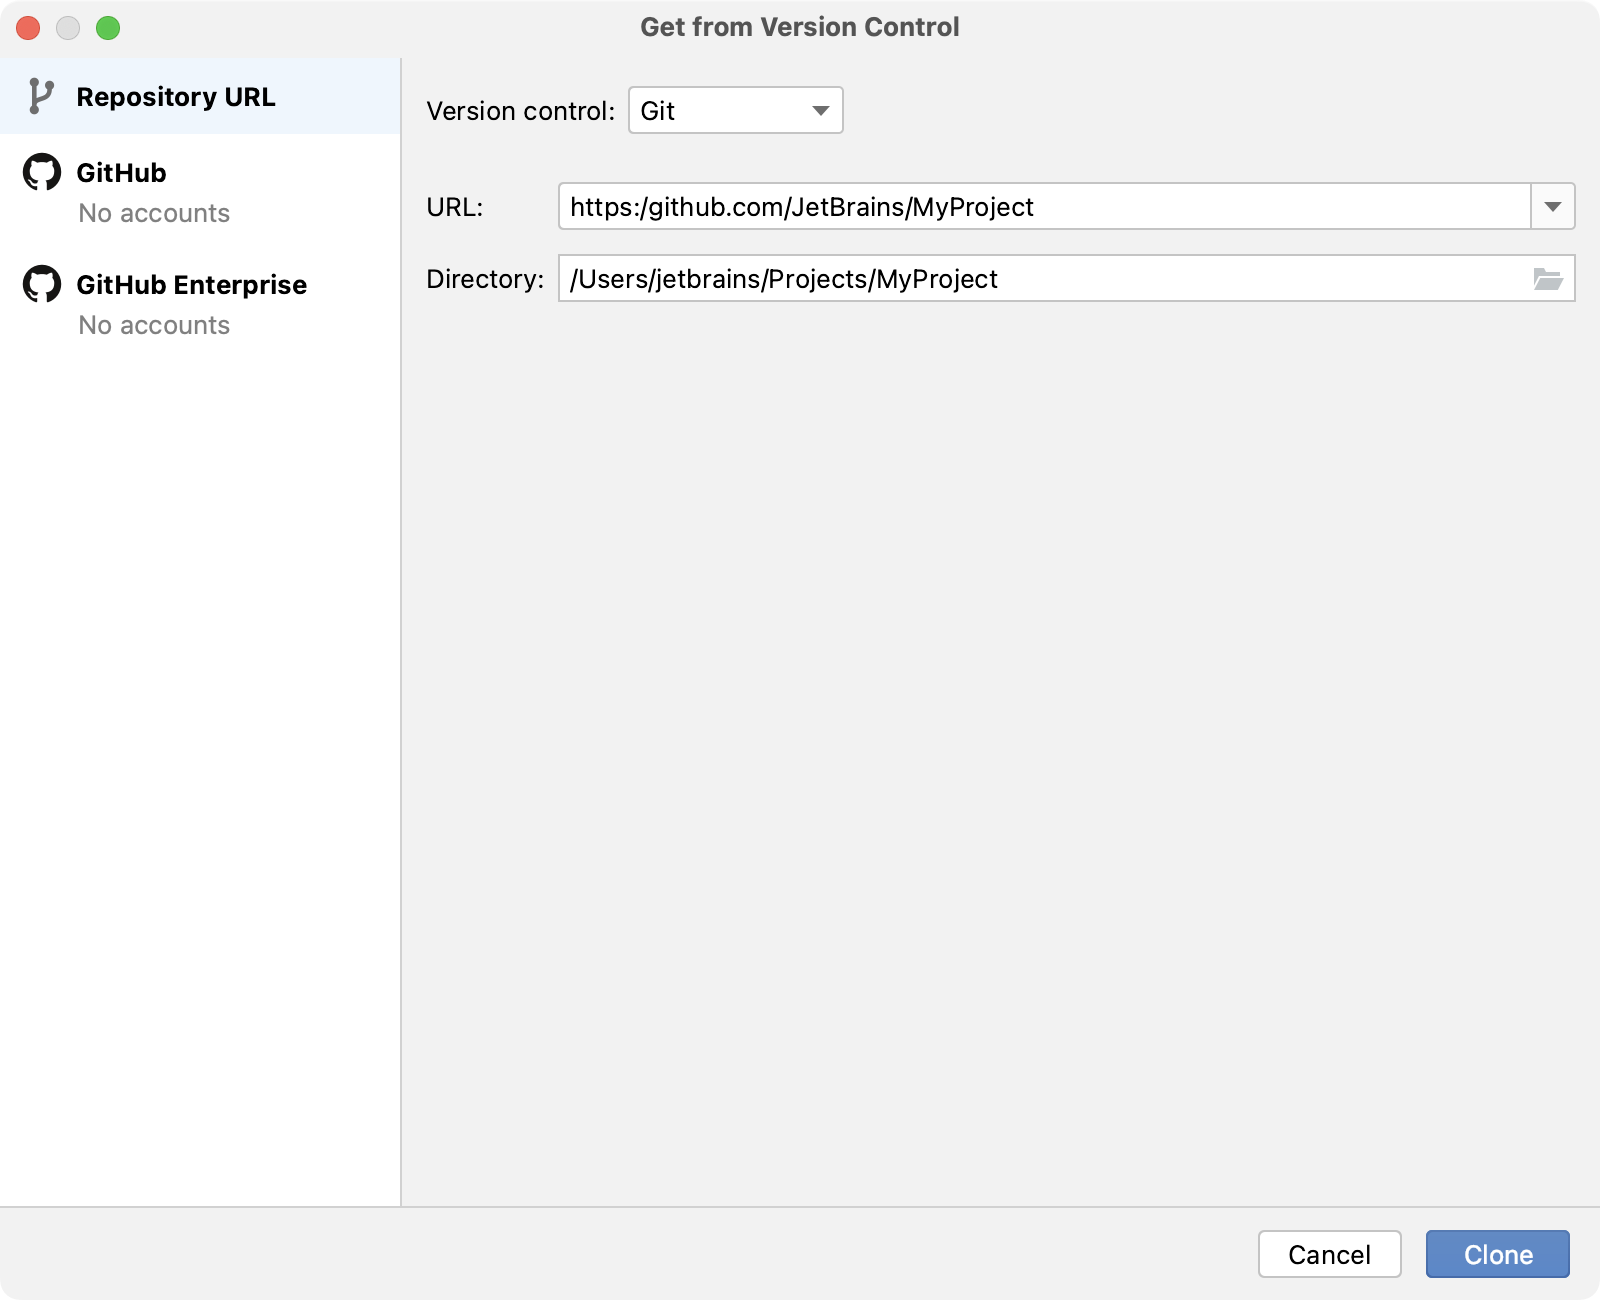
Select Git:

Specify the path to the repository and select the directory to which it will be cloned. Do not select the default DataSpell installation directory as the target local directory. Alternatively, you can select GitHub on the left, login using your credentials, and select any repository you want to work with.
Click Clone.
Once you add a directory or a project, it appears in the Workspace tool window. You can open files that reside in it, or create new files (see how to add new Jupyter notebooks and Python files).
DataSpell will use the default virtual environment to execute notebooks and scripts in the newly added directory or project. You can switch to another environment or create a new one.
Connect to a Jupyter server
Add Managed Jupyter server
Go to
Alternatively, right-click the project directory and select from the context menu.
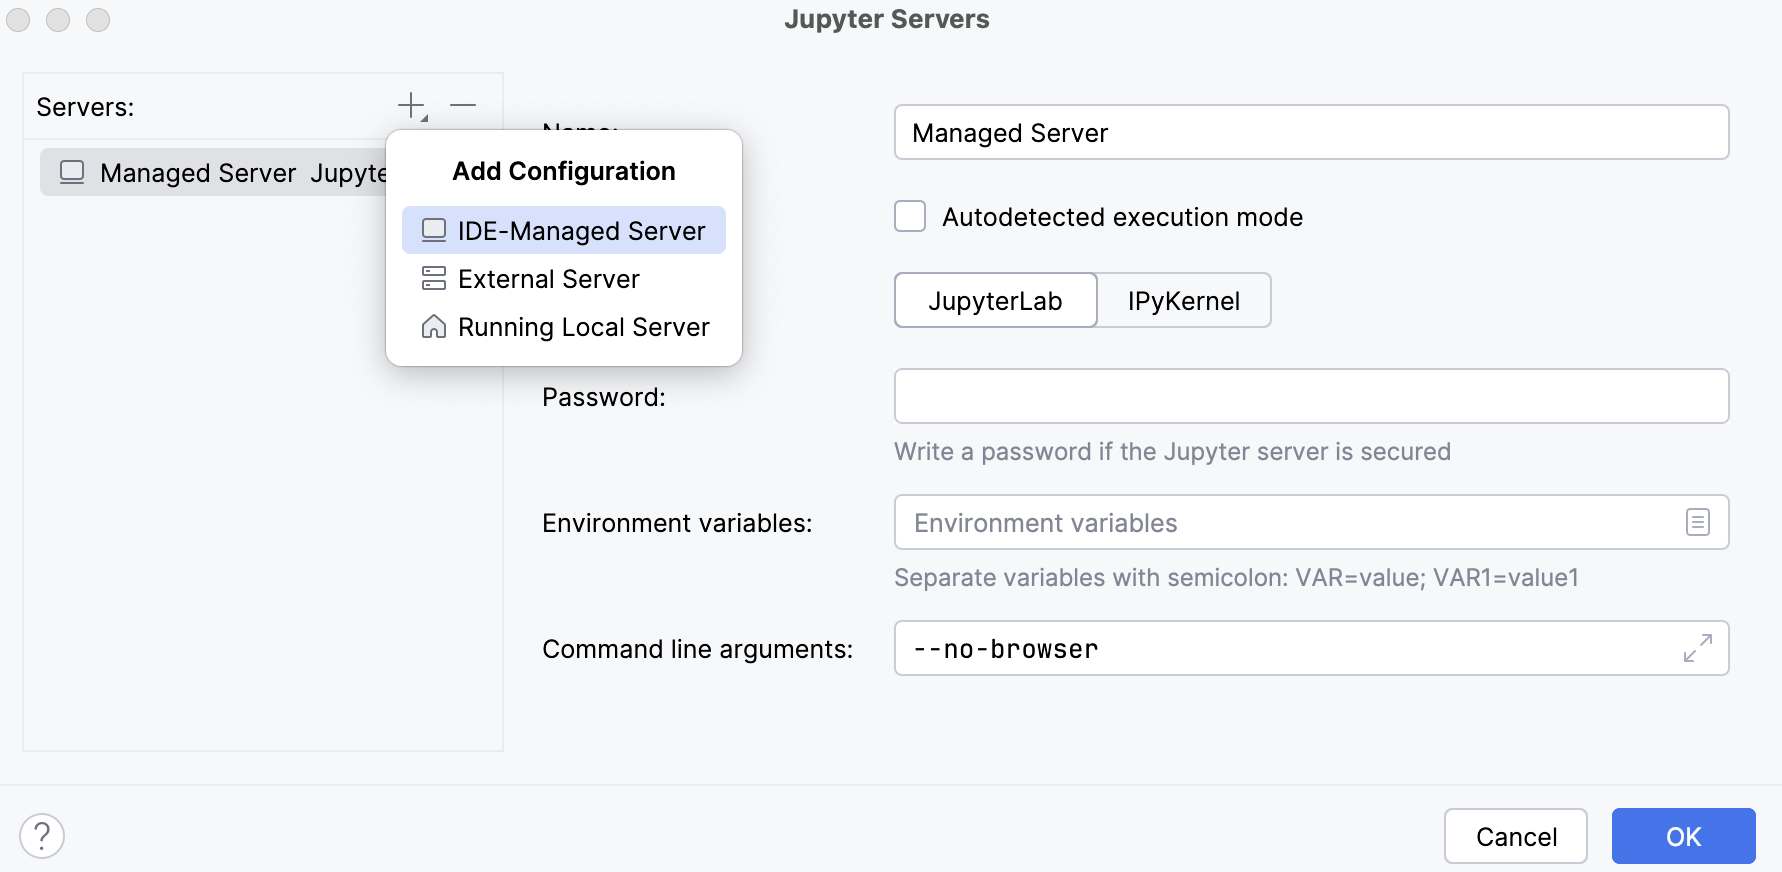
In the window that opens, click
Add Configuration or press Alt+Insert and select IDE-Managed Server.
For more information on configuring Managed Servers, refer to Set up a Managed Server.
Click OK if you want the newly created server to be automatically selected for your current notebook.

Once you have connected to a remote server, you can open, edit, run, and copy remote notebooks.
Organizing directories and projects in the workspace
Remove a directory or a project
Right-click the target directory and select Detach Directory from the context menu.
Copy a directory
To copy a directory, right-click it in the Workspace tool window, choose , then right-click the target local or remote directory and select .
If required, type a new name for the notebook, and then click OK to confirm:

Move a directory
To move a directory, you can do one of the following:
Right-click it in the Workspace tool window, choose , then right-click the target local or remote directory and select .
Drag-and-drop it to the target local or remote directory.
Click Refactor to confirm:

Managing notebooks in directories and projects
Rename a notebook
To rename a notebook, select the target file in the Workspace tool window, right-click it, choose , and specify a new filename.
Copy a notebook
To copy a notebook, right-click it in the Workspace tool window, choose , then right-click the target local or remote directory and select .
If required, type a new name for the notebook, and then click OK to confirm:

Move a notebook
To move a notebook, you can do one of the following:
Right-click it in the Workspace tool window, choose , then right-click the target local or remote directory and select .
Drag-and-drop it to the target local or remote directory.
Click Refactor to confirm:
