Spring Boot REST API tutorial, part 3: Upload and download files
3: Upload and download files
In Spring Boot REST API tutorial, part 2: Add GET and DELETE endpoints, the API worked with photo identifiers and file names. It could describe a photo, but it did not hold an image. In this part, add a page for uploading files, store their bytes in the service, and return them through a download endpoint.
Create an HTML page for file uploads
To upload an image, the browser needs a way to select a file and send it to the API. This page provides a file picker and an upload button, then shows the server response in an alert.
In src/main/resources/static, create upload.html with the following content:
<!DOCTYPE html> <html lang="en"> <head> <meta charset="UTF-8"> <title>Photo Upload</title> </head> <body> <h2>Photo Upload</h2> <input id="fileupload" type="file" name="fileupload"/> <button id="upload-button" onclick="uploadFile()">Upload</button> <script> async function uploadFile() { let formData = new FormData(); formData.append("data", fileupload.files[0]); await fetch("http://localhost:8080/photos", { method: "POST", body: formData }).then(result => result.text()) .then(text => alert(text)); } </script> </body> </html>Spring Boot serves files in this directory directly, so the page is available at
/upload.htmlwithout a controller.FormDatamakes the browser send a multipart request, which carries the file bytes together with the file name and content type. Each part has a name: here it isdata. The upload endpoint uses that same name to find the file in the request. A mismatch there is a common cause of an upload that appears to do nothing.
Add file data to the model
The existing Photo class has a file name but nowhere to keep the image. Add the bytes and the content type, such as image/jpeg, so the download endpoint can later tell the browser what kind of file it is returning.
Add fields for the content type and file bytes to
Photo:private String contentType; @JsonIgnore private byte[] data;The photo listing only needs metadata. Including the bytes would add a long base64 string to each photo in the JSON response.
@JsonIgnoretells the Jackson JSON converter to skip this field, leaving the identifier, file name, and content type. The bytes remain stored for the download endpoint to return separately.Generate the accessors for both new fields: press Alt+Insert, select Getter and Setter, and select
contentTypeanddata.Remove the constructor from
PhotosServicethat addshello.jpg:public PhotosService() { db.put("1", new Photo("1", "hello.jpg")); }Real uploads replace that example, which has no image data. Also, remove the two-argument constructor from
Photo:public Photo(String id, String fileName) { this.id = id; this.fileName = fileName; }Keep the no-argument constructor.
Handle multipart file uploads
In
PhotosService, add a method that builds and stores a photo from the file data:public Photo save(String fileName, String contentType, byte[] data) { Photo photo = new Photo(); photo.setId(UUID.randomUUID().toString()); photo.setFileName(fileName); photo.setContentType(contentType); photo.setData(data); db.put(photo.getId(), photo); return photo; }The server assigns a UUID to identify the photo and returns the stored object so the client receives that identifier for later requests. Photos remain in memory until the application stops; part 4 replaces the map with a database.
In
PhotosController, add the upload endpoint:@PostMapping("/photos") public Photo create(@RequestPart("data") MultipartFile file) throws IOException { return photosService.save(file.getOriginalFilename(), file.getContentType(), file.getBytes()); }@RequestPart("data")selects the file sent by the page.MultipartFileprovides its original name, content type, and bytes.The controller extracts these values so the service does not depend on the HTTP-specific
MultipartFiletype. The same service method could accept a file name, content type, and bytes from another source without needing an HTTP request. Reading the bytes can throwIOException, which the method declares.
Increase the upload size limit
The default file size limit is 1 MB. If you upload a larger file, the request fails, and the Run tool window reports MaxUploadSizeExceededException. Raise the limit before uploading larger photos. This setting belongs in application.properties, where you configure application behavior without changing the Java code.
Open src/main/resources/application.properties and start typing
spring.servlet.multipart. IntelliJ IDEA completes the configuration keys and shows their descriptions. Set both limits:spring.servlet.multipart.max-file-size=100MB spring.servlet.multipart.max-request-size=100MBmax-file-sizelimits each file;max-request-sizelimits the whole request, including multipart overhead.
Add a file download endpoint
The API can now store an image, but its JSON responses deliberately leave out the bytes. Add a separate controller for downloads. This endpoint returns the image bytes and sets headers that tell the browser what kind of file it received and what to call it.
In the web package, create a class named
DownloadControllerand inject the service:@RestController public class DownloadController { private final PhotosService photosService; public DownloadController(PhotosService photosService) { this.photosService = photosService; } }Both controllers receive the same service instance, so they use the same stored photos.
In
DownloadController, add a method that returns the photo bytes as a file download:@GetMapping("/download/{id}") public ResponseEntity<byte[]> download(@PathVariable String id) { Photo photo = photosService.get(id); if (photo == null) { throw new ResponseStatusException(HttpStatus.NOT_FOUND); } HttpHeaders headers = new HttpHeaders(); headers.setContentType(MediaType.valueOf(photo.getContentType())); headers.setContentDisposition( ContentDisposition.builder("attachment") .filename(photo.getFileName()) .build()); return new ResponseEntity<>(photo.getData(), headers, HttpStatus.OK); }ResponseEntitycombines the bytes, headers, and status.Content-Typeidentifies the file format, andContent-Dispositionasks the browser to download the file under its original name.
Test the file upload and download
Restart the application, open
http://localhost:8080/upload.html, choose an image smaller than 100 MB, and click Upload.The alert shows an identifier, a file name, and a content type. Copy the identifier from the alert.
Open
http://localhost:8080/photos. The JSON lists the identifier, file name, and content type without the image bytes.Open
http://localhost:8080/download/<id>, replacing<id>with the copied identifier. The browser downloads the image under its original name.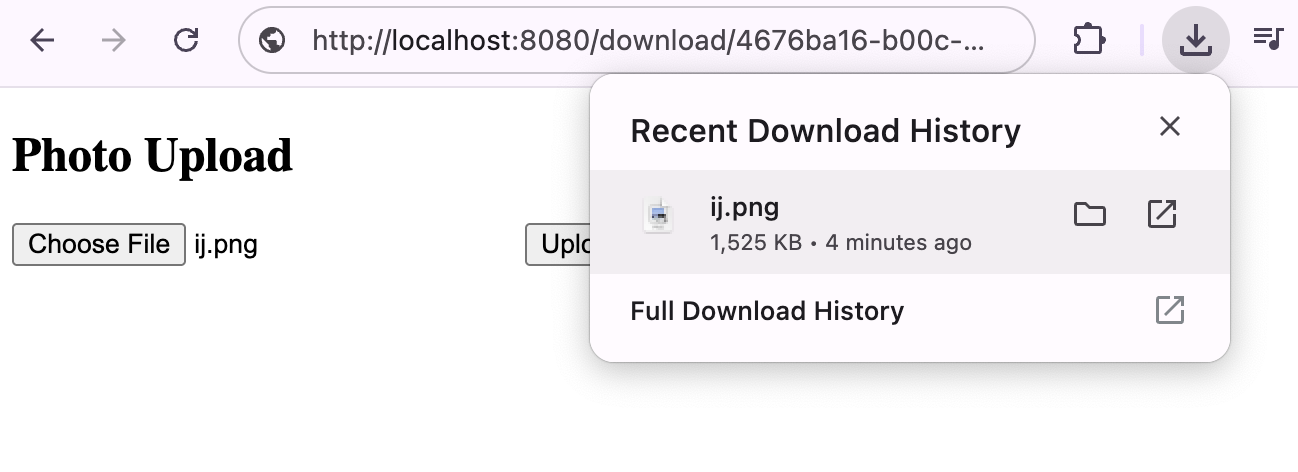
Request an identifier that does not exist. The download endpoint answers with a 404, the same as the JSON endpoints, because both ask the service and both treat
nullthe same way.