Zendesk Integration
The integration between Zendesk and YouTrack helps you keep customer communication synced between both tools.
When the integration with Zendesk is enabled and configured in YouTrack, it works as follows:
When a new ticket appears in Zendesk, it creates a new ticket in YouTrack.
The ticket in YouTrack has a link to the corresponding ticket in Zendesk.
Ticket updates are synced both ways: changes from YouTrack are synced to Zendesk, and vice versa.
Prerequisites
To create a new integration with Zendesk, make sure you meet the following prerequisites.
Your YouTrack is accessible to inbound connections.
The Zendesk user account you use to generate an API token has the Admin role.
Setup
To enable and configure the Zendesk integration, follow these steps:
Create a Helpdesk project in YouTrack.
Generate an API token for your user account in Zendesk.
Create a mapping between a Helpdesk project in YouTrack and a Zendesk brand.
Create an API Token in Zendesk
To set up an integration with Zendesk, first, you need to create an API token for your user account in Zendesk.
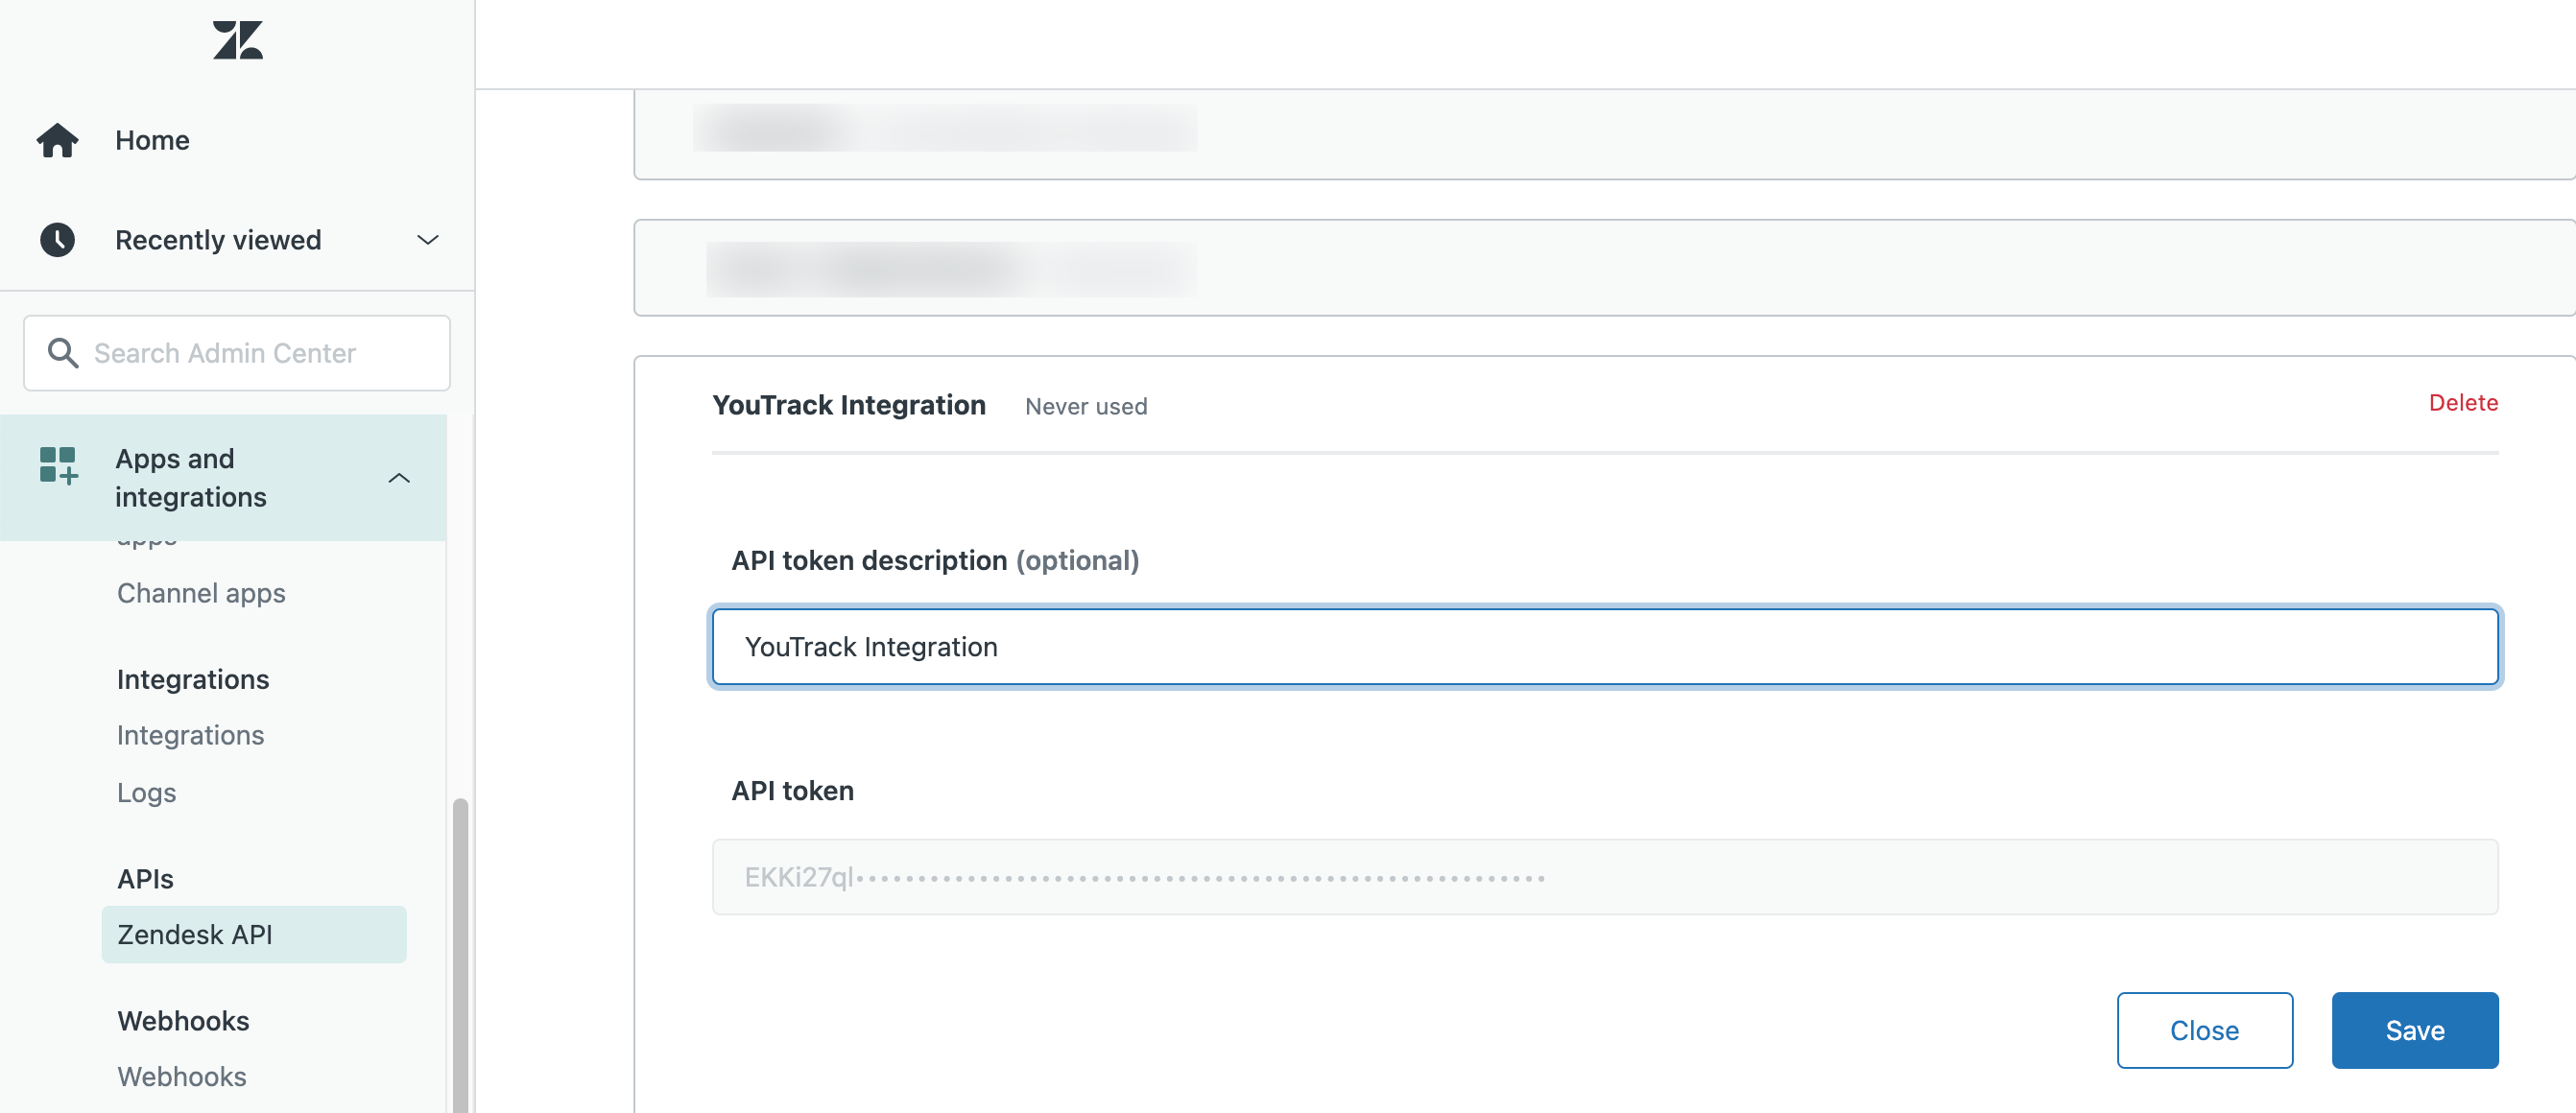
To create an API token in Zendesk:
In Admin Center in Zendesk, click Apps and integrations.
Select Zendesk API.
Click the Settings tab and make sure the Token Access option is enabled.
Click the Add API token button.
Copy the API token to enter it in the integration setup dialog.
For more details on creating API tokens, refer to the Zendesk documentation.
Connect to a Zendesk Site
To set up an integration with Zendesk, you need to connect to your Zendesk site first.
To connect to a Zendesk site:
From the main navigation menu in YouTrack, select
.
Click the New Zendesk Integration button.
The New Integration form opens.
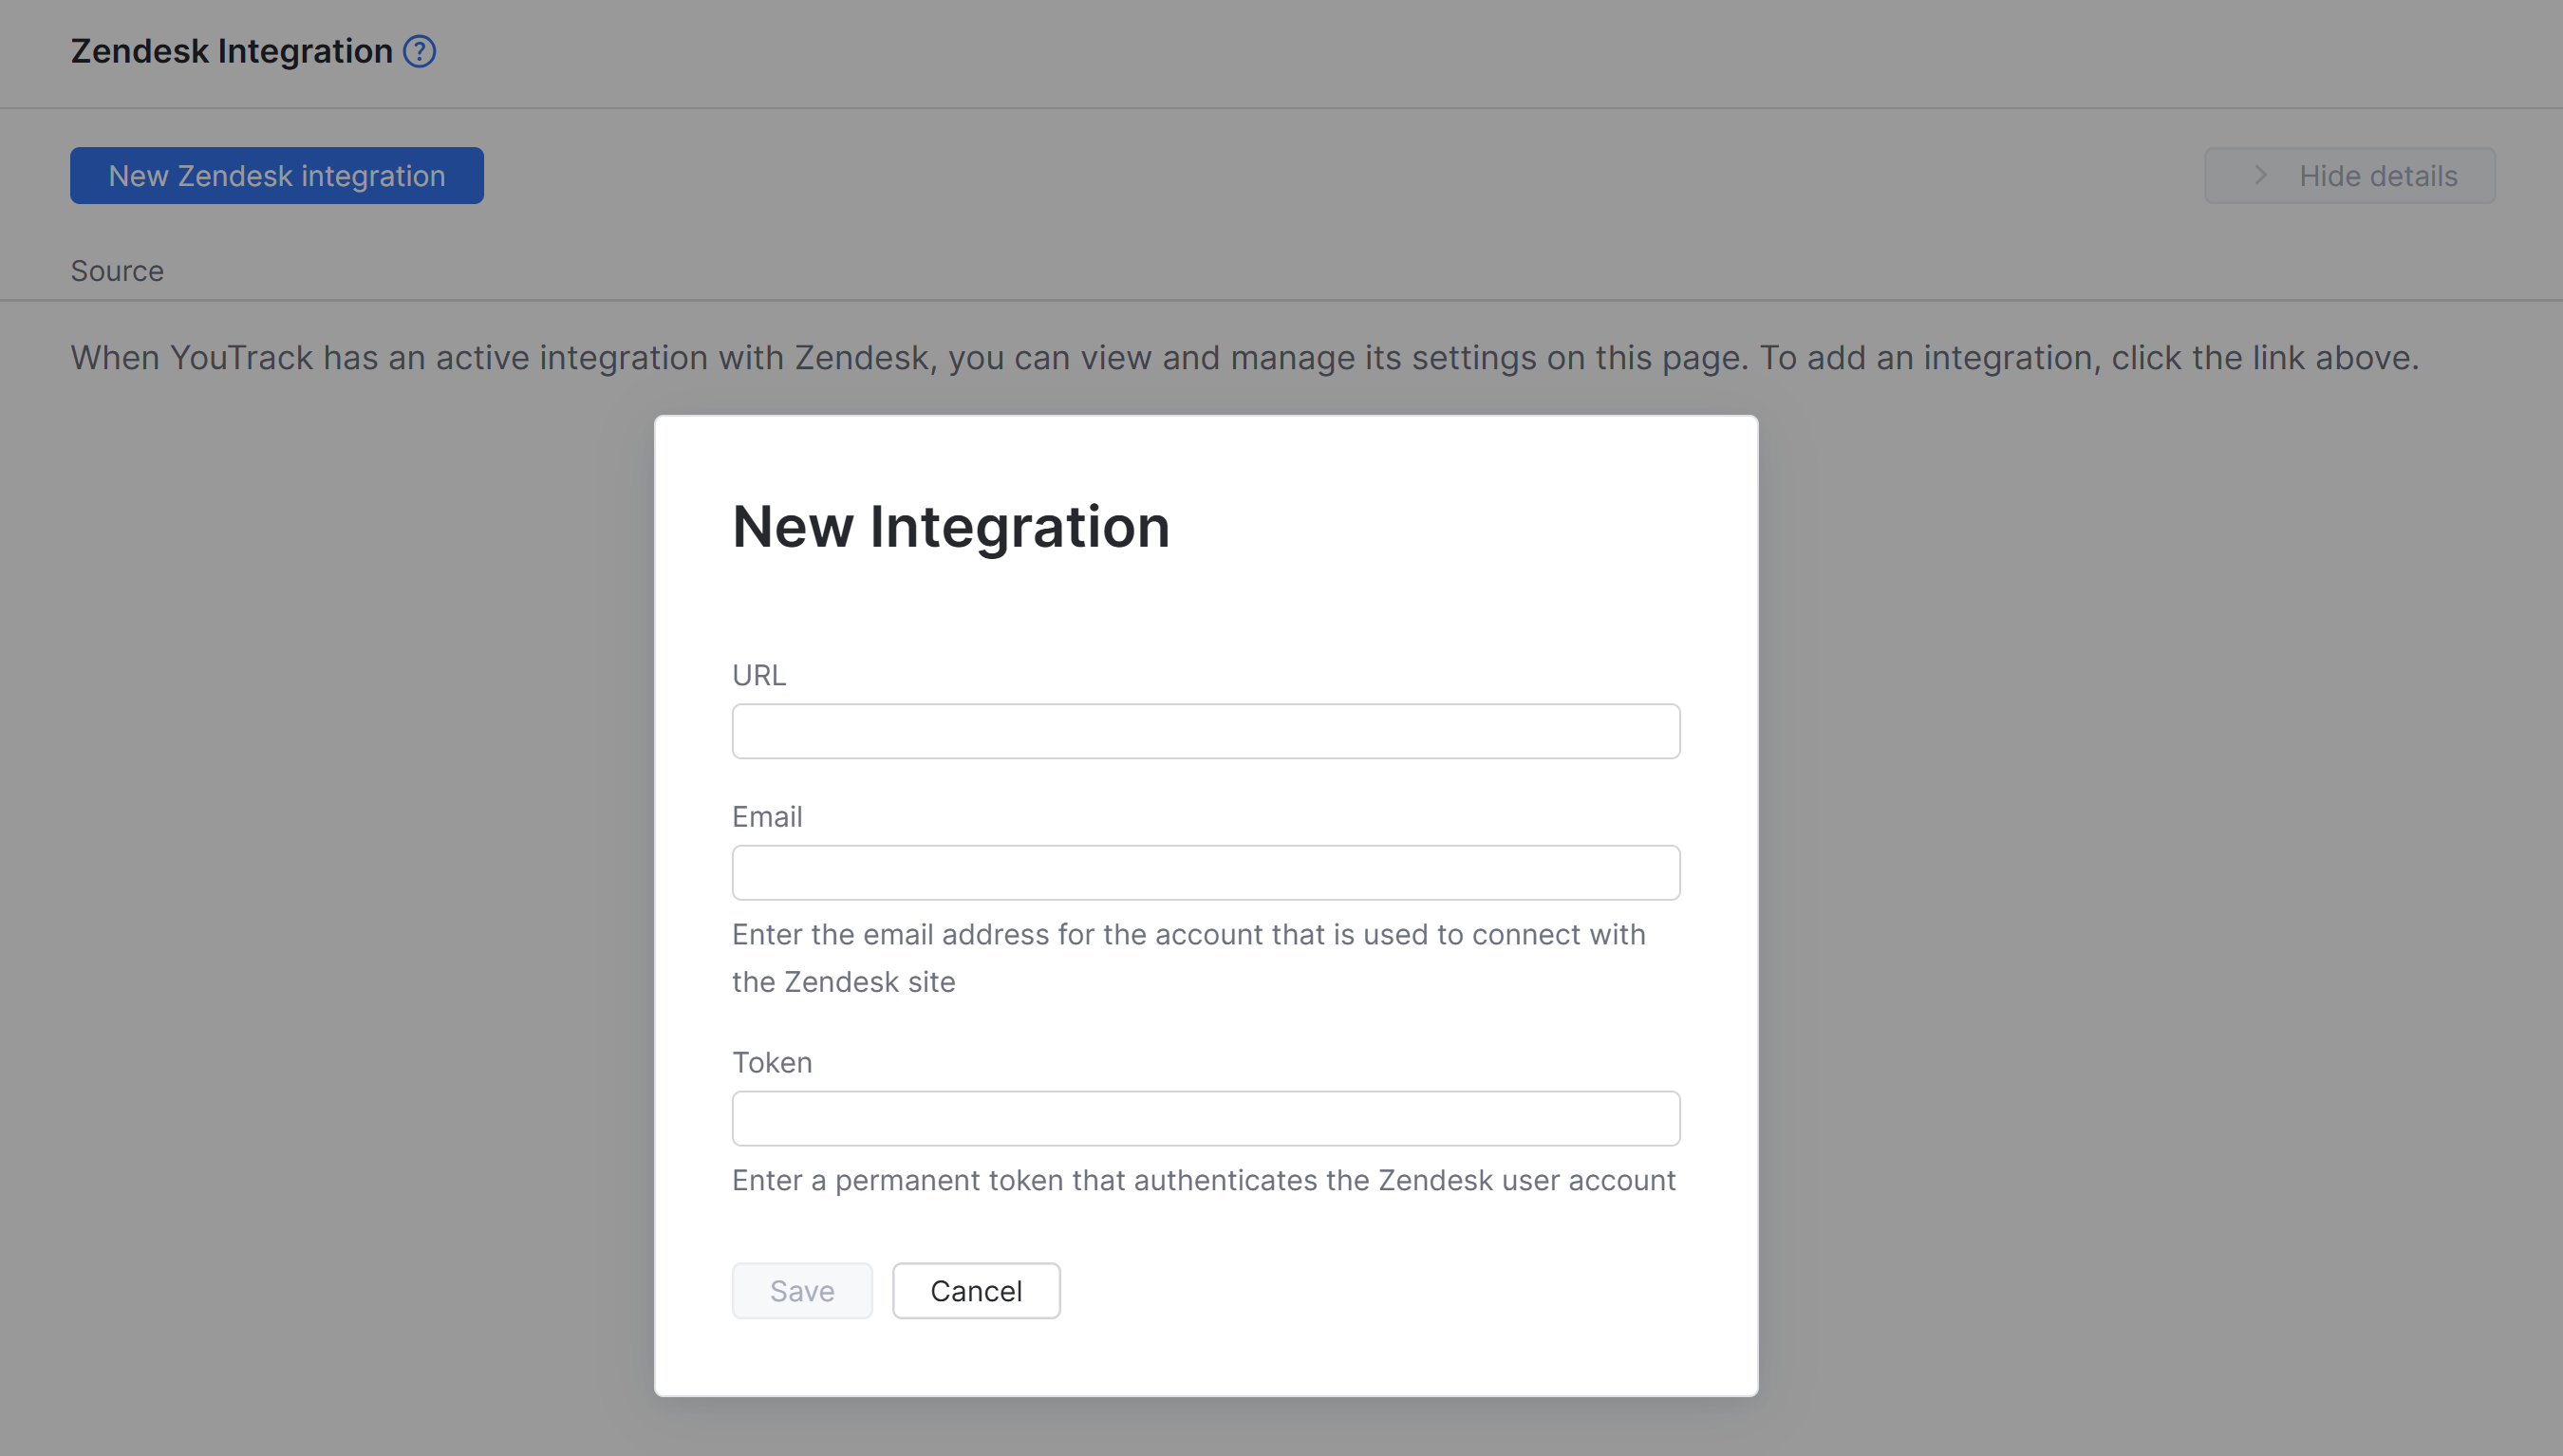
Enter the following settings:
Setting
Description
URL
The URL of your Zendesk site.
Email
The email address for the user account you use to connect to Zendesk.
Token
The API token that you use to authenticate the Zendesk user account.
Import script package
The package that contains the scripts for importing data from Zendesk. The default package is
@jetbrains/youtrack-zendesk-client/zendesk-integration-client.Click the Save button.
Your YouTrack is connected to the Zendesk site.
In the background, a new import configuration has been added to your YouTrack. When you add a mapping to the Zendesk integration, YouTrack will update the project mapping in the import configuration, and the import will run continuously.
To check the details of this import configuration, open the
Administration menu and select .
To learn more about imports in YouTrack, see Imports.
Create a Mapping
To configure an integration of a YouTrack project with a brand in Zendesk, set up a mapping.
To create a mapping:
From the main navigation menu, select
.
On the Zendesk Integration page, click the New Mapping button.
The New Mapping dialog opens.
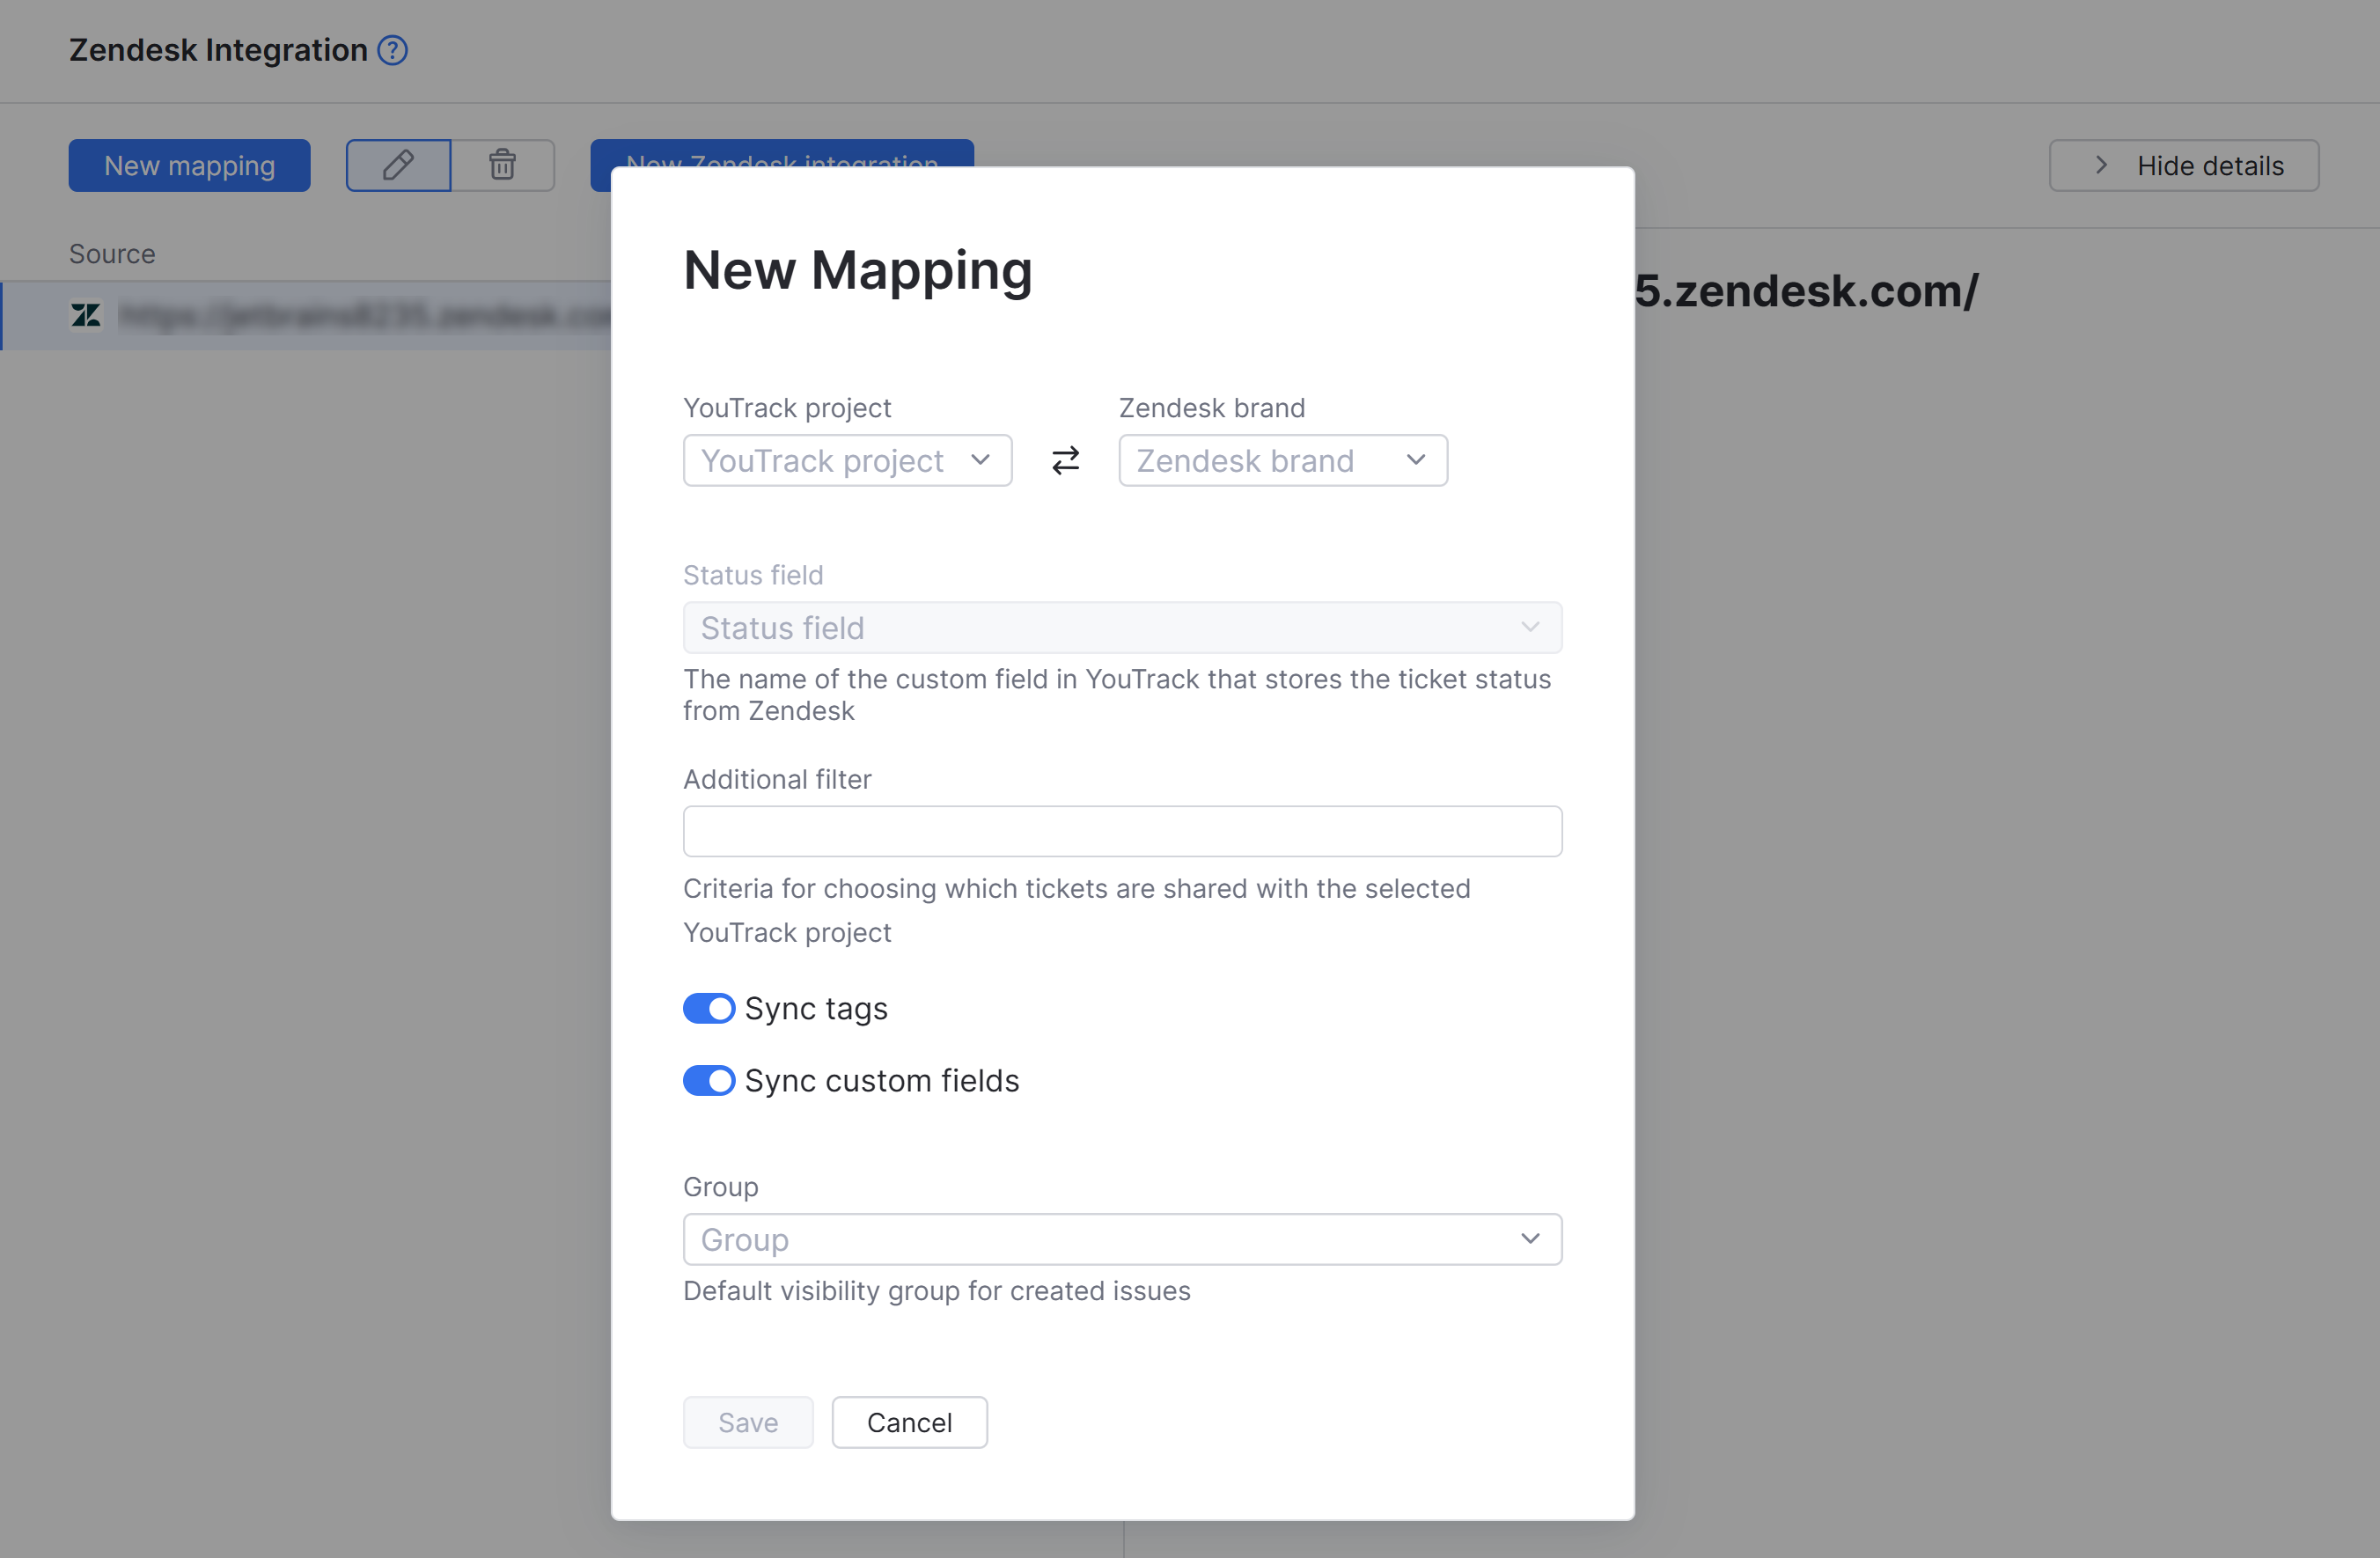
Provide values for the following settings:
Setting
Description
YouTrack project
The Helpdesk project in YouTrack where tickets from Zendesk will be imported.
Zendesk brand
The tickets from this Zendesk brand will be synced with the tickets in YouTrack.
Status field
The name of the custom field in YouTrack that stores the ticket status from Zendesk.
Additional filter
Additional criteria for choosing which Zendesk tickets are shared with the selected YouTrack project. For filtering, use the Zendesk query language.
Sync tags
Enable this option to sync tags between YouTrack and Zendesk.
Sync custom fields
Enable this option to sync custom fields and their values between YouTrack and Zendesk.
Group
All tickets in YouTrack created from tickets in Zendesk will have default visibility restricted to this user group.
Click the Save button.
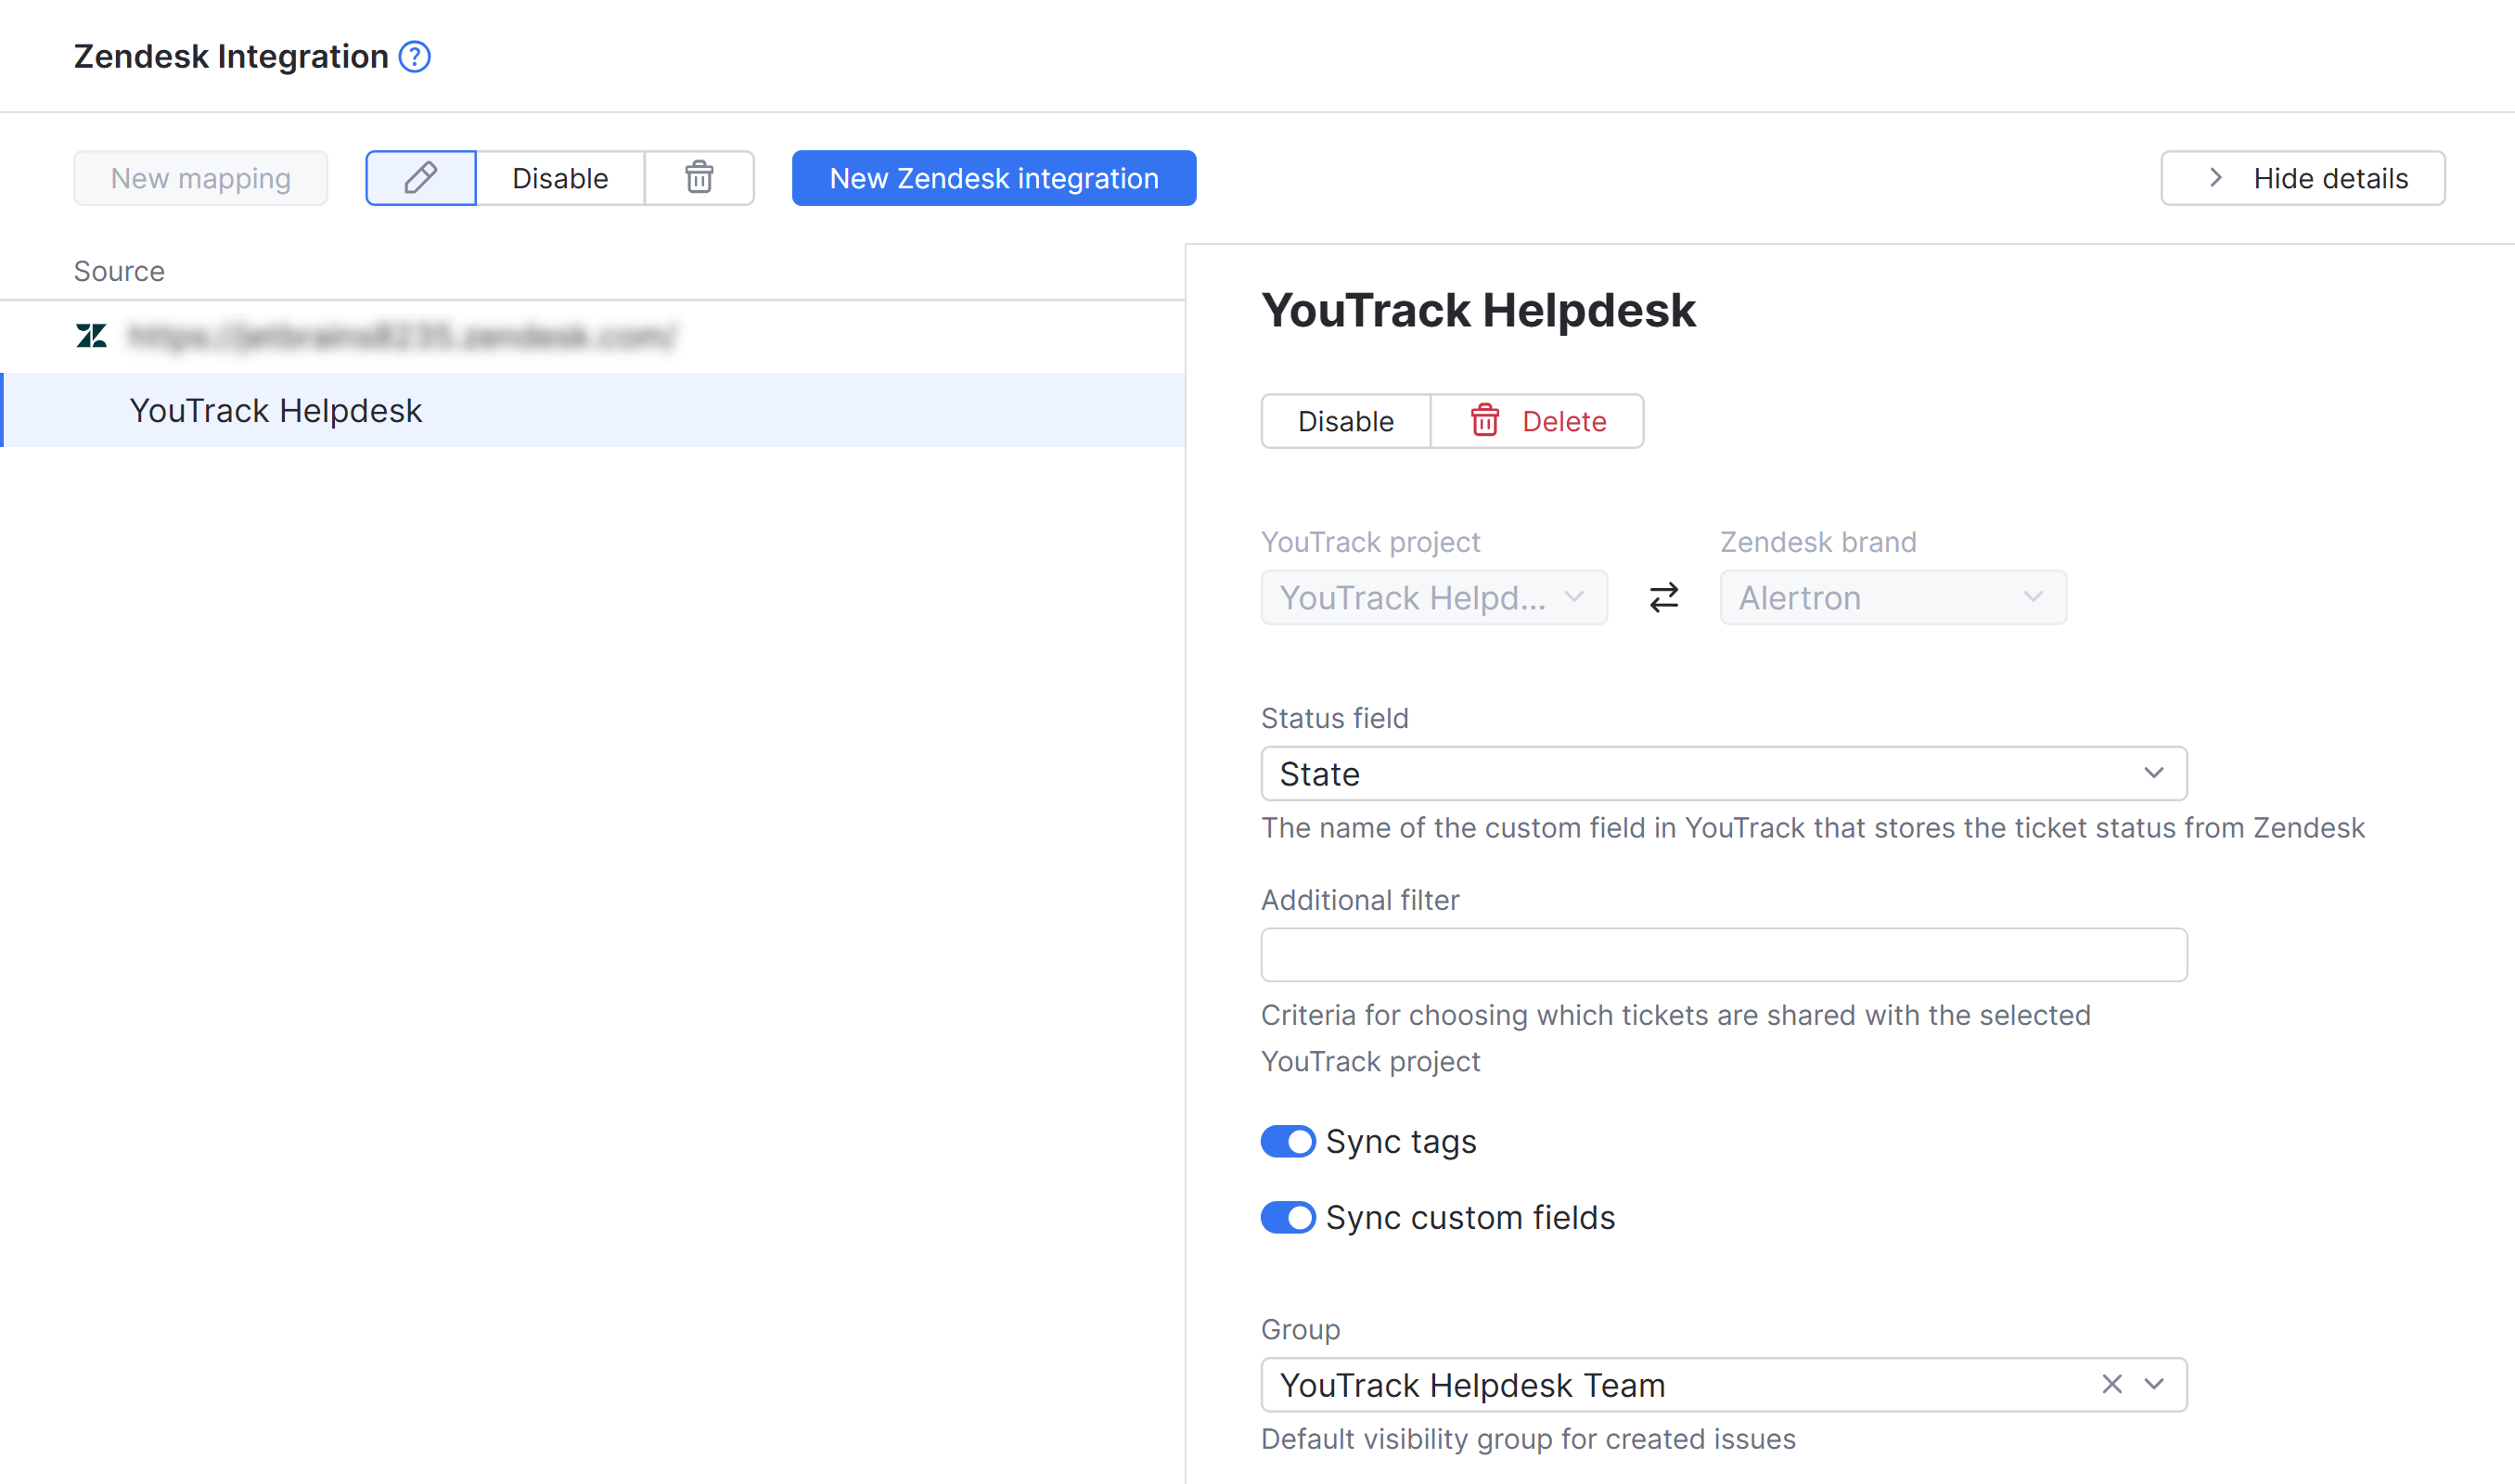
A mapping between a YouTrack project and a Zendesk brand is created. The Zendesk integration is set up and active.
In the background, the import configuration that connects YouTrack and Zendesk is updated. The project mapping in the import configuration now connects the selected YouTrack project and the Zendesk brand.
The import configuration between YouTrack and Zendesk is set up and active.
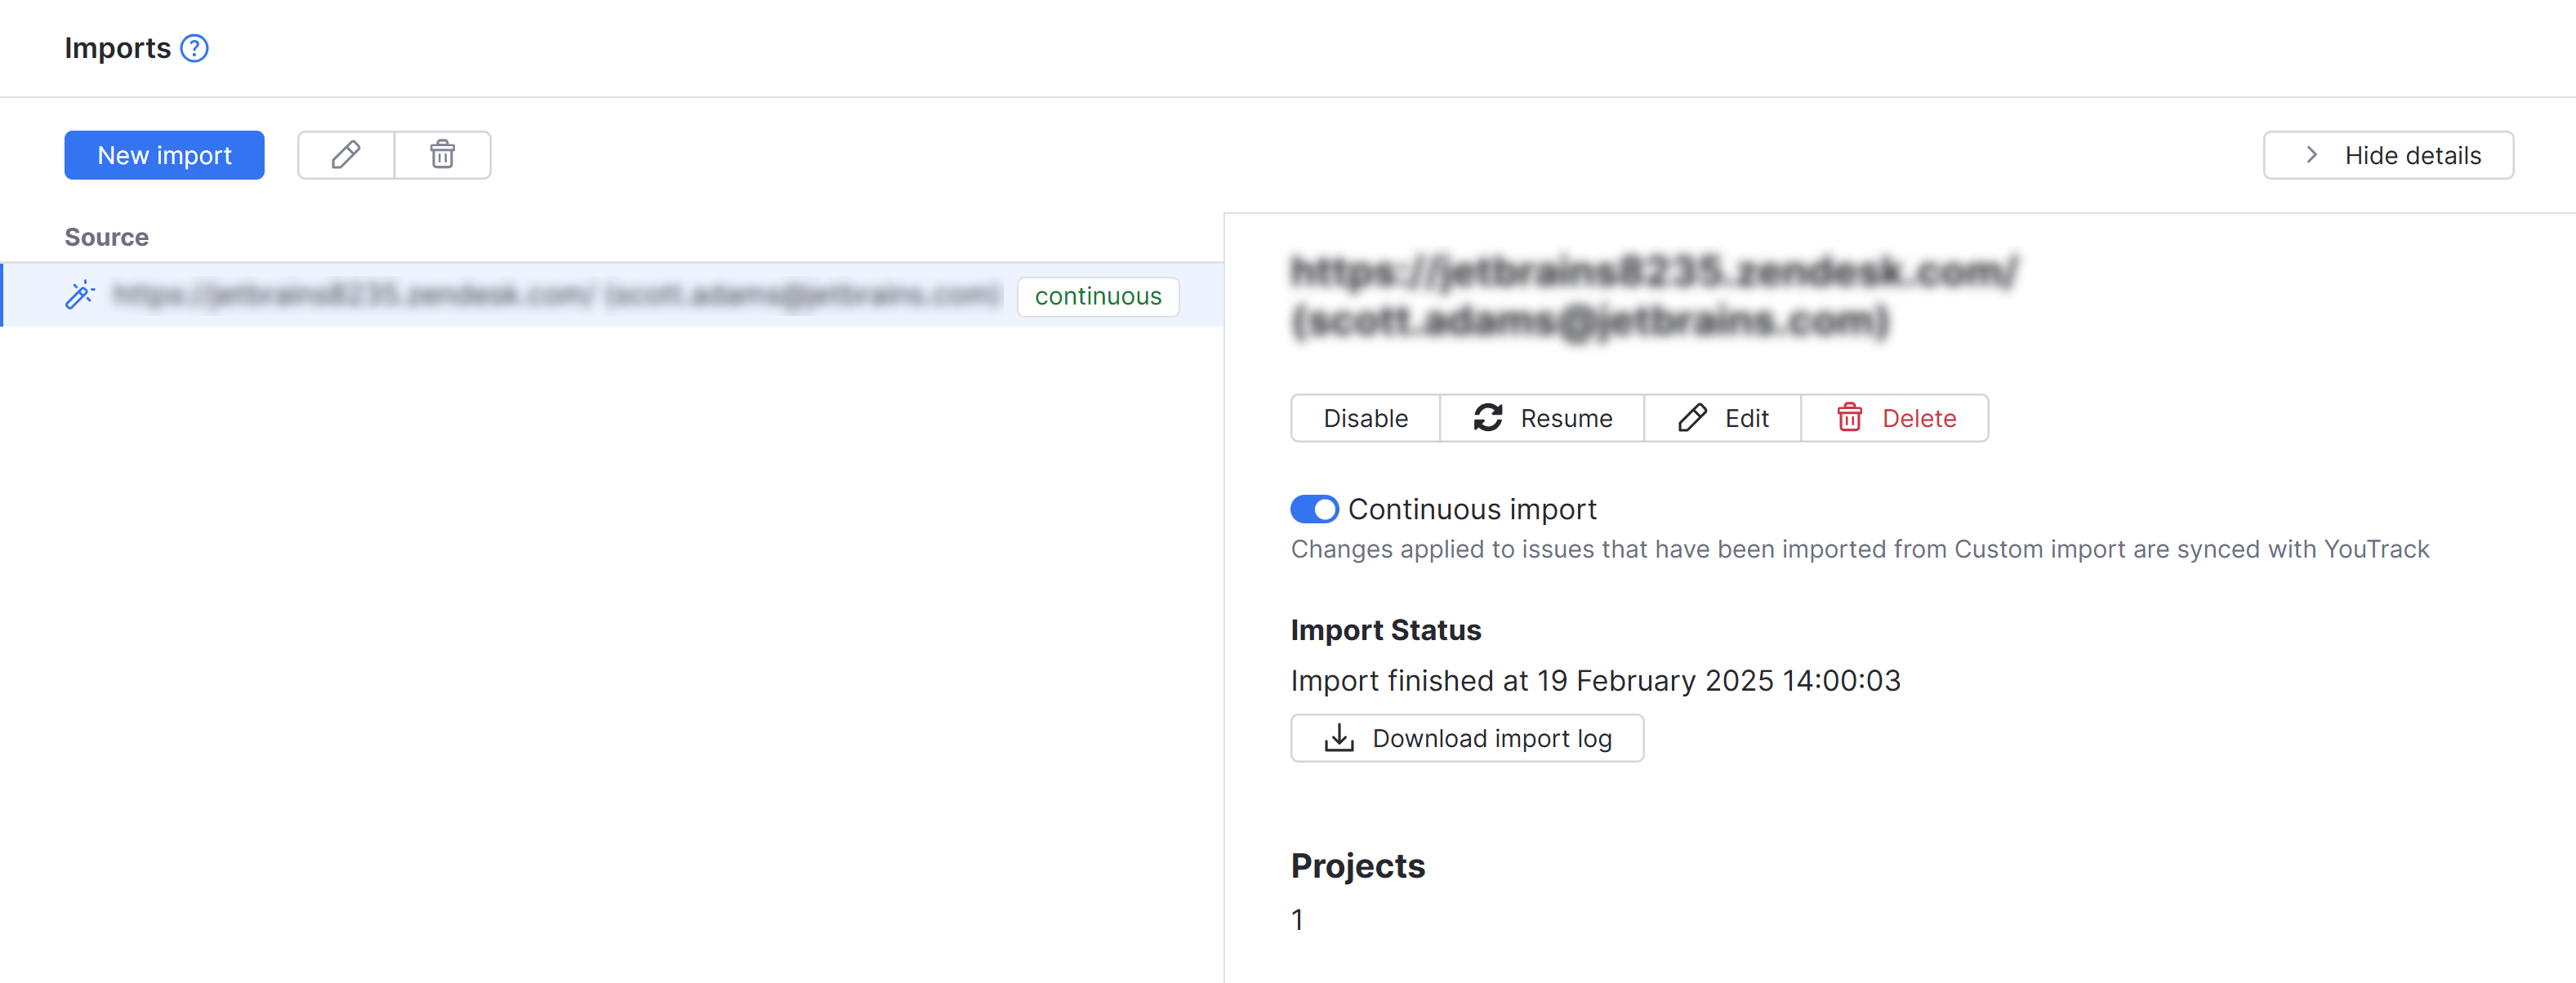
To check the details of this import configuration, open the
Administration menu and select .
In the background, the
Send issue updates back to Zendeskworkflow rule is attached to the YouTrack project.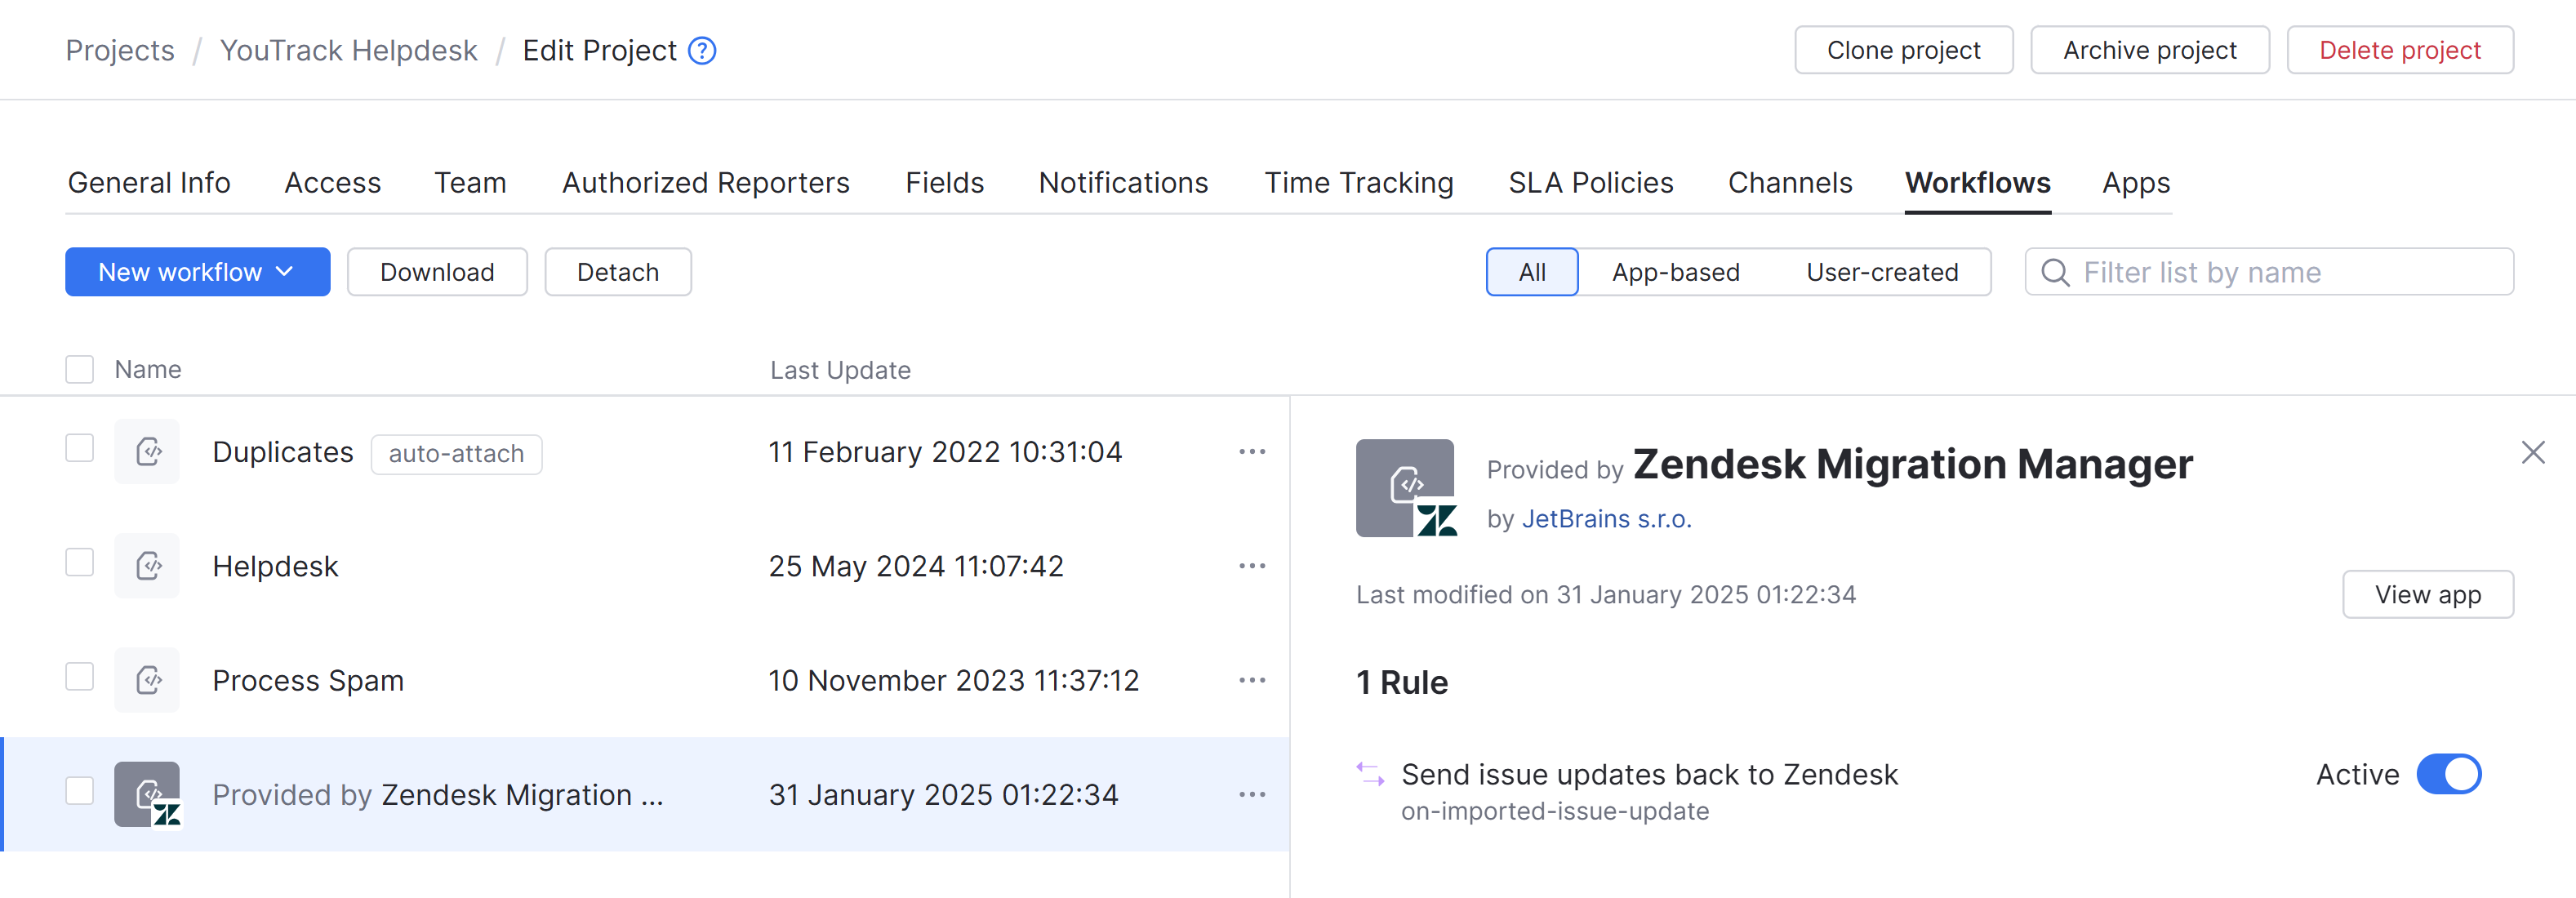
This workflow is provided by the Zendesk Migration Manager app, which is also attached to the YouTrack project.
To check the details of the workflow rule and the Zendesk Migration Manager app, navigate to the settings page for your YouTrack project and check the Workflows and Apps tabs, respectively.
Use the Zendesk Integration
Zendesk Integration in Action
When a ticket appears in Zendesk, YouTrack processes it and determines whether it matches an existing mapping.

If the Zendesk ticket matches the settings in the mapping, a corresponding ticket is created in YouTrack.
YouTrack creates new tickets as follows:
YouTrack stores the current state of the Zendesk ticket in the custom field set in the integration settings.
If YouTrack finds a user account matching the original requester's email, this user is set as the ticket reporter. Otherwise, YouTrack creates a new reporter account.
The Origin field in YouTrack displays the original ticket number and a link to the corresponding ticket in Zendesk.
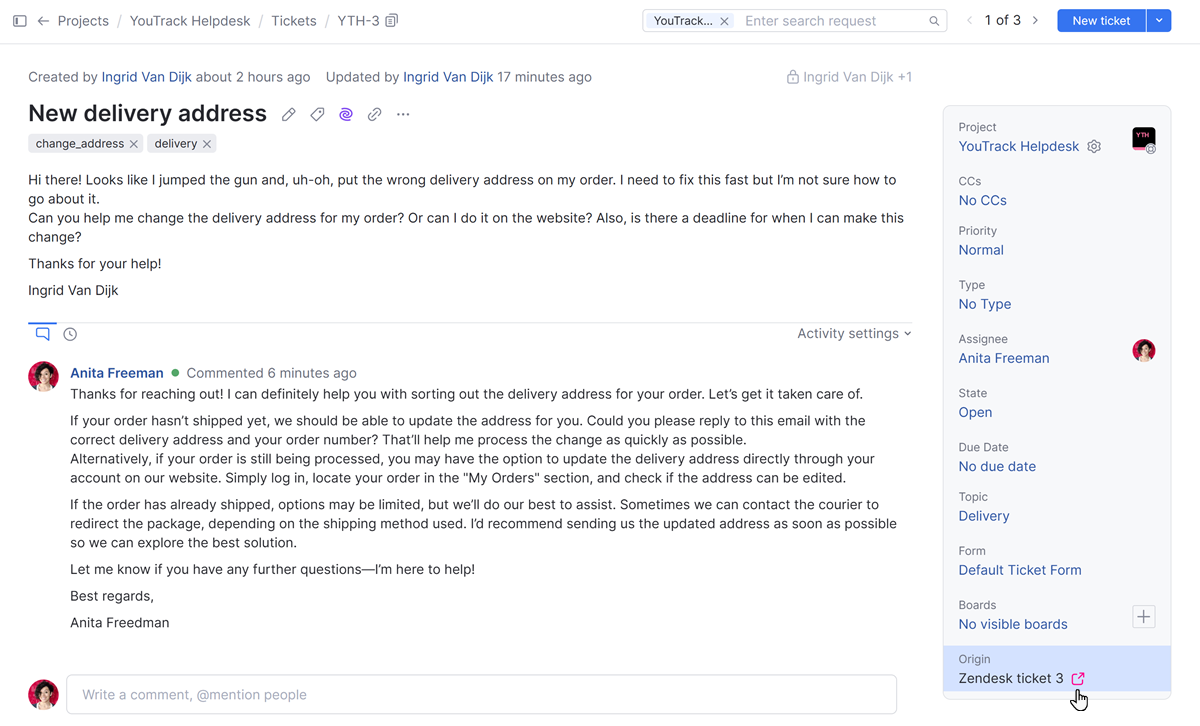
When you write a comment or change a custom field value in the YouTrack ticket, the change is imported into Zendesk and vice versa. For more details on how the integration works and syncs data, see Technical Details.
If you write an internal comment to a ticket in Zendesk, it appears in YouTrack as a private comment visible to the project team.
Technical Details
Behind Zendesk integration, there are two script packages:
An import script pulls changes from Zendesk to YouTrack.
A workflow propagates changes from YouTrack to Zendesk.
Direction | Details |
|---|---|
Zendesk to YouTrack | Powered by the Asynchronous. Changes from Zendesk get pulled to YouTrack periodically in small batches. All data from Zendesk tickets gets pulled to YouTrack. For the full list of entities and their attributes that YouTrack imports from Zendesk, see Imported Entities. |
YouTrack to Zendesk | Powered by the Synchronous. Changes from YouTrack get pulled to Zendesk immediately. All changes from YouTrack get pulled to Zendesk with the following exceptions:
|
Available Actions
When you select a Zendesk integration from the list, the following actions are available:
Action | Description |
|---|---|
Edit | Edit the connection settings. |
Delete | Delete the Zendesk integration and all the mappings. Tickets, users, and groups that are already imported remain in YouTrack. The links to Zendesk tickets are removed from tickets in YouTrack. |
When you select a mapping from the list, the following actions are available:
Action | Description |
|---|---|
Edit | Edit the mapping settings. |
Disable | Disable the mapping. The Zendesk integration is paused. No updates are synced between YouTrack and Zendesk. |
Enable | Enable the mapping. The Zendesk integration is active again. Updates that were made while the integration was inactive are pulled into YouTrack. |
Delete | Delete the mapping. Tickets, users, and groups that are already imported remain in YouTrack. |