ROS2 setup tutorial
ROS2 is the newest version of ROS, Robot Operating System, which is a set of libraries and tools designed for robot applications.
This tutorial describes how to use CLion as an IDE for developing ROS2 applications built with colcon. If you are working with an older ROS distribution, which uses catkin build tools, please refer to the previous tutorial.
Instructions below show the following procedures on Windows: creating a ROS2 workspace, opening it as a compilation database project in CLion, building, running/debugging a package, adding another package, and rebuilding the workspace.
Create a workspace
We will take the official Simple publisher and subscriber (C++) guide as an example.
Open a terminal in Administrator mode.
Source the ROS2 installation. In our case the command is
call C:\dev\ros2\ros2-windows\local_setup.batCreate a directory for a new workspace and navigate into it
md \dev_ws\src cd \dev_ws\srcCreate a publisher-subscriber package
ros2 pkg create --build-type ament_cmake cpp_pubsubFollow the next steps to get the source files, CMakeLists.txt, and package.xml, up until building.
At this point, we have the following folder structure:
Build a workspace in terminal and generate a compilation database
In order to be able to open a ROS2 workspace in CLion, we will generate a JSON compilation database using the CMAKE_EXPORT_COMPILE_COMMANDS CMake flag.
This option is supported in CMake only for the Makefile and Ninja generators, so we also need to switch between the generators using -G.
In the same terminal where you initially sourced the ROS2 installation, navigate to the workspace-level folder (dev_ws in our case) and run
colcon build --cmake-args -DCMAKE_EXPORT_COMPILE_COMMANDS=ON -G NinjaWhen build is finished, make sure that dev_ws\build contains a compile_commands.json file. In case it is not there, make sure your colcon version supports generating workspace-level compilation databases (see this issue).
Launch CLion in the sourced environment
In the same terminal, source the workspace setup files:
call install/setup.batNext, launch CLion from the same shell. For more information, refer to Command-line interface.
For example, in the case of using Toolbox, you can create a script for launching the IDE. In our case, it is located in C:\IDE_shell_scripts.
cd C:\IDE_shell_scripts\ clionAs the result, CLion will be launched with the ROS2 environment already prepared.
Open a workspace in CLion
In CLion, call from the main menu and select the compile_commands.json file in the top-level build directory:
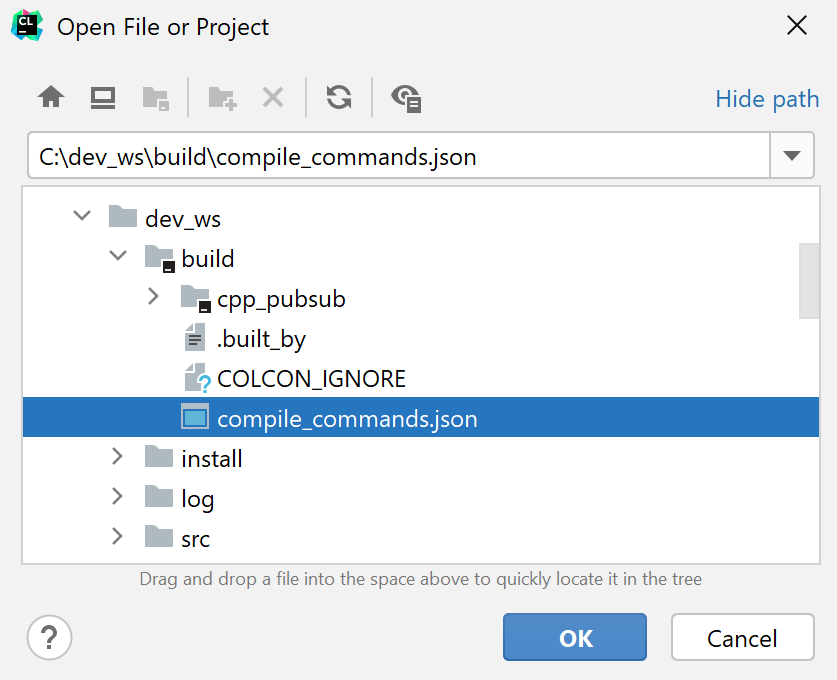
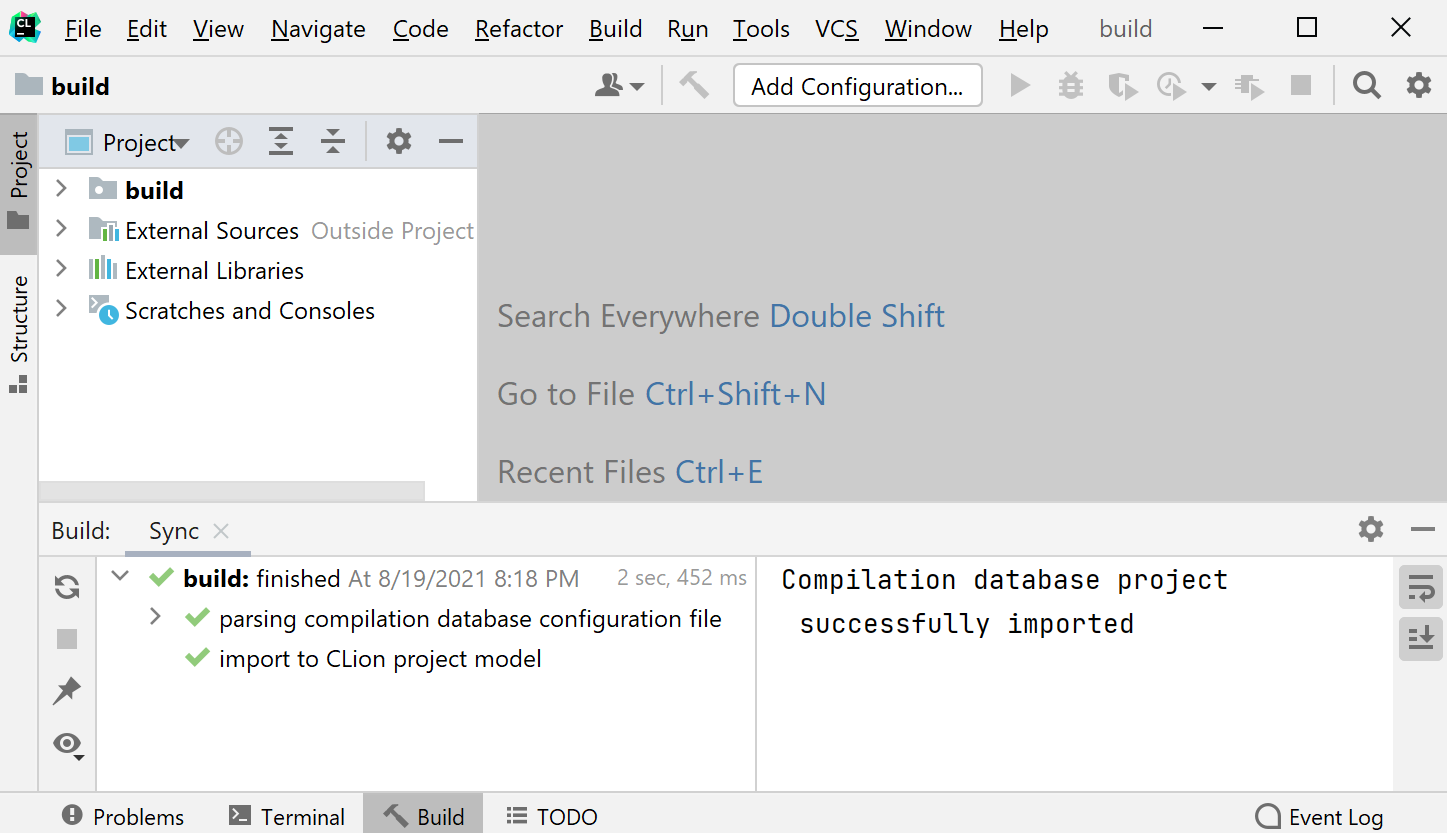
Click Open as project:

Check that the project is loaded successfully:
Change the project root
By default, CLions considers the directory containing the compile_commands.json file as project root. In our case, it is the build directory. In the Project tree, the actual source files are marked as external:
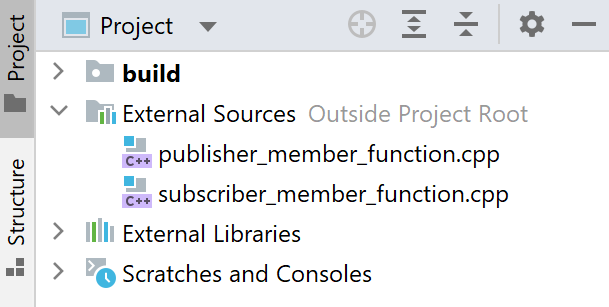
To get the correct project structure, we need to set the project root to the actual workspace directory.
Call from the main menu and select the workspace directory (dev_ws in our case).
Check the changes in Project view:
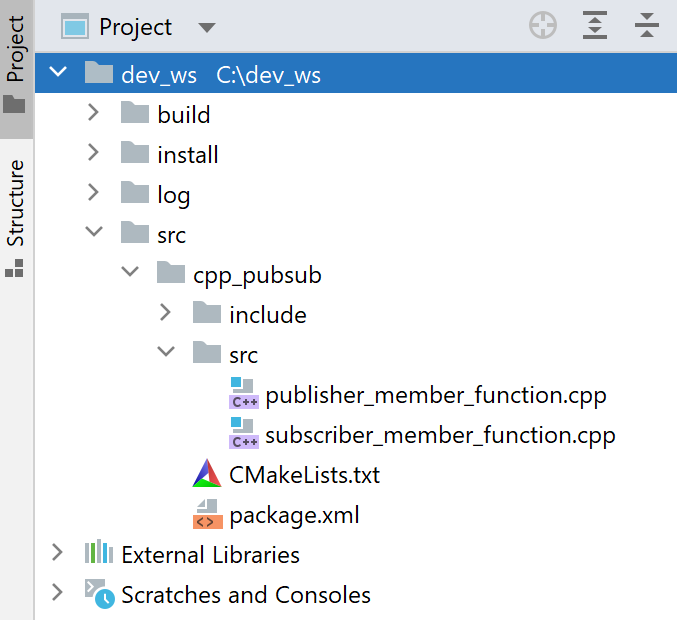
At this point, all the CLion editing features are fully available for the workspace sources.
How to build a package
In order to build and then launch a package inside CLion, we will create a custom build target for CMake commands actually performed during colcon build, and then create a custom application configuration for that target.
1. Create a script for the 'colcon build' commands
Navigate to the build logs directory. In our case, it's C:\dev_ws\log\latest_build\cpp_pubsub. Open the command.txt file from the latest build.
Copy the commands into another file and modify them to the following:
"C:\Program Files\CMake\bin\cmake.EXE" C:\dev_ws\src\cpp_pubsub -DCMAKE_EXPORT_COMPILE_COMMANDS=ON -G Ninja -DCMAKE_INSTALL_PREFIX=C:\dev_ws\install\cpp_pubsub "C:\Program Files\CMake\bin\cmake.EXE" --build C:\dev_ws\build\cpp_pubsub -- -j8 -l8 "C:\Program Files\CMake\bin\cmake.EXE" --install C:\dev_ws\build\cpp_pubsubSave the file as a .bat script. In our example, it is called cmake_commands.bat and placed into c:\dev_ws\src\cpp_pubsub\.
2. Create a custom build target
In CLion, go to and click
to add a new target.
Set the Toolchain to Visual Studio. For more information about configuring a Visual Studio toolchain in CLion, refer to Windows tutorial.
Click the three dots icon next to the Build field. Then click
to add an external.
In the Program field, select the newly created script. Set the Working directory to the package build directory.
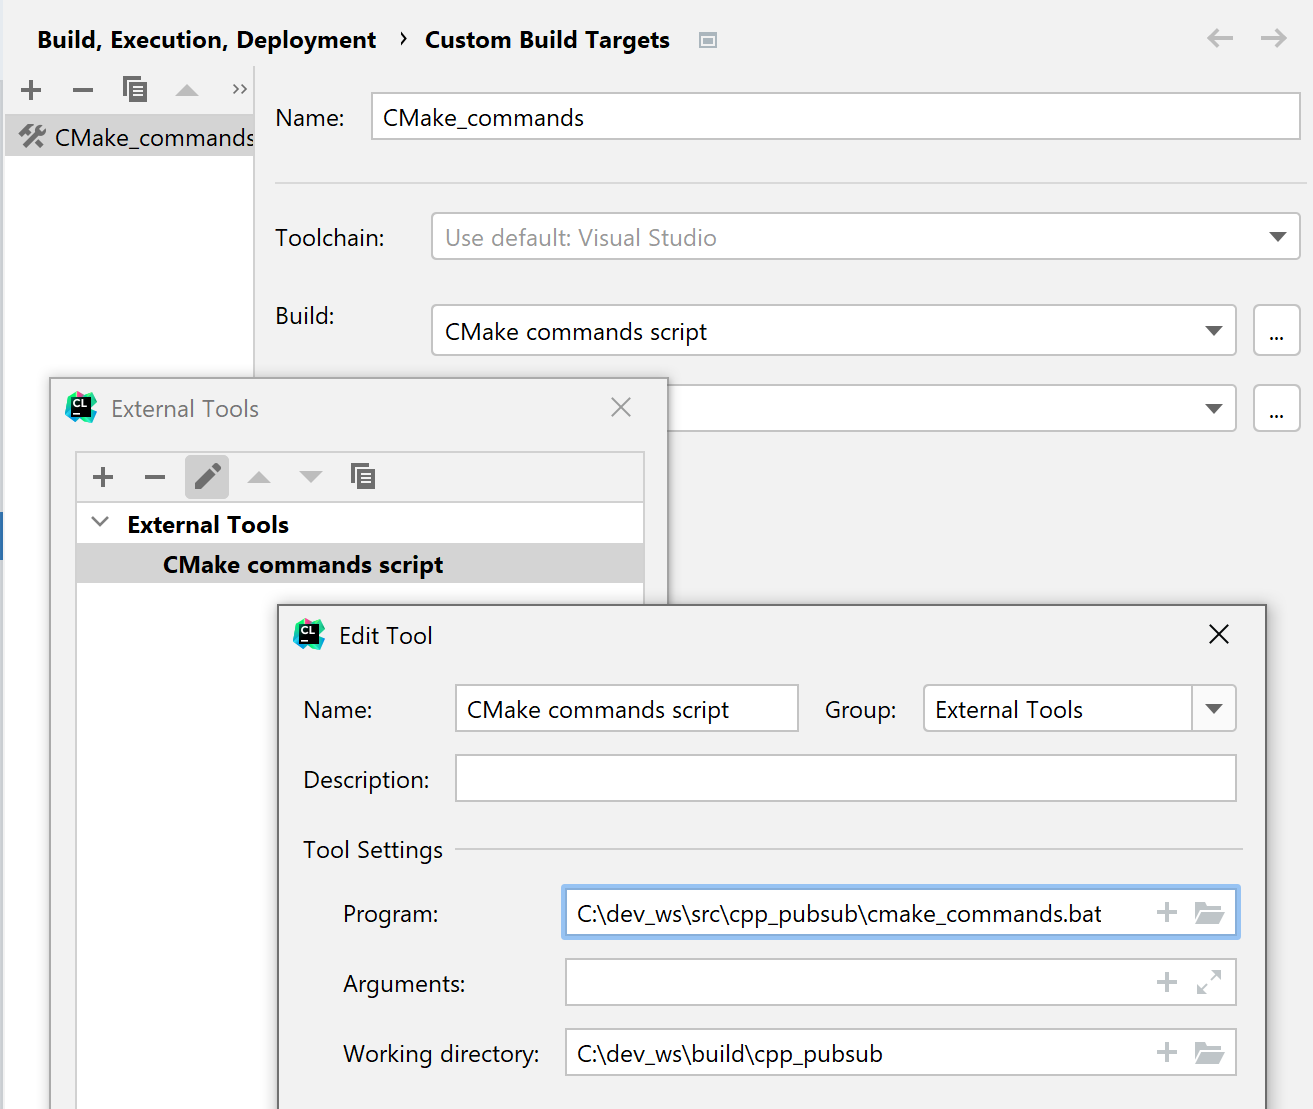
Save the custom target.
3. Create a run/debug configuration for the custom build target
To be able to build and then launch the target we have for the package, we need to create a corresponding configuration.
In the main menu, go to , click
and select Custom Build Application.
In the configuration settings, select the Target and make sure to remove Build from the Before launch area.
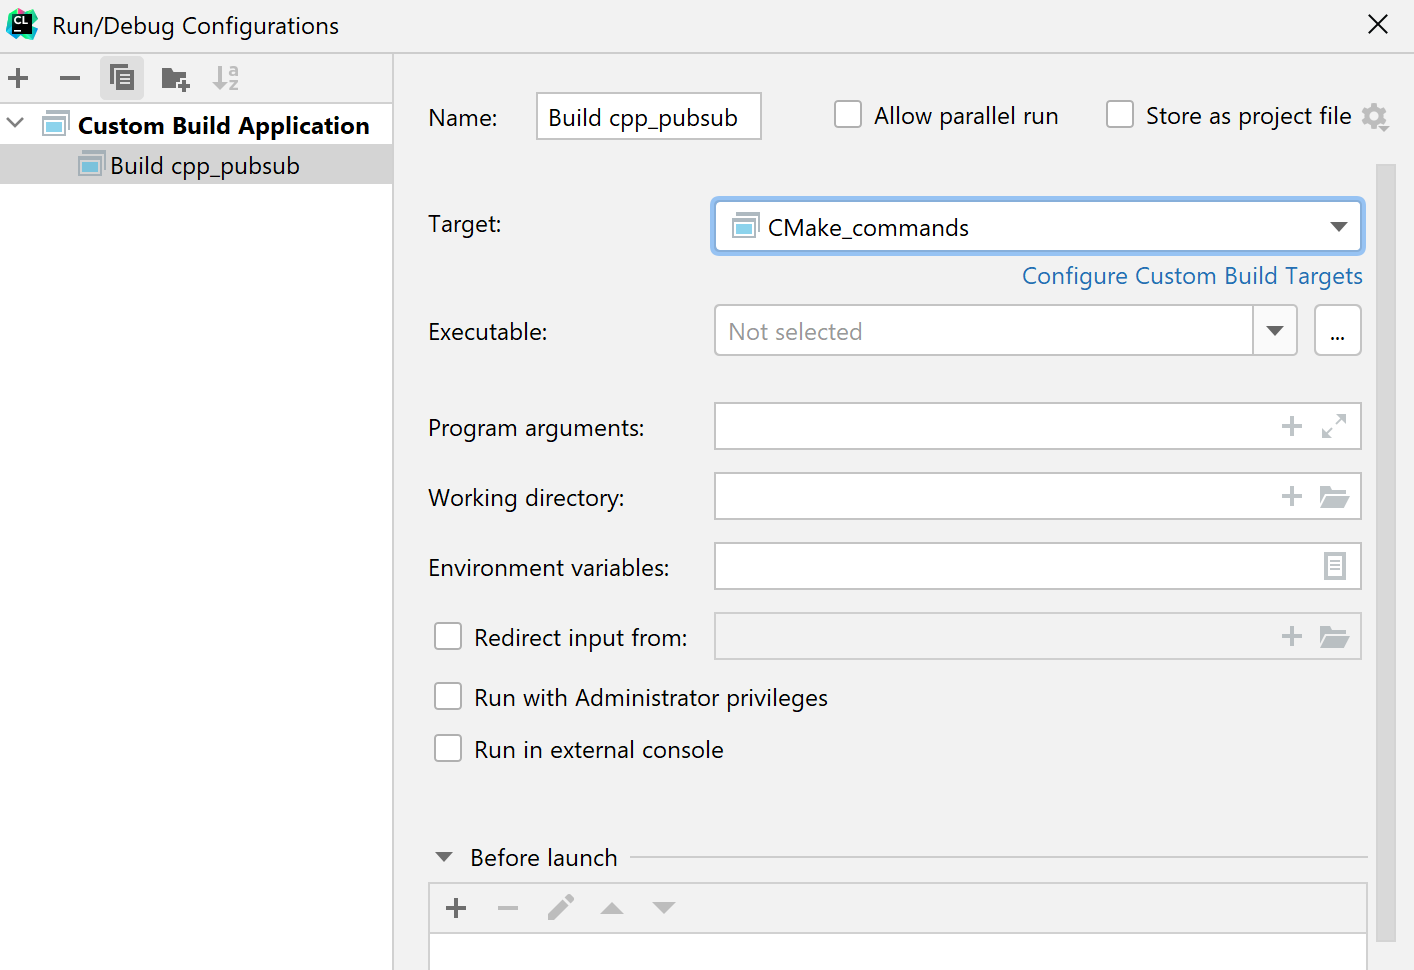
4. Build a package
Select the configuration in the toolbar switcher:
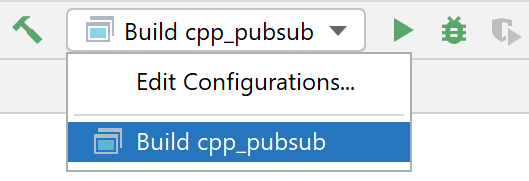
Click the hammer icon or press Ctrl + F9. Alternatively, call Build | Build 'Build cpp_pubsub' from the main menu.
Check the result in the Run tool window.
Run/debug a package
Open the Edit Configurations dialog again.
Modify the configuration for build to the following:
Set the Executable to the actual package binary.
Select the Run with Administrator privileges checkbox. See Debug as root for more information.
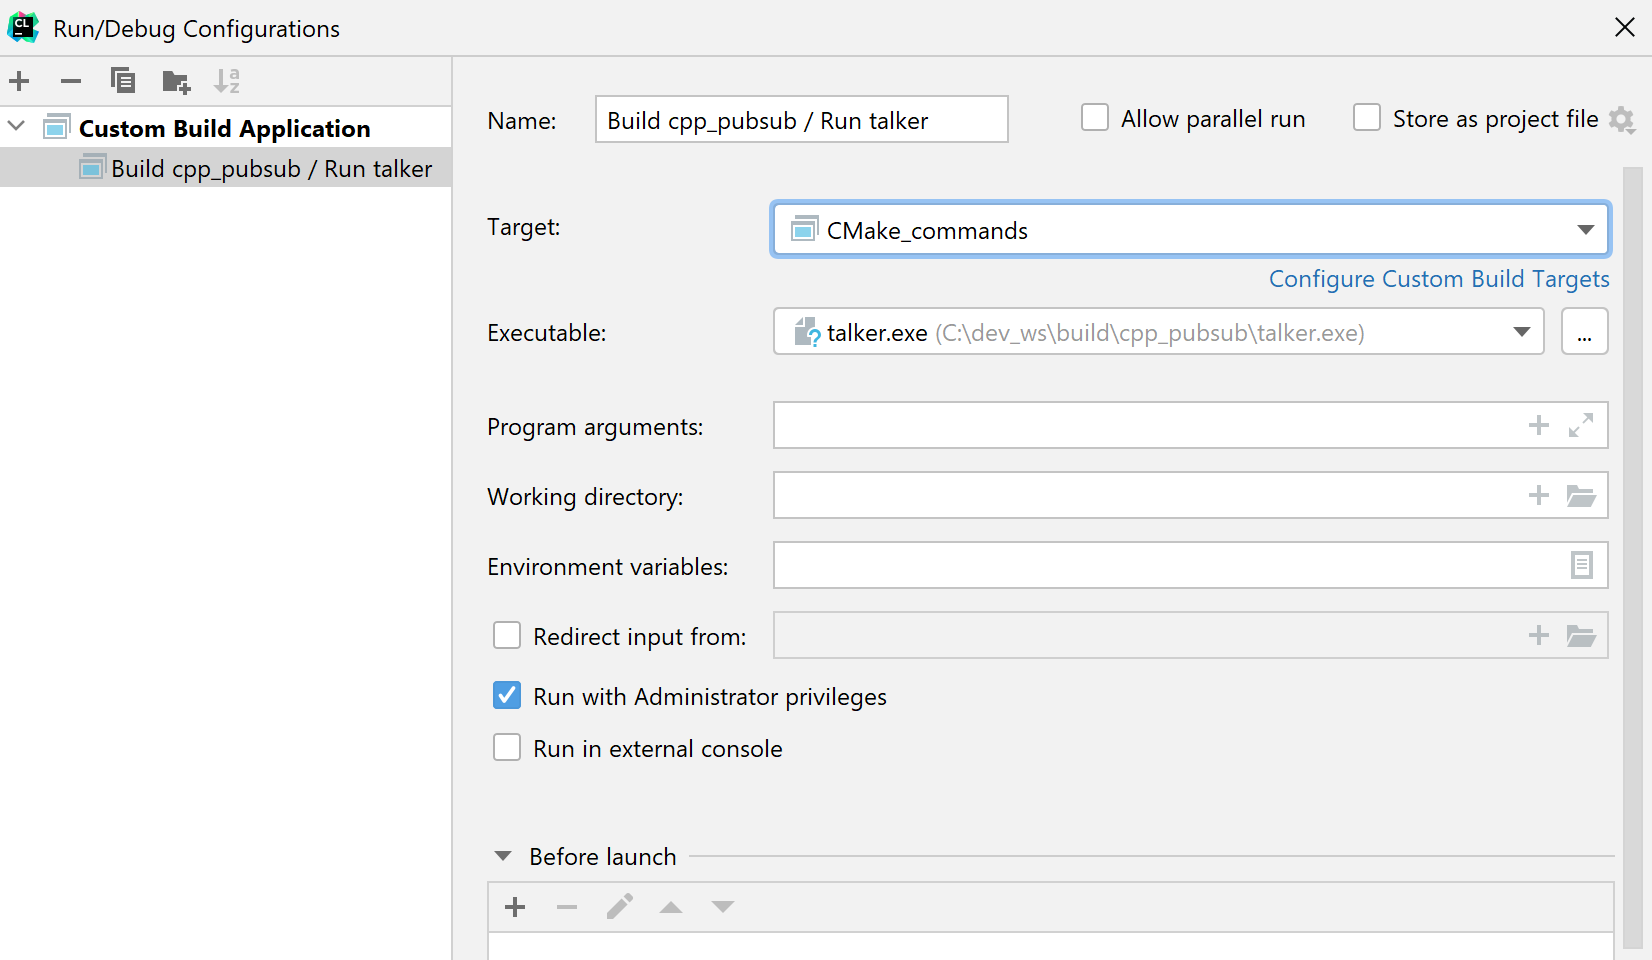
After saving the configuration, it is ready to be Run
or Debugged
. All the CLion debugging and dynamic analysis features will be available for the workspace code.
CLion will take the debugger from target's toolchain. In our case, it is MSVC LLDB.
How to build a workspace
Now let’s take a look at how we can add a new package and rebuild the entire workspace in CLion. To illustrate this, we’ll take an example of adding a Simple service and client package to our dev_ws workspace.
Prepare new package files
Build the whole workspace
To (re)build the entire workspace, we will configure an external tool for colcon build and call it without leaving CLion.
Go to and click
to add a new tool.
Configure the tool to perform the same
colcon buildcommand as we used when building from the command line: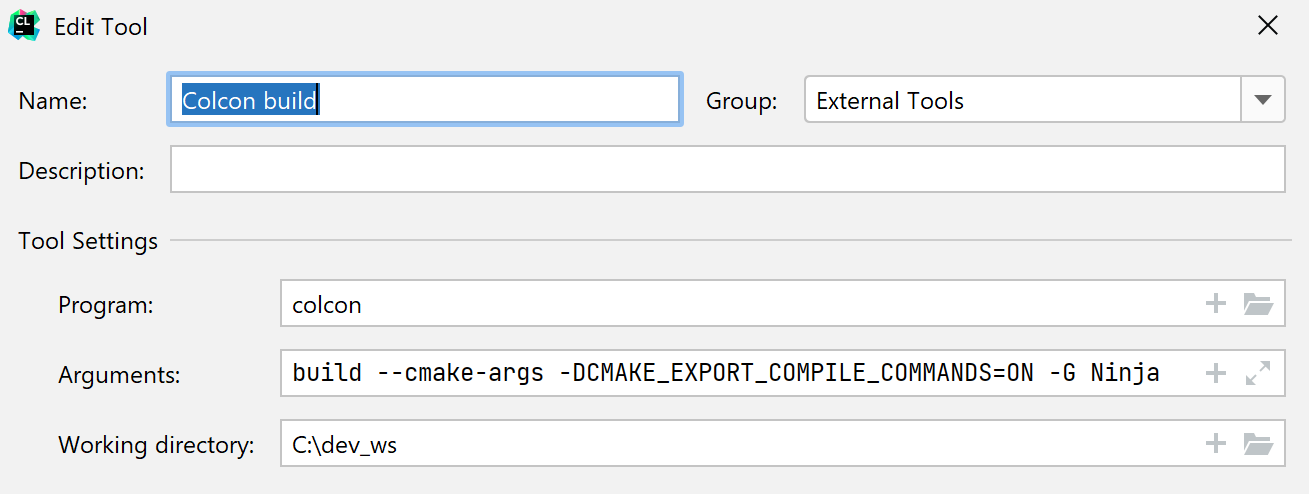
After saving the tool, call it via in the main menu.
Check the results in the Run tool window:
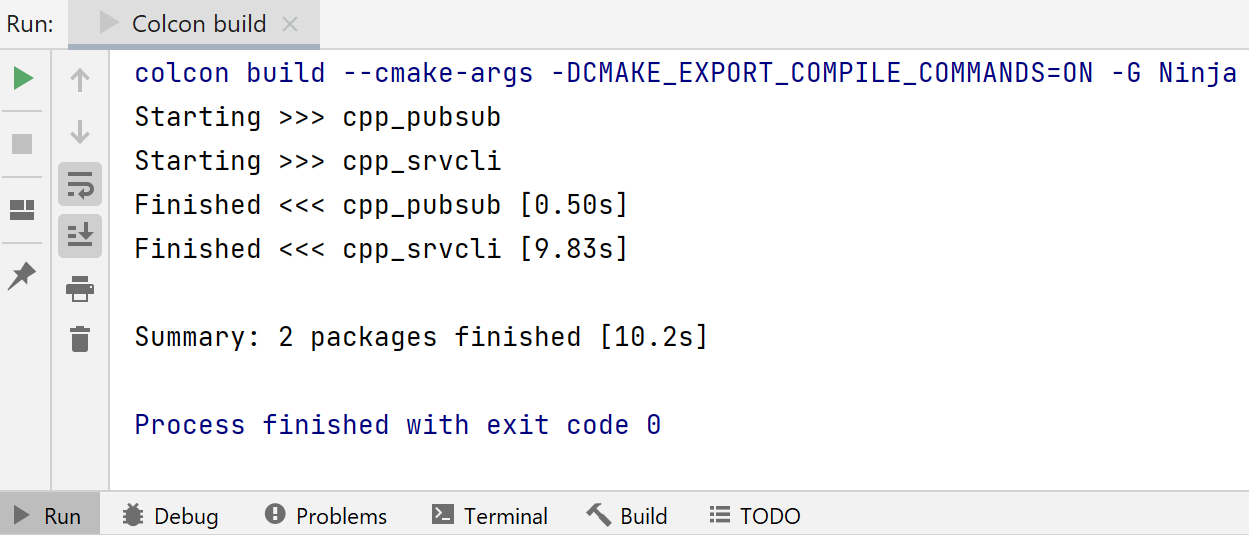
Check that compile_commands.json has been regenerated and now includes the entities for both packages:
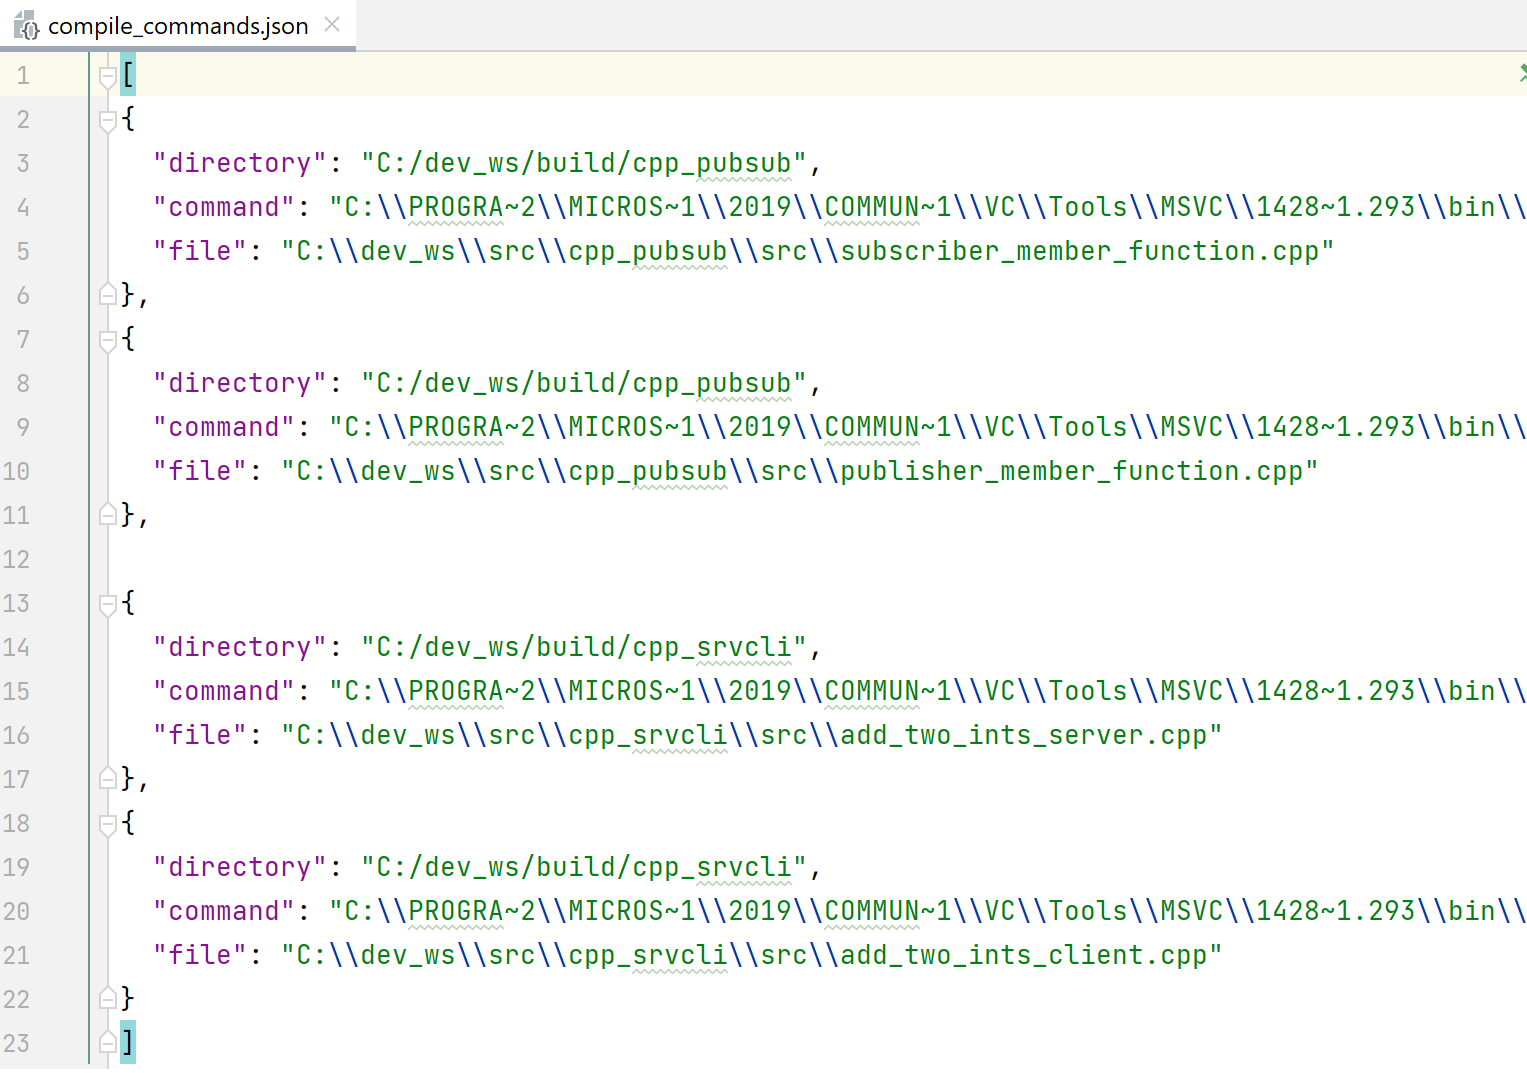
Make sure to reload the compilation database (press Ctrl+Shift+O or call form the main menu). To avoid reloading the project manually, configure auto-reload.
At this point, both of the packages are included in CLion project model and you can work with them as usual. To build and run the second package, follow the steps described above.