Create a Project
To create a project
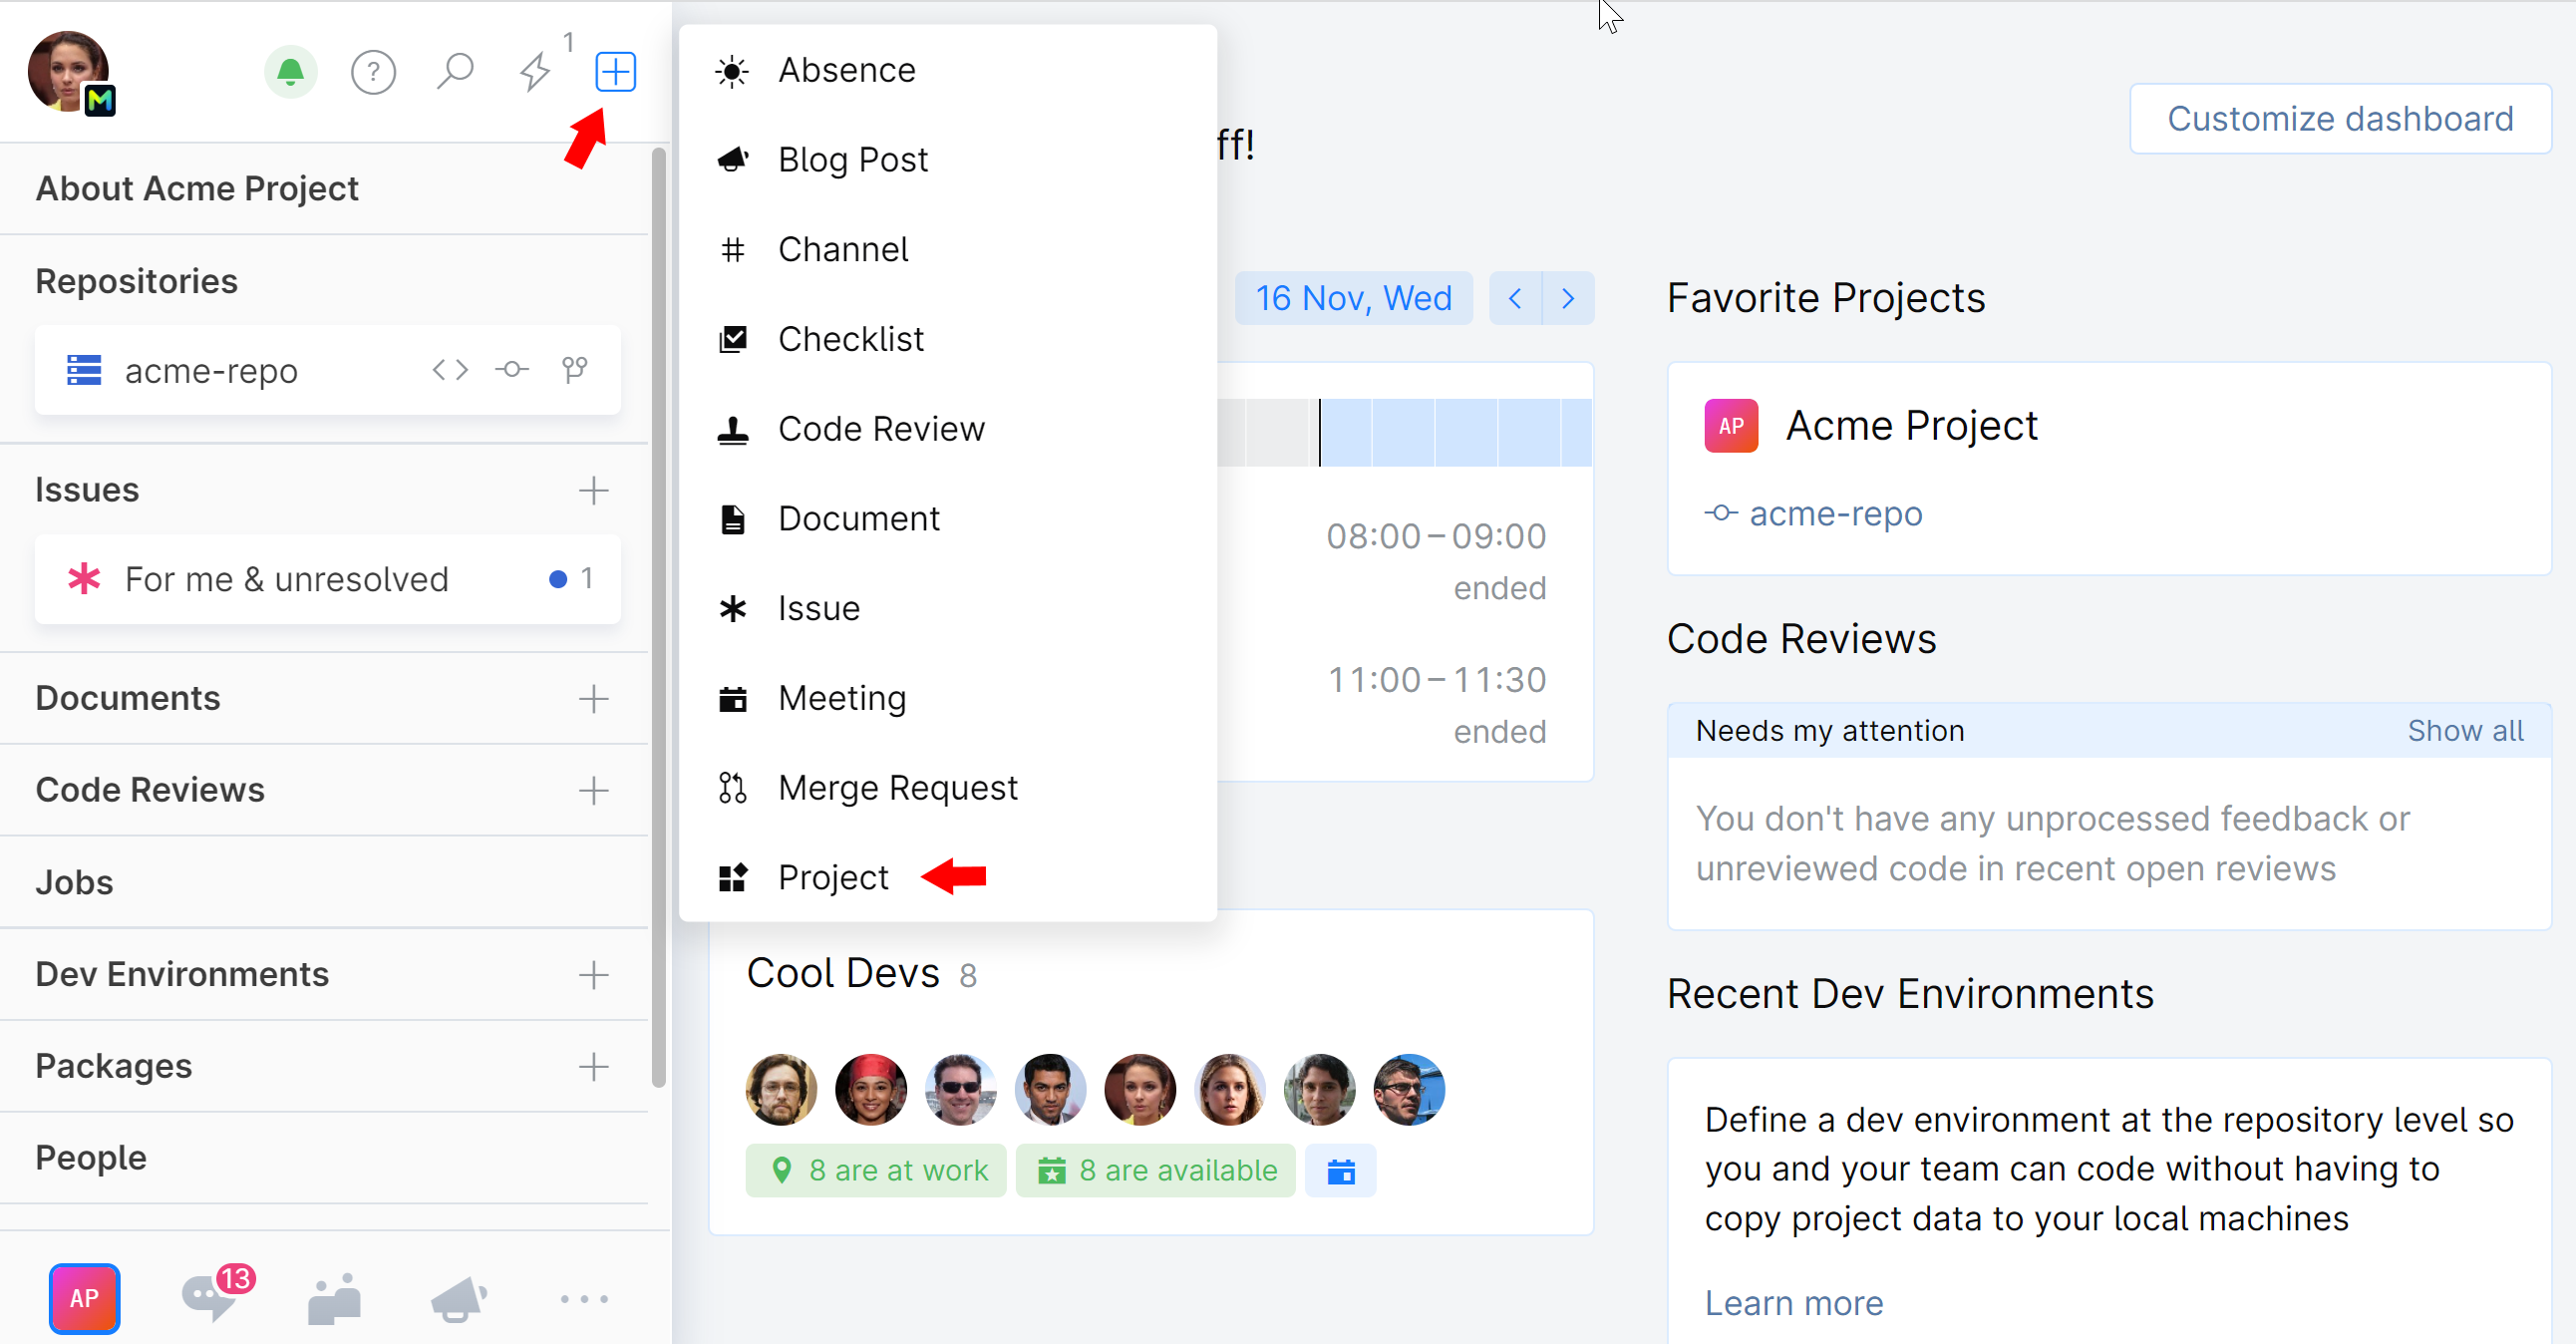
On the top left, click
 and choose Project:
A New Project form will pop up.
Fill out the form:
Name: Come up with the project name, at least two characters long.
Key: A short unique project identifier that will be used in code reviews, issues, etc.
Tag (Optional): A tag to attribute a project to some group of related projects. Can be in the form of a slash-separated virtual path. Select an existing tag from the drop-down list, or create a new one by clicking Add tag.
Restricted (Optional):
A restricted project is only visible to its members assigned by the project administrator — all others won't be able to see and access it. (Available starting with Organization plan.)
An internal project, including all its resources (repositories, reviews and discussions, documents, issues, etc.), can be viewed by anyone in organization. The Project Administrator can still limit the access to selected project resources (commit, create reviews, view and edit documents, etc.) to specific members or teams.
Description (Optional): A short informative description of your project that will be displayed under the project name.
Click Create when done.
The project will be created and you'll be prompted to its home page.
Now you can add a repository, text documents, and checklists to your project, or come back to it later.
You will also need to specify who will have access to this project.