Notification Settings
In Space, all notifications that are relevant to you are posted to your notification feeds in Chats. Notification feeds are your personal read-only channels that are only visible to you.
Choose what you want to be notified about
Space comes with a default notification feed #Spacebox which receives all the notifications from a set of events you are subscribed to. These predefined subscriptions cover all the events that concern you, such as documents shared with you, meetings you’re invited to, approvals of your absence or membership requests, failed or successful automation jobs, and so on.
Space notifications are highly customizable. You can:
Turn off your predefined personal subscriptions or edit them to unsubscribe from specific events.
Add custom subscriptions to get updated on events not necessarily related to you. For example, you can choose to receive notifications about new issues in a particular project or new commits by a particular author.
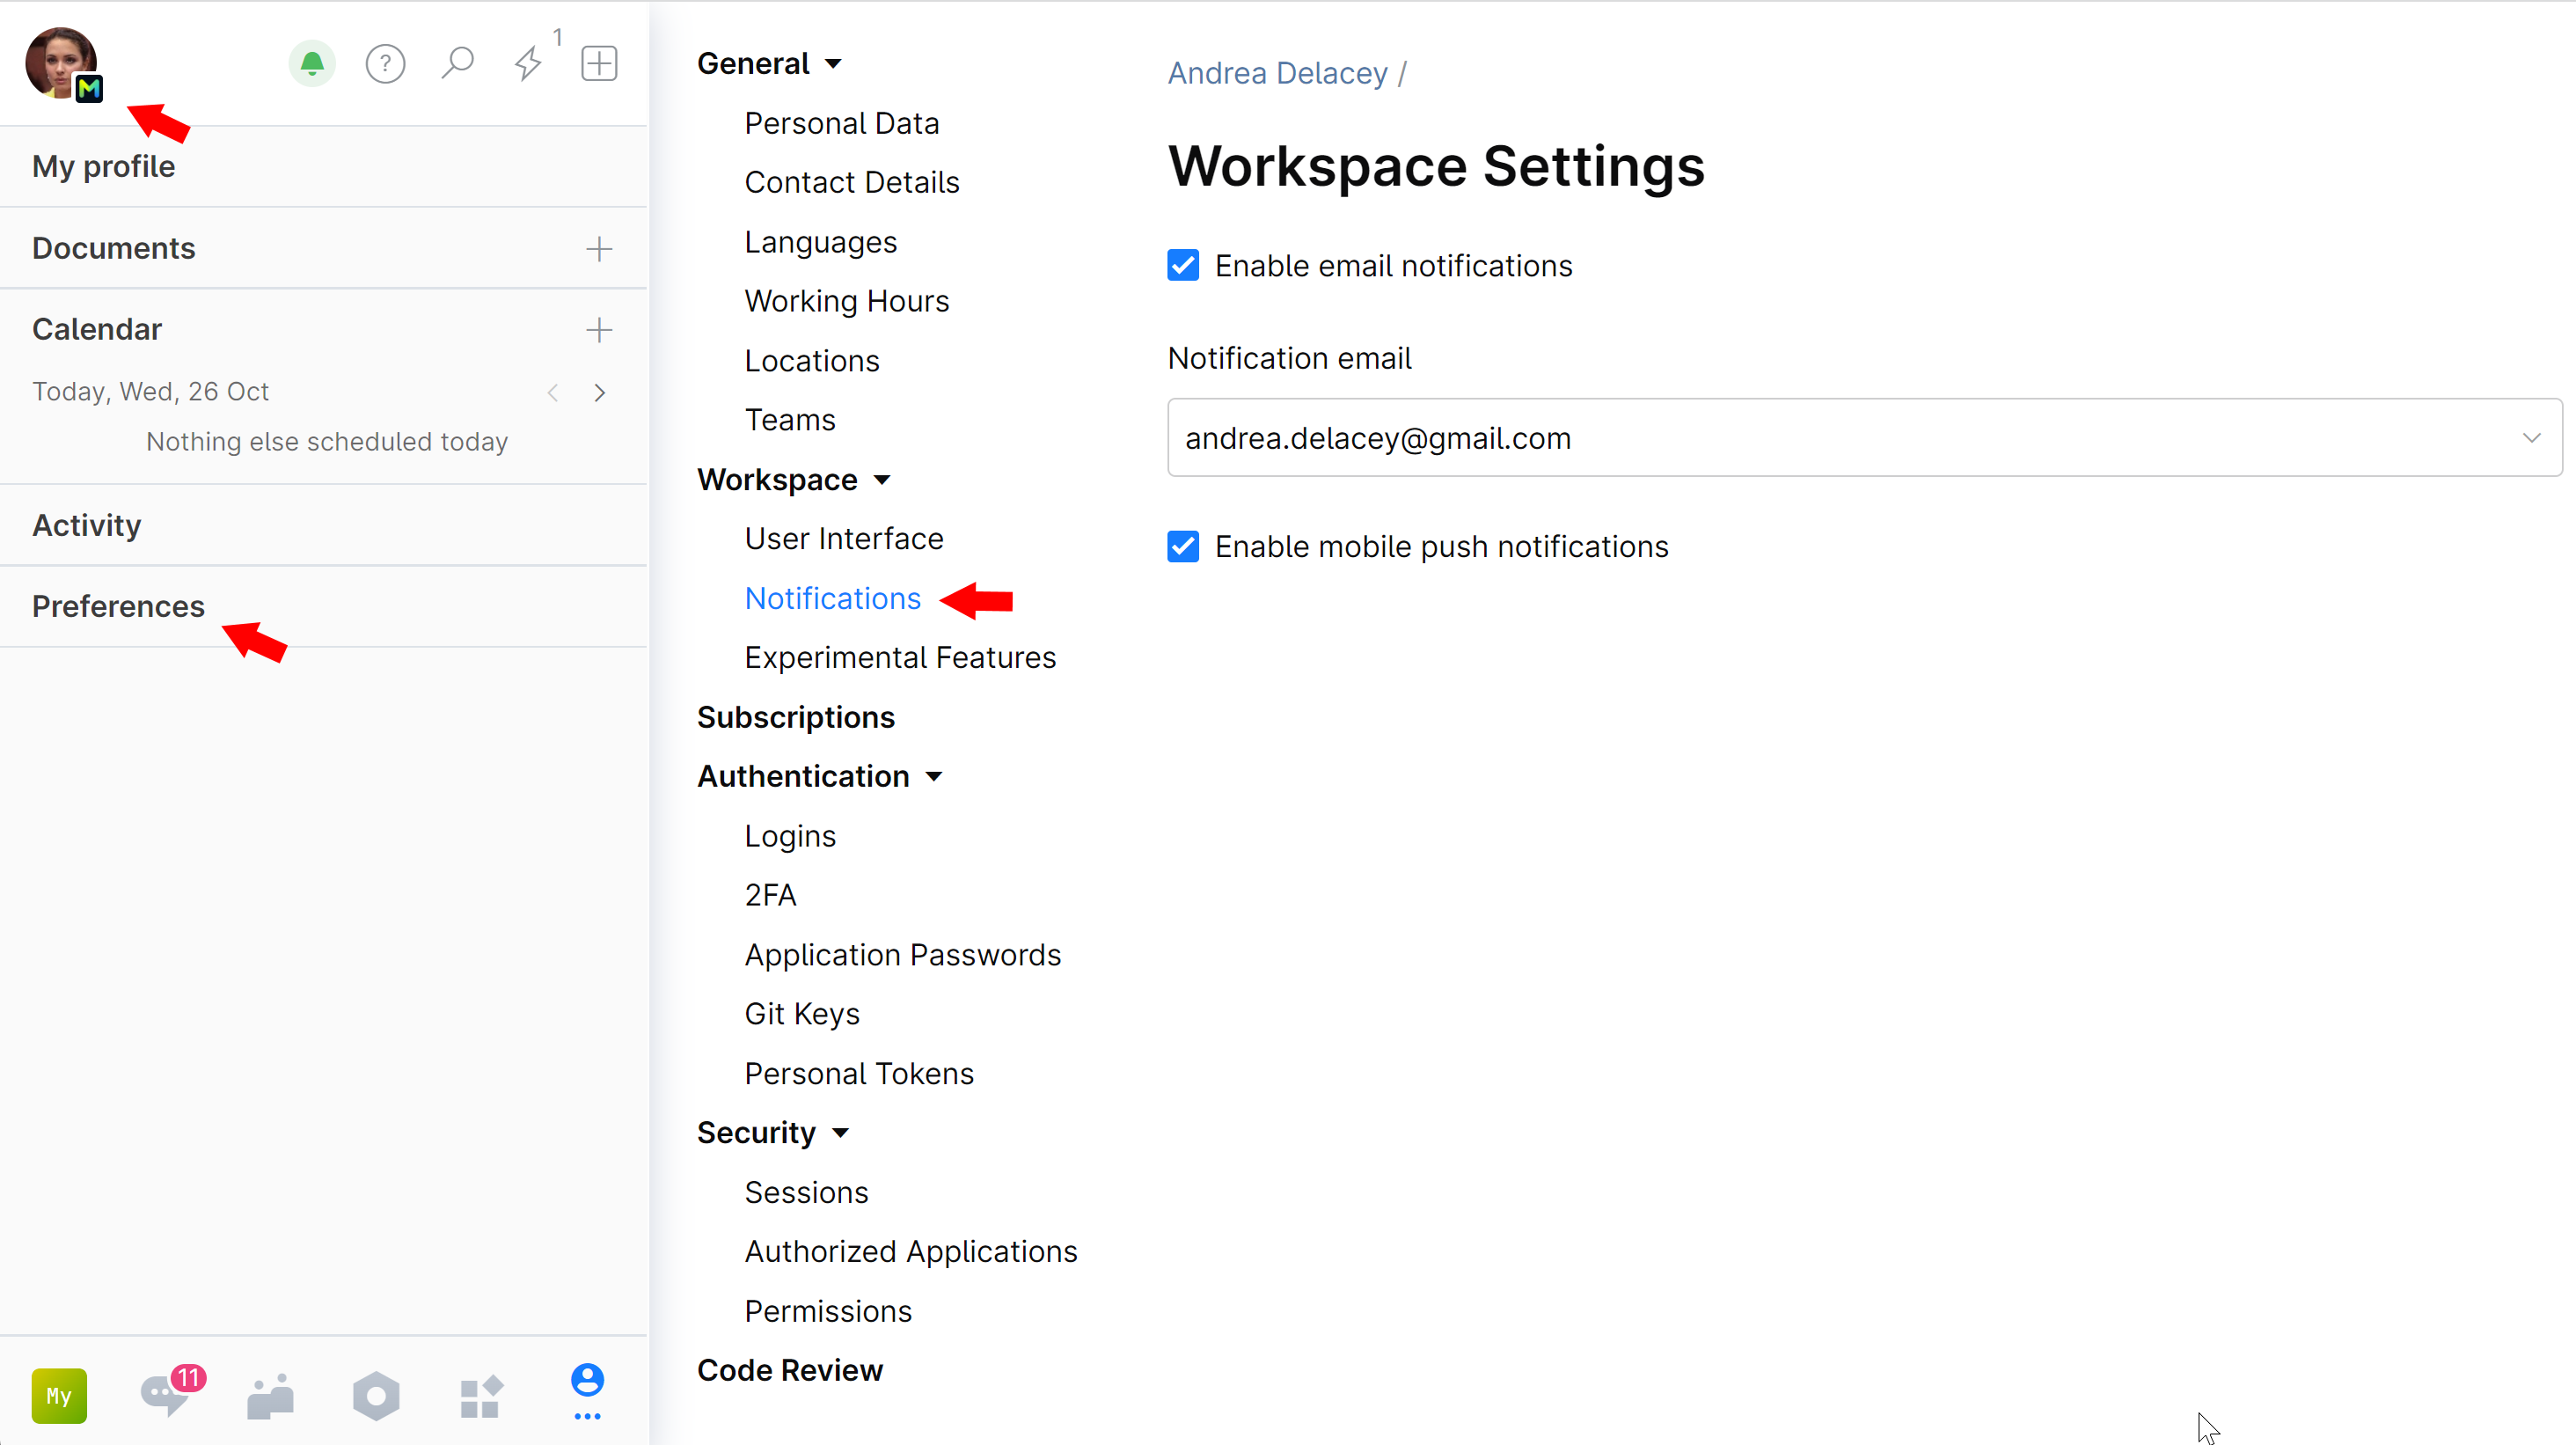
Turn on/off email and mobile push notifications. When disabled, notifications will be only delivered to your feeds.
Access notification settings
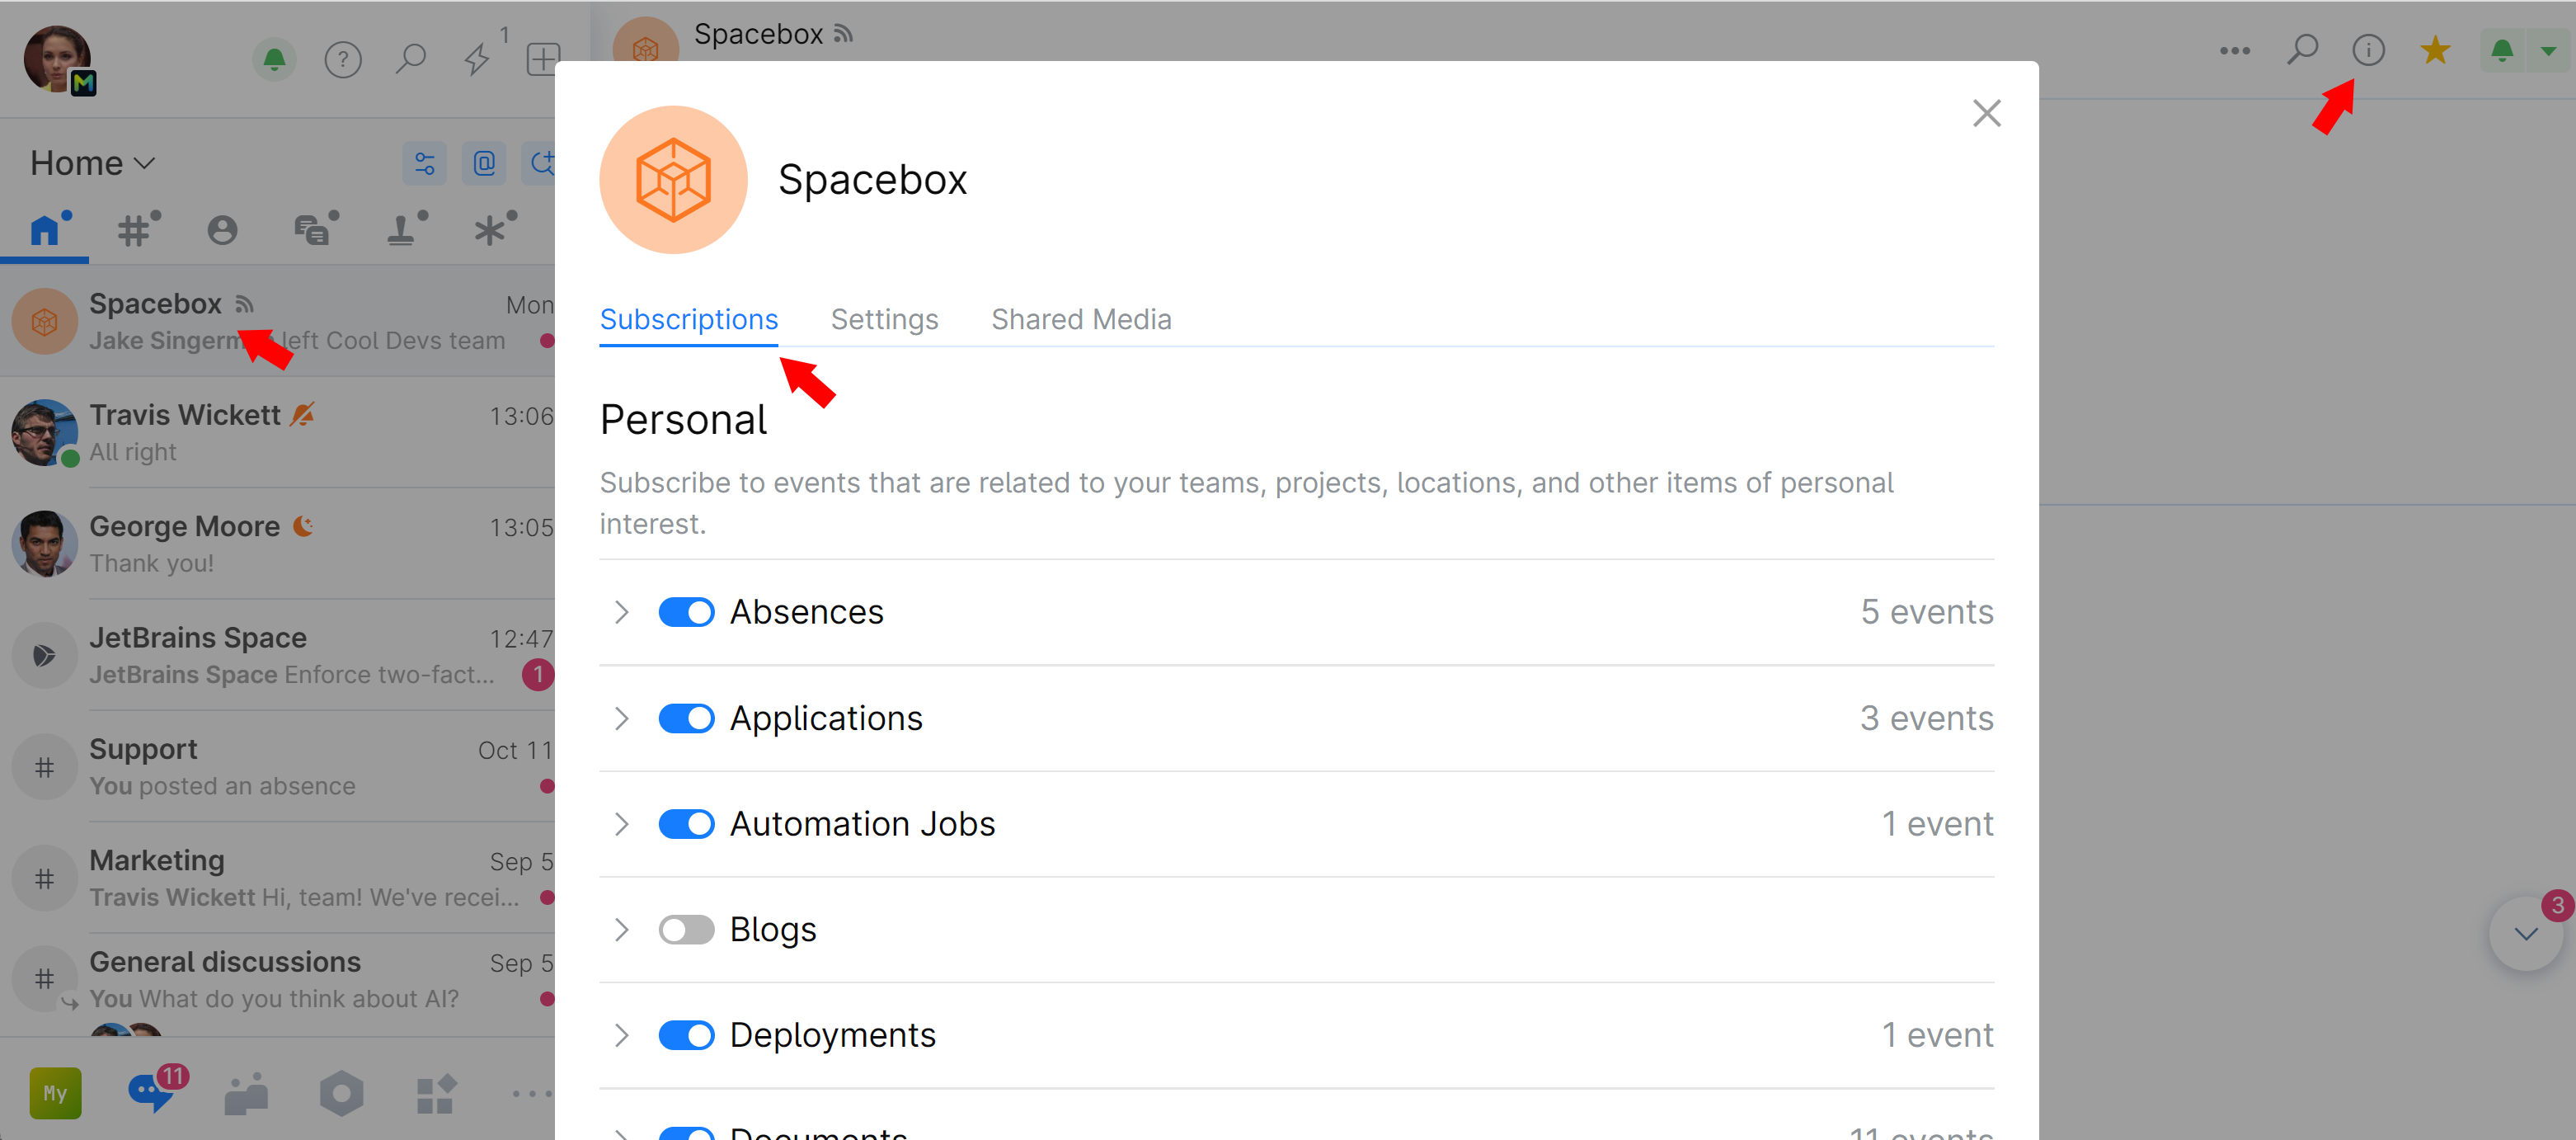
You can also access your notification settings directly from your #Spacebox feed or from whatever additional feed your notifications are delivered to.
Navigate to Chats, open your feed, click ![]() (on the top-right), then go to the Subscriptions tab:
(on the top-right), then go to the Subscriptions tab:
Edit predefined subscriptions
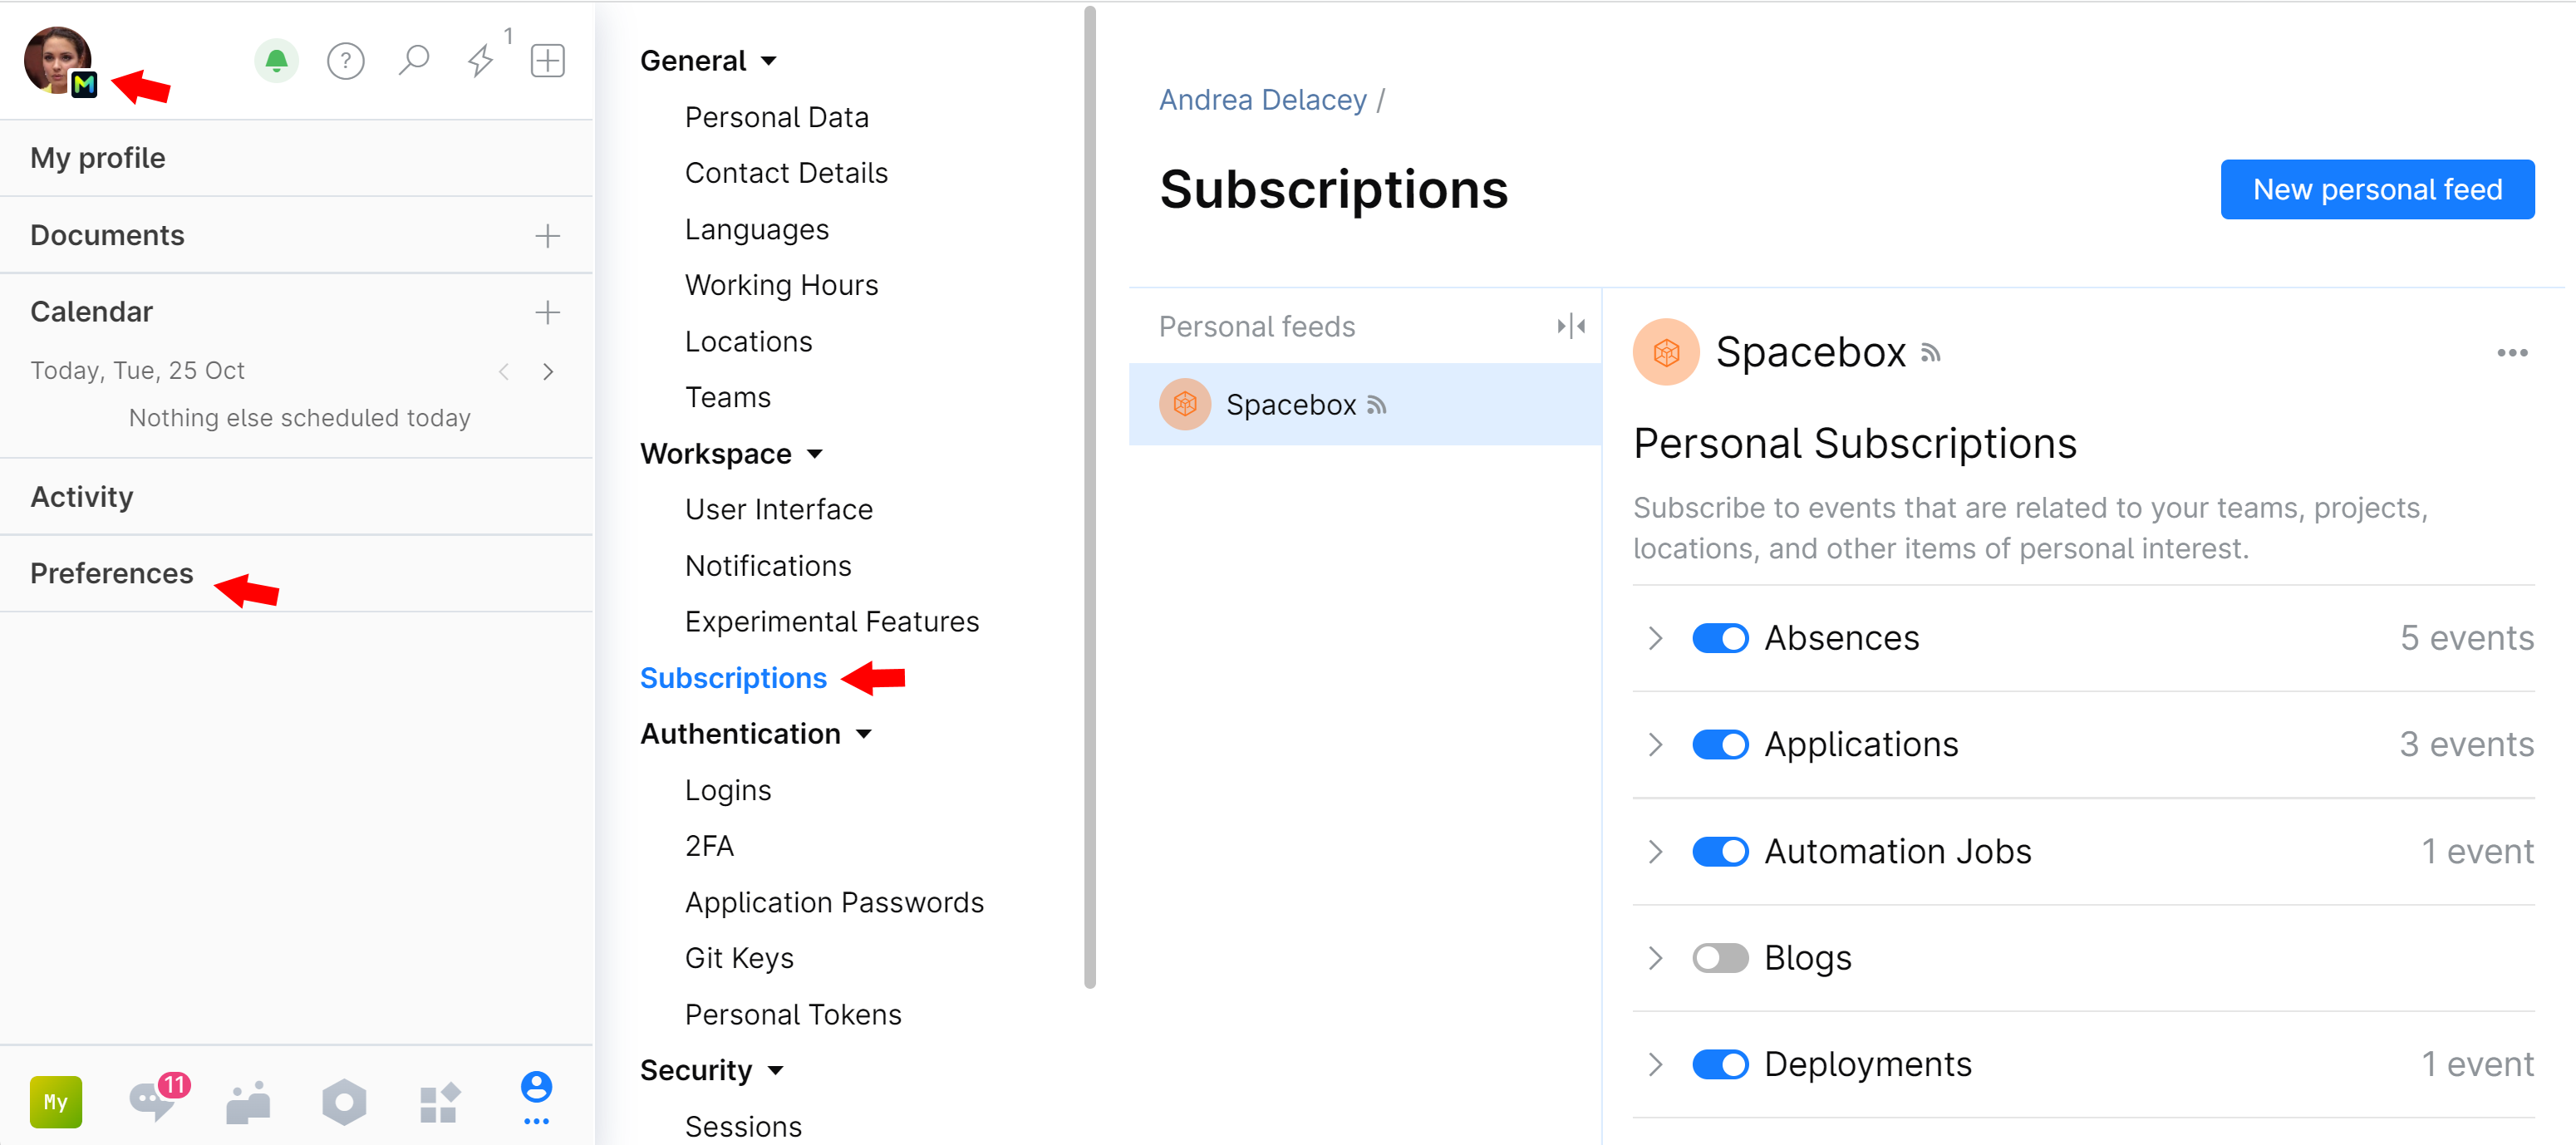
On your personal navigation sidebar, choose Subscriptions,
Or
Go to Chats, open your notification feed, then click
 and go to the Subscriptions tab.
Your predefined Personal subscriptions are grouped by their source, such as: Absences, Blogs, Documents, and so on.
To completely disable unwanted subscriptions, use the toggles.
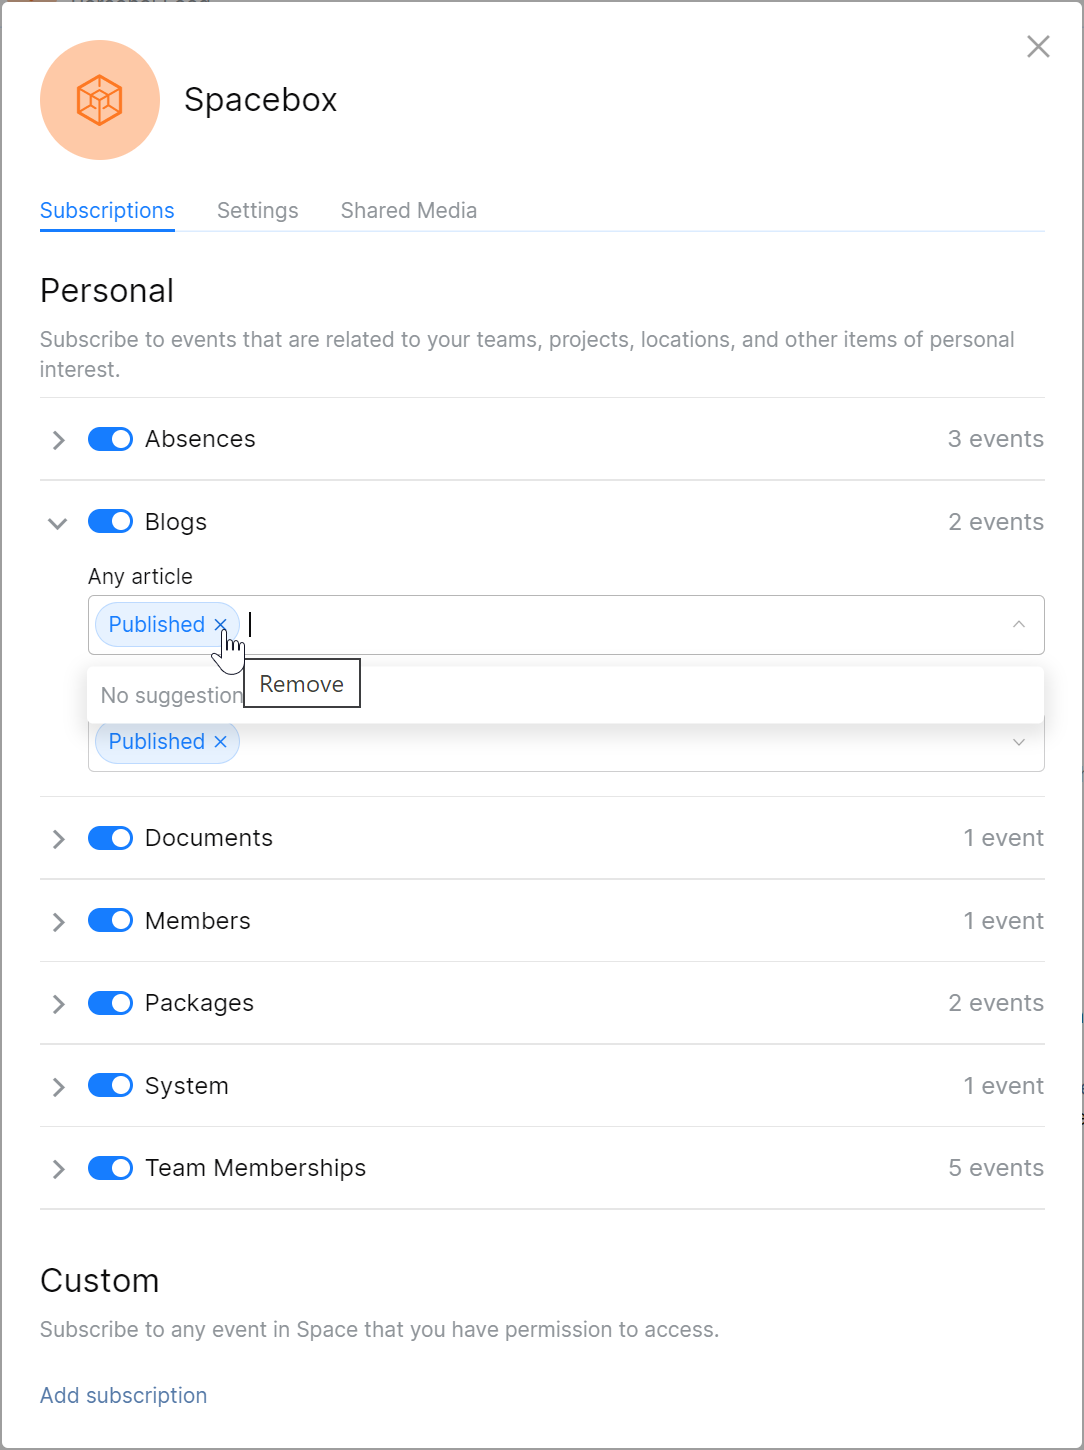
To fine tune a subscription, expand it, then add or remove individual events that are included with it:
Add custom subscriptions
While personal predefined subscriptions update you on the events that are connected to you in one way or another, the custom subscriptions provide you with a much wider scope of events and filtering options to choose from. You can subscribe to all kind of events from various parts of Space, including the ones not directly related to you.
On your personal navigation sidebar, choose Subscriptions,
Or
Go to Chats, open your notification feed, then click
 and go to the Subscriptions tab.
Under Custom Subscriptions, click Add subscription.
Give the subscription an informative name that would reflect its settings.
Choose the subject from the drop-down list. Subject is a category of events from a certain source, e.g. Absences, Blogs, Issues, etc.
Apply filters to narrow down the source to specific entities. For example, if your subject is Issues, you can choose a specific project to get updates from.
Choose the events you want to be notified about, e.g. Issue created.
Click Add.
Create additional notification feeds
You can create additional notifications feeds if you're getting too many different notifications you can effectively track in a single feed. For example, you can create a separate feed named #Meetings and configure it to receive all your meetings invites and updates.
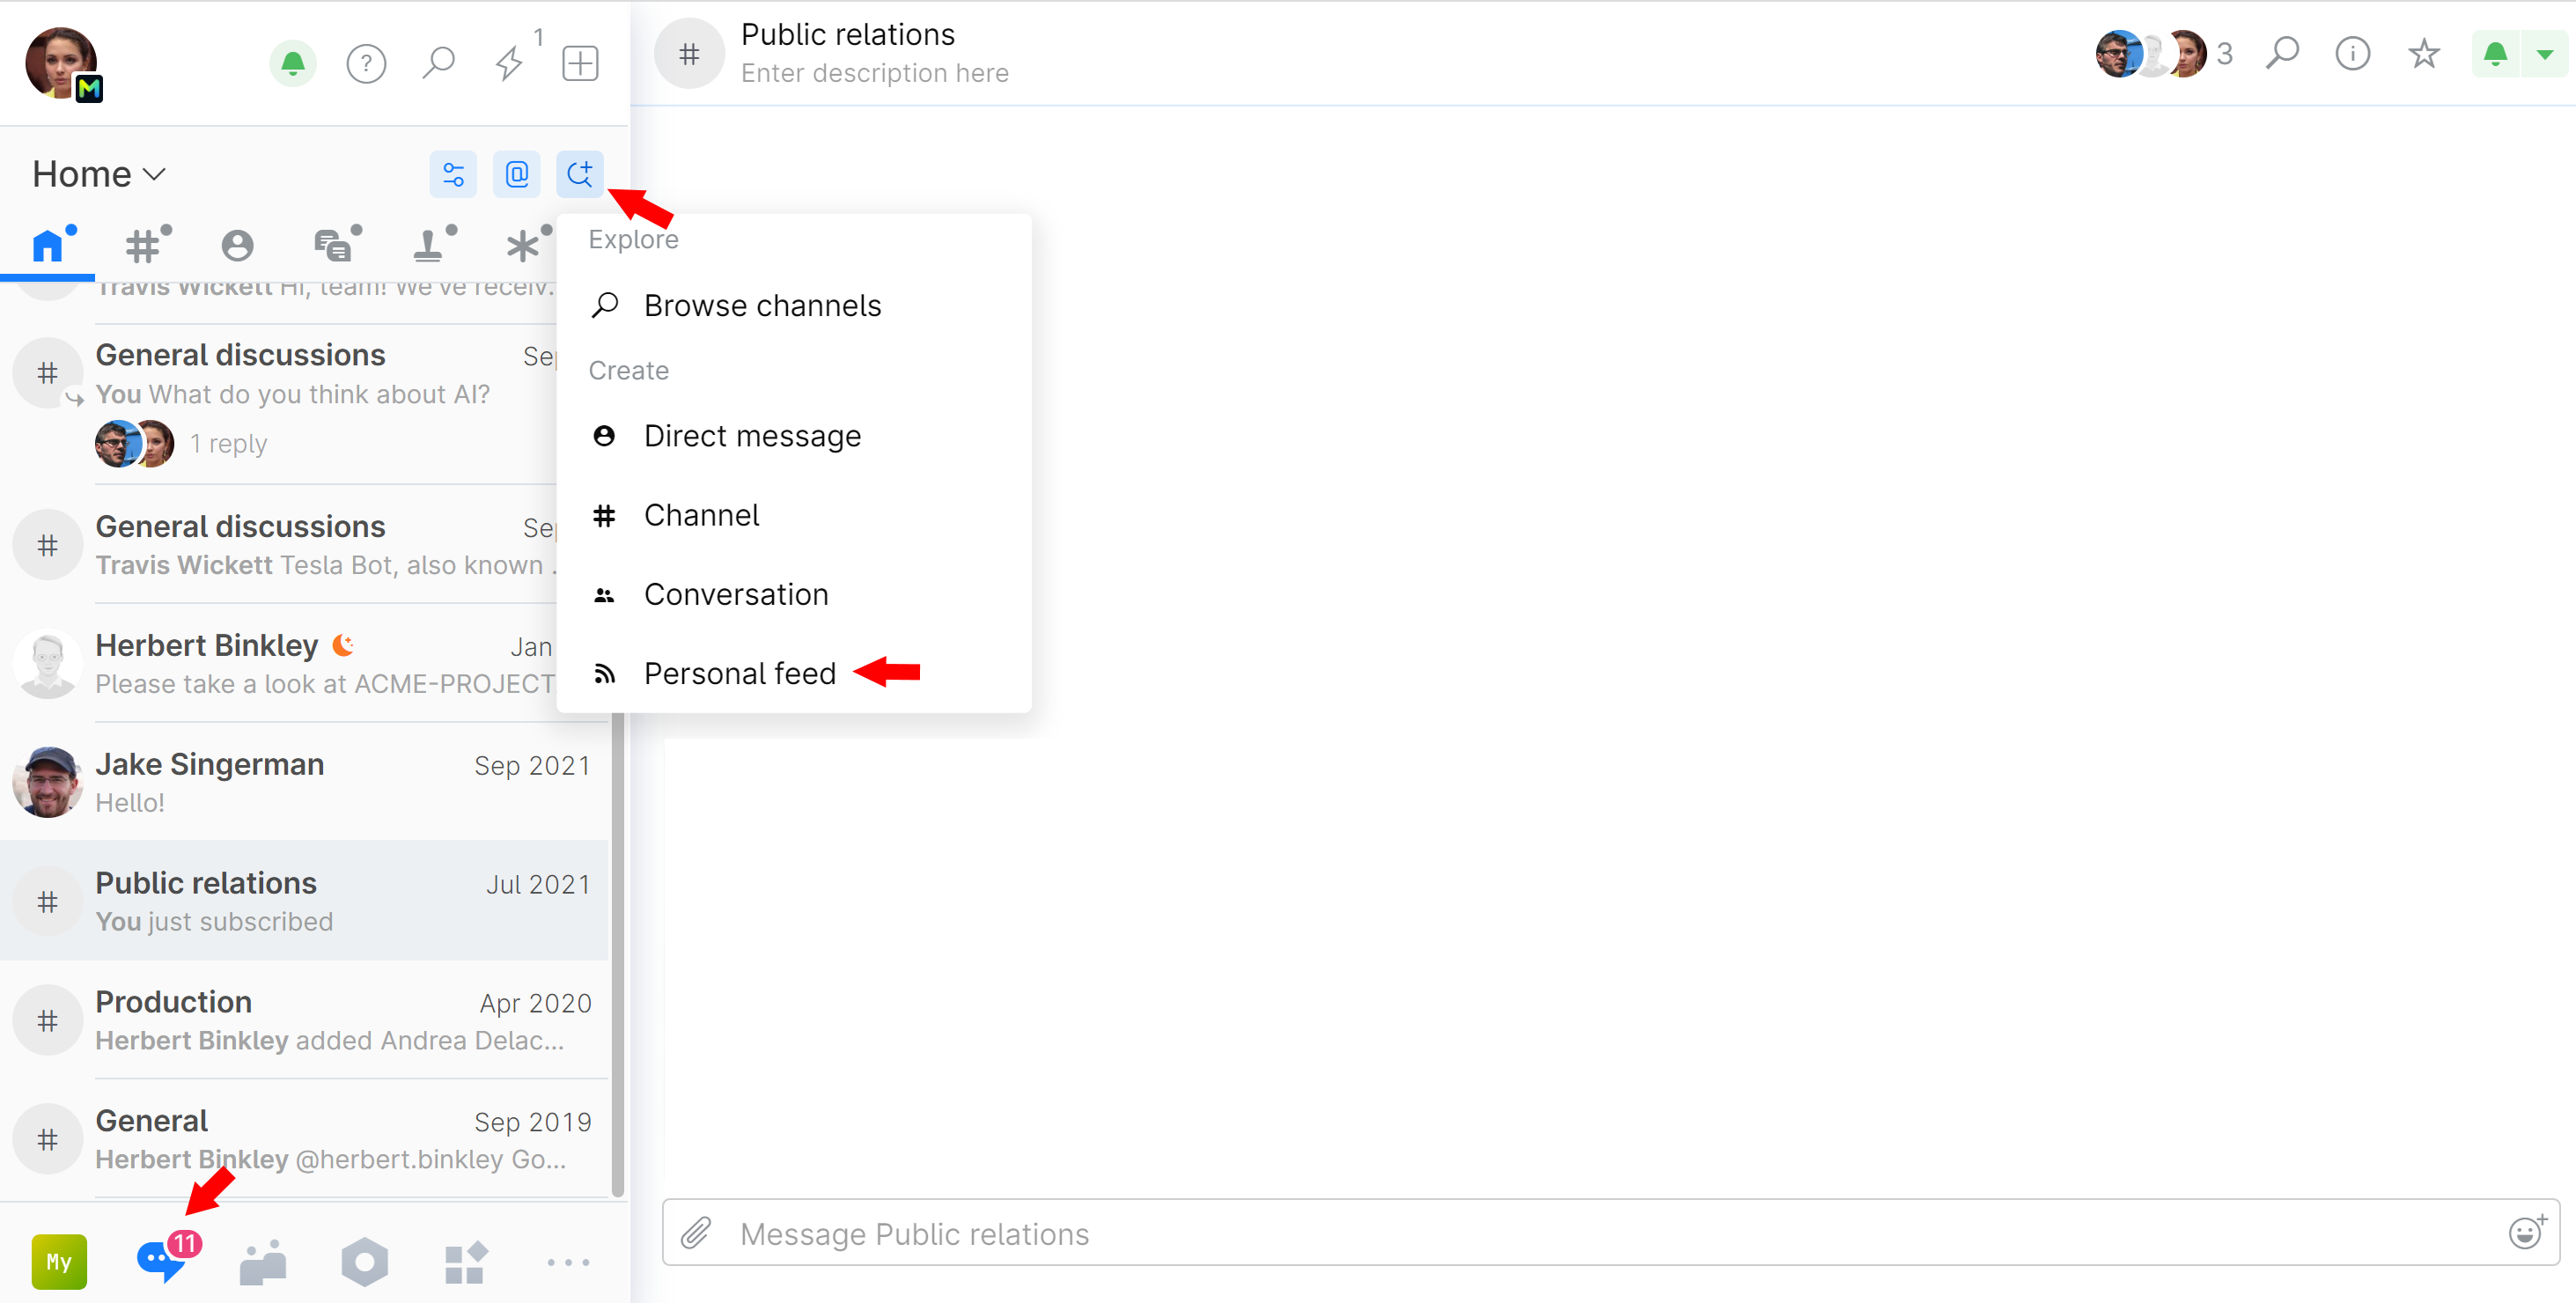
Go to Chats.
Click
 on top of the contact list and choose New personal feed:
Give your feed a descriptive name. For example, if you're creating this feed for meeting updates, you can call it Meetings.
To easily distinguish this feed from other channels, you can assign it a distinctive icon and color:
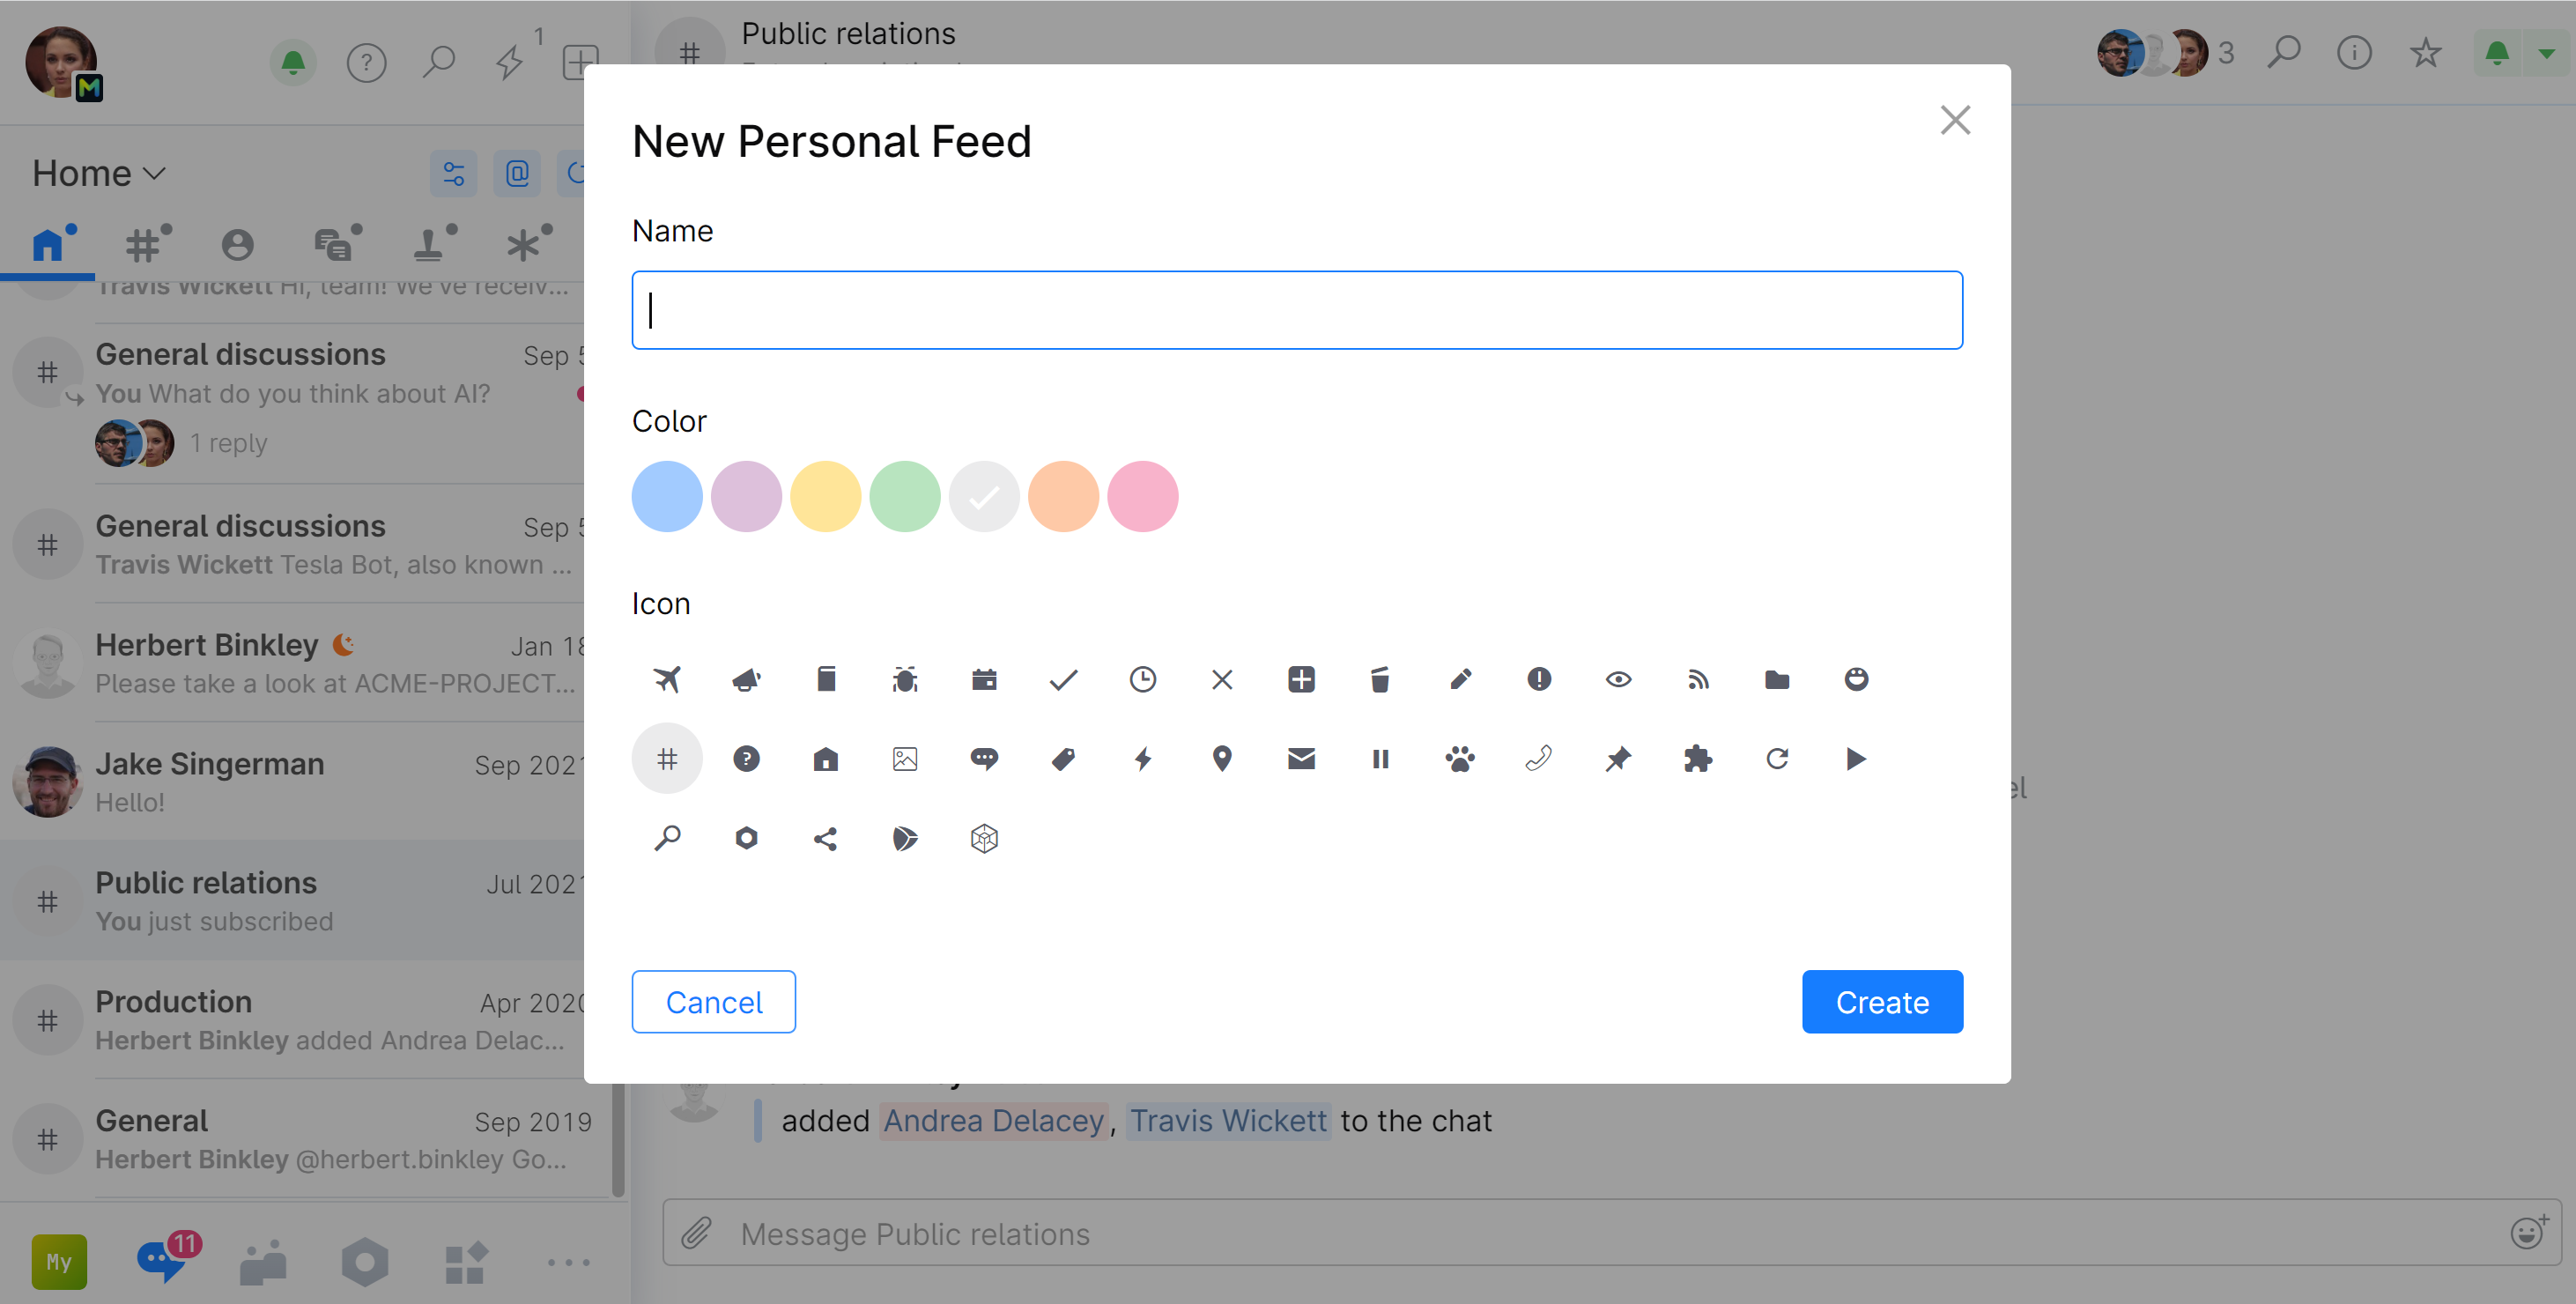
Click Create.
Once the feed is created, you can go to its Subscriptions settings and subscribe to a number of events by enabling and editing the predefined personal subscriptions or by adding a custom subscription.
The personal subscriptions you enable in this feed will be automatically disabled in your other feed.
Manage push notifications
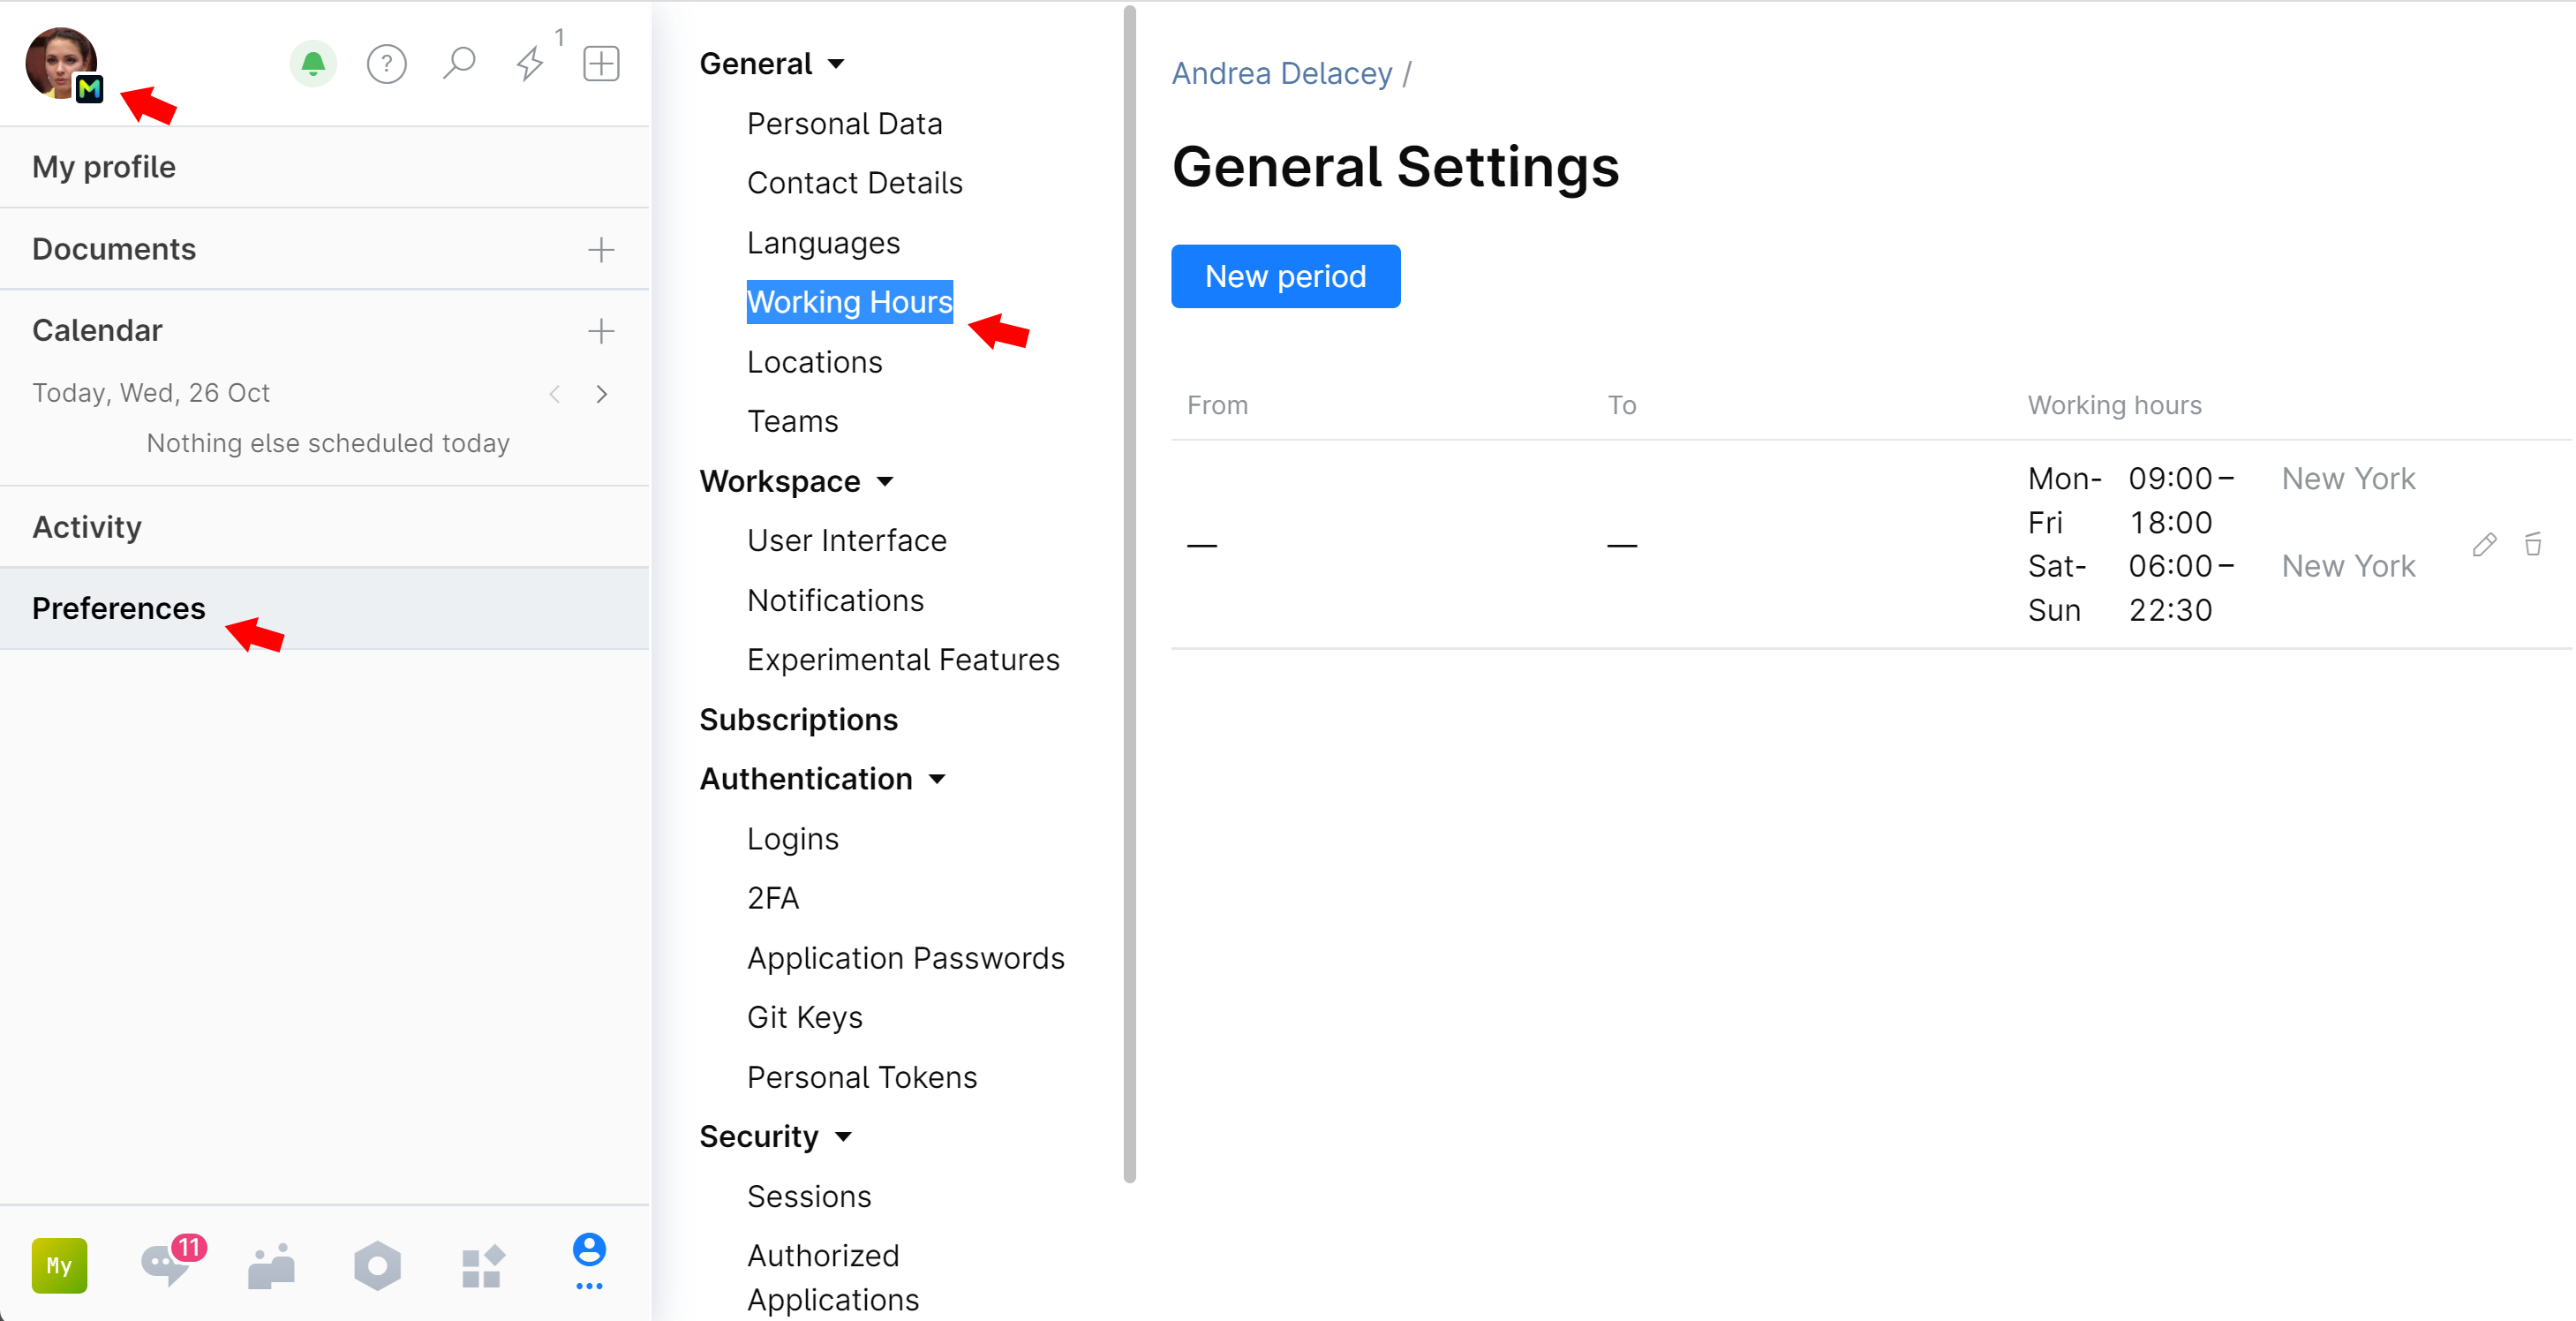
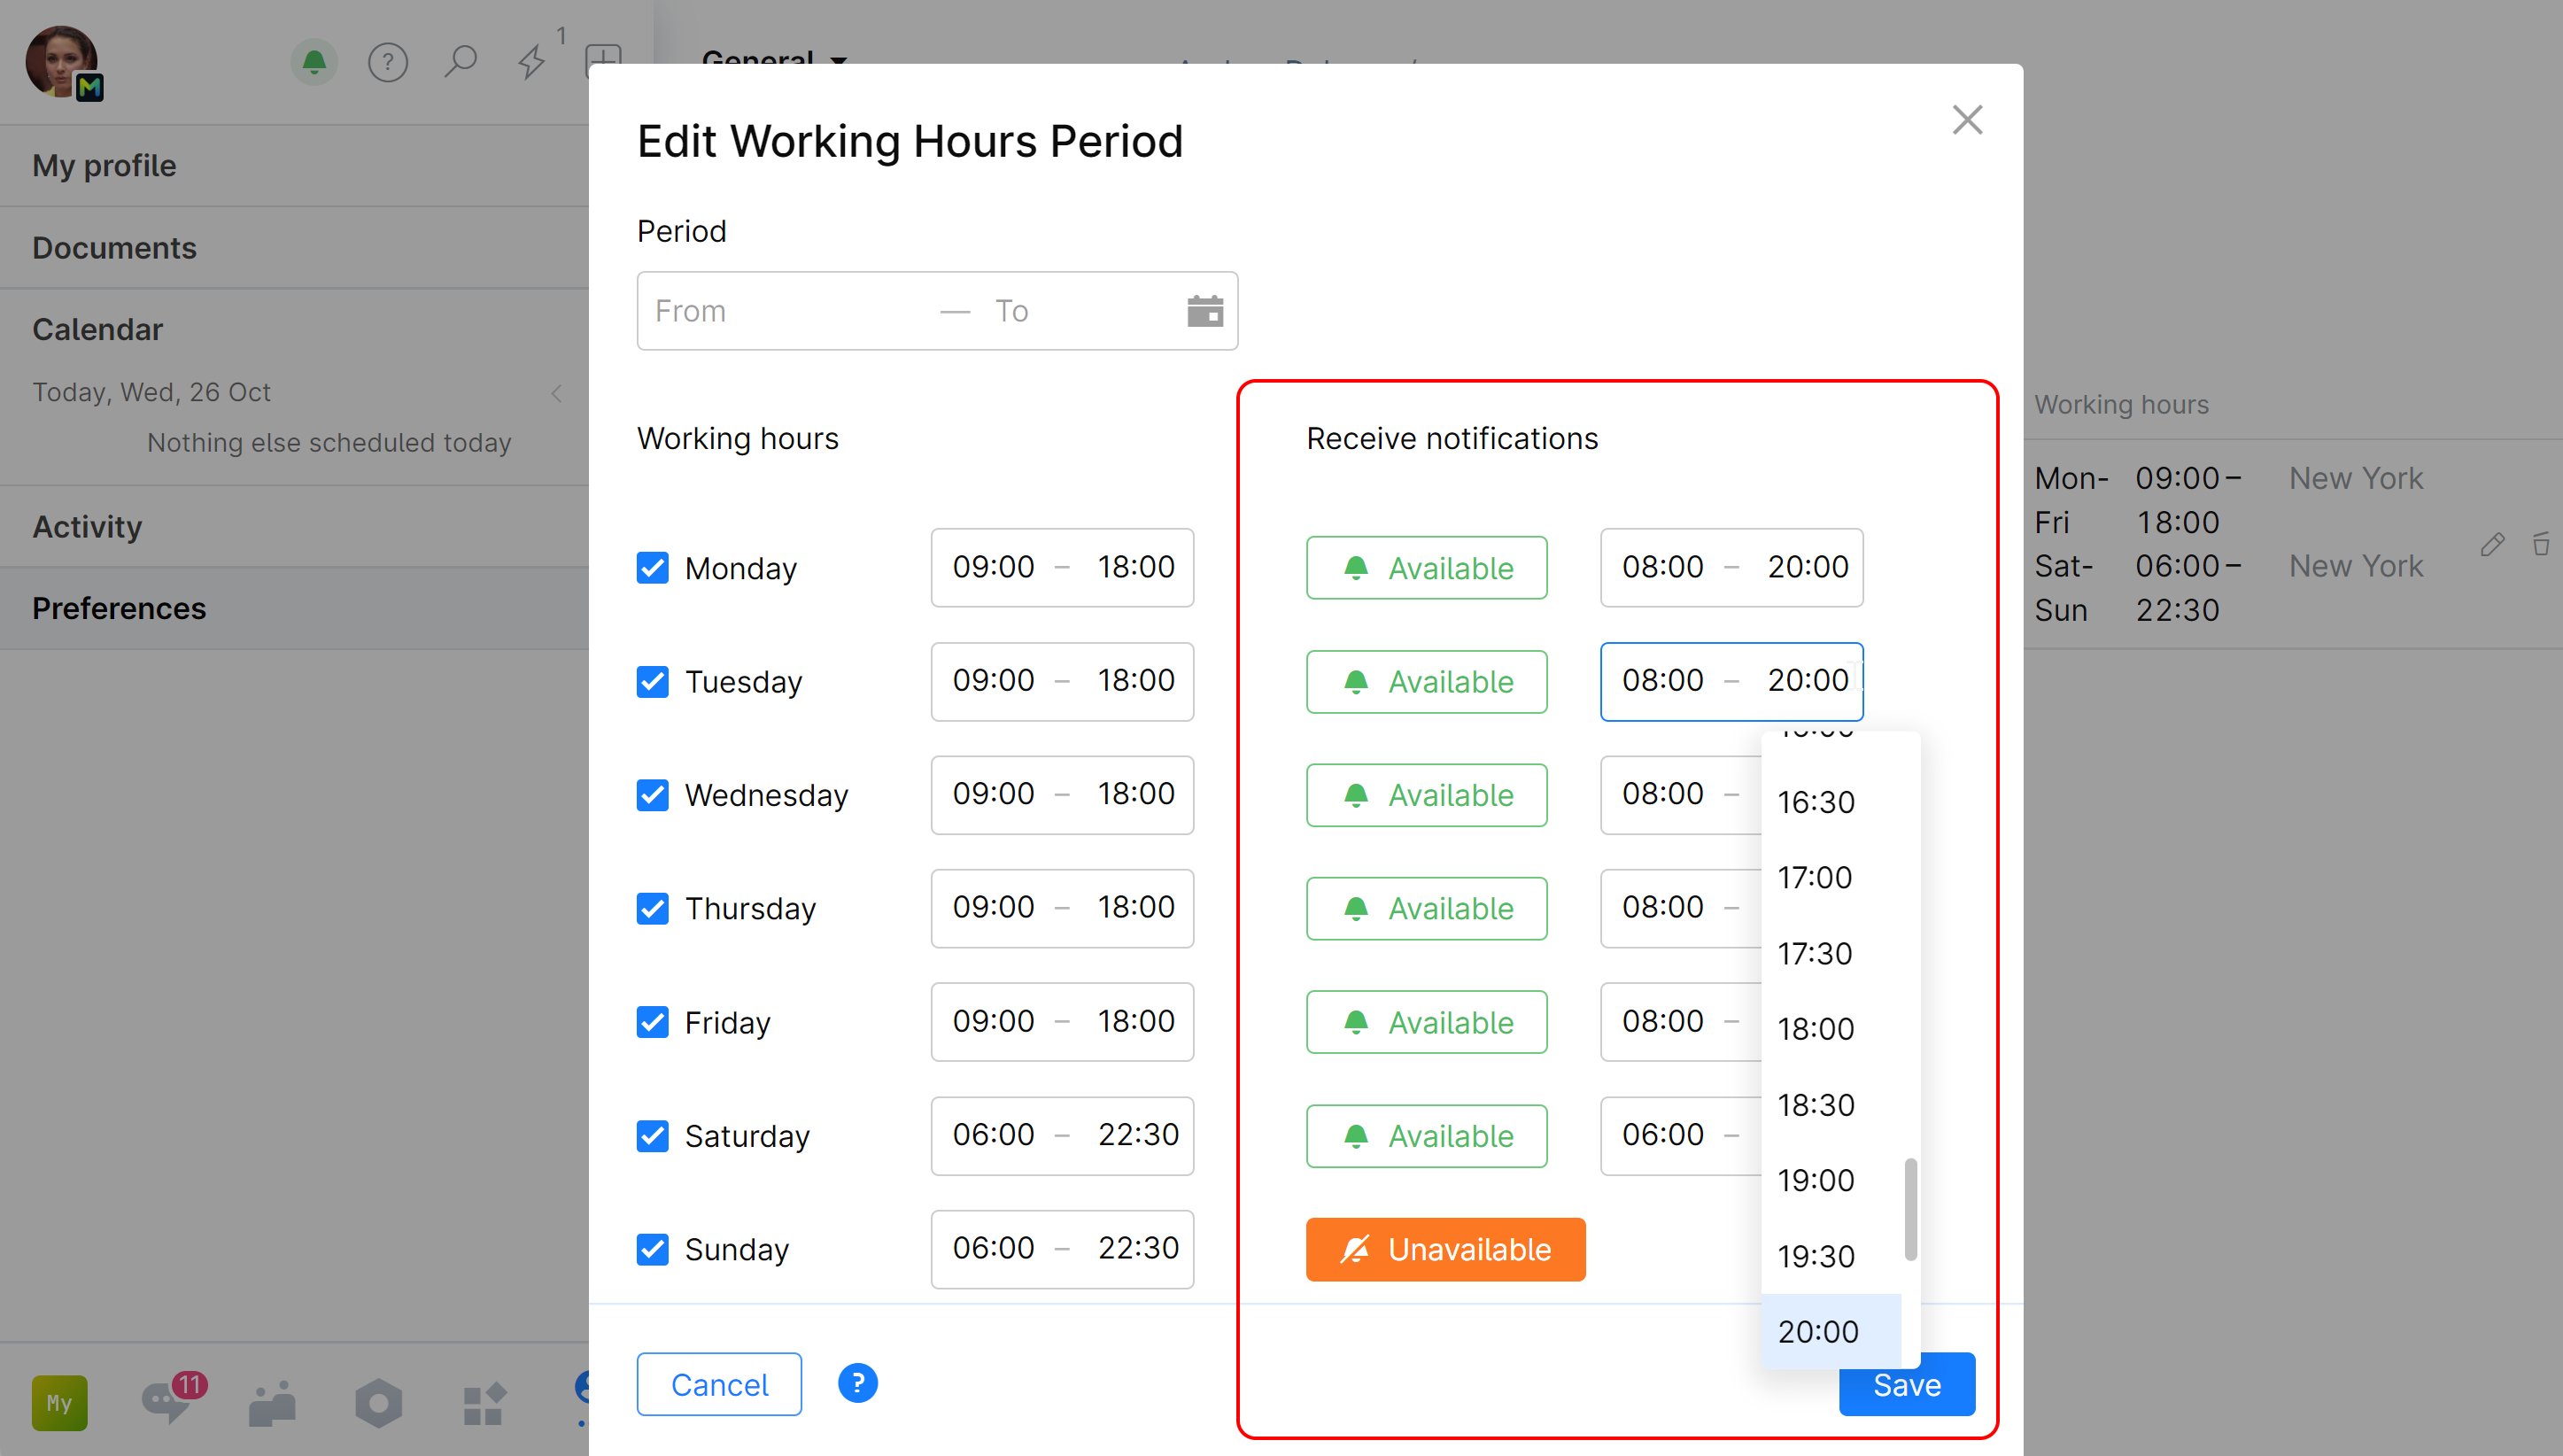
Set your notification schedule to receive push notifications on your phone or desktop app only during selected hours.
Your Availability Status will change according to these setting.
Turn ON/OFF email and mobile push notifications
You can stop receiving all notifications to your email and/or push notifications to your mobile device.
When these options are disabled, you will only receive notifications to the Chat.
