
Adding dependencies
Adding JUnit 5 Dependencies.
This project is currently using JUnit 4.13, but these guidelines apply to any version of JUnit 4. We also have a dependency on Hamcrest. We need to edit our Maven pom.xml file.
<!-- start of pom.xml is above here -->
<dependency>
    <groupId>junit</groupId>
    <artifactId>junit</artifactId>
    <version>4.13</version>
    <scope>test</scope>
</dependency>
<dependency>
    <groupId>org.hamcrest</groupId>
    <artifactId>hamcrest-library</artifactId>
    <version>2.2</version>
    <scope>test</scope>
</dependency>
<!-- rest of pom.xml below -->
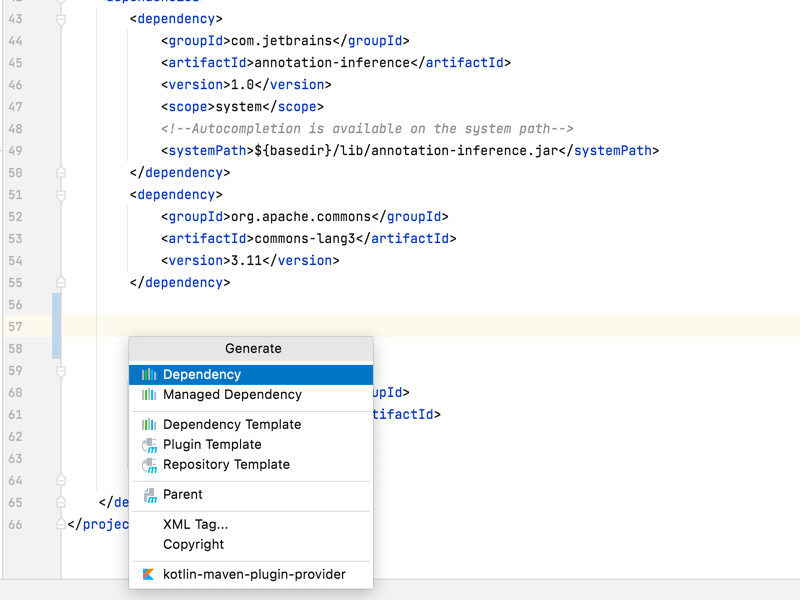
The first thing we need to do in order to migrate to JUnit 5 is to add the JUnit 5 dependencies. We can get IntelliJ IDEA to do this for us, if we press ⌘N (macOS) / Alt+Insert (Windows/Linux), within the POM file, the IDE will offer the option of adding a new dependency:
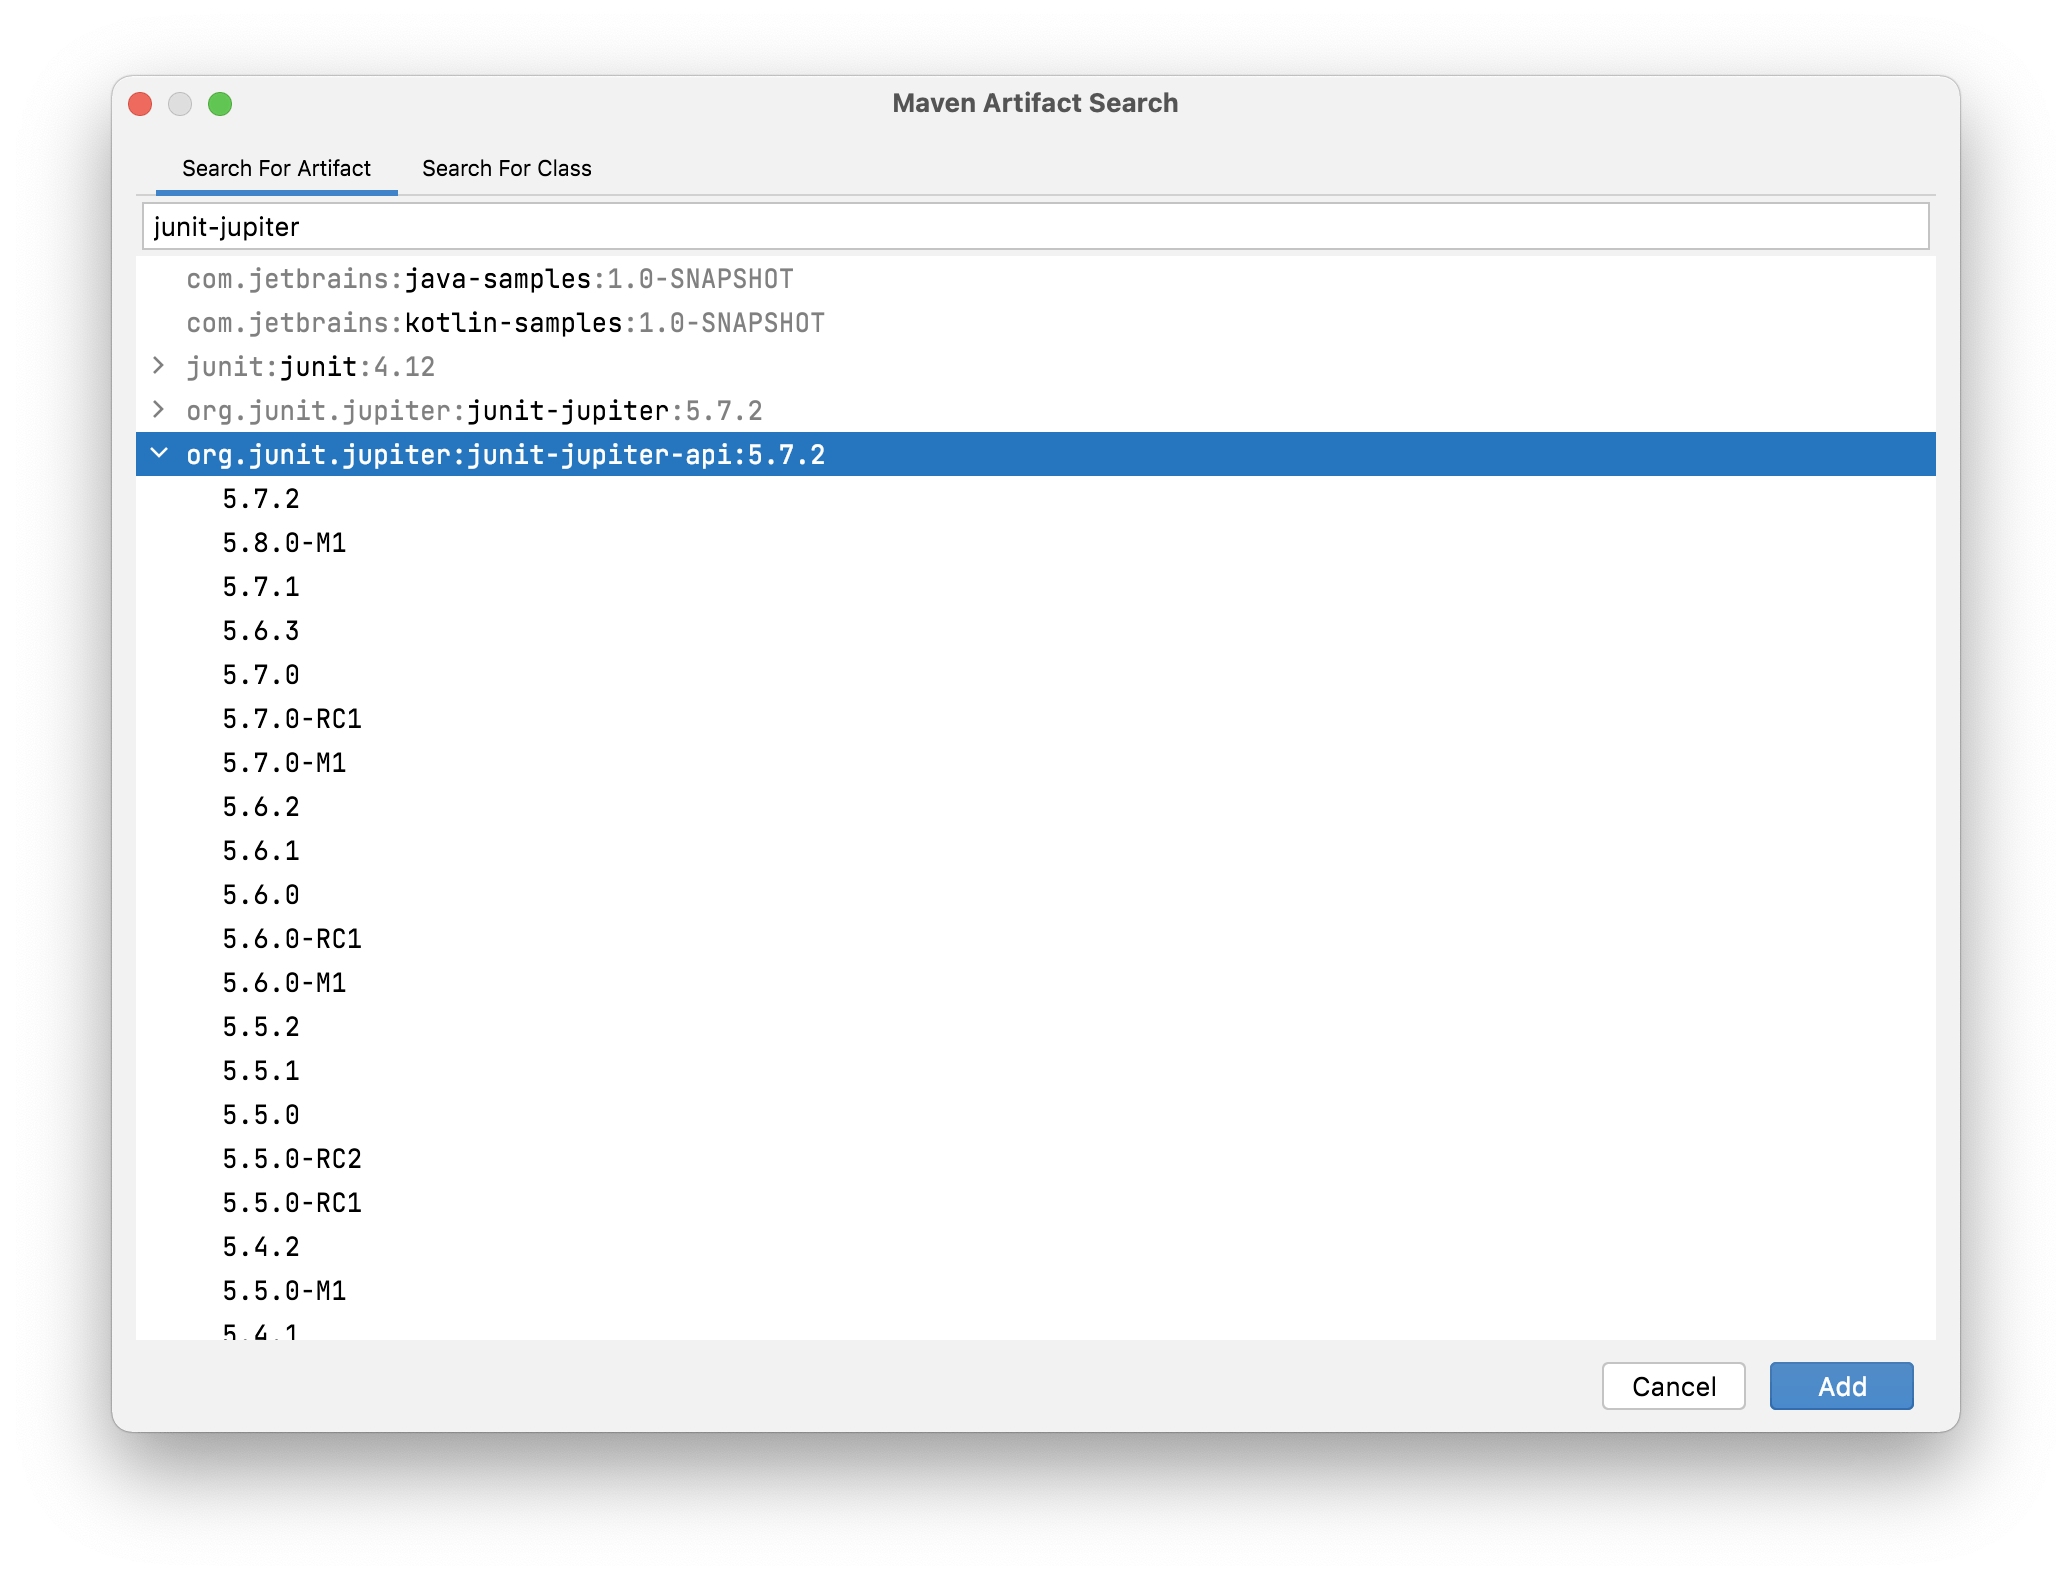
For most test suites, all we need to do is to add two new dependencies. To start with let's add a dependency on the basic junit-jupiter-api.
IntelliJ IDEA has identified that 5.7.2 is the current release version.
IntelliJ IDEA updates the Maven POM file with the new dependency version and imports.
Click the Maven icon in the top-right to ensure that IntelliJ IDEA loads the changes. Alternatively you can use ⇧⌘I (macOS), or Ctrl+Shift+O (Windows/Linux).
We only need these dependencies to run tests, so add the test scope to them as well.
<dependency>
   <groupId>org.junit.jupiter</groupId>
   <artifactId>junit-jupiter-api</artifactId>
   <version>5.7.2</version>
   <scope>test</scope>
</dependency>
<dependency>
   <groupId>org.junit.vintage</groupId>
   <artifactId>junit-vintage-engine</artifactId>
   <version>5.7.2</version>
   <scope>test</scope>
</dependency>
Now we should be able to safely remove the old JUnit 4 dependency from the Maven POM file, and the project will still compile. Click the Maven icon to make sure that IntelliJ IDEA removes the old dependency from the project.
Navigate back to the Junit4ToJUnit5 class using ⌘0 (macOS) / Alt+0 (Windows/Linux), to find the file. Rebuild the whole project with the new dependencies using ⌘F9 (macOS) / Ctrl+F9 (Windows/Linux). If it all builds correctly, use ⌃R (macOS) / Shift+F10 (Windows/Linux), to run the test class to check the tests work as you expect.
The results are shown in the Run window which you can access using ⌘4 (macOS) / Alt+4 (Windows/Linux).
If the tests ran correctly you can commit your changes.
We have added the new dependencies to the Maven pom.xml file and removed the old JUnit 4 dependency from it. Use ⌘K (macOS) / Ctrl+K (Windows/Linux) to commit your changes since you know everything still works as expected. We'll continue the migration in a series of small steps.