
Walking Through Your Spring Boot Project
Let's take a look at what IntelliJ IDEA has created for us and why.
Project Walk-through
In the previous step we asked IntelliJ IDEA to create us a Spring Boot project with Spring Web as a dependency. Let's now take a look at what has been automatically created, so that we can build on that understanding in the next step.
Let's take a look around some aspects of the project. The easiest way to do this is from the Project tool window which you can access with ⌘1 (macOS) / Alt+1 (Windows/Linux). We will look at:
- The .mvn Folder
- The pom.xml File
- HelloWorldApplication.java
- HelloWorldApplicationTests.java
The .mvn Folder
This folder has been created because Spring Boot uses the Maven wrapper when you create a Spring Boot project with the Maven build system. This means you don't have to install Maven locally to run your Spring Boot project. You should commit this project to version control, but you can ignore it from now on.
The Maven pom.xml File
This file is generated with the dependencies that you selected when we created this project.
<dependencies>
  <dependency>
    <groupId>org.springframework.boot</groupId>
    <artifactId>spring-boot-starter-web</artifactId>
  </dependency>

  <dependency>
    <groupId>org.springframework.boot</groupId>
    <artifactId>spring-boot-starter-test</artifactId>
    <scope>test</scope>
  </dependency>
</dependencies>
The first dependency on spring-boot-starter-web is there because we selected Spring Web as a dependency. The second dependency on spring-boot-starter-test is something you get with any Spring application. It gives you the ability to create tests with various testing libraries.
It's very easy to add dependencies to your pom.xml file once you have created your Project. Use ⌘N (macOS) / Alt+Insert (Windows/Linux) and then browse for your dependency. However, for our demo, these are the only dependencies that we need.
The SpringHelloWorldDemoApplication.java File
Inside your main | java | com.example.helloworld file structure you'll see your HelloWorldApplication.java file. Let's take a look in more detail.
This is what your Java file will look like. The name will be whatever your called the file with Application appended to it.
package com.example.helloworld;

import org.springframework.boot.SpringApplication;
import org.springframework.boot.autoconfigure.SpringBootApplication;

@SpringBootApplication
public class HelloWorldApplication {

    public static void main(String[] args) {
        SpringApplication.run(HelloWorld.class, args);
    }
}
We've got our package at the top of the class as you'd expect followed by our import statements.
This @SpringBootApplication annotation enables additional Spring Boot functionality which is useful to know in case you find yourself troubleshooting your code.
The main line here is:
SpringApplication.run(HelloWorldApplication.class, args);
This makes a call to SpringBoot's run method, and we need to pass the main class of our project to Spring, in this case, it's the same class.
When you run this method, Spring looks at what Maven has pulled in to the class path from the dependencies in our pom.xml file among other things, and makes assumptions about the shape of your project from there. There are a bunch of transitive dependencies that Maven can pull in based on what Spring finds on your class path and the application.properties file. Transitive dependencies are dependencies that your dependencies are reliant on.
For example, we have a dependency in our Maven pom.xml called spring_boot_starter_web. That in turn, has a transitive dependency on spring-boot-starter-tomcat. In this instance, when the Spring run method is called, it checks the class path and your application.properties file (which is empty) among other things, and sees that you want a Tomcat webserver, so it creates one for you.
The HelloWorldApplicationTests.java File
If you head down to the test | java | com.example.springhelloworlddemo folder you'll see you have another class called SpringHelloWorldDemoApplicationTests.java. This is a test you get for free with Spring Boot. It checks if the Application Context can start, it will fail if not. The test can be a useful starting point for creating your own integration tests.
Running your Spring Boot Application
We have the basics of our Spring Boot Application at this point. You can run it with ⌃R (macOS) / Shift+F10 (Windows/Linux). Alternatively you can use the gutter icons:
![]()
The application will run using the Tomcat webserver. You can verify it's working by going to your web browser and typing localhost:8080. Port 8080 is the default port for Tomcat.
You should get a 404 response which will look similar to this:
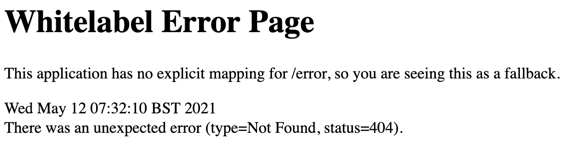
We're getting this page because we have support for REST Controllers with the spring-boot-starter-web dependency, but we also need to create a controller and add a request mapping for that controller. We will do both of those things in the next step.
Lastly, before we do any more development it's a good idea to stop your server from running. You can do this with ⌘F2 (macOS), or Ctrl+F2 on Windows and Linux.