
Packaging the Application
We can package the application into a Java ARchive file (JAR).
When the code is ready, we can package our application in a JAR. JAR files are often used to deploy an application to the production server. Once a JAR file has been built, it is called an artifact. Let's take look at how to create artifacts in IntelliJ IDEA.
Creating an Artifact
-
Press ⌘; (macOS) / Ctrl+Alt+Shift+S (Windows/Linux) to bring up the Project Structure dialog.
-
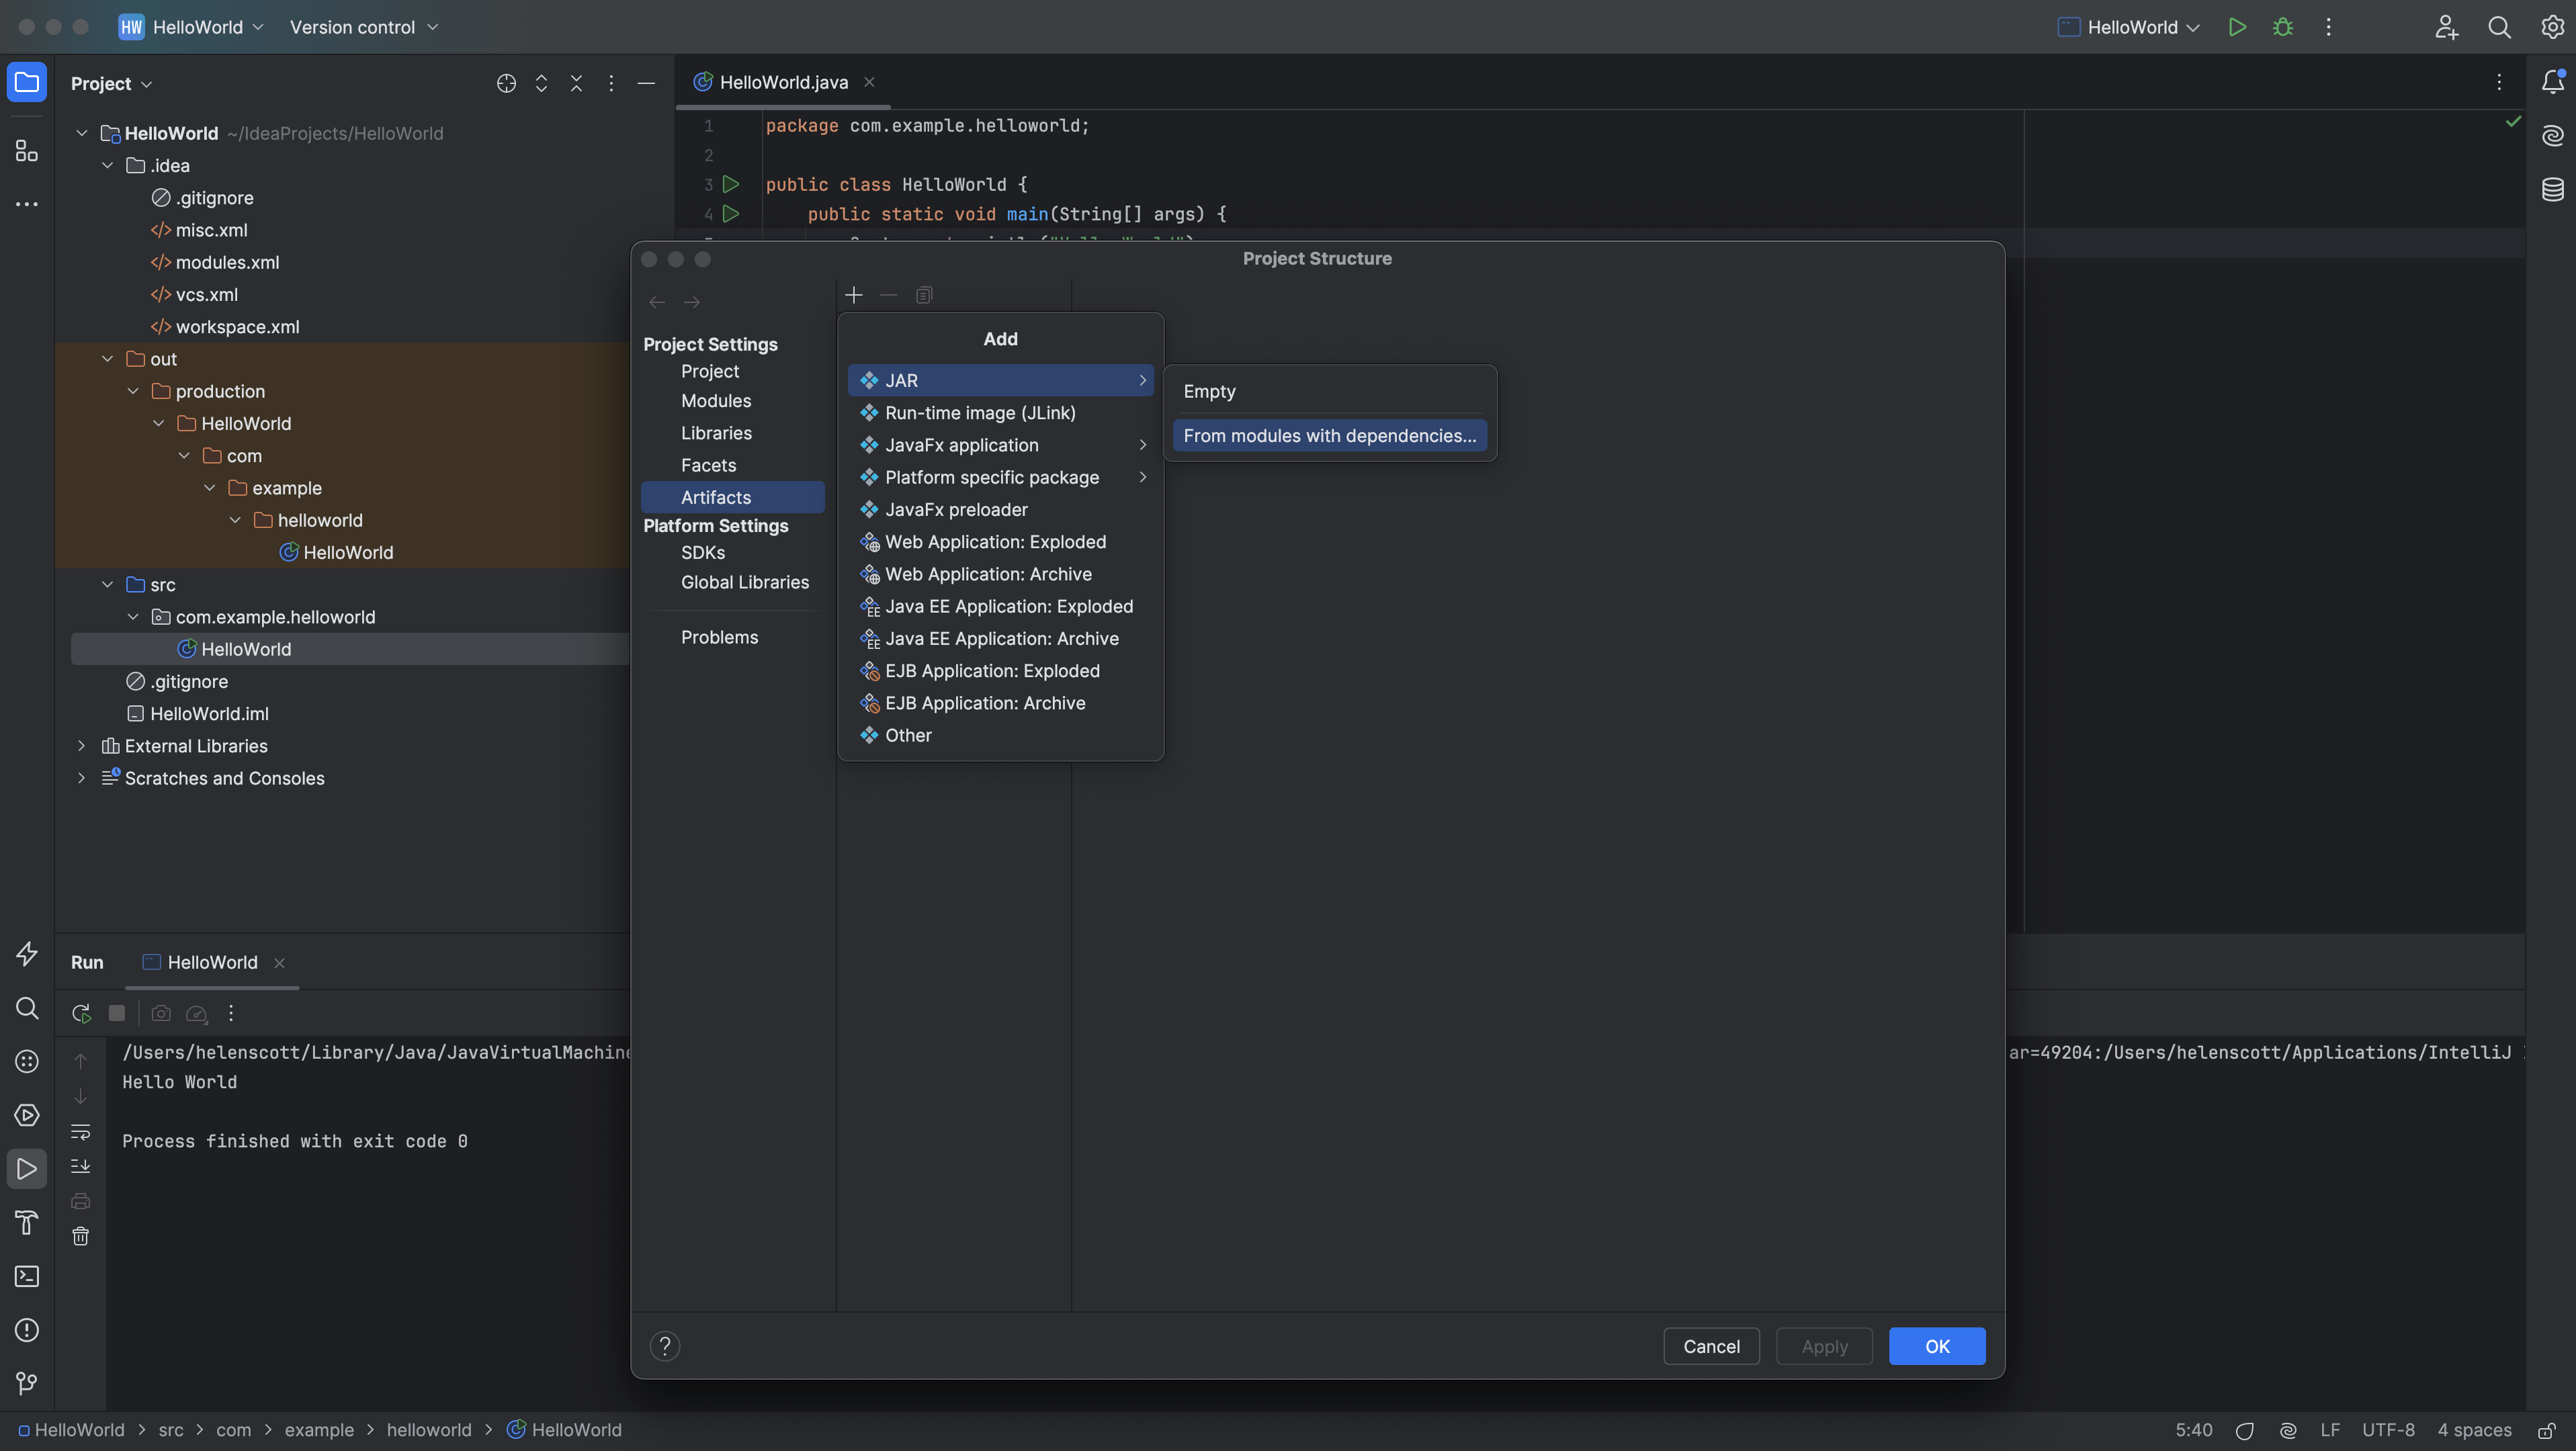
Select Artifacts from the left-hand menu and then press + (macOS) / Plus (Windows/Linux). Select JAR and then From modules with dependencies.
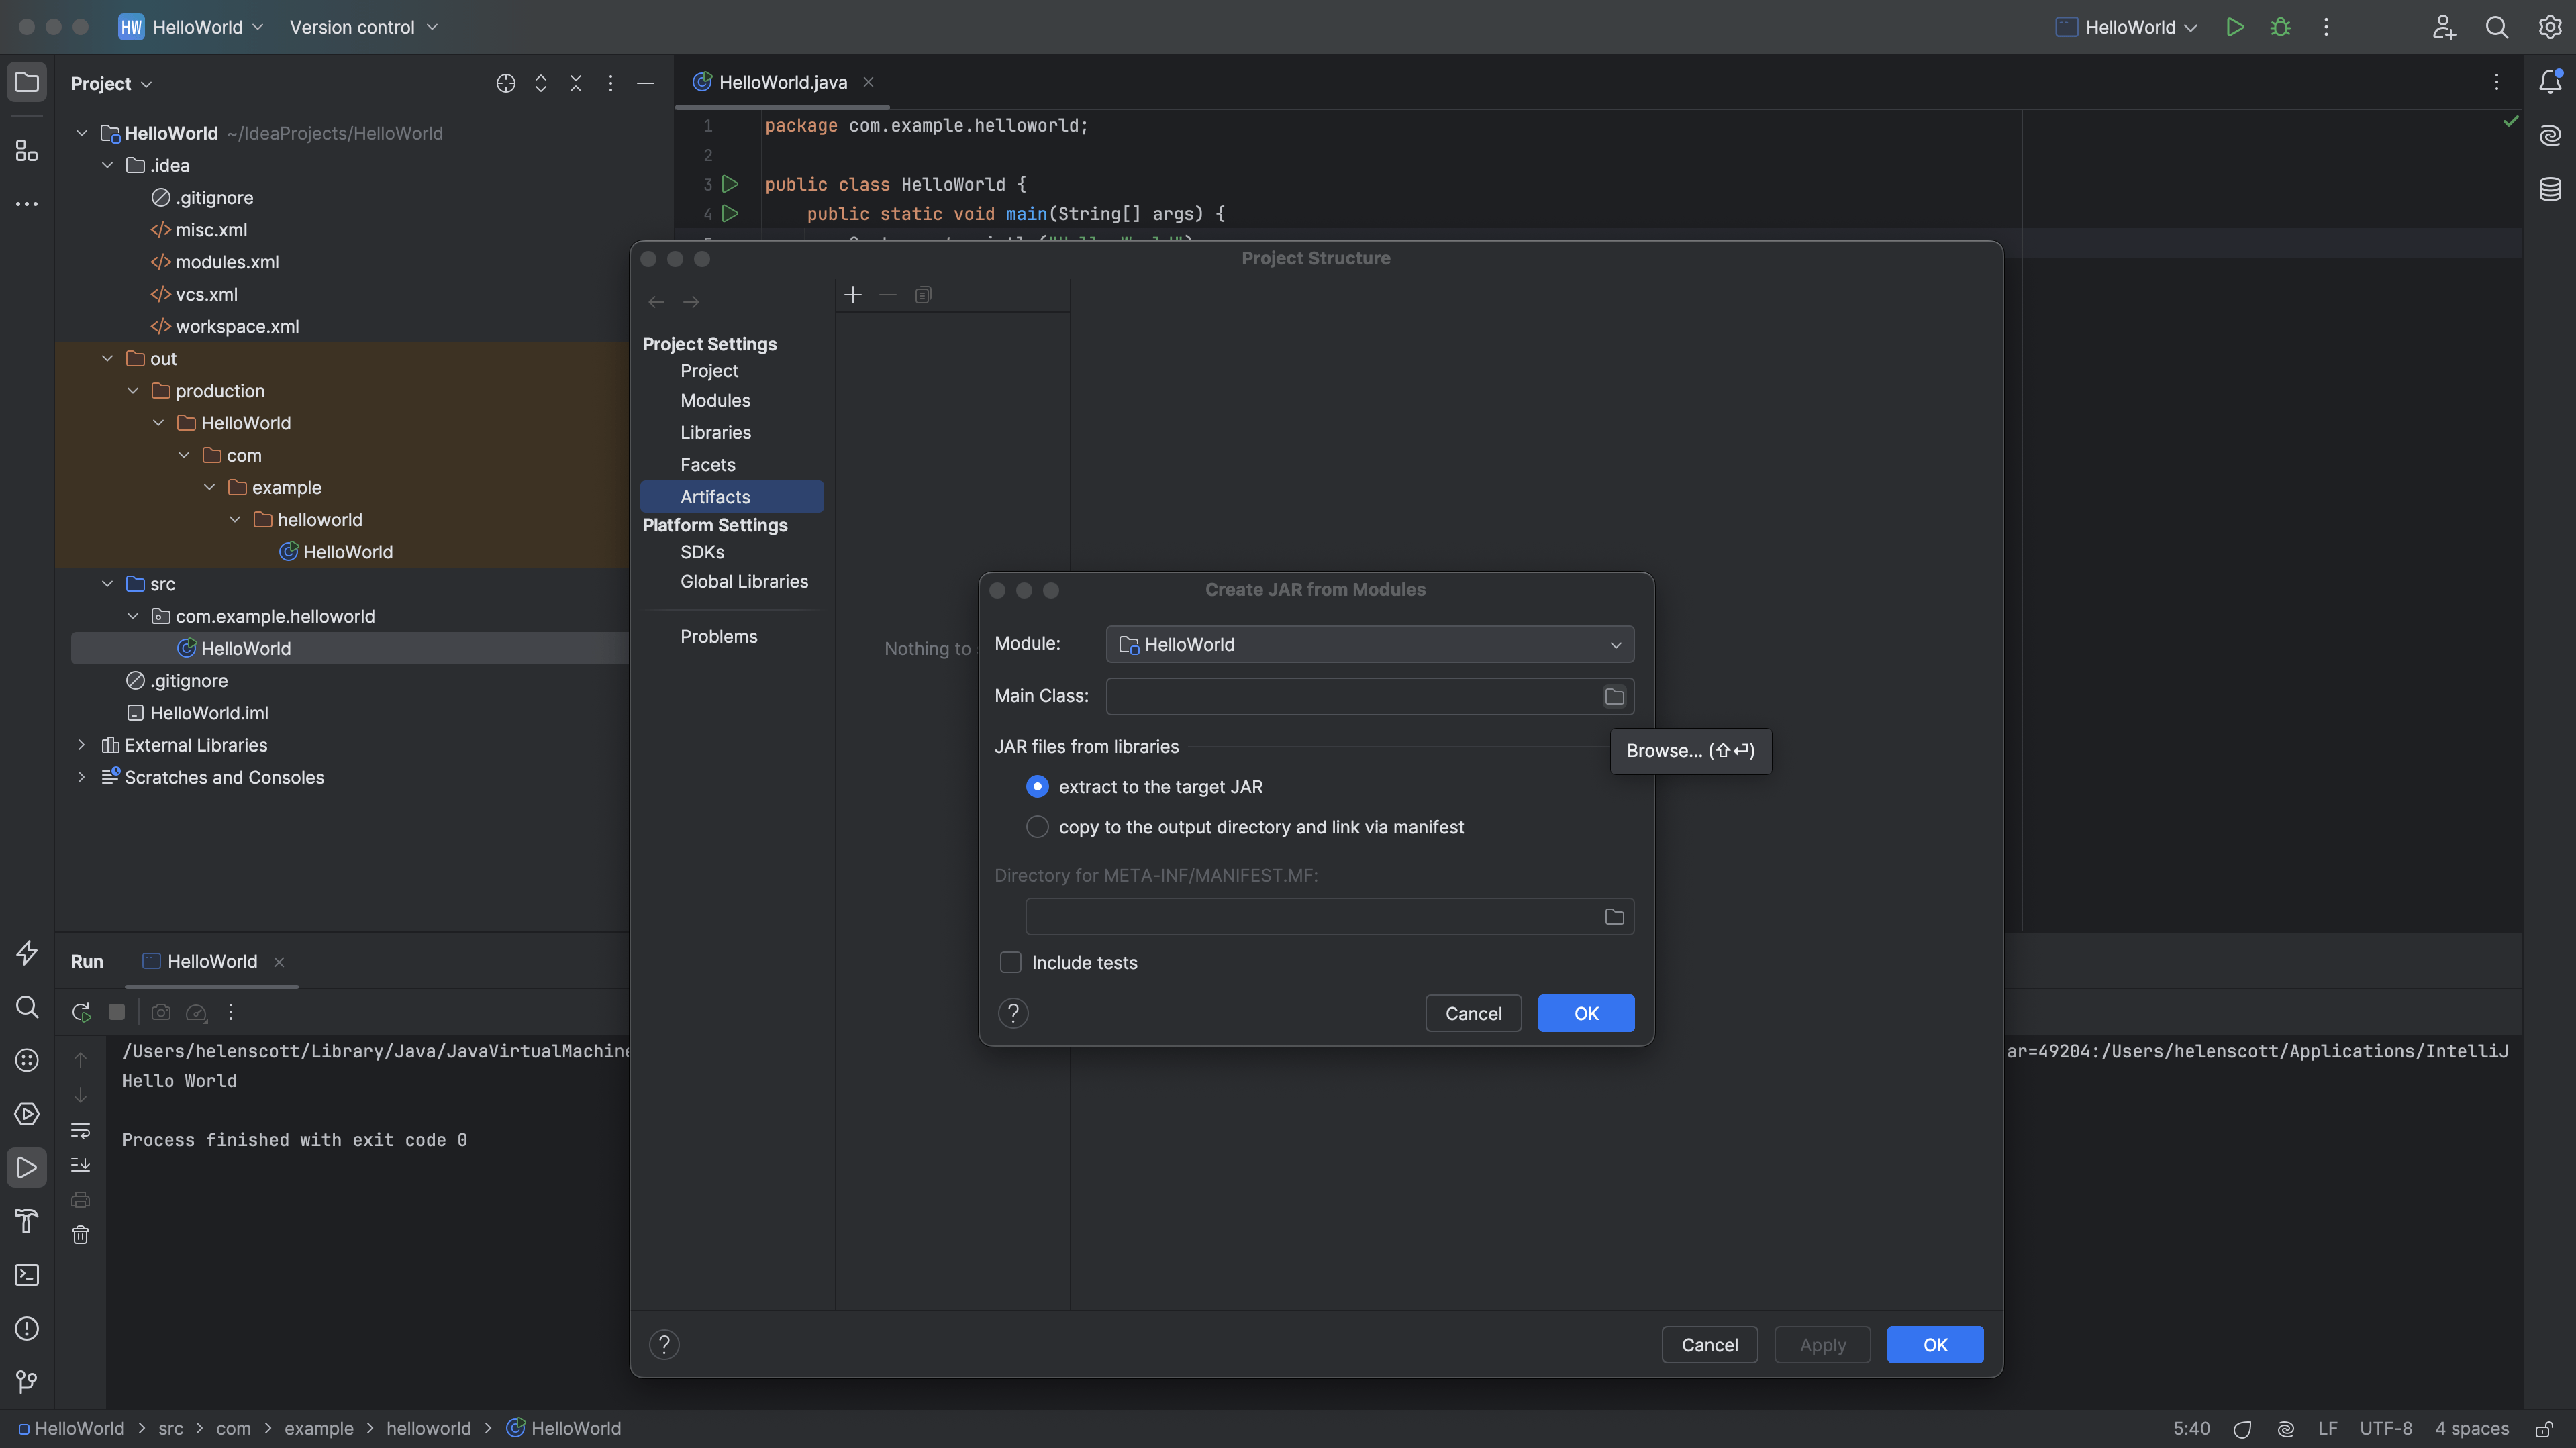
Click the browse button for the Main Class to navigate to your main method.
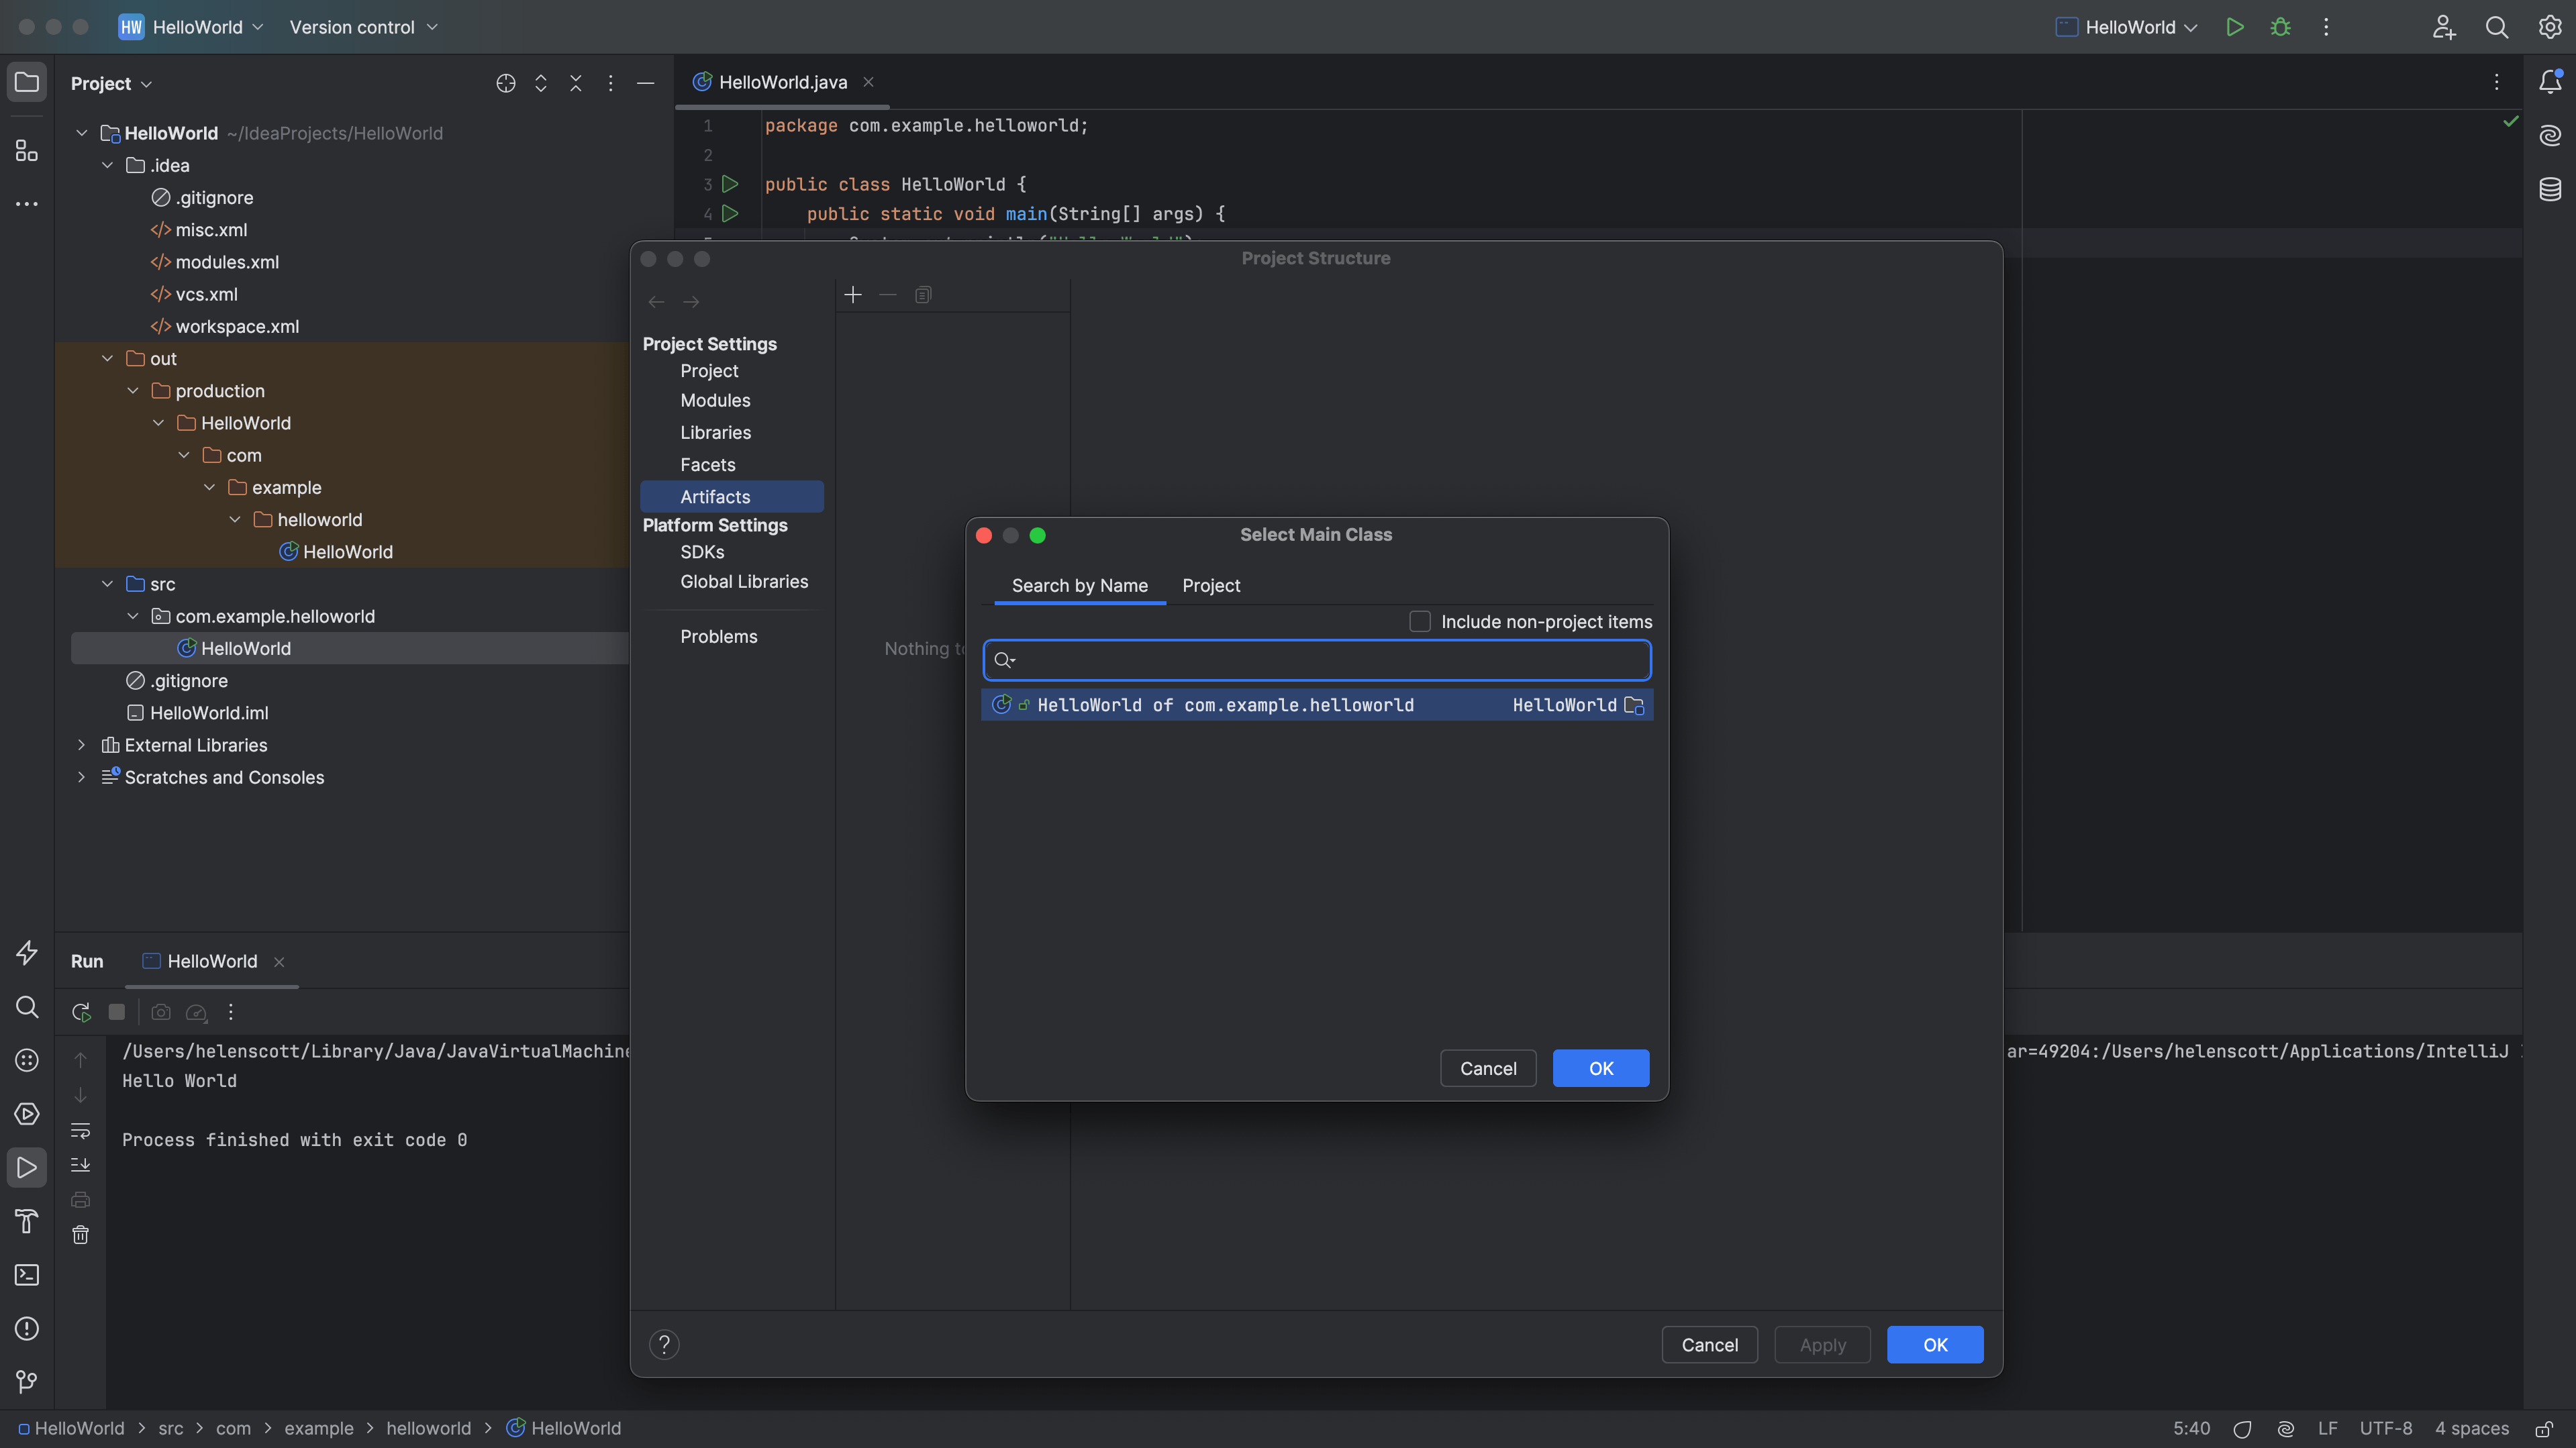
IntelliJ IDEA will show you a list of classes in your project, you only have one so press OK or double click to select it.
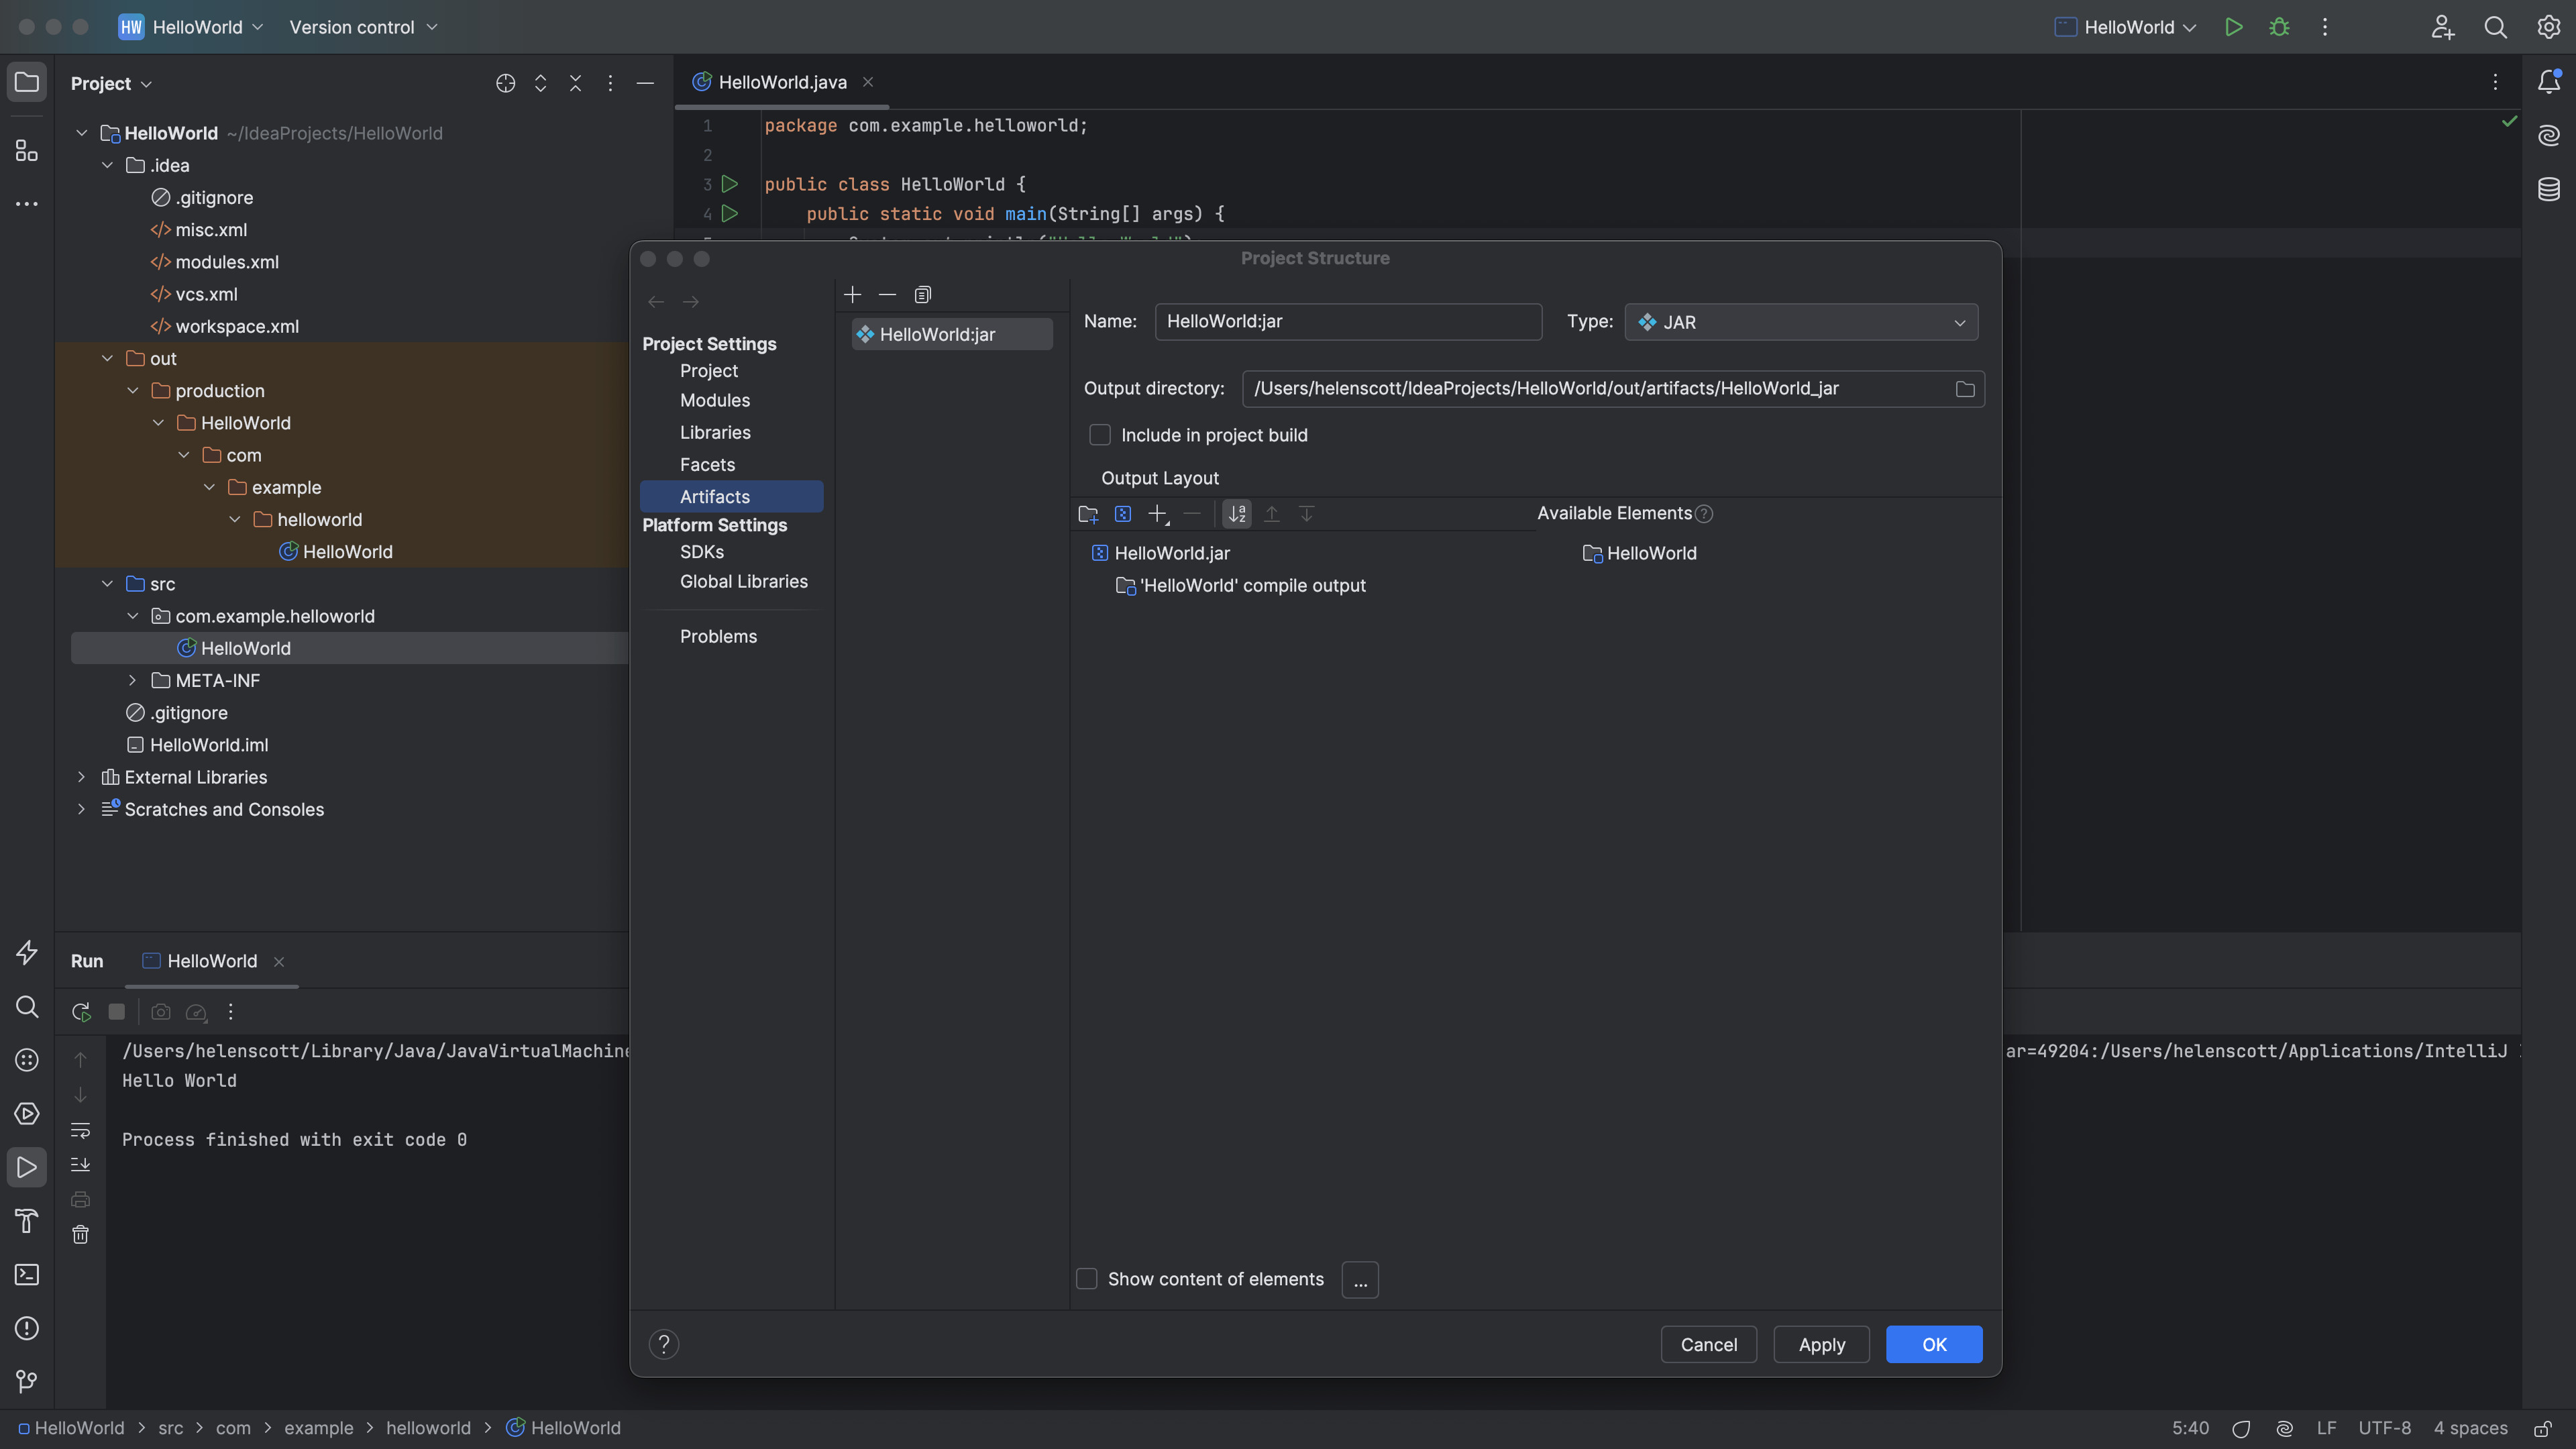
- All the other defaults are fine for this tutorial, press OK. Now you can see your new JAR file defined in the Project Structure dialog.
-
If it matches the above screenshot, press OK. You have now defined how to build the JAR file, but you haven't actually built it yet. You need to build it with your build artifacts.
-
Go to Build | Build Artifacts. You will only have one to choose from which is the one that we just defined.
-
You can now build your artifact by going to Build > Build Artifacts... and choose your new JAR artifact from the list. The JAR file is located in your
outfolder calledHelloWorld.jar.

To make sure that this JAR file was created correctly you will want to run it. We'll do this in the next step of this tutorial by using a run configuration.