
Creating a Maven project
Start by creating a brand-new project that uses Maven as the build tool.
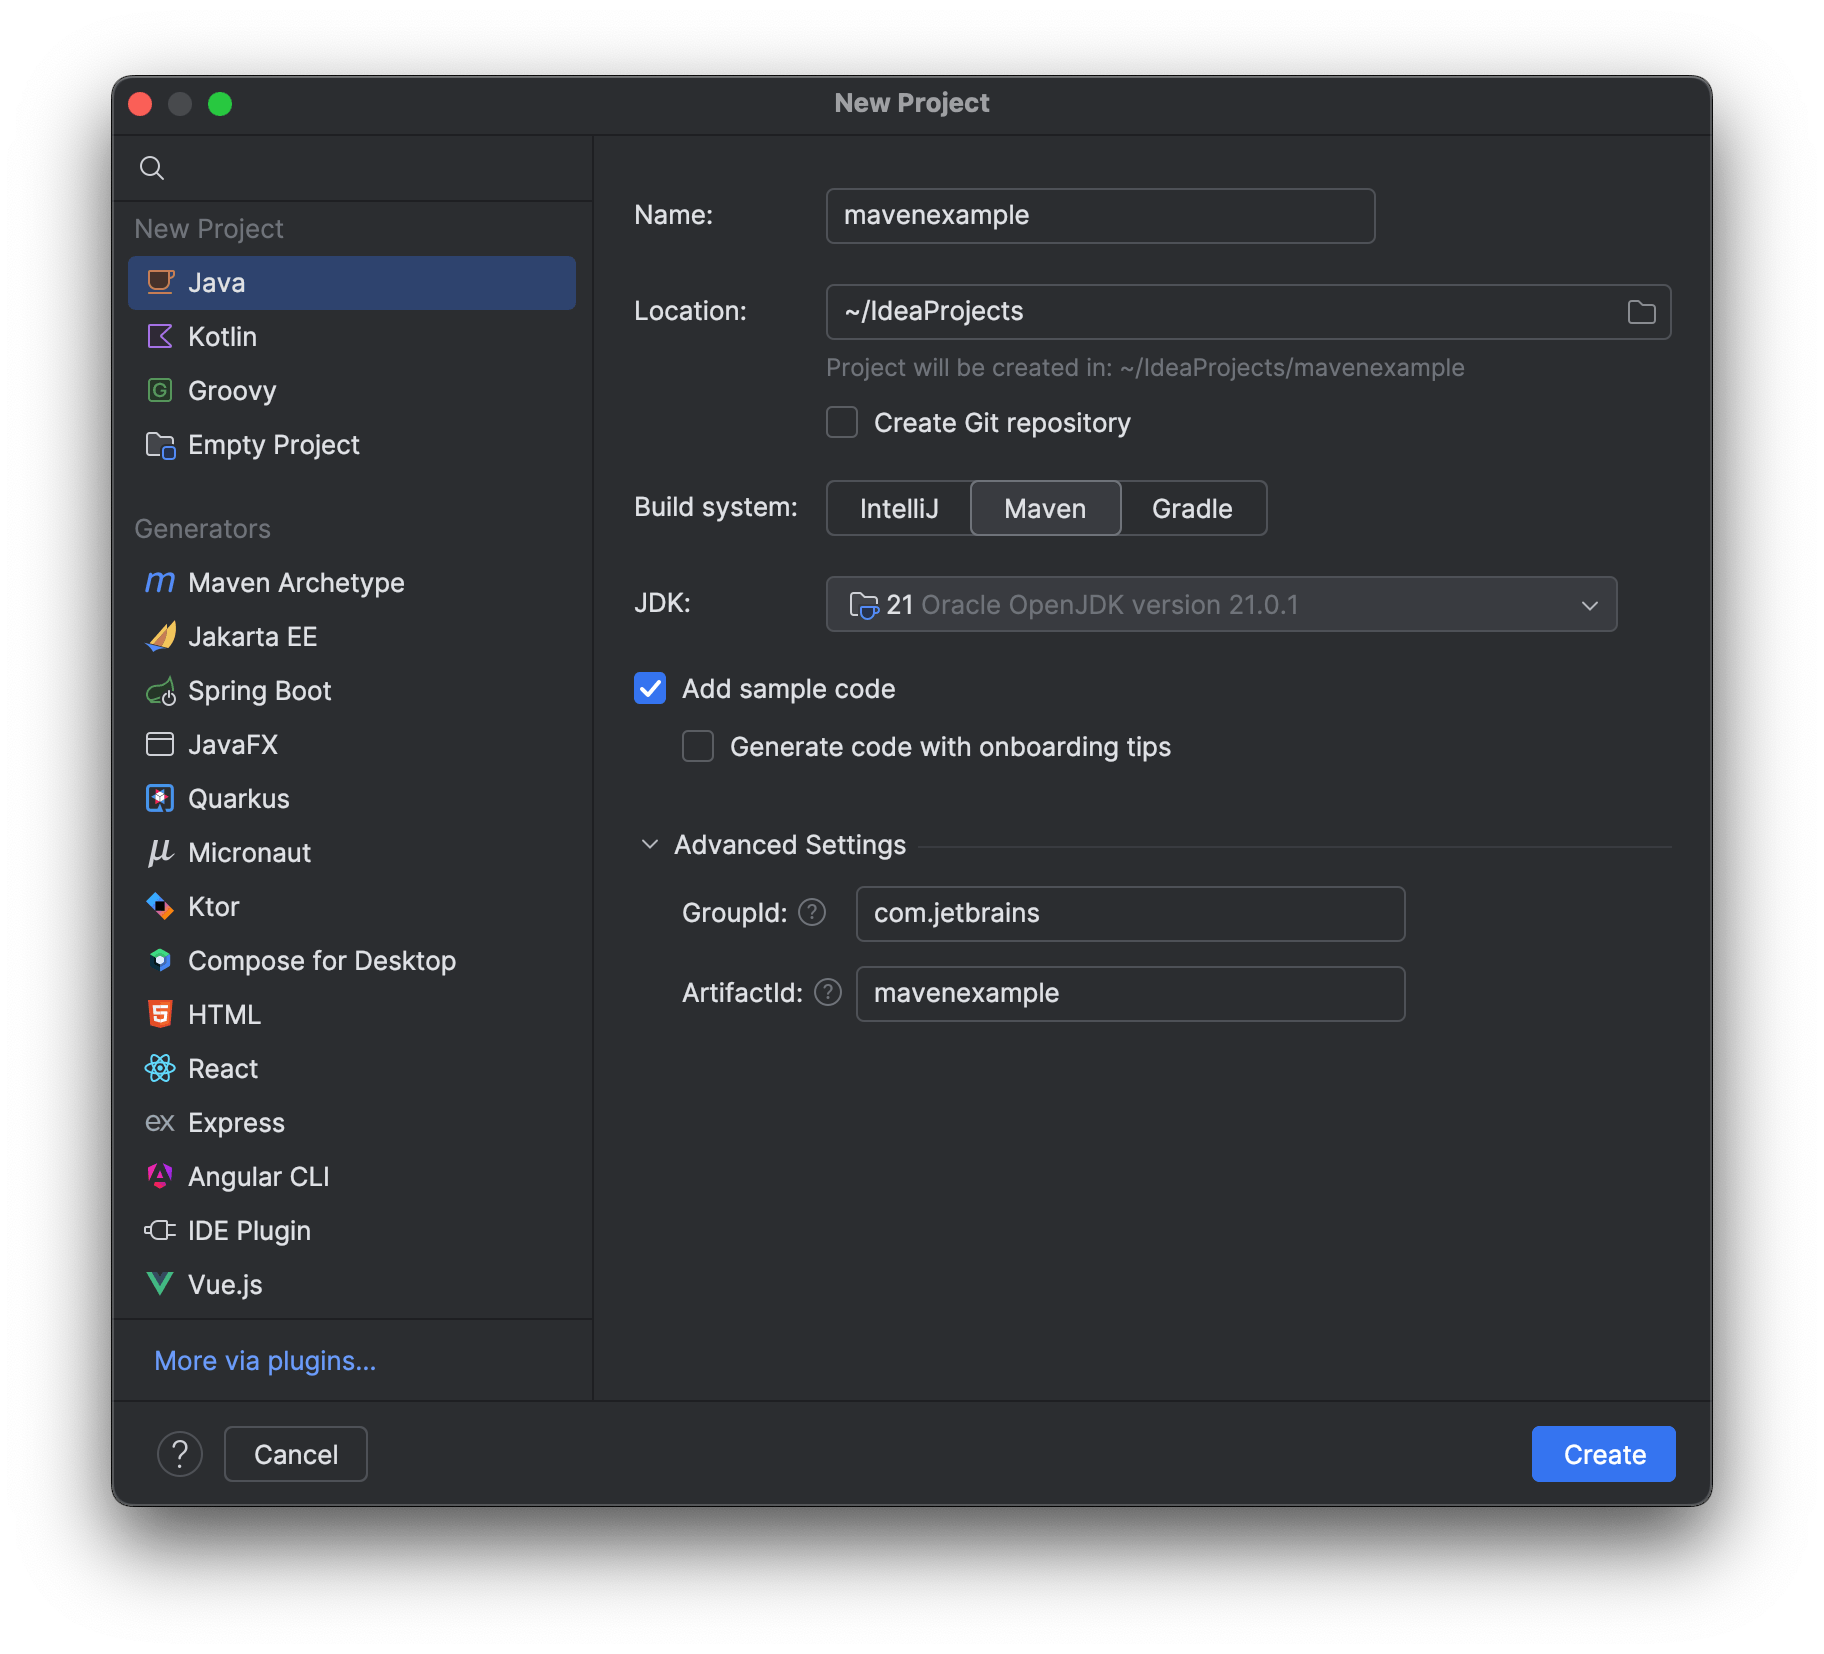
Let's create a brand-new Maven project. From the Welcome Screen select New Project, or if you already have an IntelliJ IDEA project open, select File -> New -> Project...
Choose a name for your project such as "mavenexample" and then keeping the default of Java on the left, select Maven as the Build system on the right. We also need to choose a JDK for our project.
We can optionally choose a maven archetype to use to create the project. If you're creating a simple project, you don't need to select an archetype.
If you click on Artifact Coordinates you'll see more Maven settings. You can declare a group id, and the artifact id of the application itself.
Press Create, and IntelliJ IDEA will generate the basic pom.xml file as well as the default directory structure for a Maven project with the source and test folders defined.
You can use ⌘E (macOS) / Ctrl+E (Windows/Linux) and then type i⌘E (macOS) / Ctrl+E (Windows/Linux)n Maven to open the Maven Projects window, where you can see the standard Maven lifecycle phases, as well as the goals defined by various Maven plugins.