
Using Apache Tomcat with an existing application
How to add Apache Tomcat to your application.
If you’re not creating a new project from scratch and instead have an existing project that runs on Tomcat, you can configure IntelliJ IDEA to connect to your existing Tomcat installation. Let's work with this application from GitHub:
- Clone the Project in IntelliJ IDEA and follow the instructions in
README.mdto run the project. - then go to Run | Edit Configurations.
- Select Add new run configuration and then Tomcat Server | Local (because we are running our Apache Tomcat server on our machine) from the drop-down:

- Give the configuration a name such as
tomcatand then click Configure next to the Application Server drop-down. - Paste in the same path we used earlier to point to the location of Apache Tomcat on your machine and press OK.
- Leave the remaining values as the default and click the Deployment tab at the top.
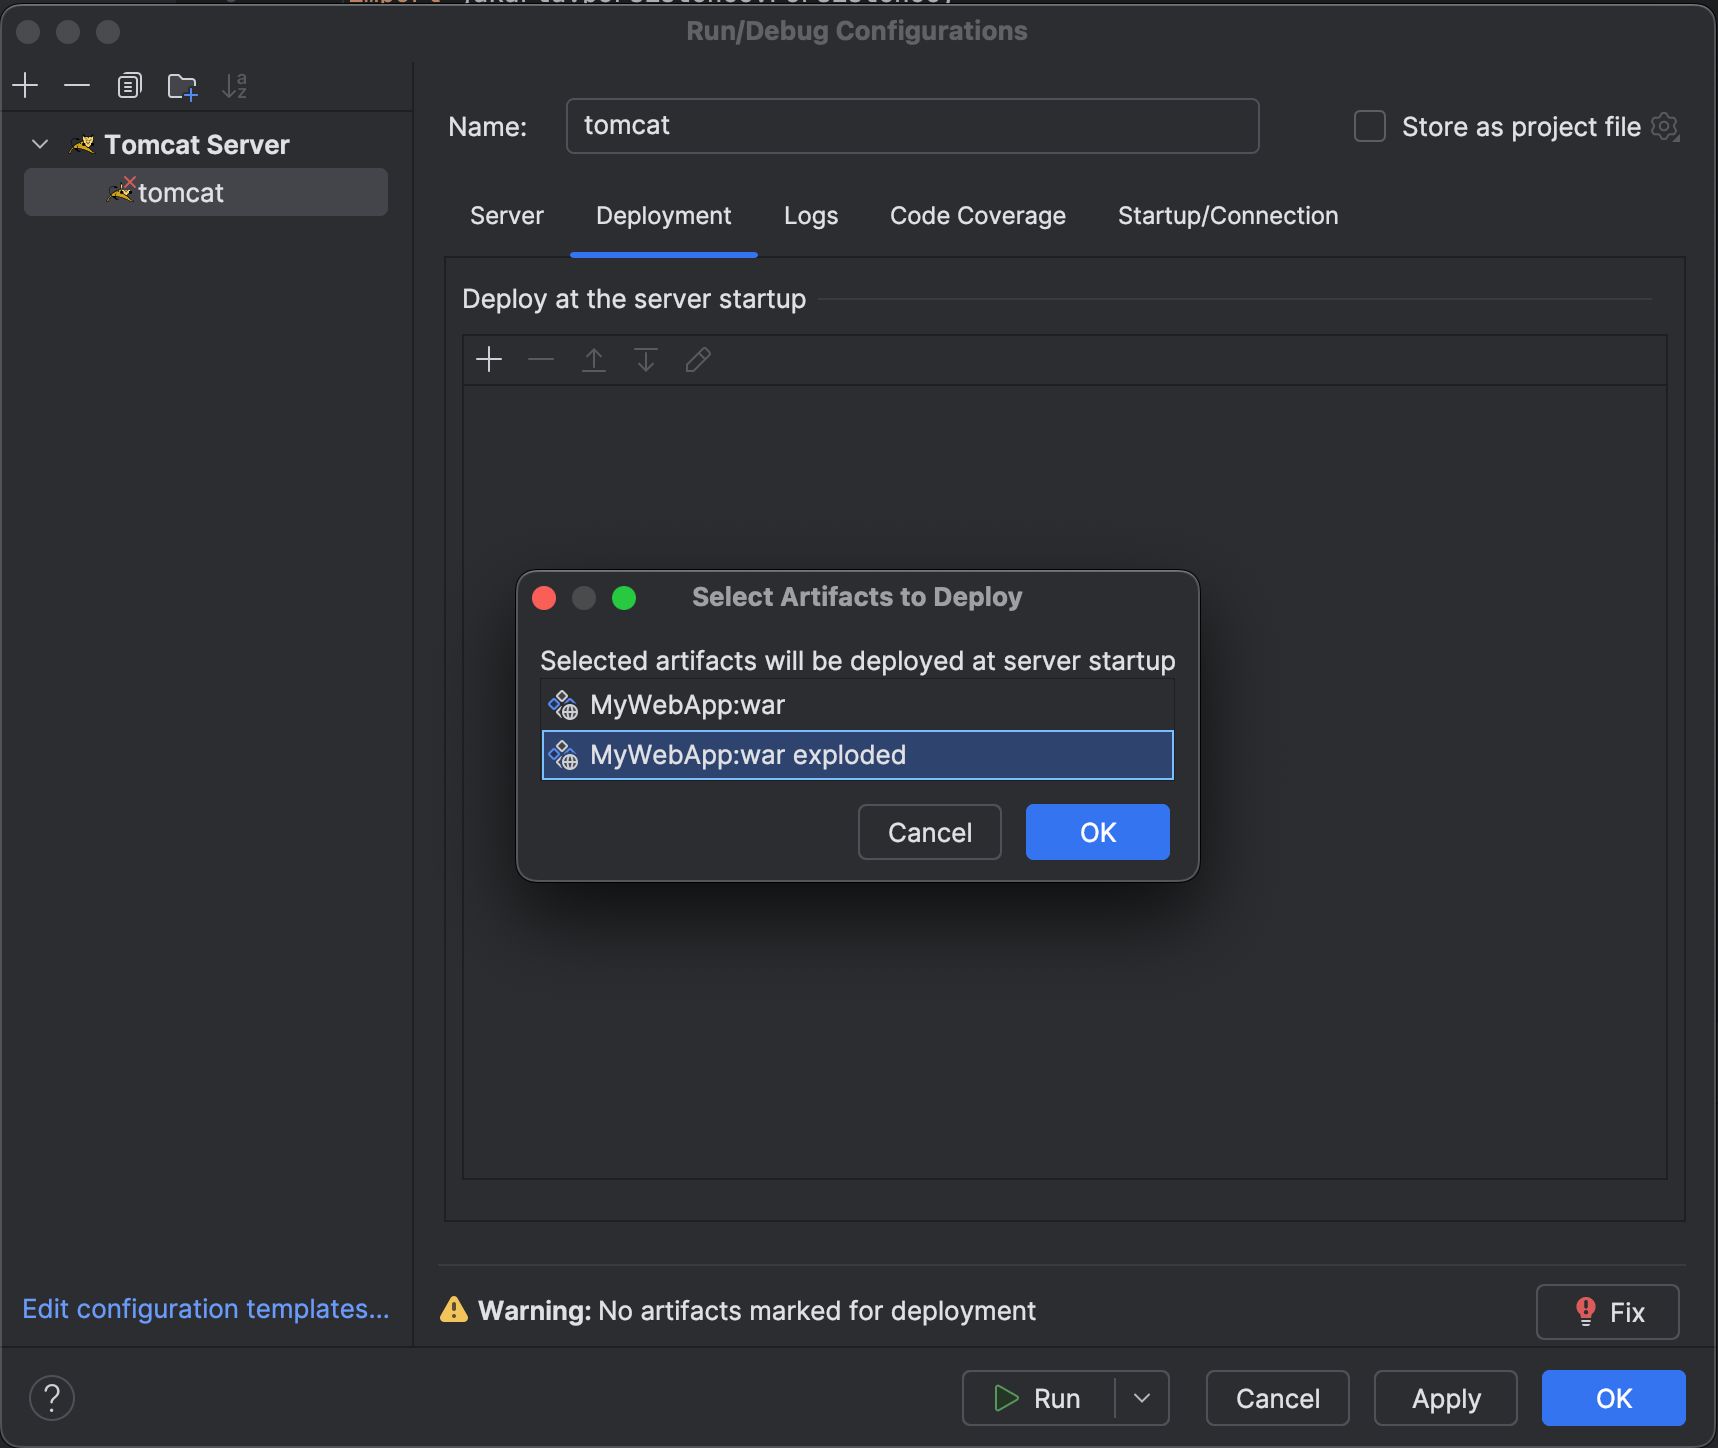
- Click the + to add a new deployment artifact and select
Artifact. - Select
MyWebApp:war explodedbecause that will allow you to update the application code without redeploying or restarting the server and Press OK.
- Click OK to finish configuring the Run configuration.
You can run the application with ^R (macOS), or Shift+F10 (Windows/Linux) and IntelliJ IDEA will open our browser at the application’s root context which in this case displays an actual page because this app has an index.jsp file.