
Google Kubernetes Engine
Harnessing the Power of Google Kubernetes Engine.
Creating a new cluster
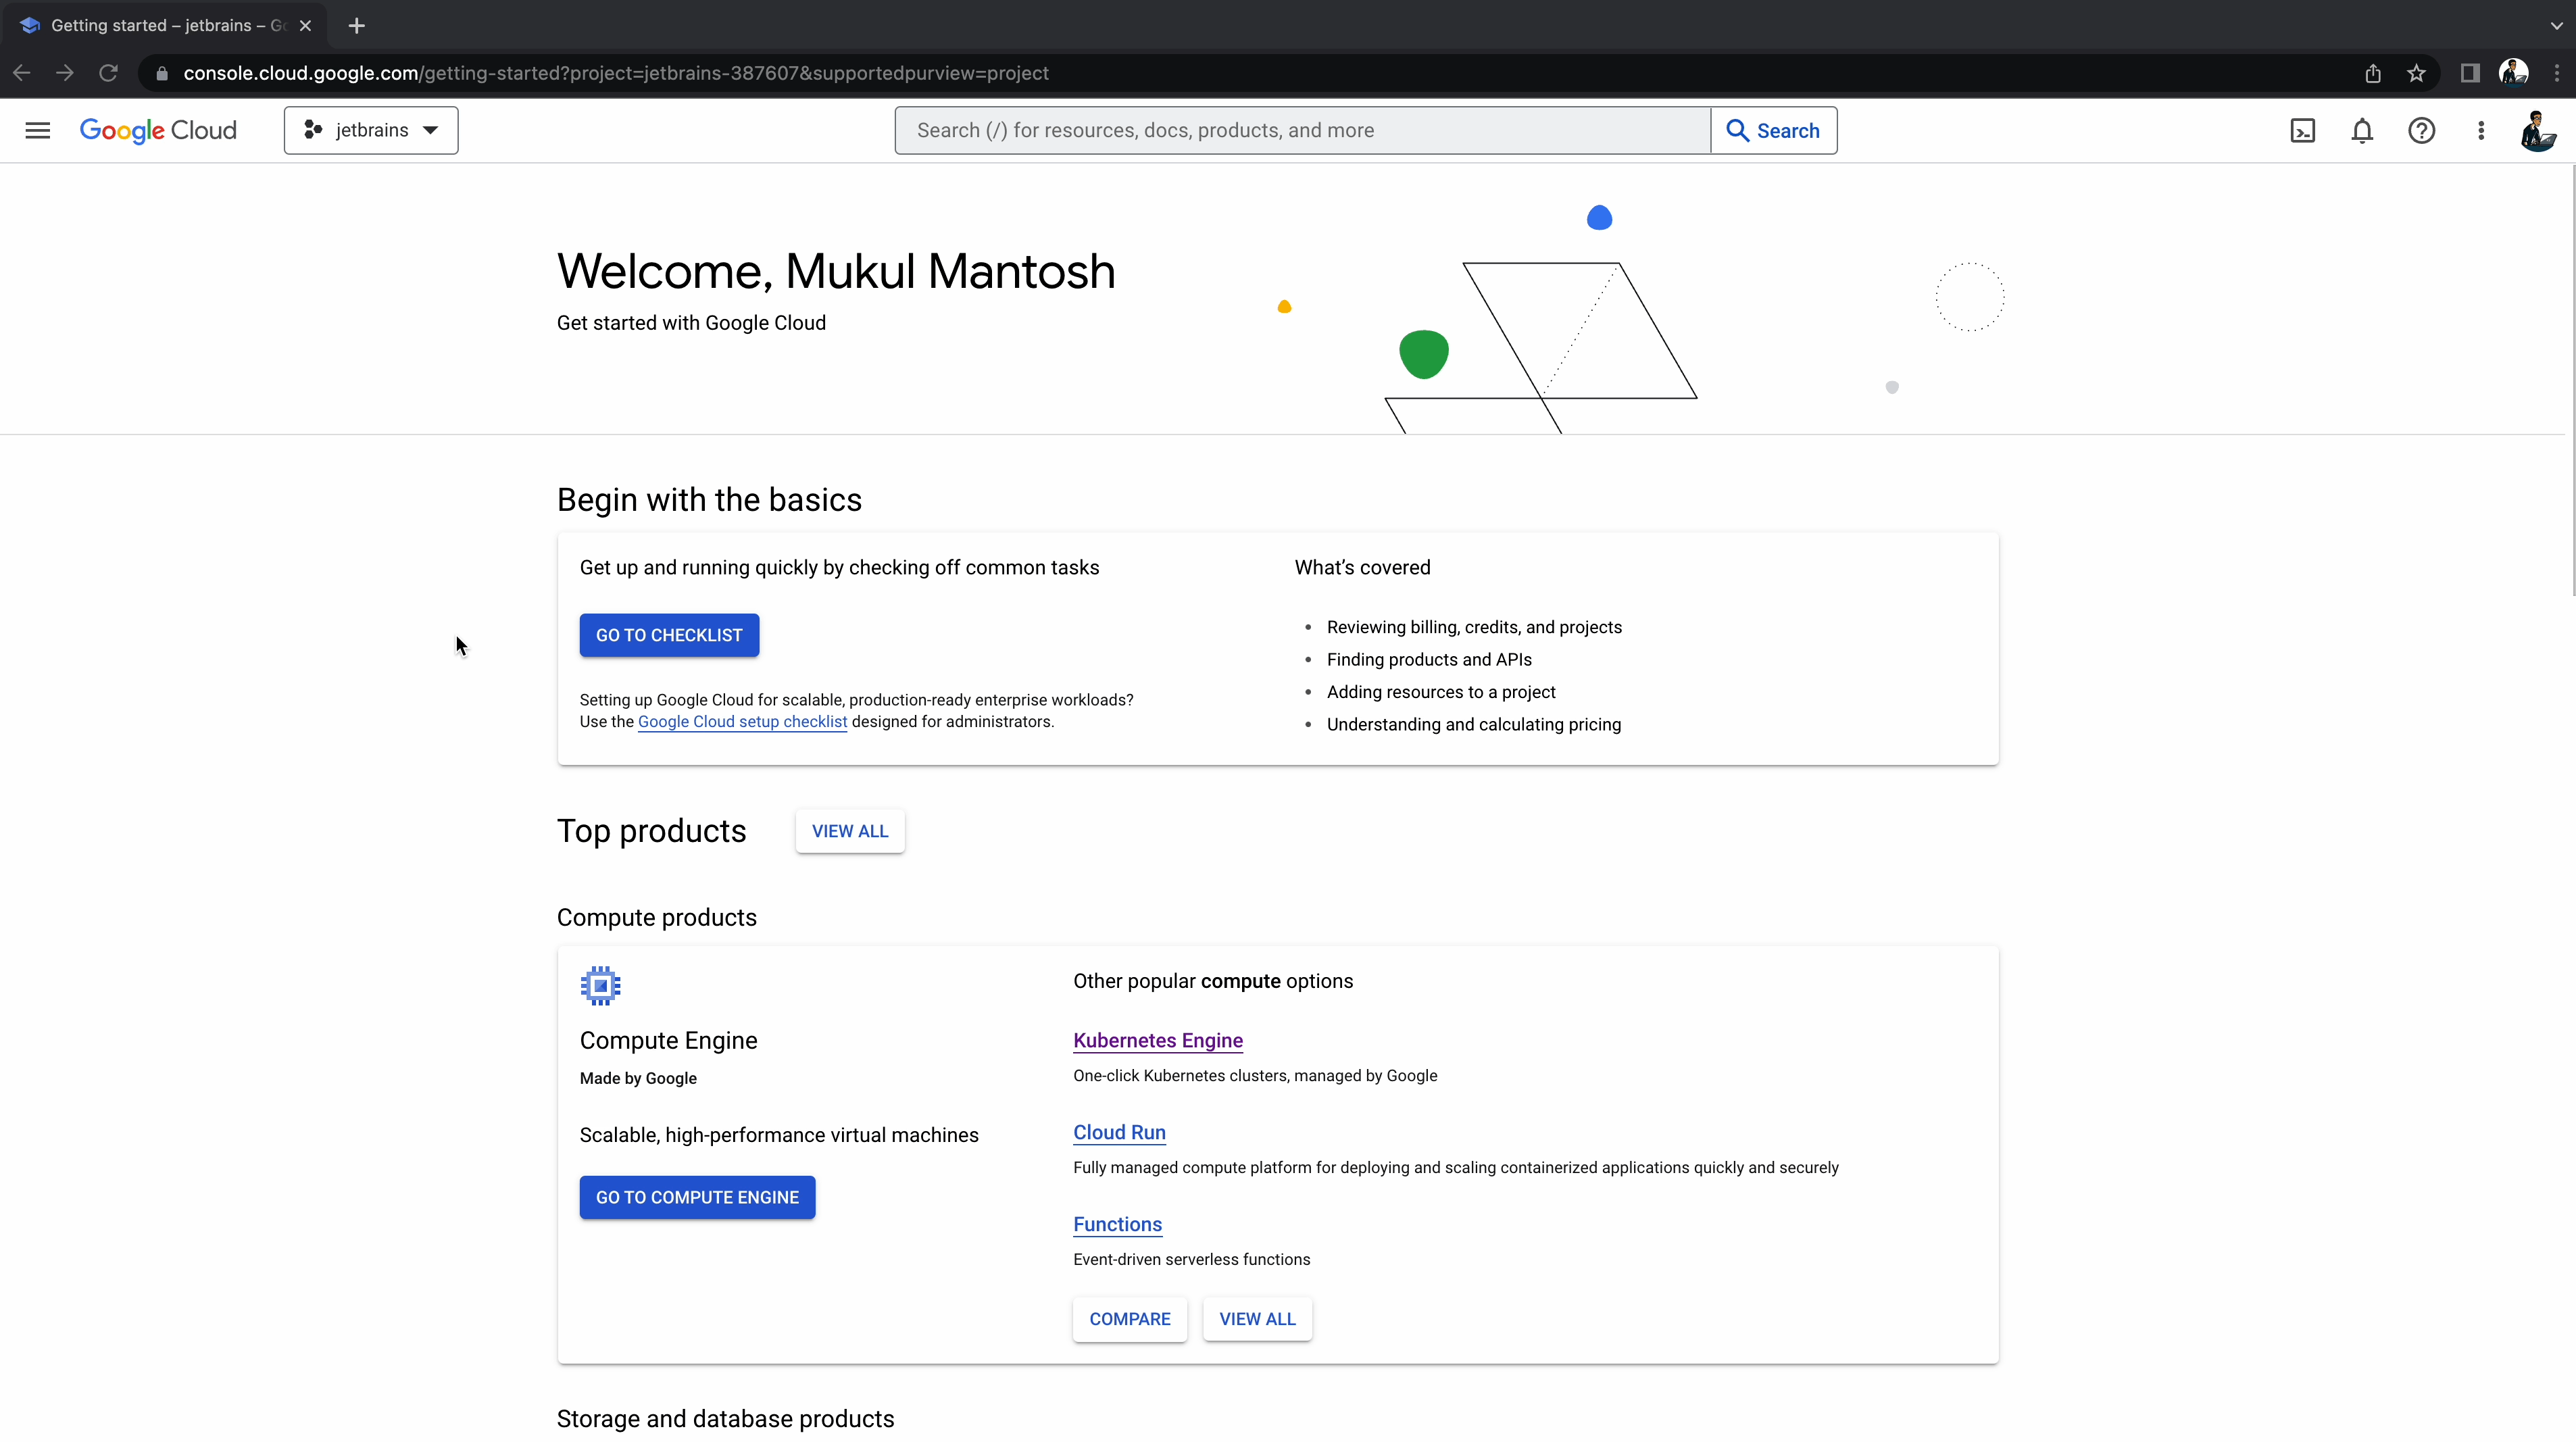
We’re now going to set up Google Kubernetes Engine (GKE). Before we start, ensure you have a valid Gmail account then visit the following URL: console.cloud.google.com.
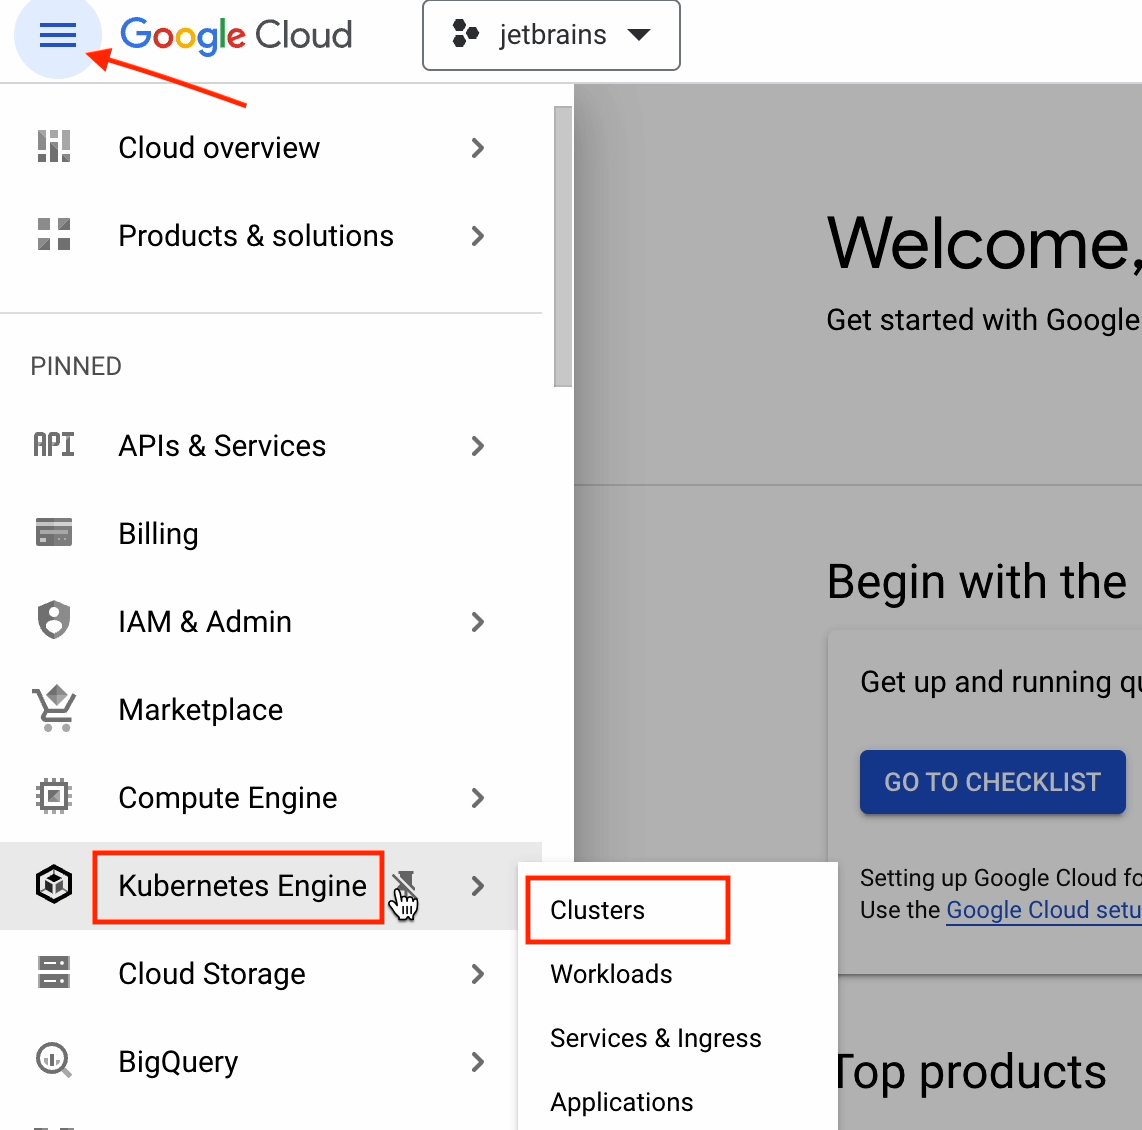
Click on the hamburger menu and go to Kubernetes Engine | Clusters
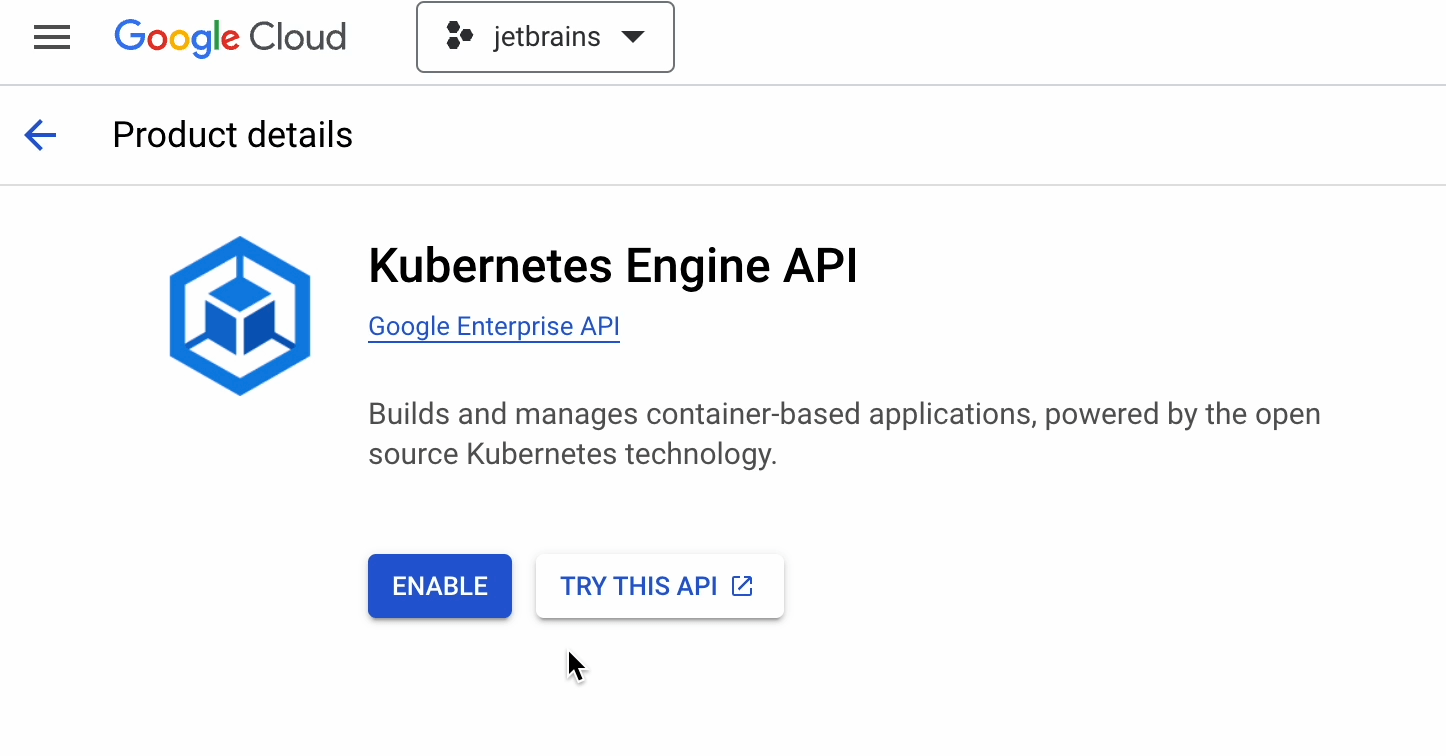
Enable the Kubernetes Engine API. It will take a few seconds to initialize.
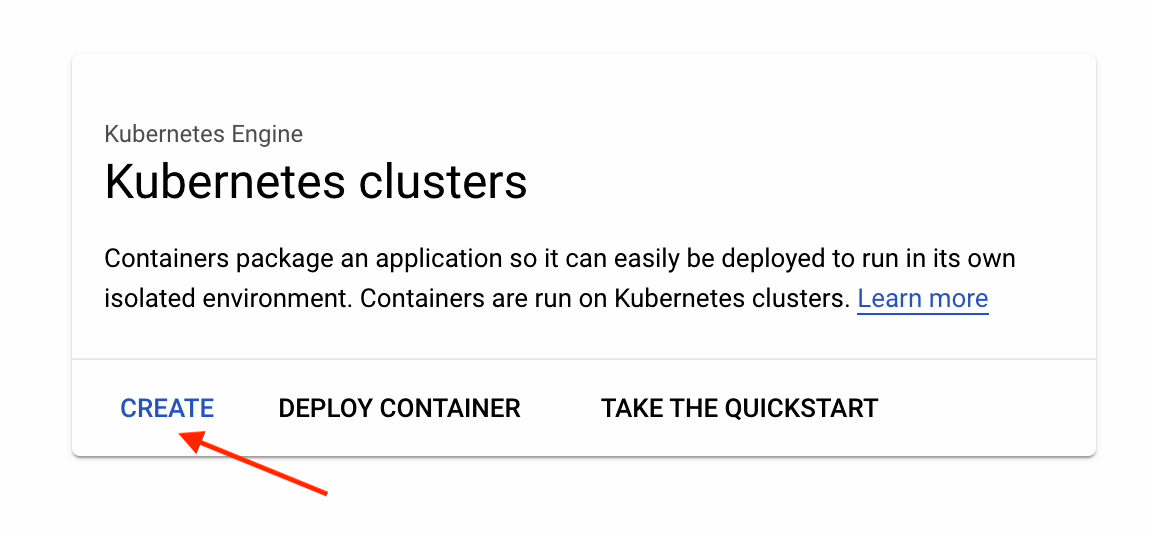
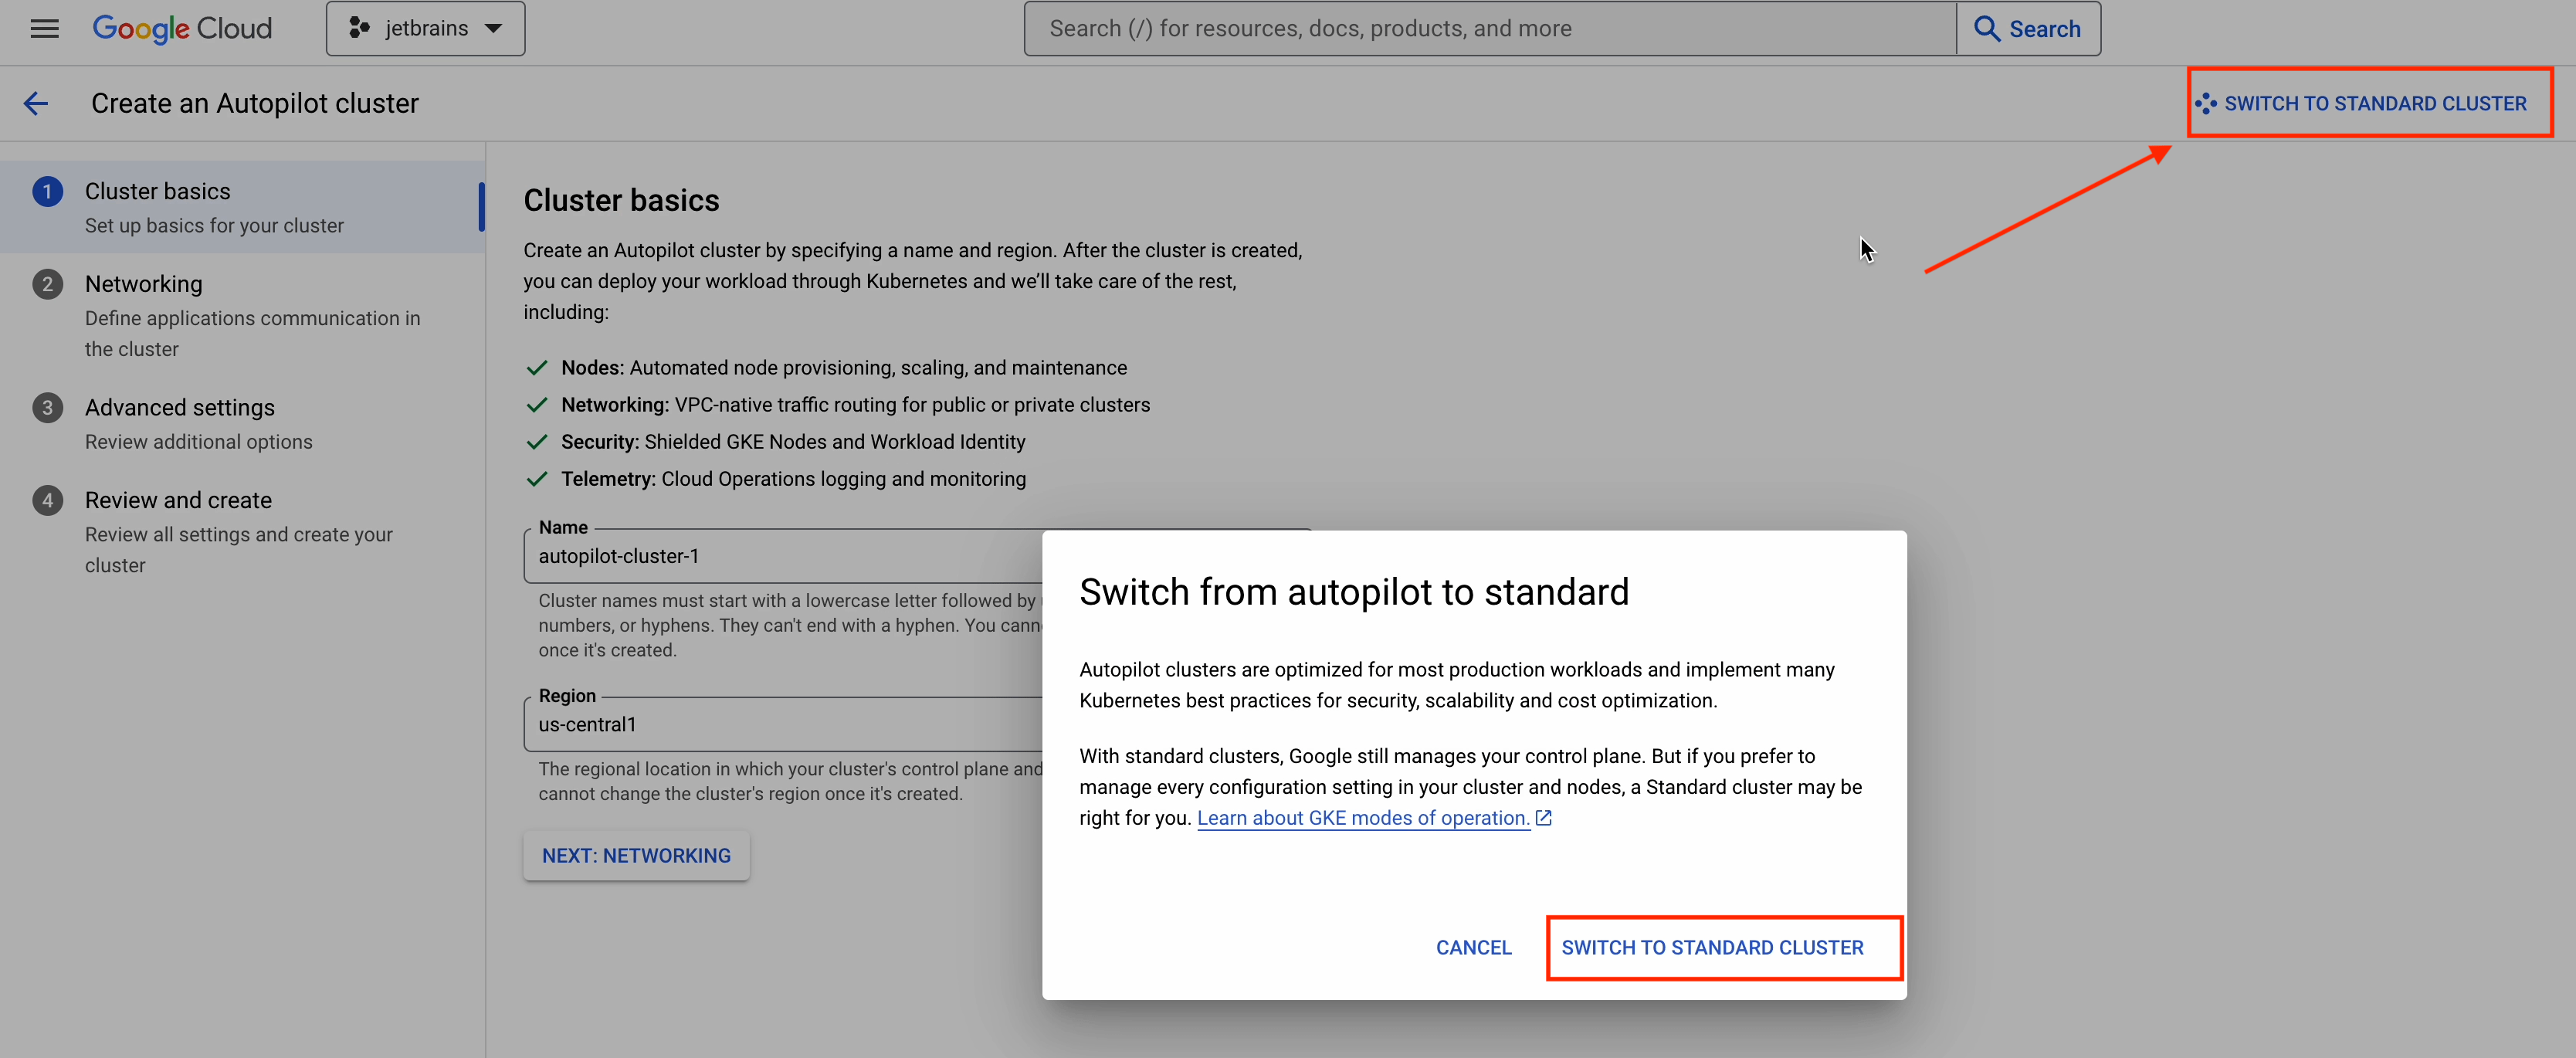
Click on Create.
Select Switch to Standard Cluster.
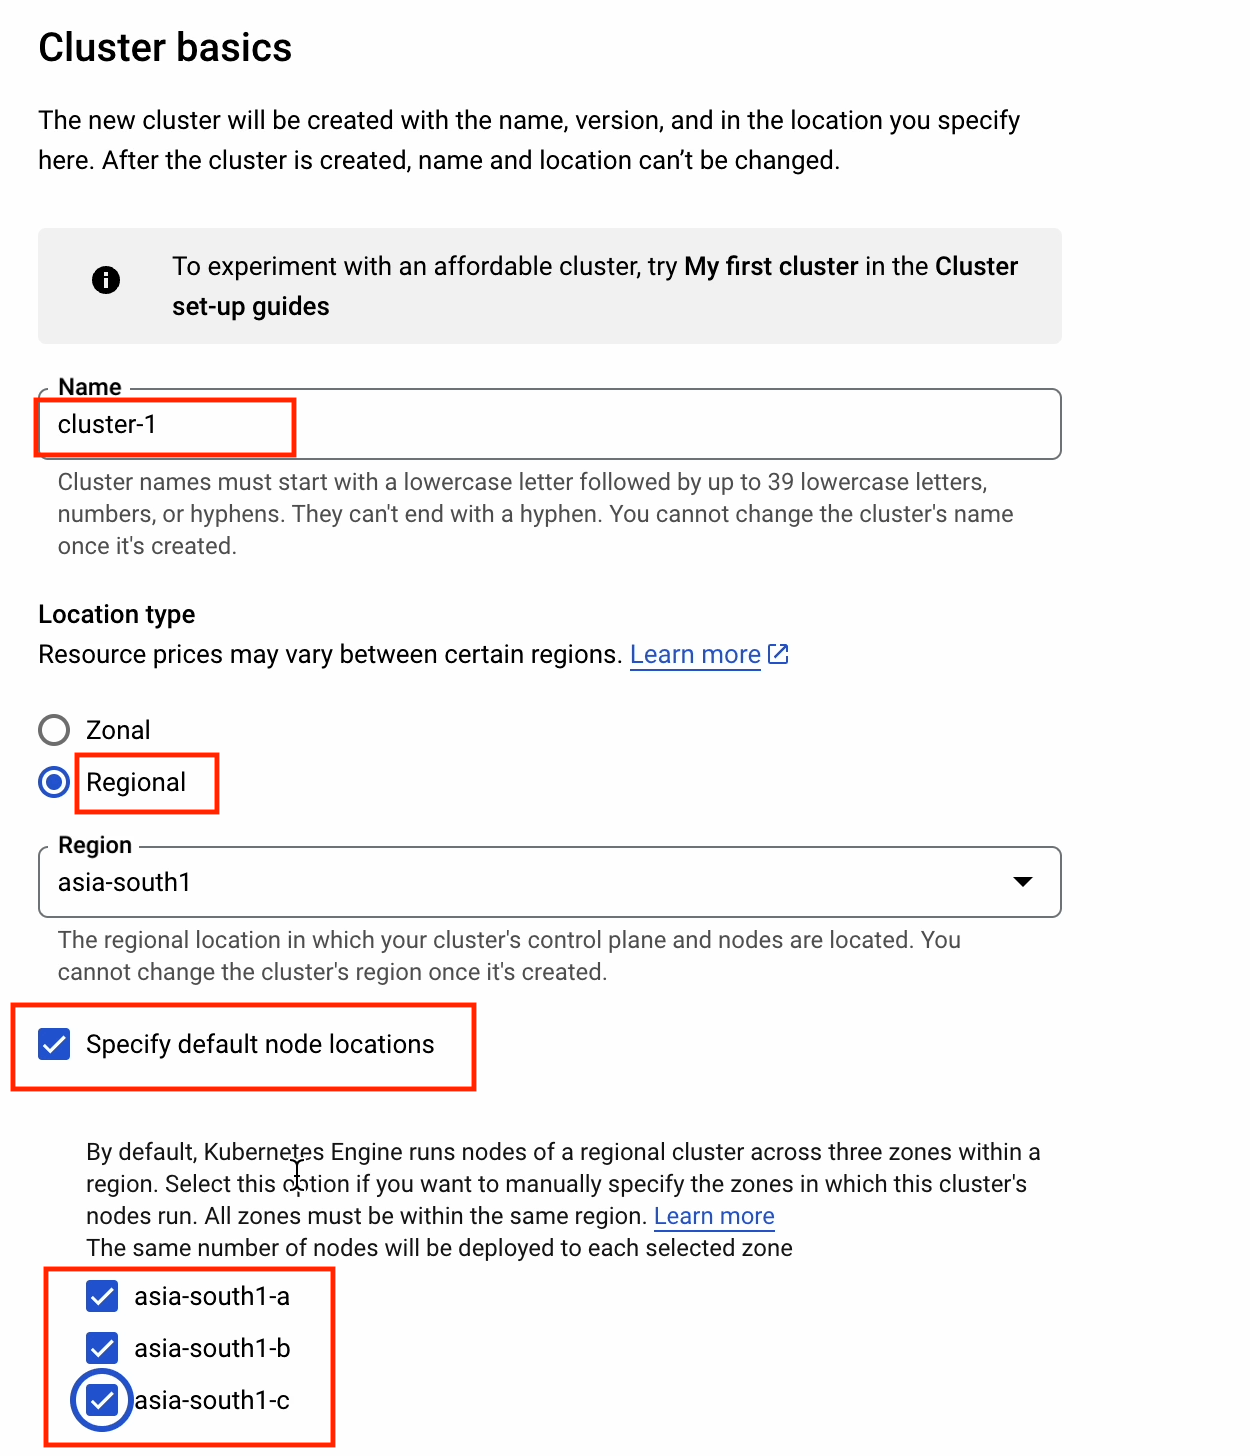
Enter your cluster’s basic information as follows:
- Choose a cluster name. For the purposes of this demonstration, I’ll select the default.
- Set the location to Regional.
- Click on Specify node locations and pick all three locations.
I’ll choose the regular channel and select Kubernetes version 1.25.8.
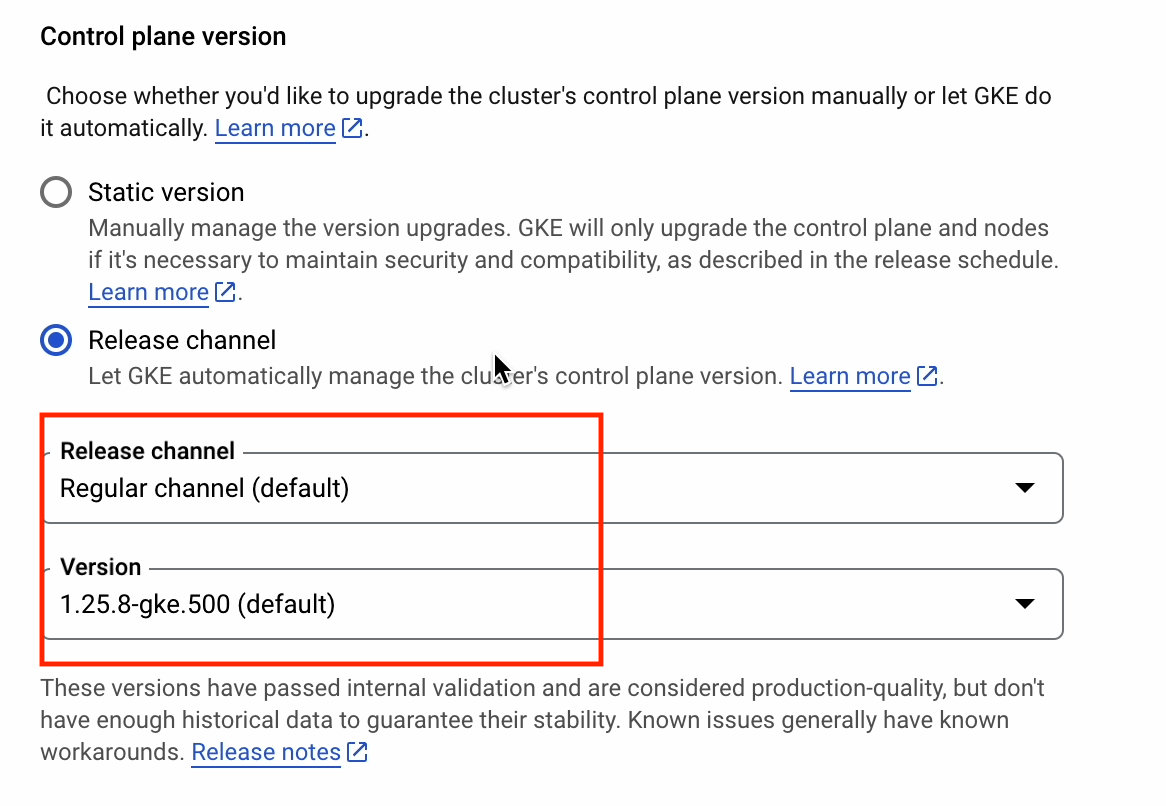
To find out more about release channels, follow this link: cloud.google.com/kubernetes-engine/docs/concepts/release-channels.
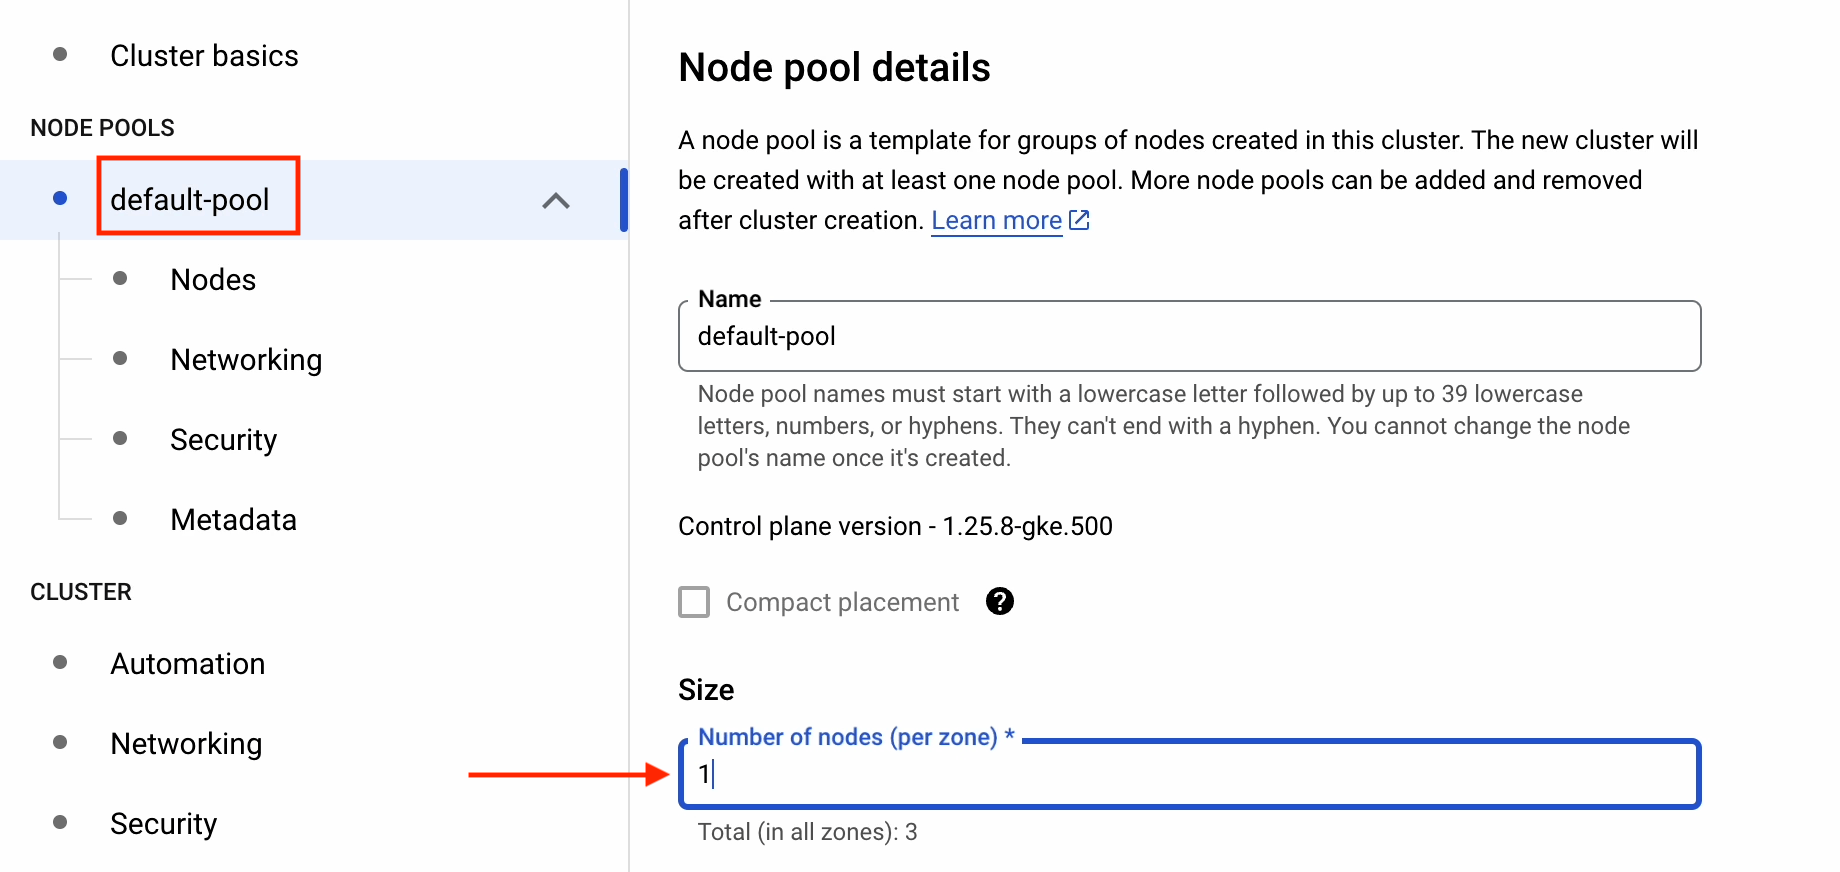
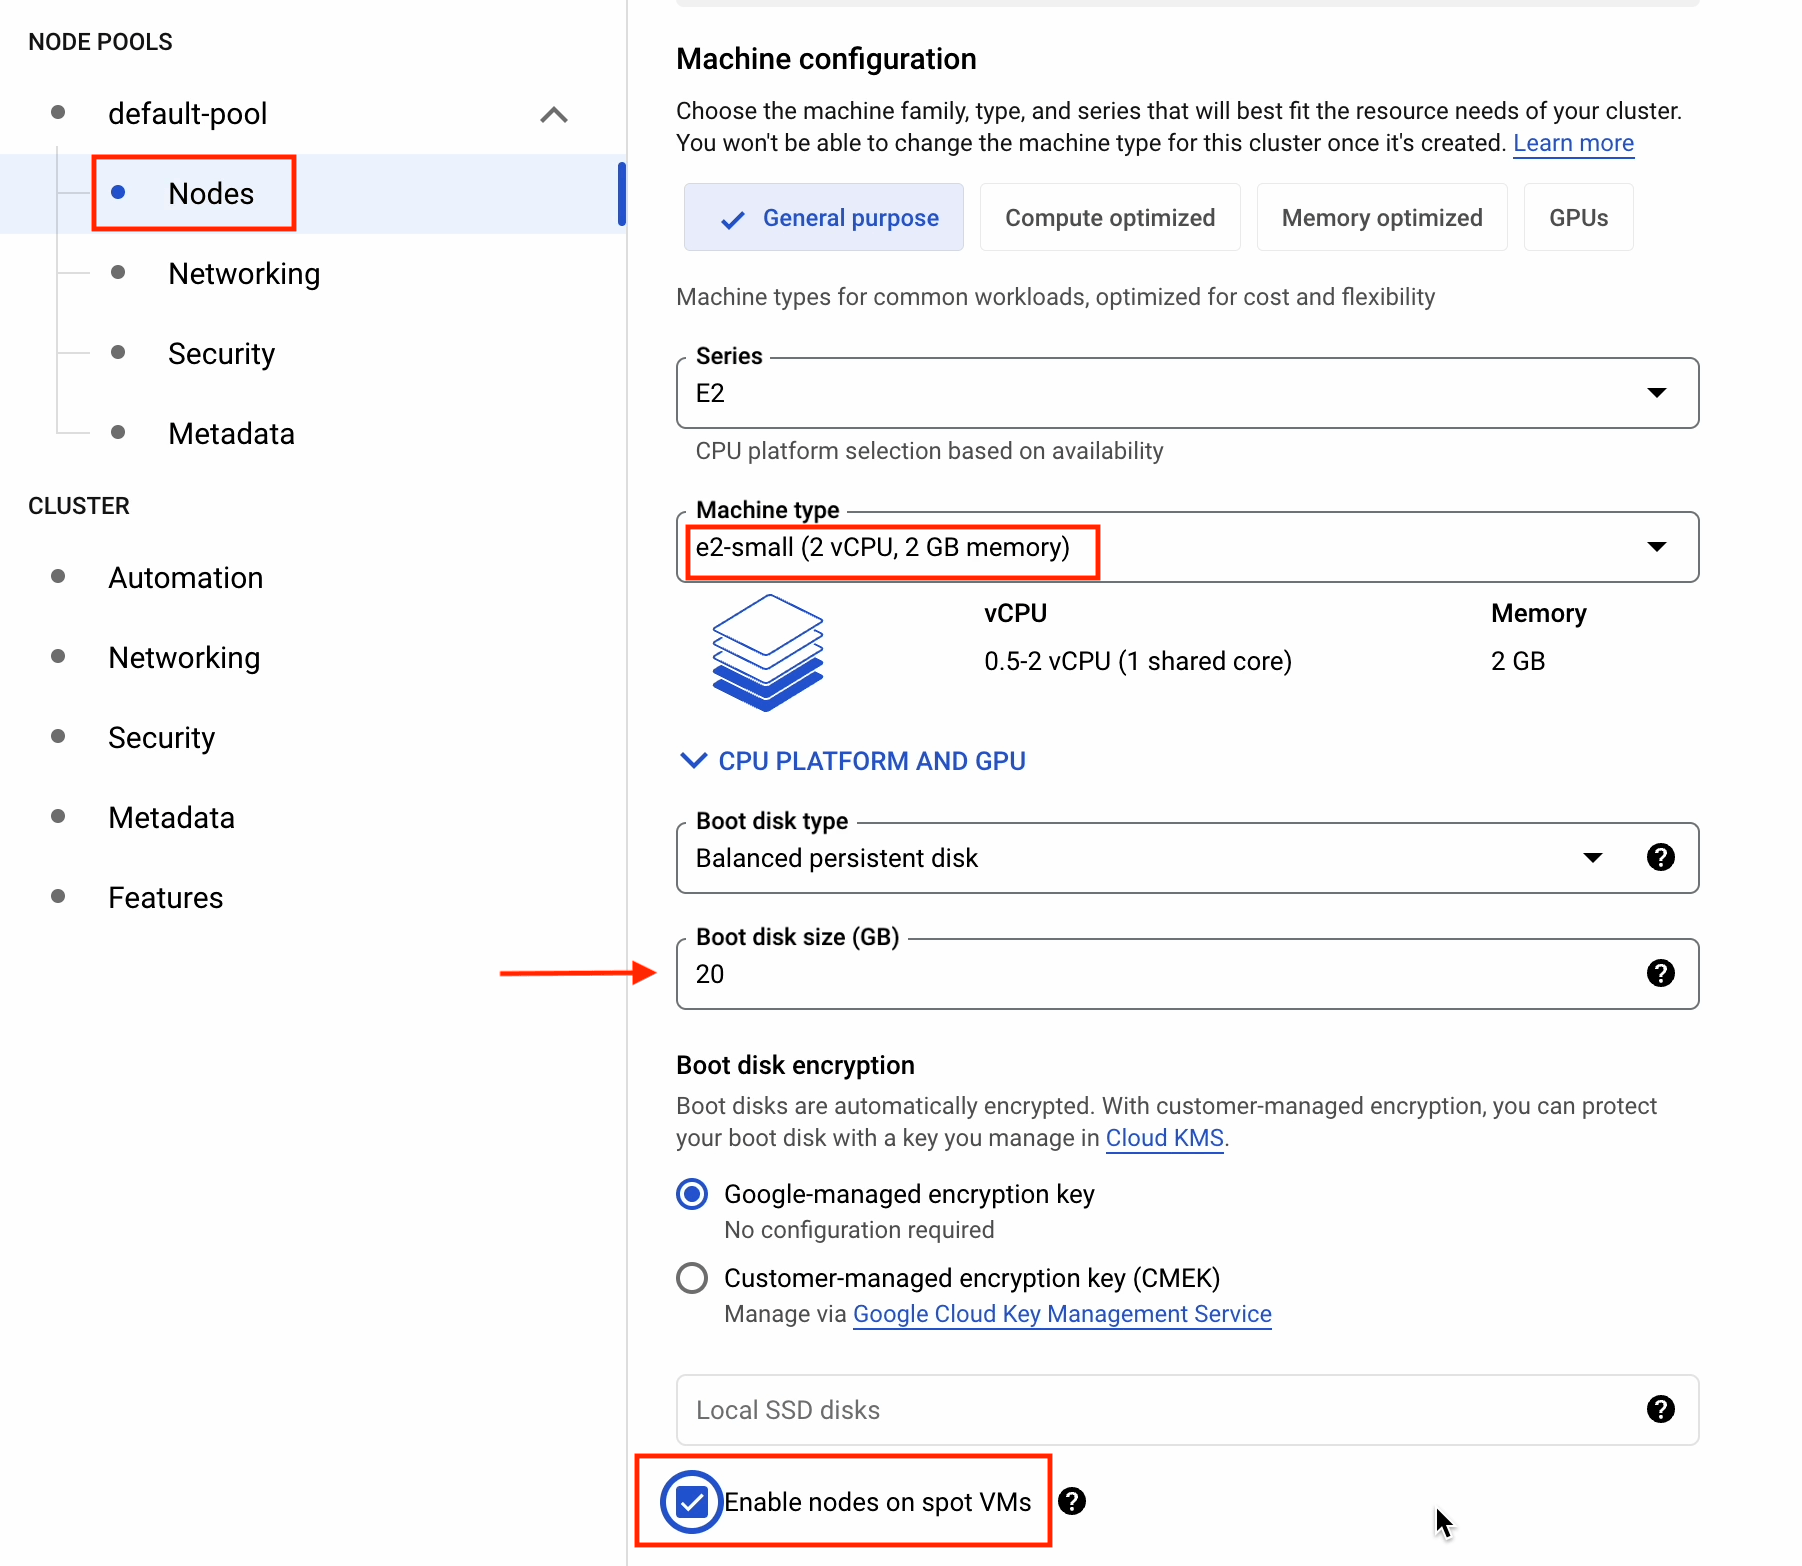
In the default-pool section, I’ll select one node per zone. There are three zones, so there will be three nodes in total.
Under Nodes, make the following changes to reduce the cost:
- Change Machine type to e2-small.
- Change Boot disk size to 20GB.
- Tick Enable nodes on spot VMs.
To learn more about Spot VMs, visit: cloud.google.com/compute/docs/instances/spot.
Under Security, select Allow full access to all Cloud APIs.
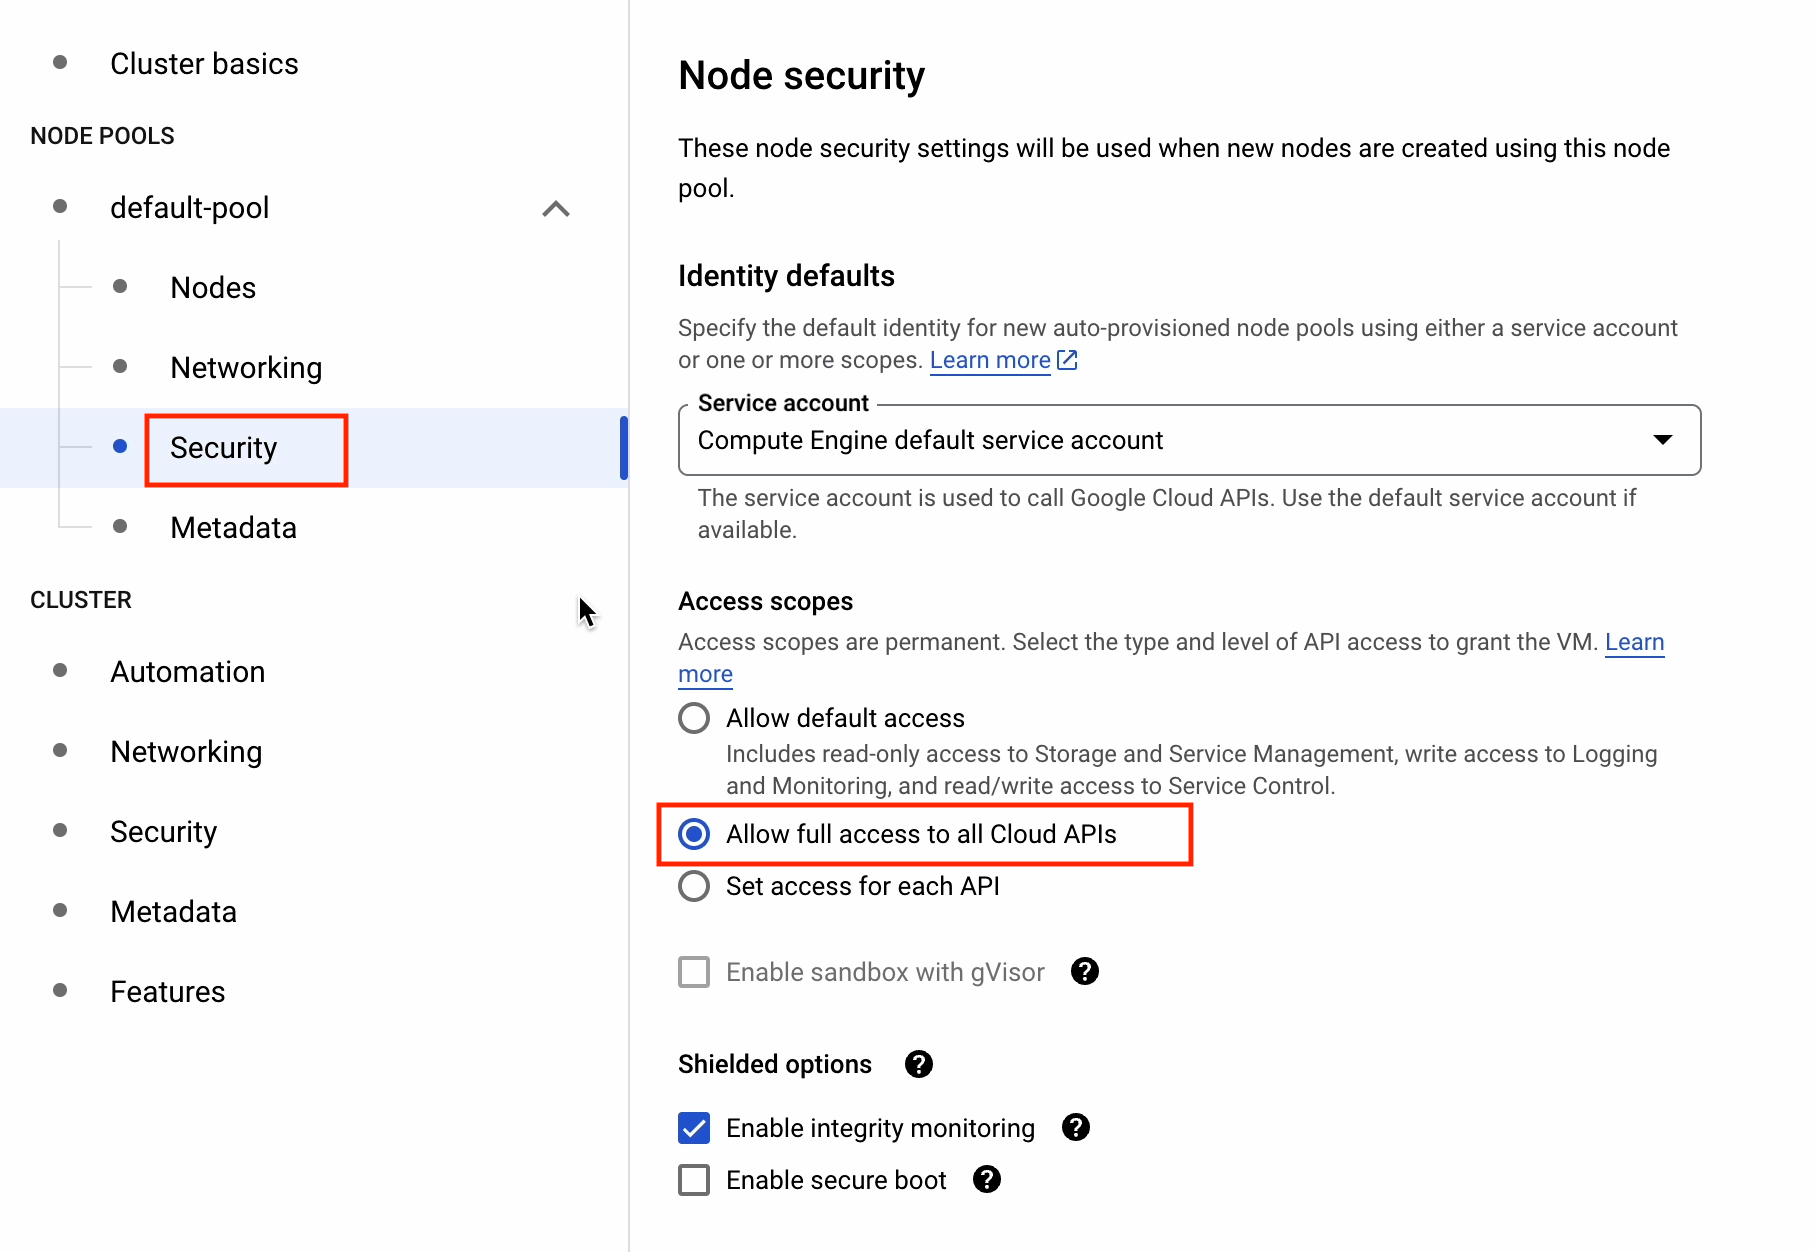
References: cloud.google.com/compute/docs/access/service-accounts#accesscopesiam

Continuing on with the networking section.
Tick the Access control plane using its external IP address and Enable control plane global access check boxes.
Make sure to provide the Control plane IP range.
References: cloud.google.com/kubernetes-engine/docs/how-to/private-clusters
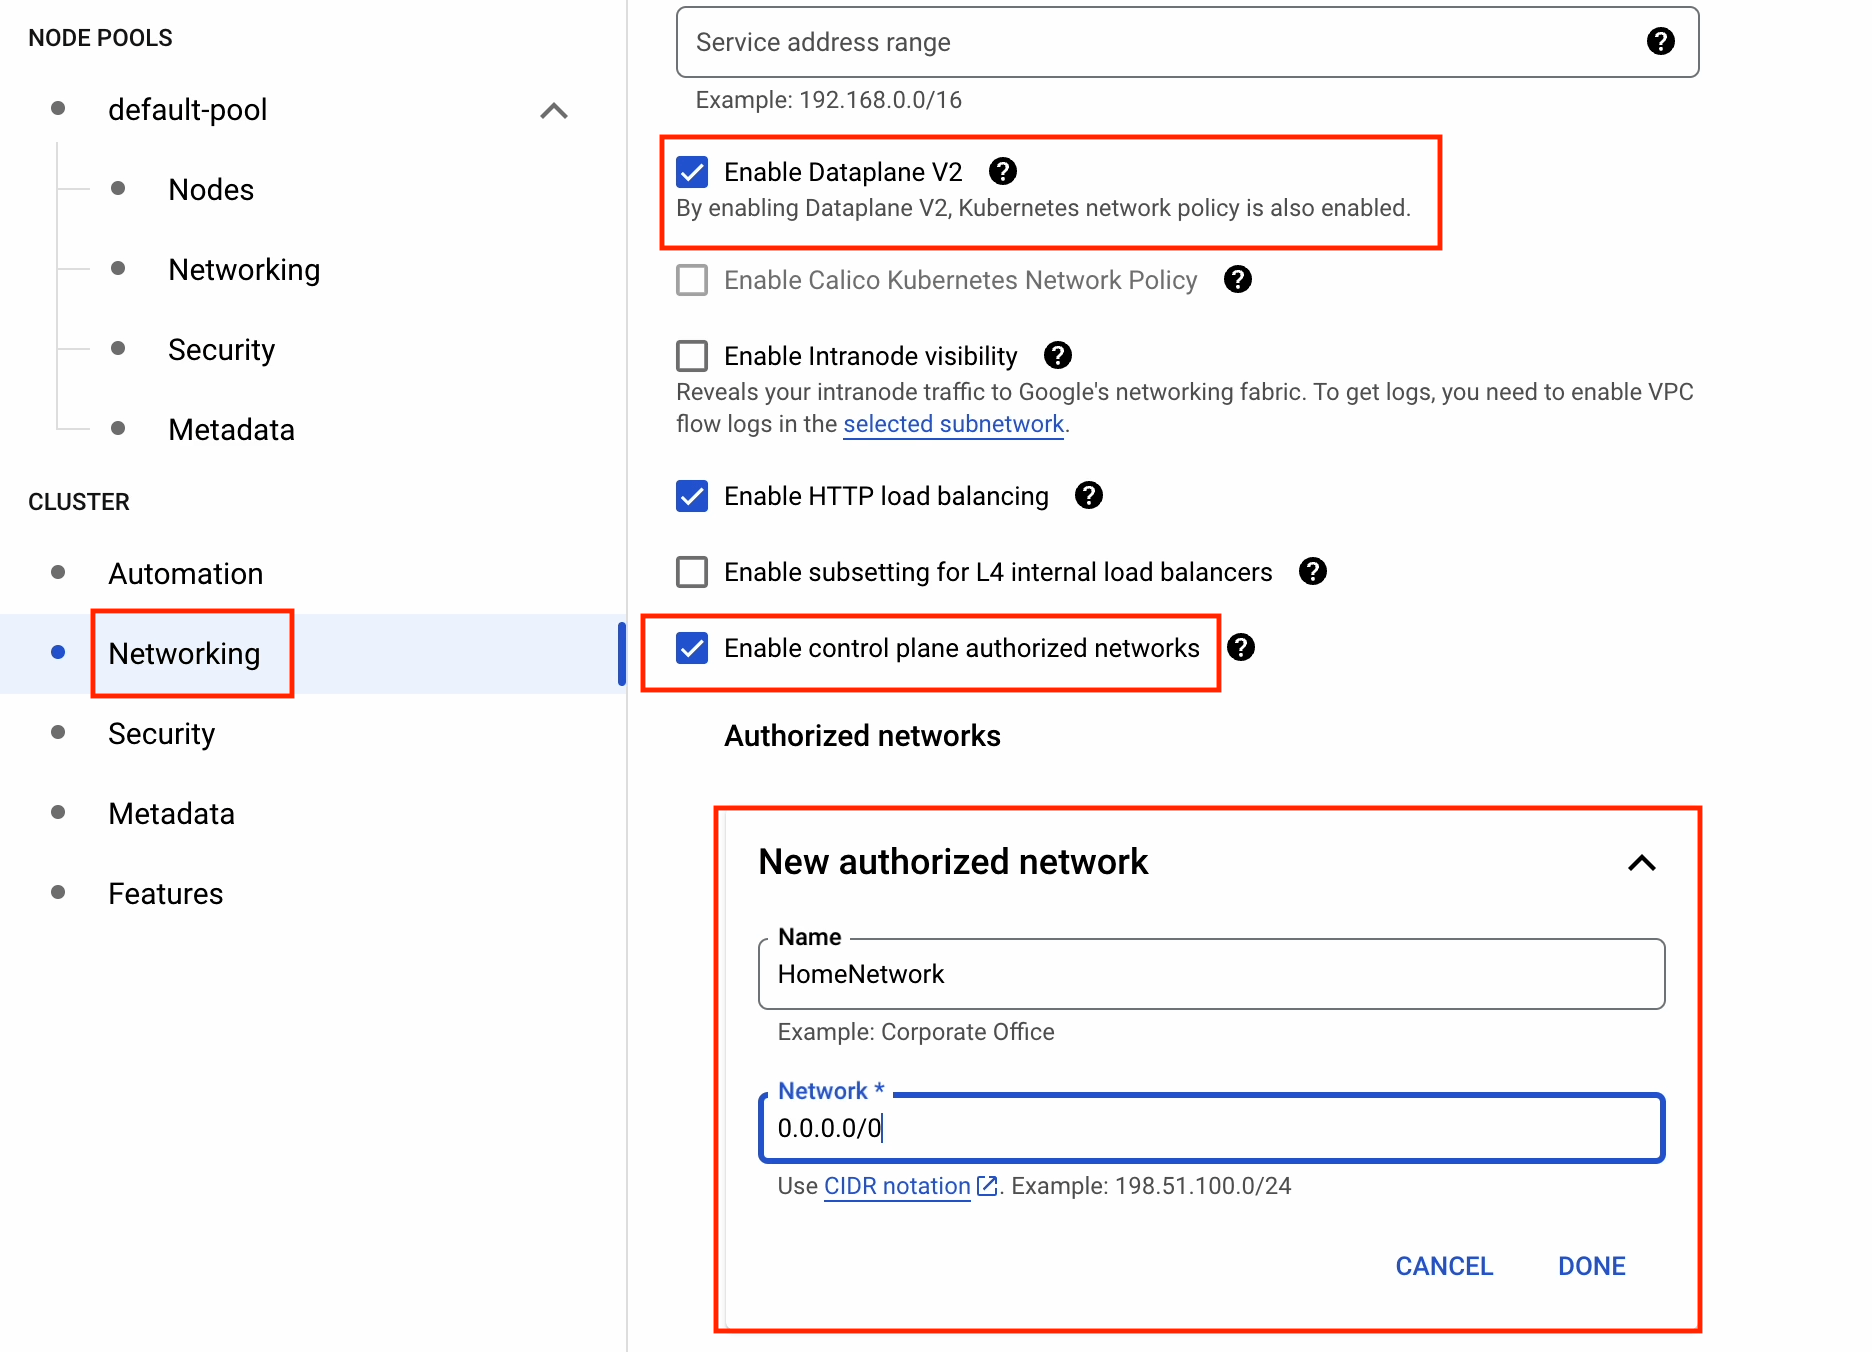
Under Cluster | Networking, tick the following boxes:
- Enable Dataplane V2
- Enable control plane authorized networks
GKE Dataplane V2 is a data plane for GKE and Anthos clusters that is optimized for Kubernetes networking.
To find out more about Dataplane V2, see: cloud.google.com/kubernetes-engine/docs/concepts/dataplane-v2.
In the Authorized networks section, I’ll try to access the cluster from the public internet. In the interest of security, only give a static IP address that is restricted to your organization.
Security is a broad subject area, and so we won’t go into too much detail here. However, if you’re interested learning more about hardening your clusters, then follow the link below: cloud.google.com/kubernetes-engine/docs/how-to/hardening-your-cluster.
Under Cluster | Security, make sure to enable Workload Identity.
Workload Identity allows workloads in your GKE clusters to impersonate Identity and Access Management (IAM) service accounts in order to access Google Cloud services.
To learn more about Workload Identity, follow the link below:
cloud.google.com/kubernetes-engine/docs/how-to/workload-identity.

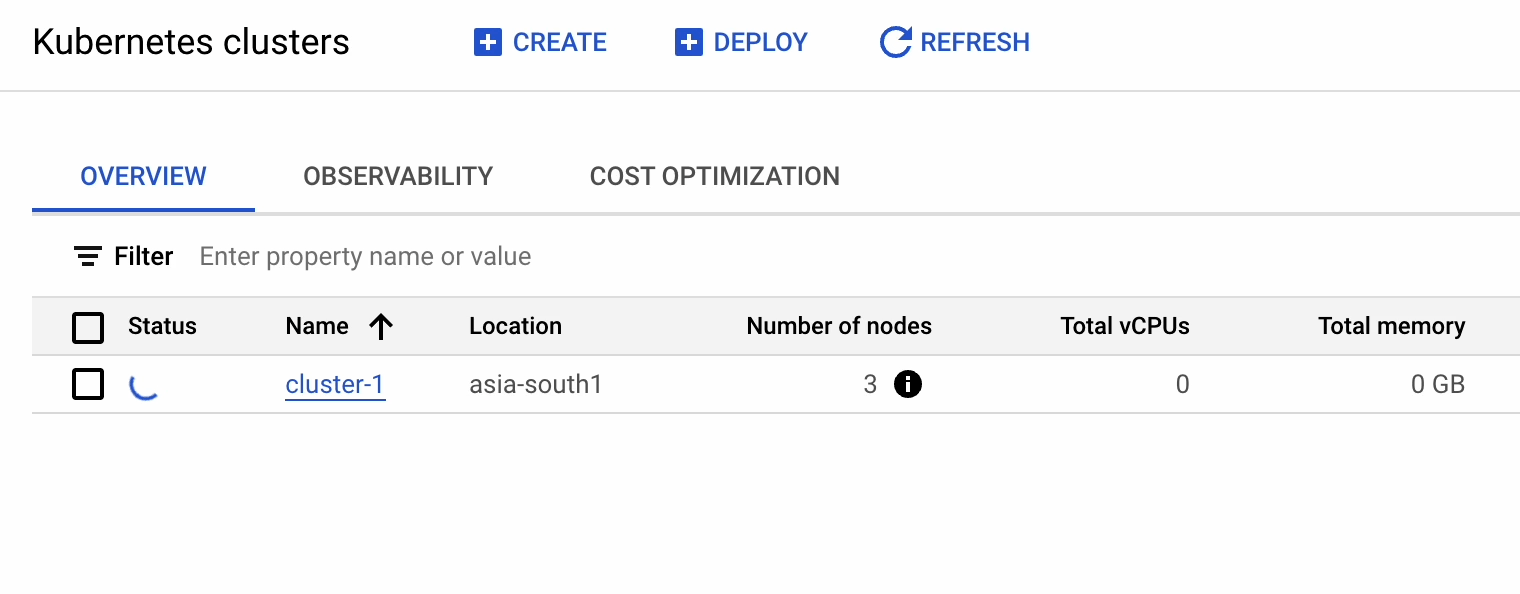
Now that we’ve made all the necessary changes, let’s proceed by clicking Create.
It will take a couple of minutes to launch the new cluster.
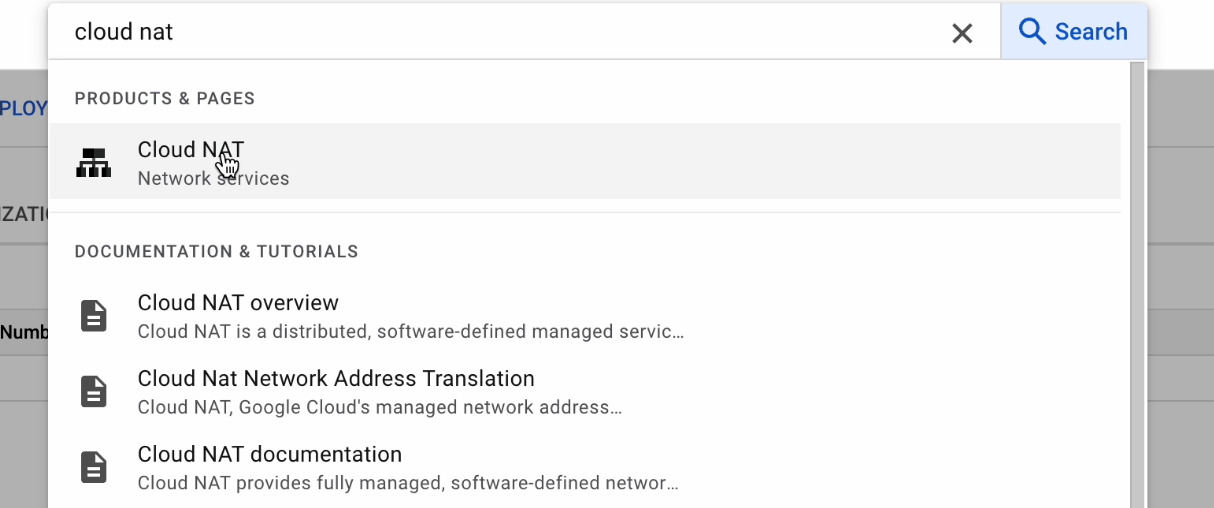
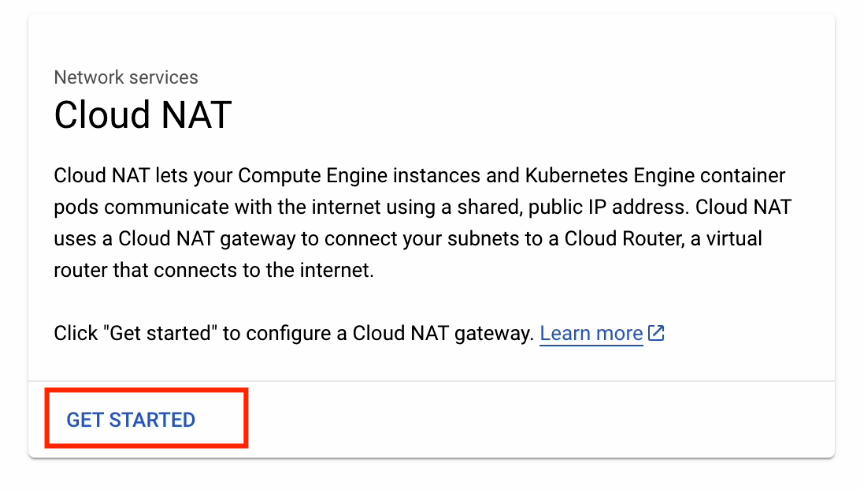
Cloud NAT
Cloud NAT provides outgoing connectivity for the following resources:
- Compute Engine virtual machine (VM) instances without external IP addresses.
- Private Google Kubernetes Engine clusters.
- Cloud Run instances through Serverless VPC Access.
- Cloud Functions instances through Serverless VPC Access.
- App Engine standard environment instances through Serverless VPC Access.
Click on Get Started.
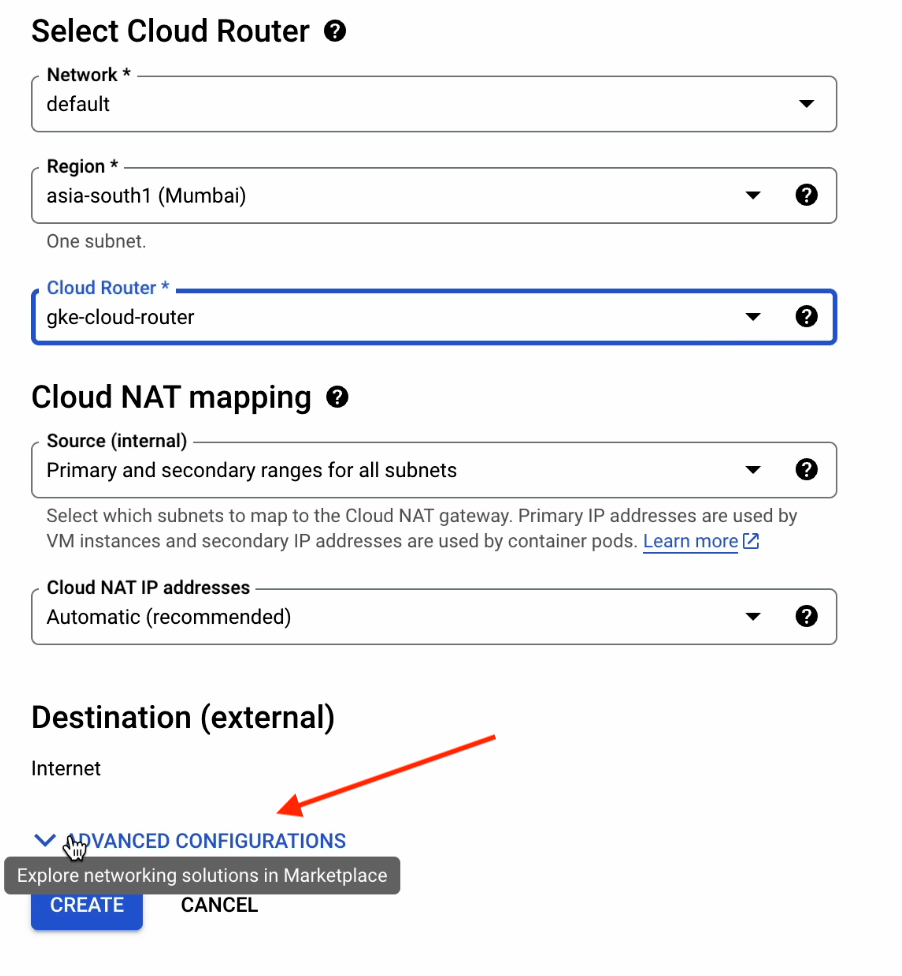
Provide the following information and choose your region which is closest to your location:
- Gateway name – gke-cloud-nat
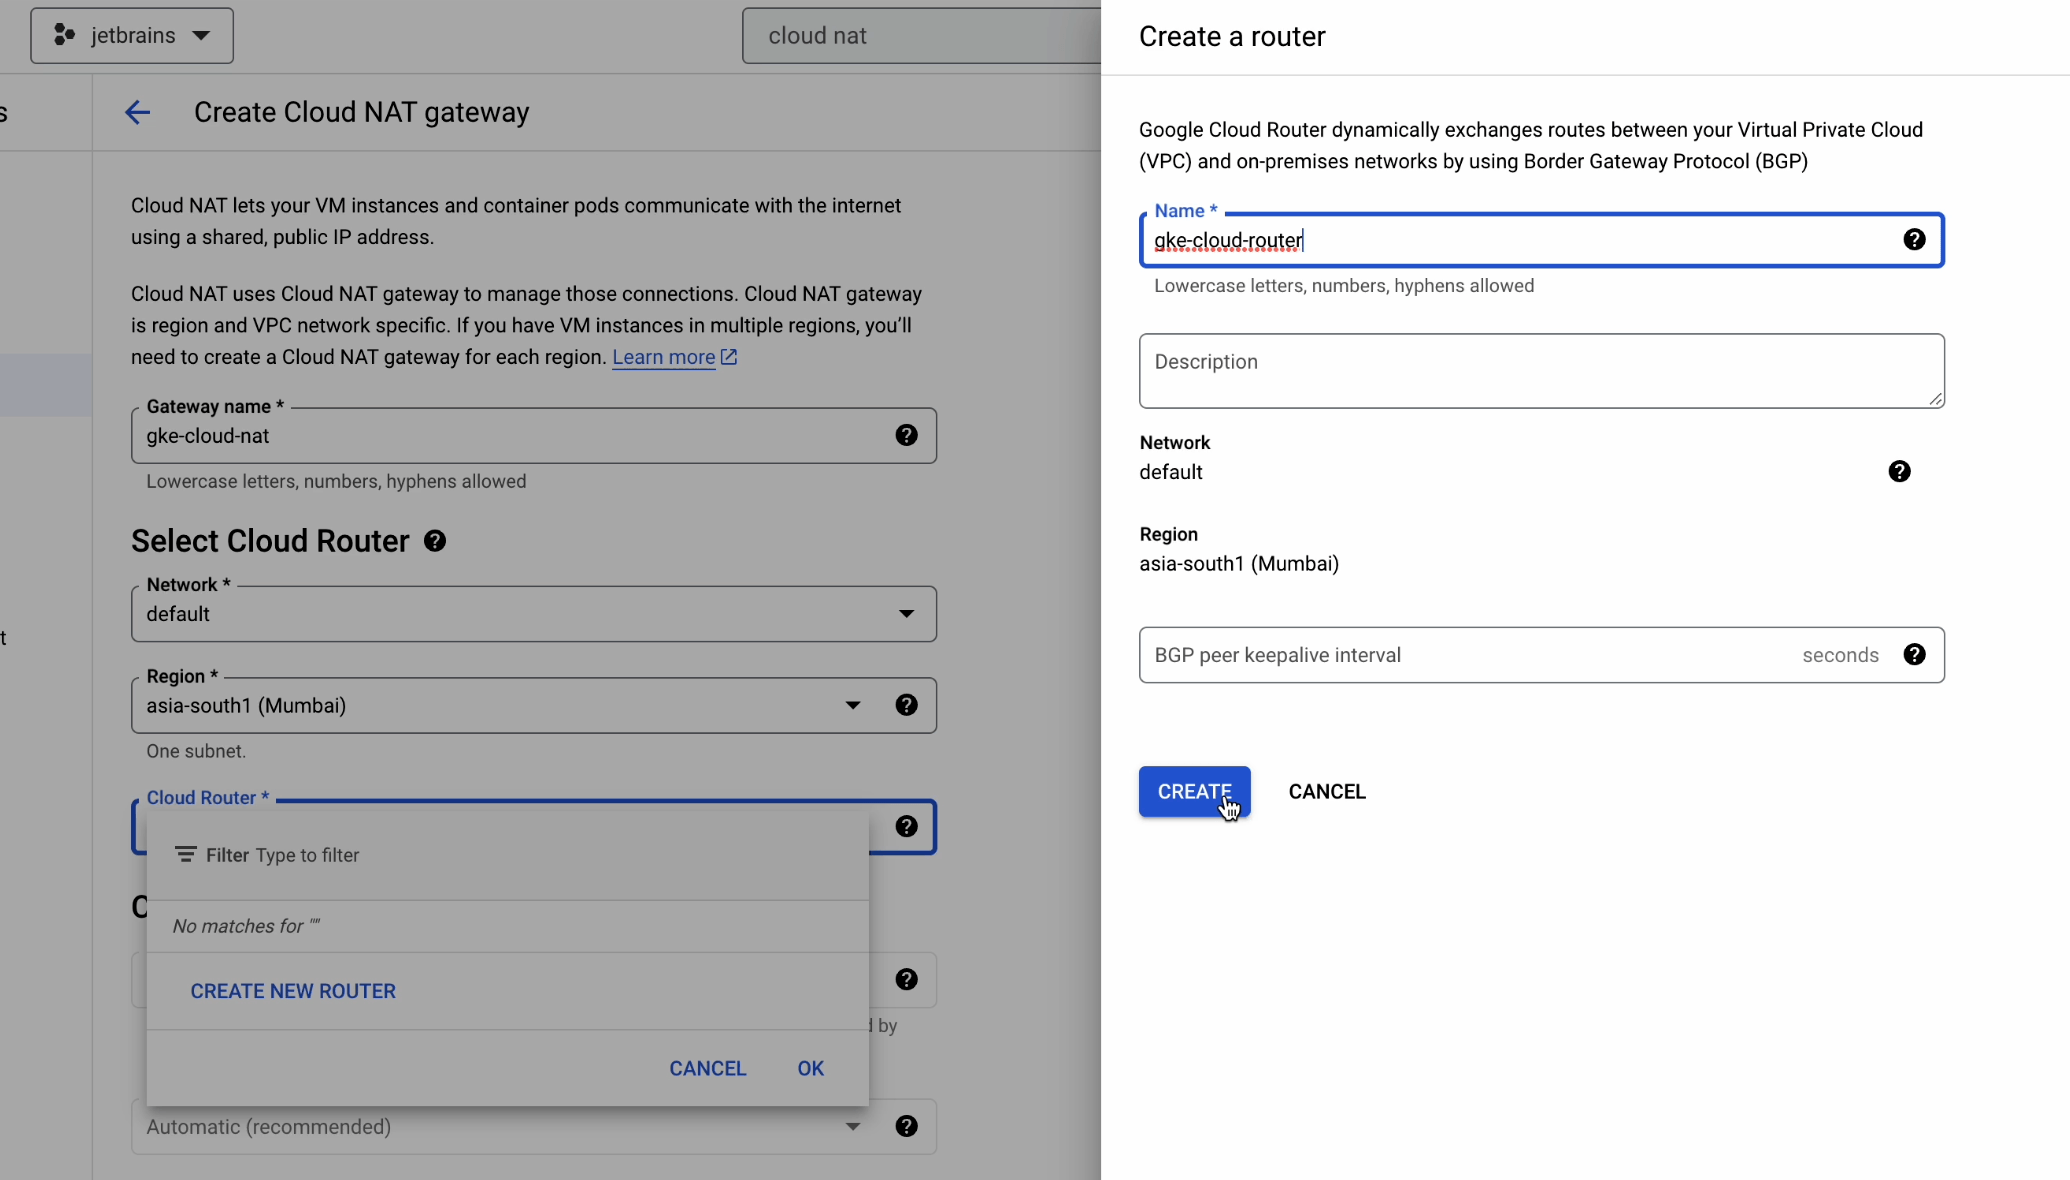
- Region – asia-south1 Make sure to create a new cloud router.
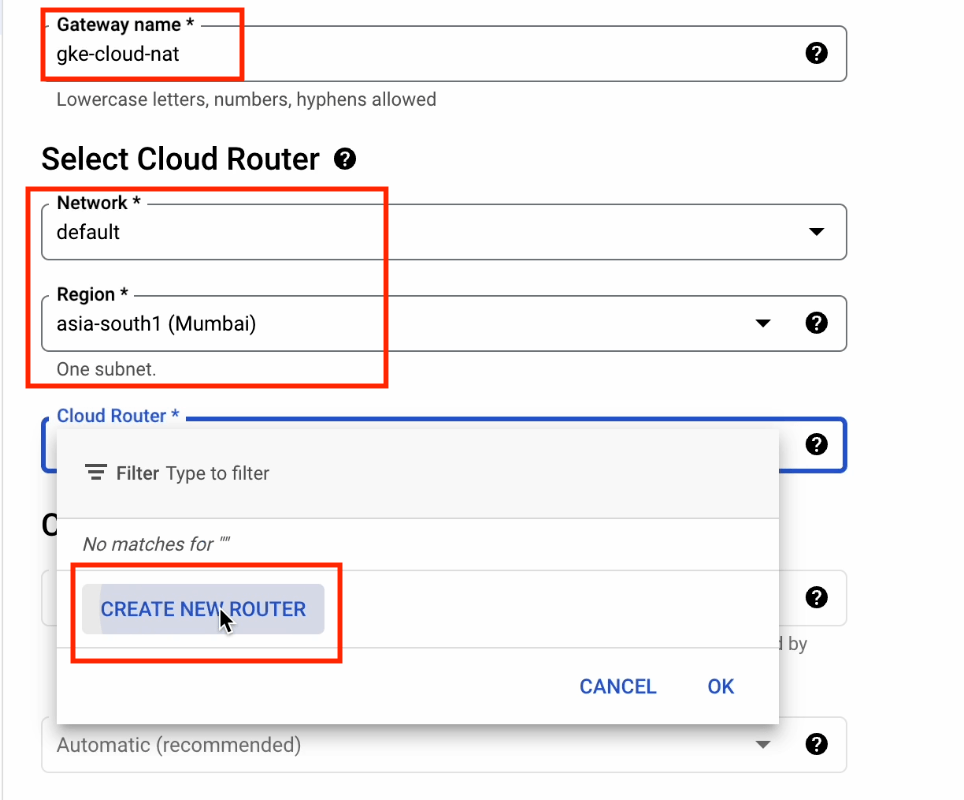
Name it “gke-cloud-router” and leave the rest of the fields set to their defaults.
Now go ahead and click on Advanced Configurations.
Tick the Enable Dynamic Port Allocation box: cloud.google.com/nat/docs/ports-and-addresses#dynamic-port.
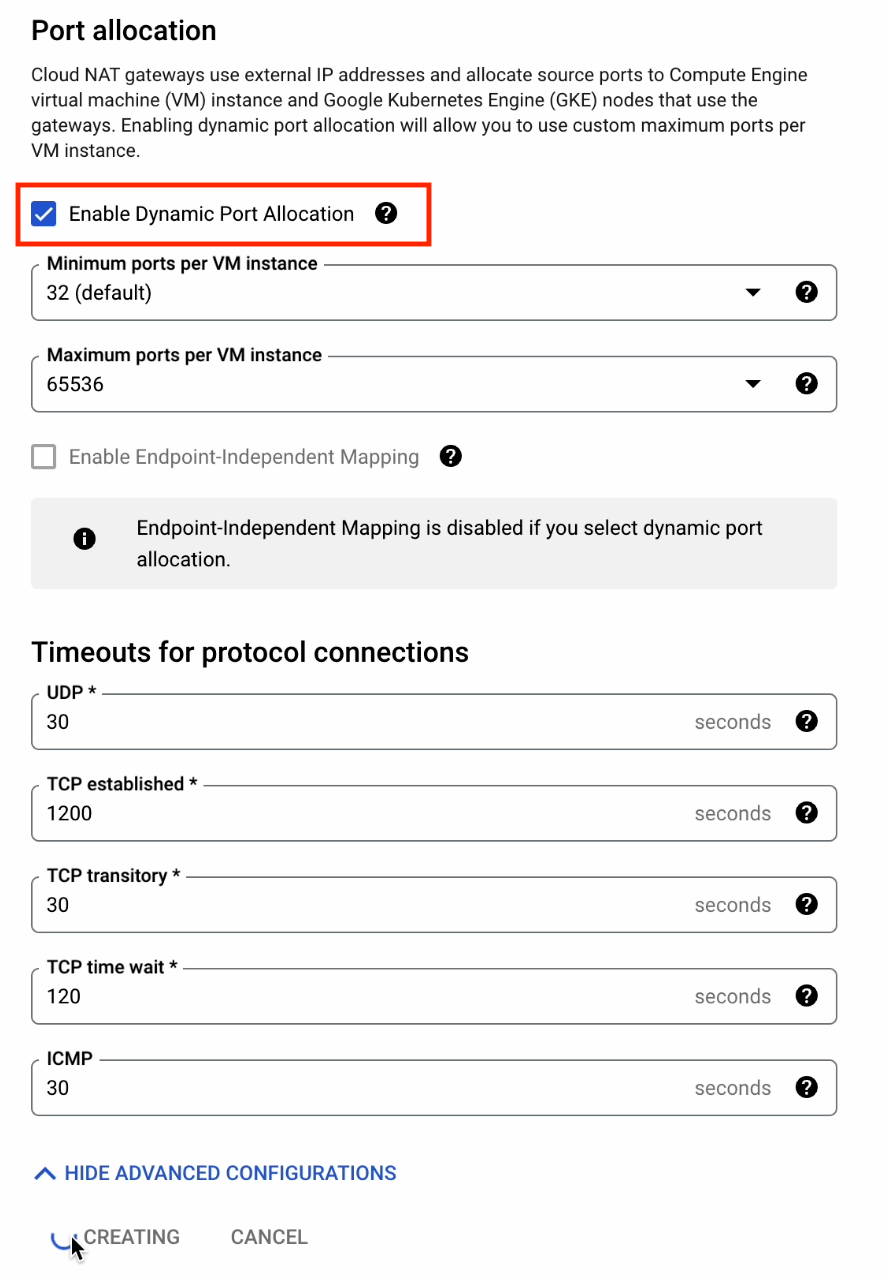
Leave everything set to the defaults, and then click Create.
There we go. Our Cloud NAT has been successfully created!

Private service connection
We need to enable this feature to work with CloudSQL, which we’ll be setting up shortly on a private network.
To learn more about it, visit: cloud.google.com/sql/docs/mysql/configure-private-services-access.
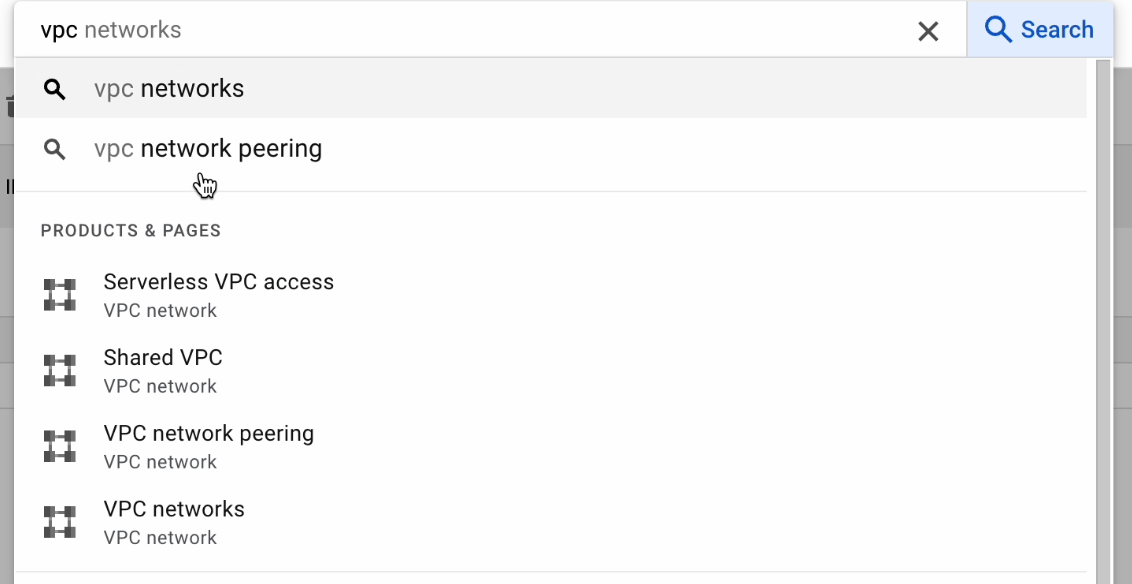
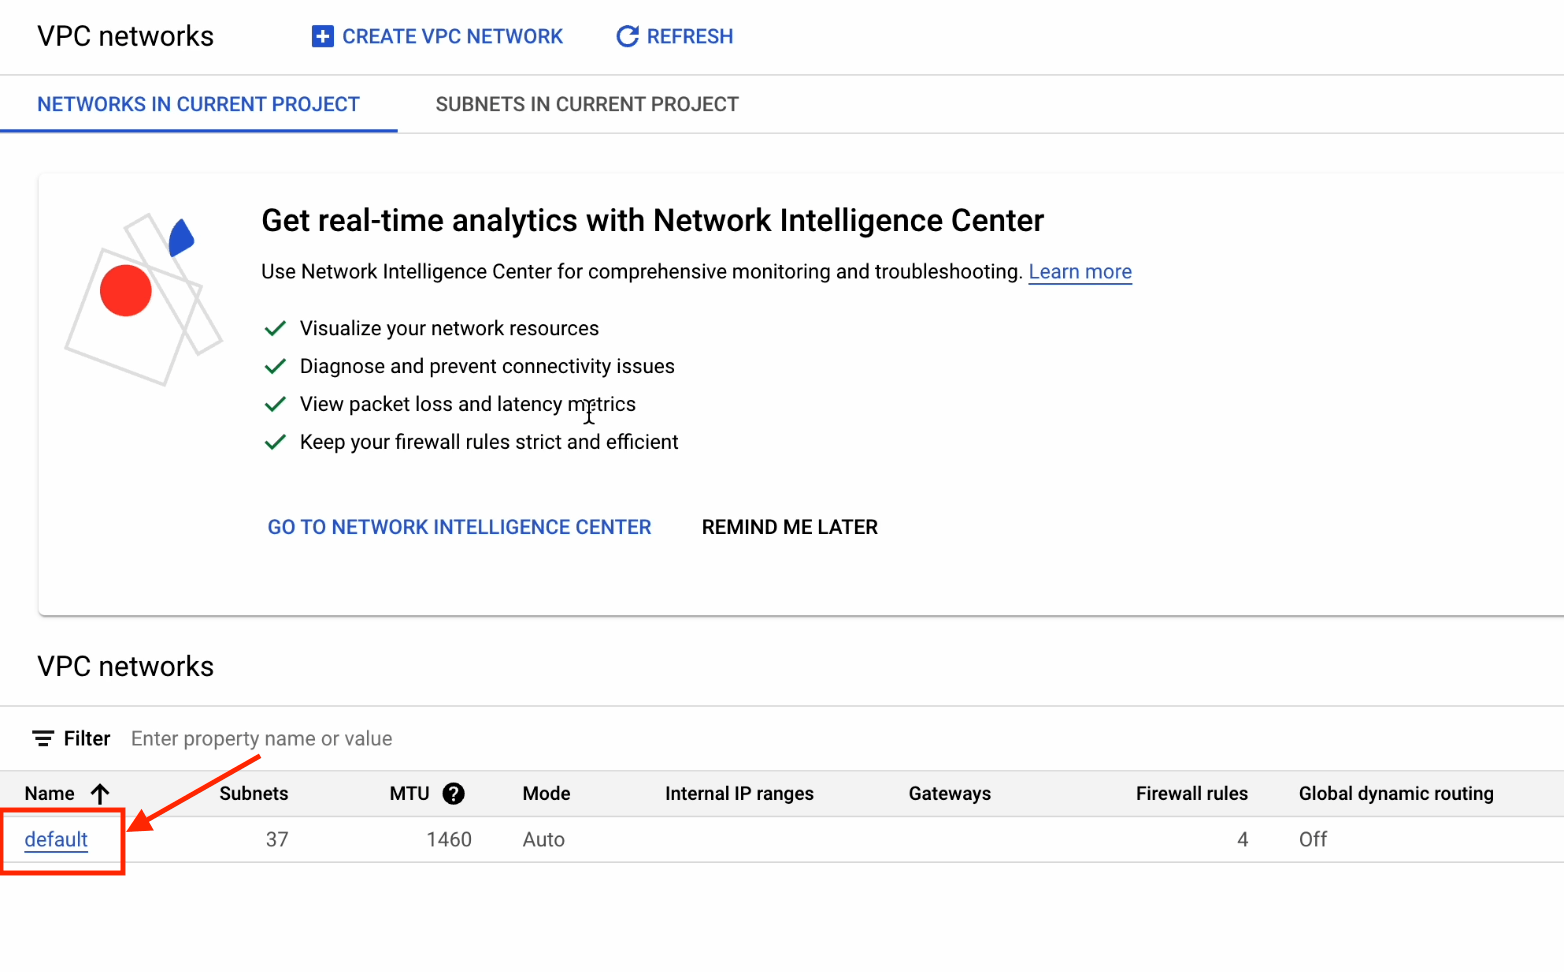
Let’s begin by searching for “vpc” and clicking on “VPC networks”
Click on default.
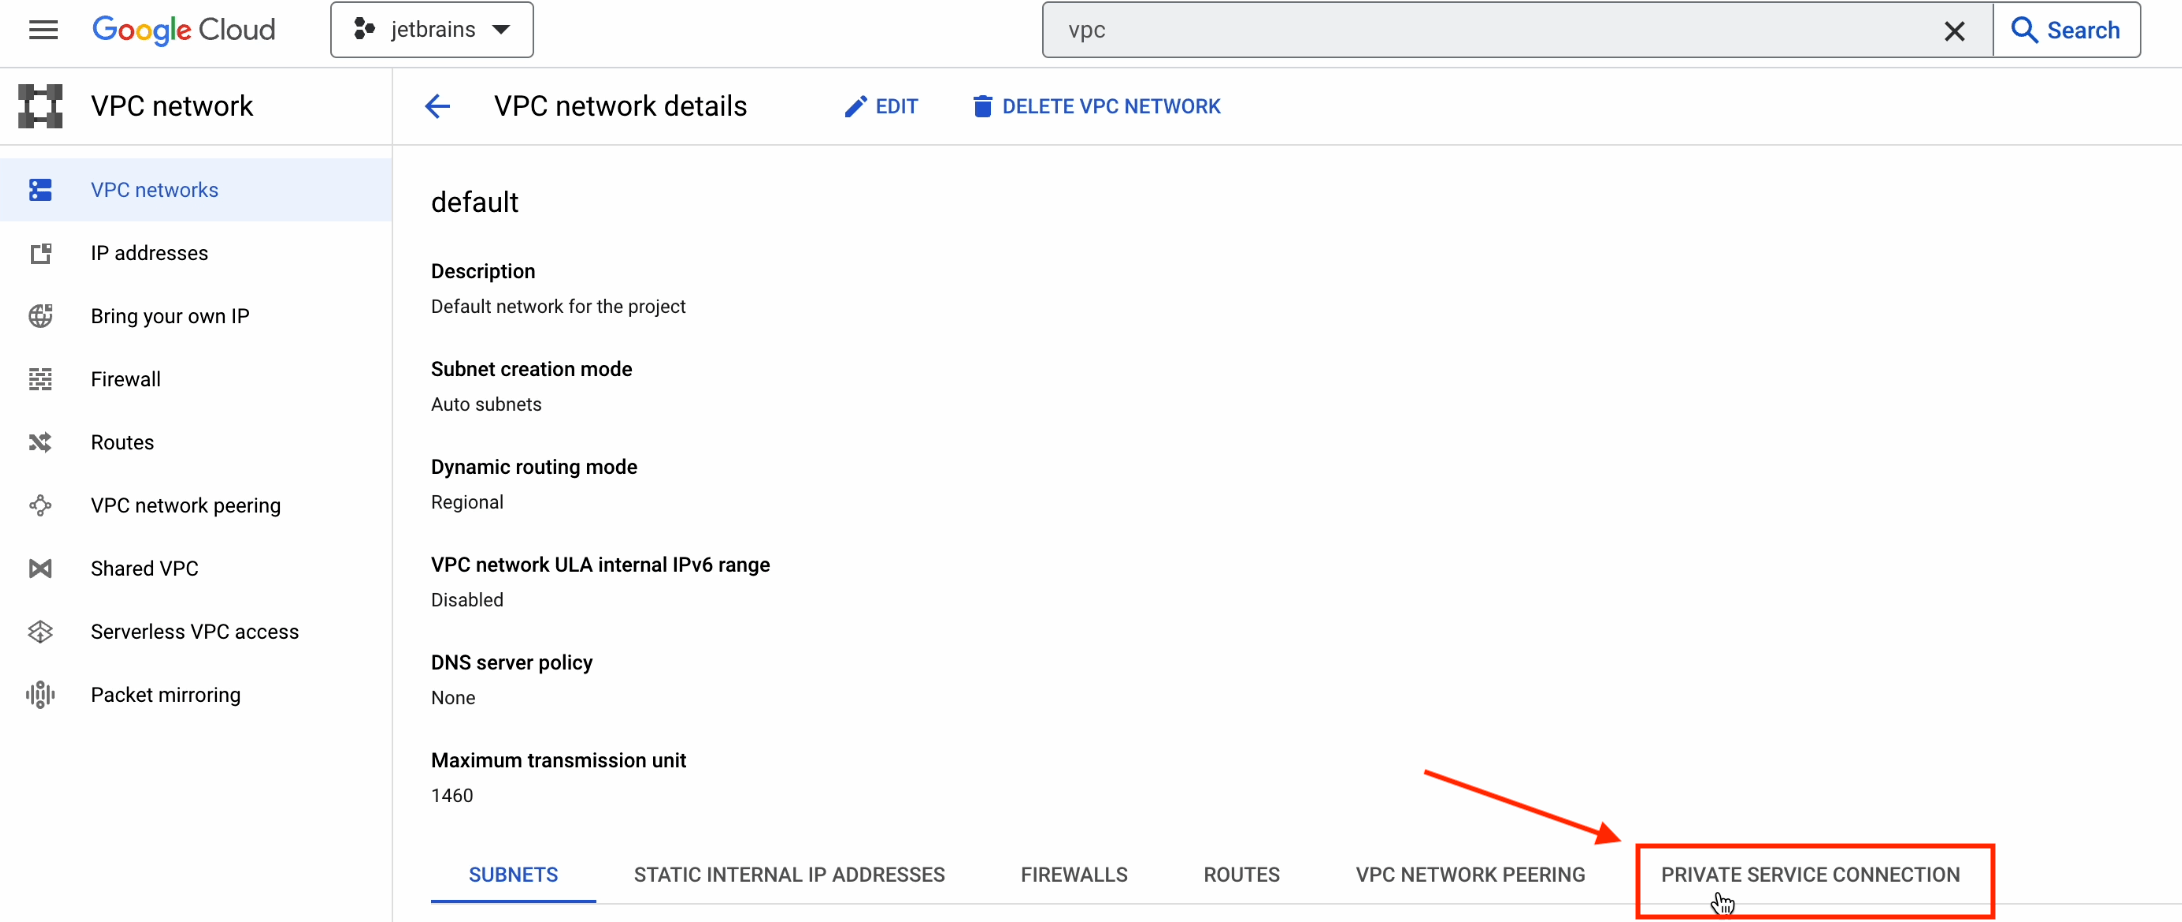
Click on Private Service Connection | Enable API to activate the Service Networking API.
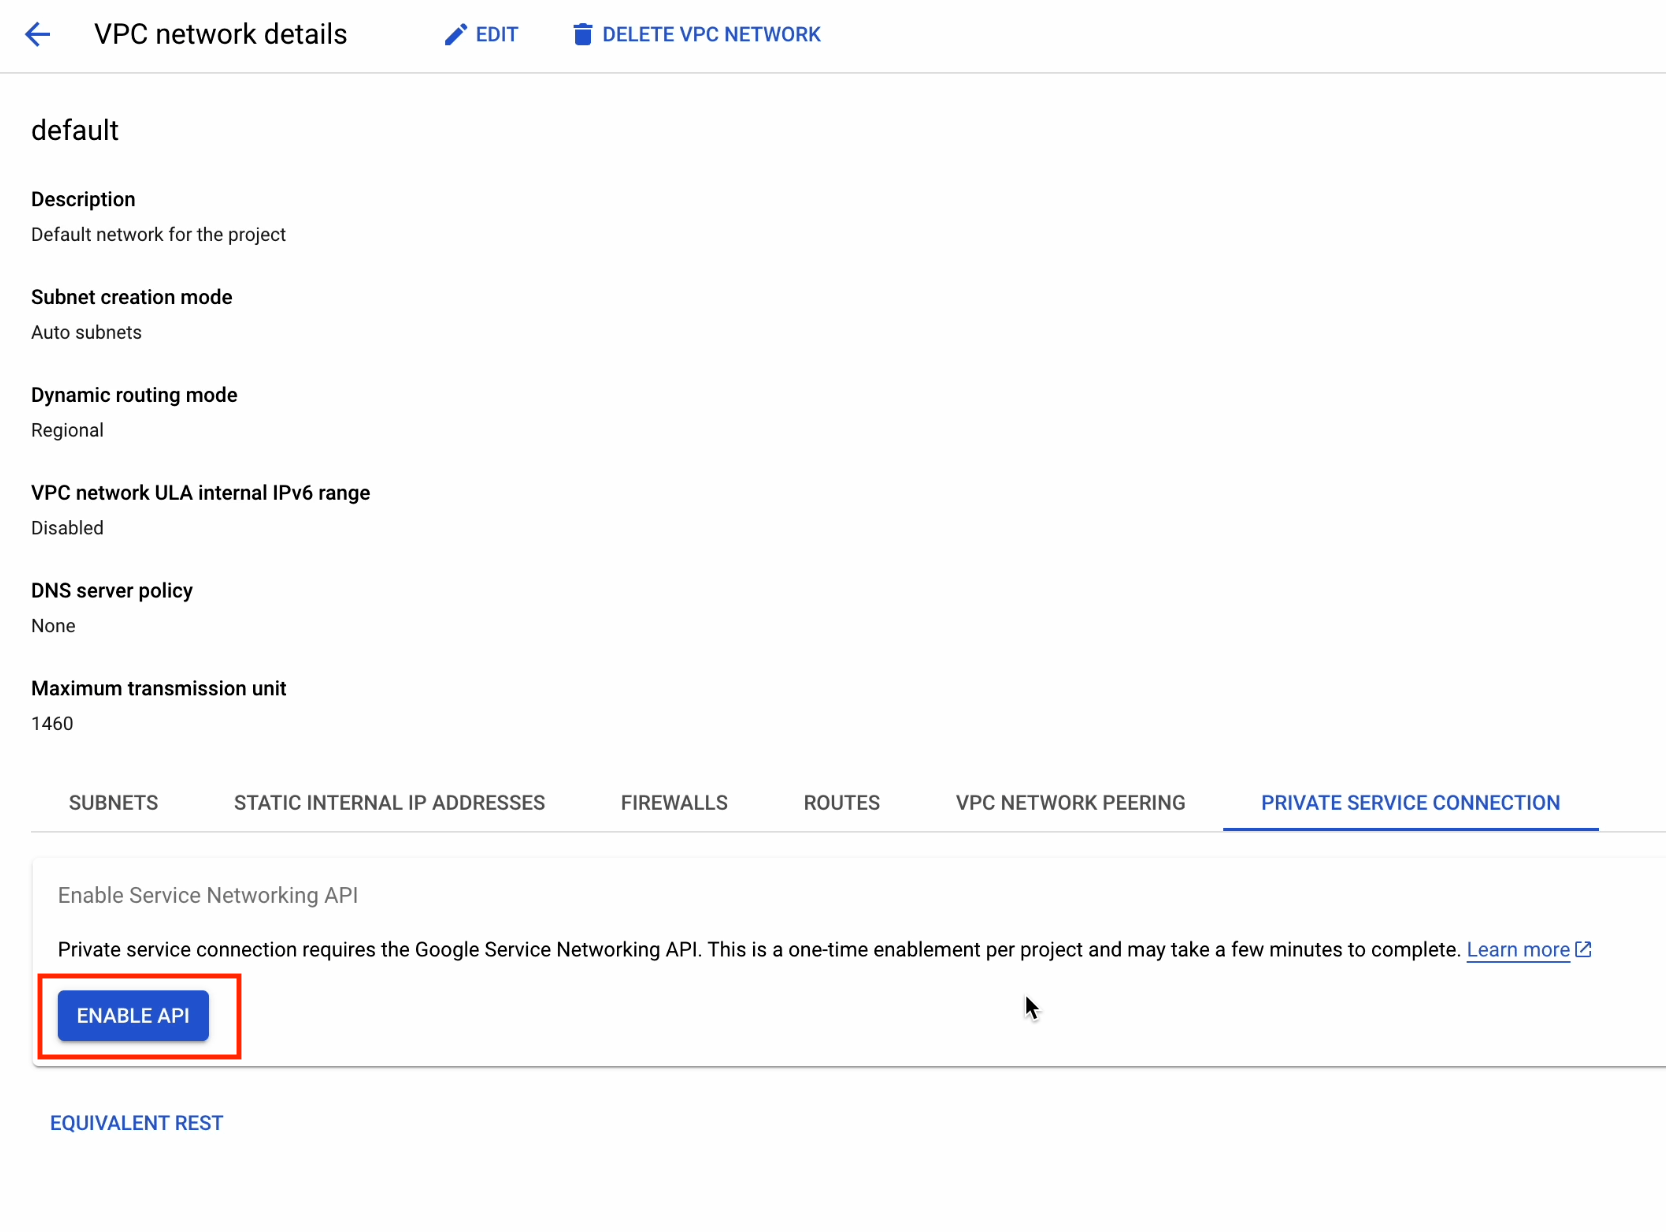
Once the API is enabled, click on Allocate IP Range.
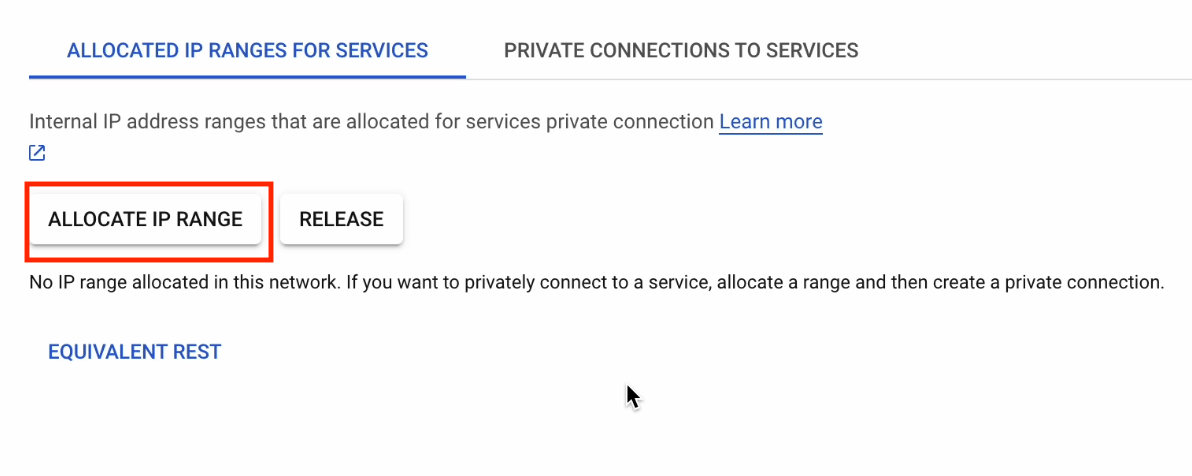
The IP range should be on Automatic, with Prefix length set to 16.
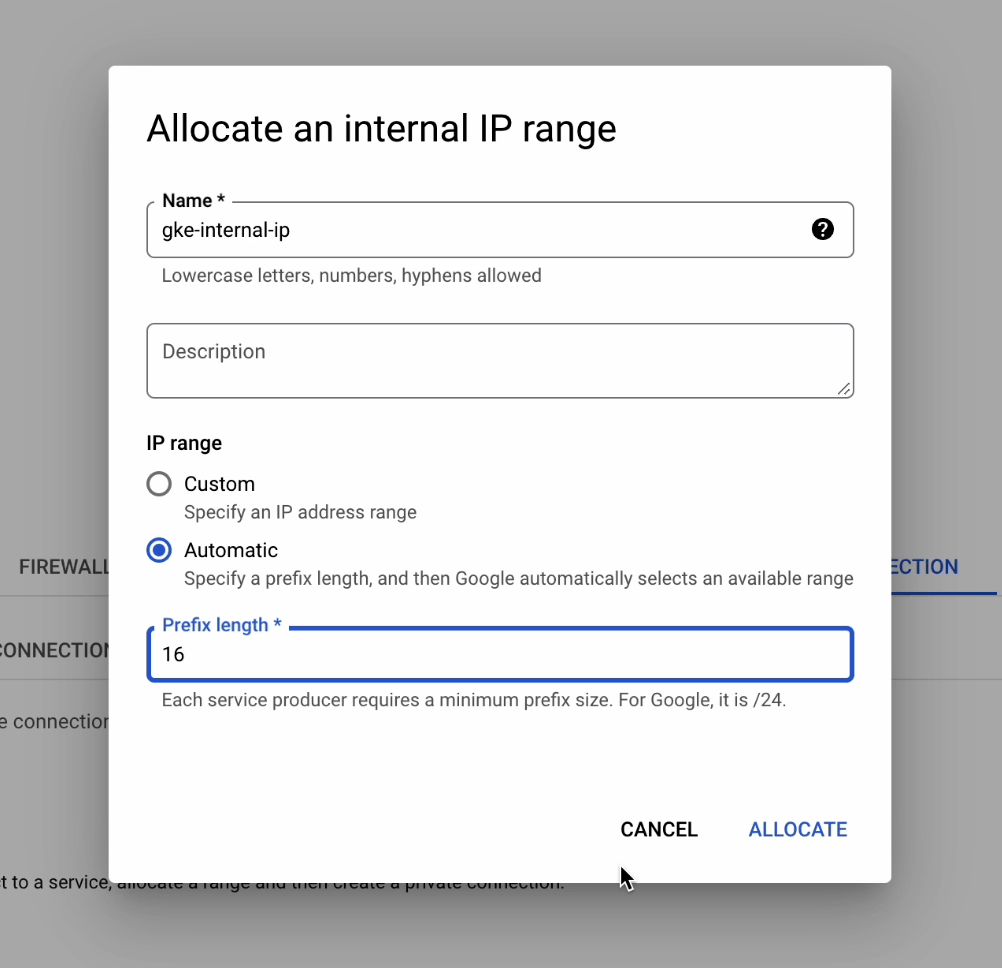
The IP range has now been successfully configured.

Next let’s enable Private Connection to Services.
Click on Create Connection.
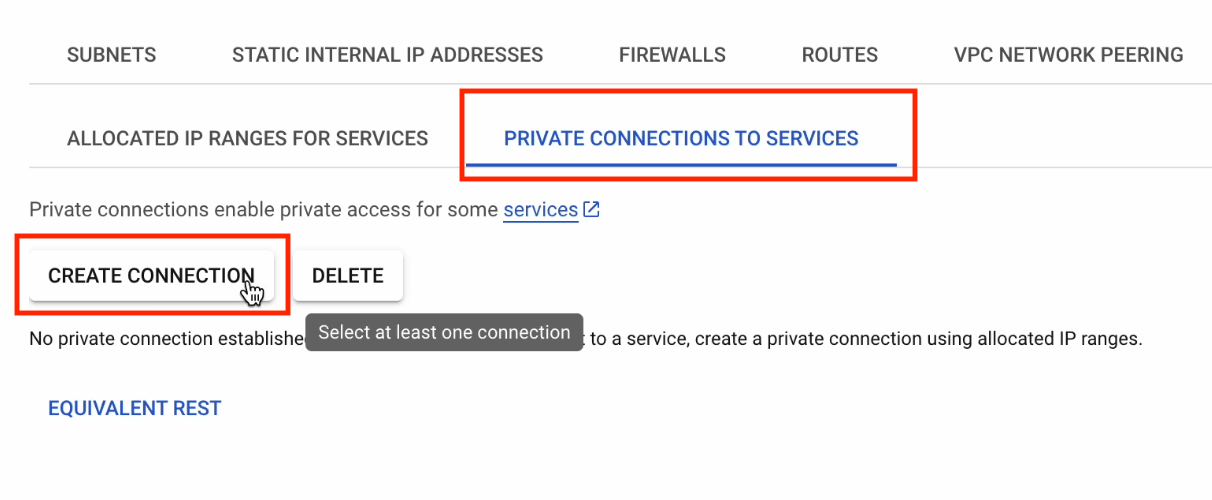
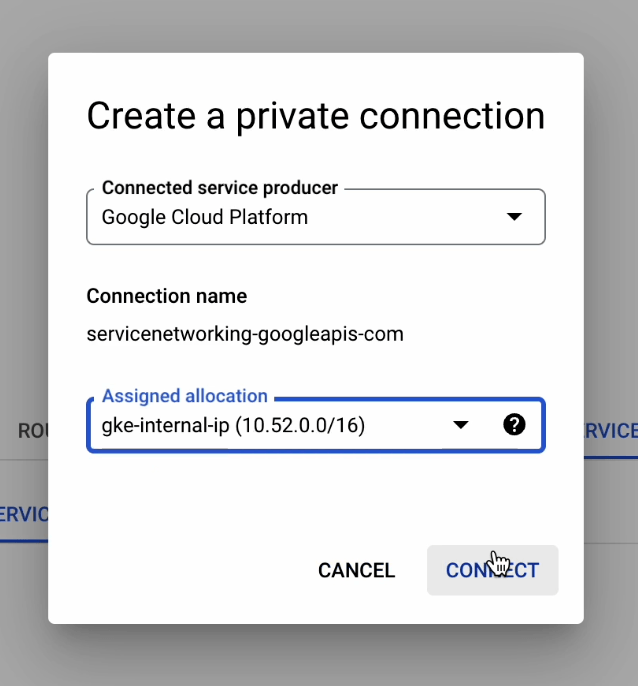
Select gke-internal-ip, which we created earlier, and click on Connect.
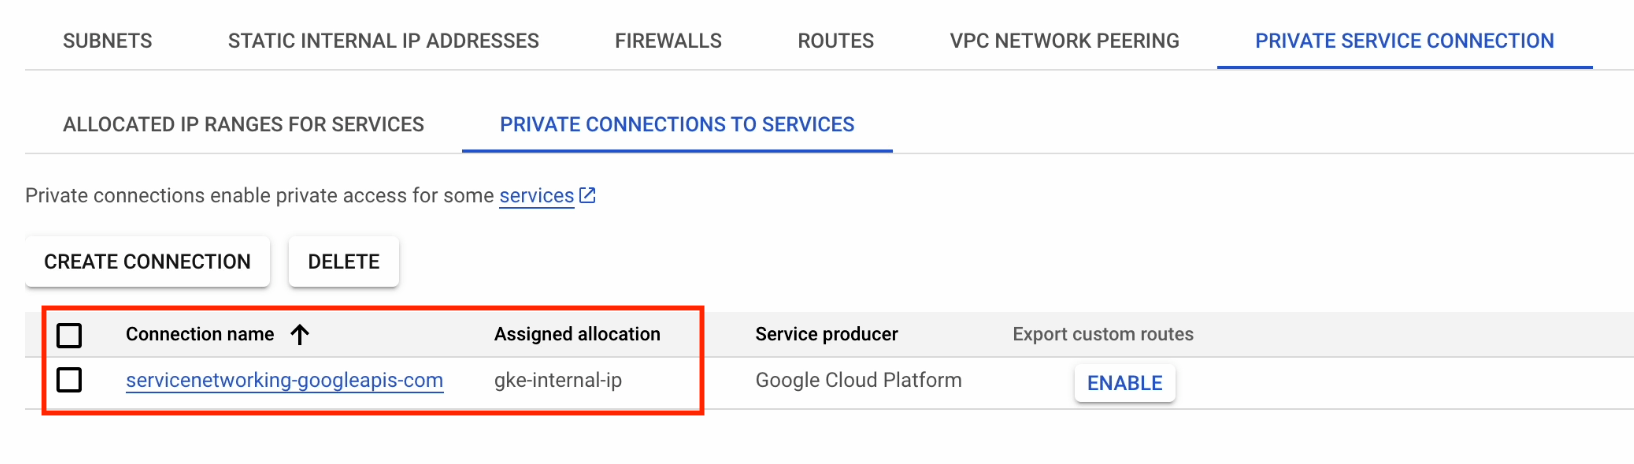
Our private service connection has now been successfully created.
Cloud SQL
Now we’ll create our cloud database.
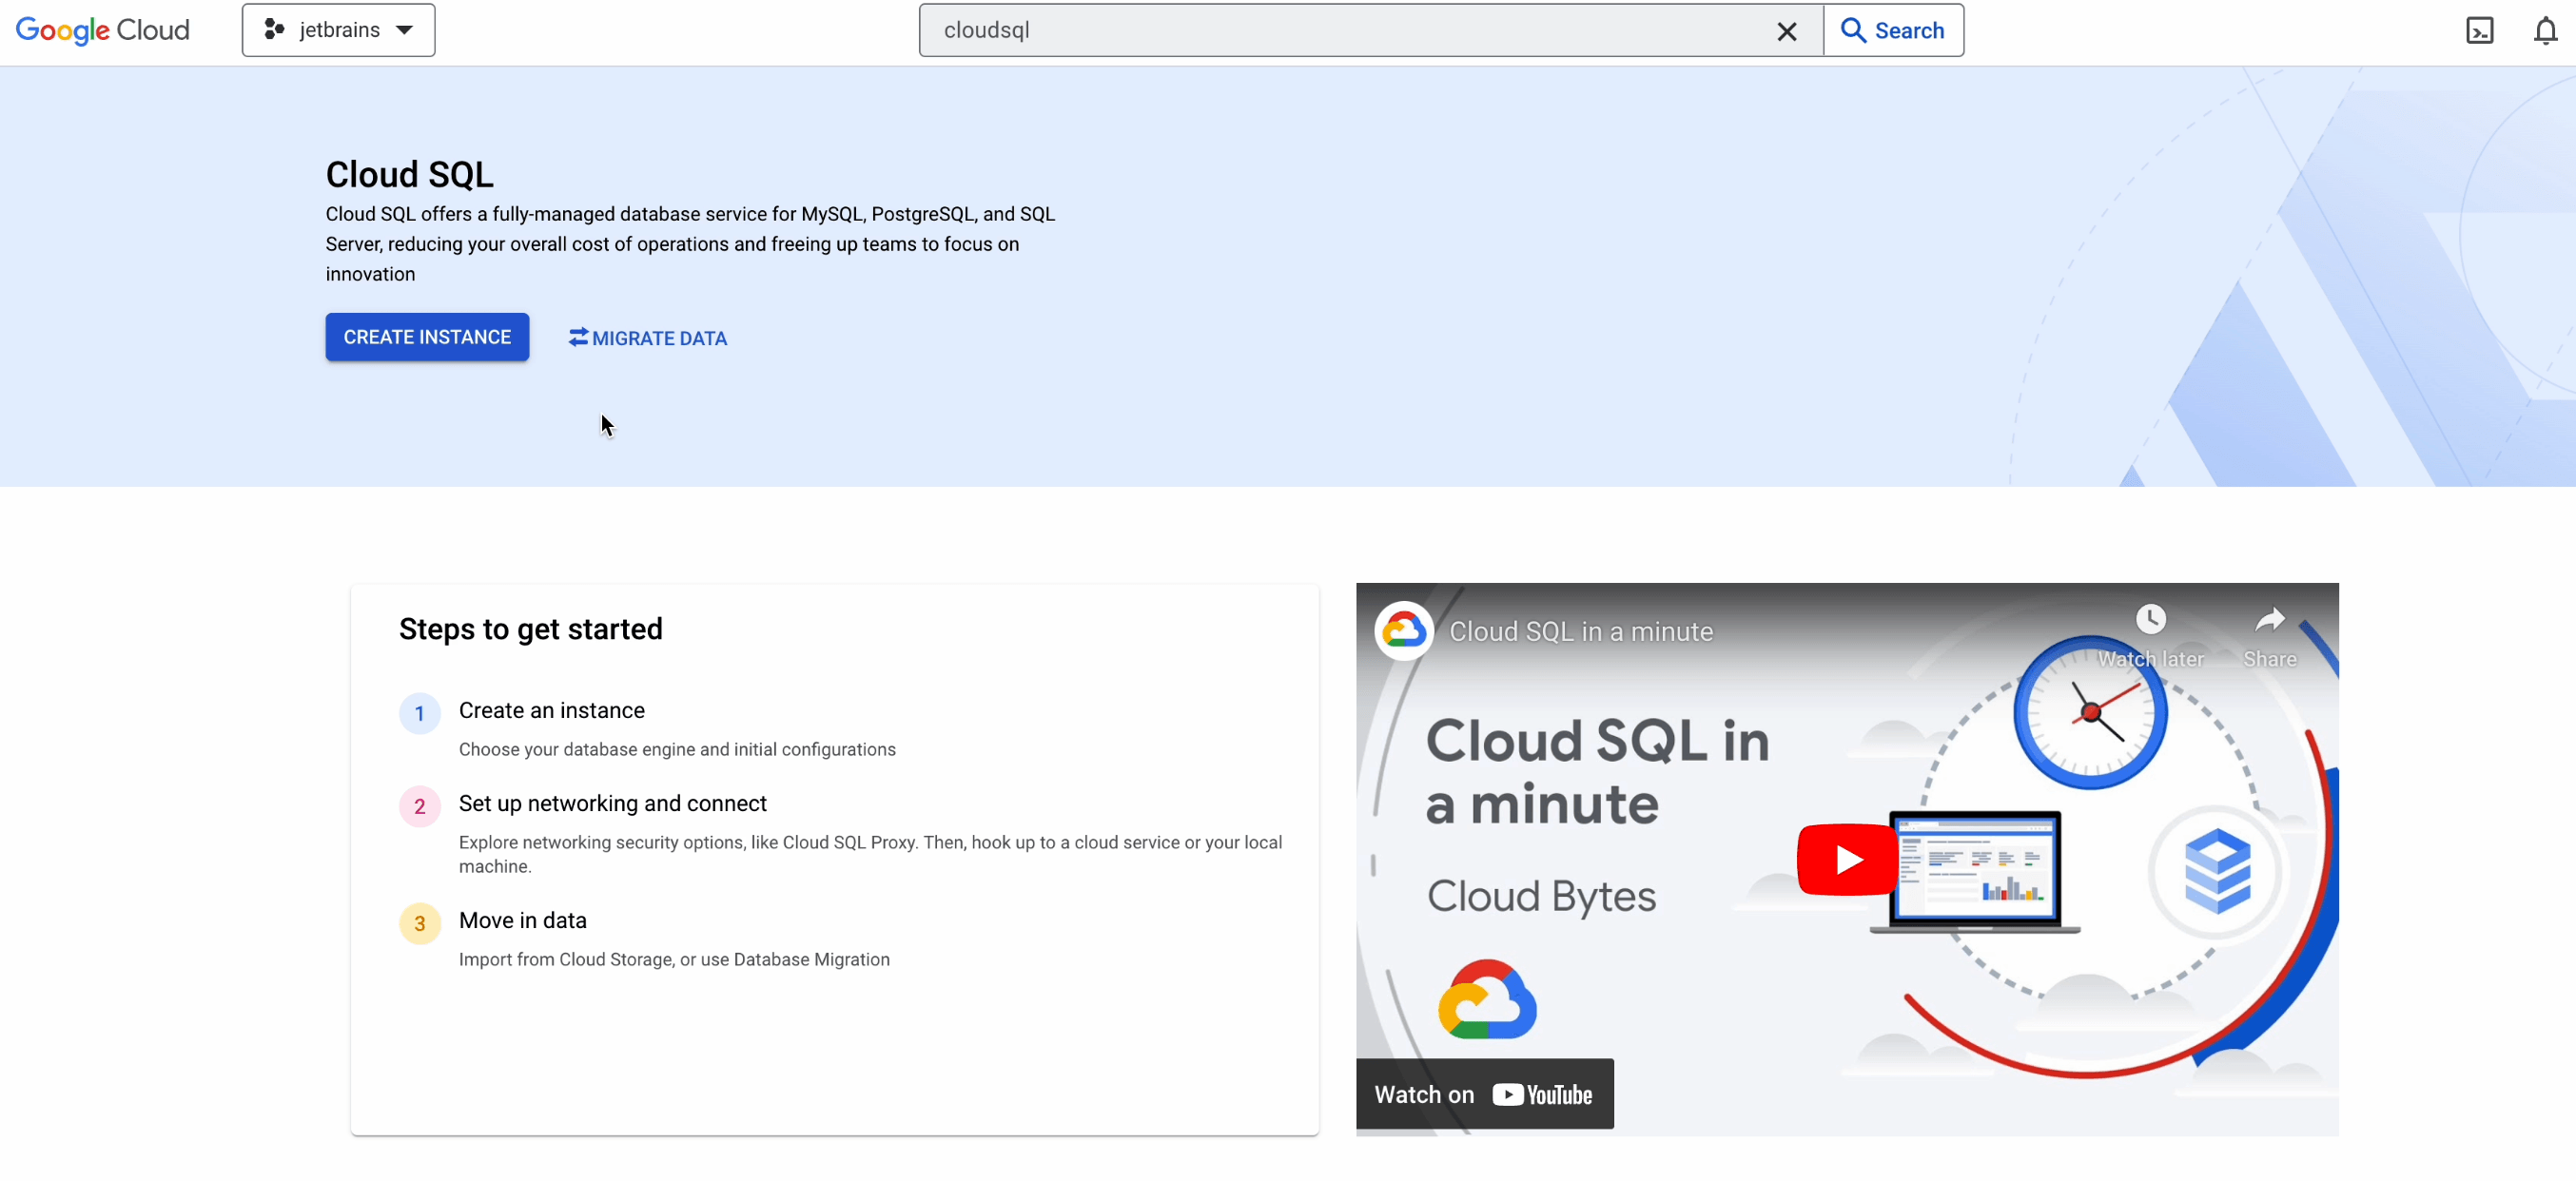
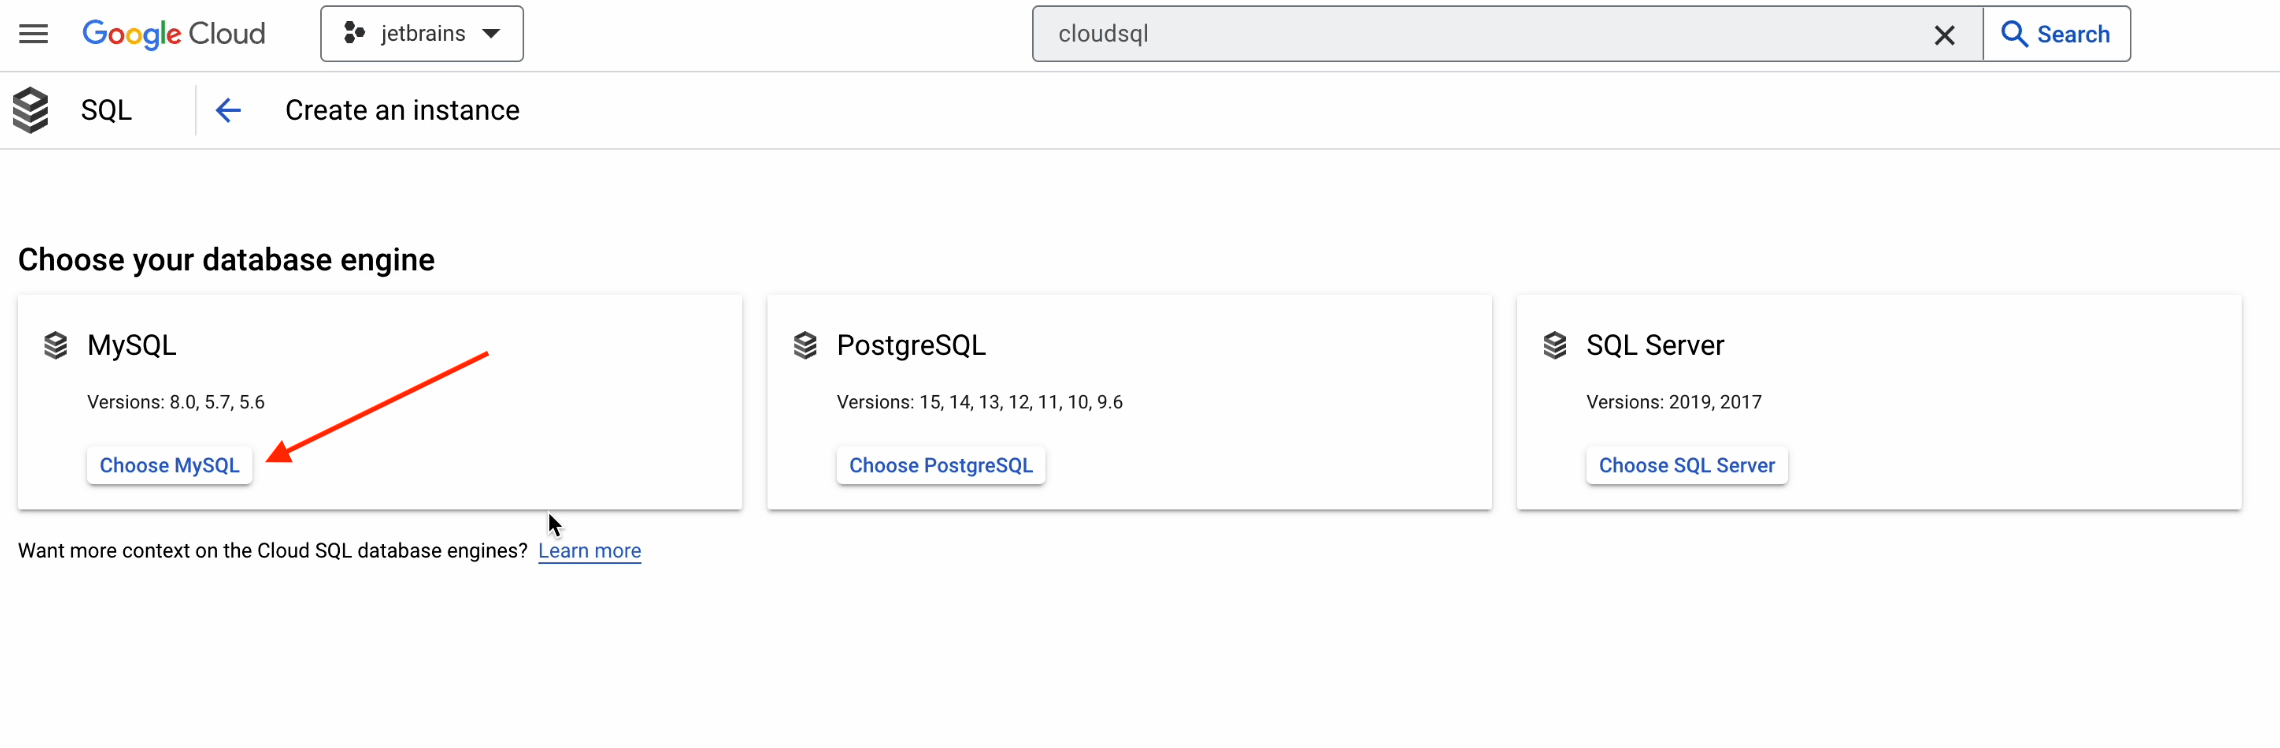
Click on Create Instance and select MySQL.
First, we’ll need to add some necessary information:
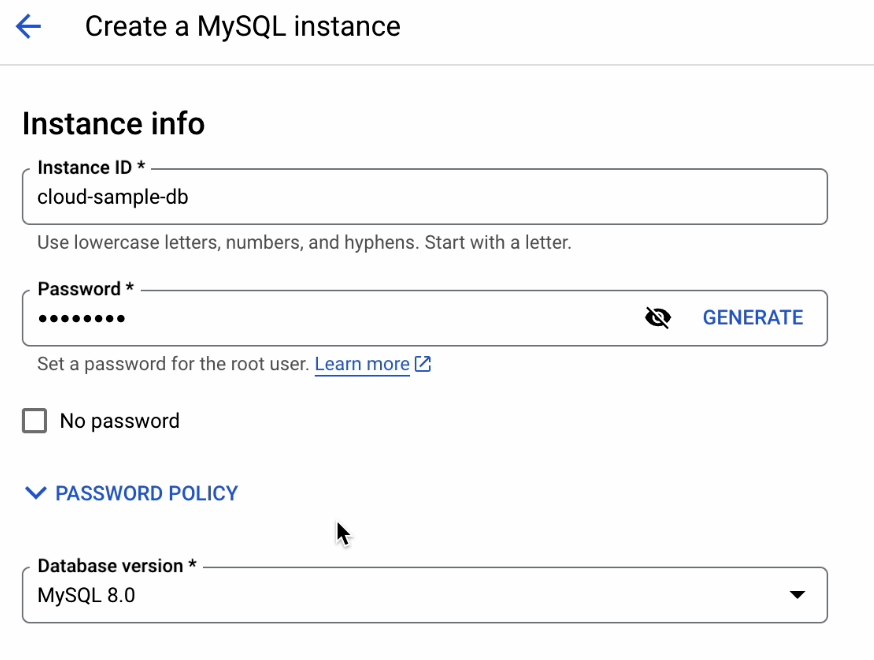
- Provide the instance ID. For the purposes of this tutorial, we’ve chosen
cloud-sample-db. - Provide a strong password.
- Set MySQL 8.0 as the version.
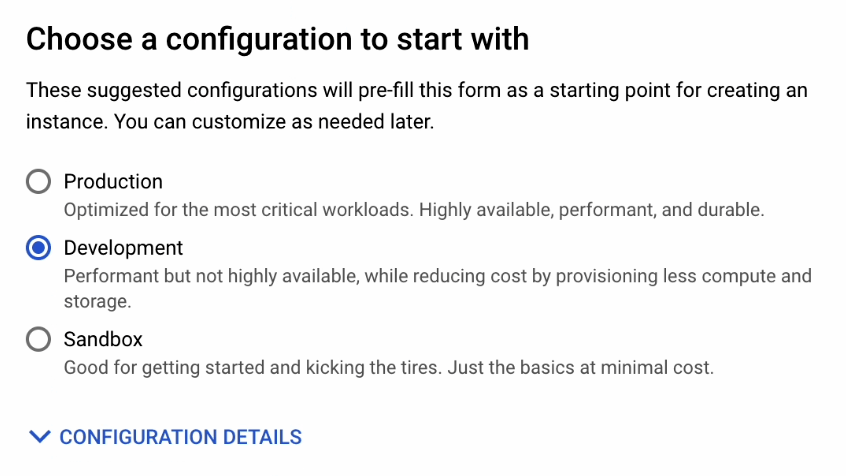
We’re going to choose the Development environment as our configuration.
Note: Because this is a tutorial, we can easily start by experimenting with the database. But this is not suitable for a production workload.
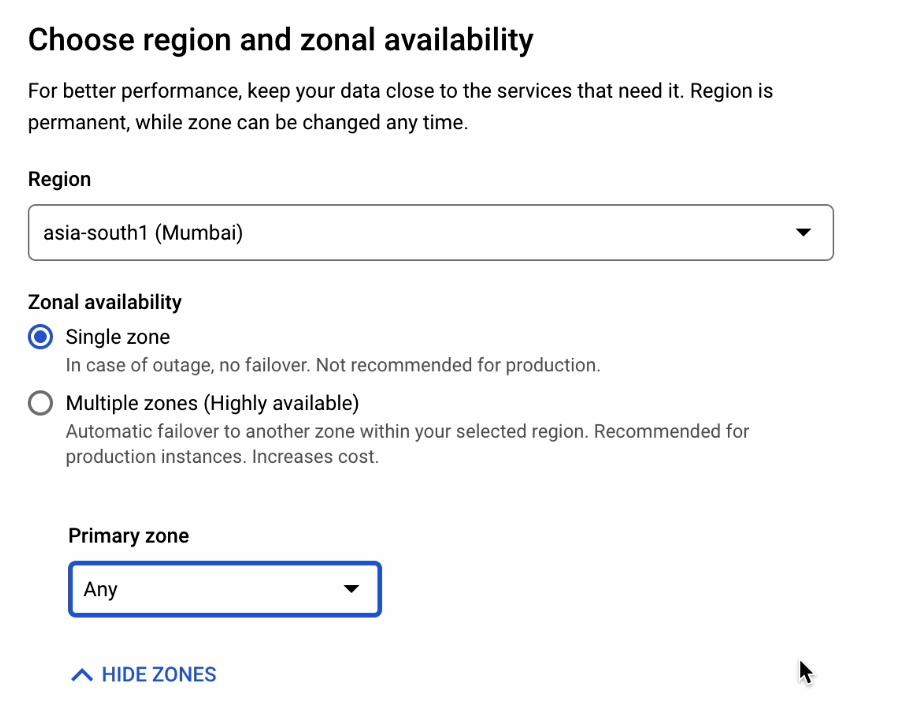
Set Zonal availability to Single zone.
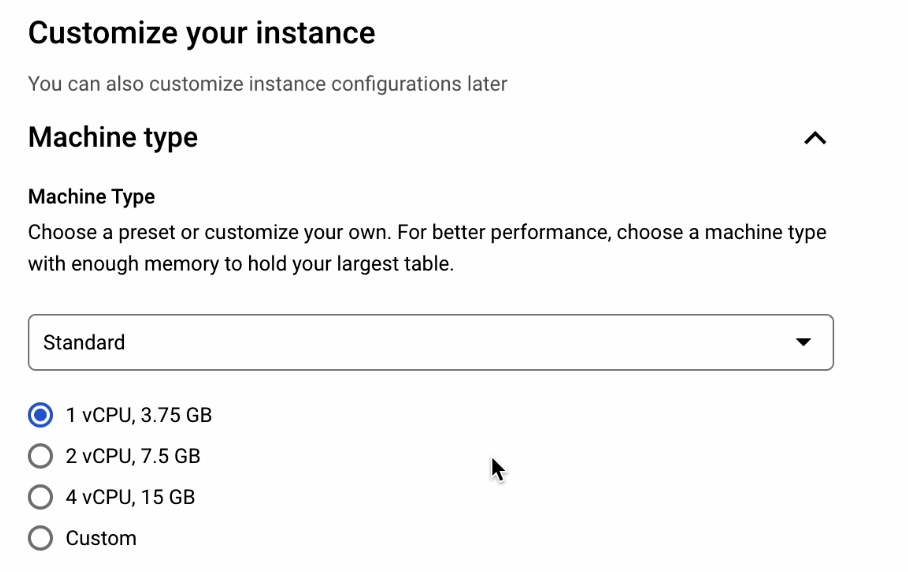
We’ll then select the Standard machine type with 1 vCPU and 3.75 GB of RAM.
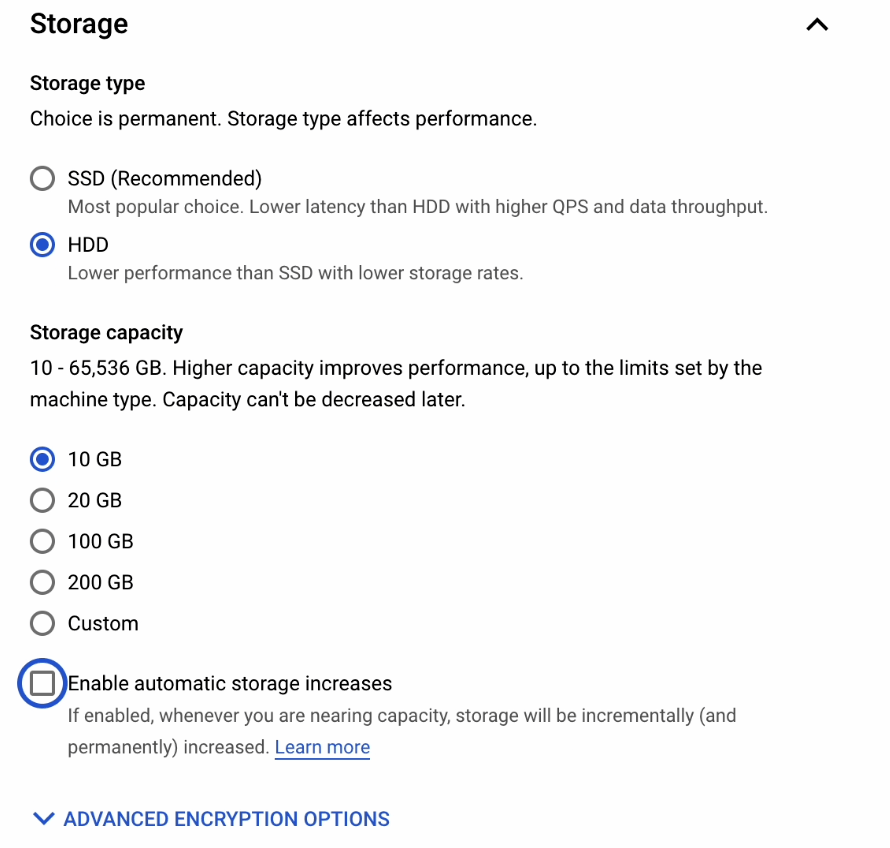
As for Storage type, we’ll select HDD. It’s a lower performance option compared to SSD, but it’s more than sufficient for testing out this application.
Storage capacity should be set to 10 GB.
Uncheck the Enable automatic storage increases box.
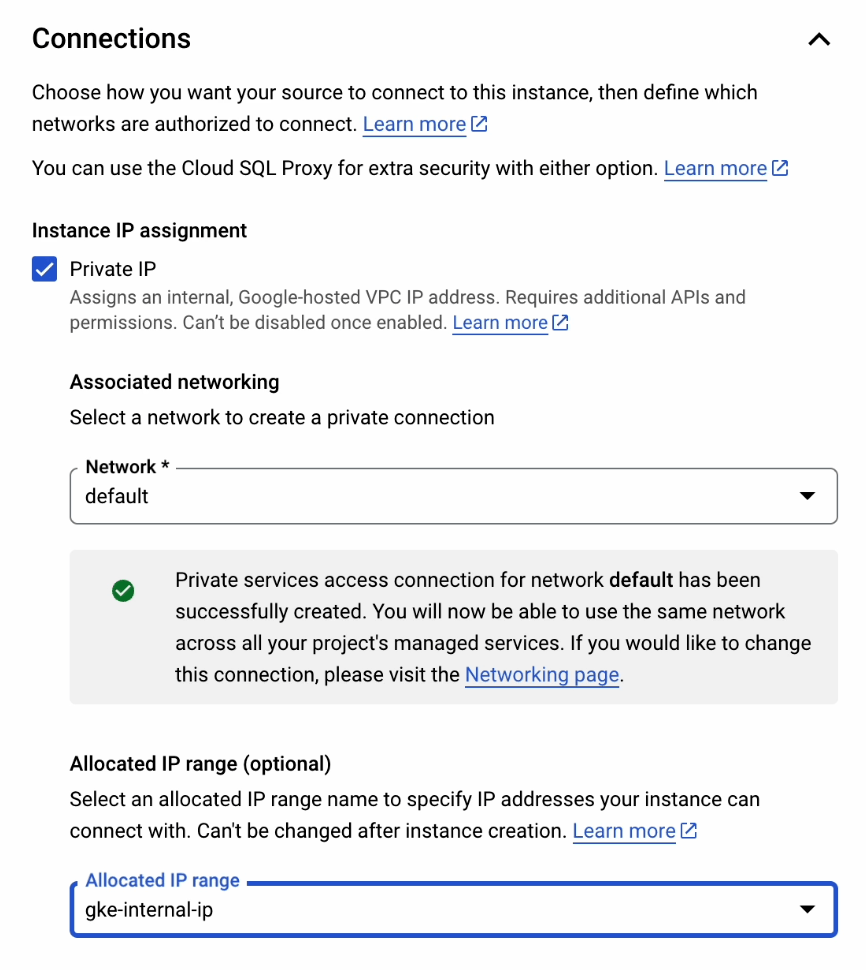
Next, go to Connections and make the following changes:.
- Tick the Private IP box under Instance IP assignment.
- Set the network to
default. - Set the allocated IP range to
gke-internal-ip.
You may remember from earlier how we created gke-internal-ip in the section entitled Private Service Connections.
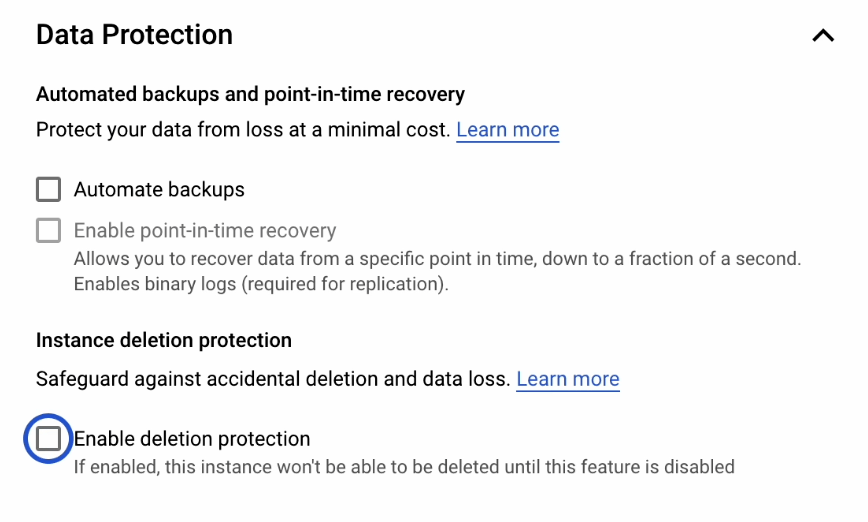
Under Data Protection, uncheck the Enable deletion protection and Automatic Backups boxes. These are not required for this tutorial. However, we strongly recommend using them when working in a production environment. They will be of immense help in the event that disaster recovery is necessary.
Everything is now configured properly, so we can go ahead and click Create Instance.
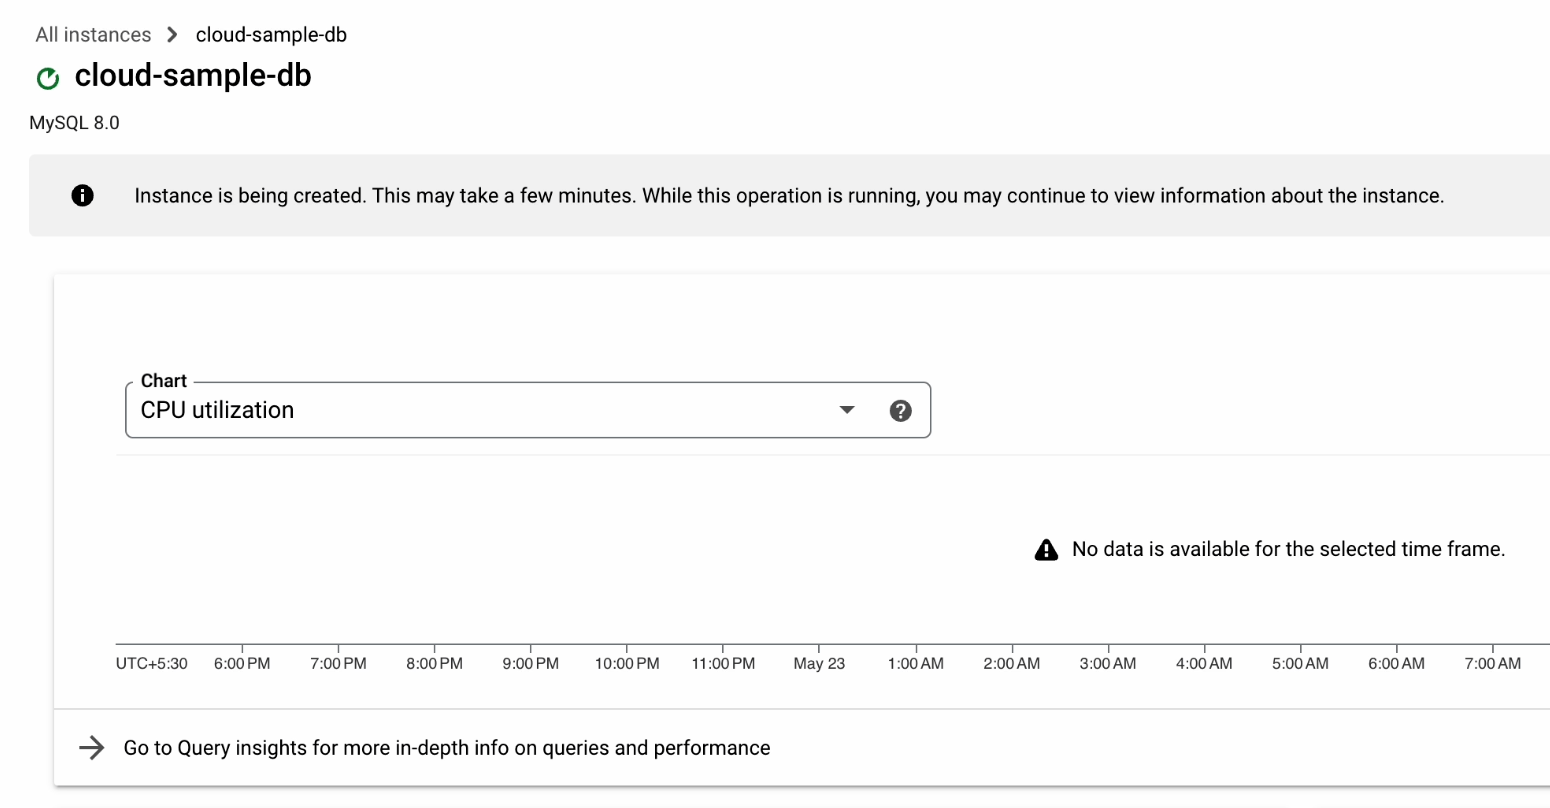
It will take a couple of minutes to initialize the database.
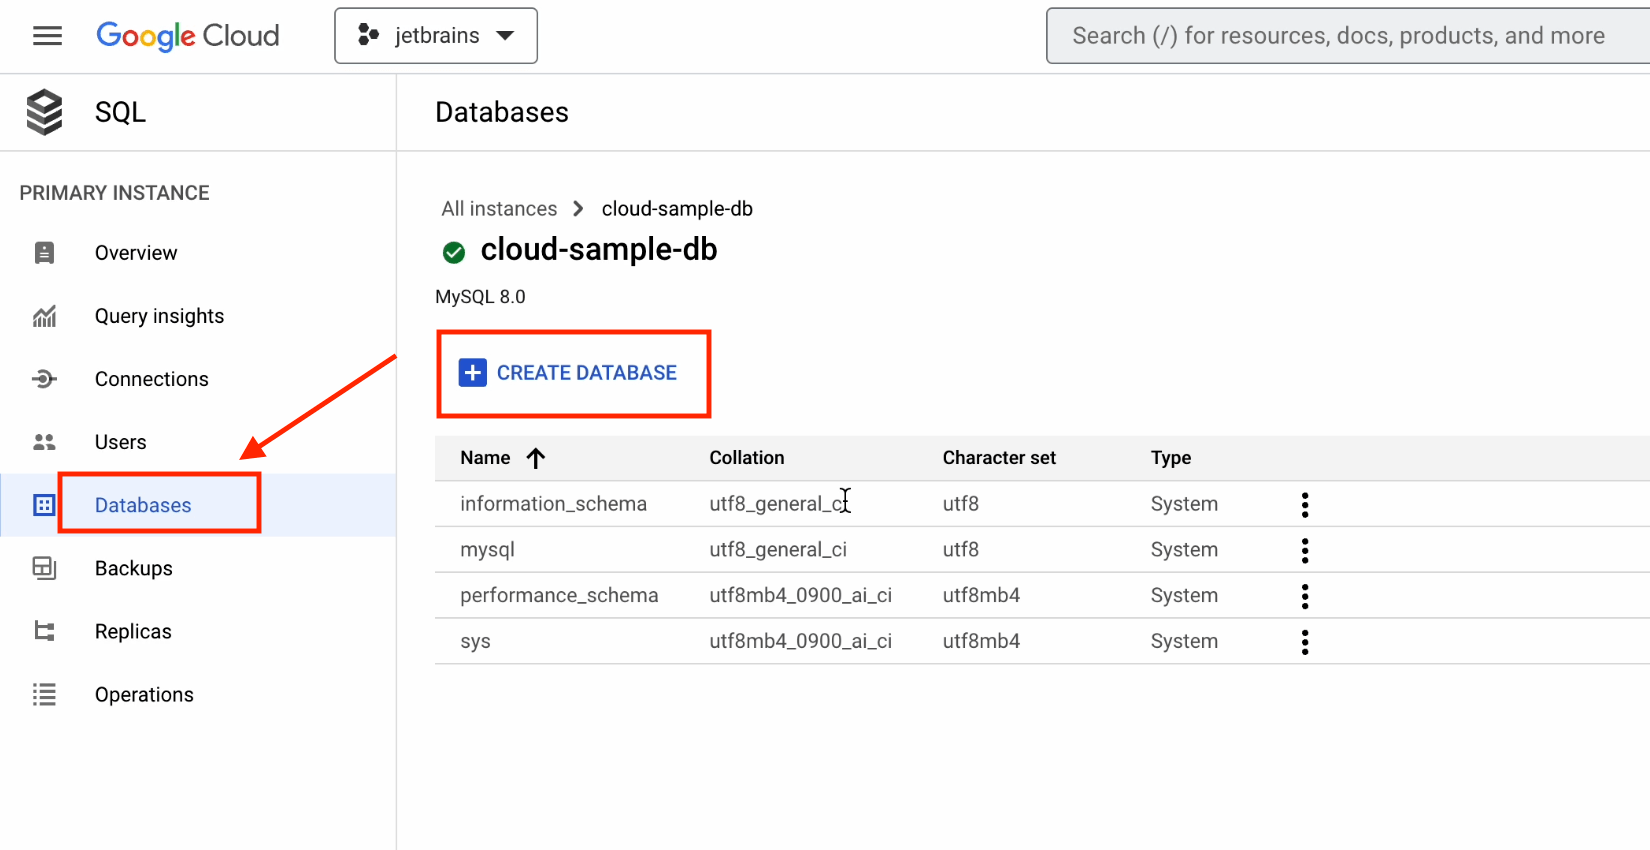
Once the database has been successfully initialized and is up and running, click on the Databases section and create a new database.
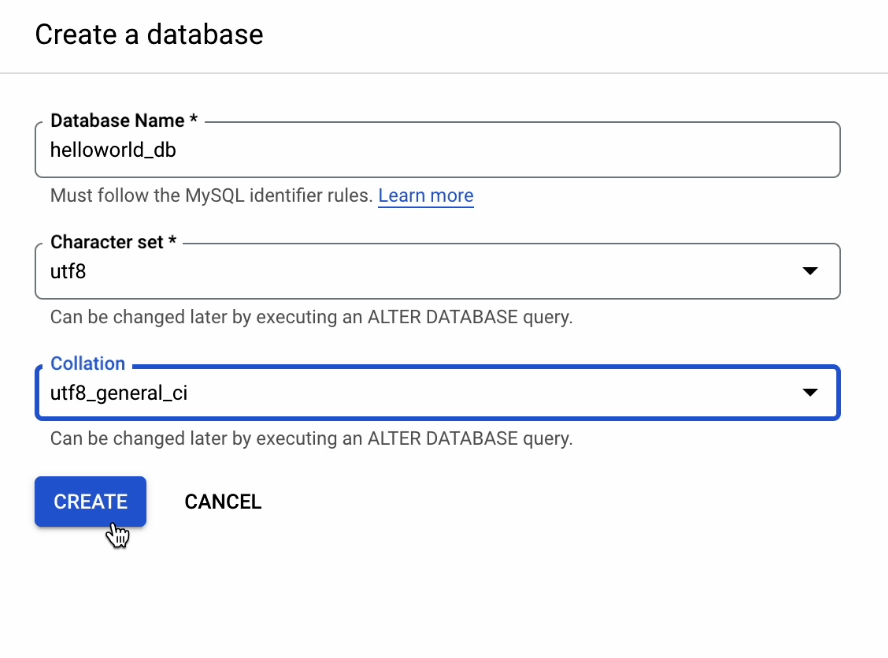
Provide the necessary information as shown below:
- Database Name –
helloworld_db - Character set –
utf8 - Collation –
utf8_general_ci
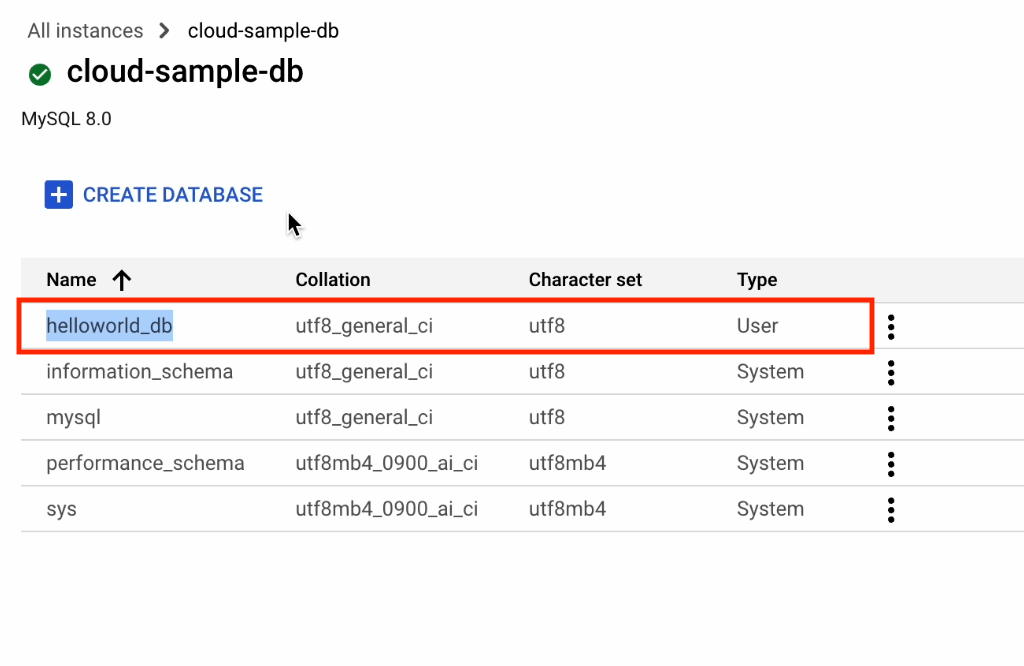
The database has been successfully created!
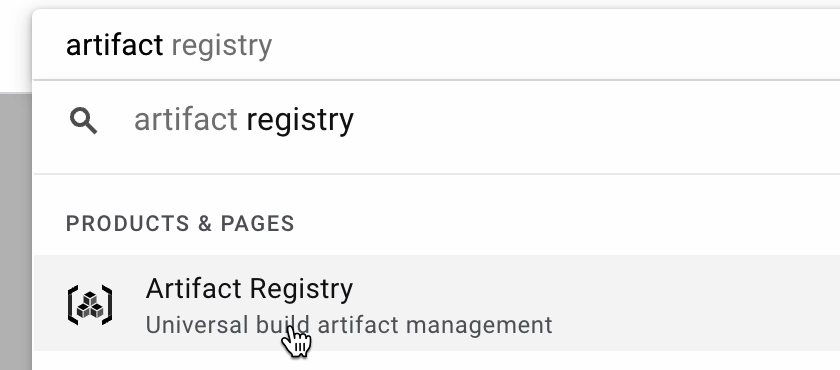
Artifact Registry
Now, we are going to store our Docker images in Artifact Registry. It’s the next generation of container registry and allows you to store, manage, and secure your build artifacts.
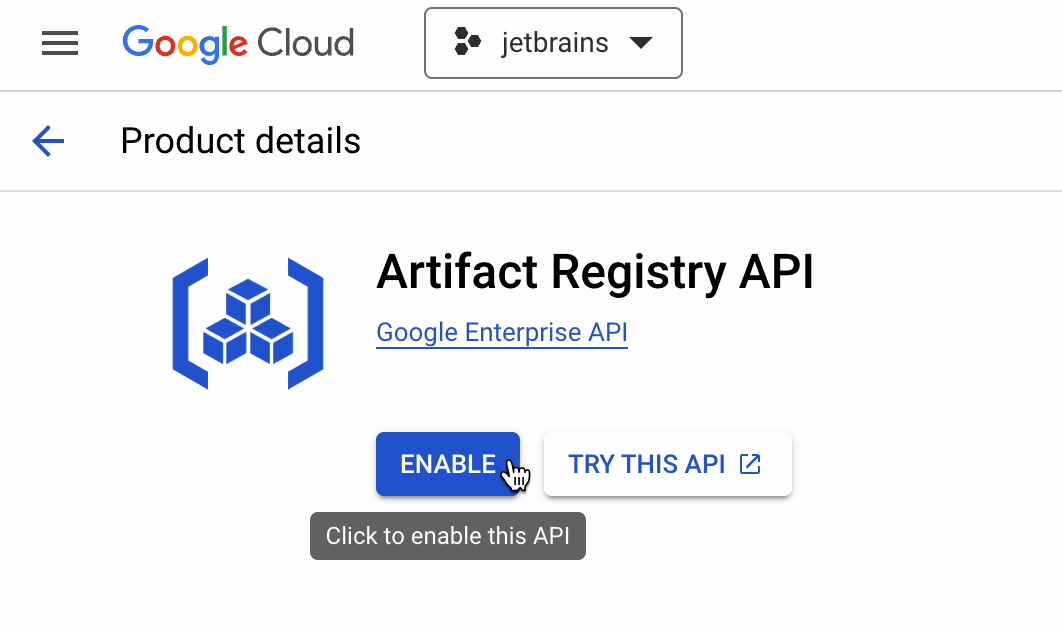
If you are using this API for the first time, then you’ll need to enable it. You’ll only have to do this once.
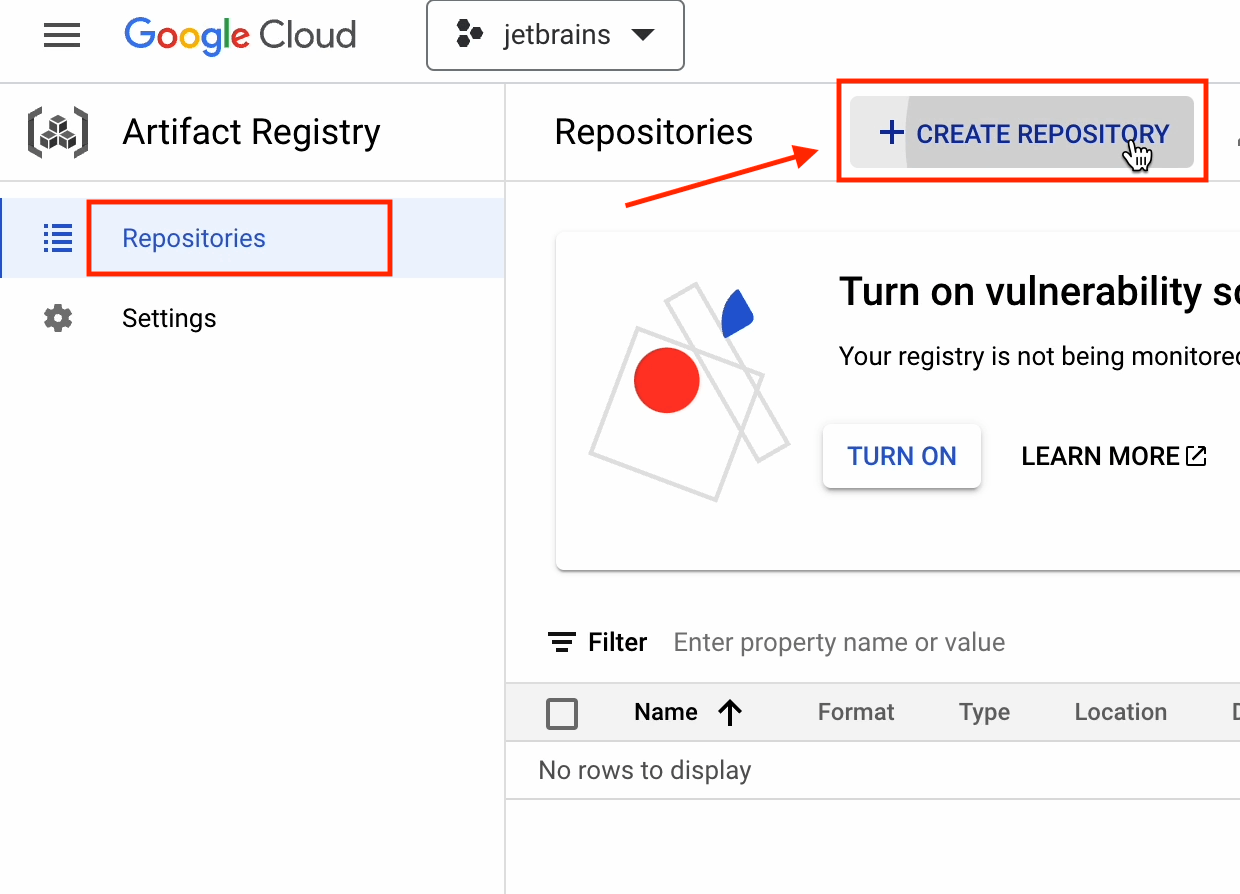
Click on Create Repository.
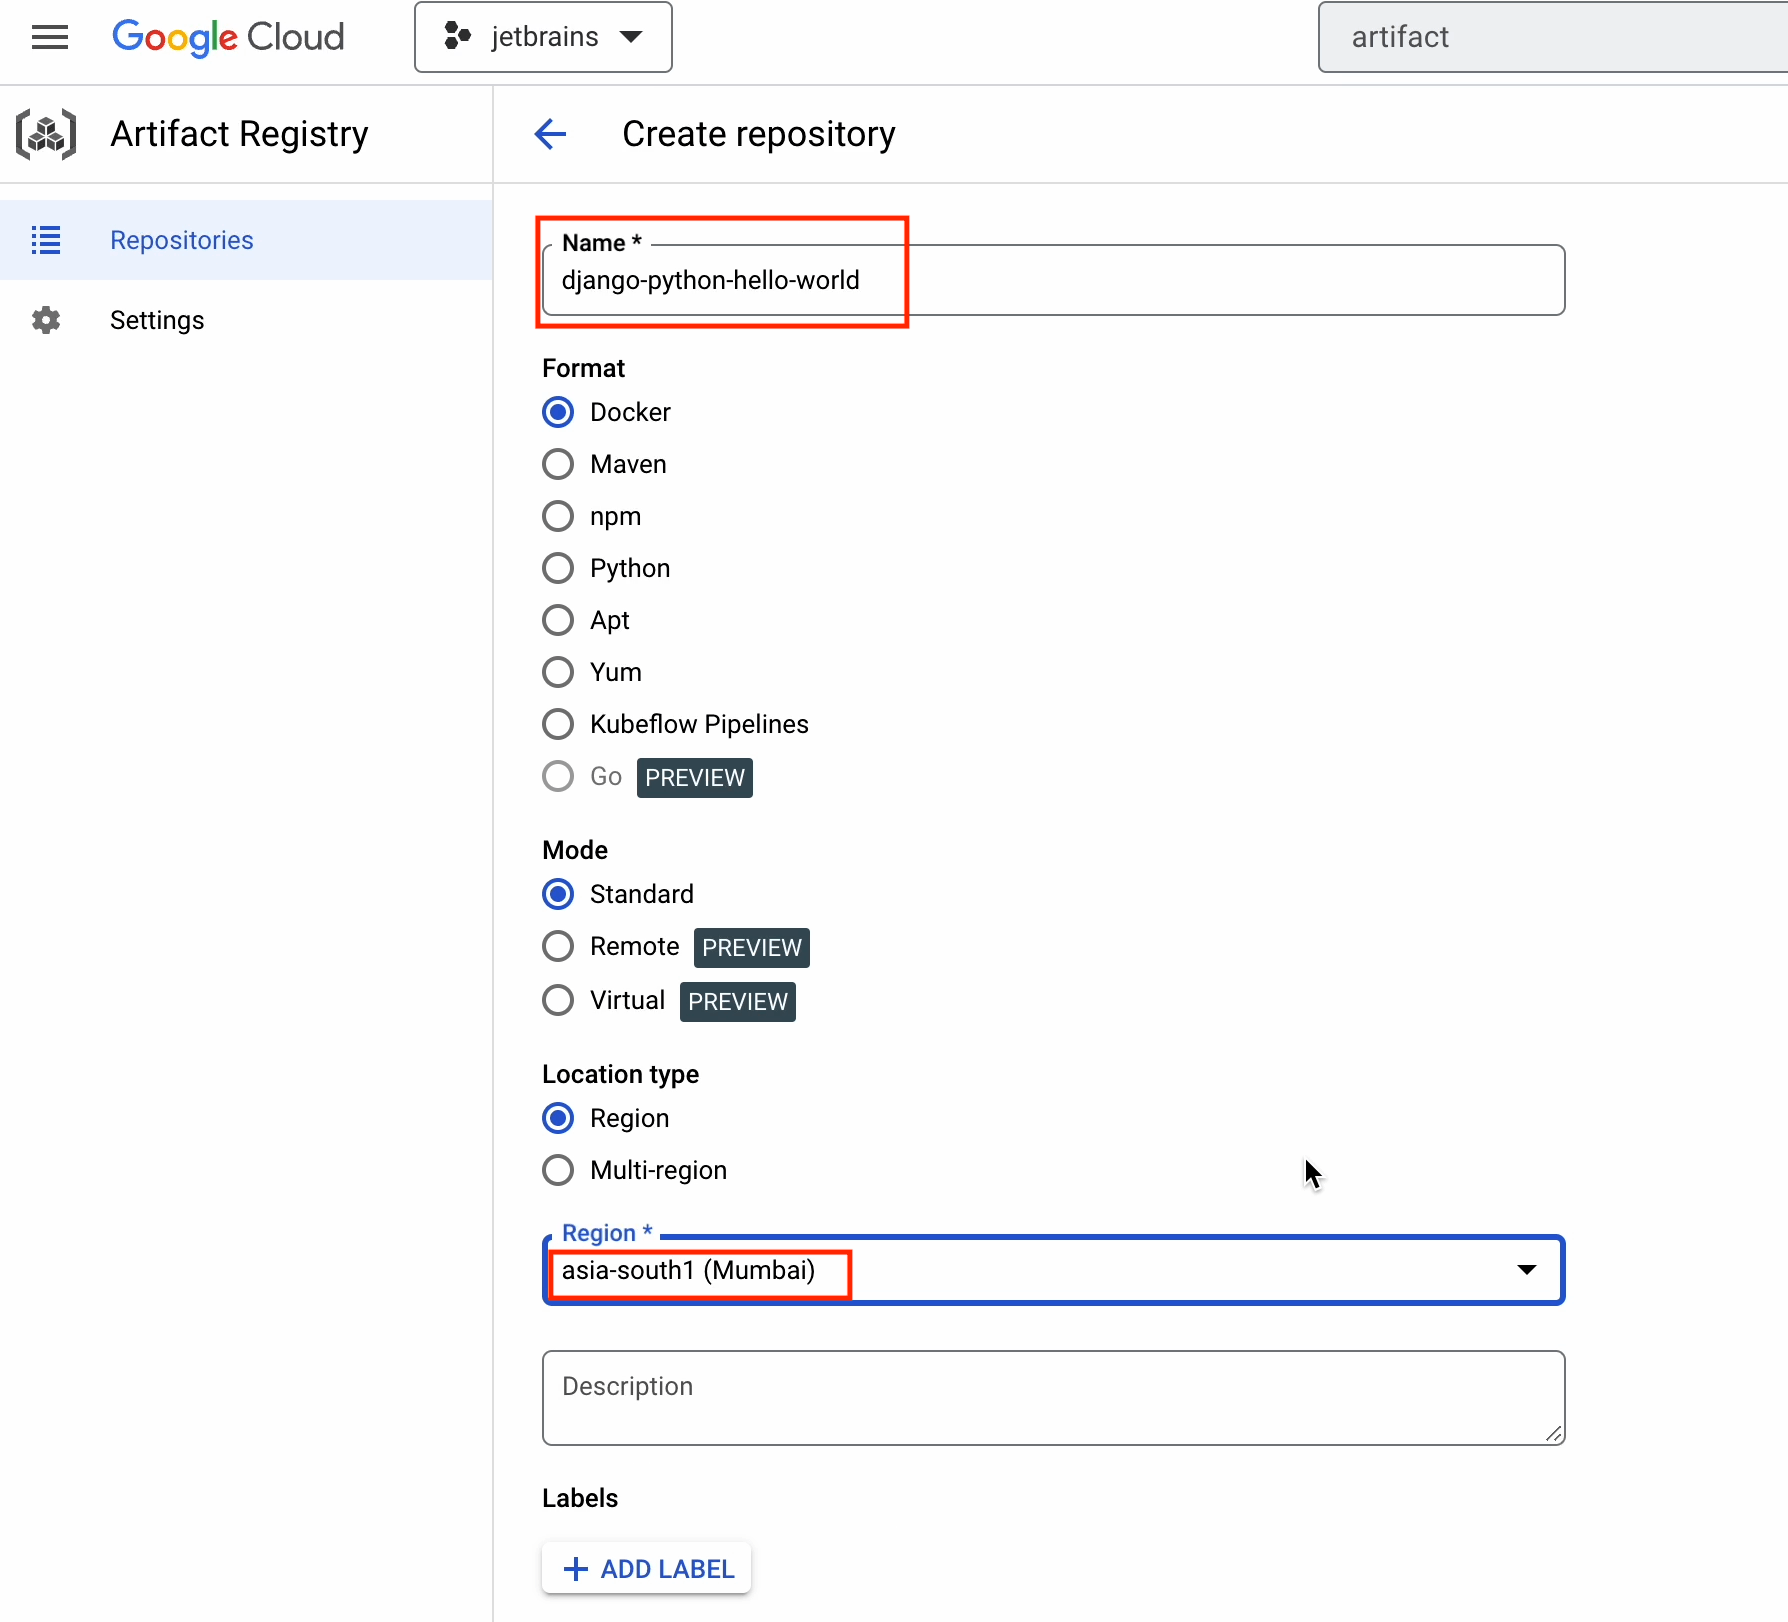
Provide the necessary information as follows:
- Name –
django-python-hello-world - Format –
Docker - Mode –
Standard - Location type –
Region - Region –
asia-south1
Make sure to choose the region that’s closest to your location.
You may have noticed that the format section offers multiple support options, including Docker, Python, Maven, and so on. This is why it’s considered a universal build artifact tool.
Now you can go ahead and click on Create.
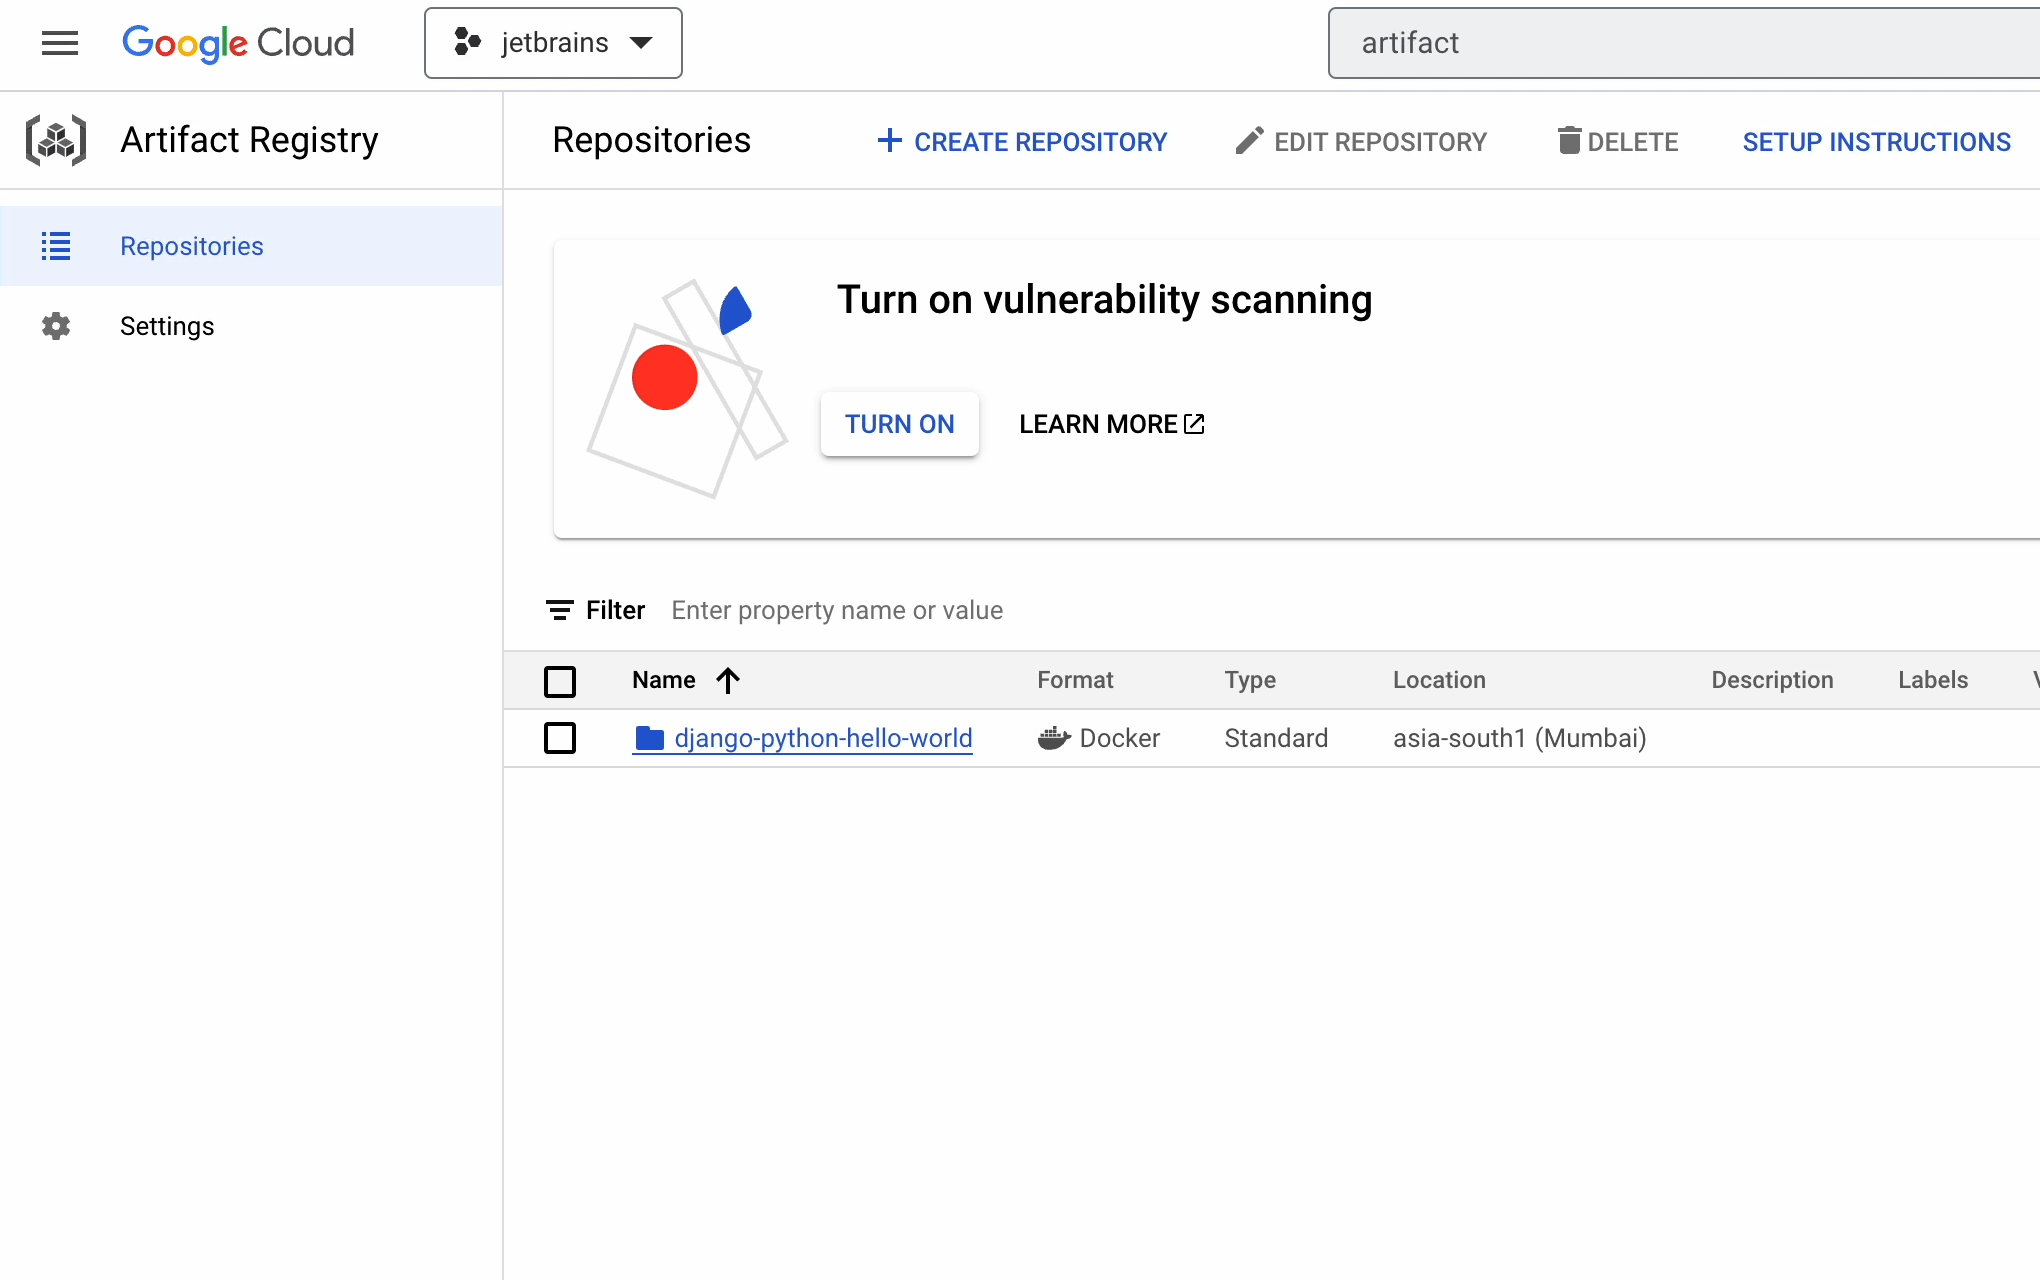
The registry has been successfully created!