Add dependencies

Different ways to add dependencies in IntelliJ IDEA

There are several ways to add new dependencies to your project.

From the build file using copy-paste

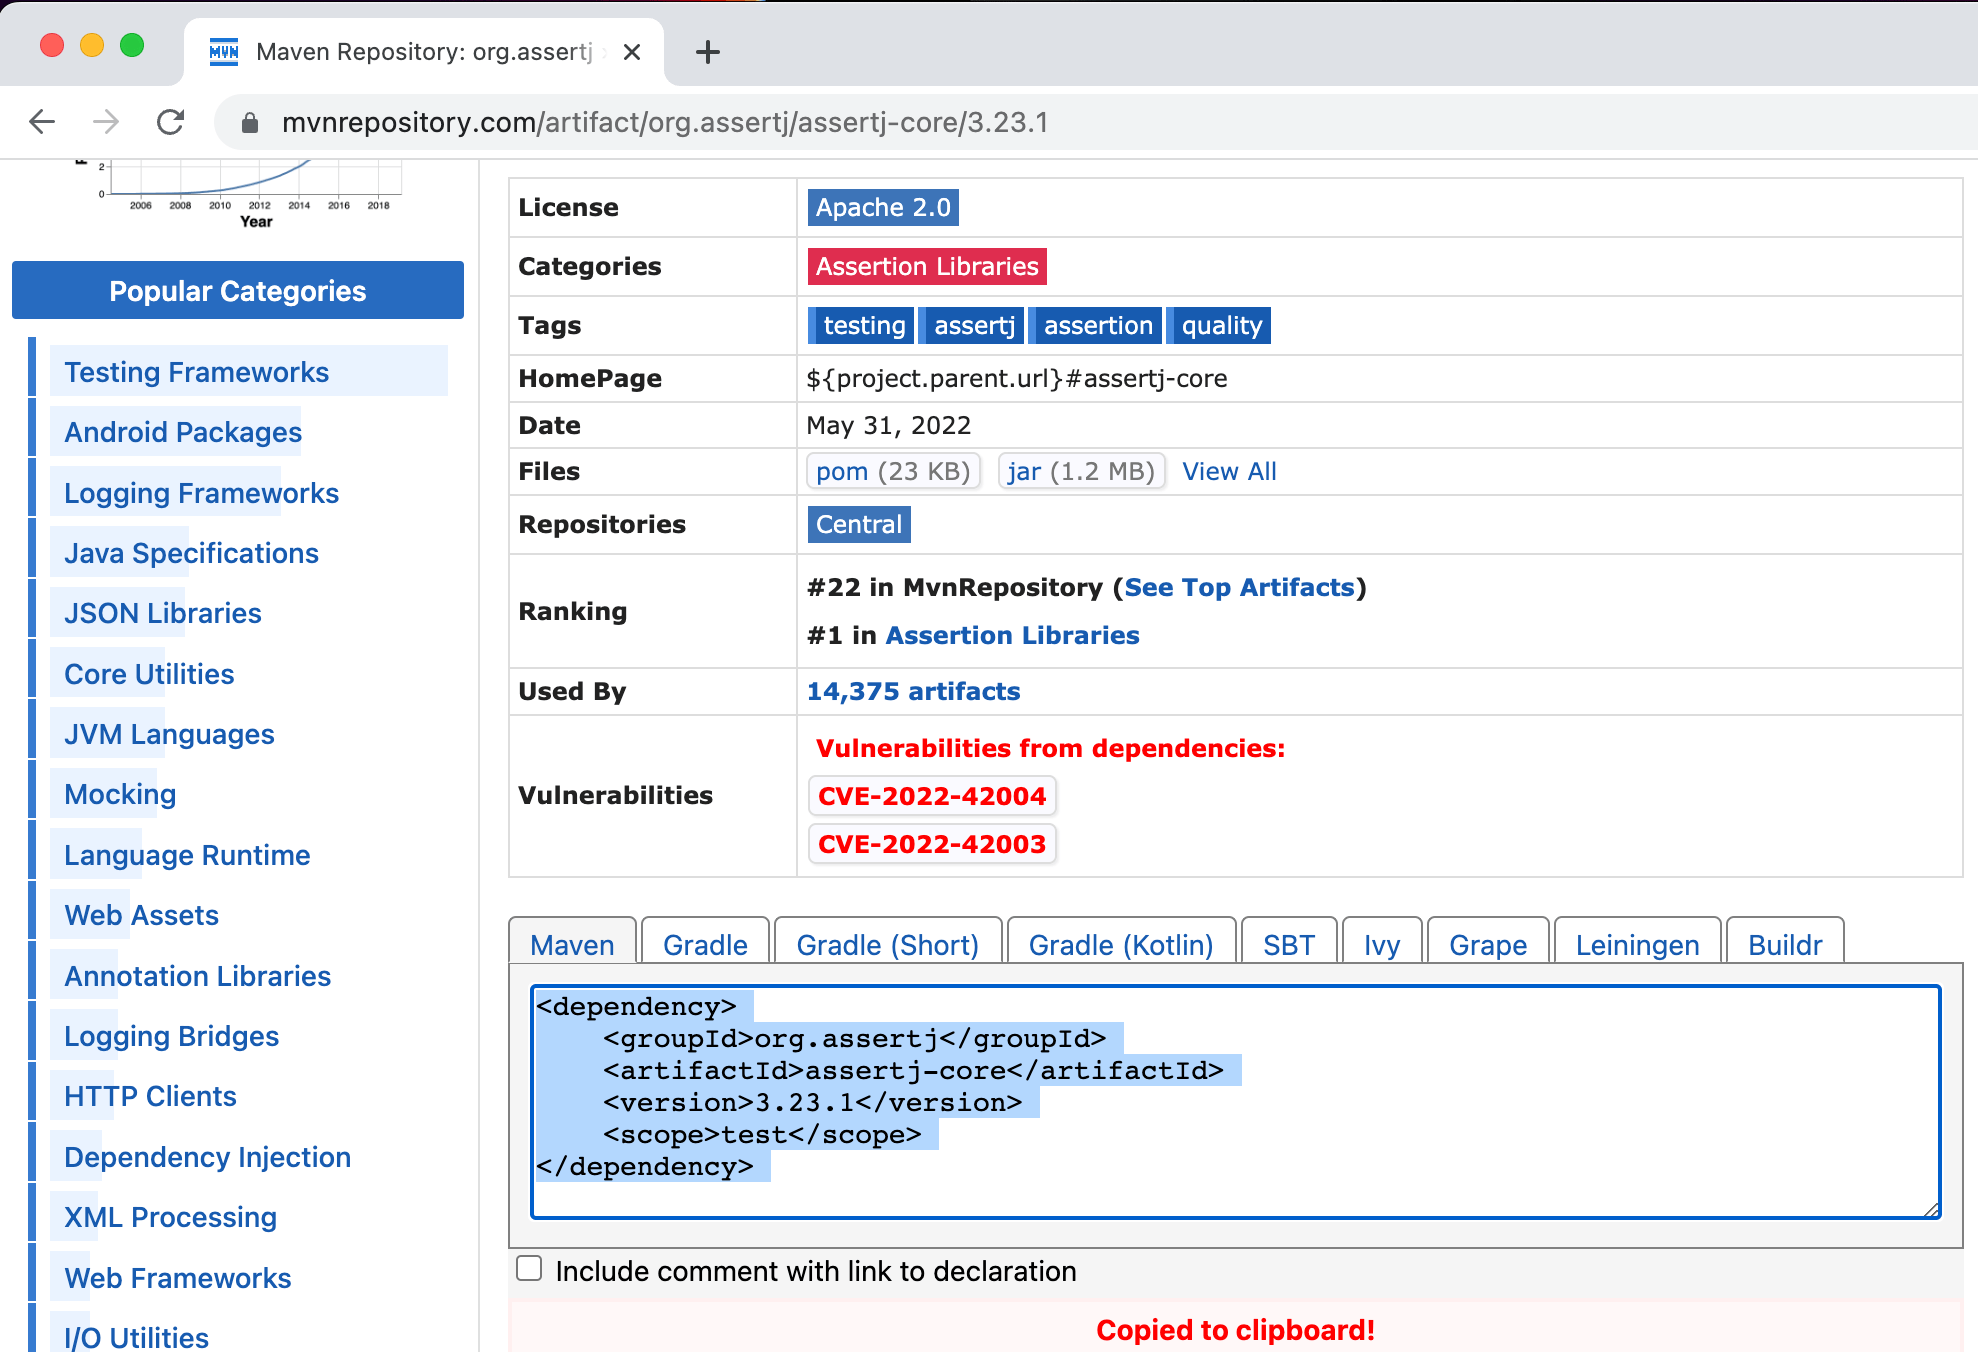
You have probably copied a dependency from Maven Repository (or another website) and pasted into your build file.

For example, we can copy the Gradle format for this dependency and paste it into our build.gradle file.

MvnRepository Gradle format

Copy dependency into build.gradle

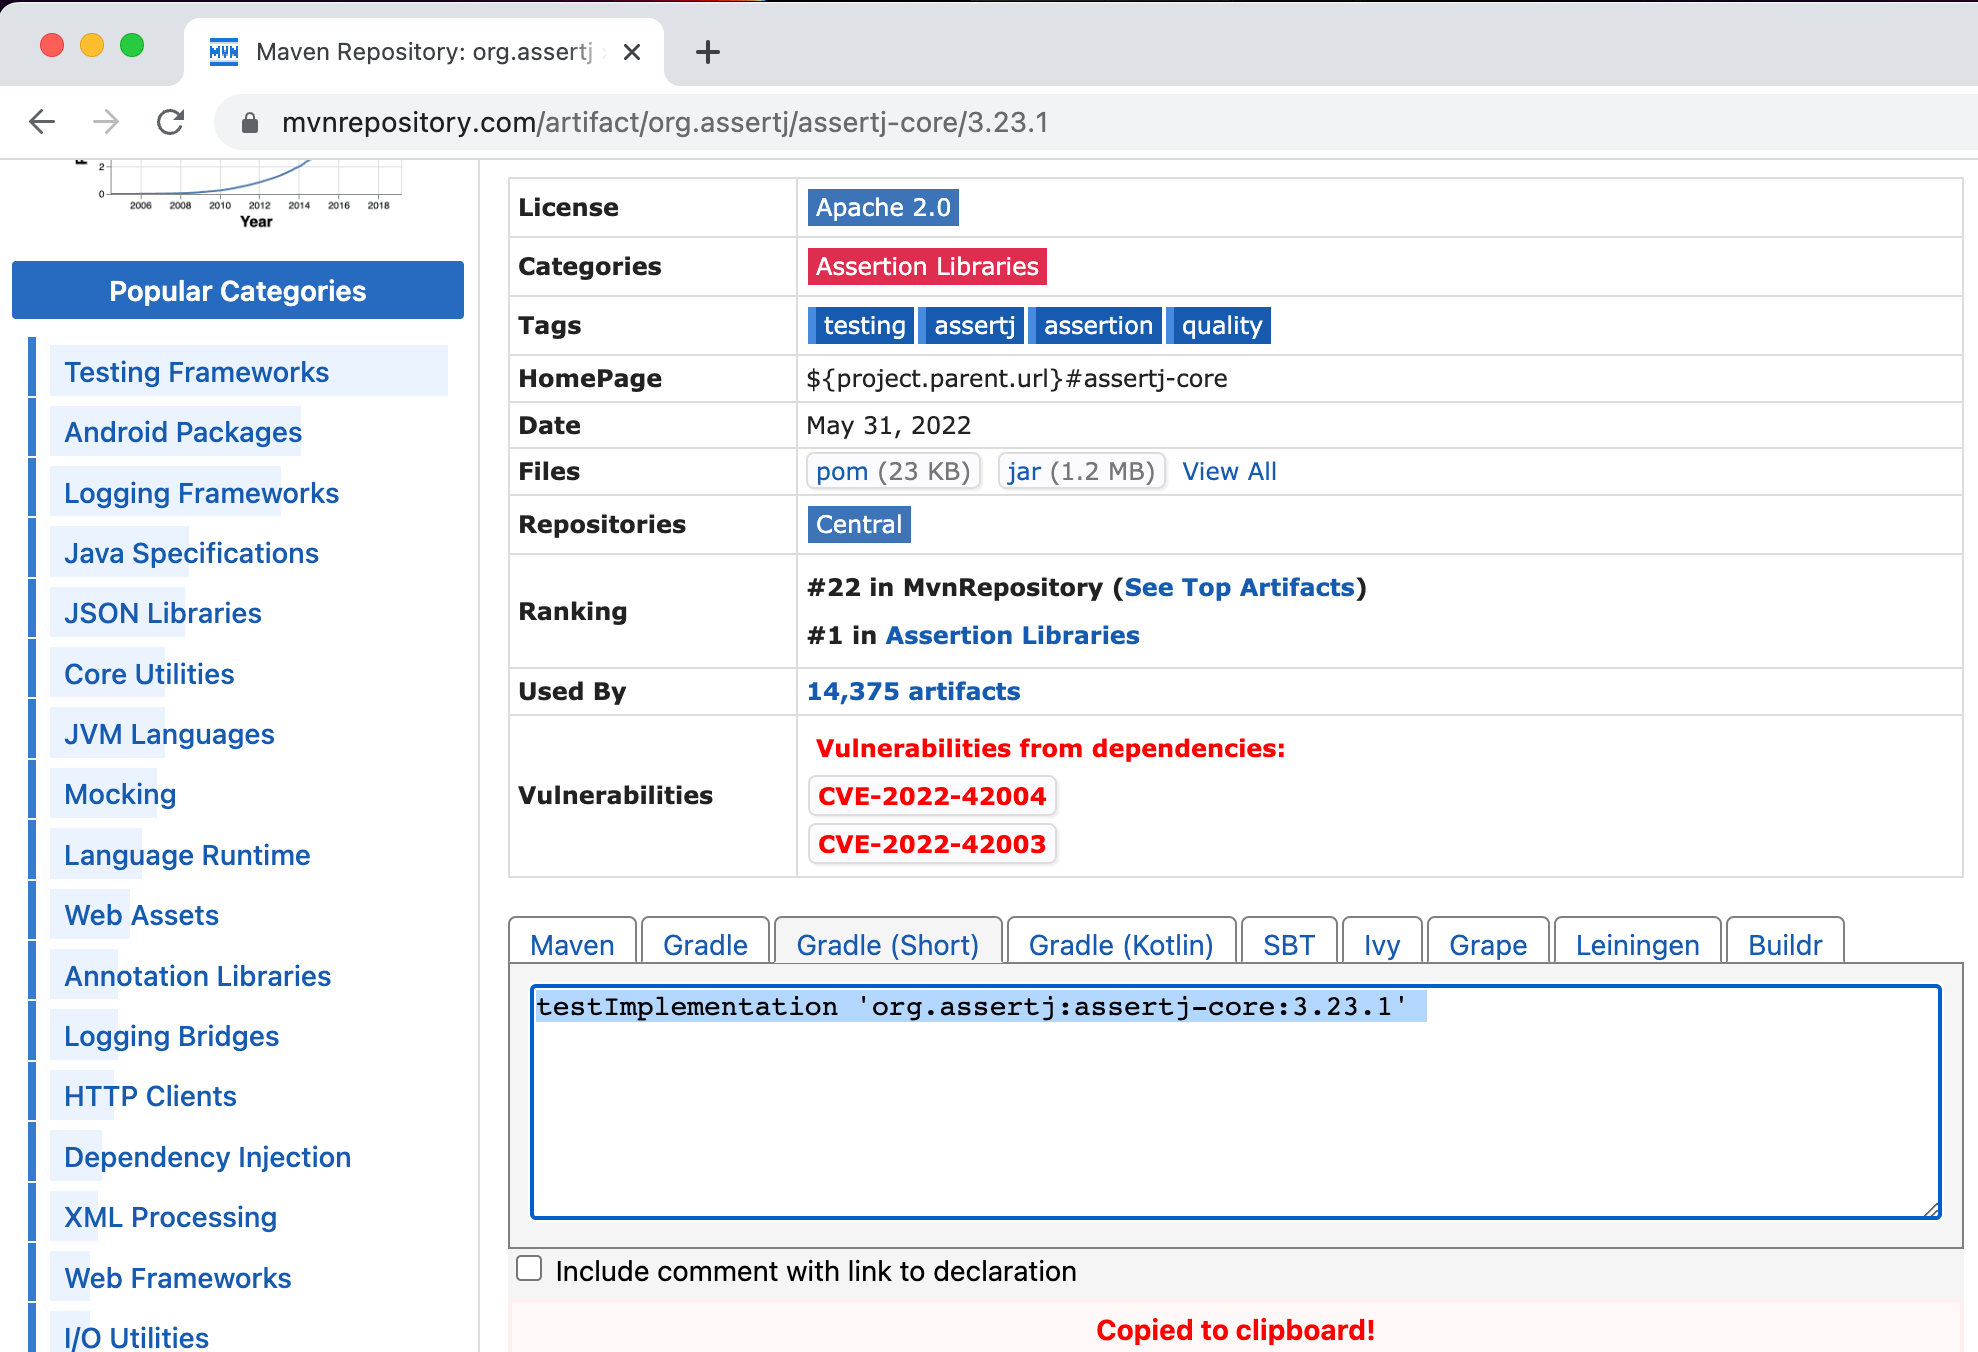
Or, if we are using Maven, we can copy the Maven xml format into our pom.xml.

MvnRepository Maven format

Copy dependency into pom.xml

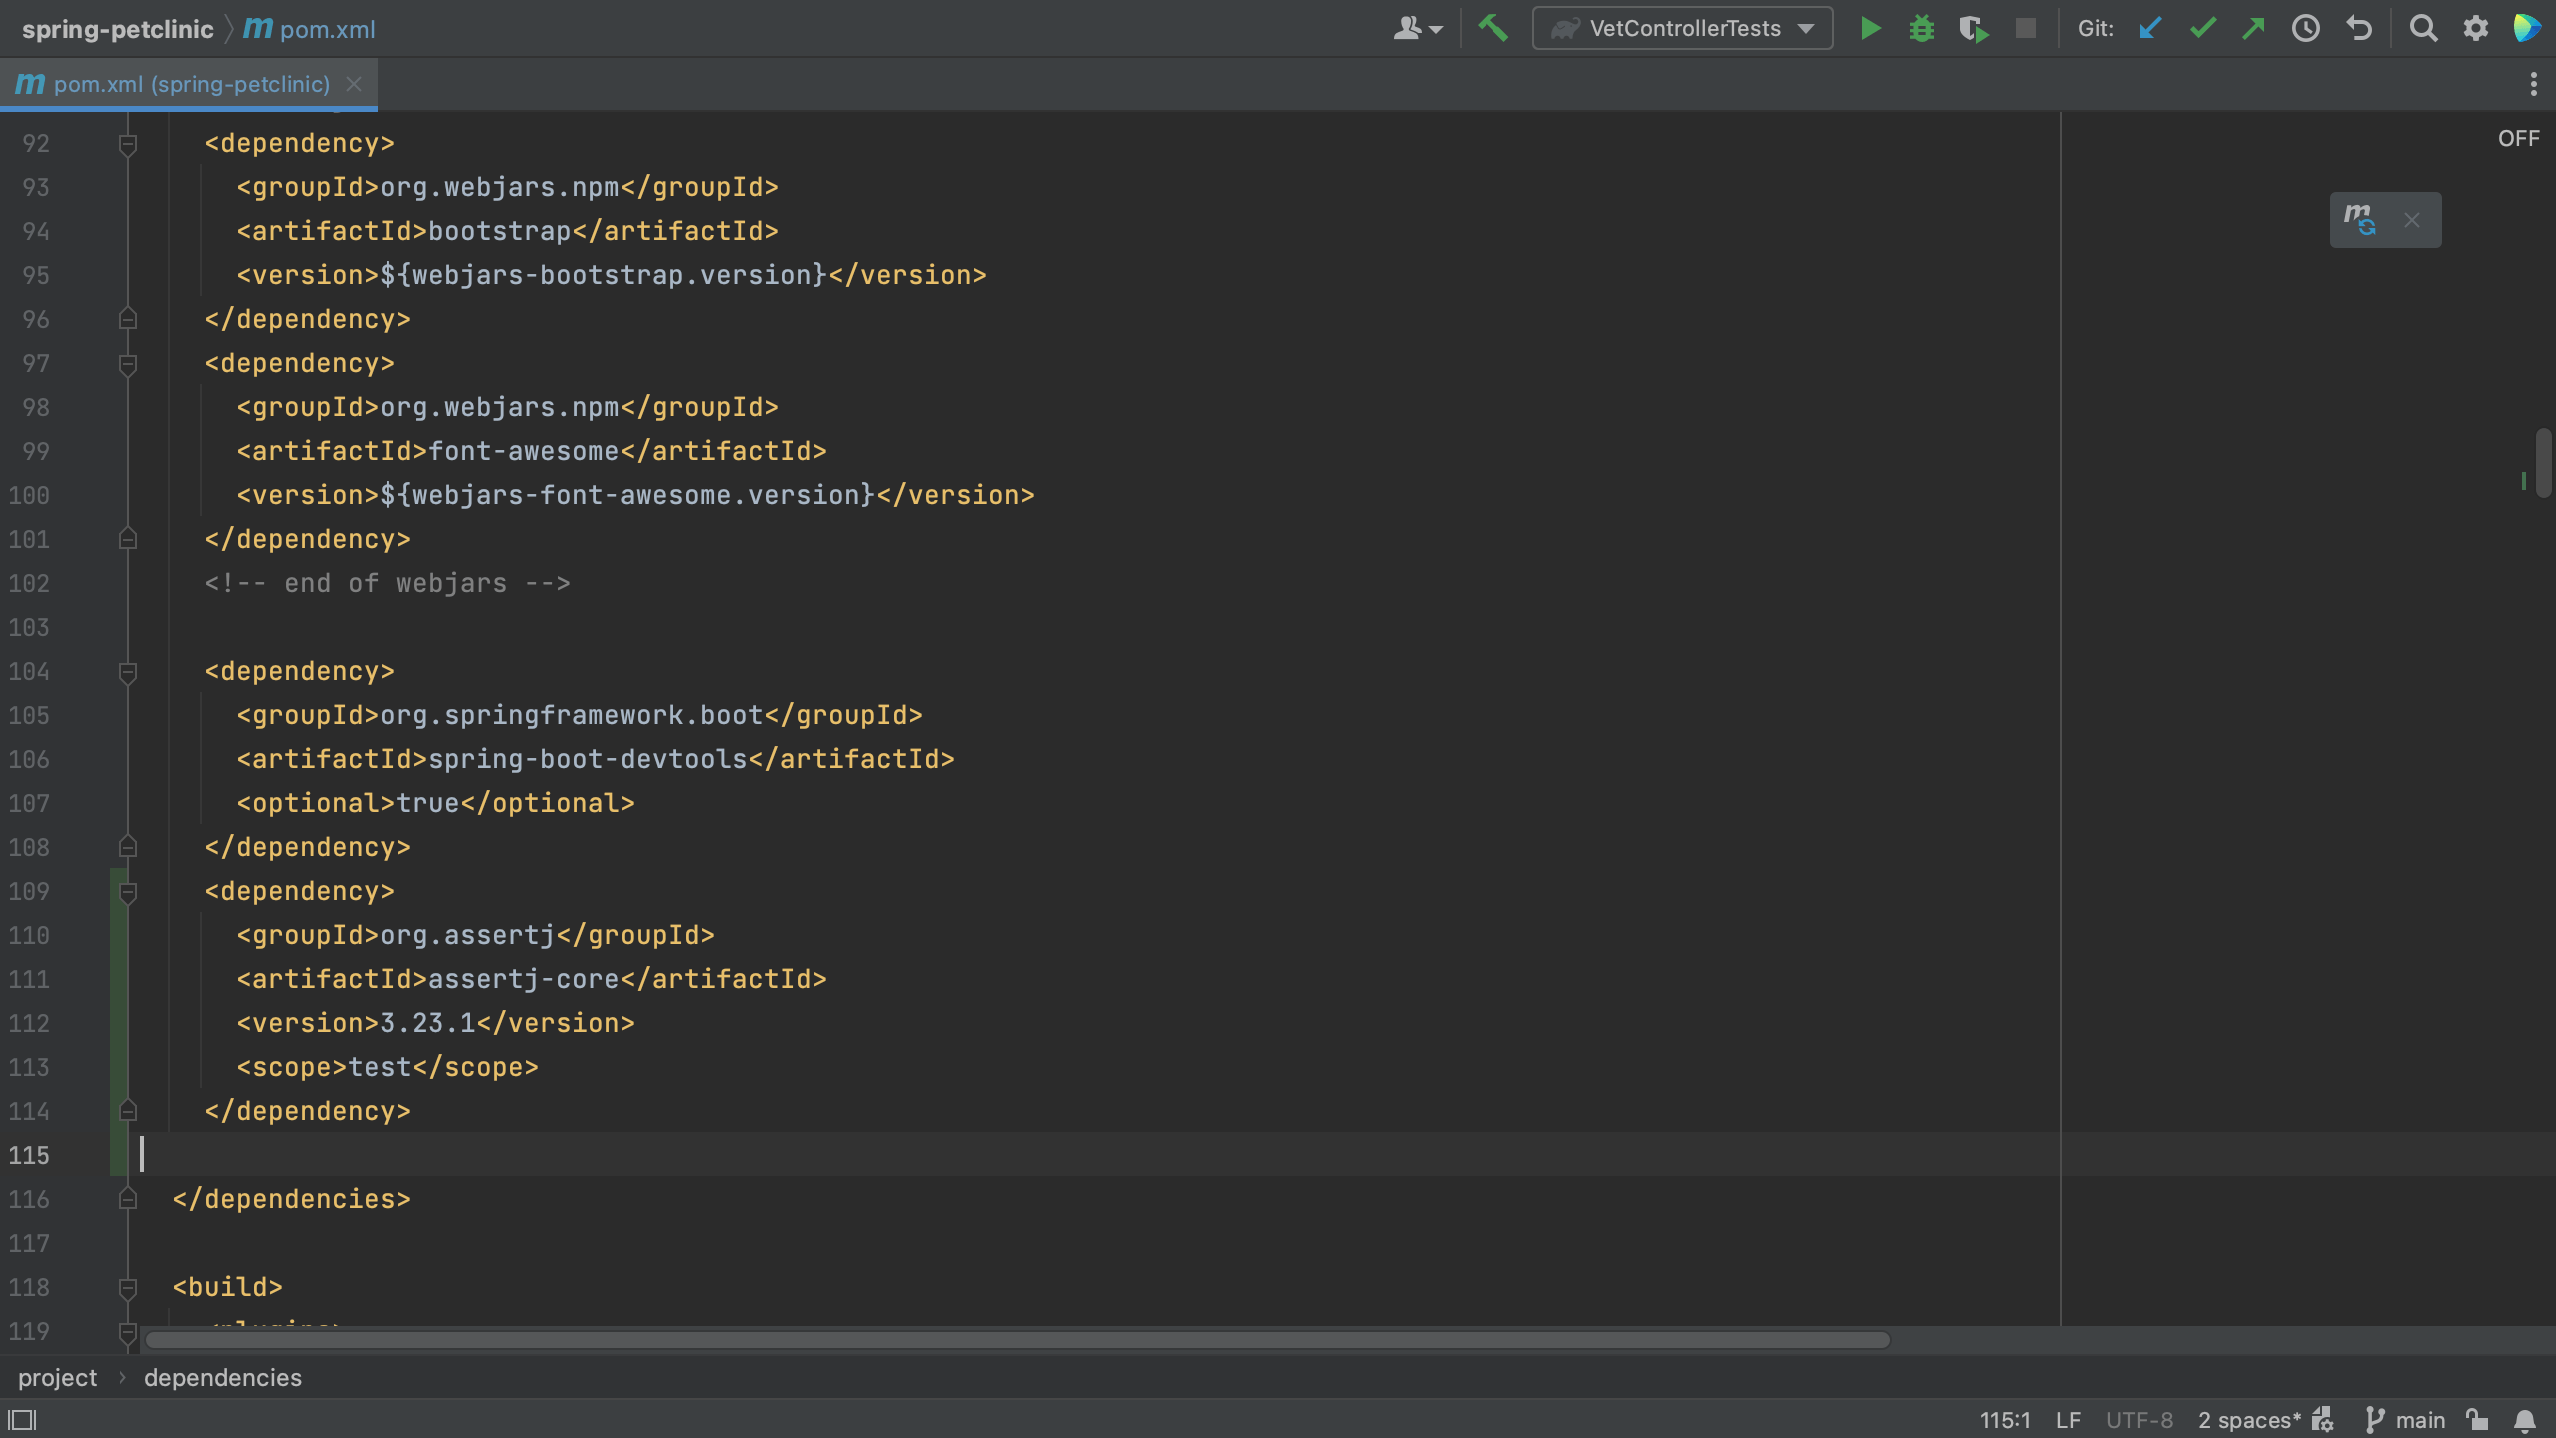
Did you know that if you copy-paste a Maven XML dependency into your build.gradle file, IntelliJ IDEA automatically turns it into the correct format for Gradle?

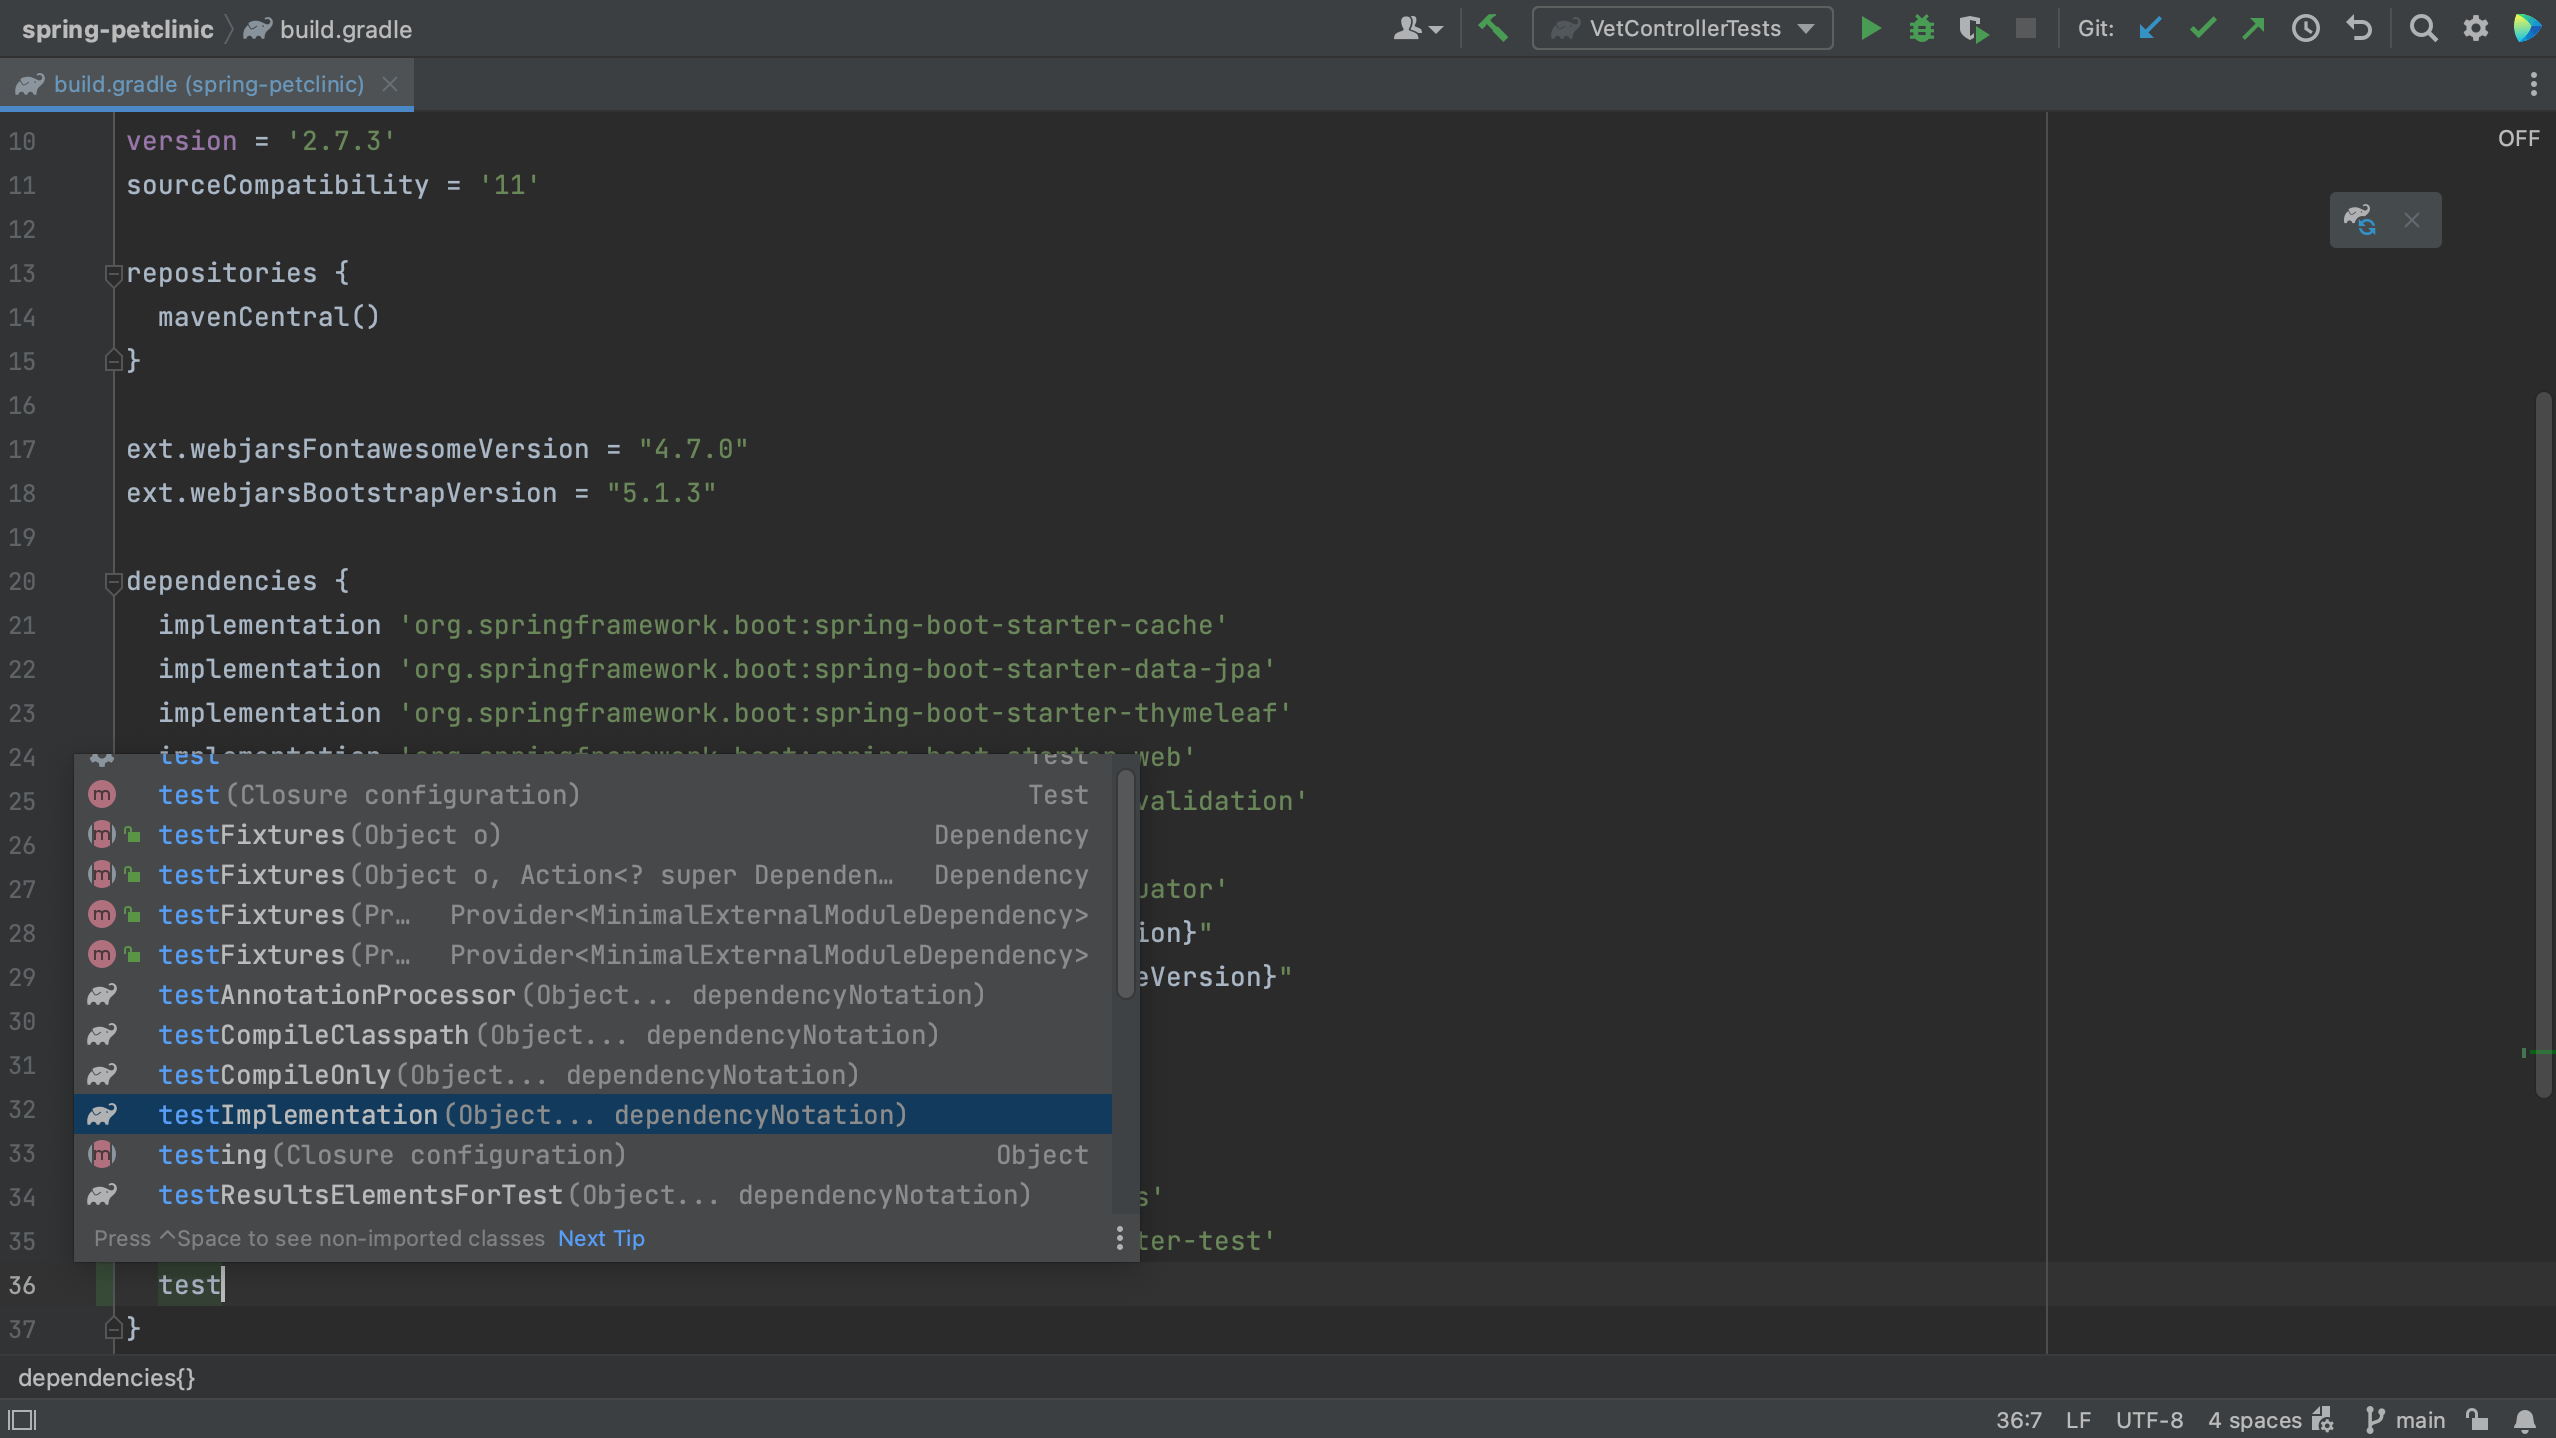
From the build file using code completion

We can also add dependencies to our build file using code completion. For example, let's add a new dependency to our pom.xml.

Code completion in pom.xml

Code completion in pom.xml

Code completion in pom.xml

Code completion in pom.xml

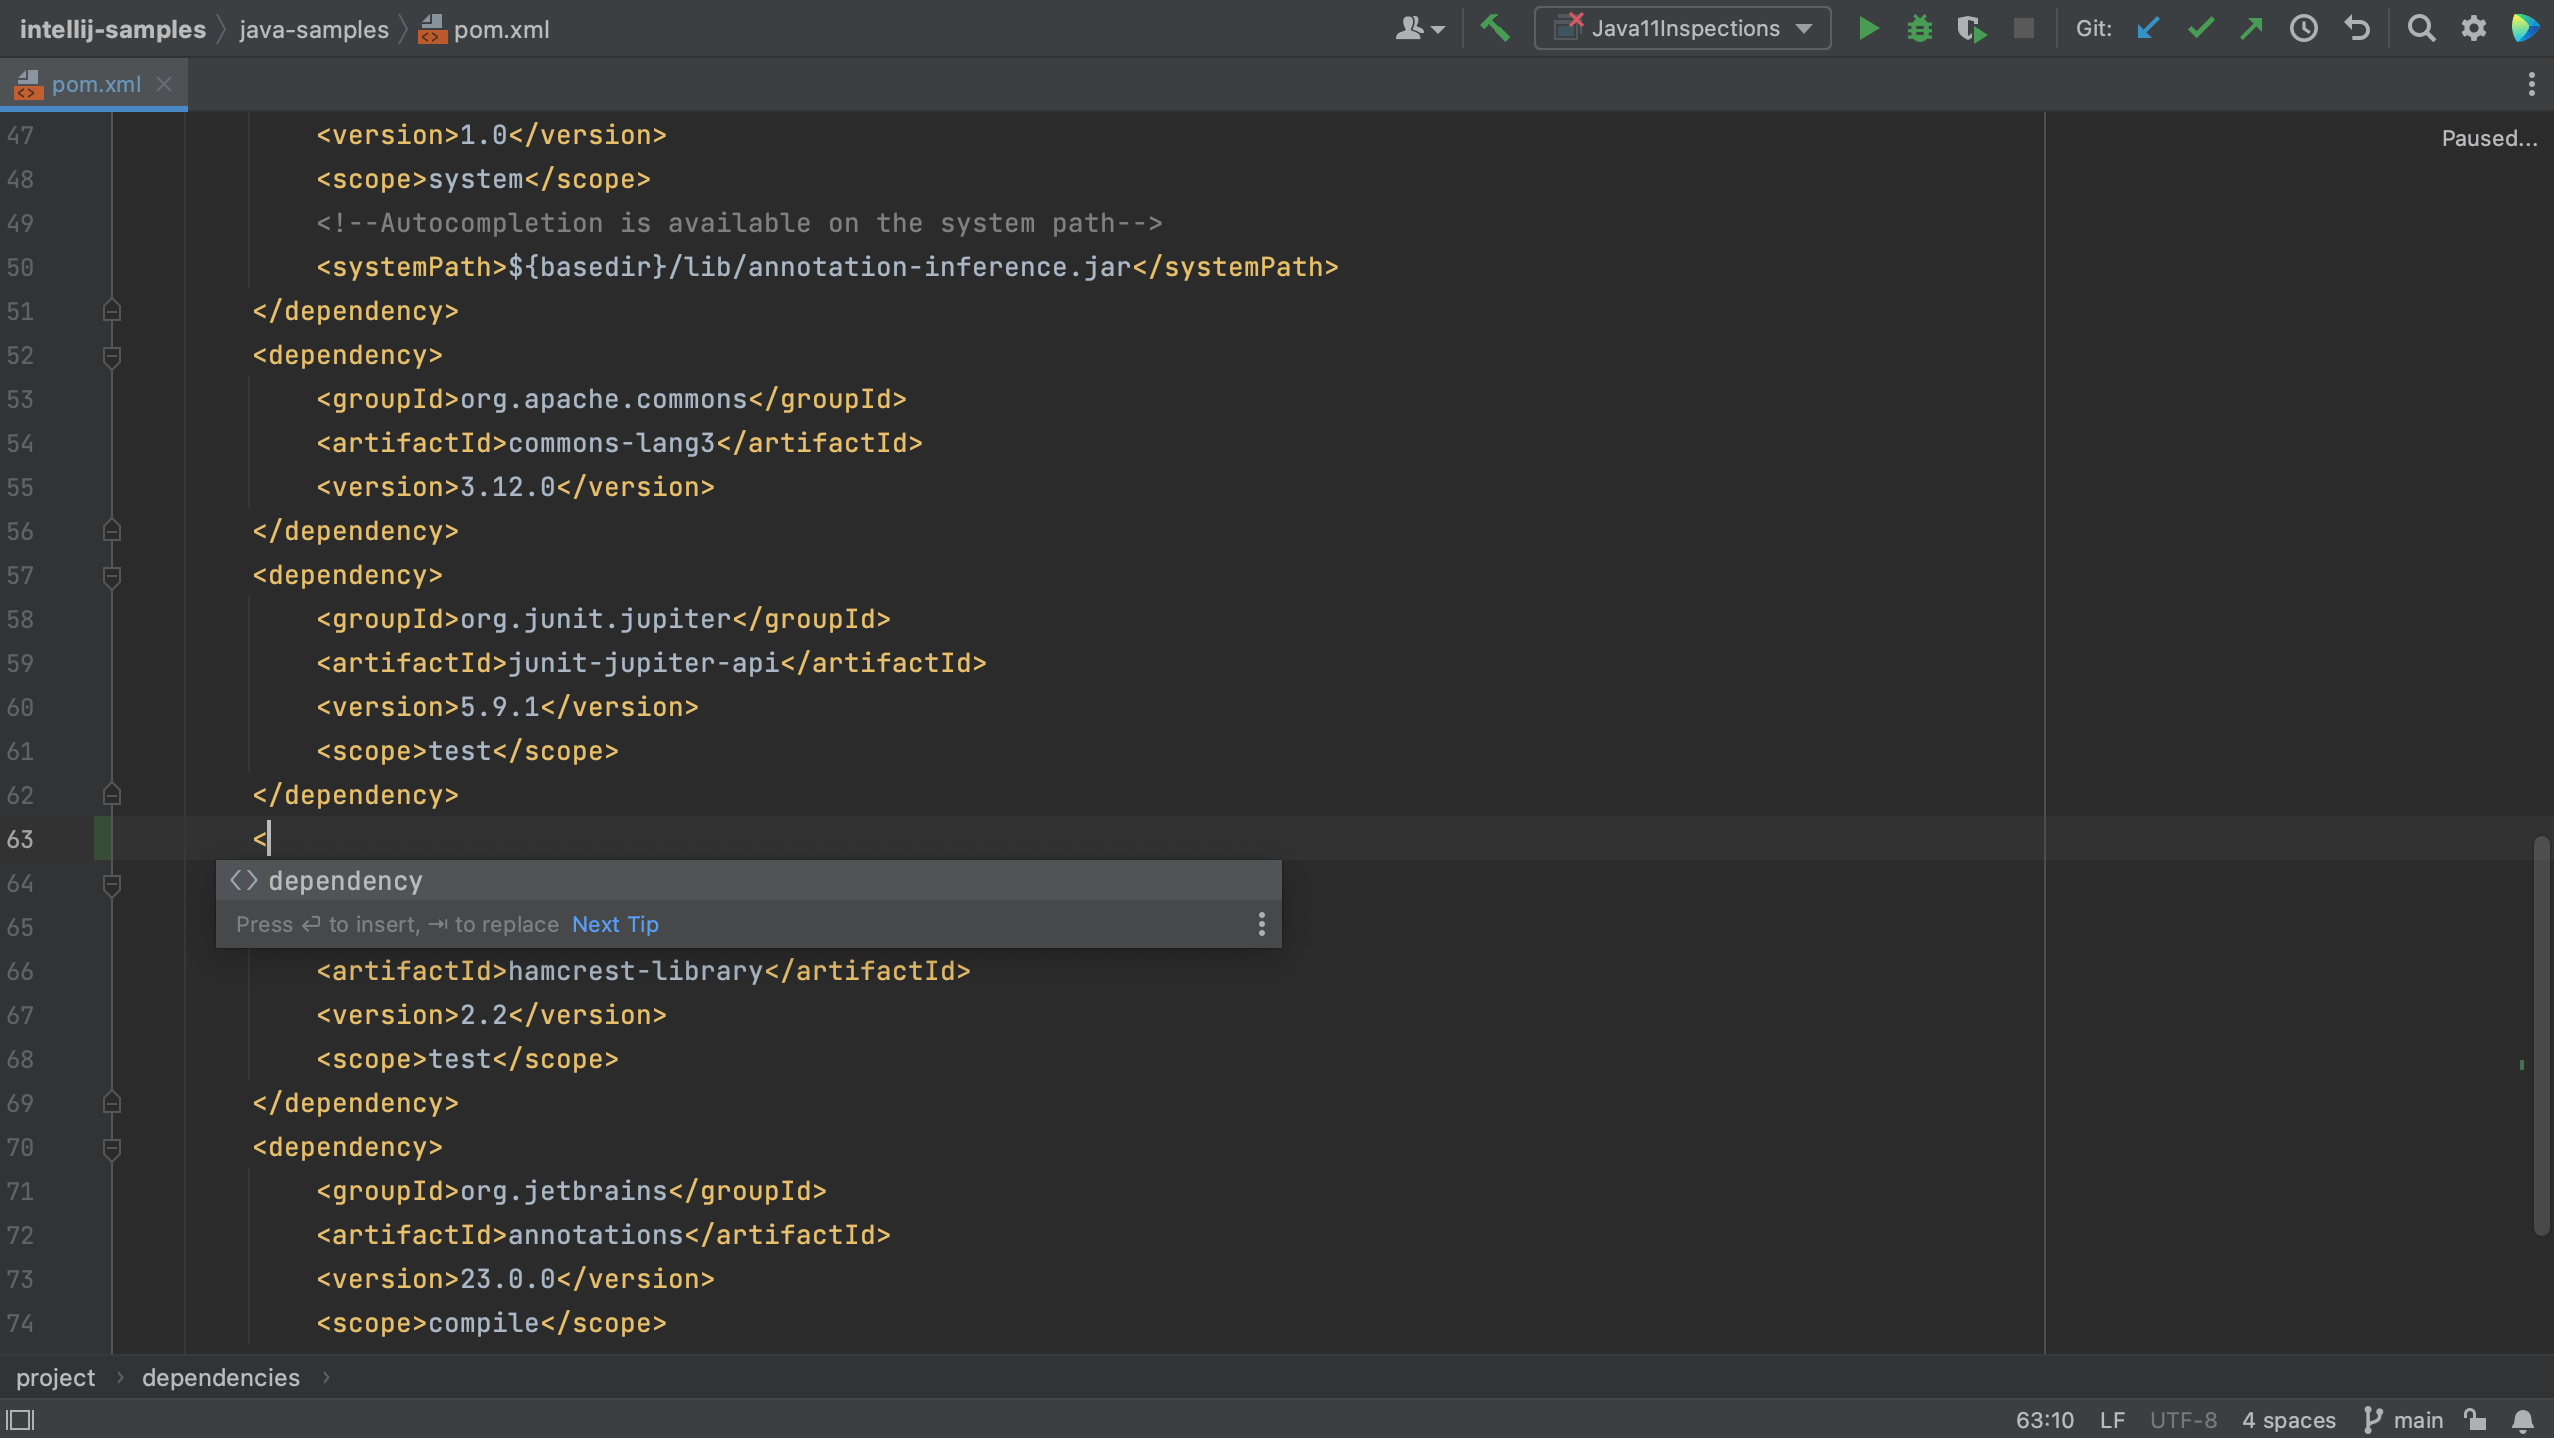
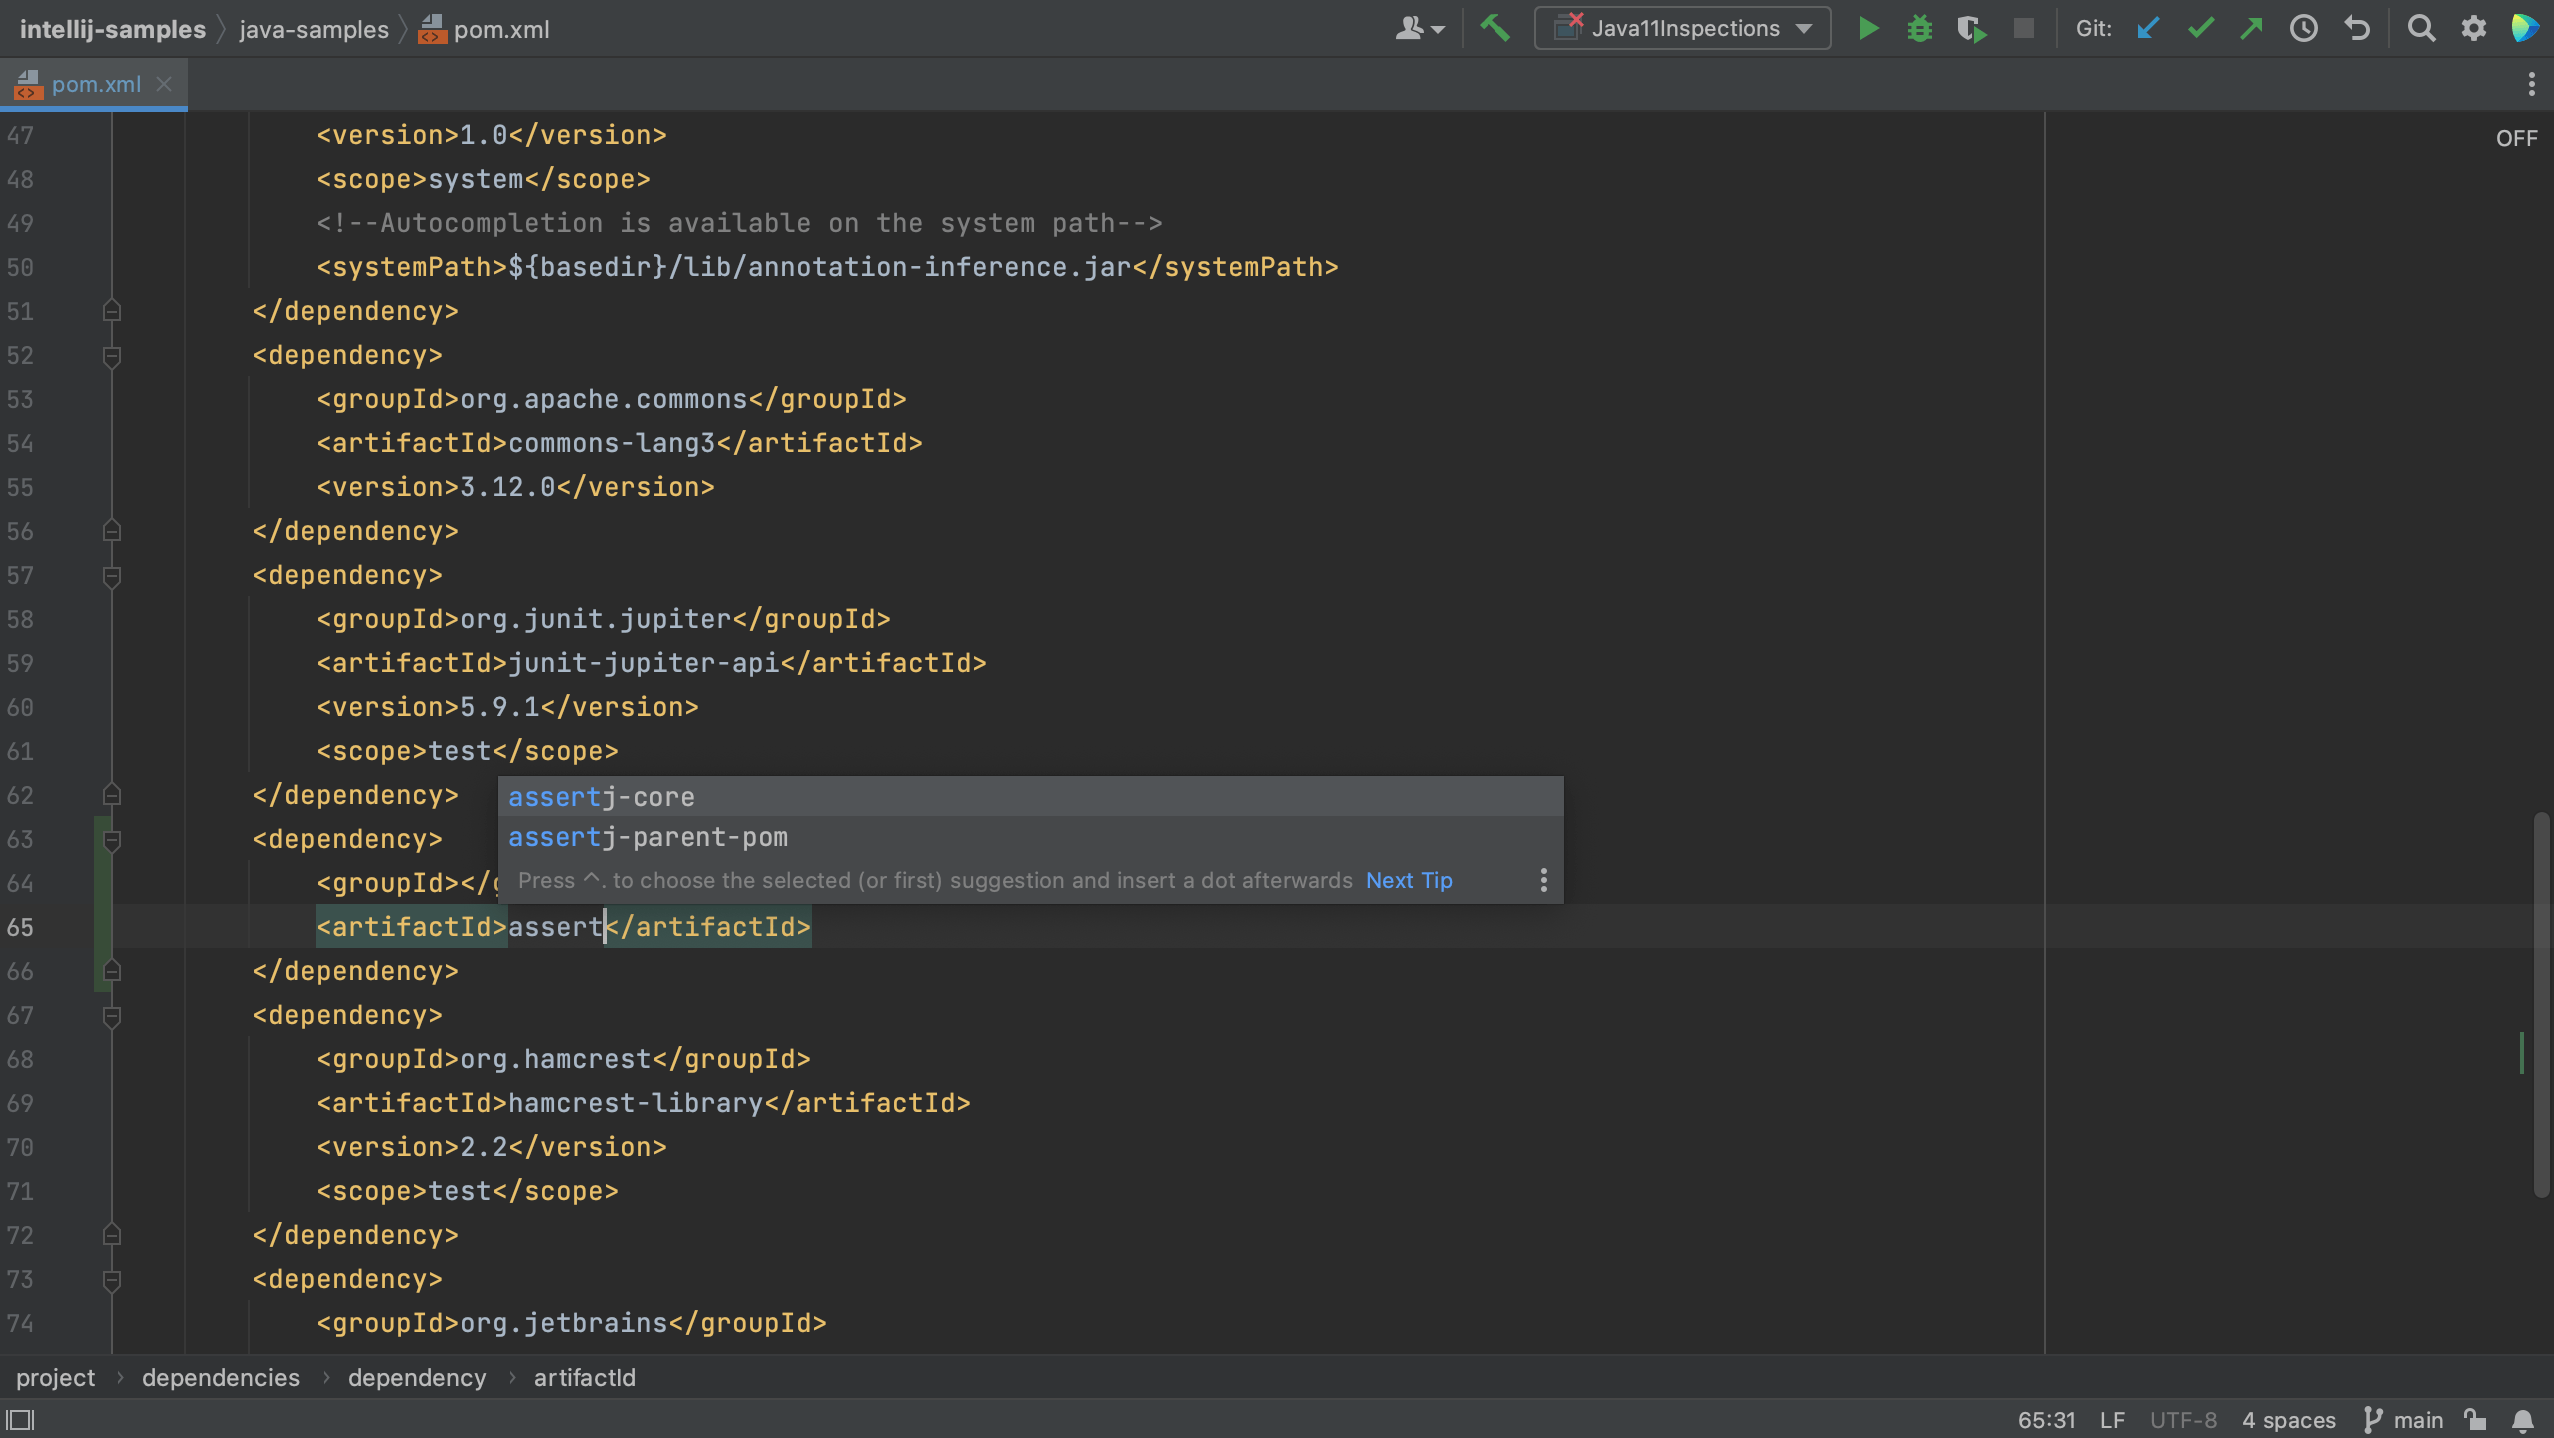
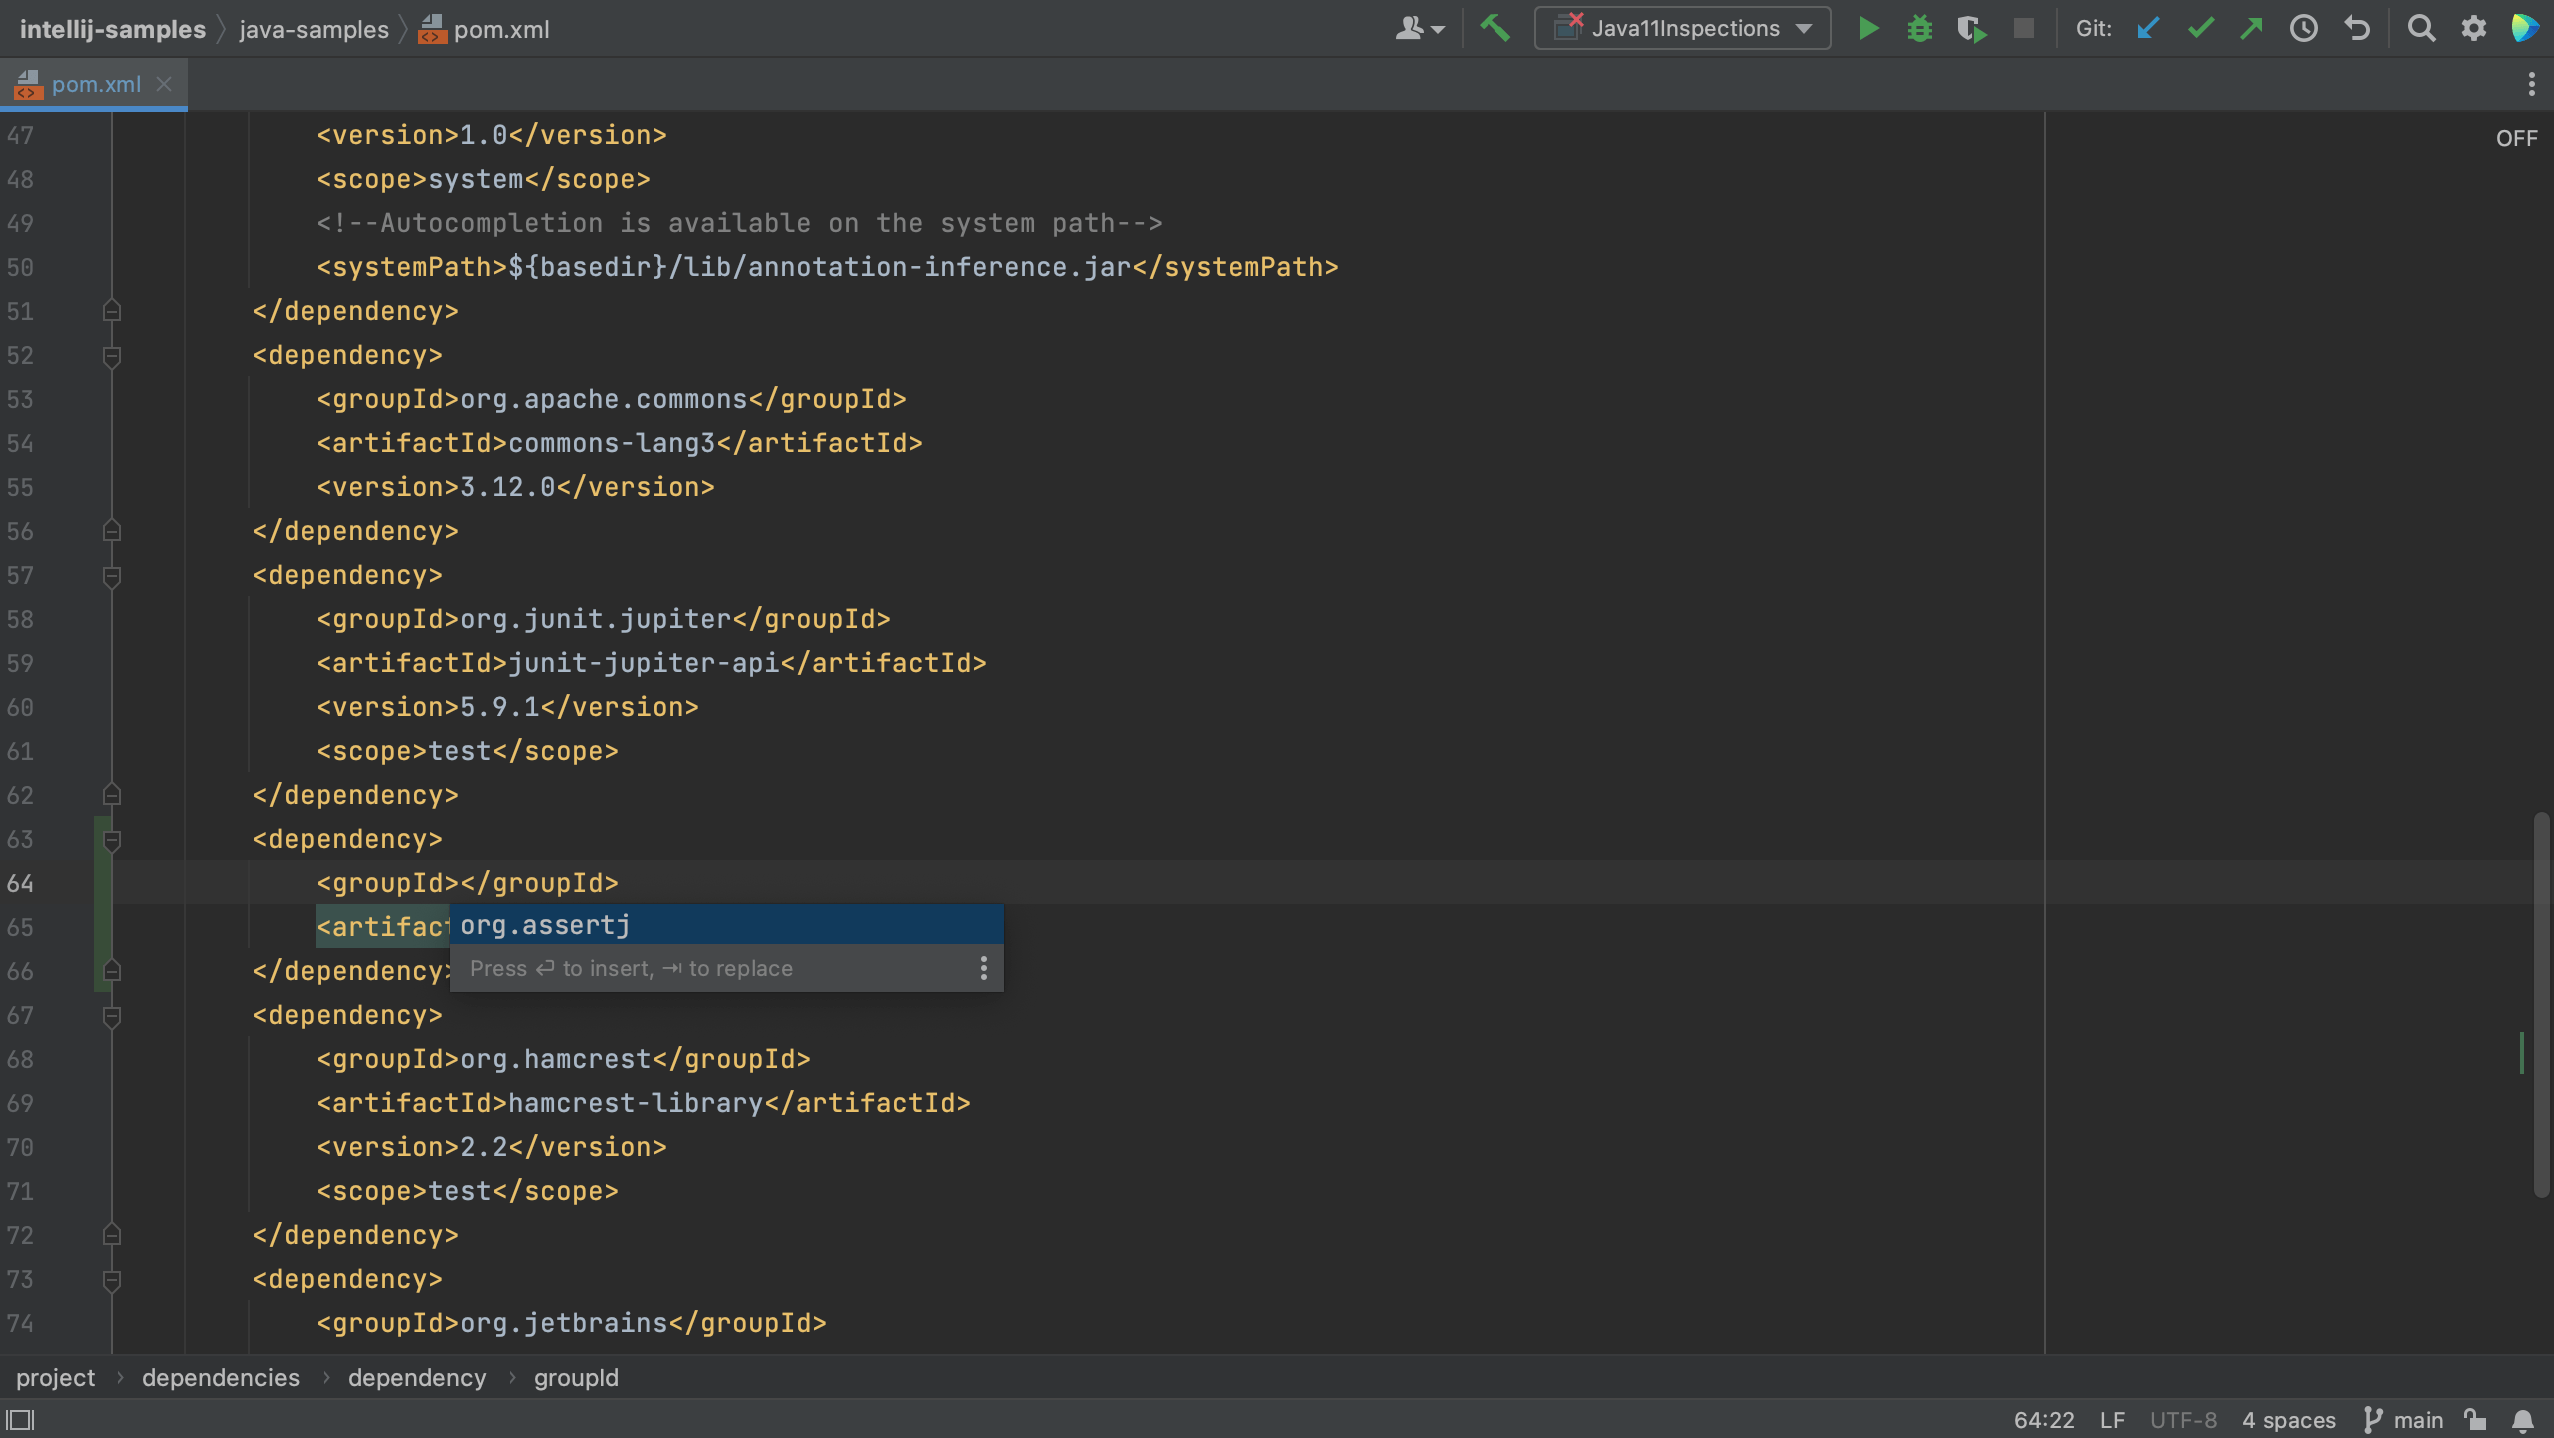
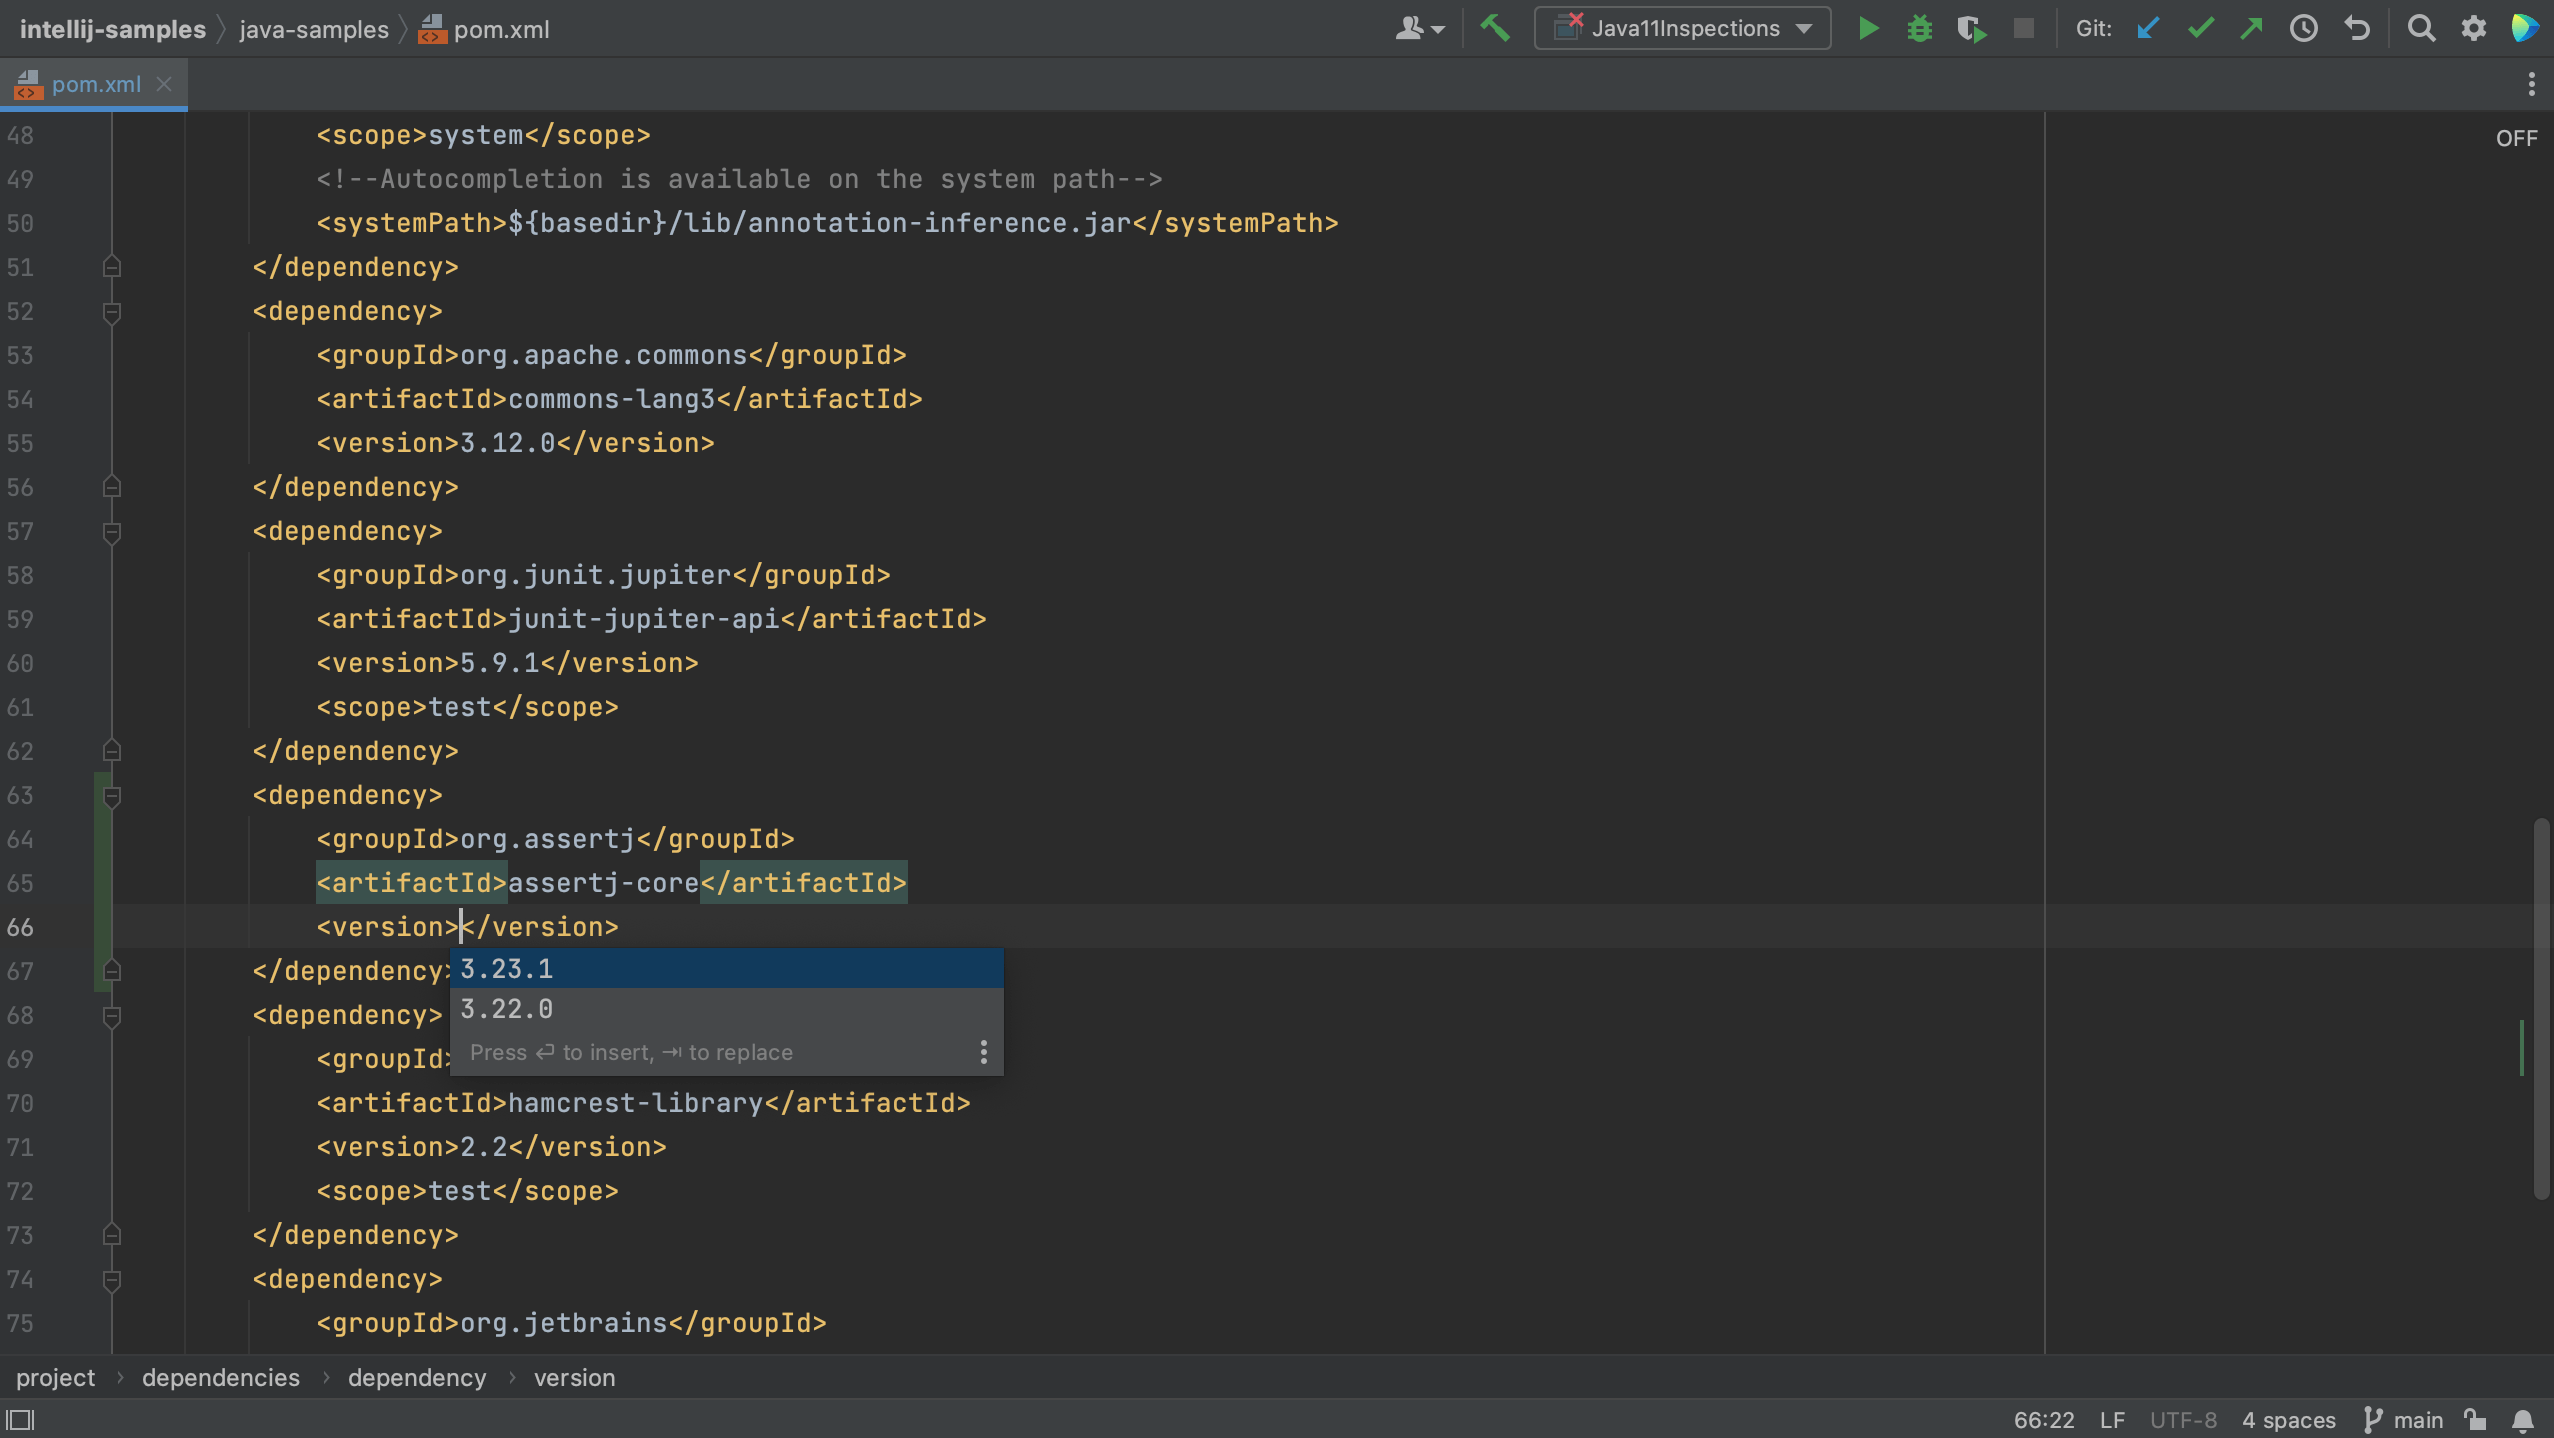
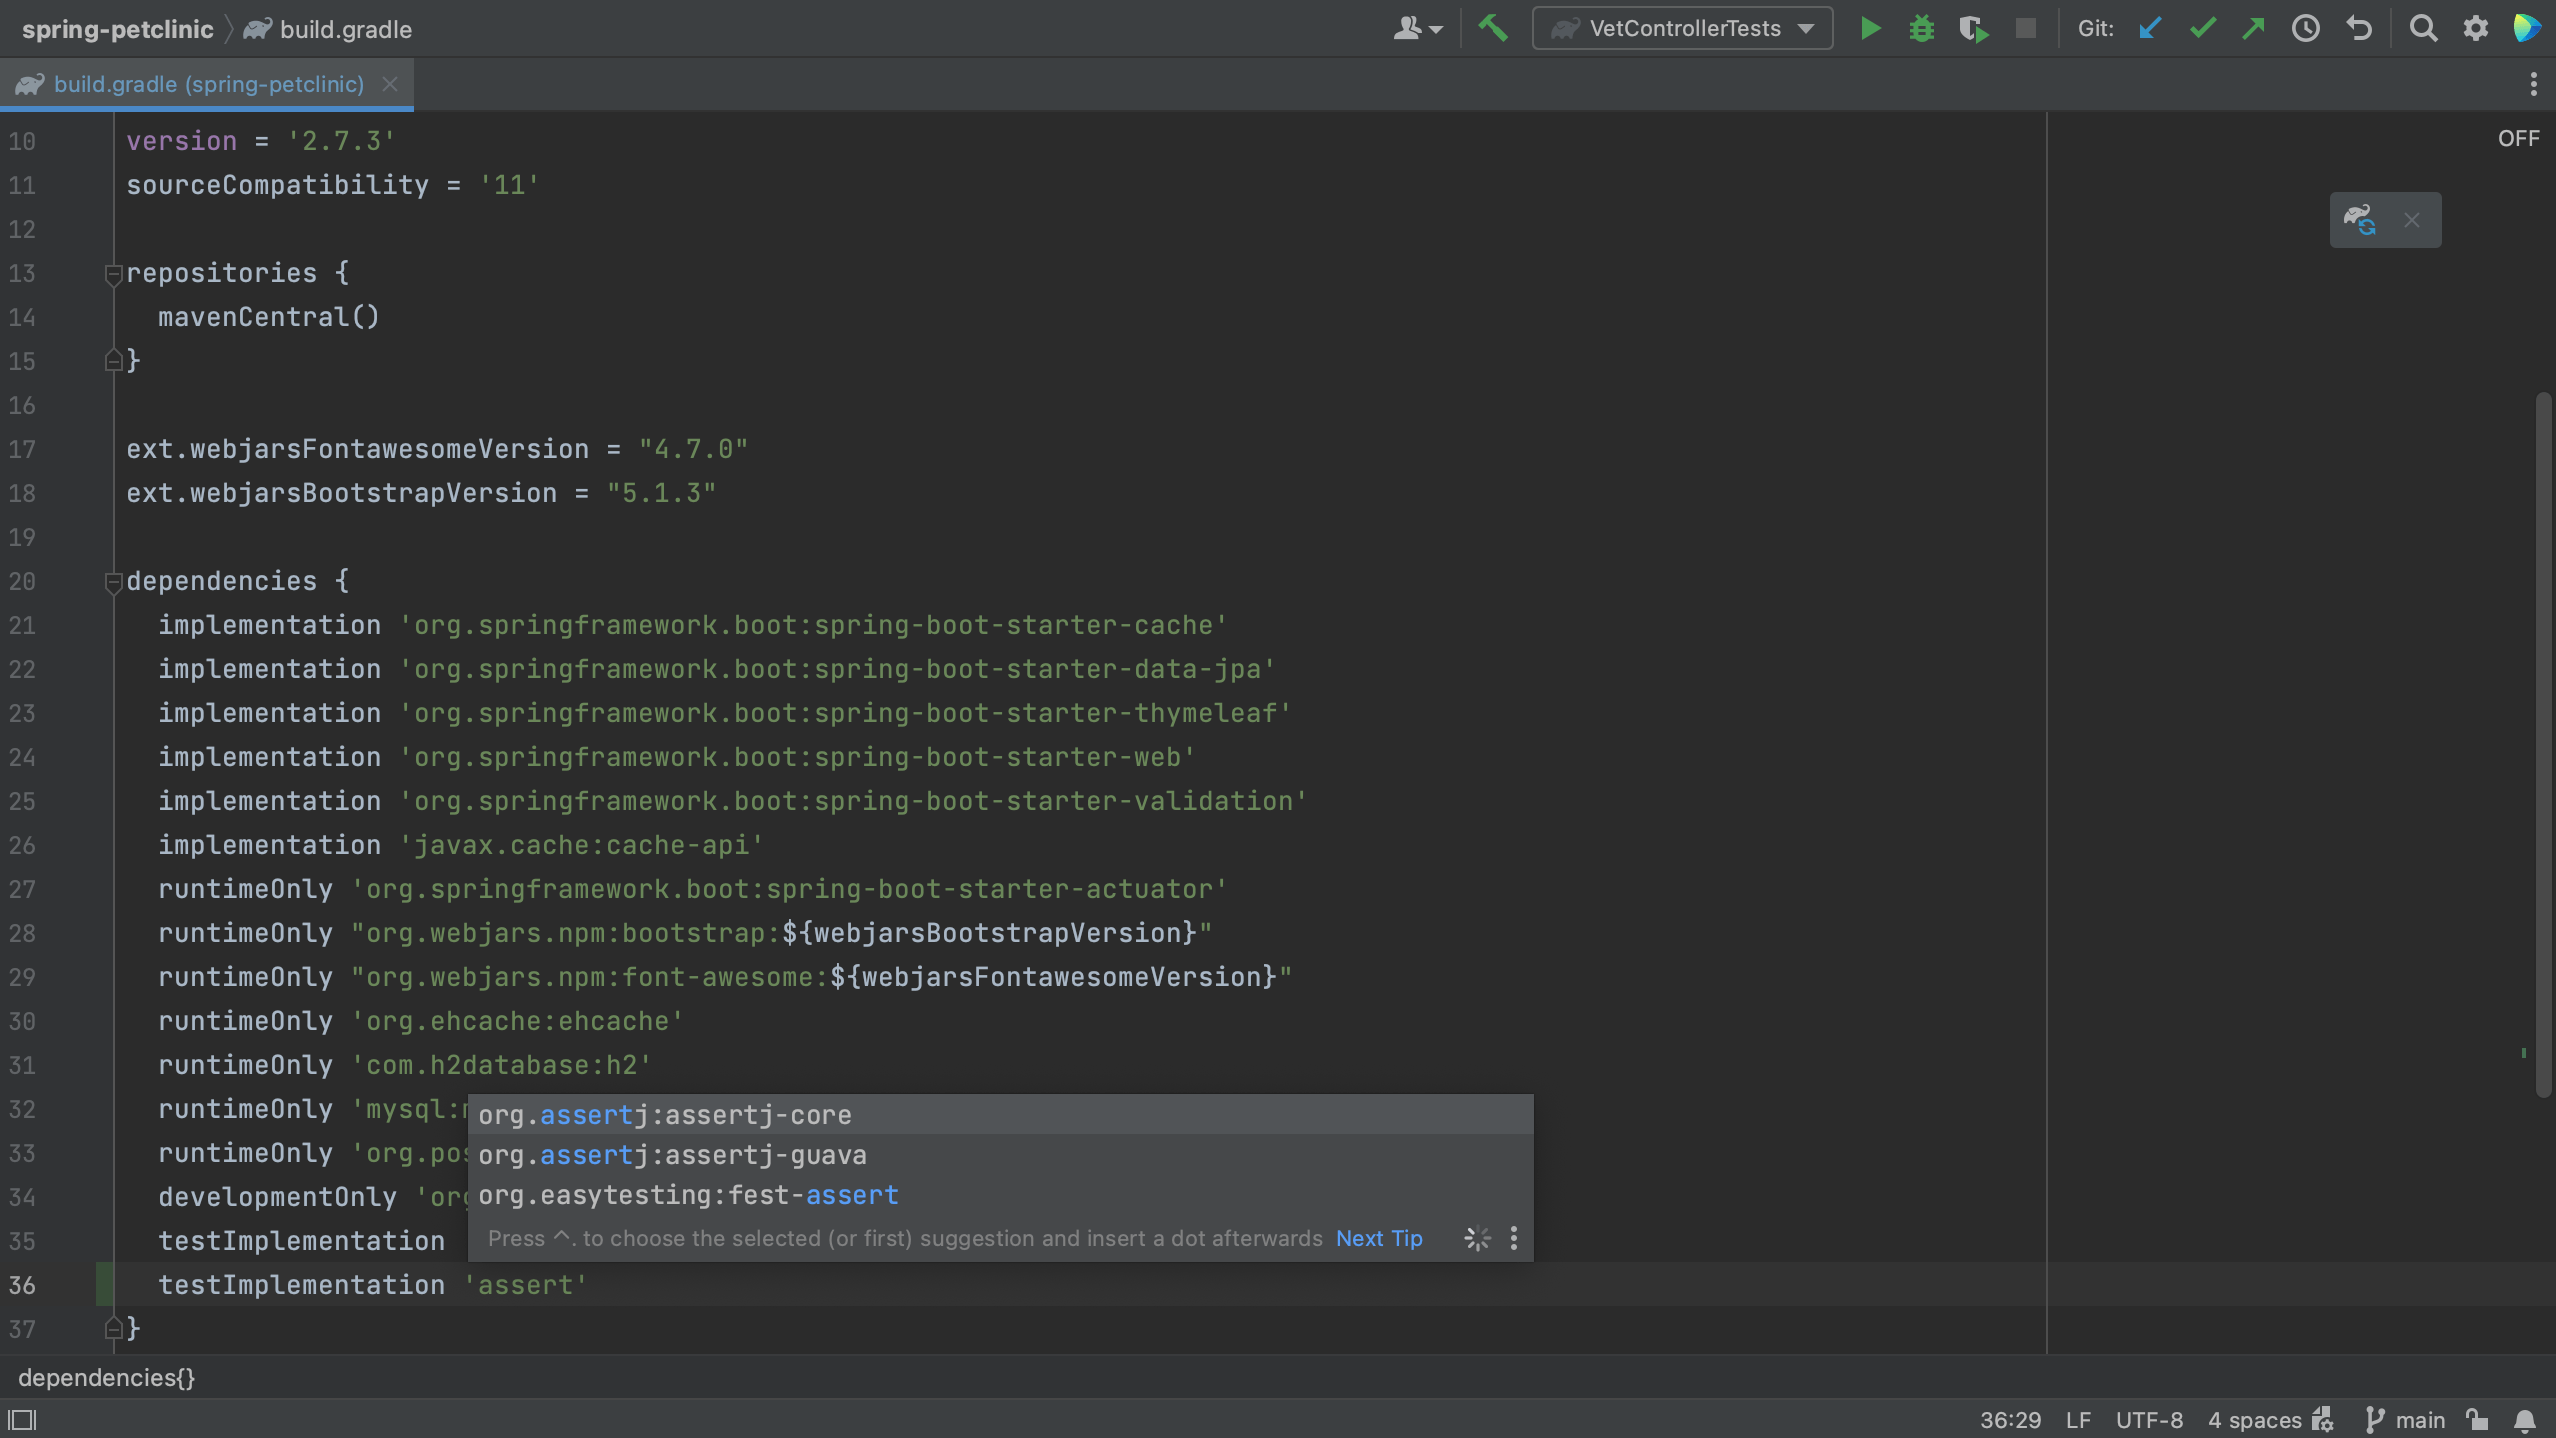
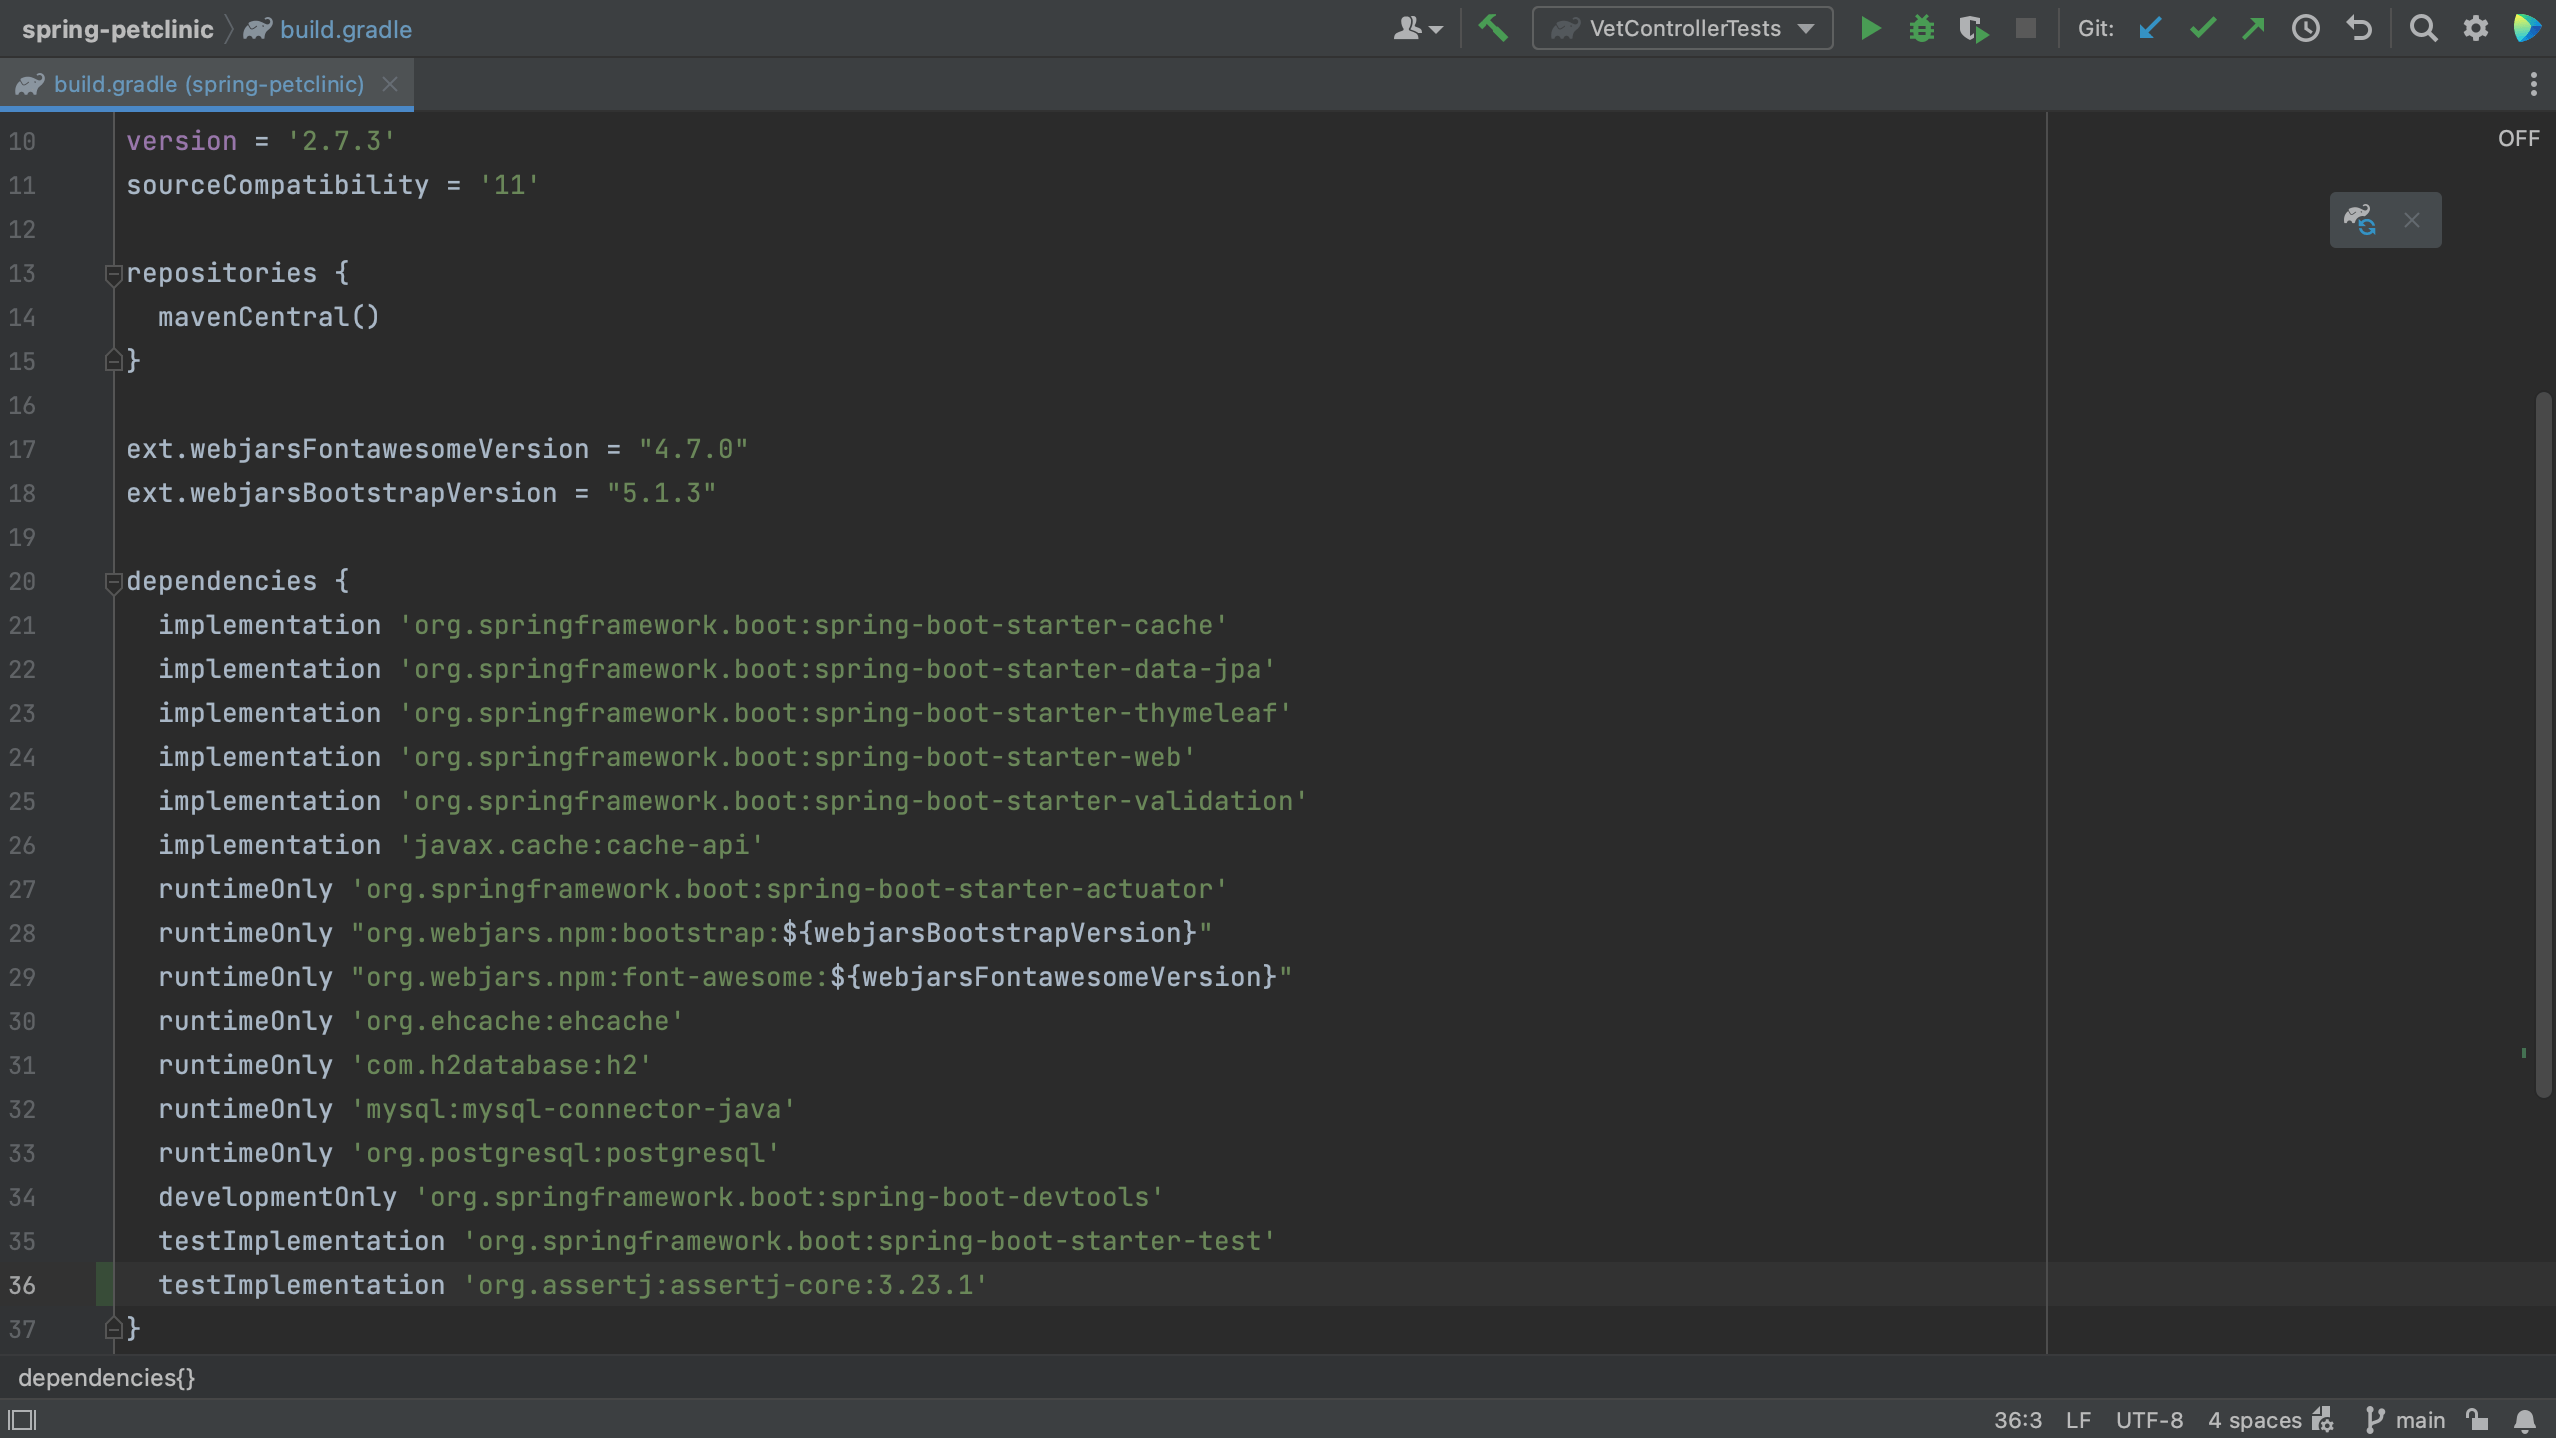
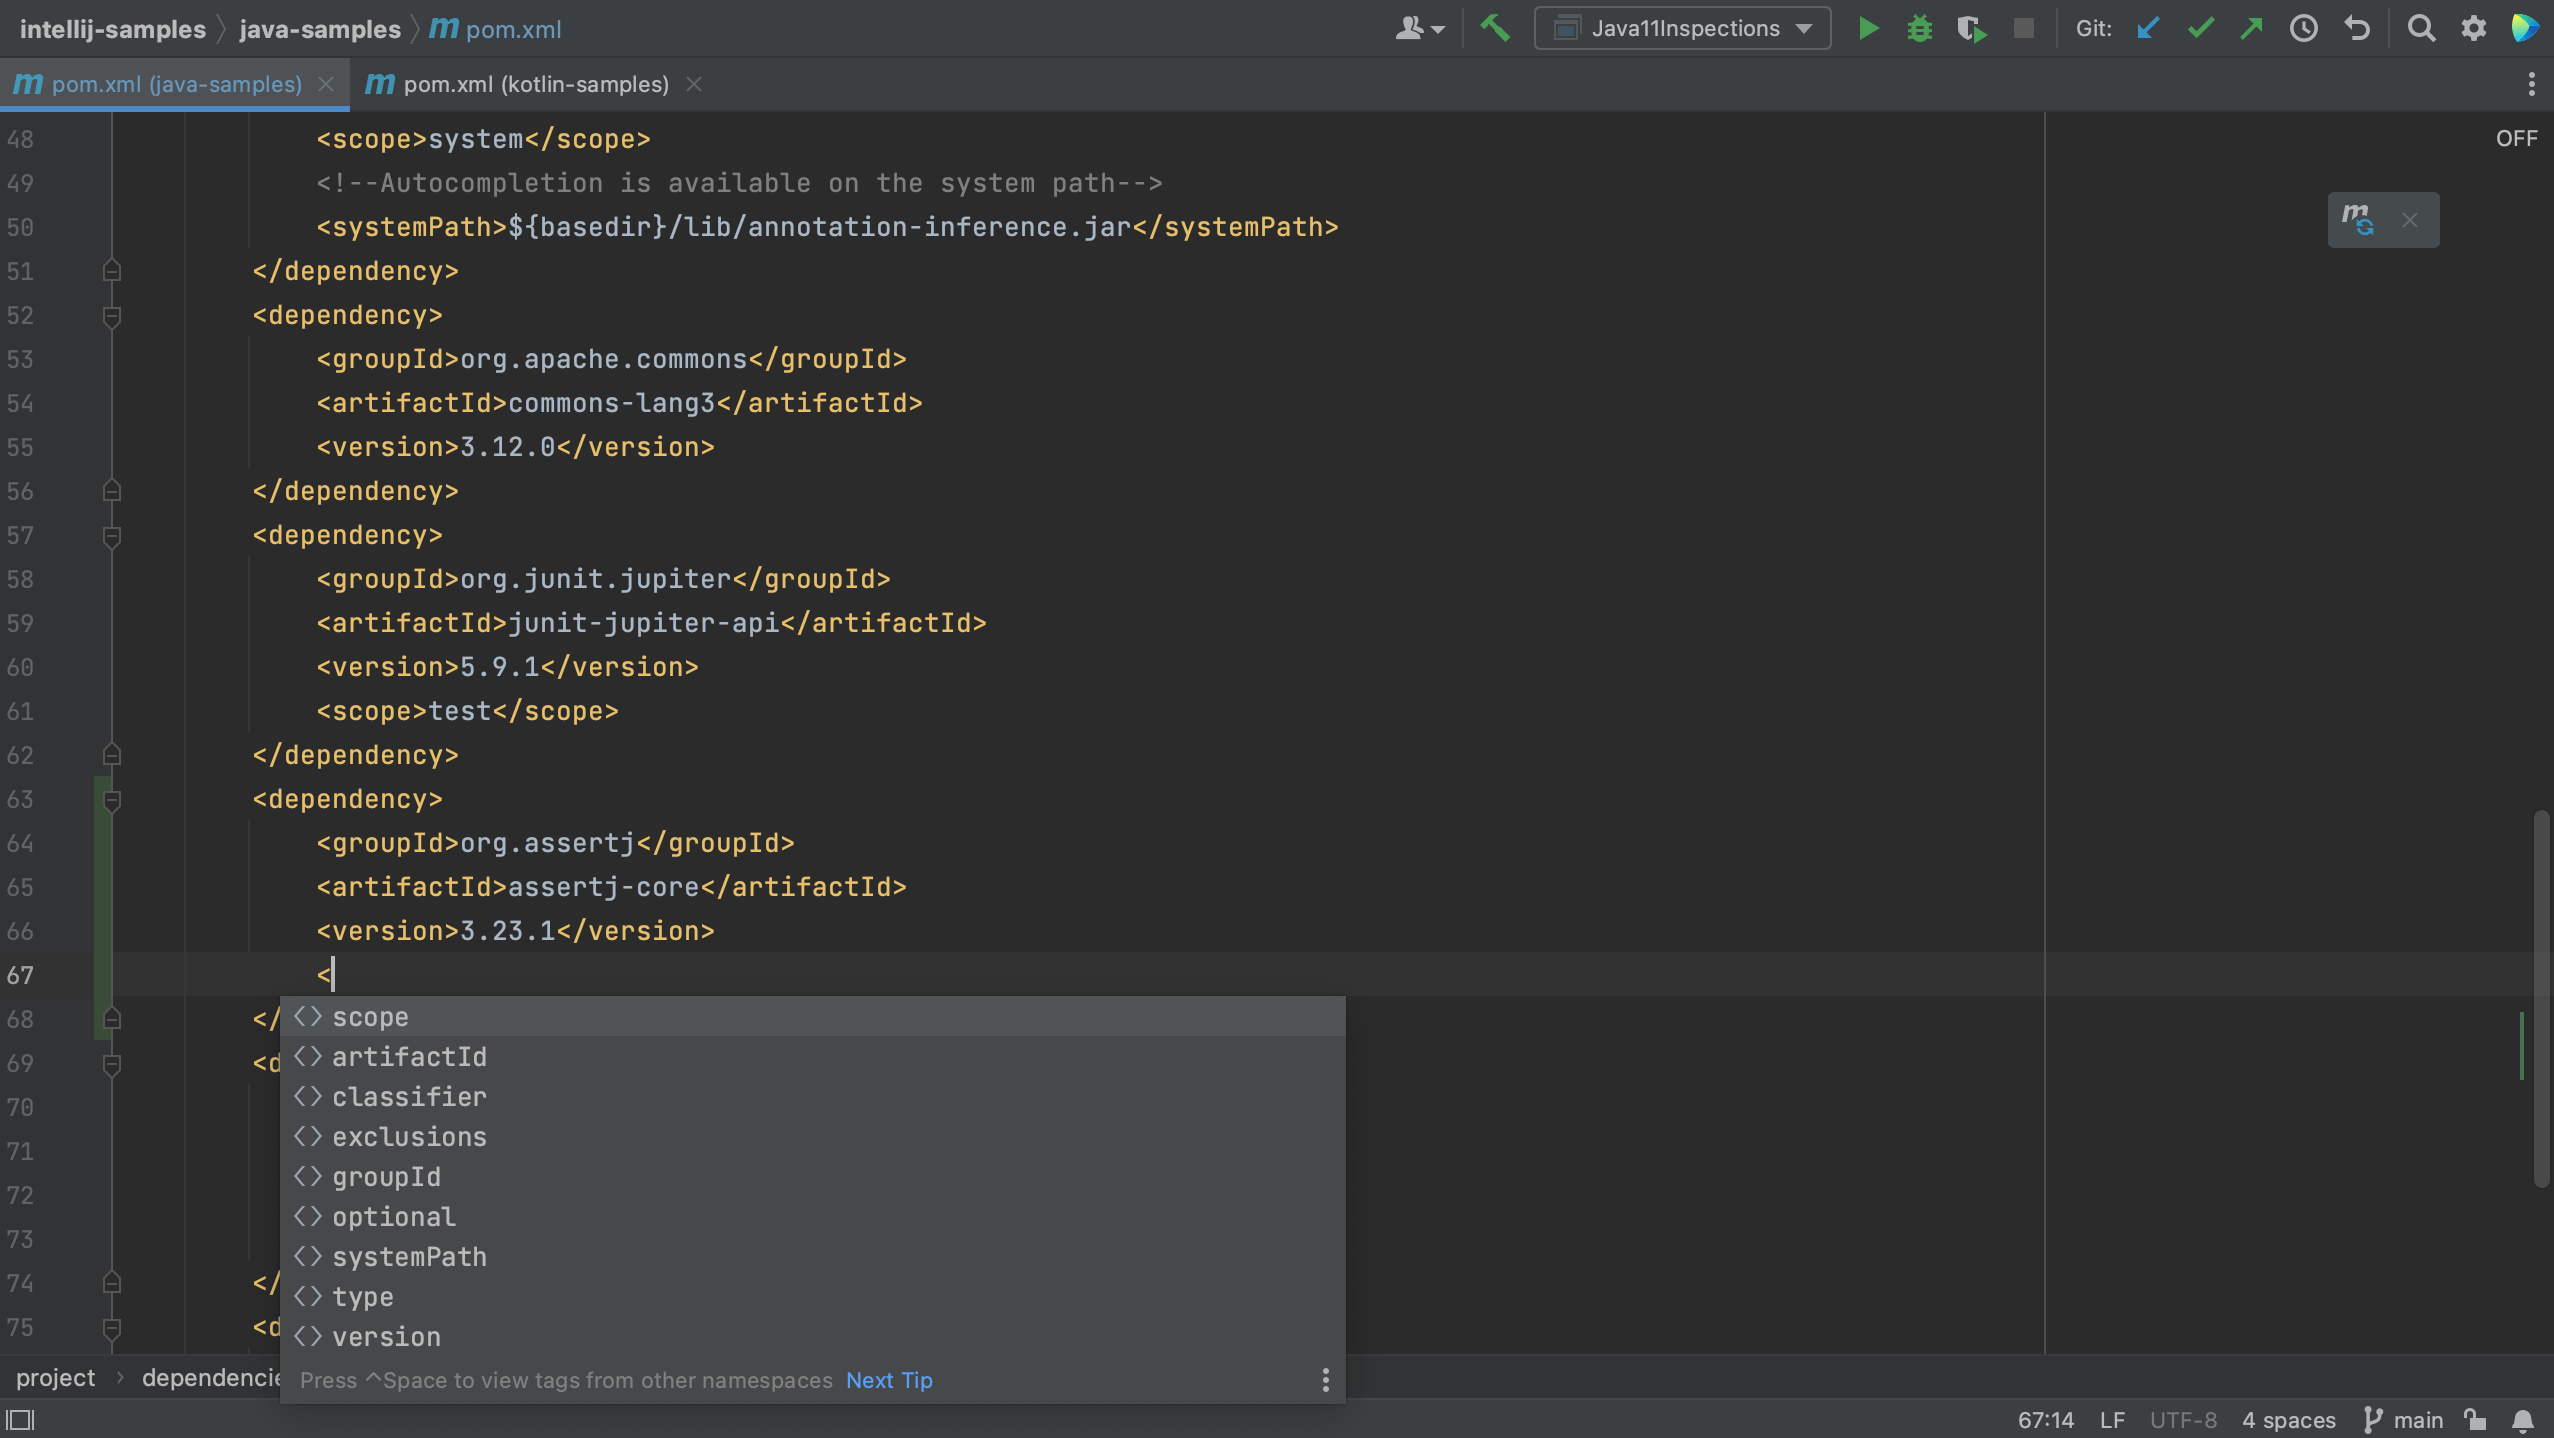
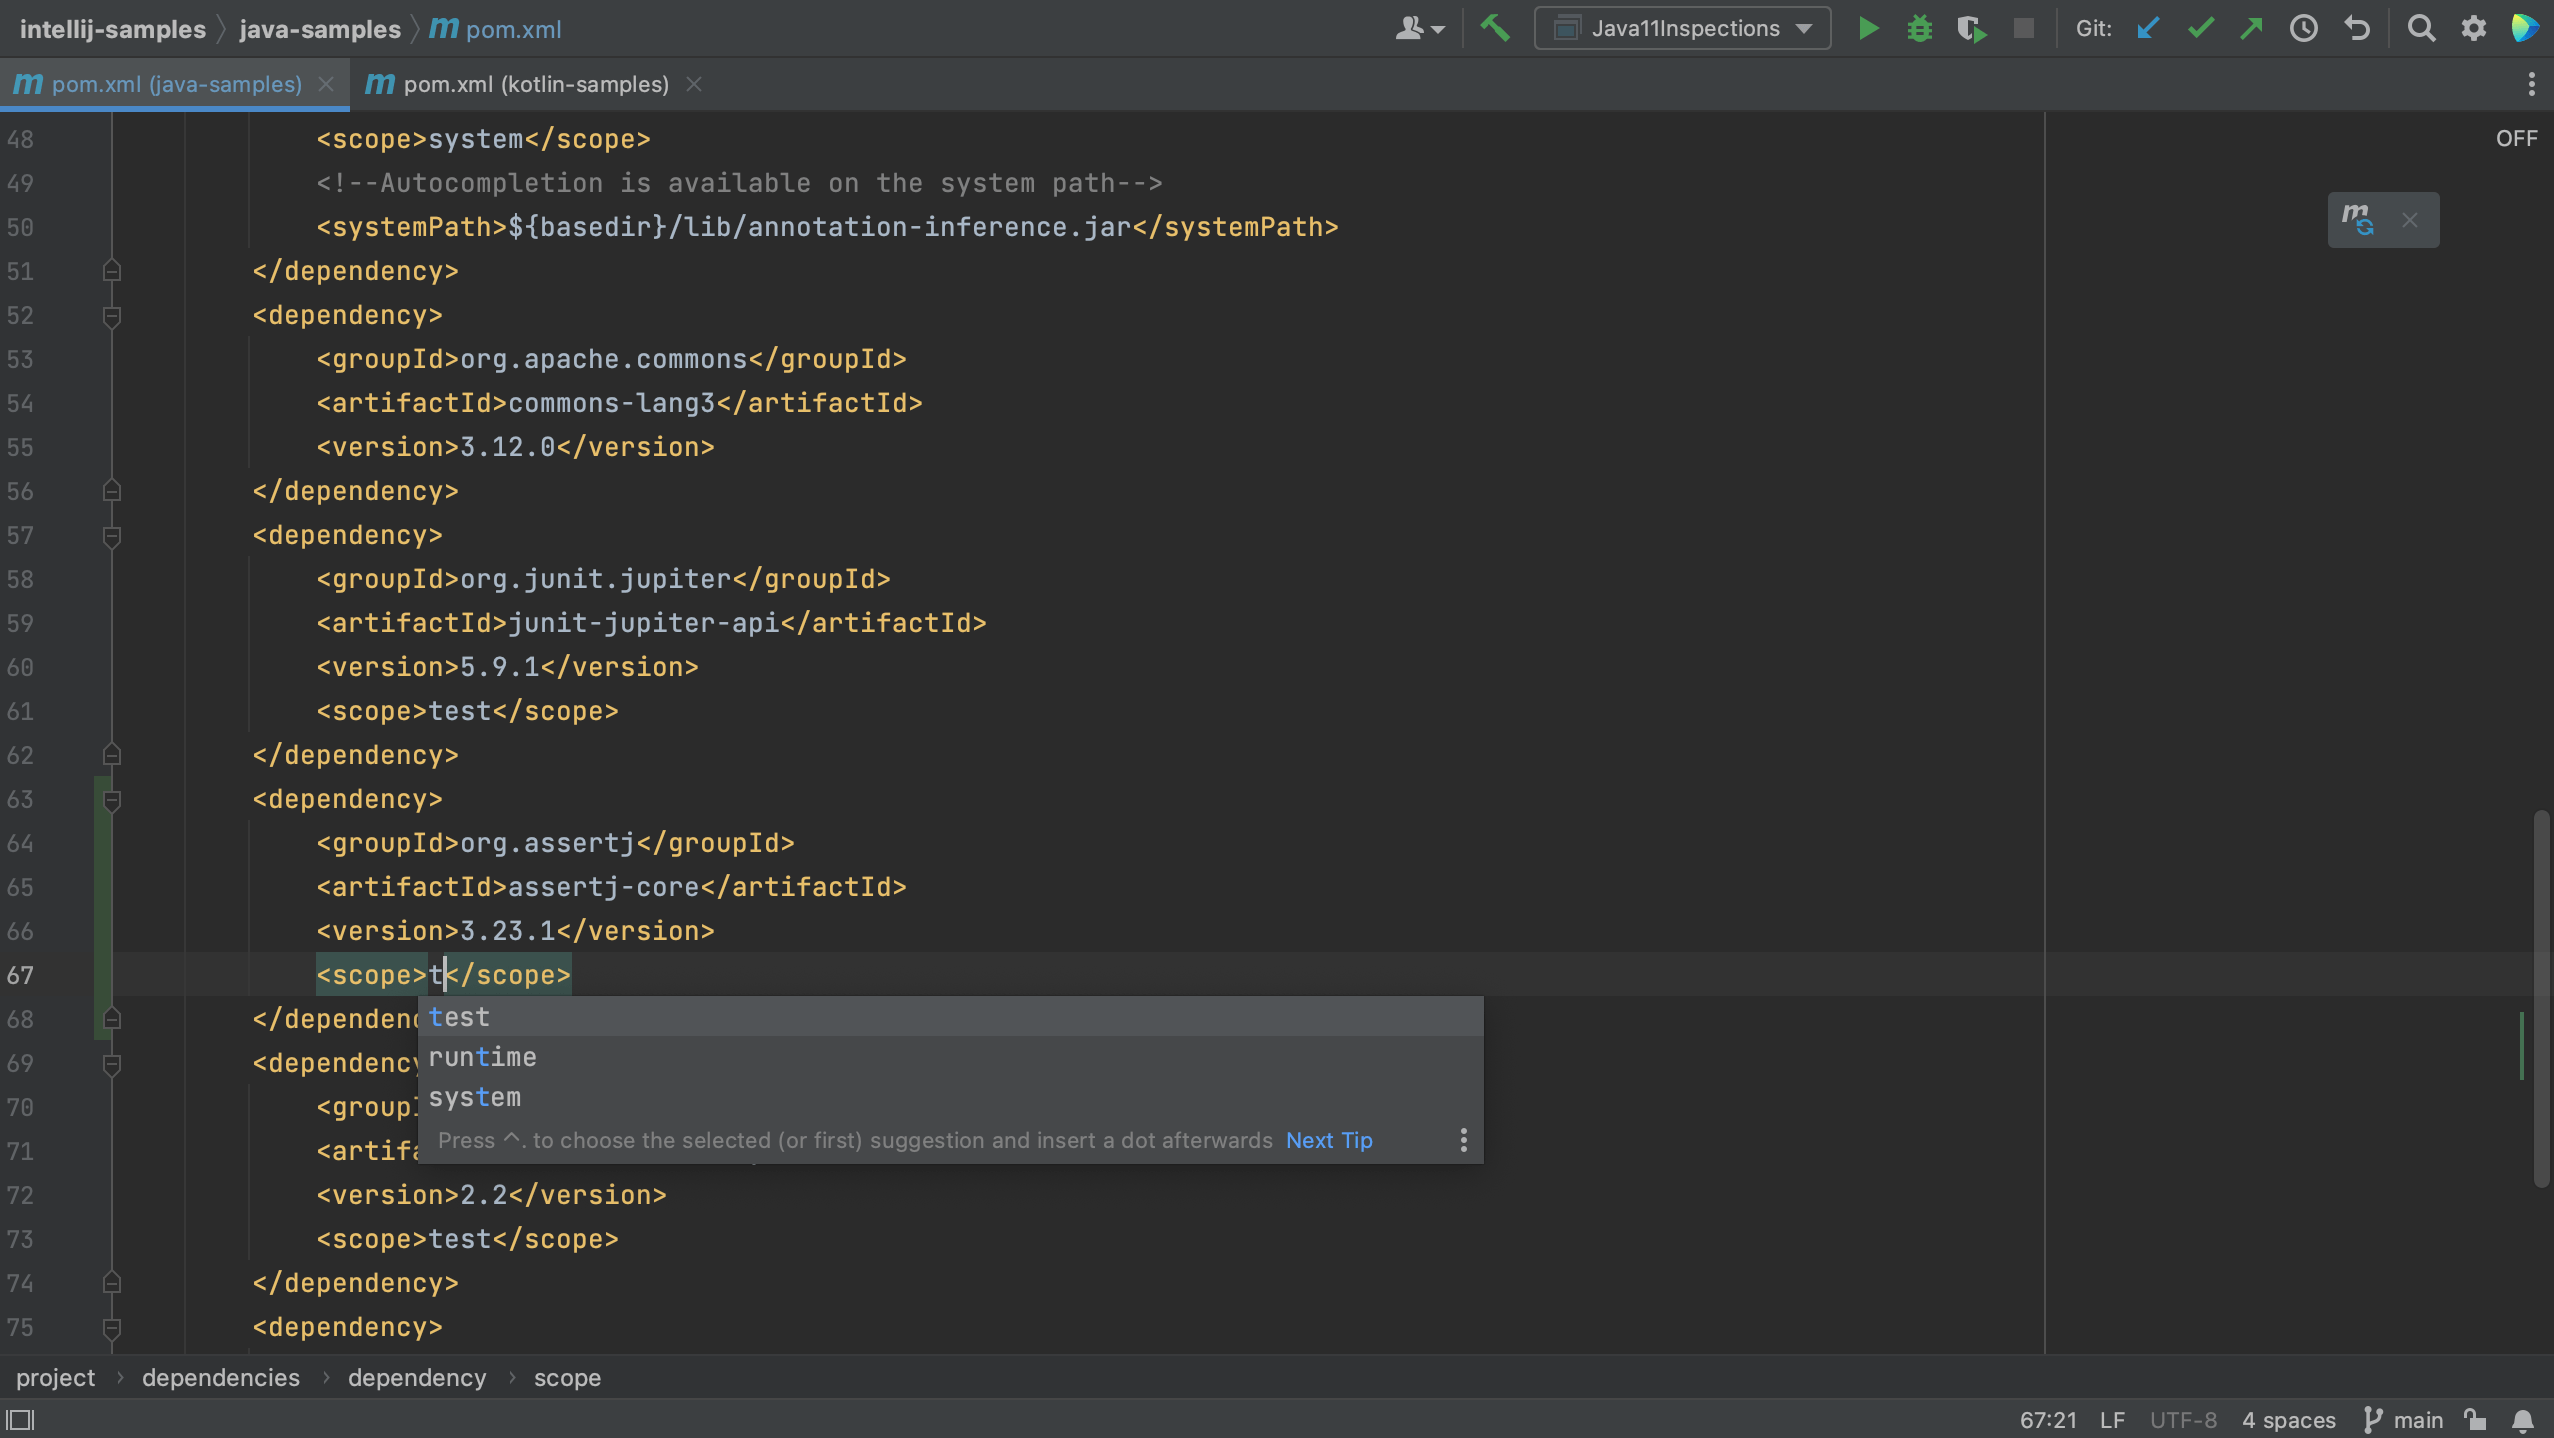
We see that IntelliJ IDEA autocompletes the dependency xml, and we can search for the dependency we want, in this example AssertJ. If needed, the version number will also be added. Since this is a test dependency, we need to add the test scope, still using code completion.

Code completion in pom.xml

Code completion in pom.xml

Code completion works in Gradle too, as you can see below.

Code completion in build.gradle

Code completion in build.gradle

From the build file using code generation

We can also use code generation from the build file to add dependencies. In the build file, the pom.xml in a Maven project, invoke Package Search using ⌘N (on macOS) or Alt+Insert (on Windows & Linux) and in the menu that opens, select Add dependency. This will open the Dependencies tool window.

Invoke Package Search in pom.xml

Note that if we are using Gradle, we can do the same in our build.gradle file.

Invoke Package Search in build.gradle

Note: If you cannot invoke Package Search, make sure the Package Search plugin is installed. To do so, open Preferences ⌘, (macOS) / Ctrl+Alt+S (Windows/Linux), go to Plugins and check to see whether the Package Search plugin is installed. If not, go to the Marketplace tab to install it.

From the Dependencies tool window

Alternatively, we can open the Dependencies tool window directly. There is no shortcut to open the Dependencies tool window, so we can either use Recent Files, ⌘E (macOS) / Ctrl+E (Windows/Linux), and type in "dependencies" to open the Dependencies tool window.

Recent Files Dependencies

Note: If you cannot find the Dependencies tool window, make sure the Package Search plugin is installed, as mentioned above.

Alternatively, we can open it by clicking Quick Launch in the bottom-left and selecting Dependencies.

Quick Launch Dependencies

In the Dependencies tool window, we can search for a dependency. For example, let's search for AssertJ.

Search AssertJ

Note that we can select a scope for this dependency. The names of the scopes are based on the build tool with which you are working. Since this is a test dependency, and we are using Gradle in this project, we can set the scope to testImplementation.

Set Scope

We can also select the version we want to use.

Set Version

We can do the same in Maven.

Search AssertJ

Note that the names of scopes for Maven are different from Gradle. In Maven, we can set the scope for a test dependency to test.

Scope Maven

When we click Add, we see that the dependency is added to the build file.

Add AssertJ

If the version number is shown in red, that means IntelliJ IDEA hasn’t downloaded this library before. Click Load Maven Changes so IntelliJ IDEA will update its dependencies based on the changes to the pom.xml or build.gradle file.

Go back to the Dependencies tool window and clear the search box by clicking the x on the right-hand side. You’ll see the project’s dependencies are updated with your new dependency.

Next, let's look for jackson-databind. We see that there are several versions available. Since we have selected Only stable, only stable versions are shown in the list.

Jackson-Databind Versions

If we uncheck this option, we see that the list of versions also includes the release candidates.

Jackson-Databind Only Stable Versions

For production code, we probably want to use stable versions, so let's select the Only stable checkbox again. With this option enabled, IntelliJ IDEA will exclude any dependencies that have no stable versions, and hide them from the list. Now we can select the latest stable version and add this to our project. Let's also Load Maven Changes again.

Finally, let's also add a new dependency to the Kotlin module. Let's switch to the Kotlin module and open the pom.xml for this module. Open the Dependencies tool window and search for Ktor.

Search Ktor

Notice that some dependencies are marked as Multiplatform.

Show Kotlin Multiplatform

If we want to see only Kotlin multiplatform dependencies, we can select the Kotlin multiplatform checkbox, as shown below.

Select Kotlin Multiplatform

When we click Add to the right of the Ktor dependency, we see that Ktor is added to the list of dependencies and to the pom.xml for the Kotlin module.

Add Ktor