
Creating CRUD APIs (TODO App)
Building APIs with Django Rest Framework.
In this section, our main focus will be on writing CRUD APIs.
Enabling Django support
First, we need to enable Django support in PyCharm.
To configure your IDE, select PyCharm | Settings for macOS or File | Settings for Windows and Linux.
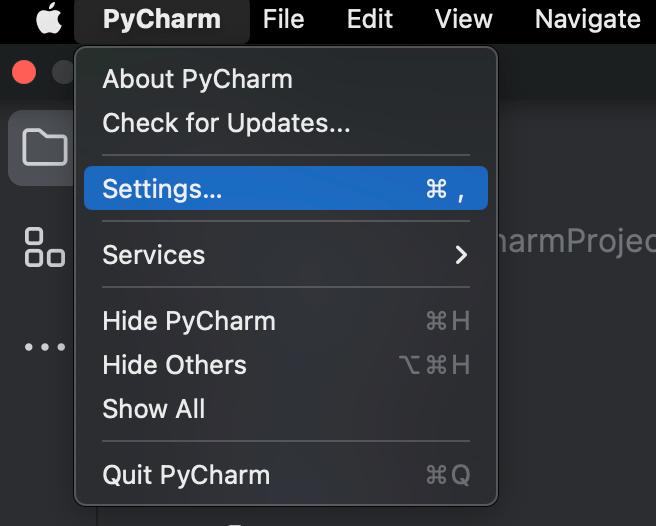
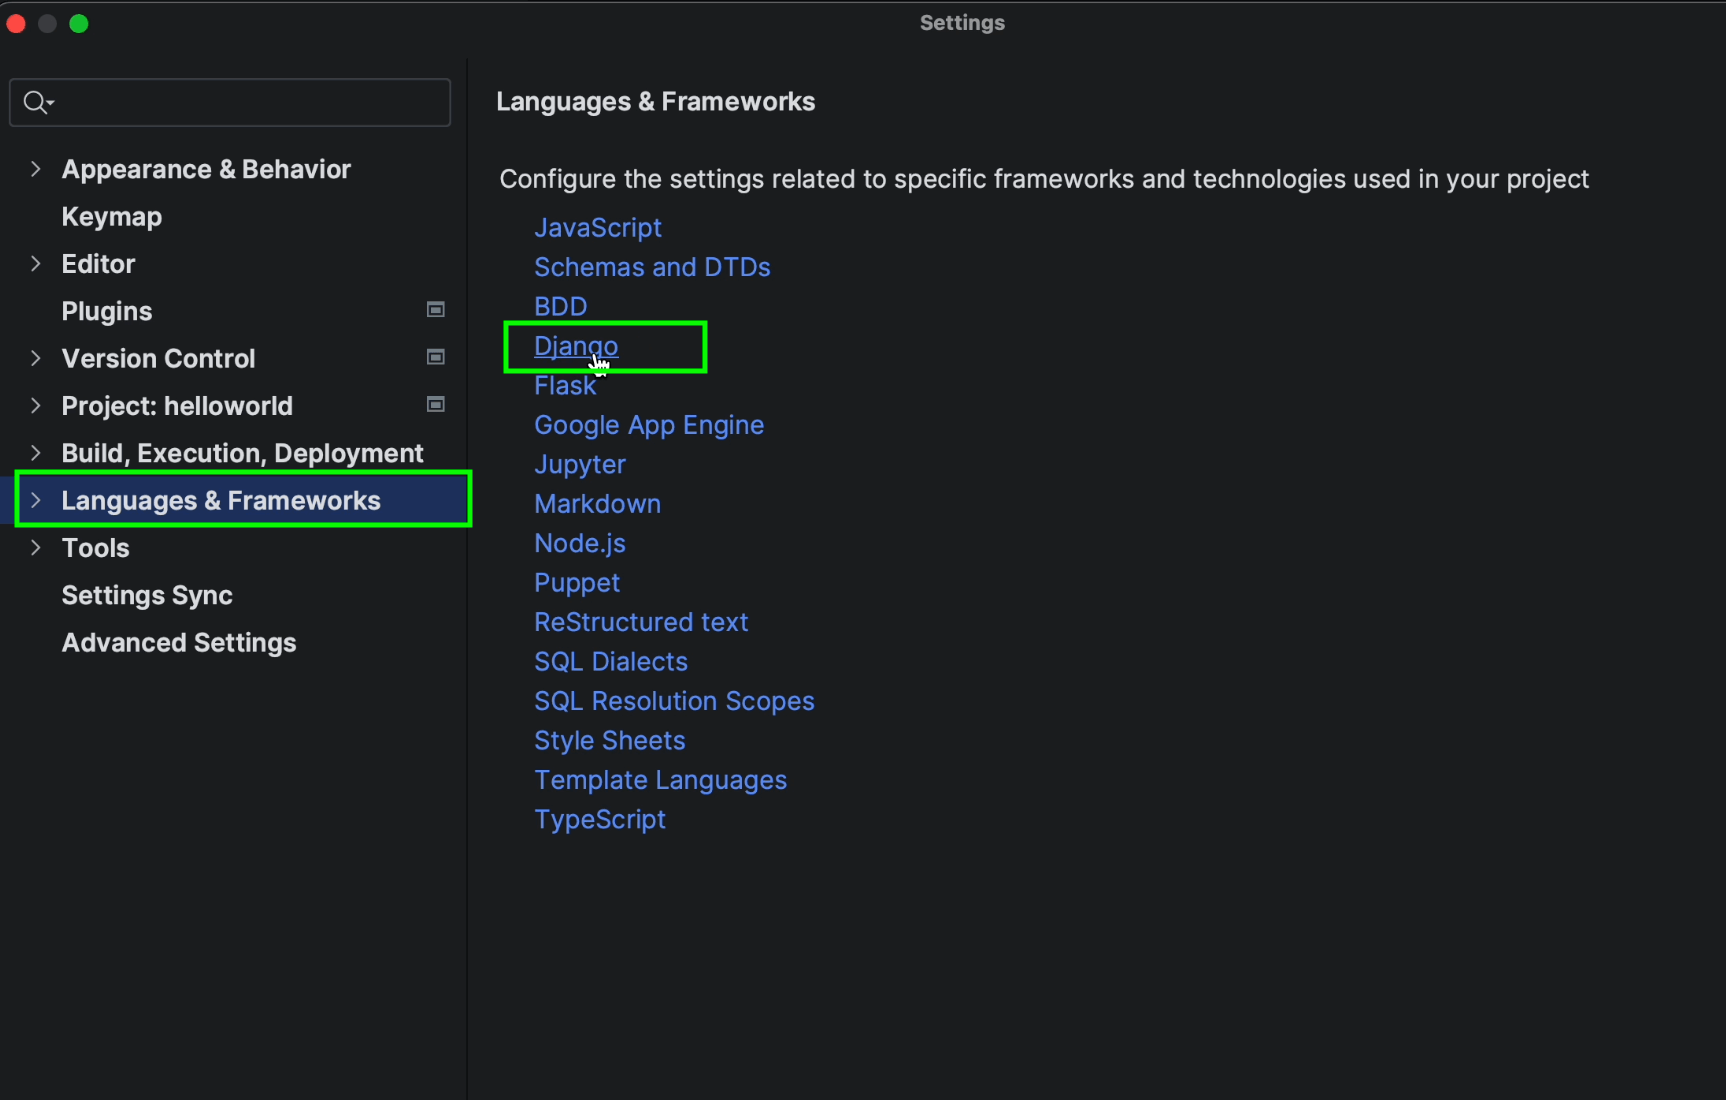
Click on Languages & Frameworks | Django
Tick the Enable Django Support checkbox.
Make sure to provide the path of the Django project root and the path for the settings.py and manage.py files.

Once you’ve done this, click on Apply and then OK.
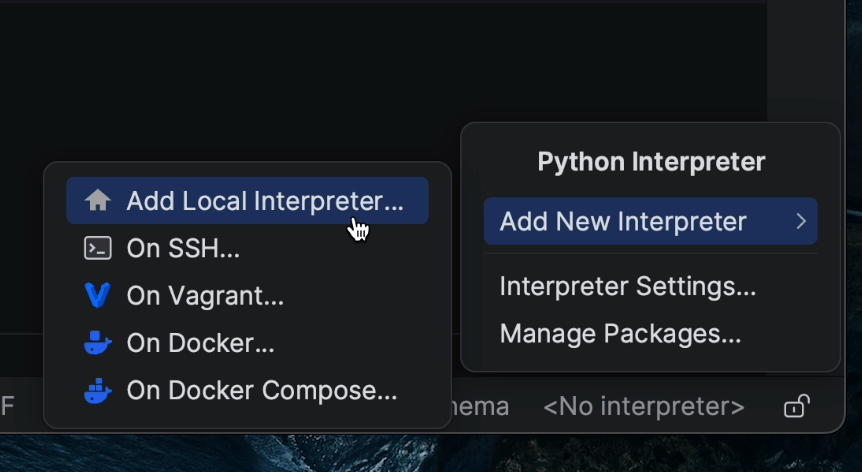
Creating a local virtual environment
Click on the bottom right-hand section where you’ll see No interpreter.
Then select Add New Interpreter | Add Local Interpreter.
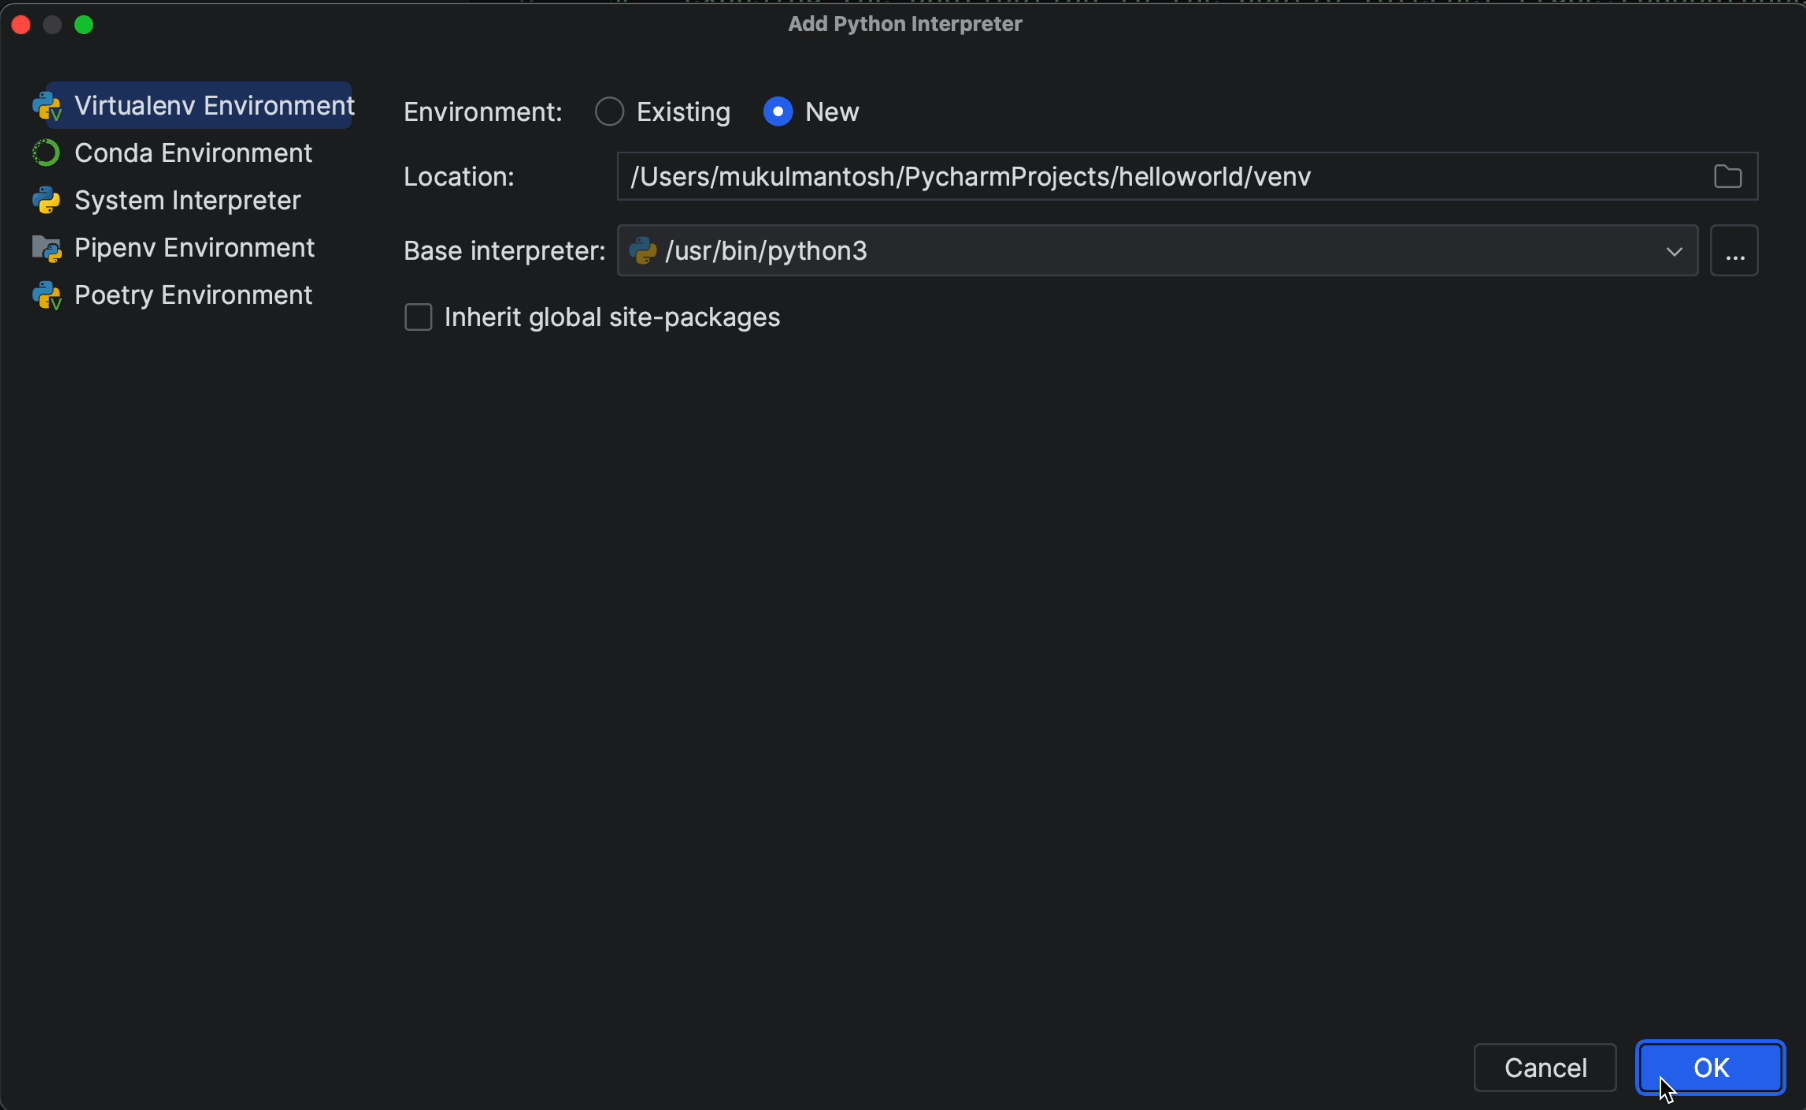
I’ll select New for the environment and provide the environment location. As things stand, it’s going to be created inside the project root.
I’ll choose Python3 as my base interpreter.
Installing Python packages
Once the virtual environment is created, I’ll go ahead and install the Python packages by running the following command in the terminal:
pip install -r requirements.txt

Then, I’ll install the Django REST Framework, which is required for our CRUD operations.
Run the following command in the terminal:
pip install djangorestframework
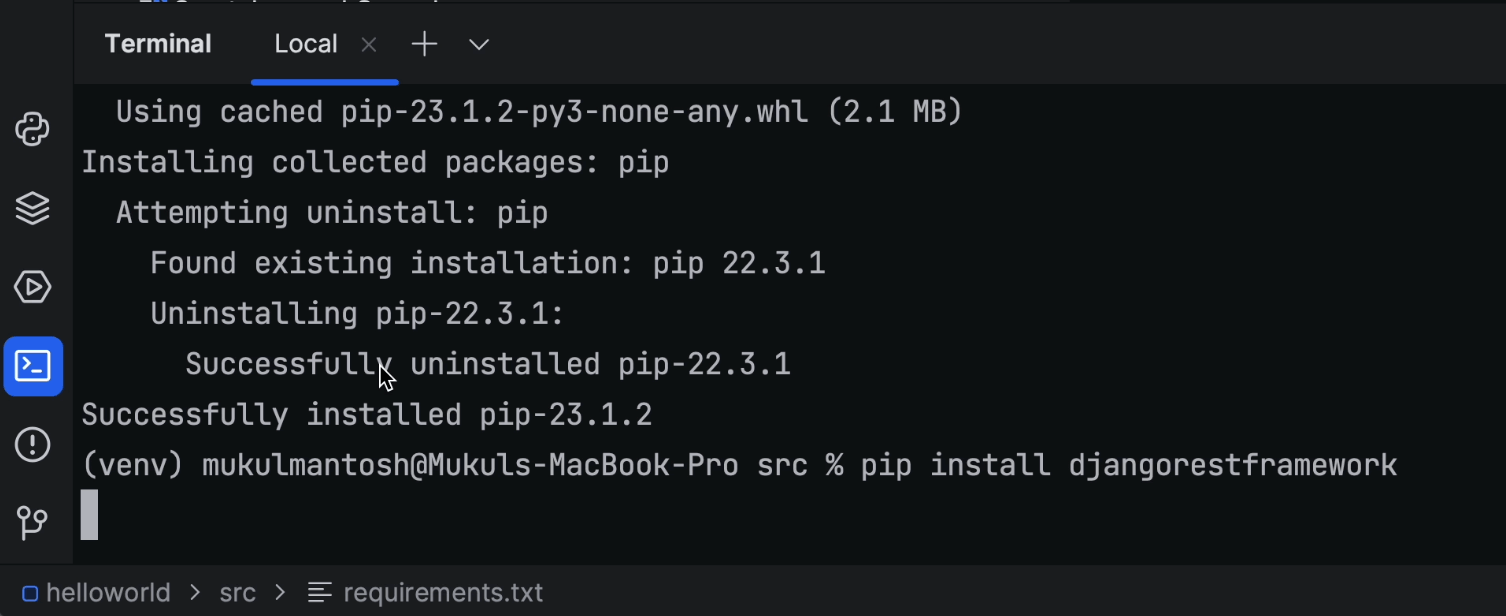
Once the package is installed, I’ll then update my requirements.txt file by running the following command:
pip freeze > requirements.txt
Creating the app and configuring settings
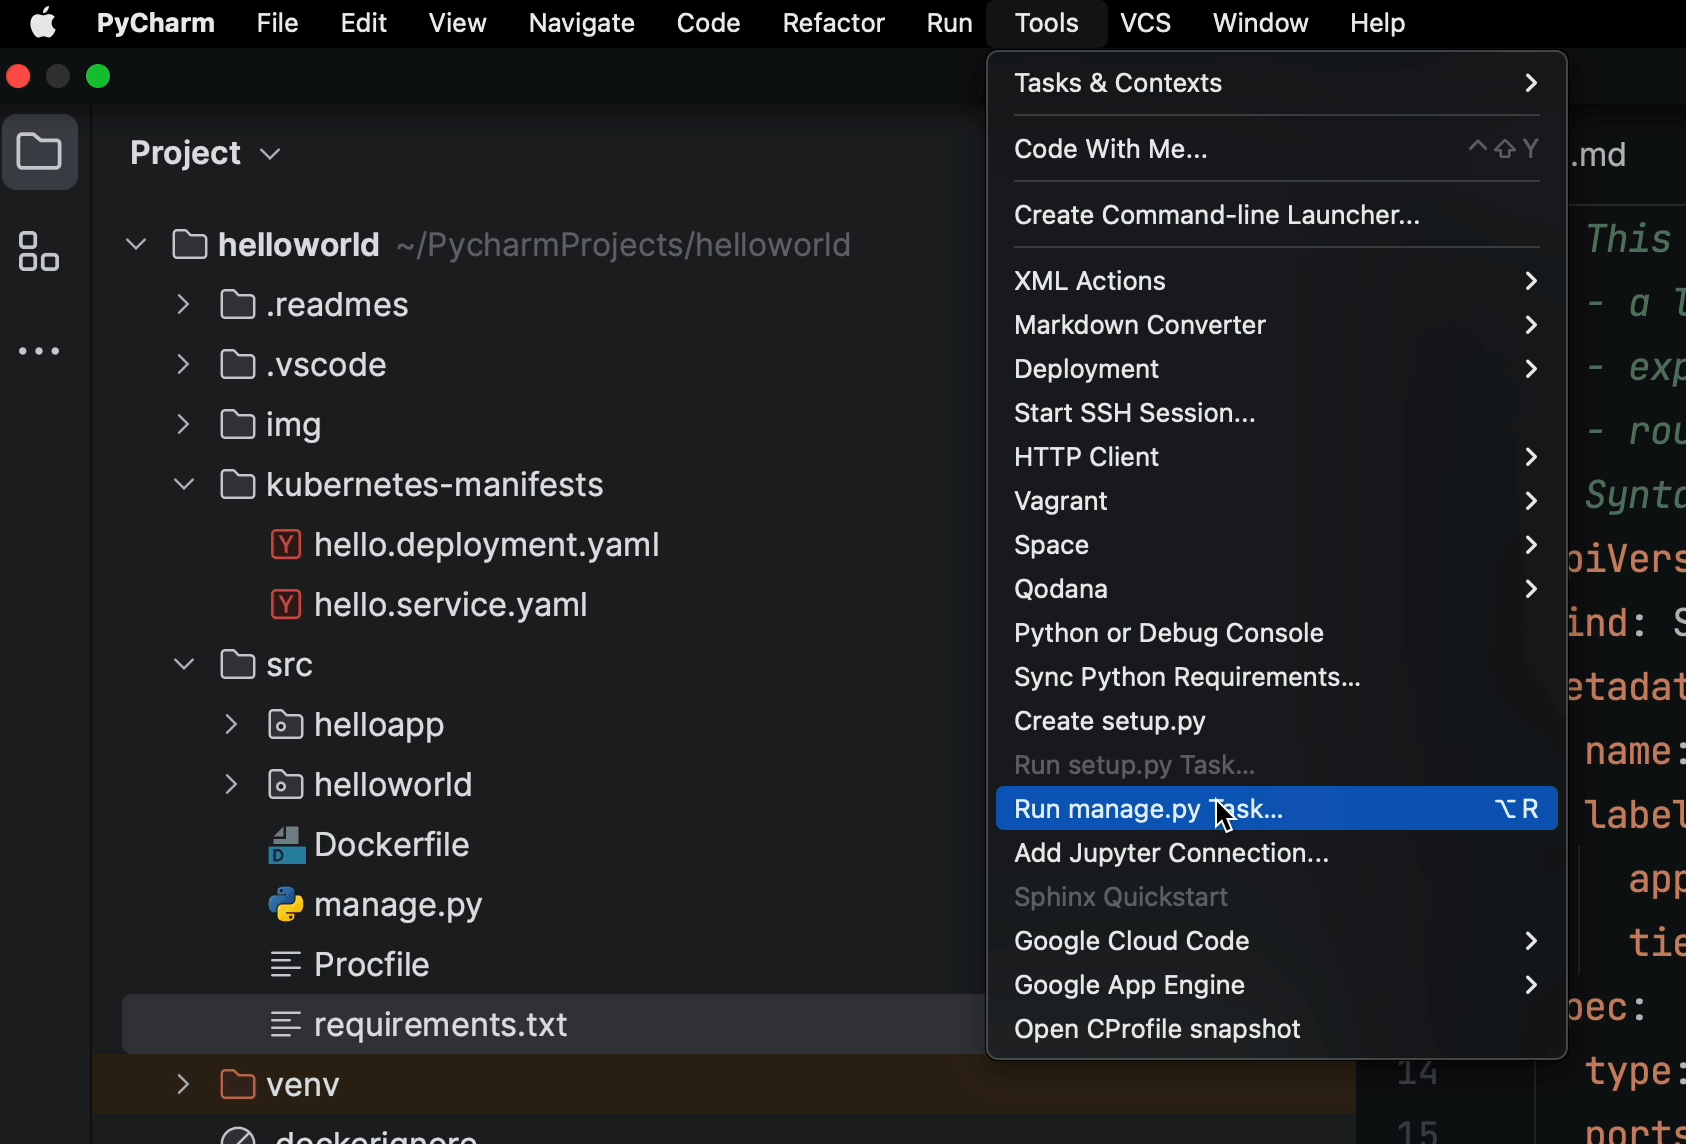
Click on Tools | Run manage.py Task.
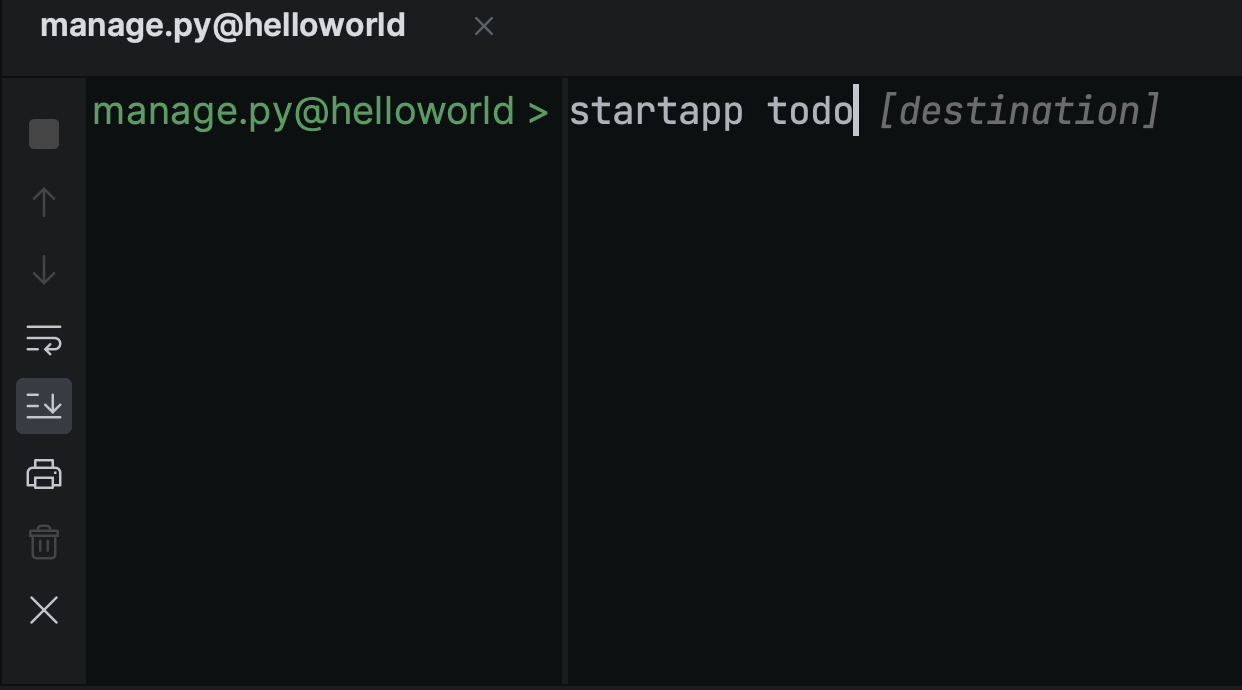
Now create a new app by typing “startapp todo”.
This will create the necessary directory, files, views, models, etc.
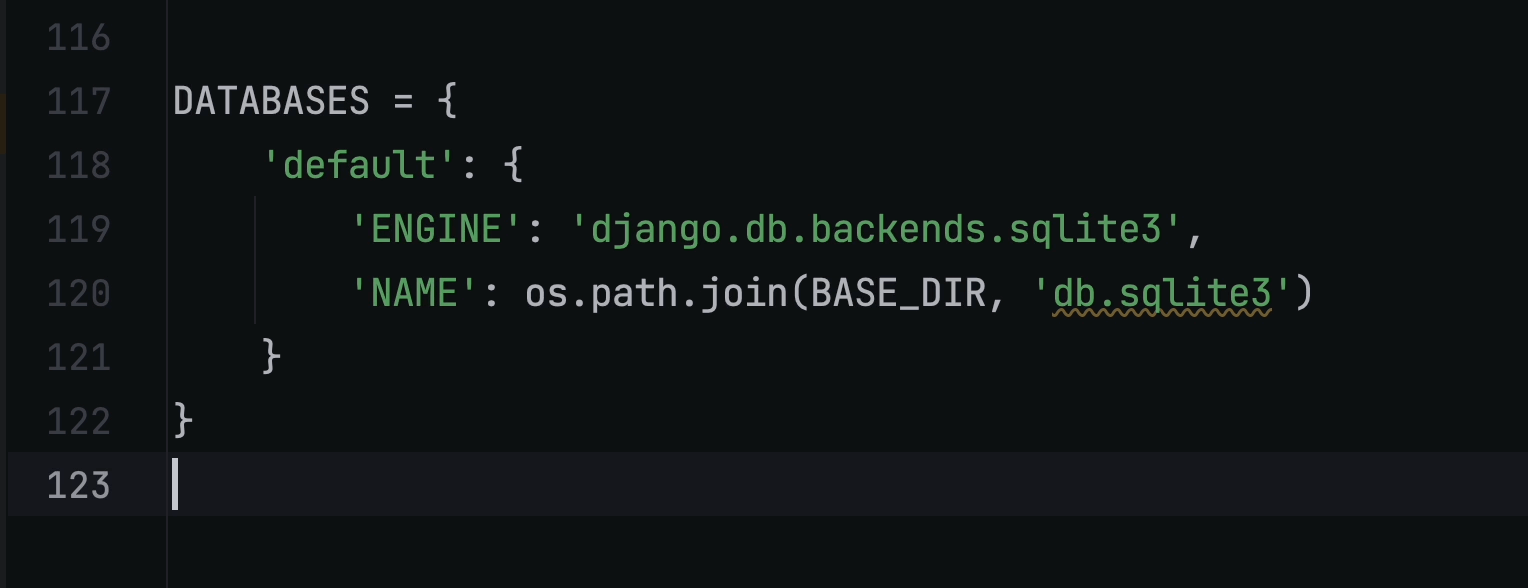
Next, open the settings.py file, which resides under src/helloworld.

Make sure to add todo and rest_framework in the INSTALLED_APPS list.
For local development, we’ll be using the sqlite3 database. Make sure to add this section at the end.
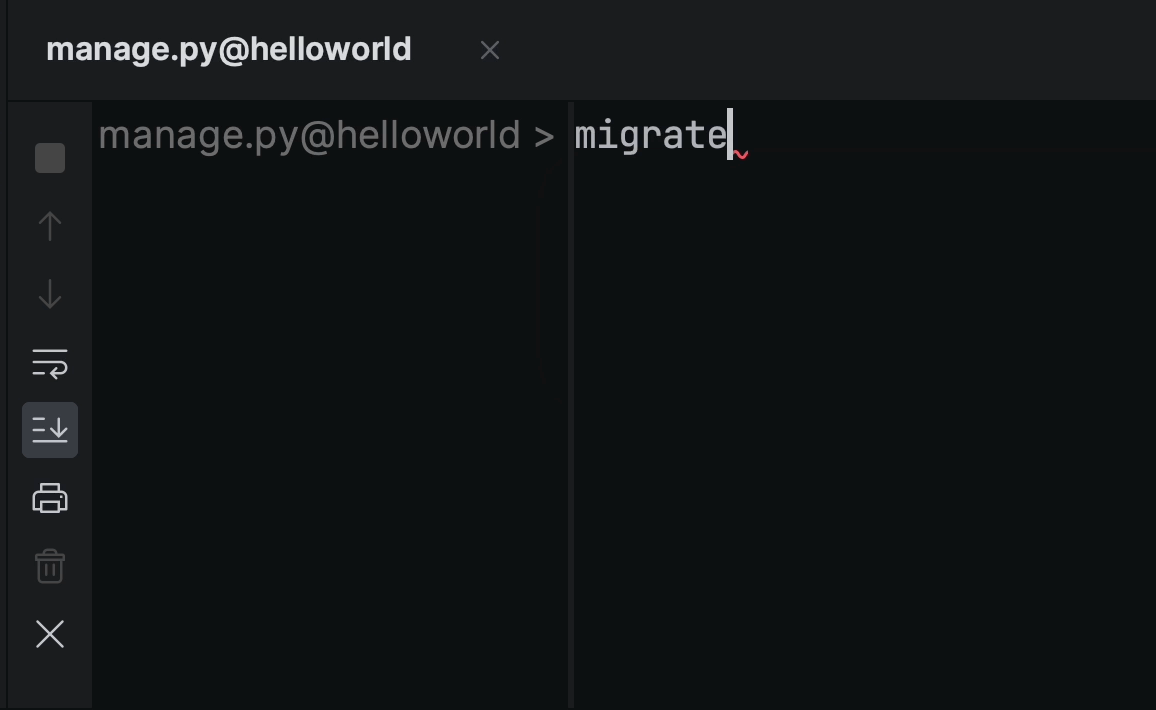
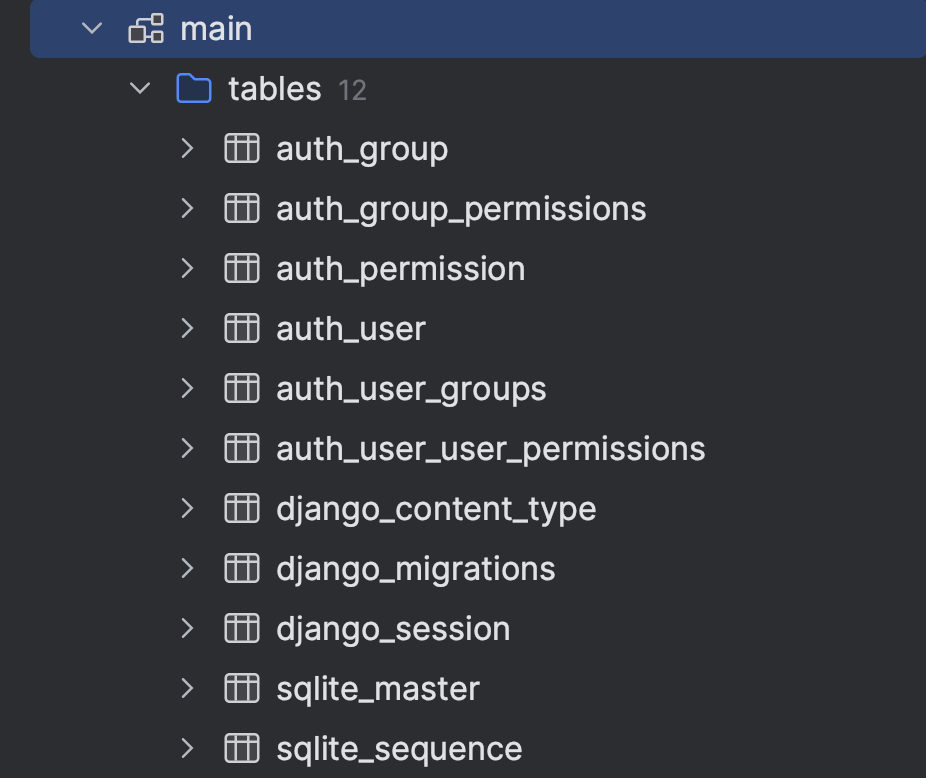
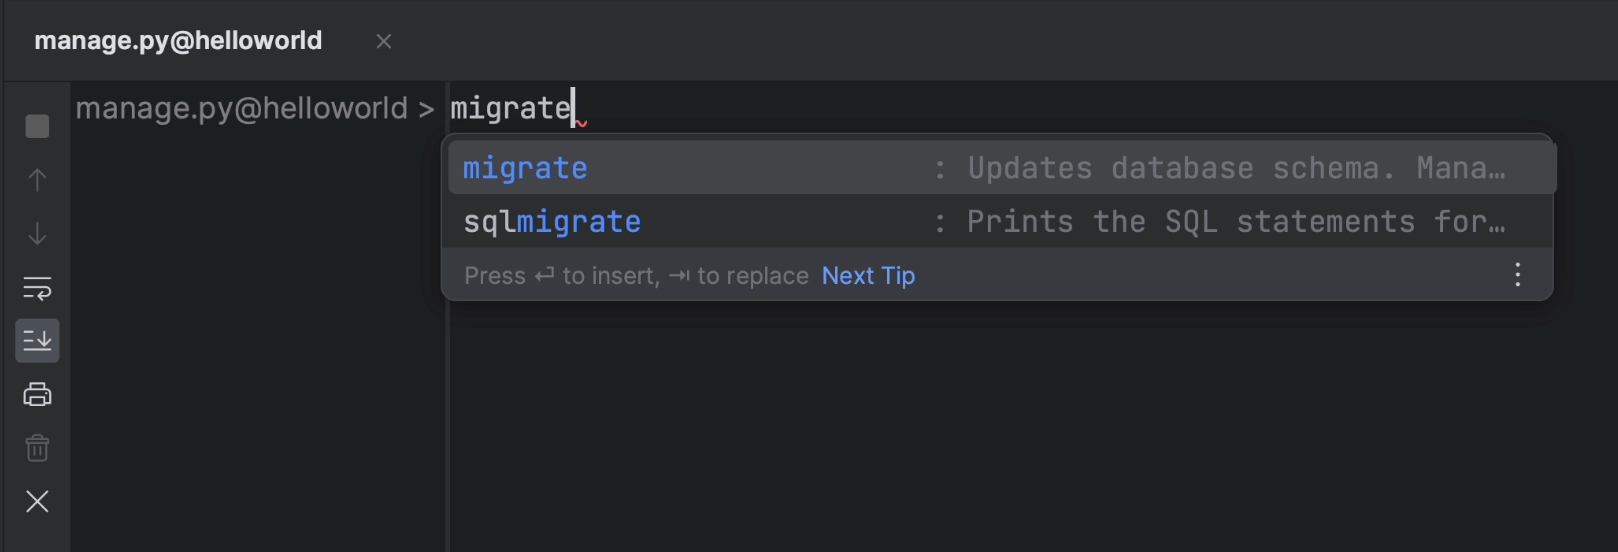
When that’s done, open manage.py again and type migrate. The default Django tables will be created.
The image below shows the newly created database tables.
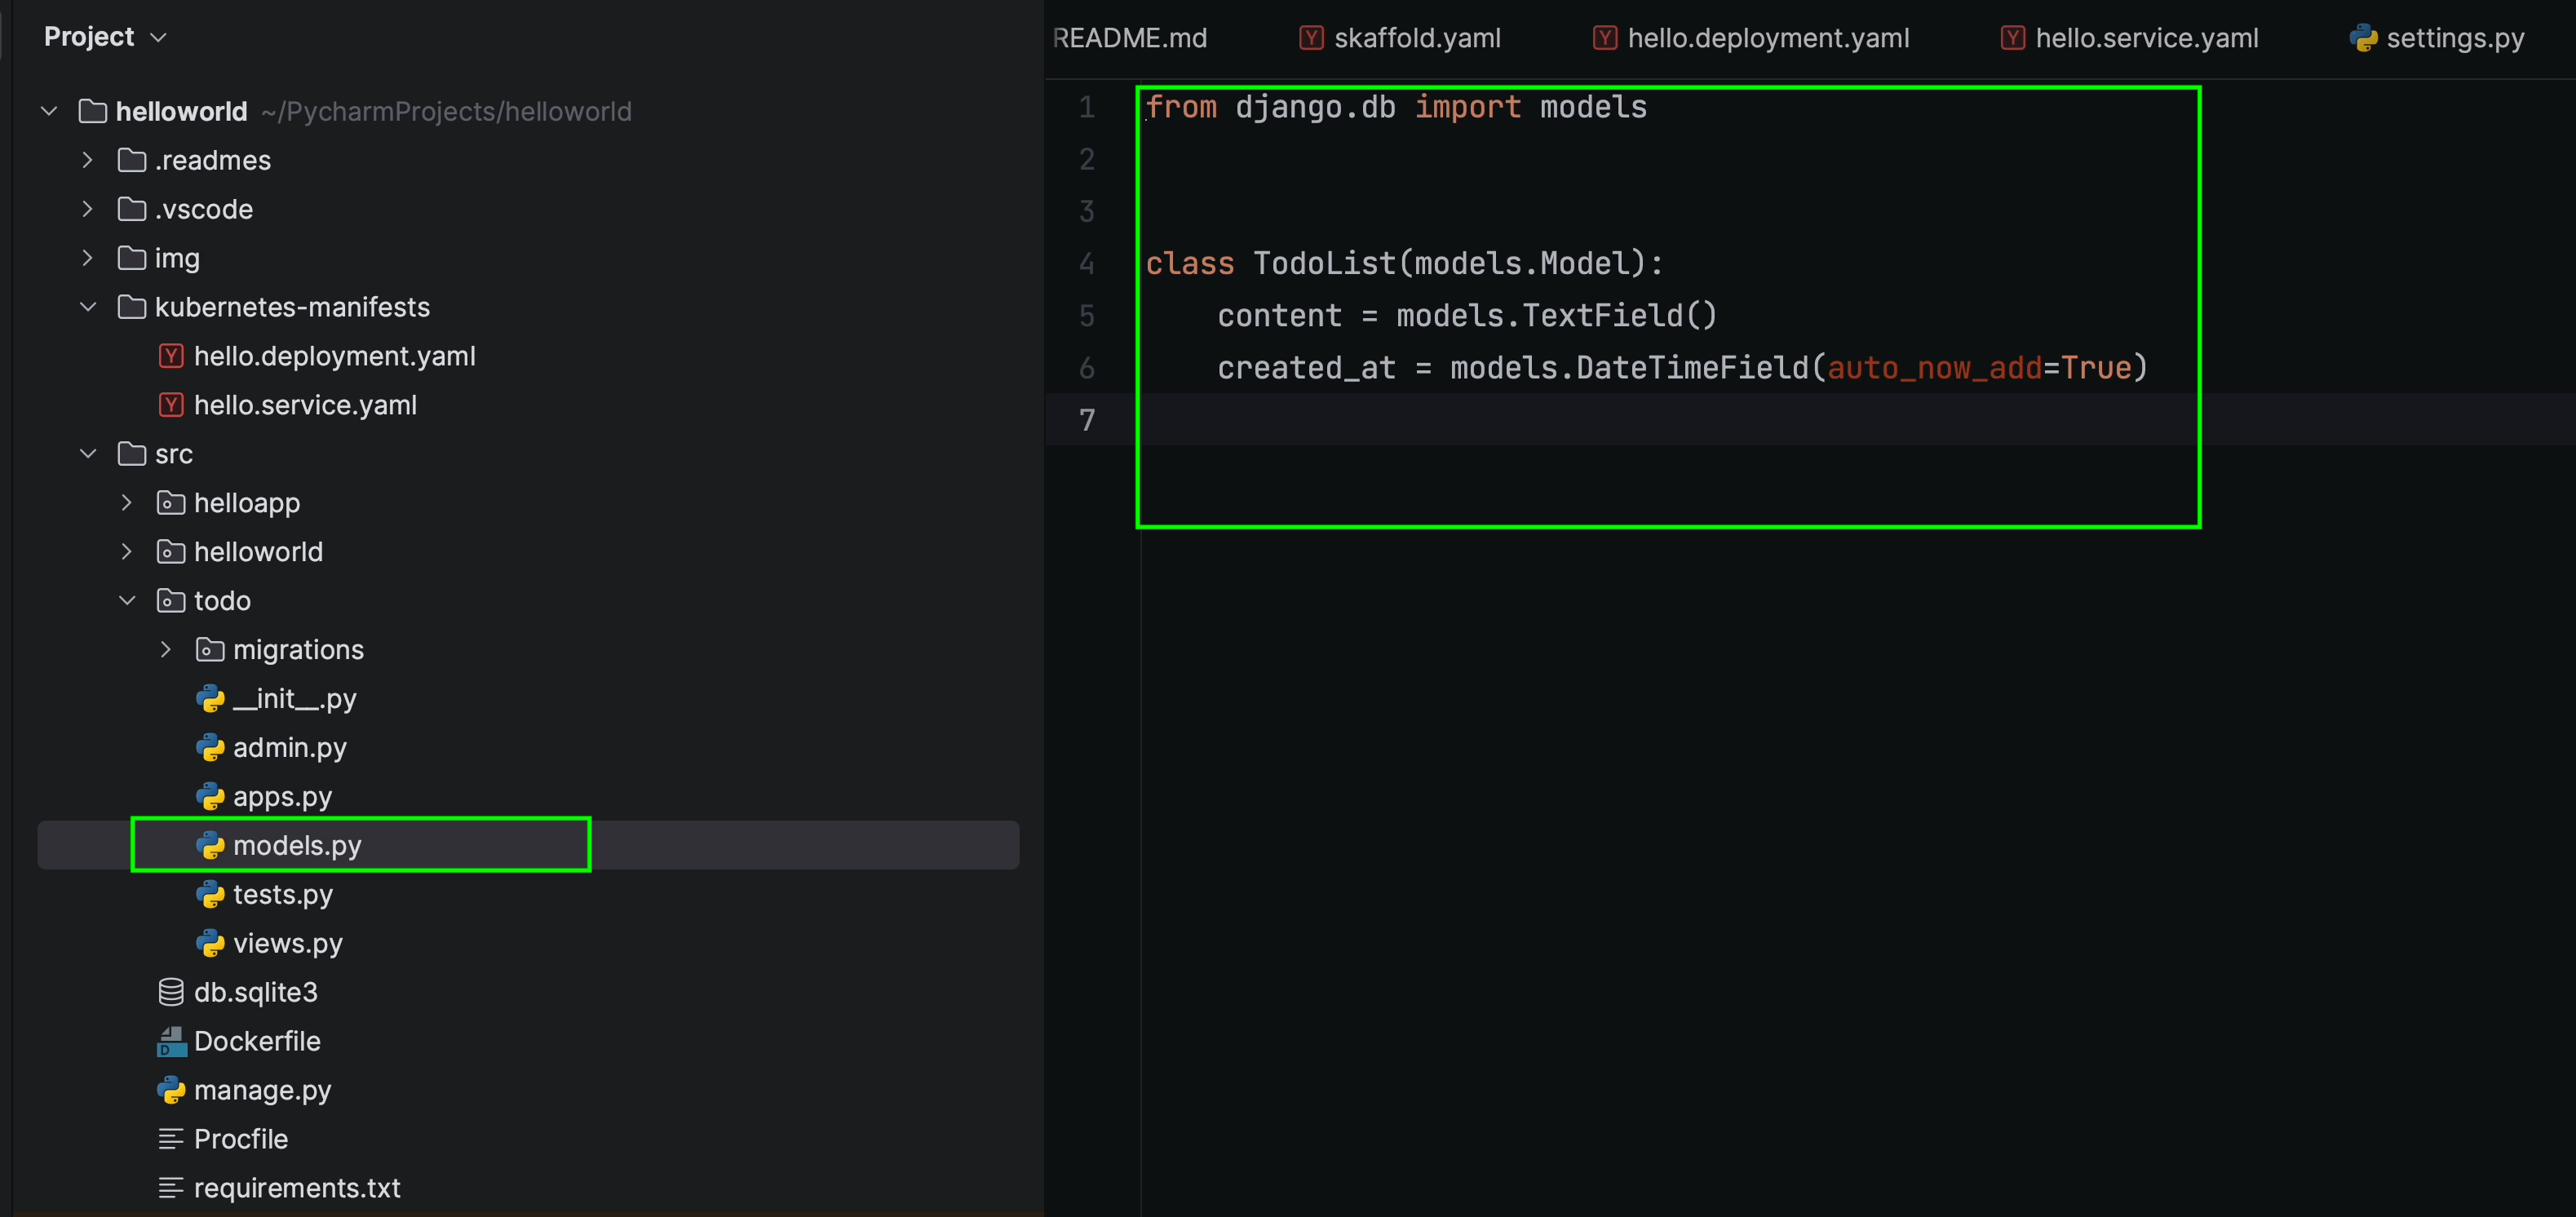
Models
I’ll create a new model and name it “TodoList”. This model is going to store information in the content column alongside created_at, which adds a timestamp when a new object is created.
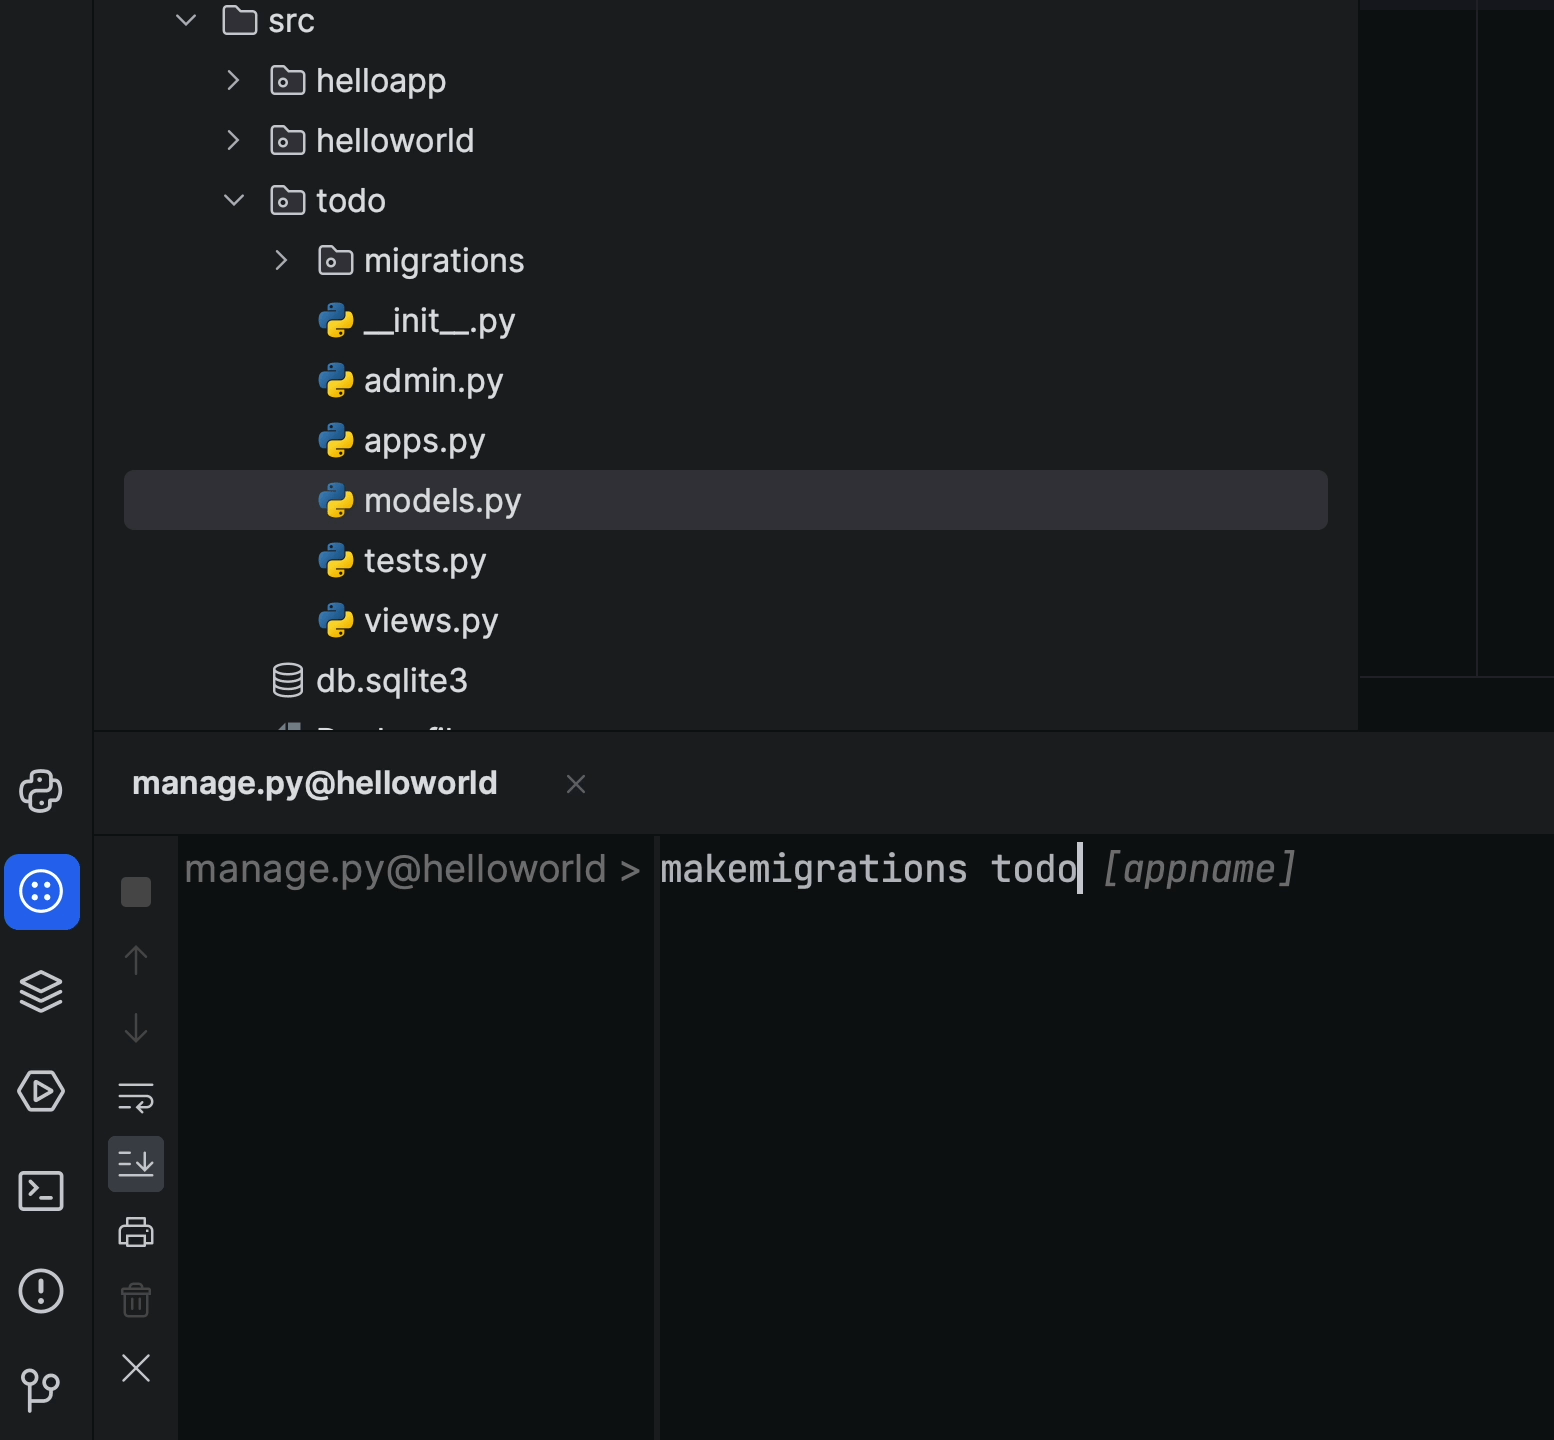
Once I’m done with the model, I’ll run the following command in the manage.py task:
makemigrations todo
And once the migration files are created, I’ll then run the migrate command.
migrate
Creating serializers
“Serializers allow complex data such as querysets and model instances to be converted to native Python data types that can then be easily rendered into JSON, XML, or other content types. Serializers also provide deserialization, which allows parsed data to be converted back into complex types after the incoming data has first been validated.”
To create a serializer, I am first going to create a new serializers.py file under the TODO app.
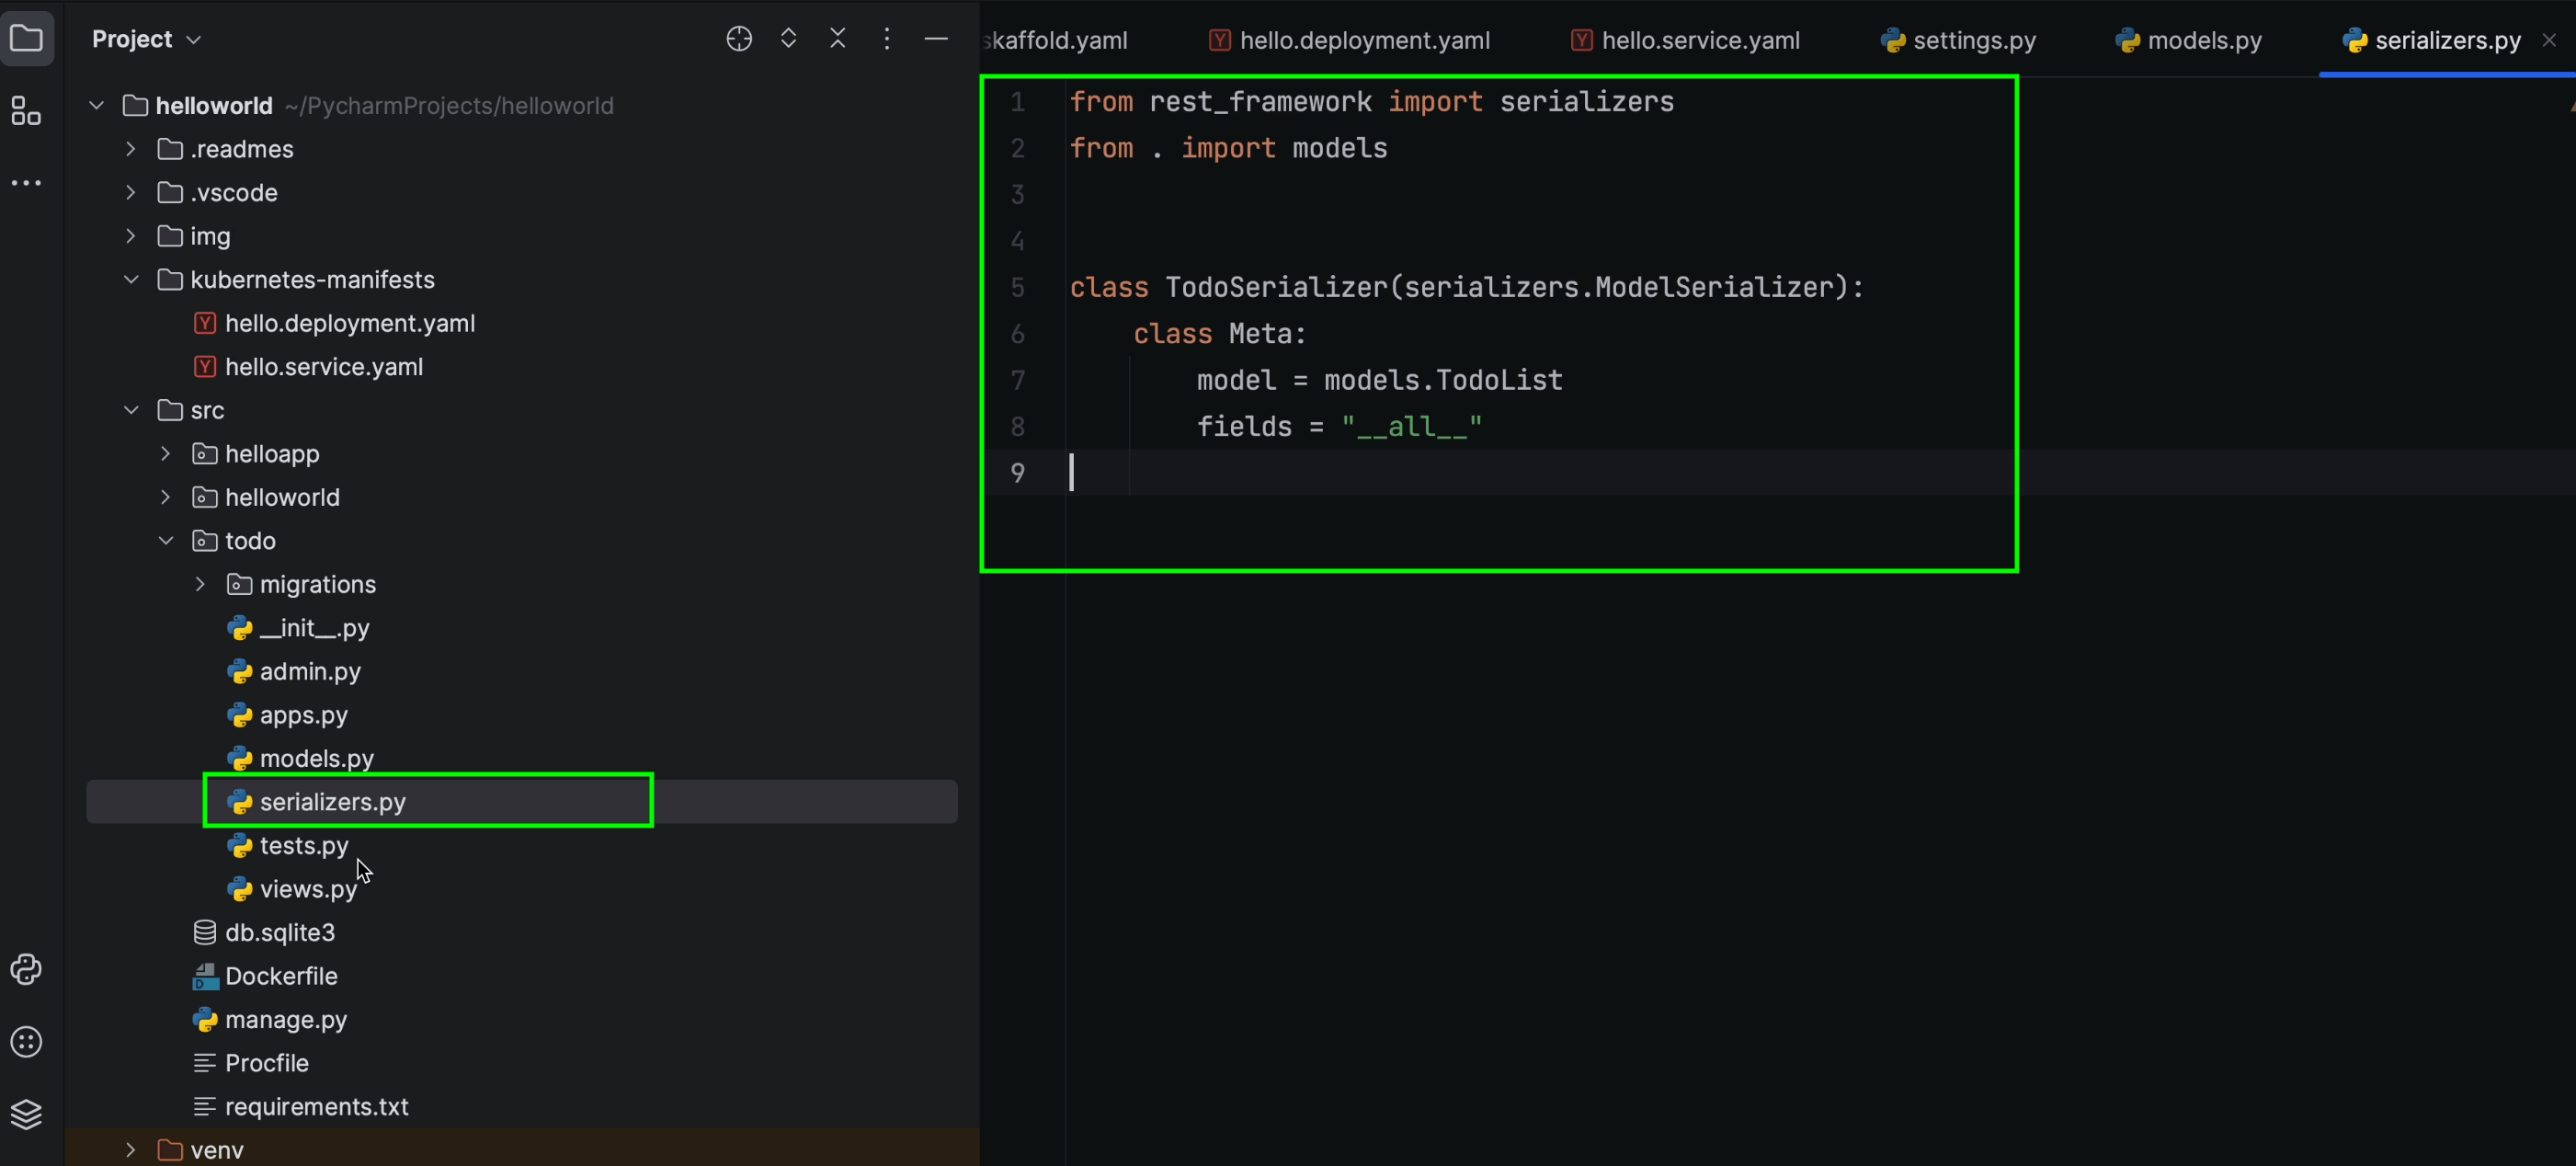
Next I’m now going to create a TodoSerializer class that inherits ModelSerializer.
The ModelSerializer class is the same as a regular Serializer class, except that:
It will automatically generate a set of fields based on your model.
It will automatically generate validators for the serializer, including unique_together validators.
It includes simple default implementations of .create() and .update().
Writing Business Logic
In this section, we’re going to focus on two major APIs:
- TodoCreateListAPIView
- TodoAPIView
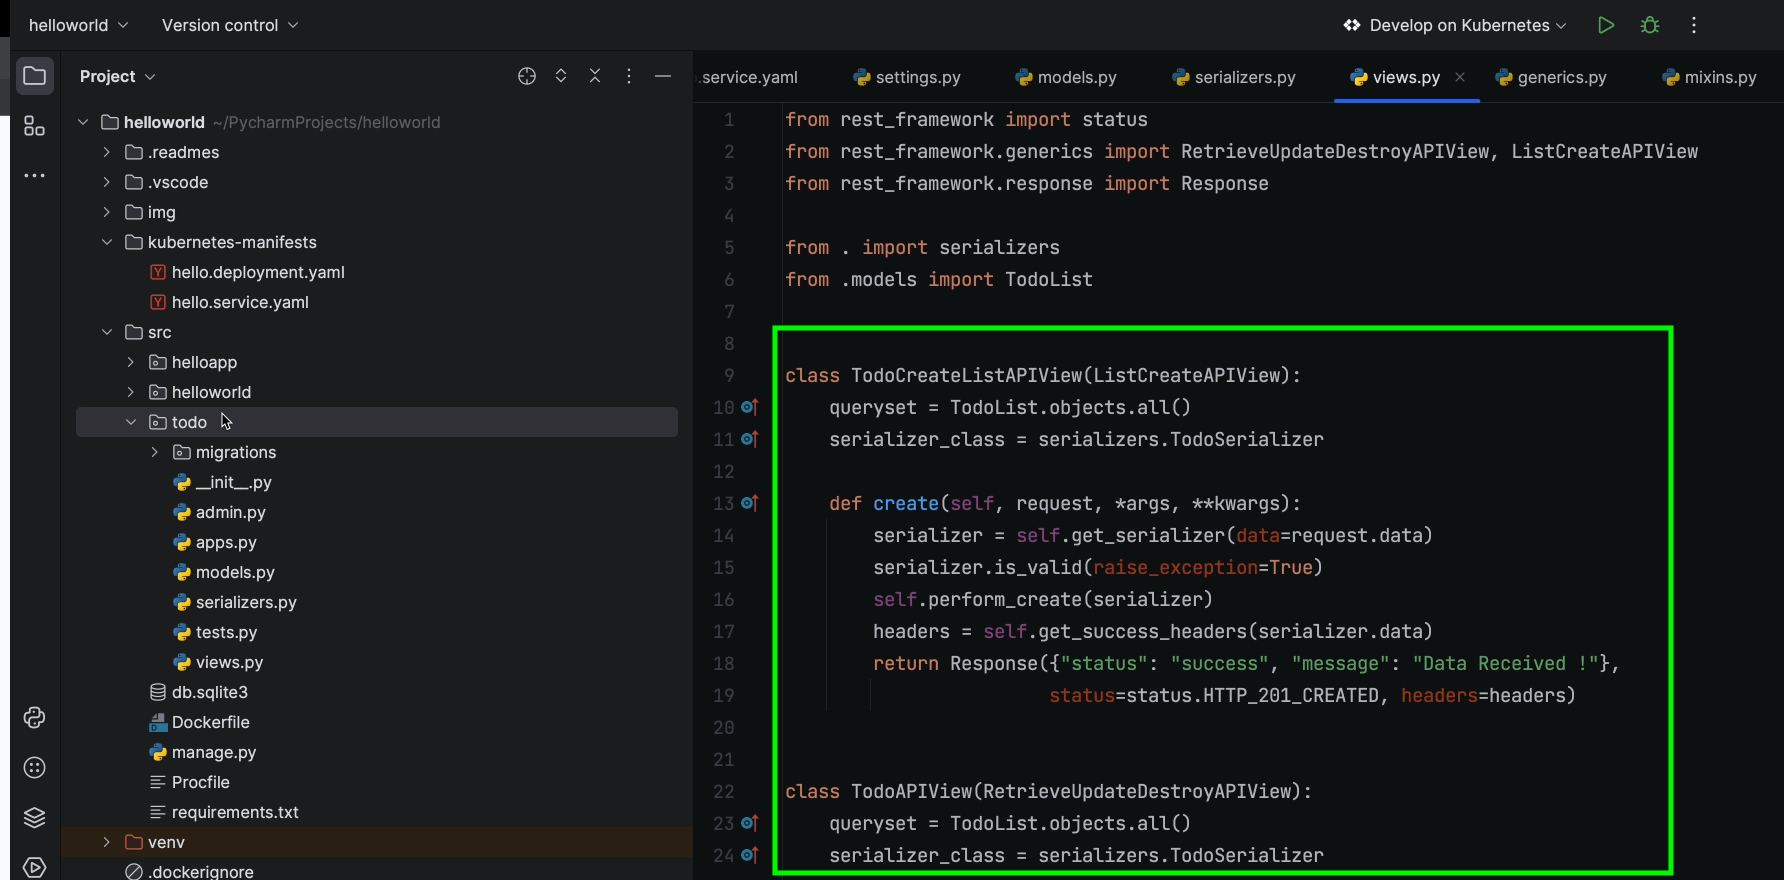
TodoCreateListAPIView inherits ListCreateAPIView, which contains the GET and POST method handlers.
TodoAPIView inherits RetrieveUpdateDestroyAPIView, which contains the GET, PUT, PATCH, and DELETE method handlers.
If you look at lines 13–19, you’ll notice that we’ve overridden the CreateModelMixin create() method, which is responsible for creating new model instances. We’ve now customized it to return a custom JSON response.
Next, we’ll go ahead and register the routes in the urls.py file:
todo/urls.py
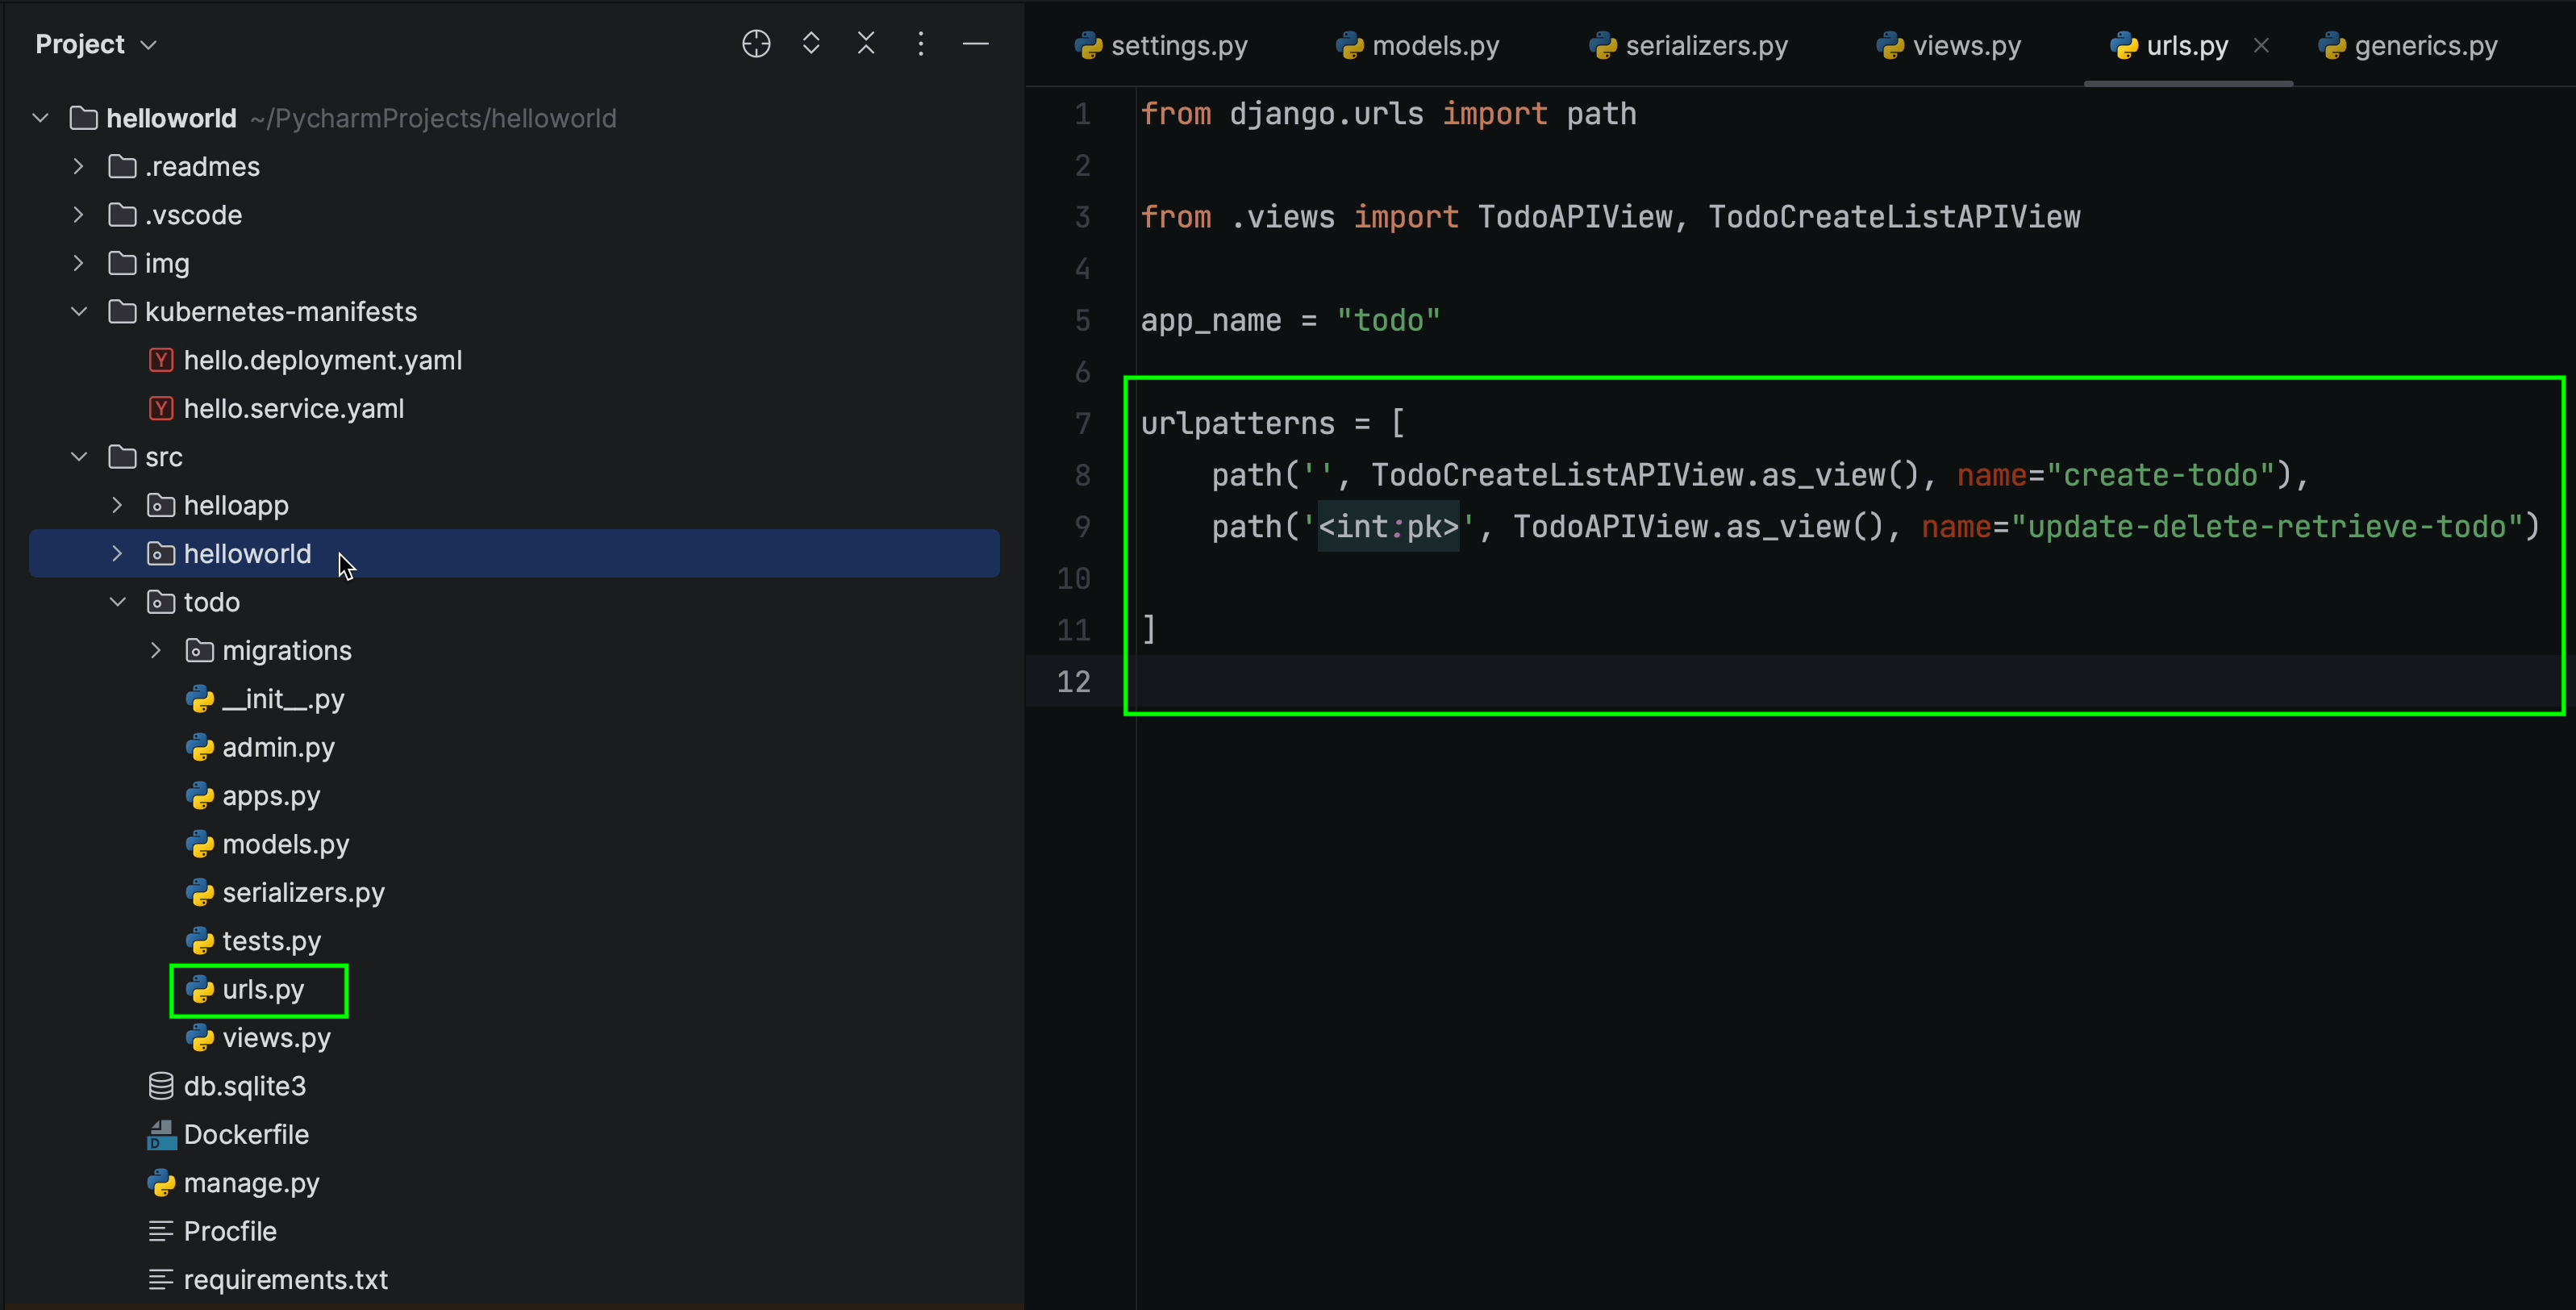
helloworld/urls.py

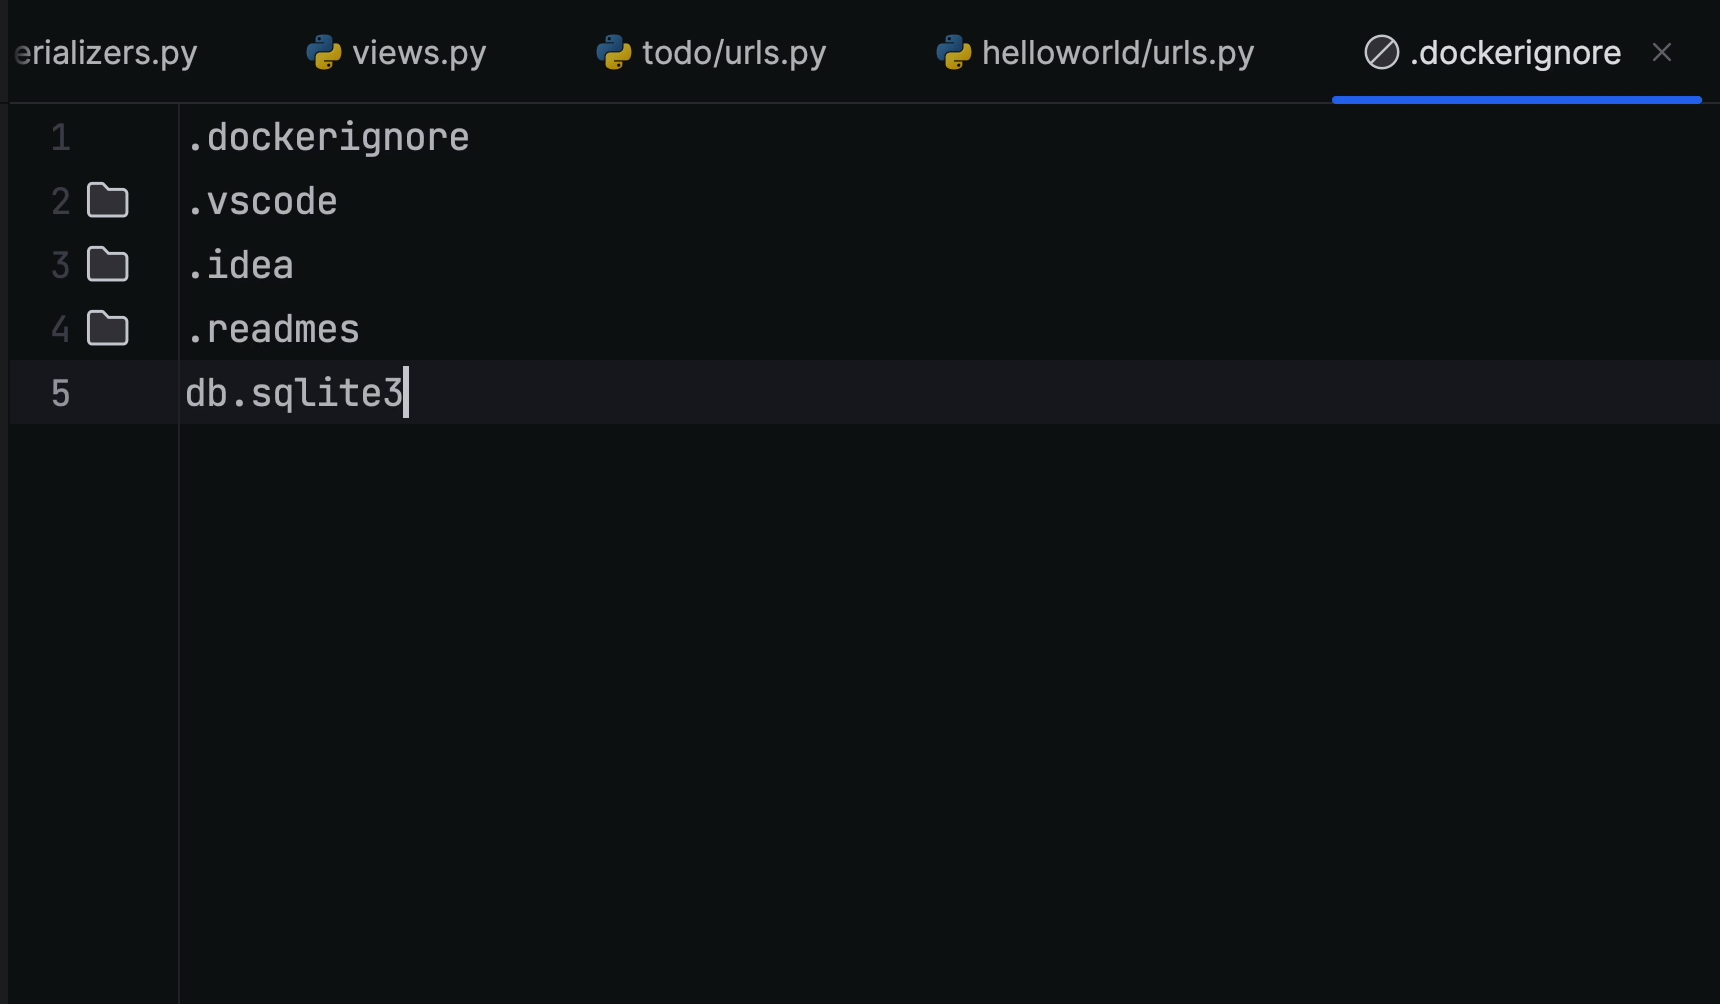
Before progressing further, make sure you’ve added db.sqlite3 to the .dockerignore file. This ensures it won’t be picked up when the image is being built, which means you’ll need to run the migration command inside the container manually.
However, for the purposes of this tutorial, we can ignore this as we are not working in a production environment. Be sure to bear this point in mind when working on a real project, though.
When working in a production environment you can try leveraging Kubernetes Jobs which is more suitable for this use case.
Running applications in a local cluster
Click on the Play icon to execute the run process. This will start the build process and within a few seconds the Kubernetes manifests will be deployed on the local machine, which in this case is Docker Desktop.

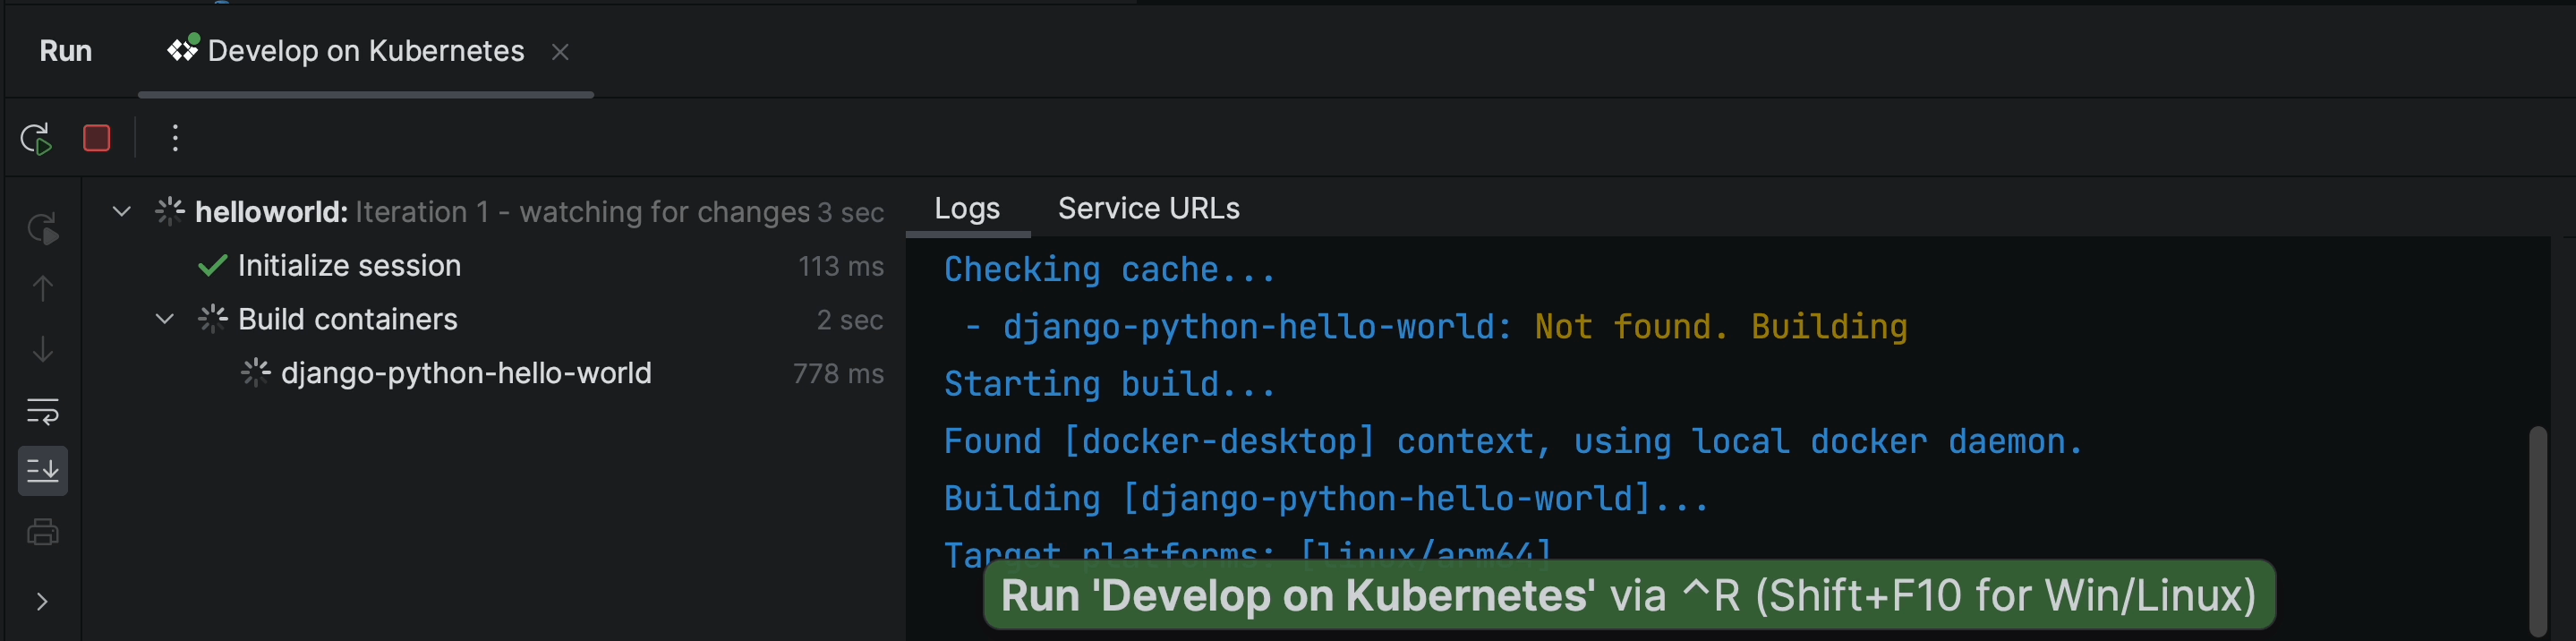
Once the application is up and running on port 4503, you’ll immediately see it take effect in the browser.
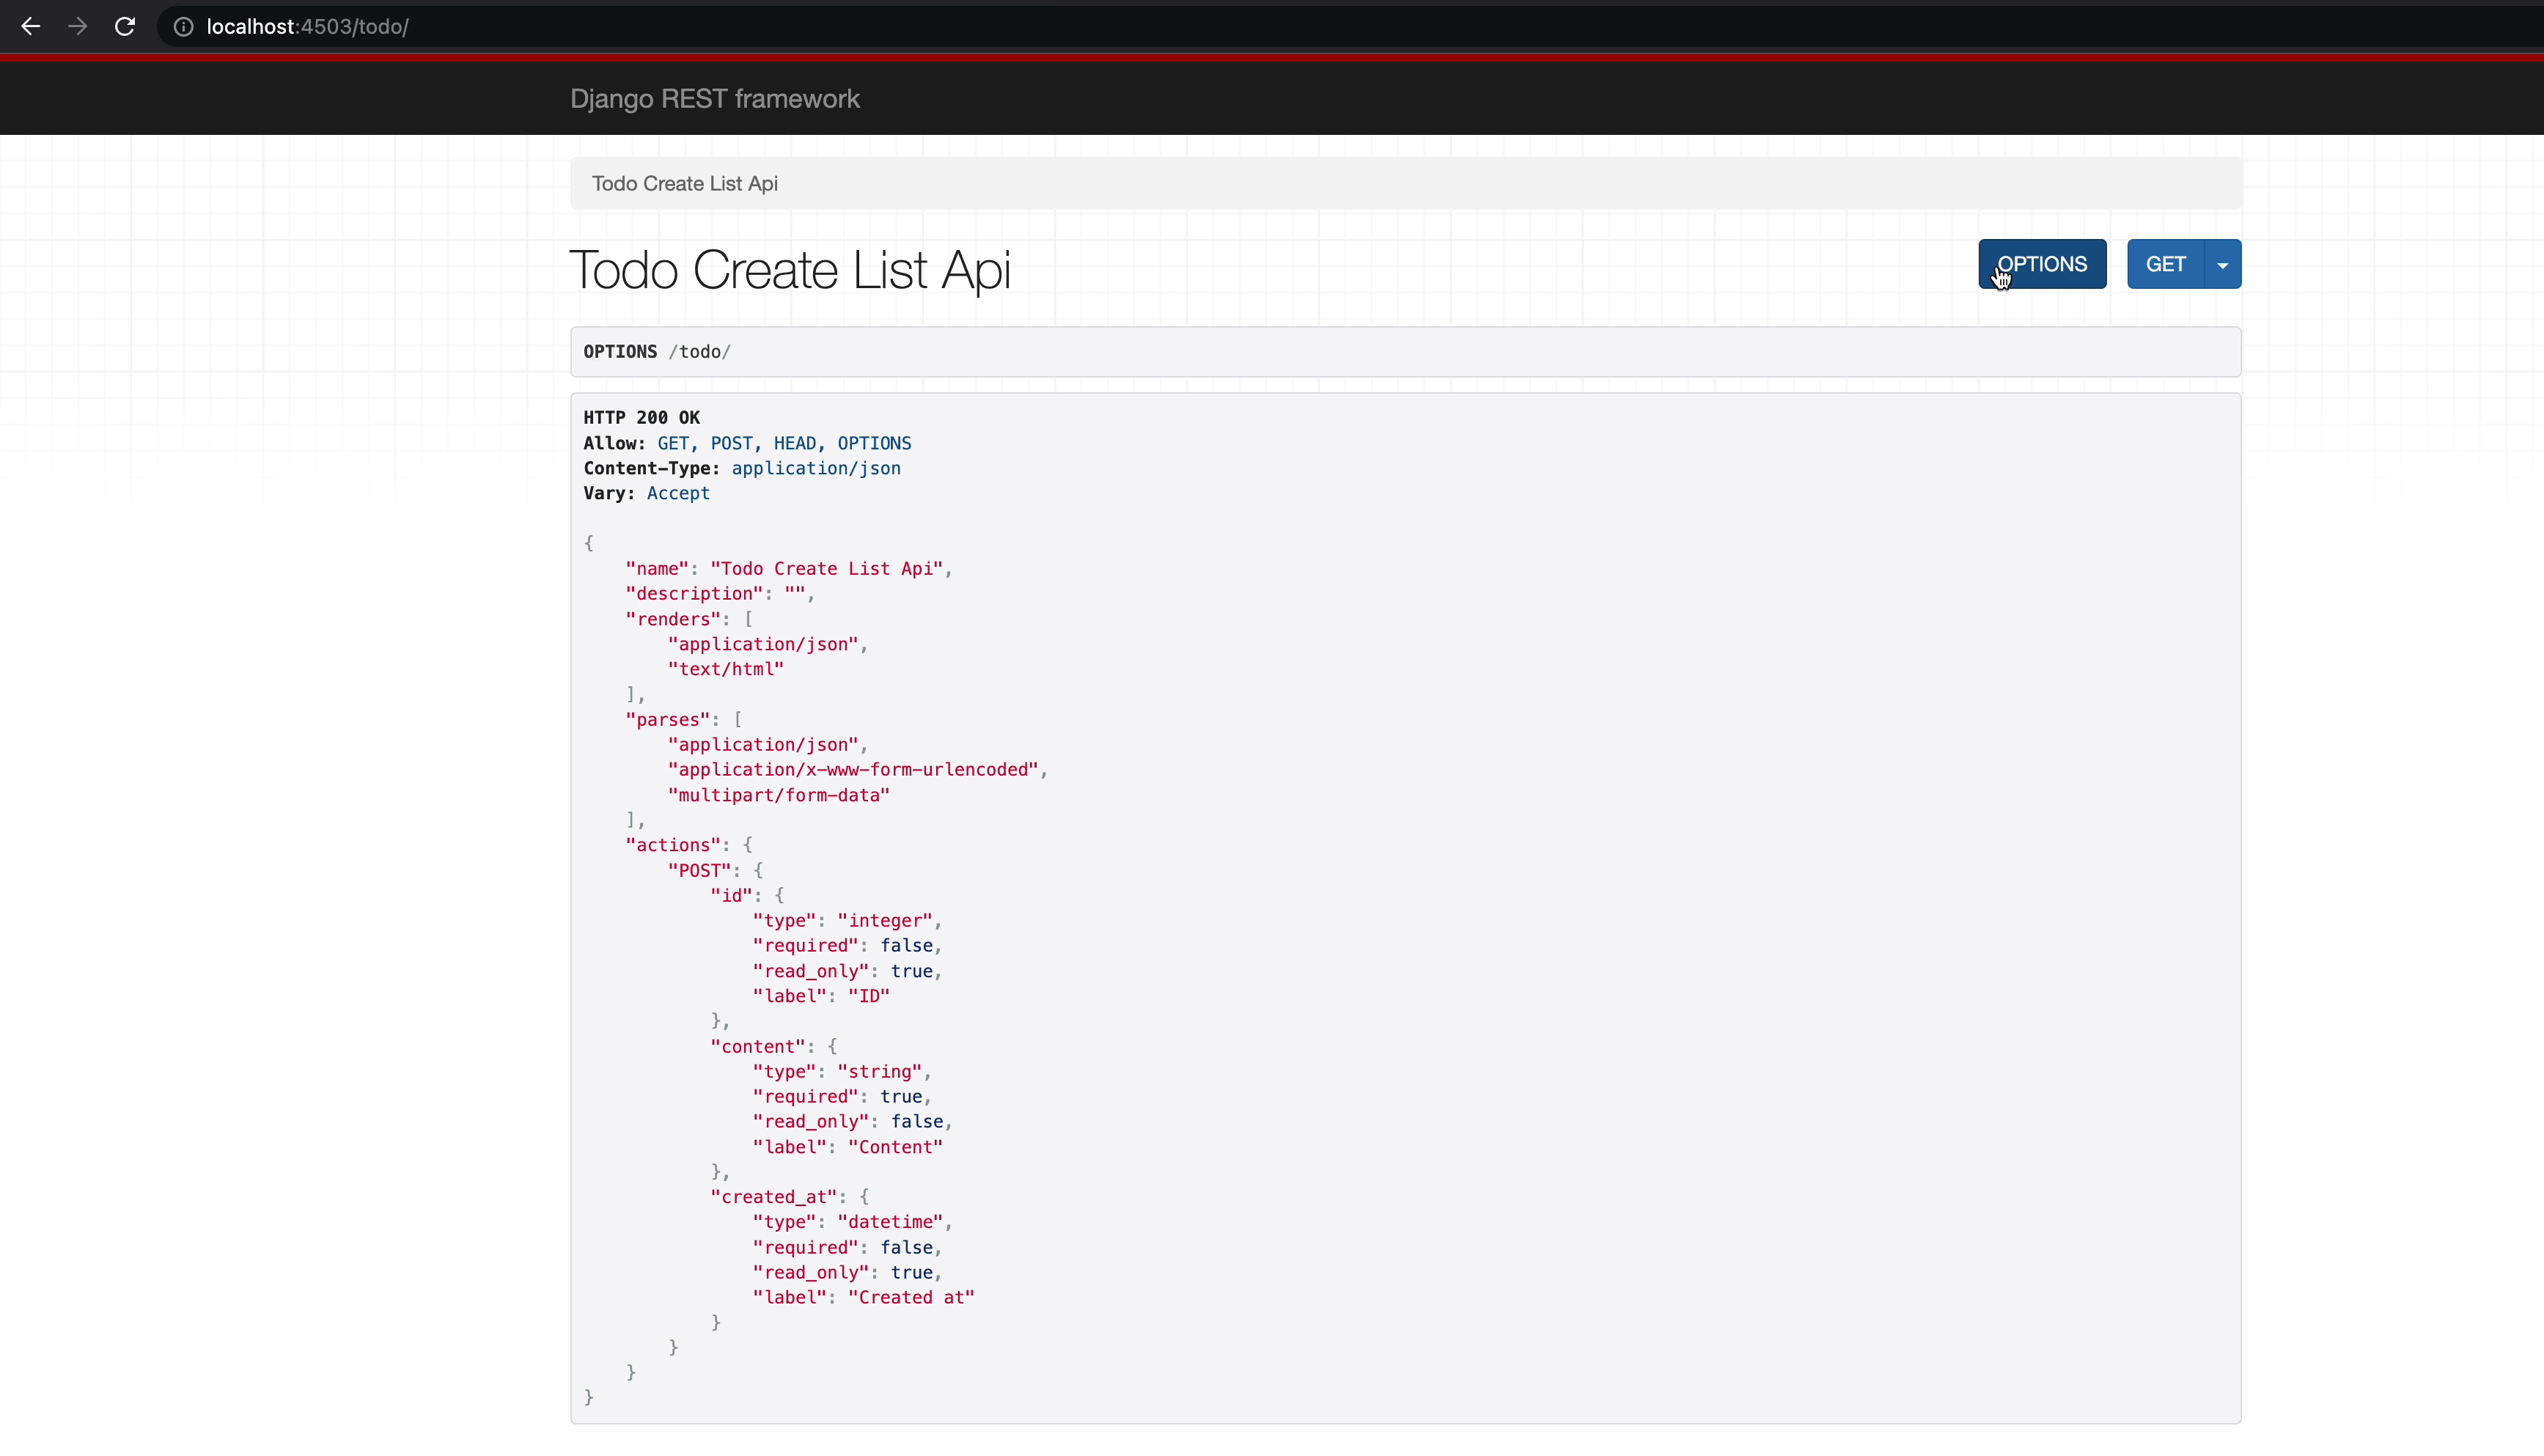
The TODO application route is finally rendering properly. Now, let’s test out all the APIs to make sure that everything is working as expected.
I’m going to open Postman and try creating a new TODO item.
I’ll perform the POST and GET operations on TodoCreateListAPIView.
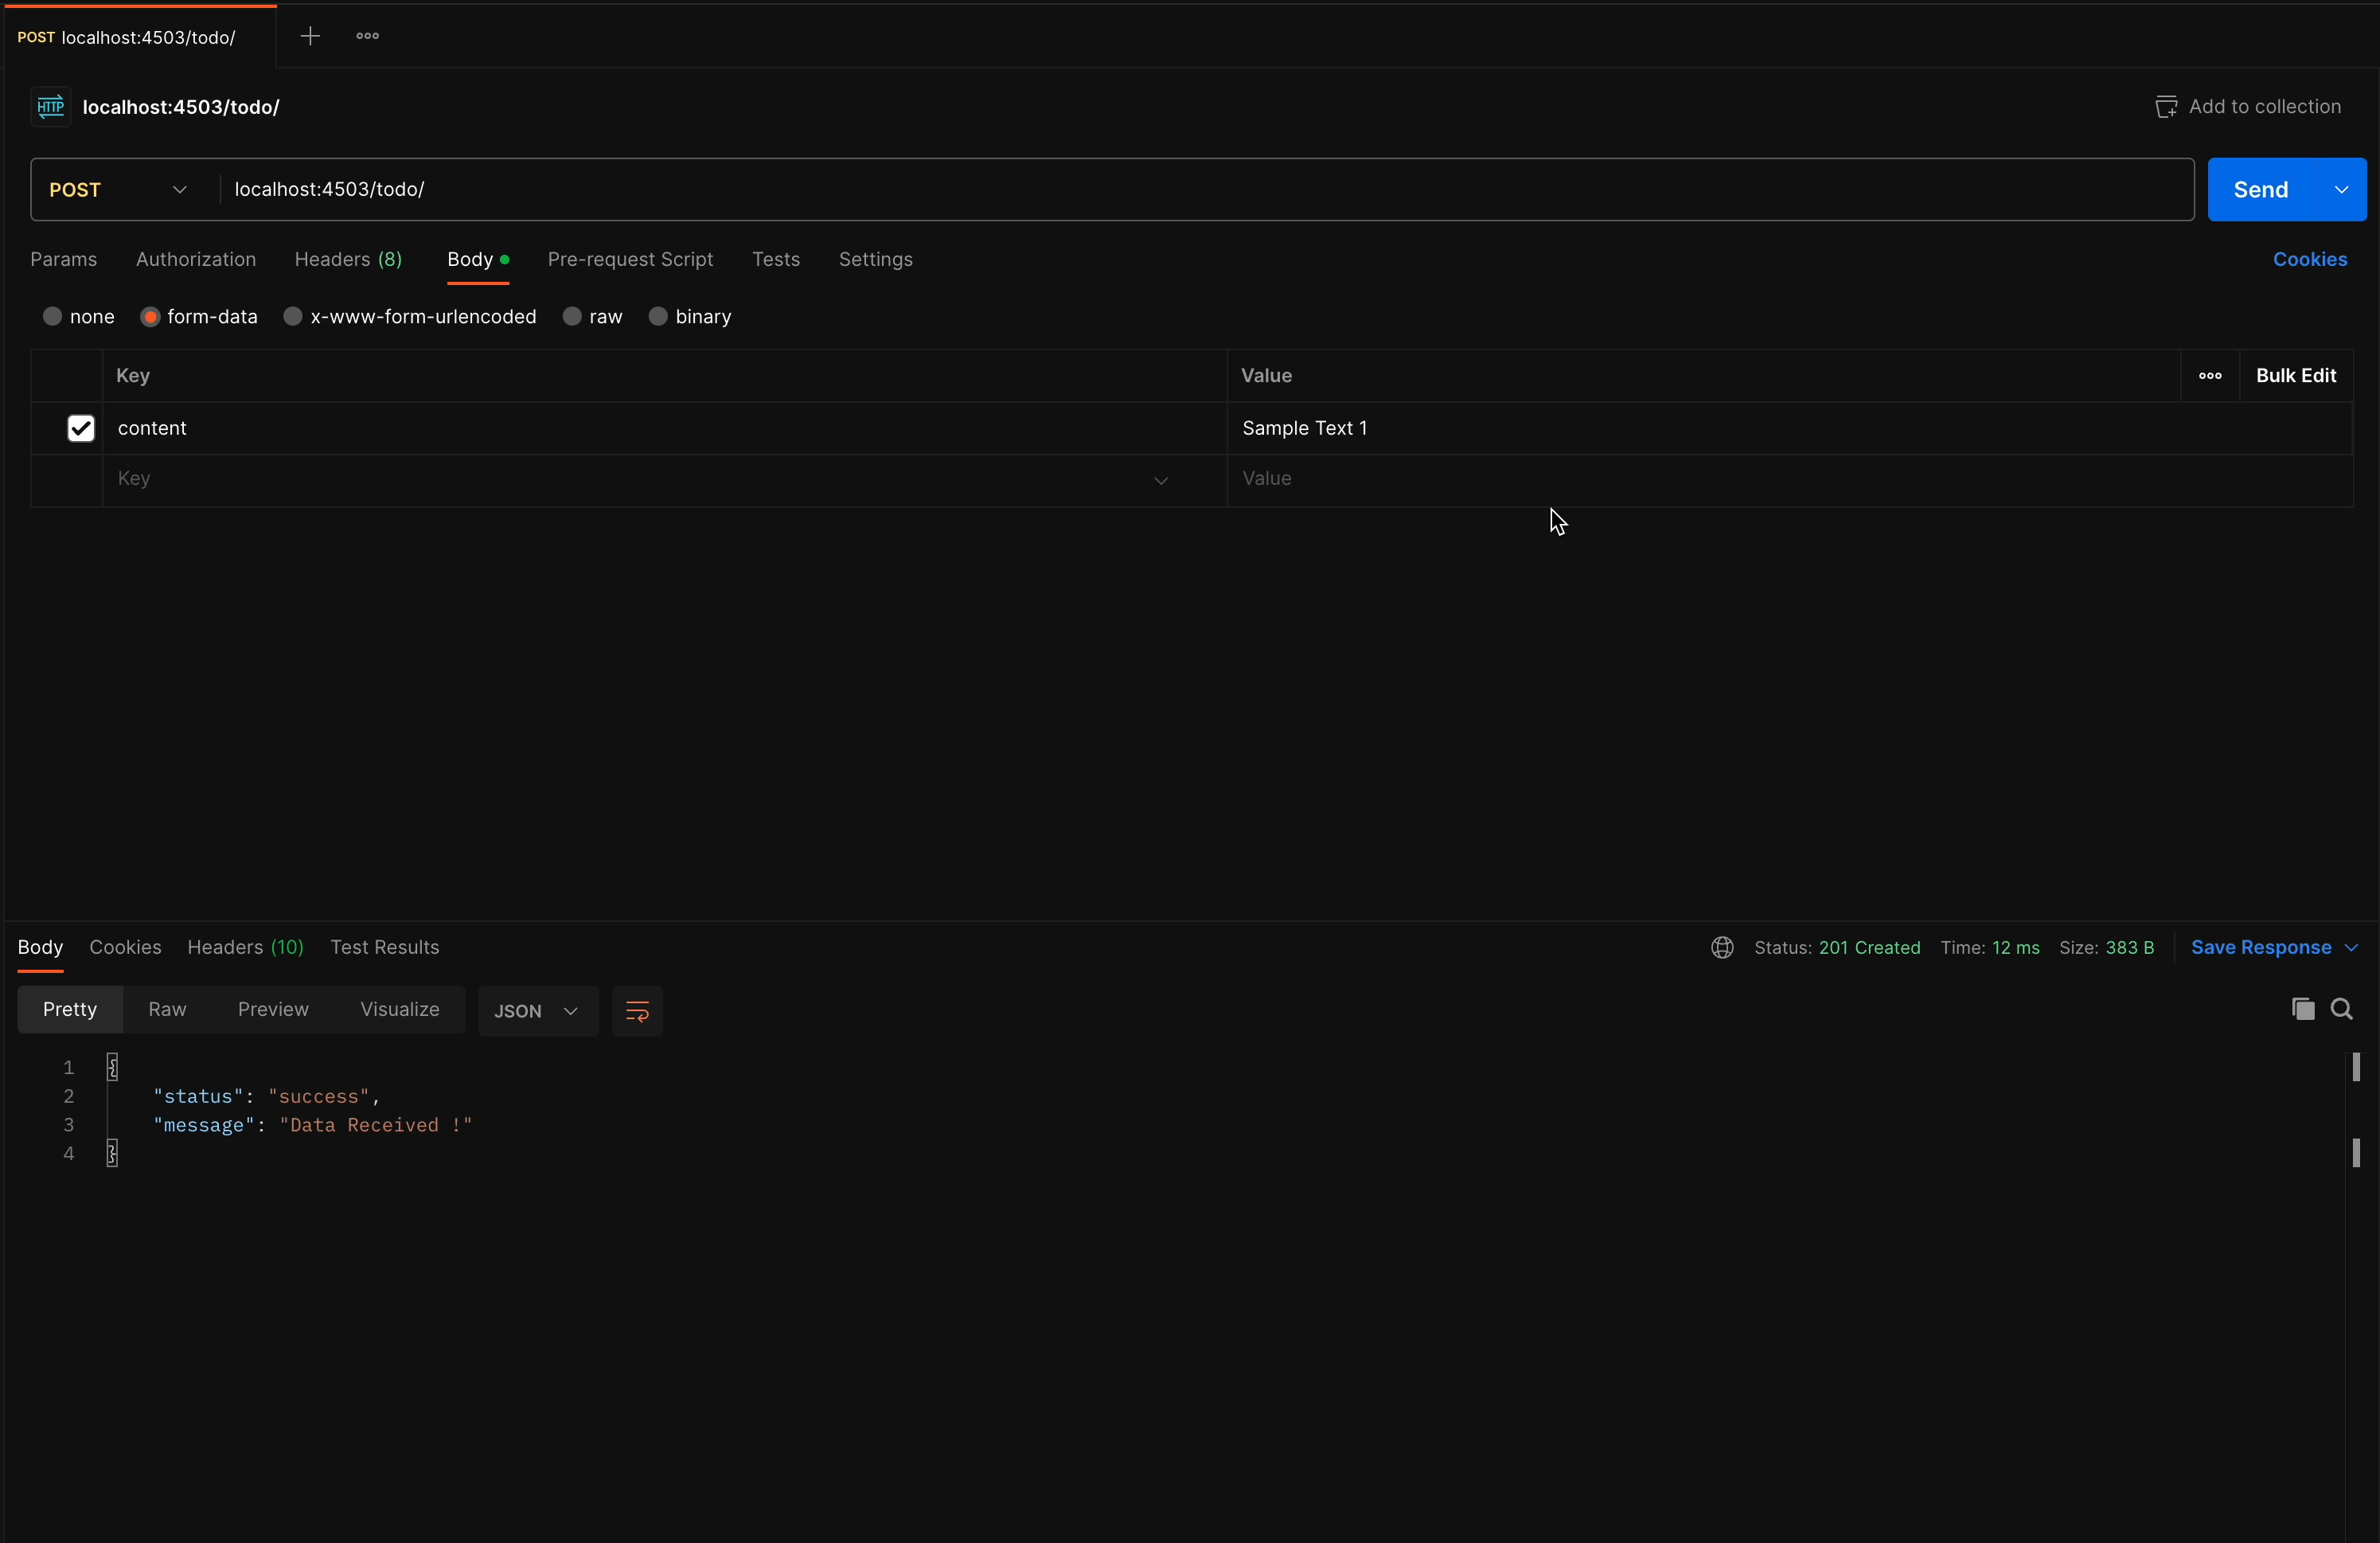
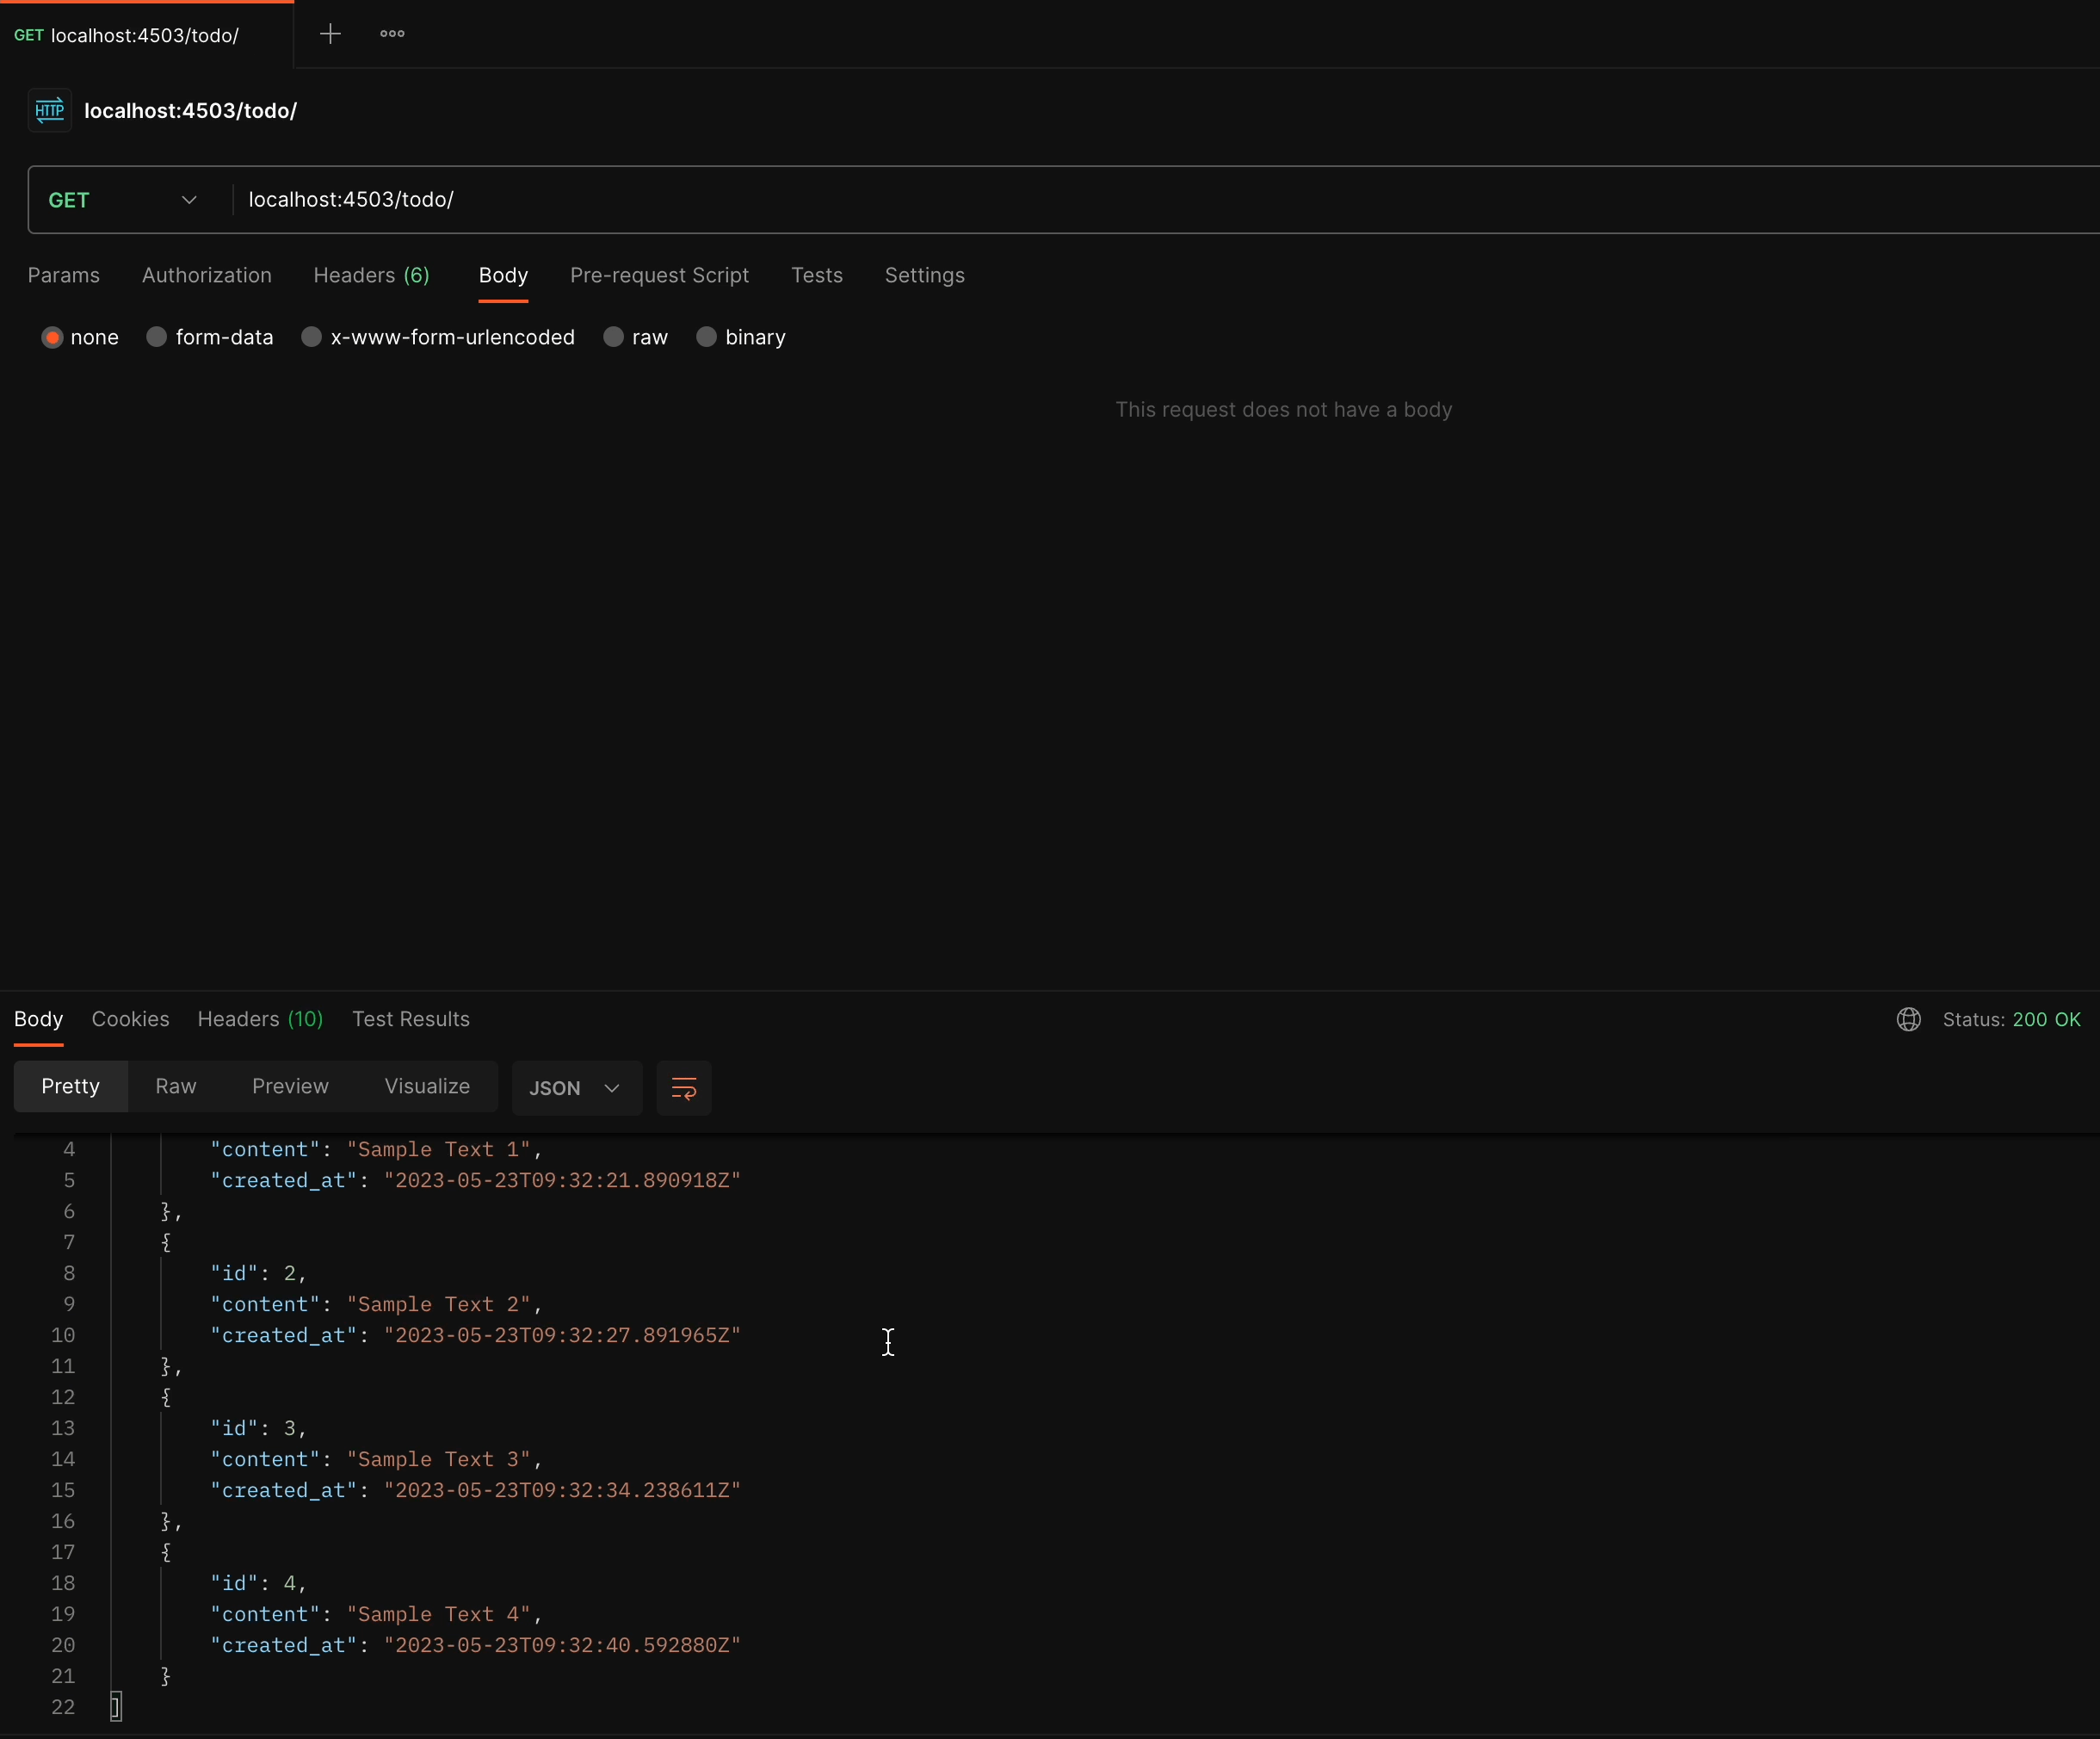
You can see the results for yourself: The API is working fine, and we got the expected response. We created a few sample TODO items and then retrieved
the list through the GET handler.
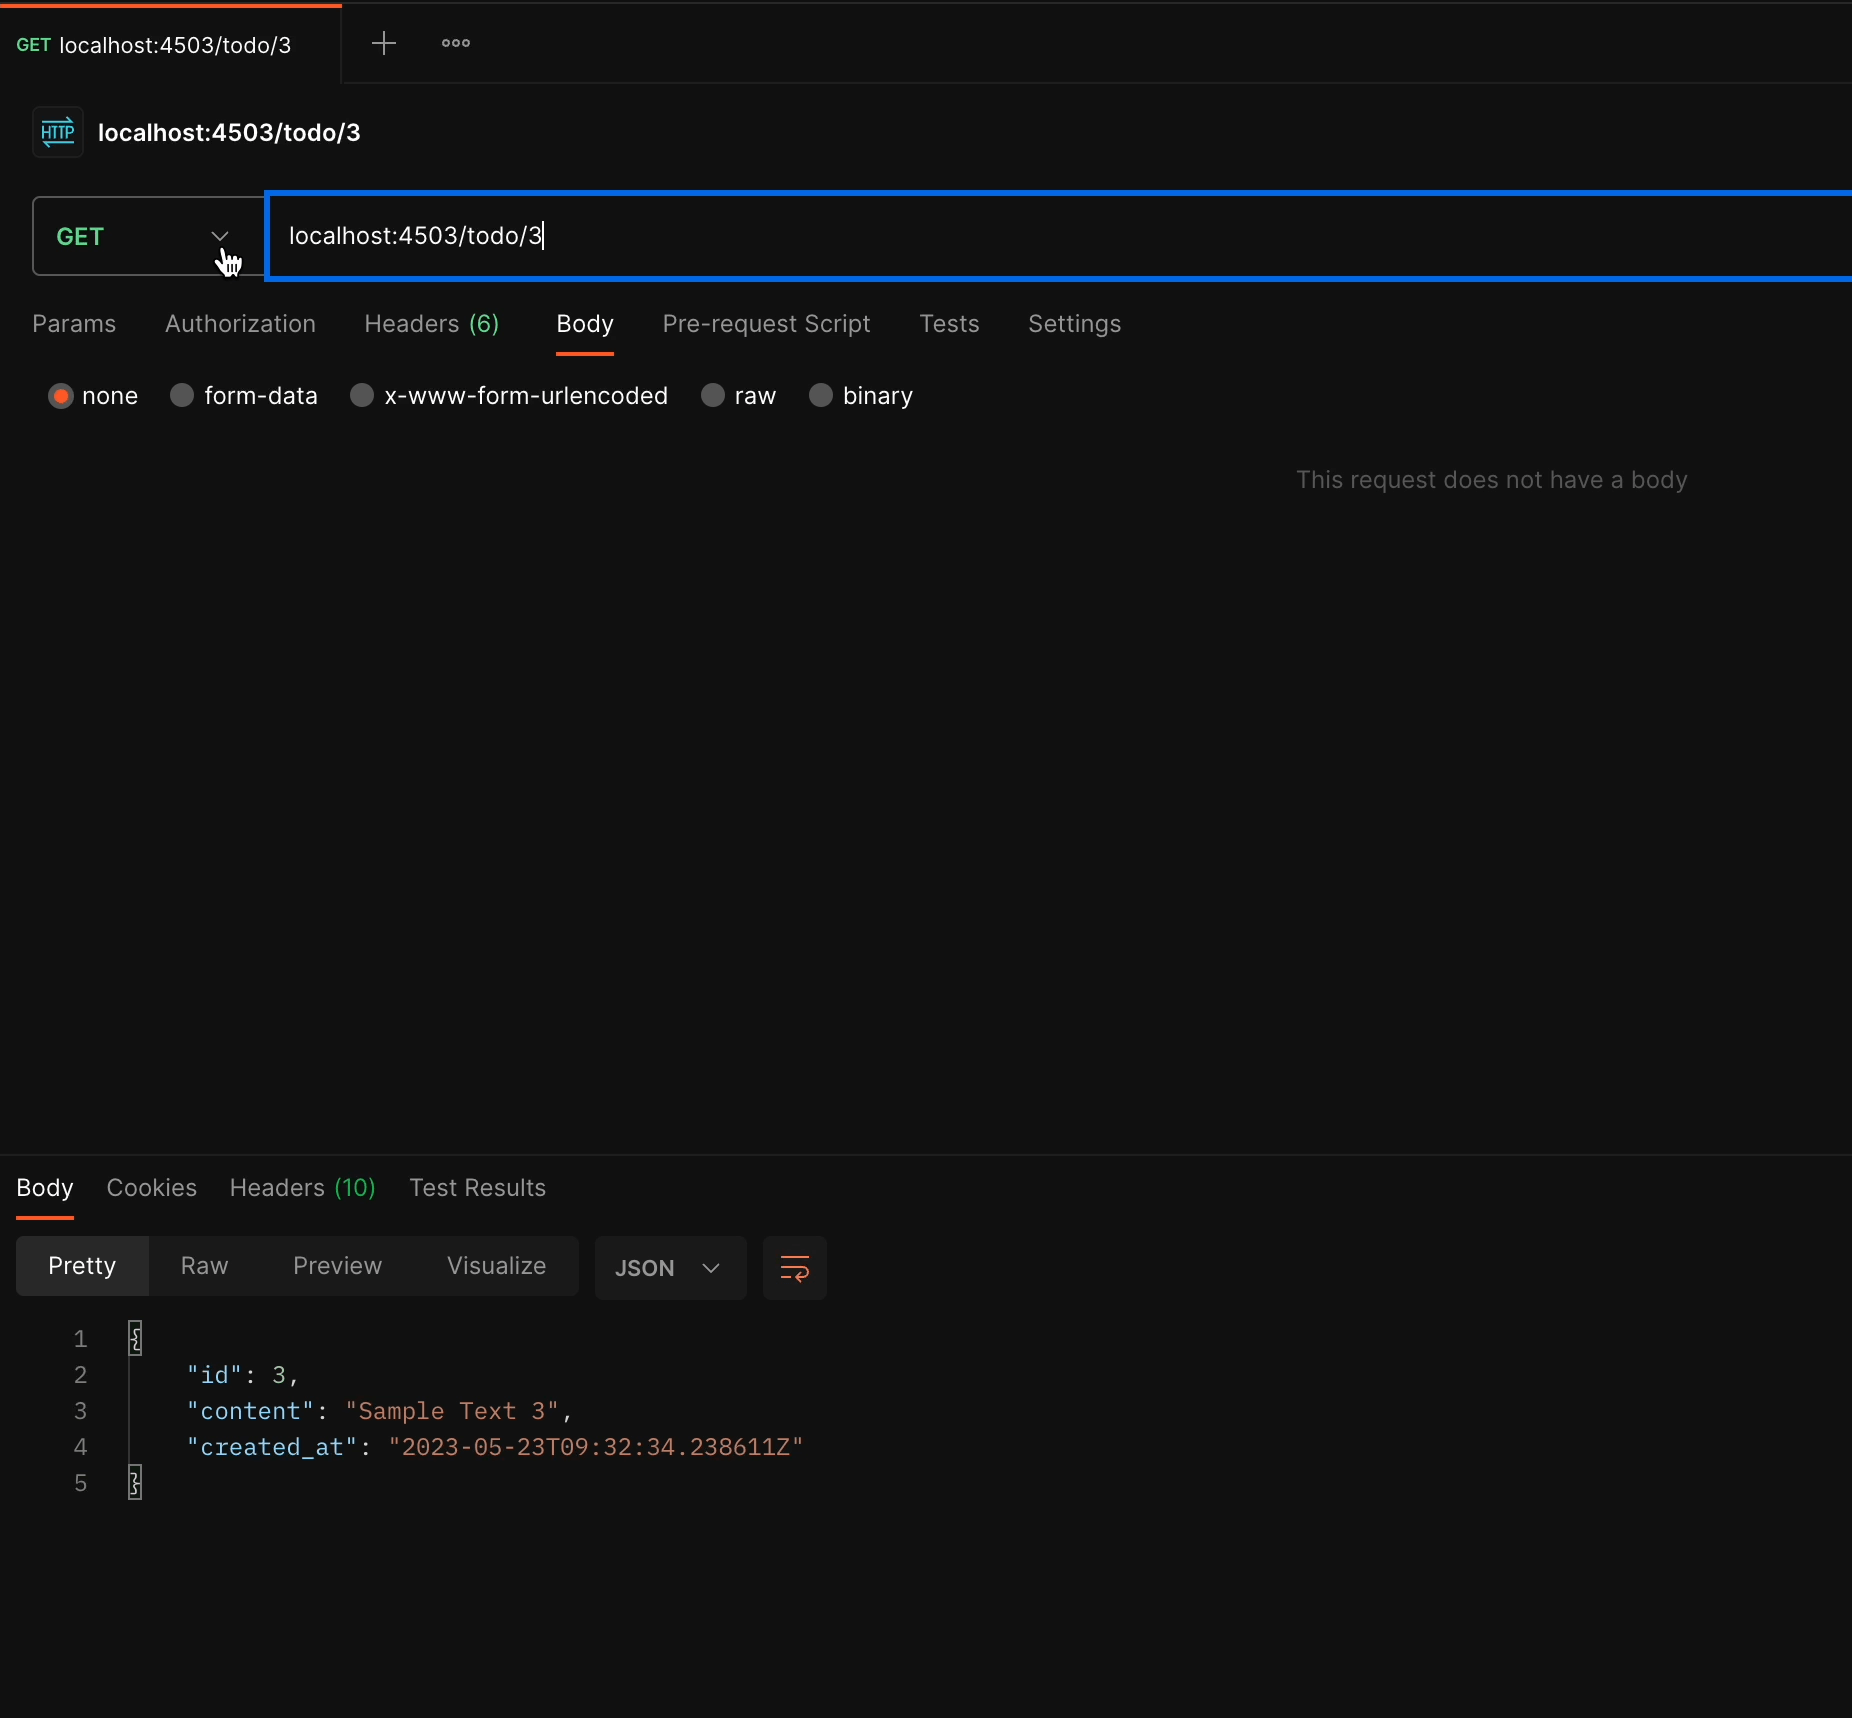
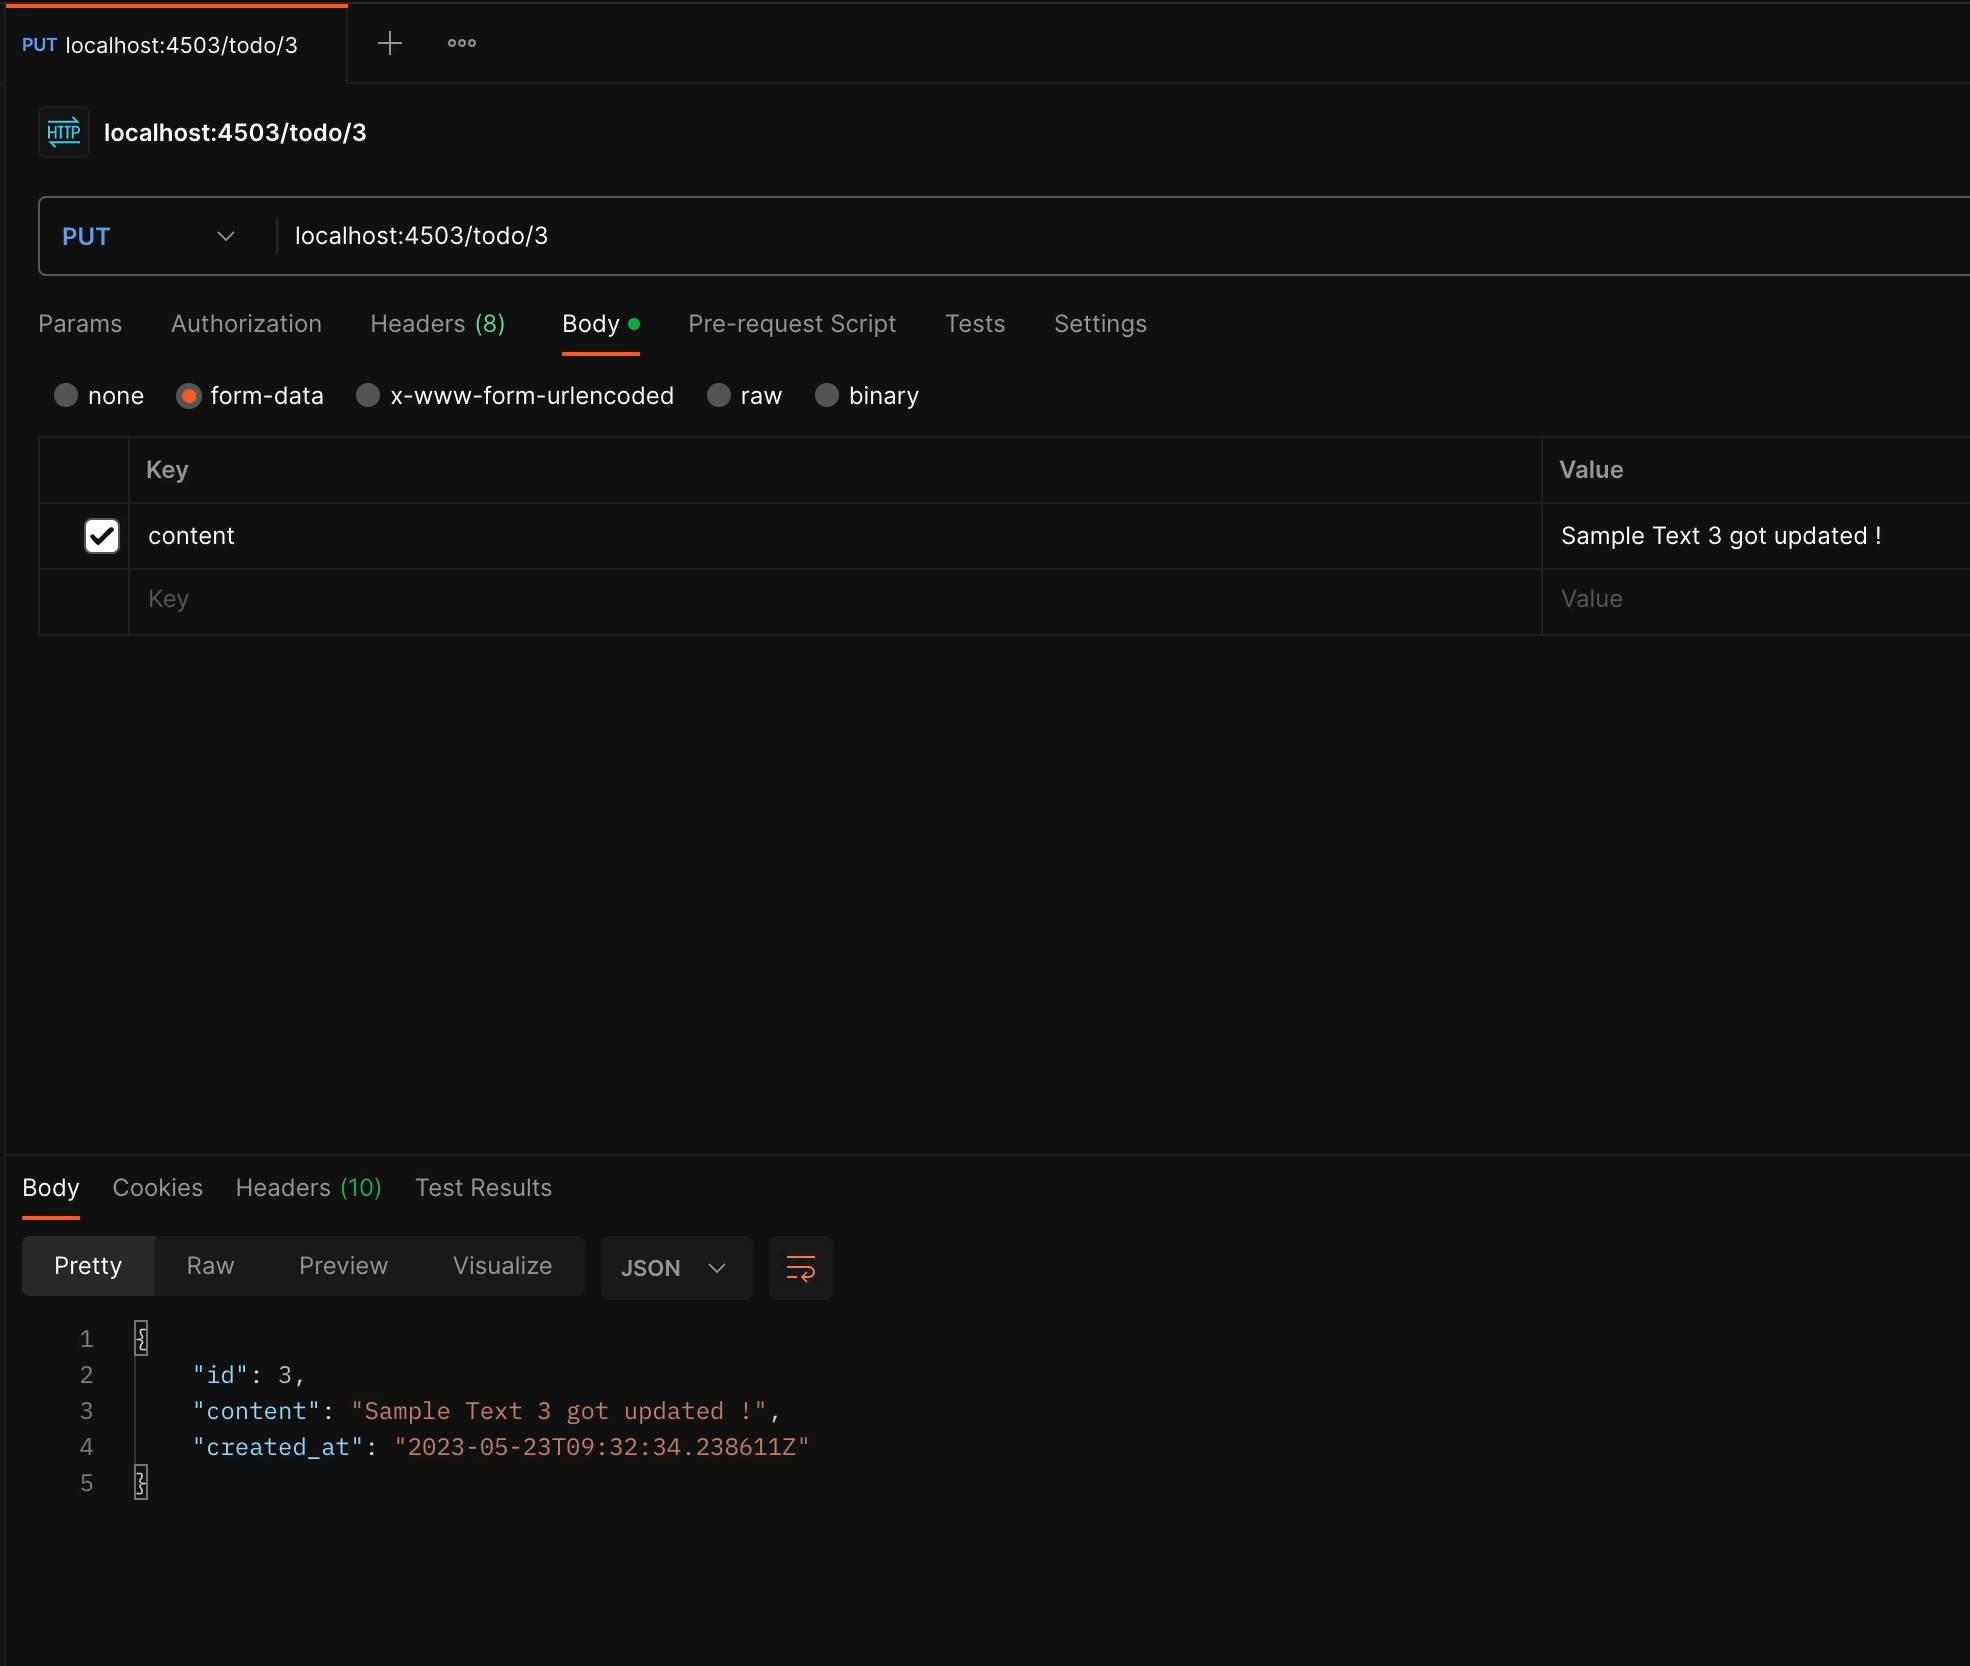
Now let’s try out TodoAPIView, which performs multiple operations like GET, UPDATE, and DELETE.
GET/<id>
PUT/<ID>
DELETE/<ID>
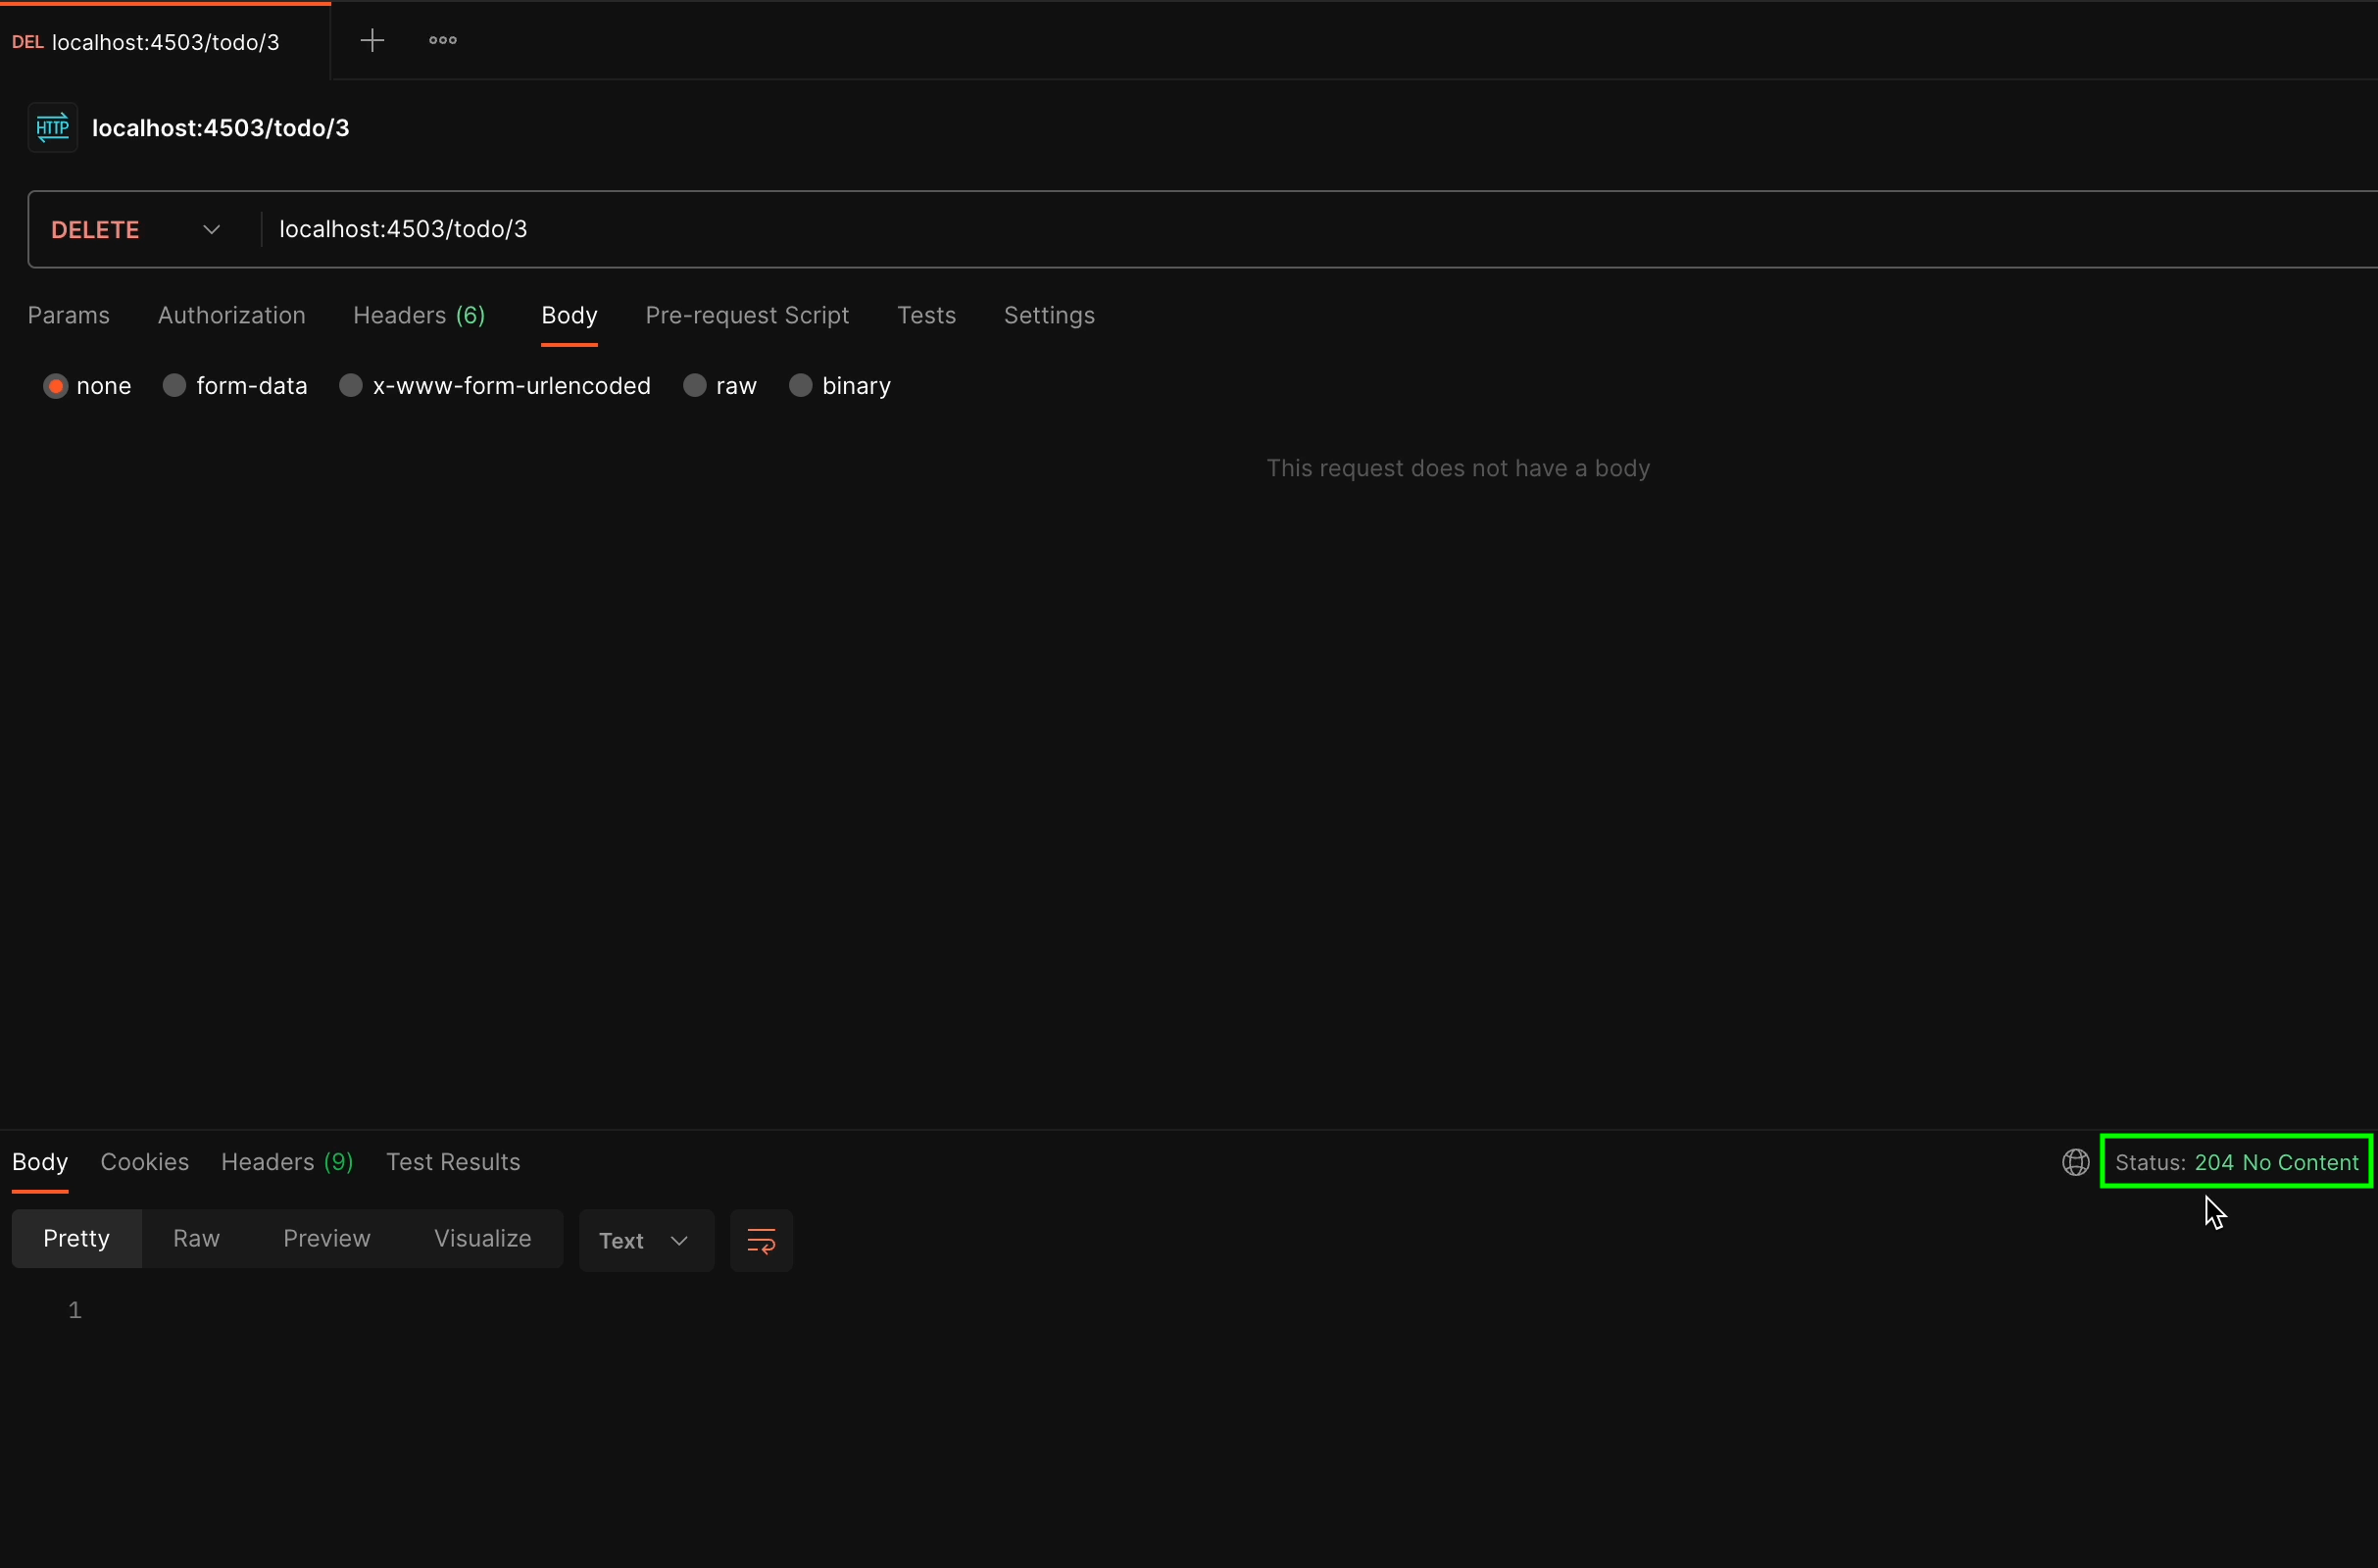
For the DELETE method, we don’t expect to receive any response and the status code should be 204 No Content.
Console logging in Cloud Code
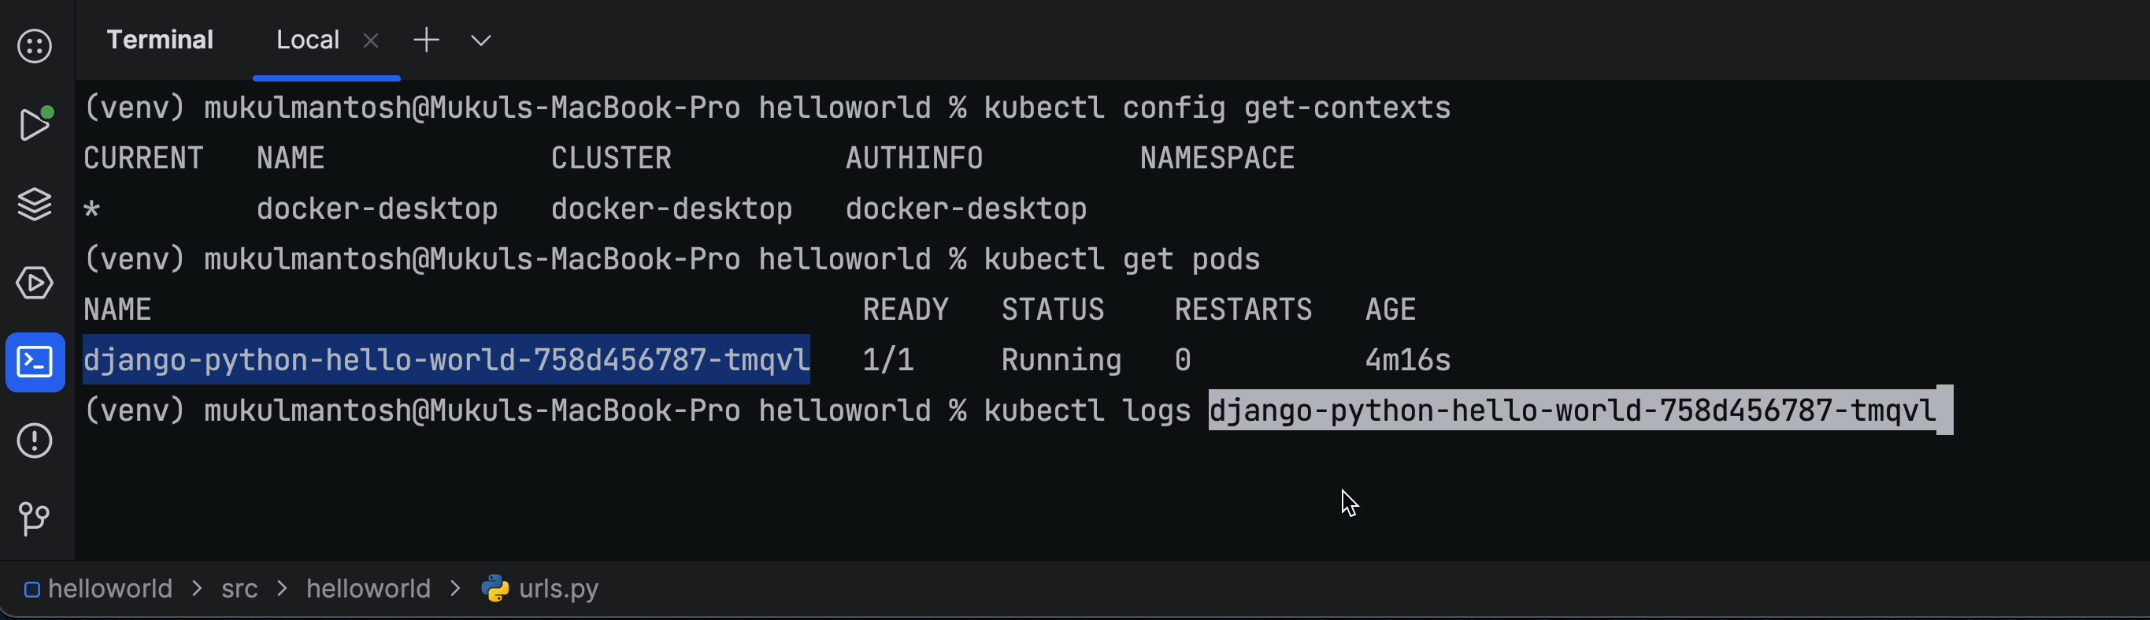
If you want to perform a standard check of the container logs, then you can run the following command:
kubectl get pods
kubectl logs <pod_name>
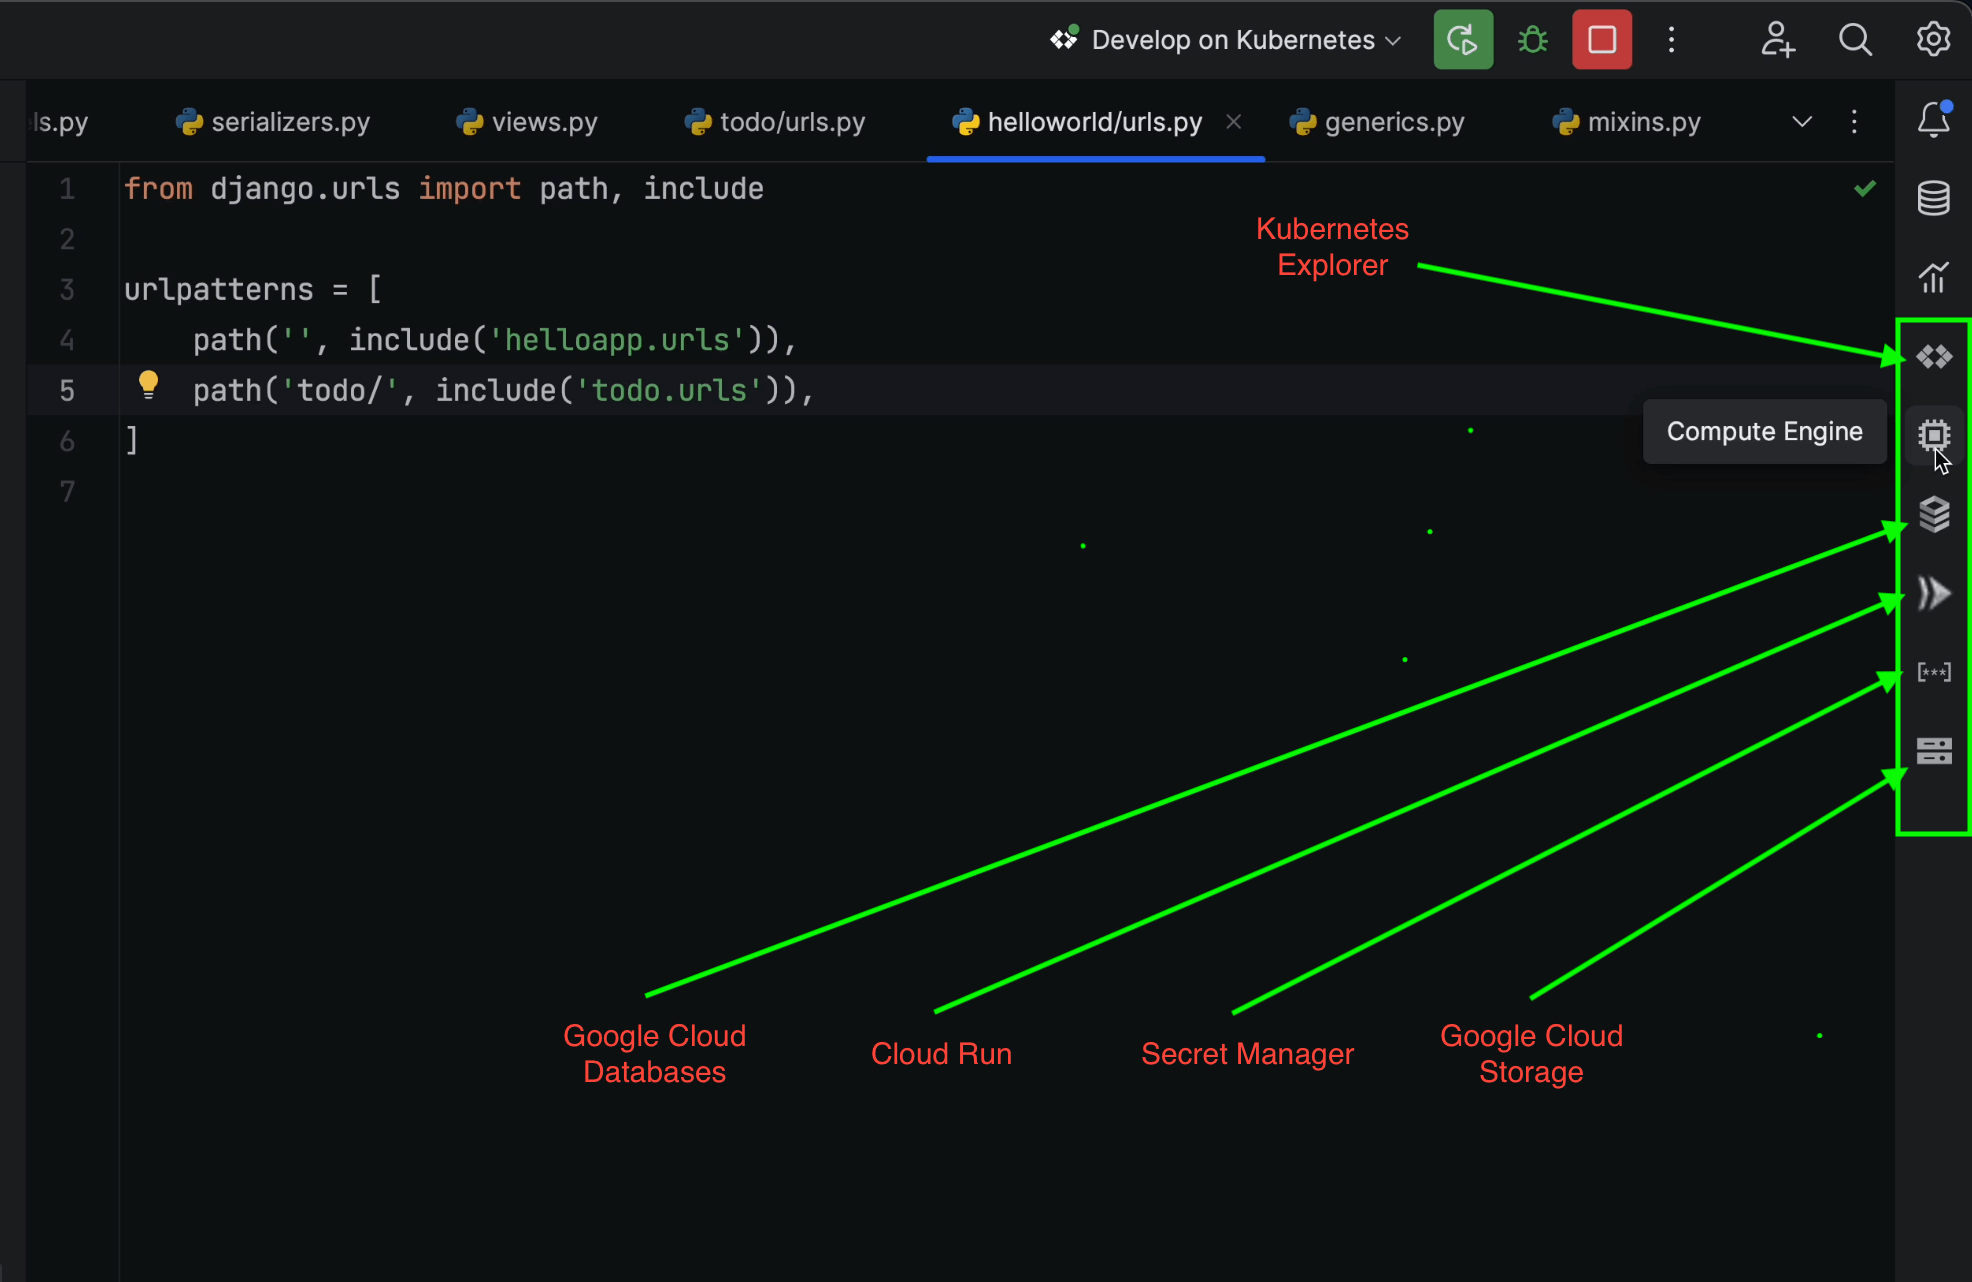
The Cloud Code plugin has a feature called Kubernetes Explorer, which allows you to stream the logs without having to write anything in the terminal.
However, the plugin is not limited to Kubernetes Explorer. It also offers multiple other features, including:
- Cloud Databases
- Cloud Run
- Secret Manager
- Cloud Storage
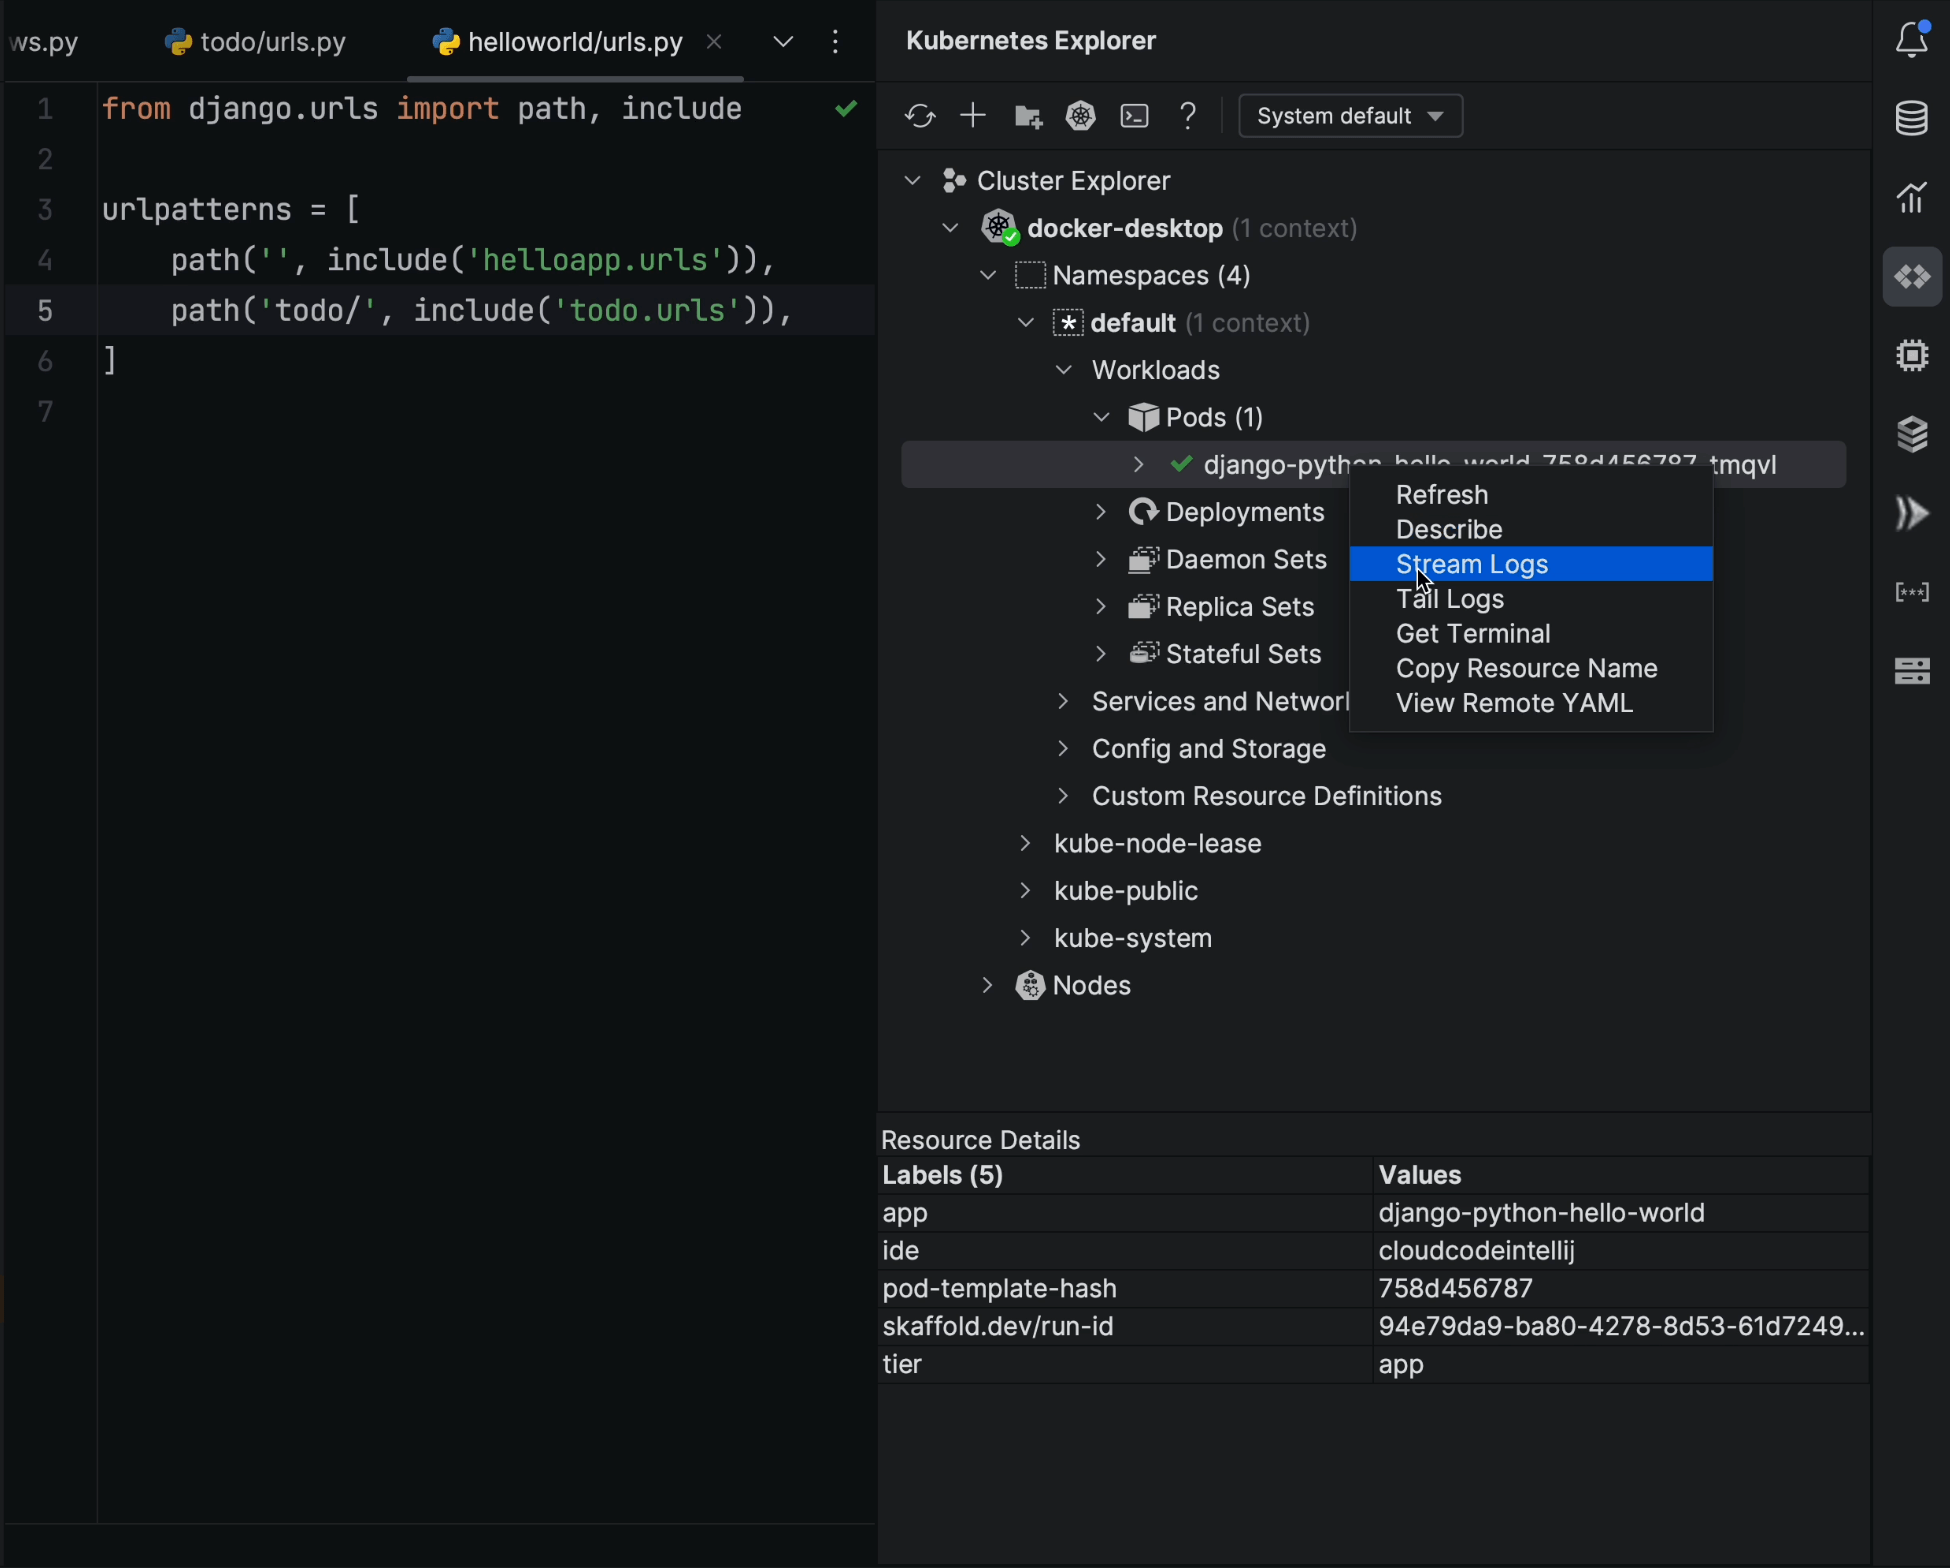
In Kubernetes Explorer, you can seamlessly connect to local or remote clusters and easily stream or tail logs, while simultaneously performing multiple operations on Deployments, ReplicaSets, and more.
Debugging
Just as running code within the container is a smooth process, so is debugging.
I’ll now add a breakpoint inside my code to inspect what’s happening.
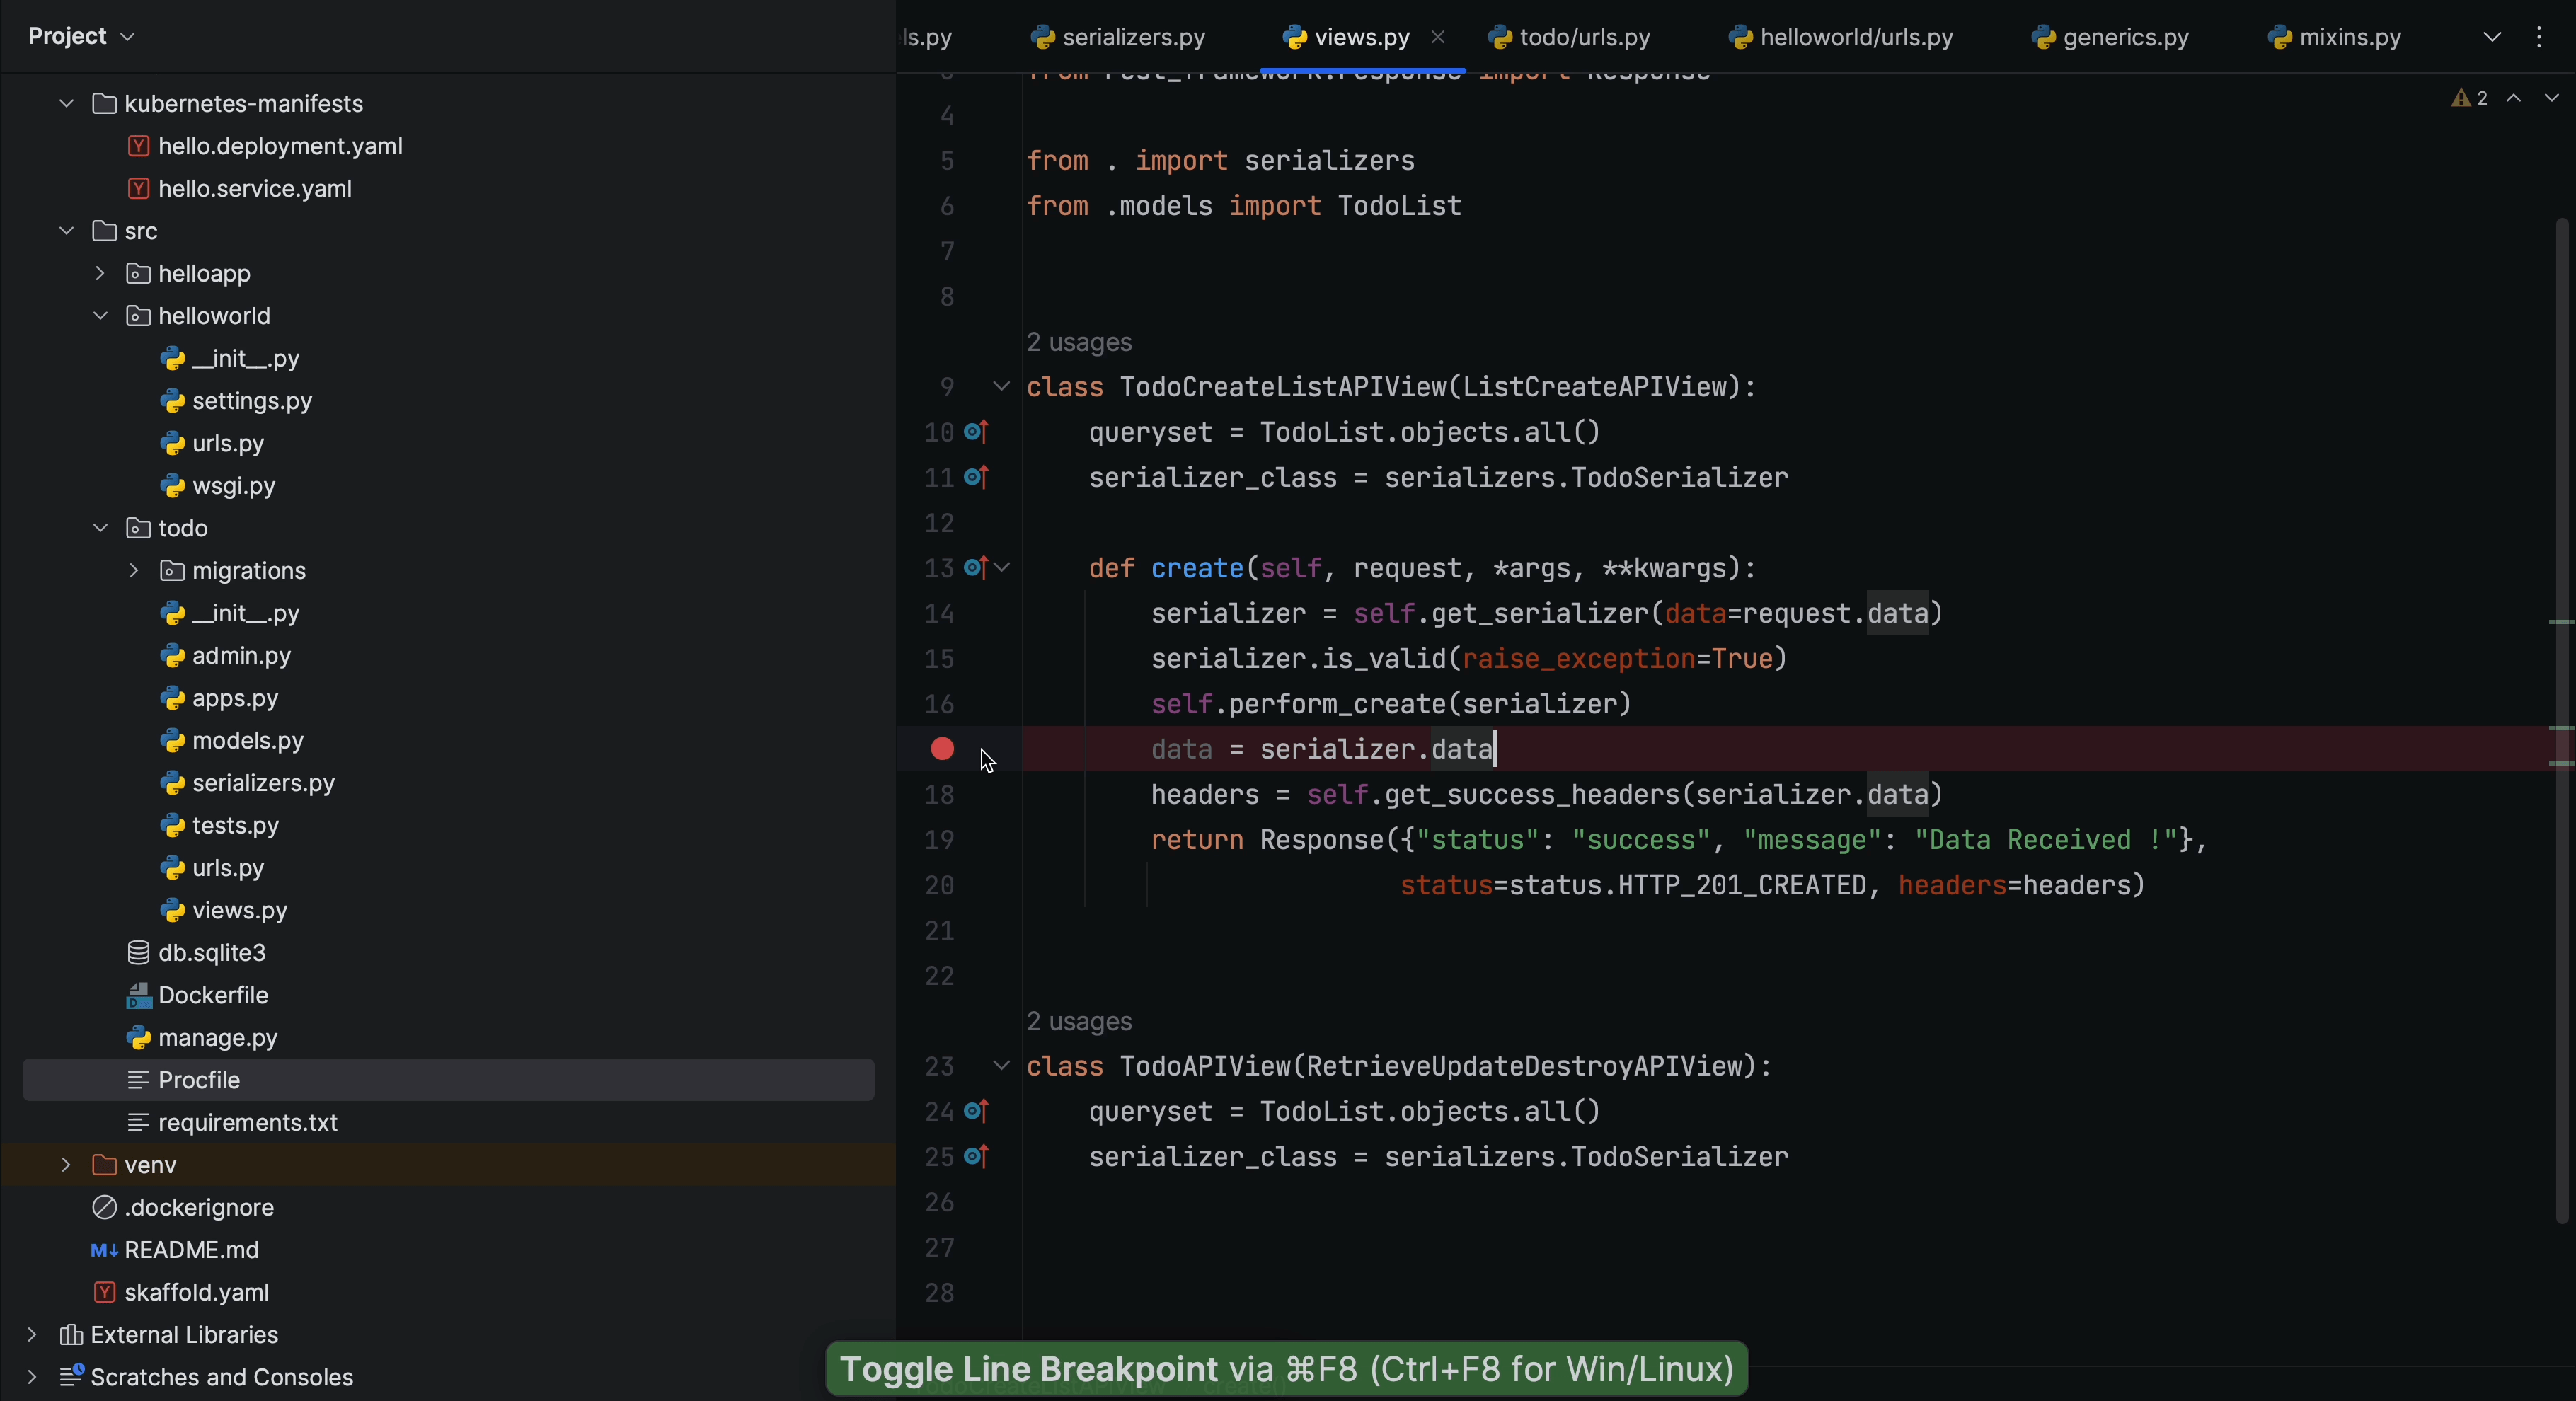
If you look carefully at what follows line 16, you’ll see that we’re capturing serialized
data that is coming in from the POST request.
Now, I’ll go ahead and click on the Debug icon.

A dialog appears informing me that the Python debug container is running and needs to map with the remote path /app.
I’ll simply click Ok to proceed, and we see there’s no change that needs to be made.
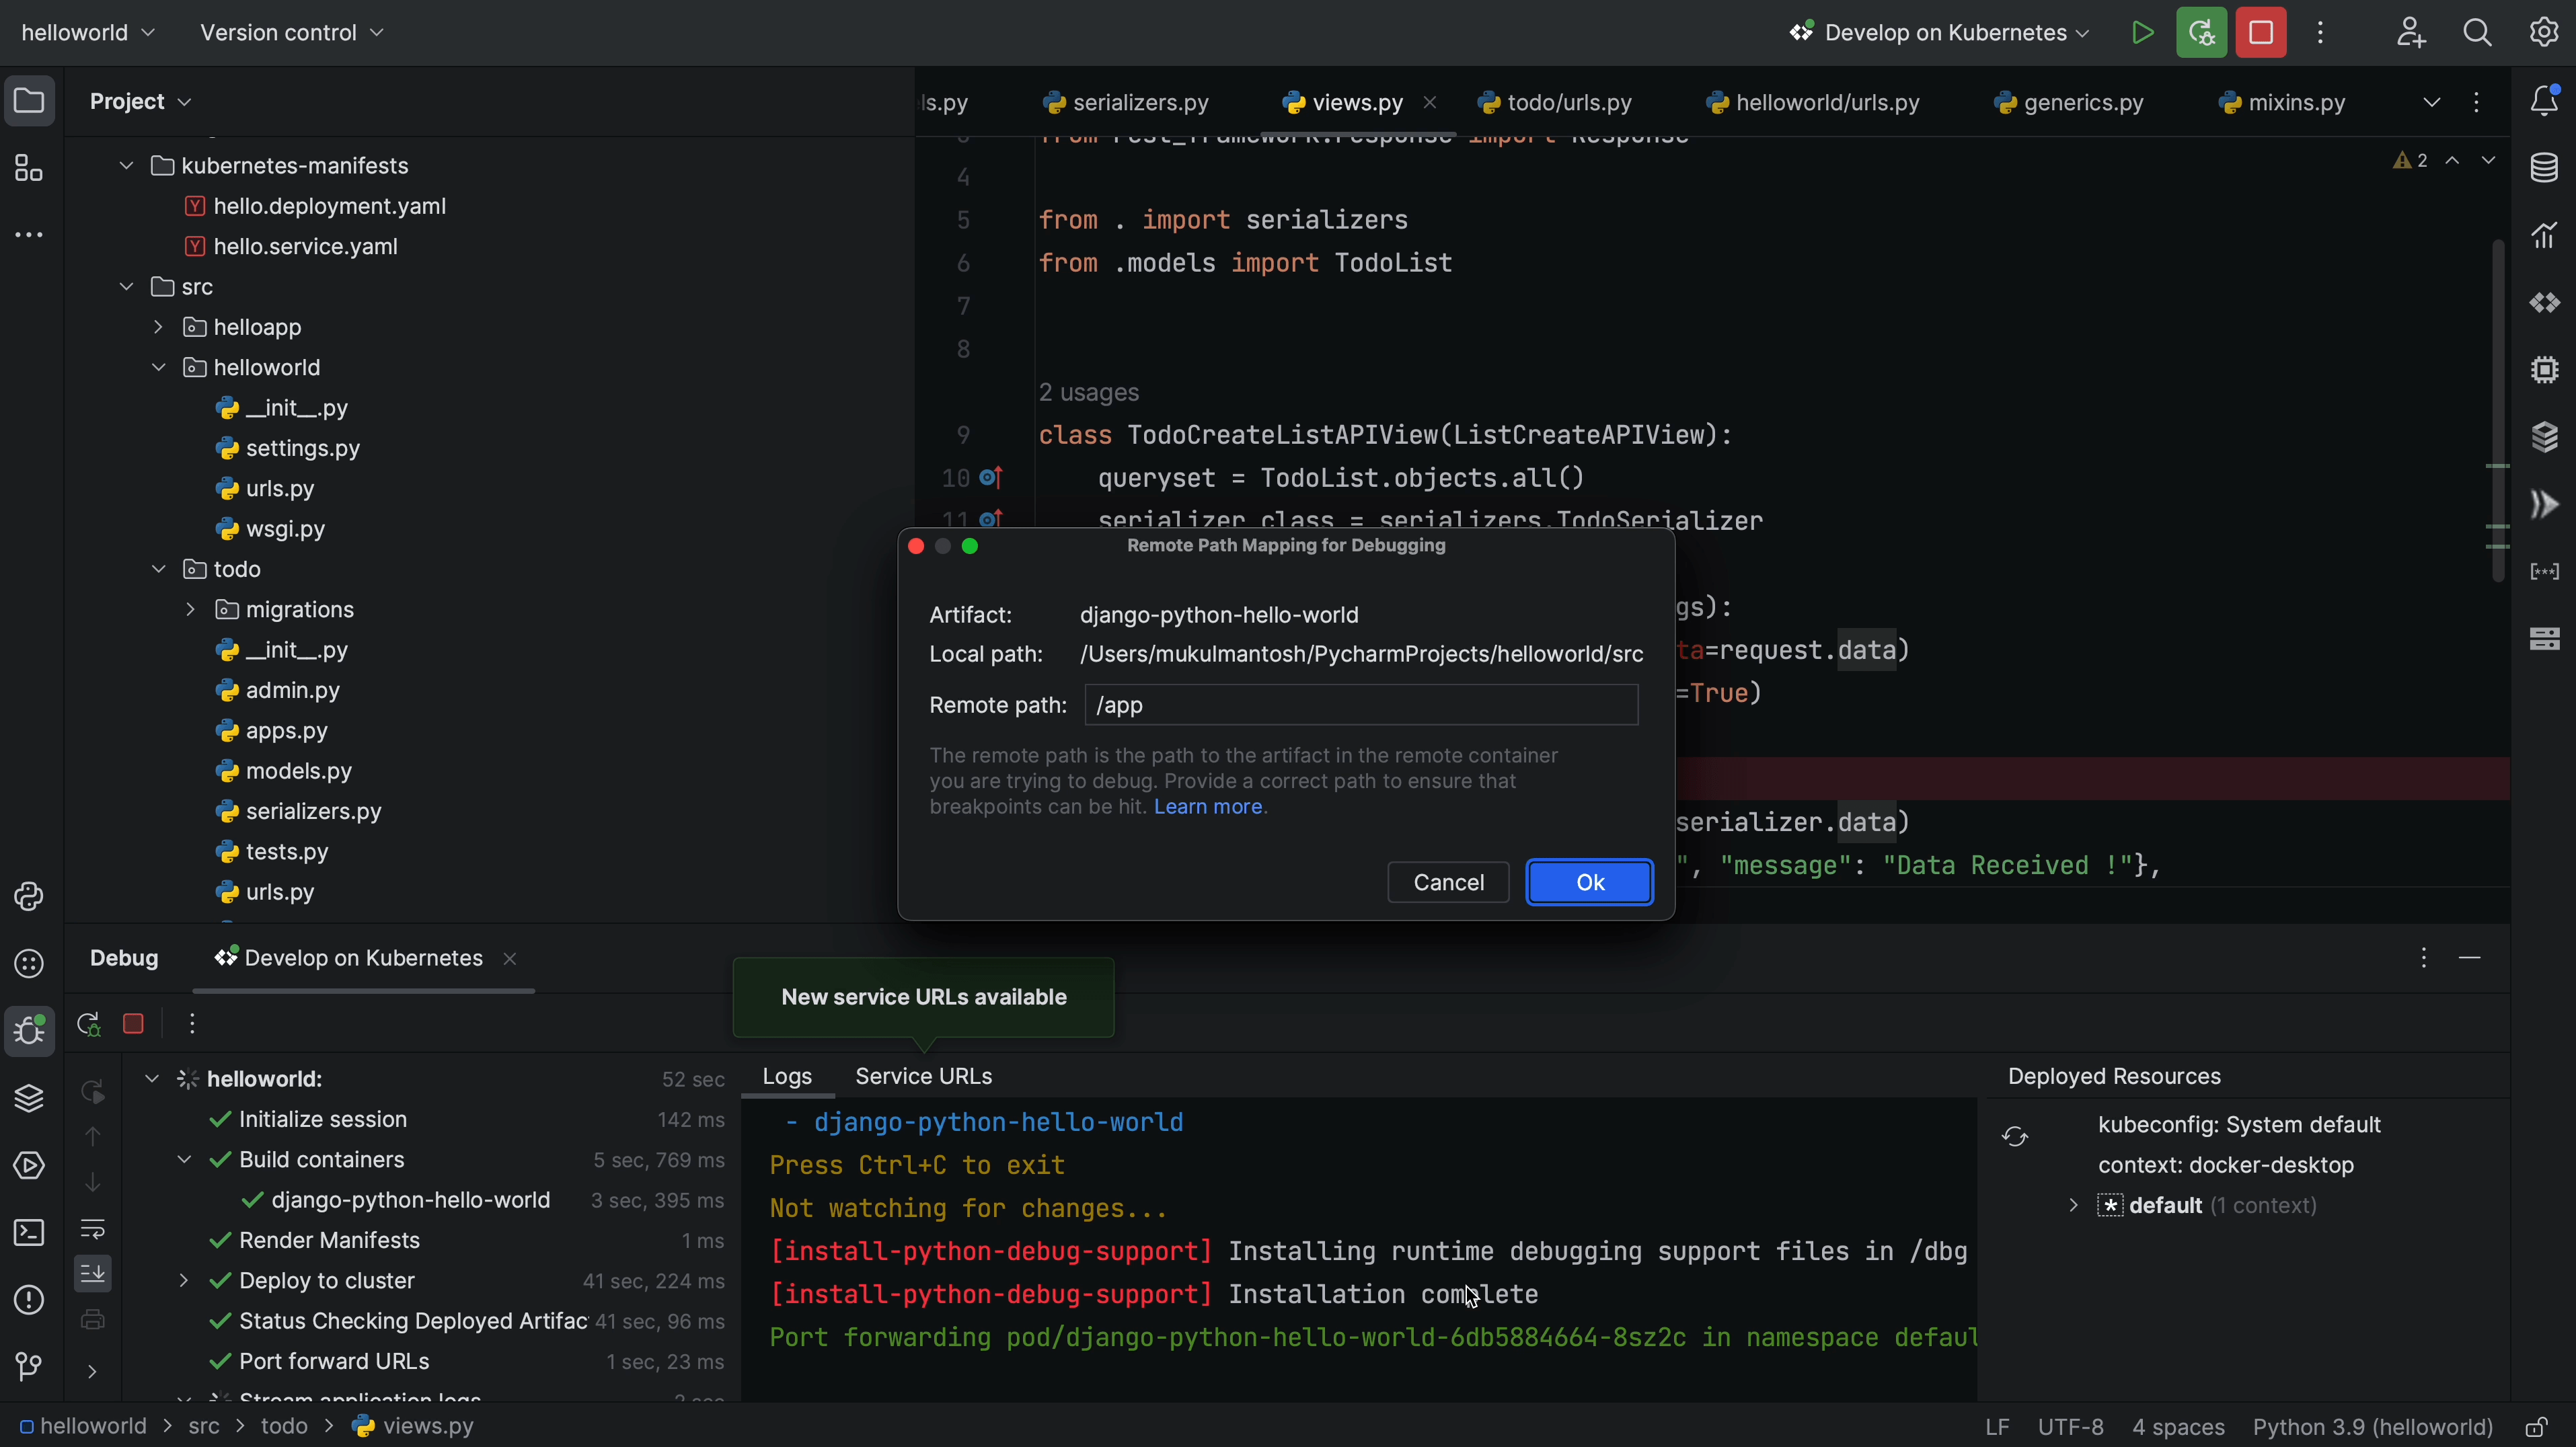
The debugger is now successfully connected!

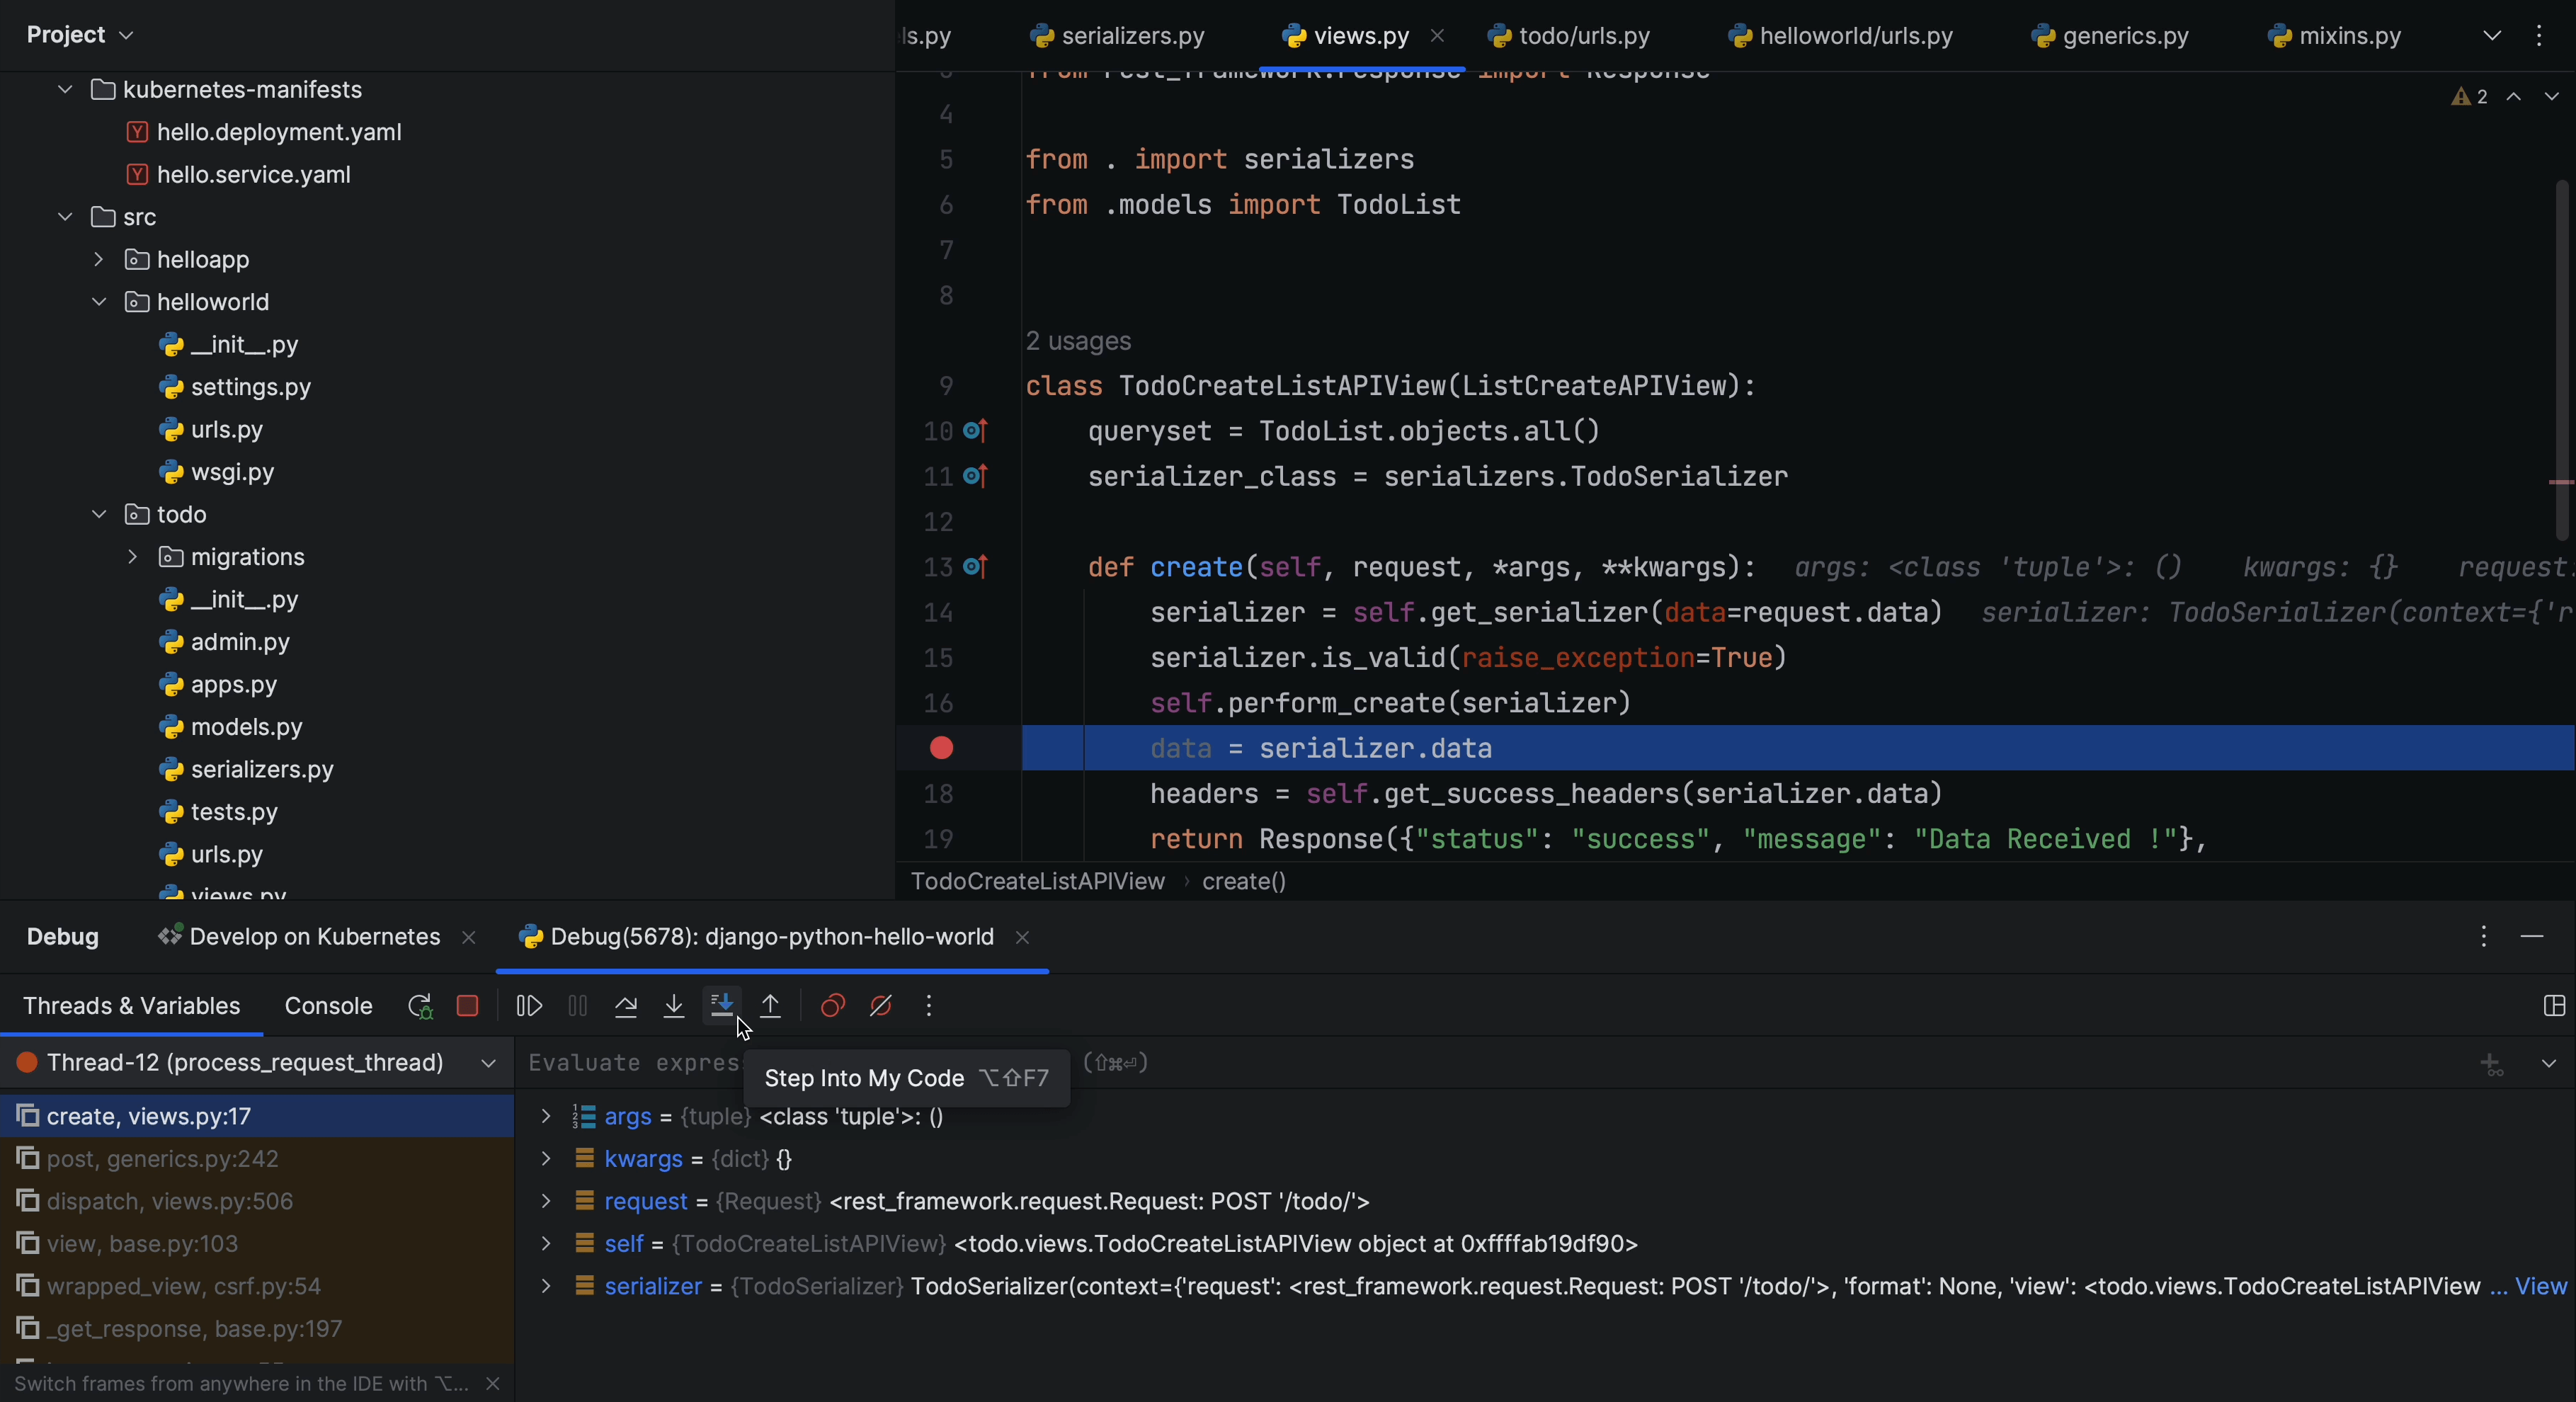
Next, let’s try to create a new TODO item and see what happens at the breakpoint.
As soon as I triggered the post request to create a new TODO item, the debugger was triggered, as you can see from the above screenshot.
I’ll now click on Step Into My Code.
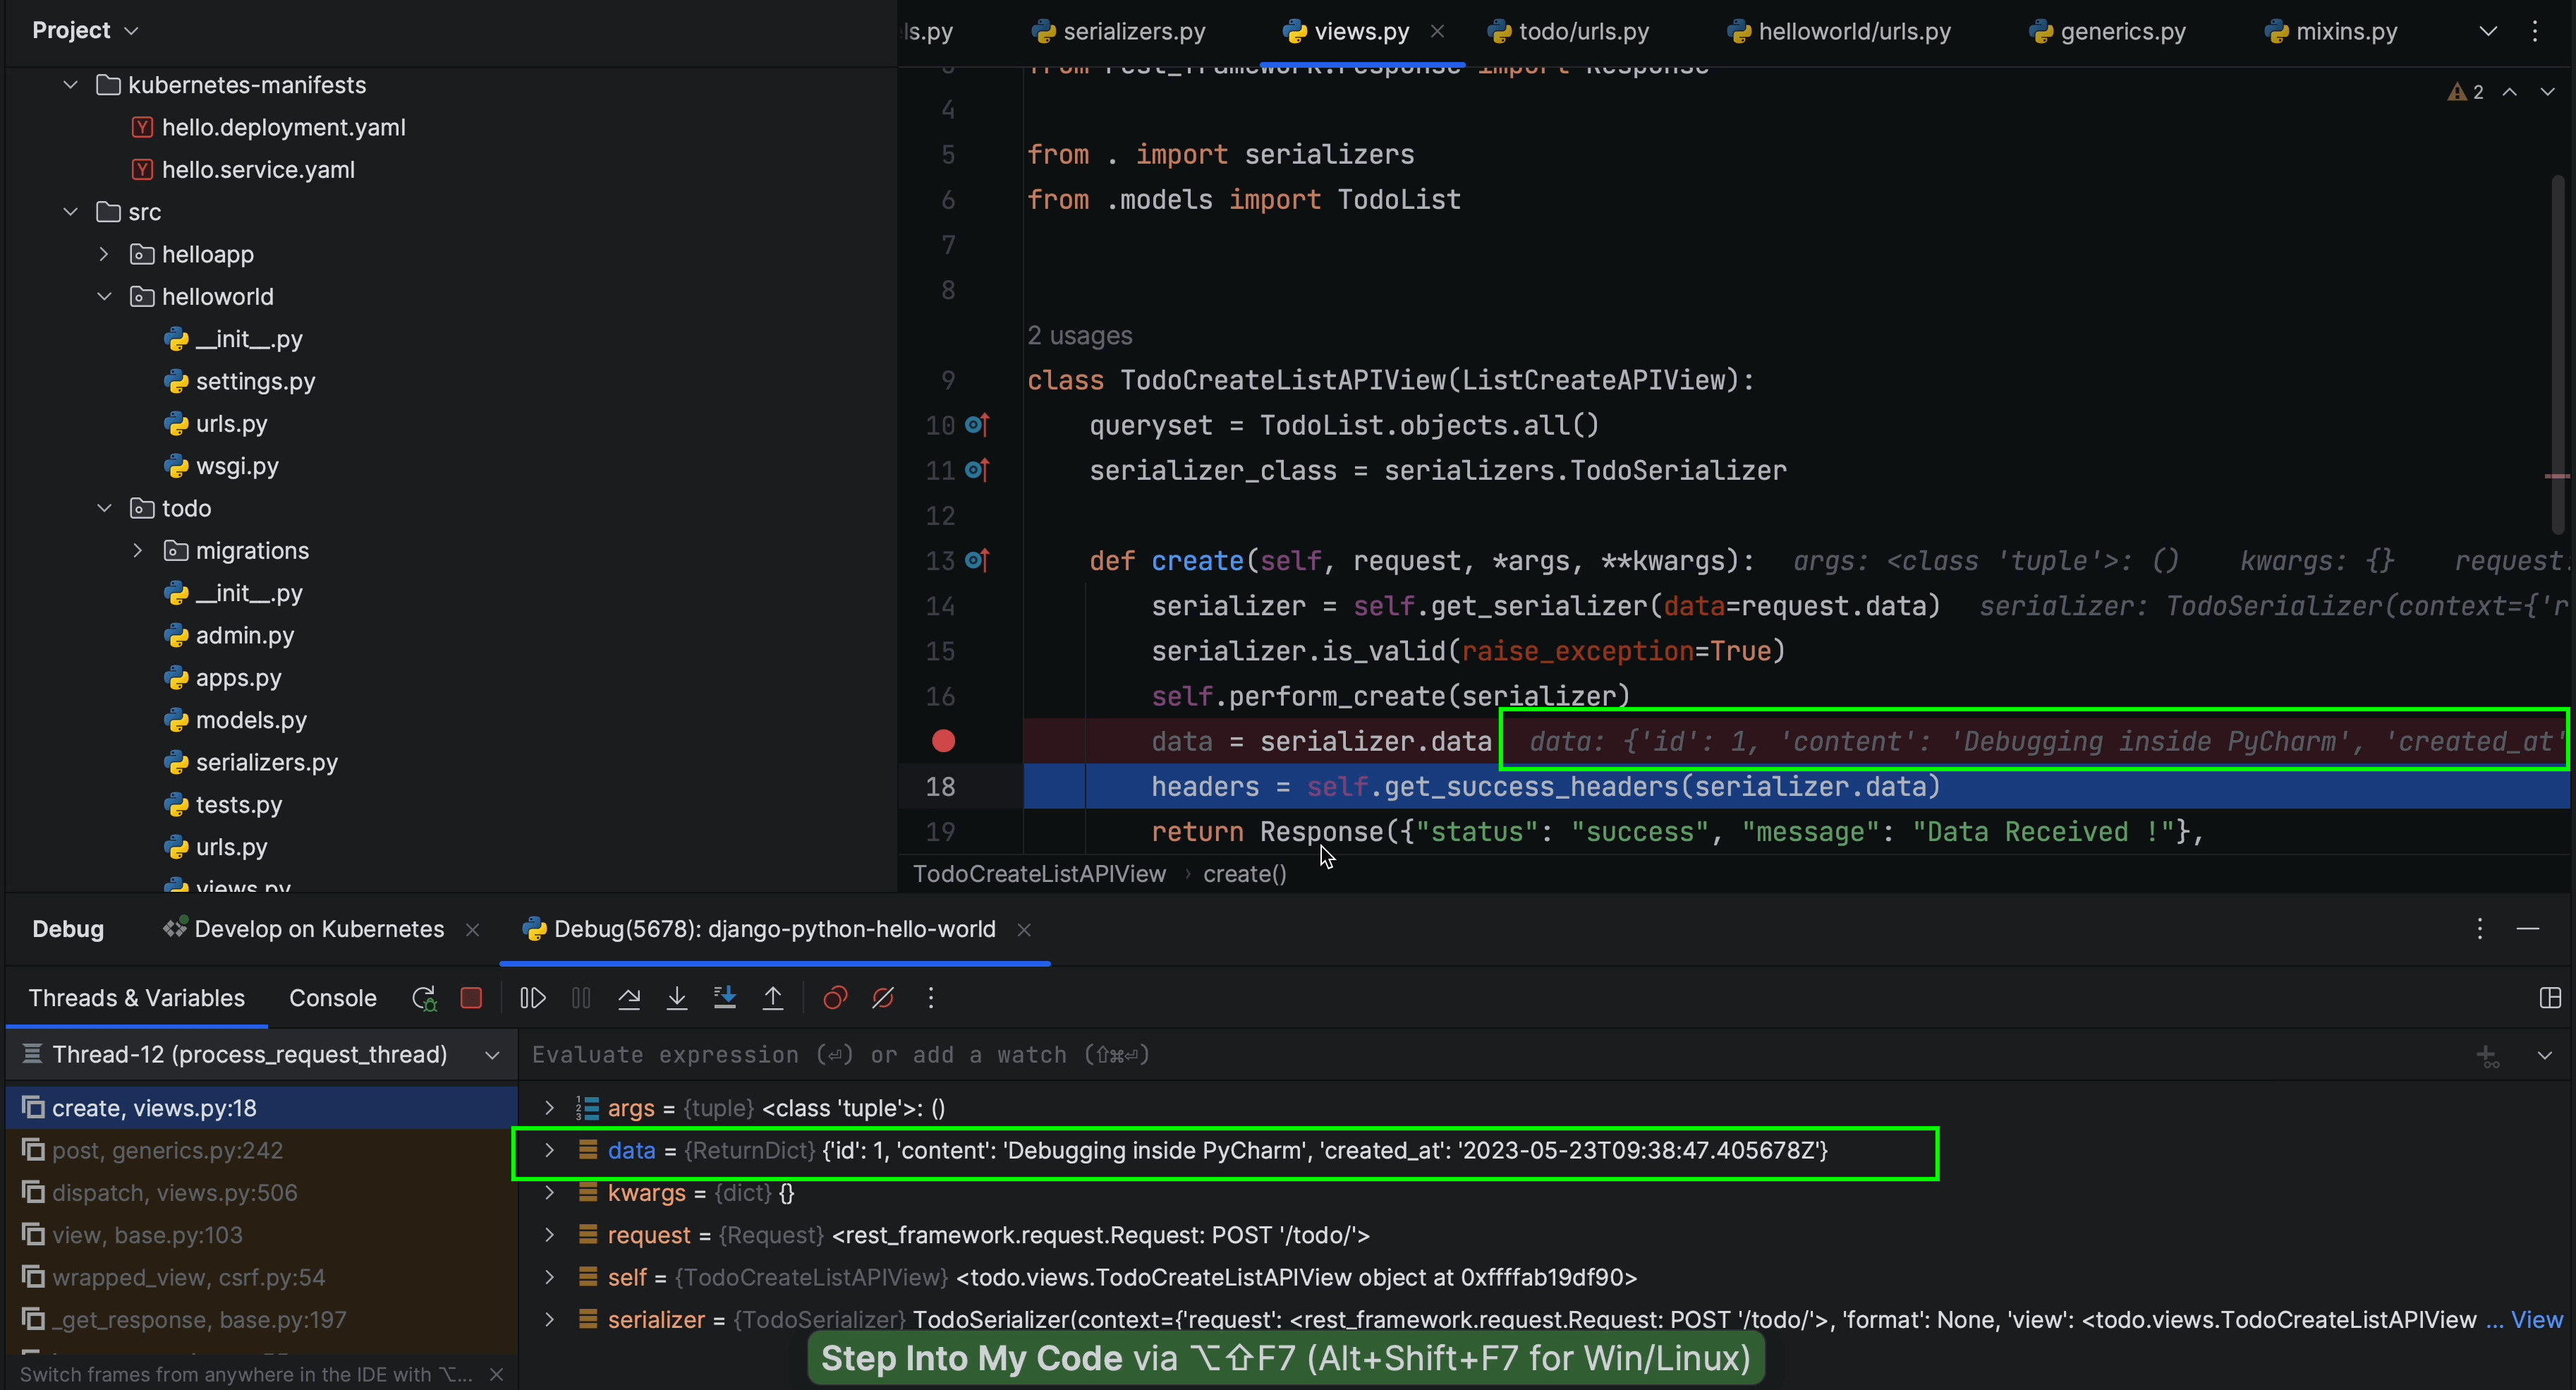
And there you have it! We’ve successfully captured the data passing through the serializer. That’s how Cloud Code simplifies the debugging process.