
Elastic Kubernetes Service (EKS)
Deploying application using EKS, RDS, ElastiCache, Route53 & AWS Certificate Manager.
Hello everyone! Welcome to the PyCharm FastAPI Tutorial Series.
In this tutorial, we will be deploying our application in AWS using the Elastic Kubernetes Service(EKS) along-with setting up domain with SSL.

Make sure before proceeding, you have installed the AWS Command Line application.
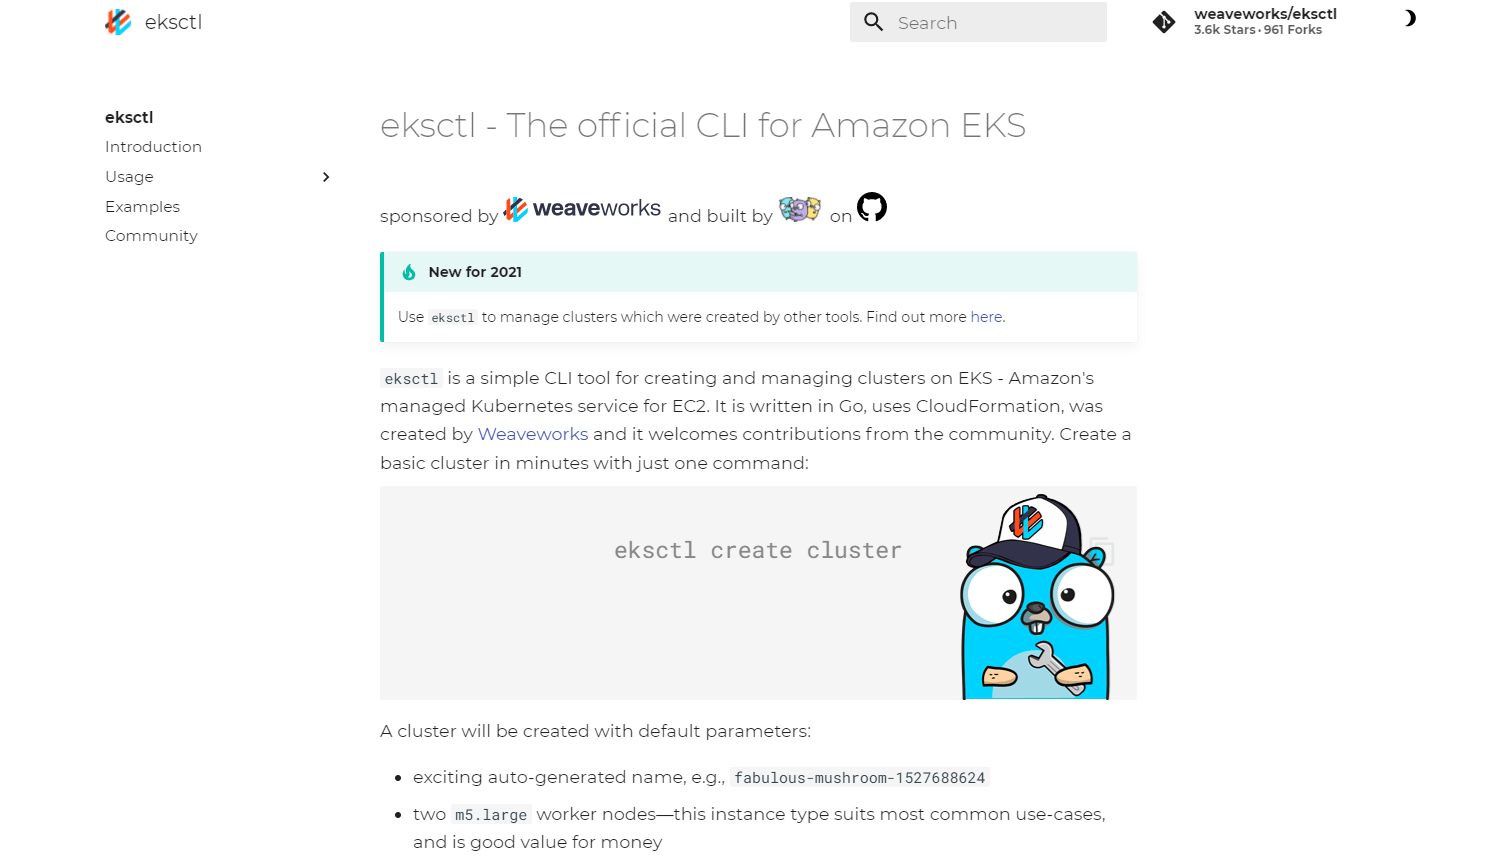
eksctl
There is one more application we need to install in our system and that is eksctl. It is the official command line tool for EKS and helps in managing clusters in EKS, developed by WeaveWorks and written in Go.
Make sure you have both kubectl and eksctl in your system, and also we expect from the audience they have previous working experience in AWS.
I am going to skip the installation steps, as it has clearly been provided in the aws & eksctl documentation. You can follow that easily or there are tons of articles available on how to do that.

References :
IAM User
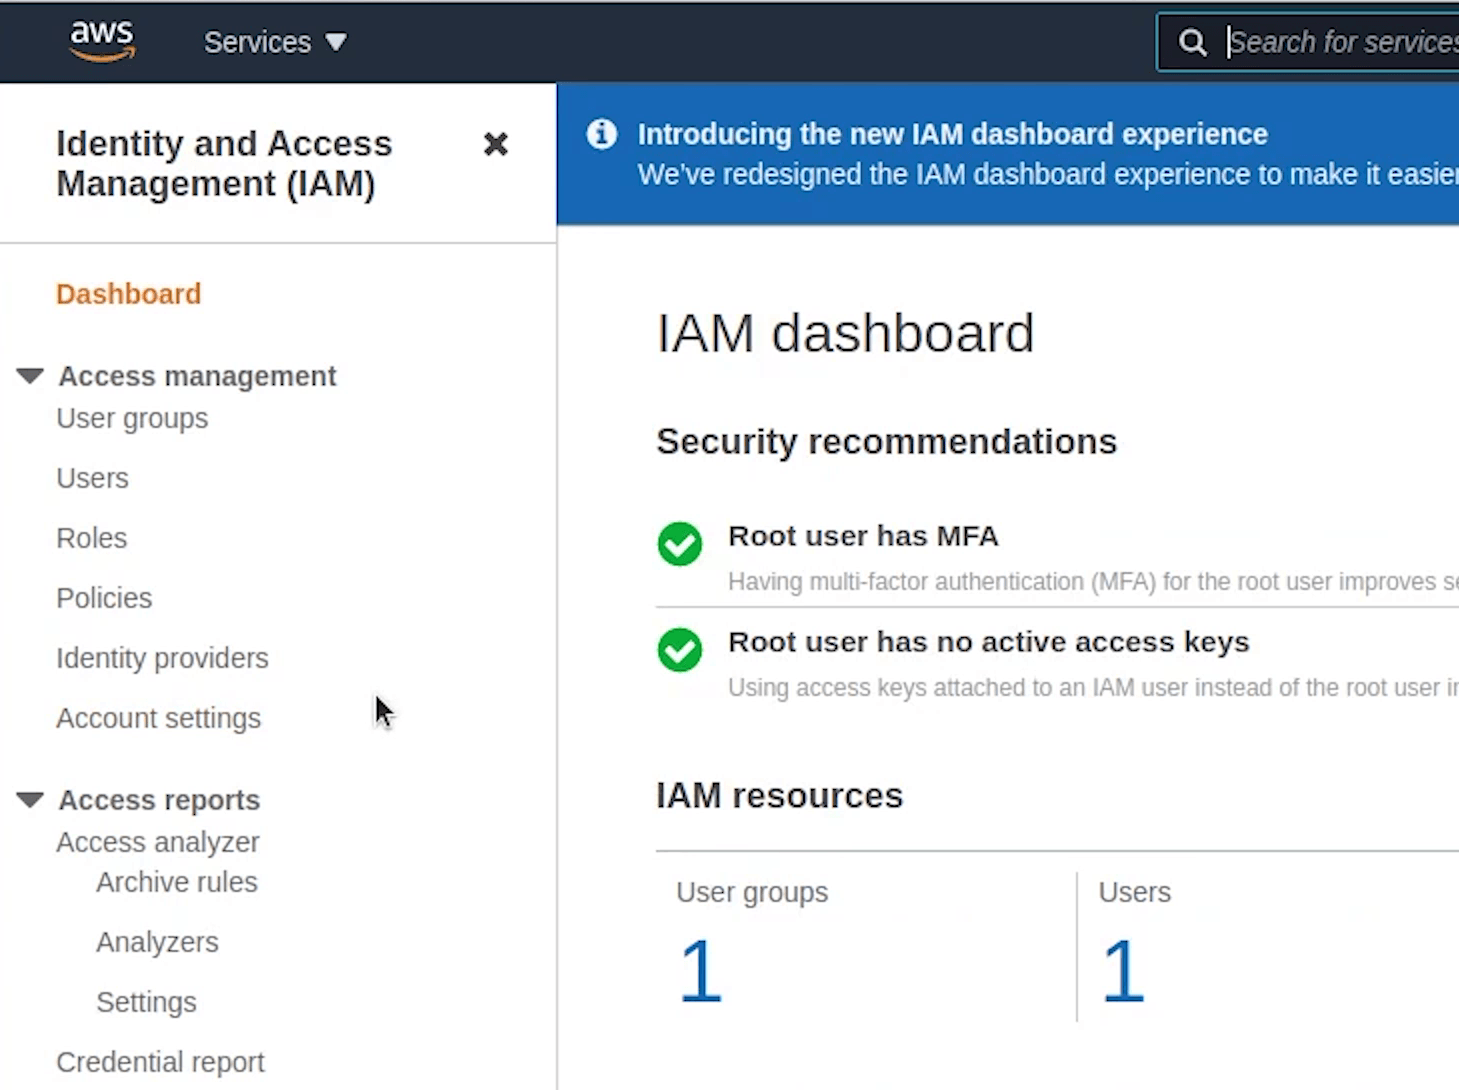
Coming back to AWS Management Console, I will create an administrative user from which we are going to access all our AWS Services. I generally don’t recommend this approach when you are working in a production or sensitive environment, kindly follow the principle of the least privilege.
I will goto IAM and create a new user with AdministratorAccess.

I have already created the new user, I just need to create the access key. Now, I need to set up these keys in my AWS CLI.


I will open up my terminal and type: aws configure.
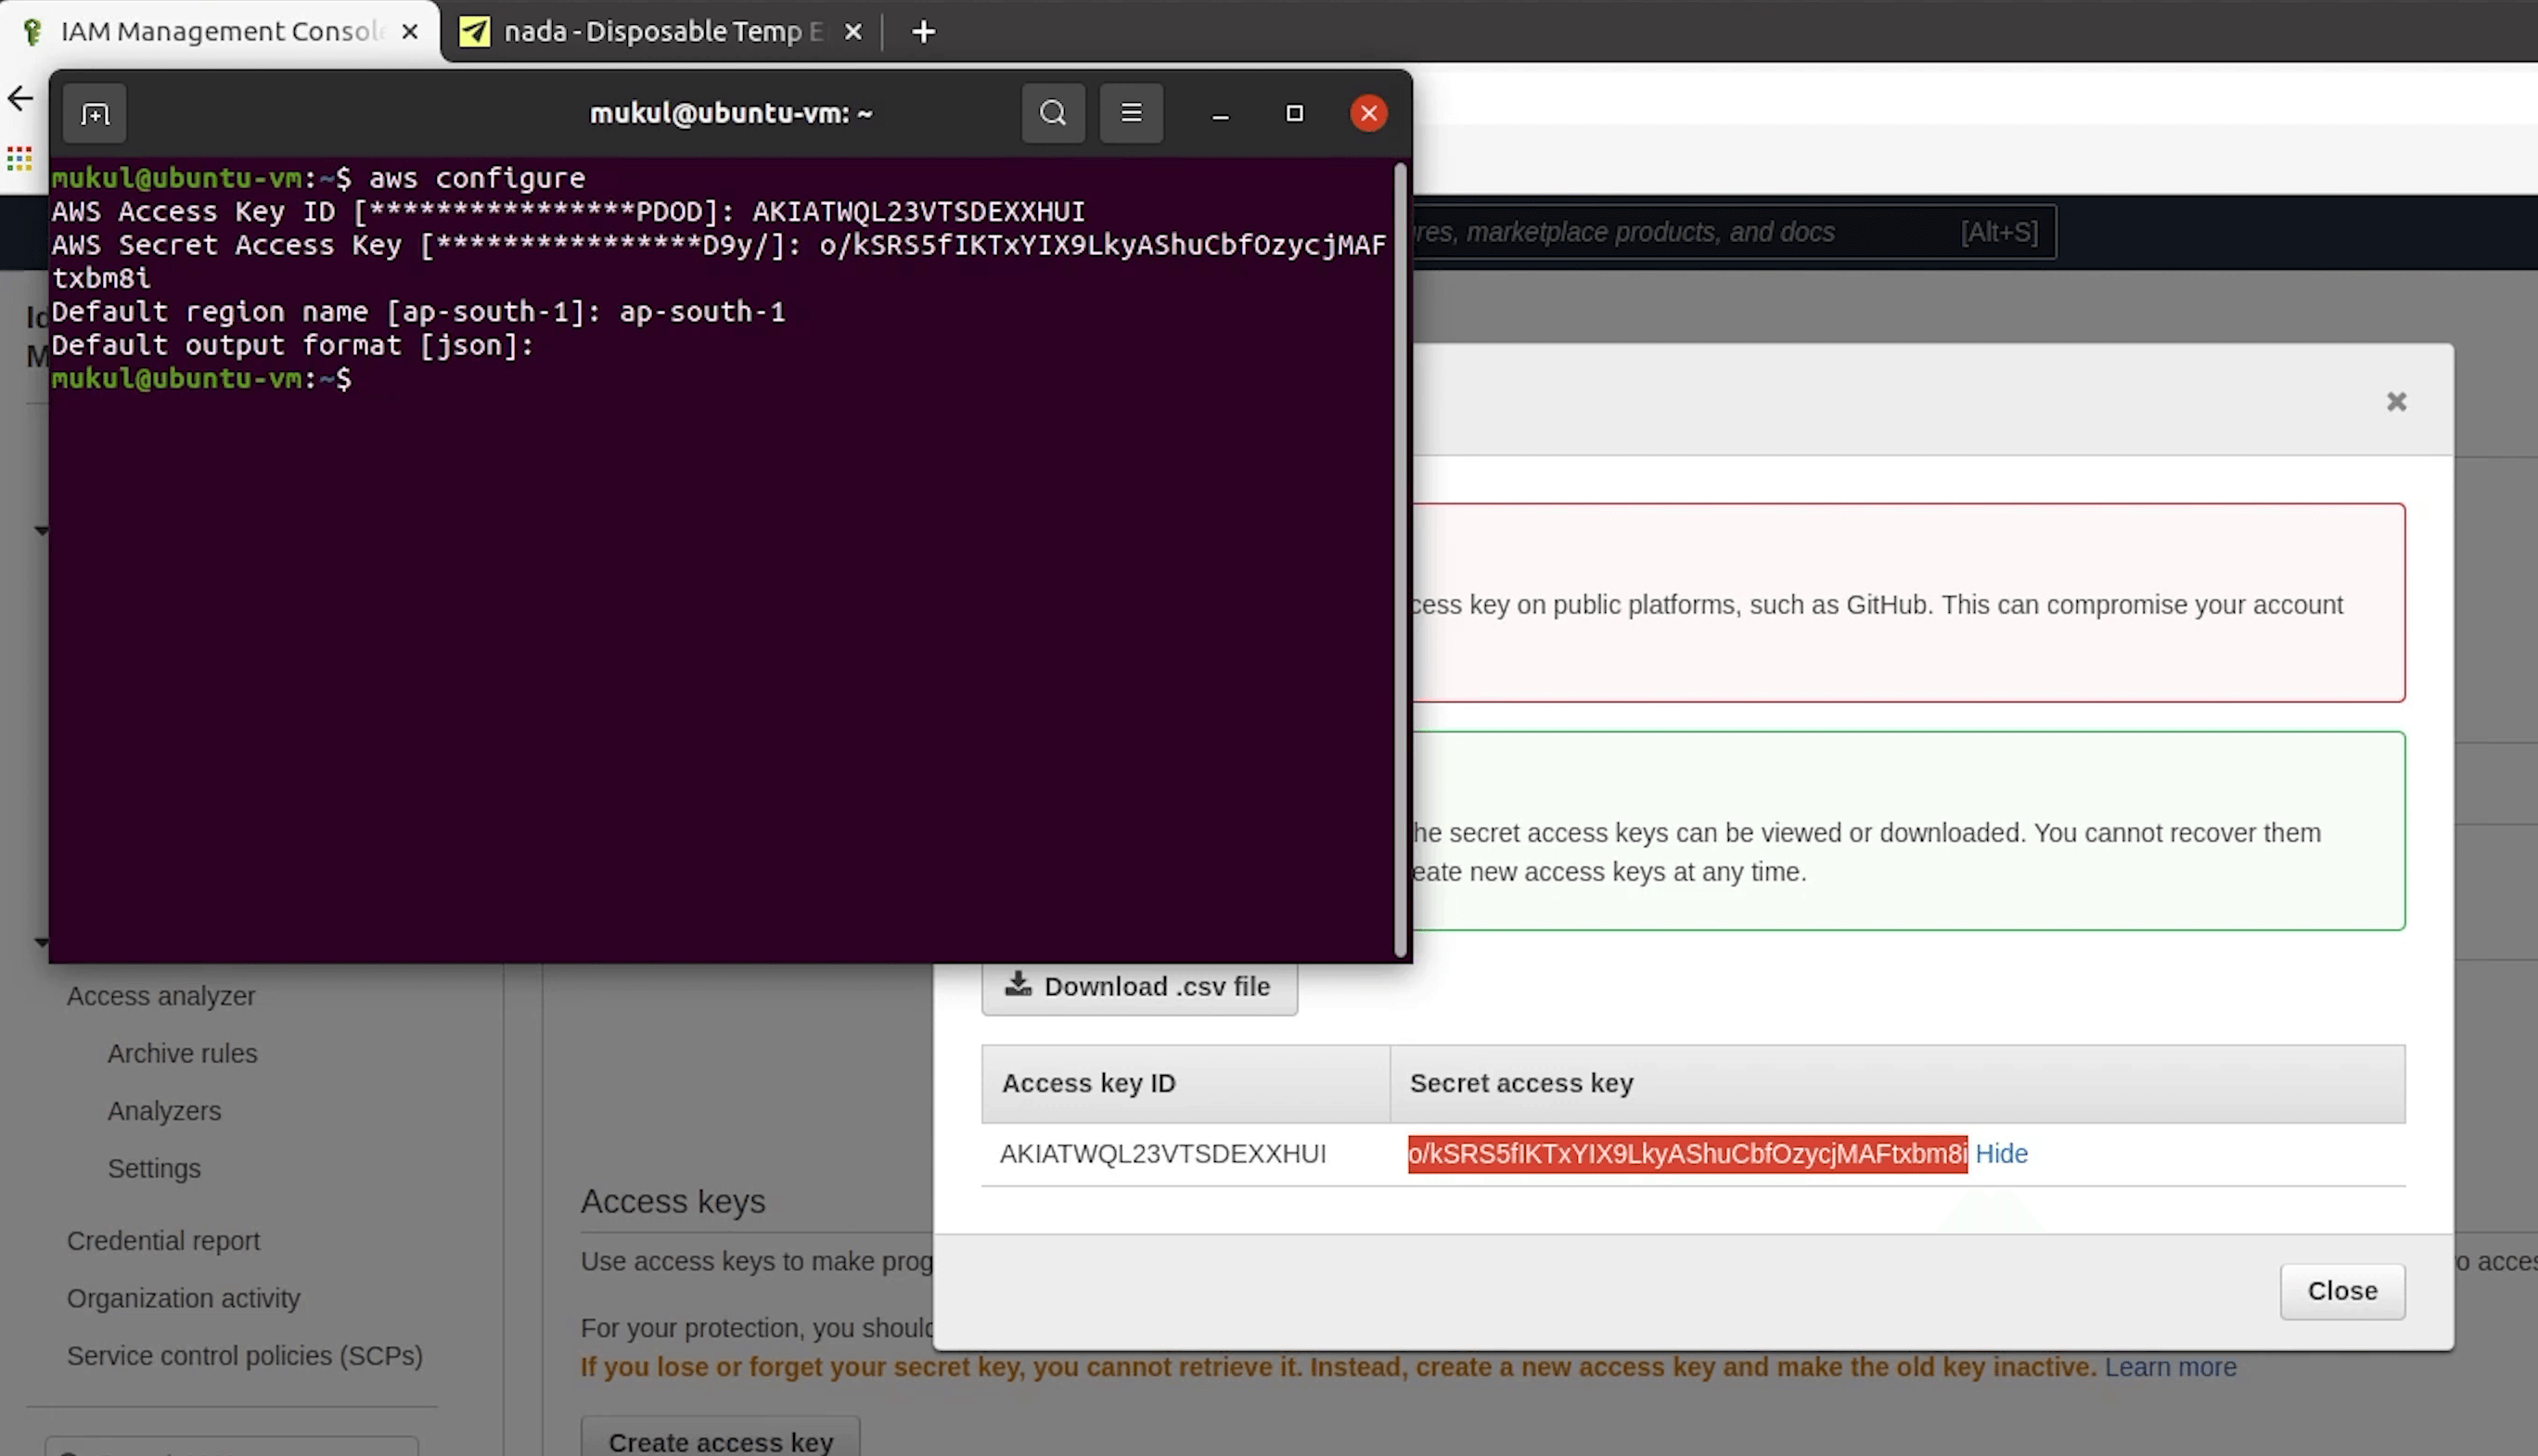
After that I will provide access key, secret access key and region name set to ap-south-1
We have successfully configured.
Elastic Container Registry (ECR)
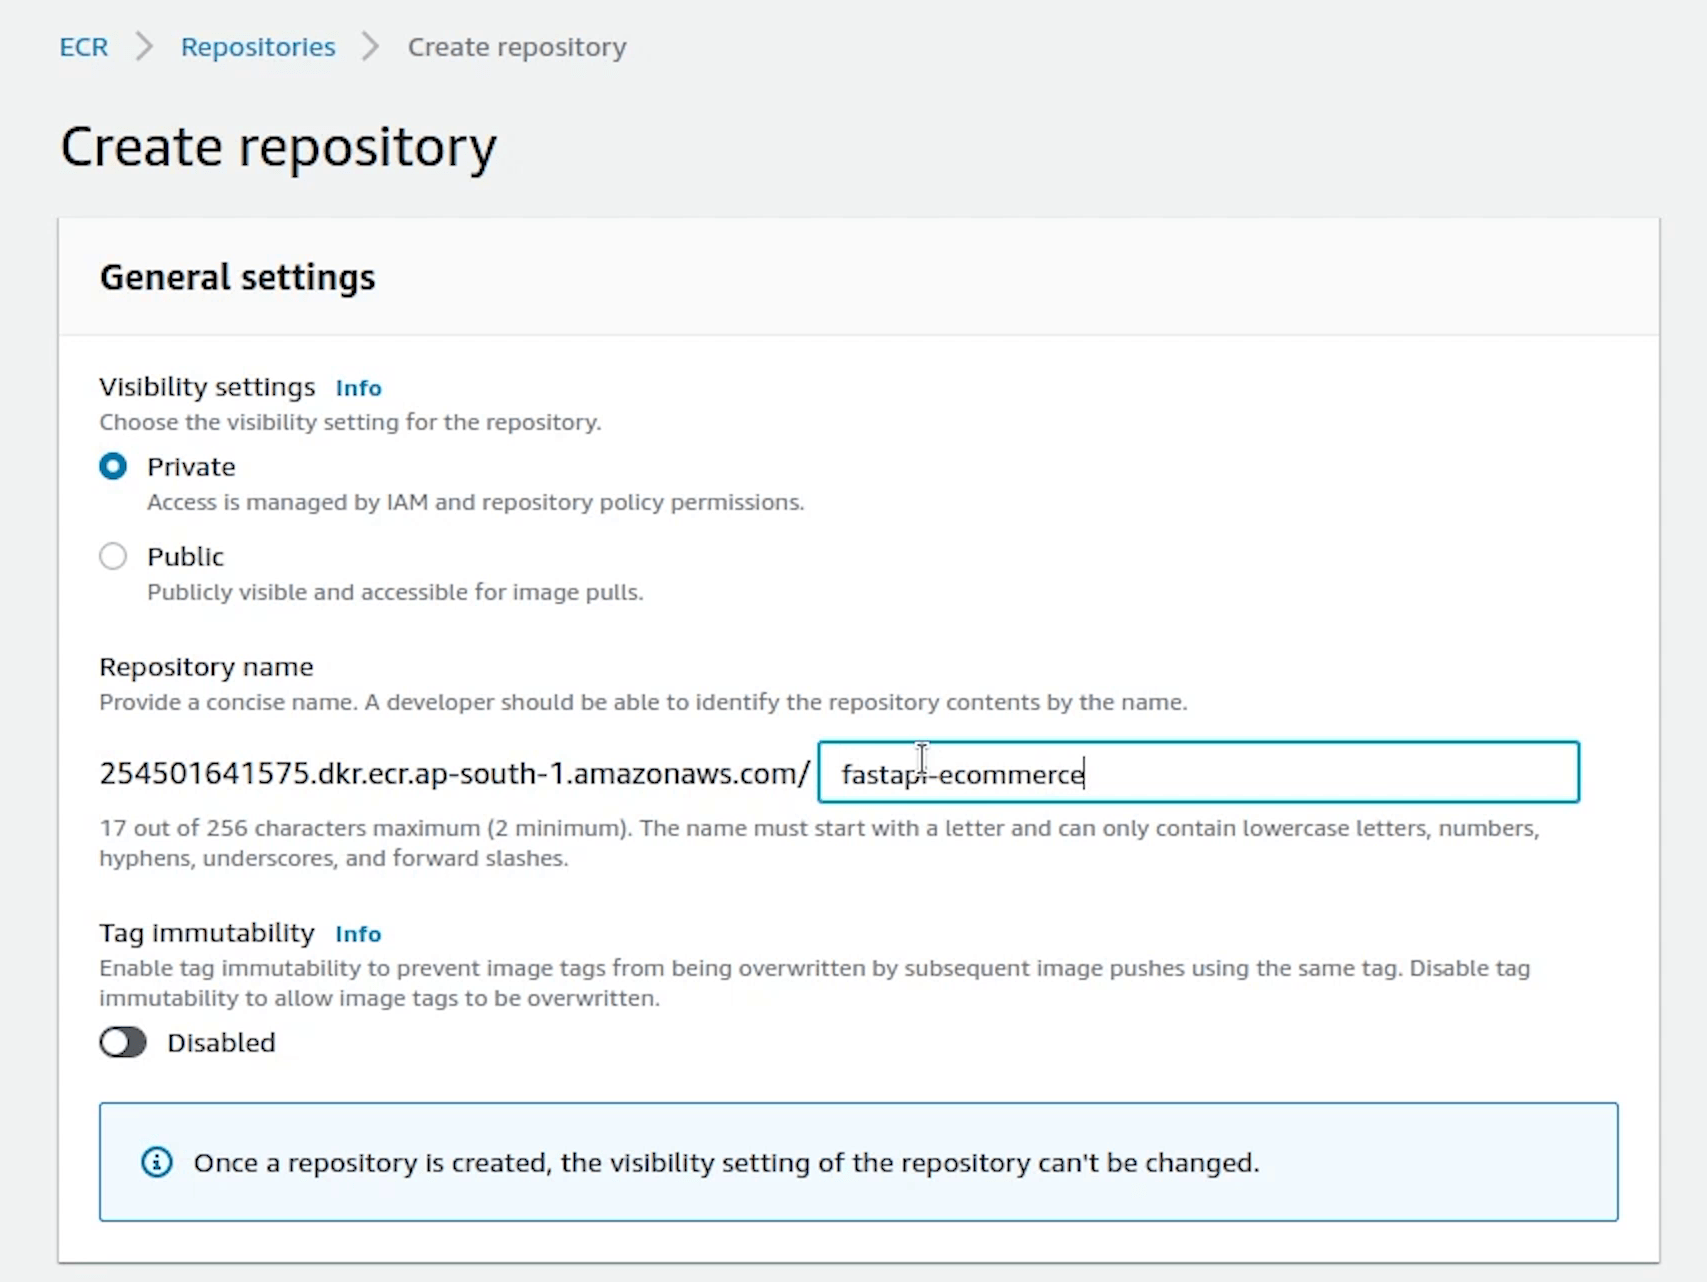
Next, we will go to ECR which is the Elastic Container Registry. We will push our Docker image to our ECR repository. I am actually trying to cover the use case when some people out there want to work with a private registry instead of using a public registry like DockerHub.
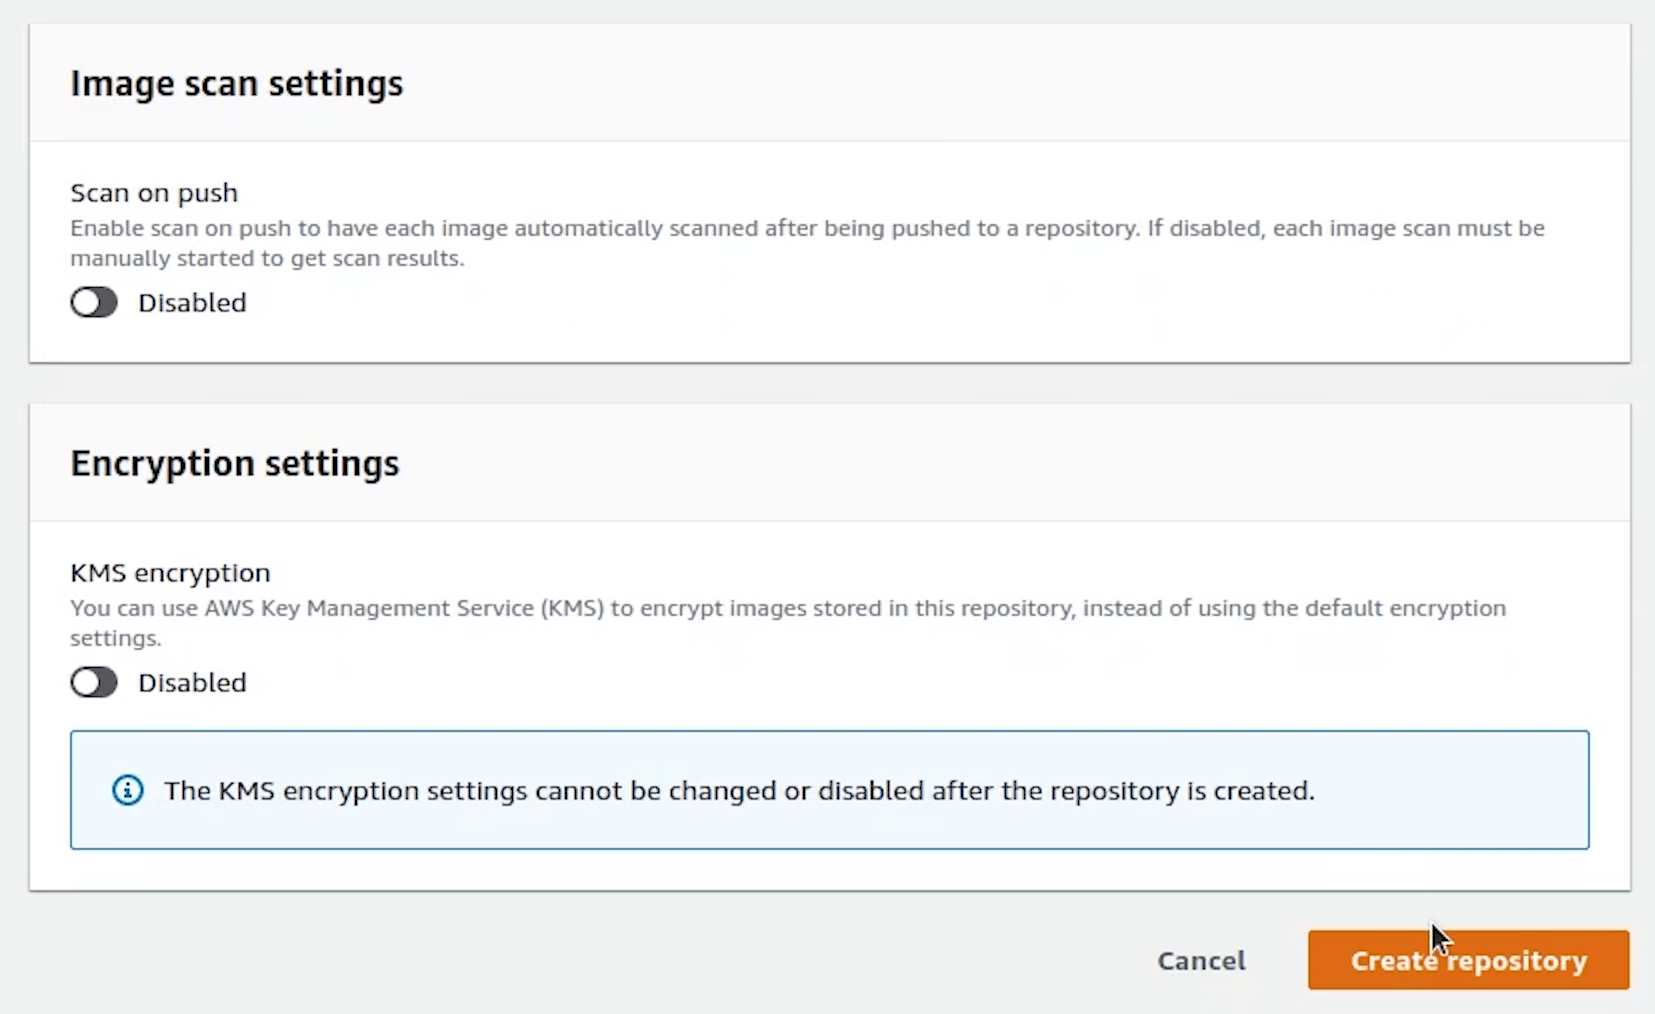
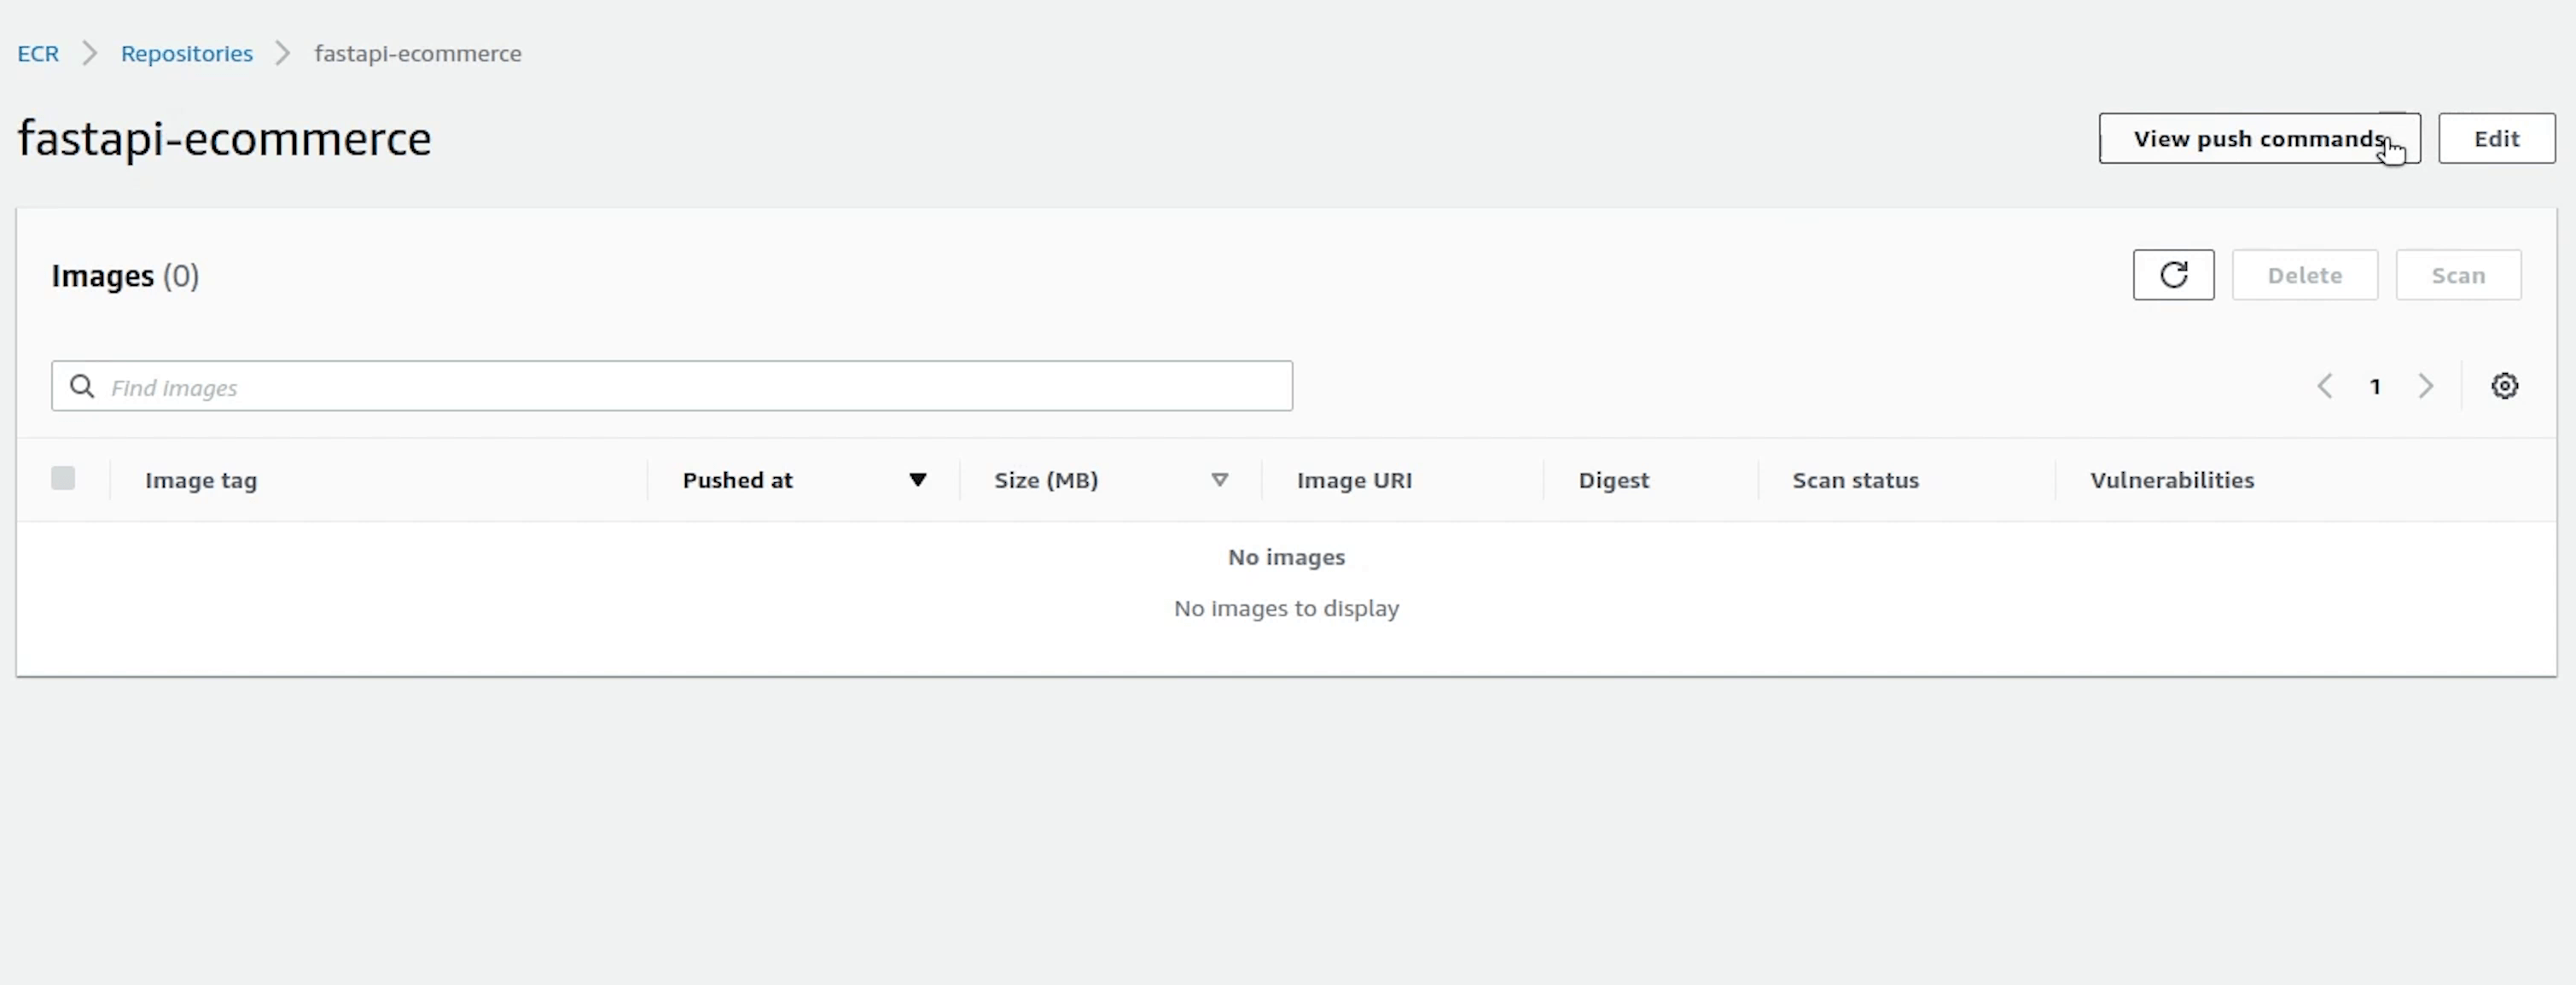
I will create a repository and name it fastapi-ecommerce. Visibility is going to be private.
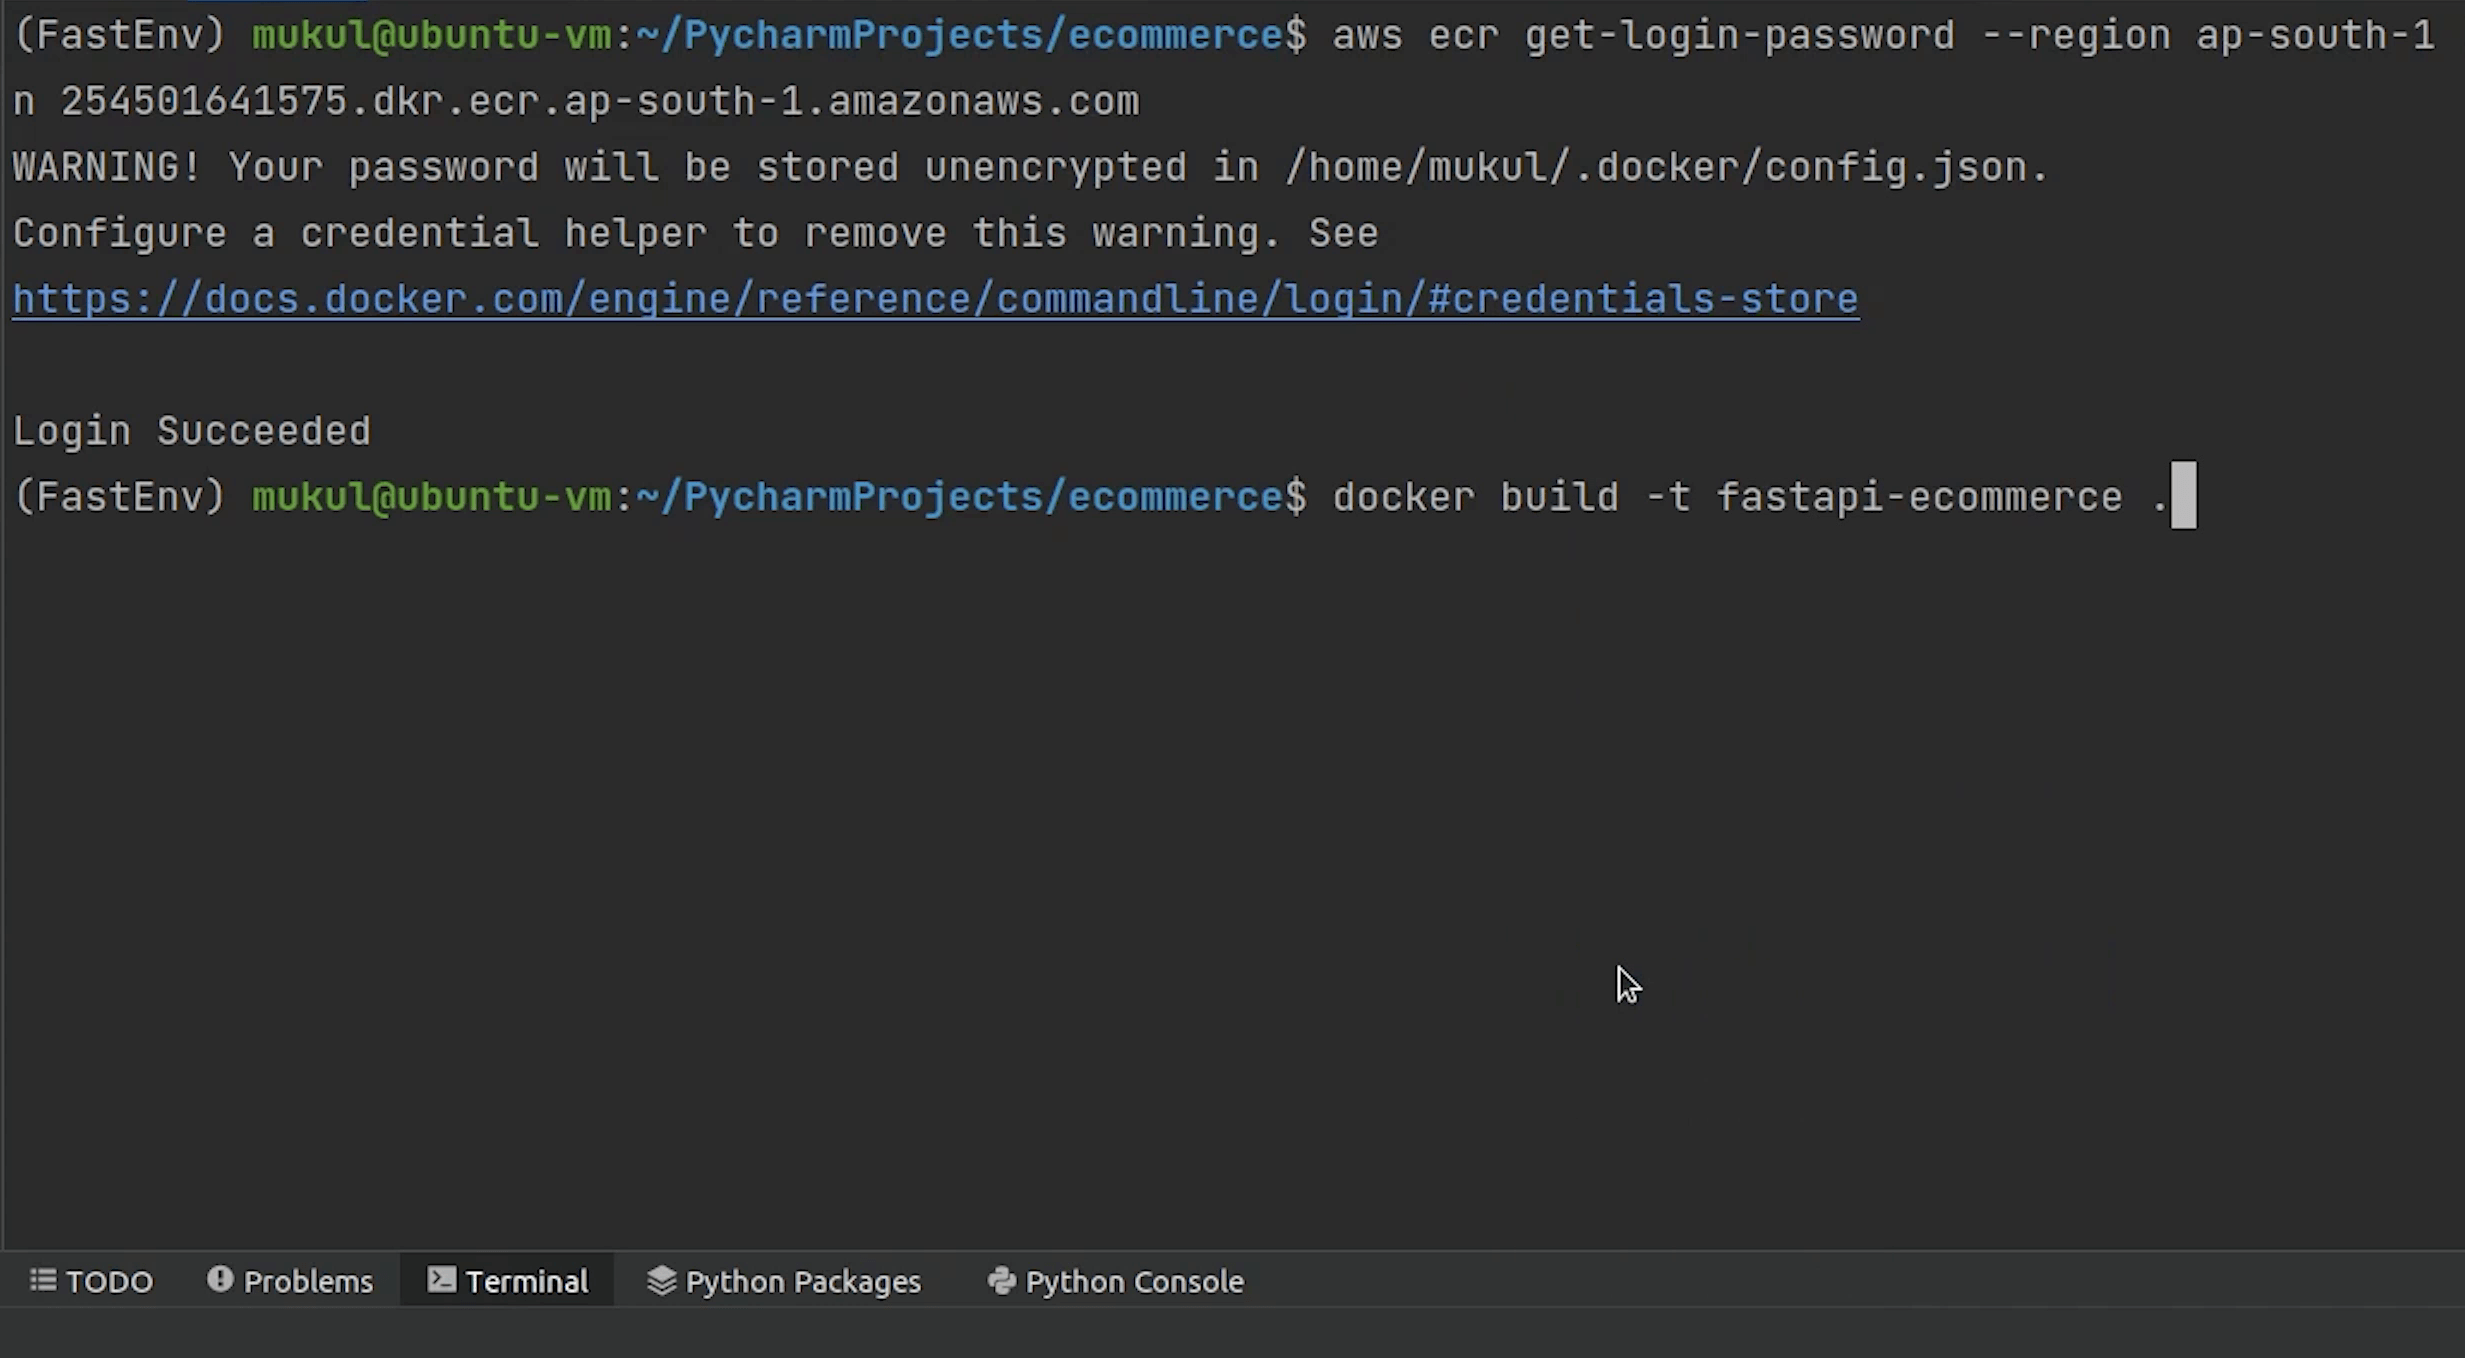
Repository is created, let me push the Docker image to ECR. But before pushing we need to authenticate our credentials and after that only we would be able to push the image to AWS.
Once you open the repository, on the top right you will see a link appearing View push commands. I am going to click on that.

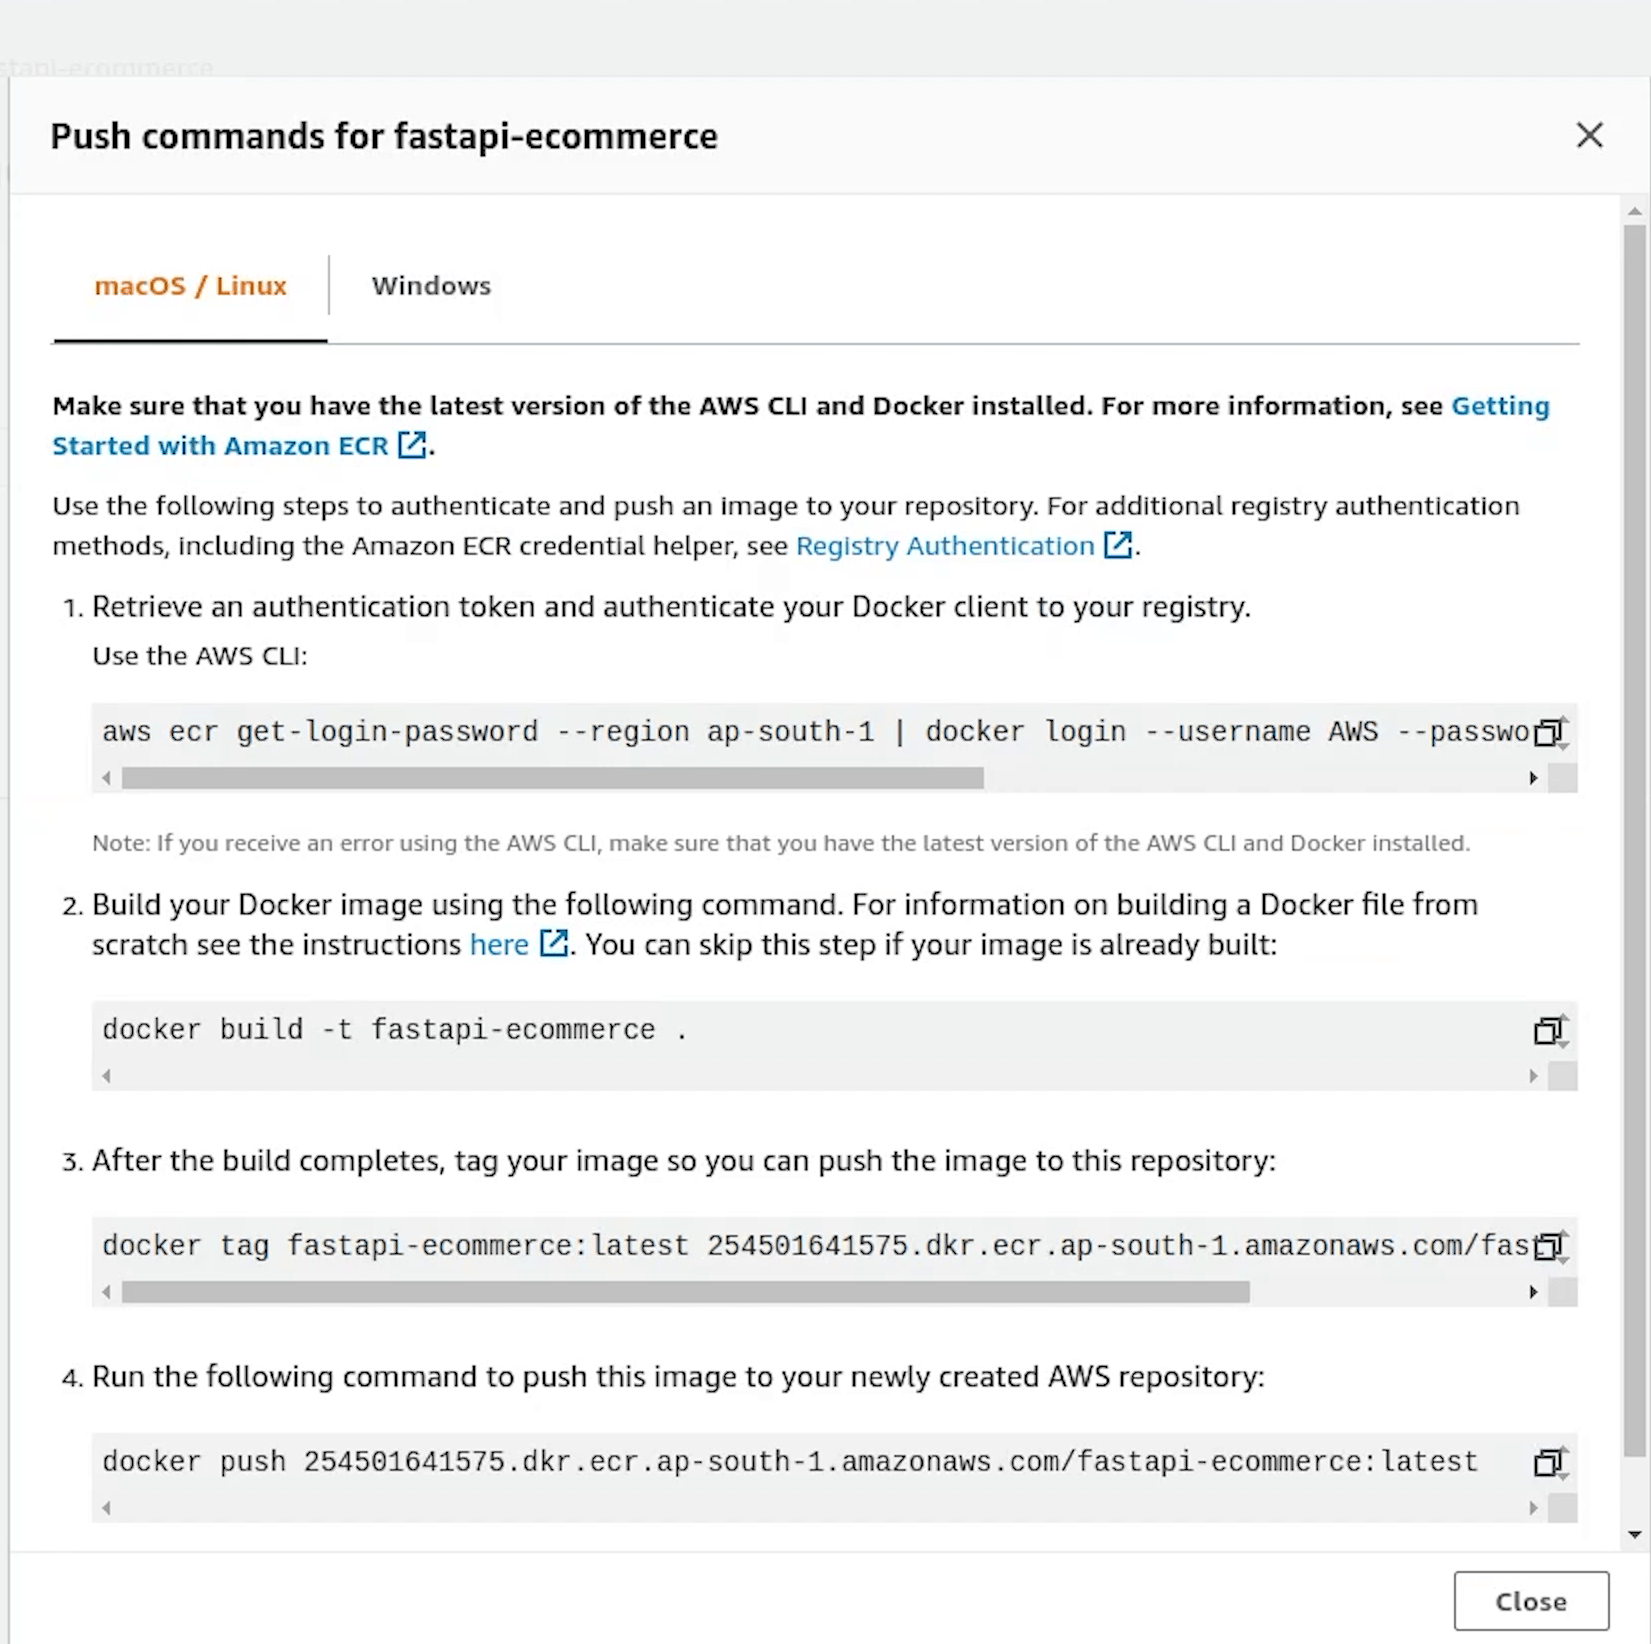
I will copy the first line and execute in the terminal.
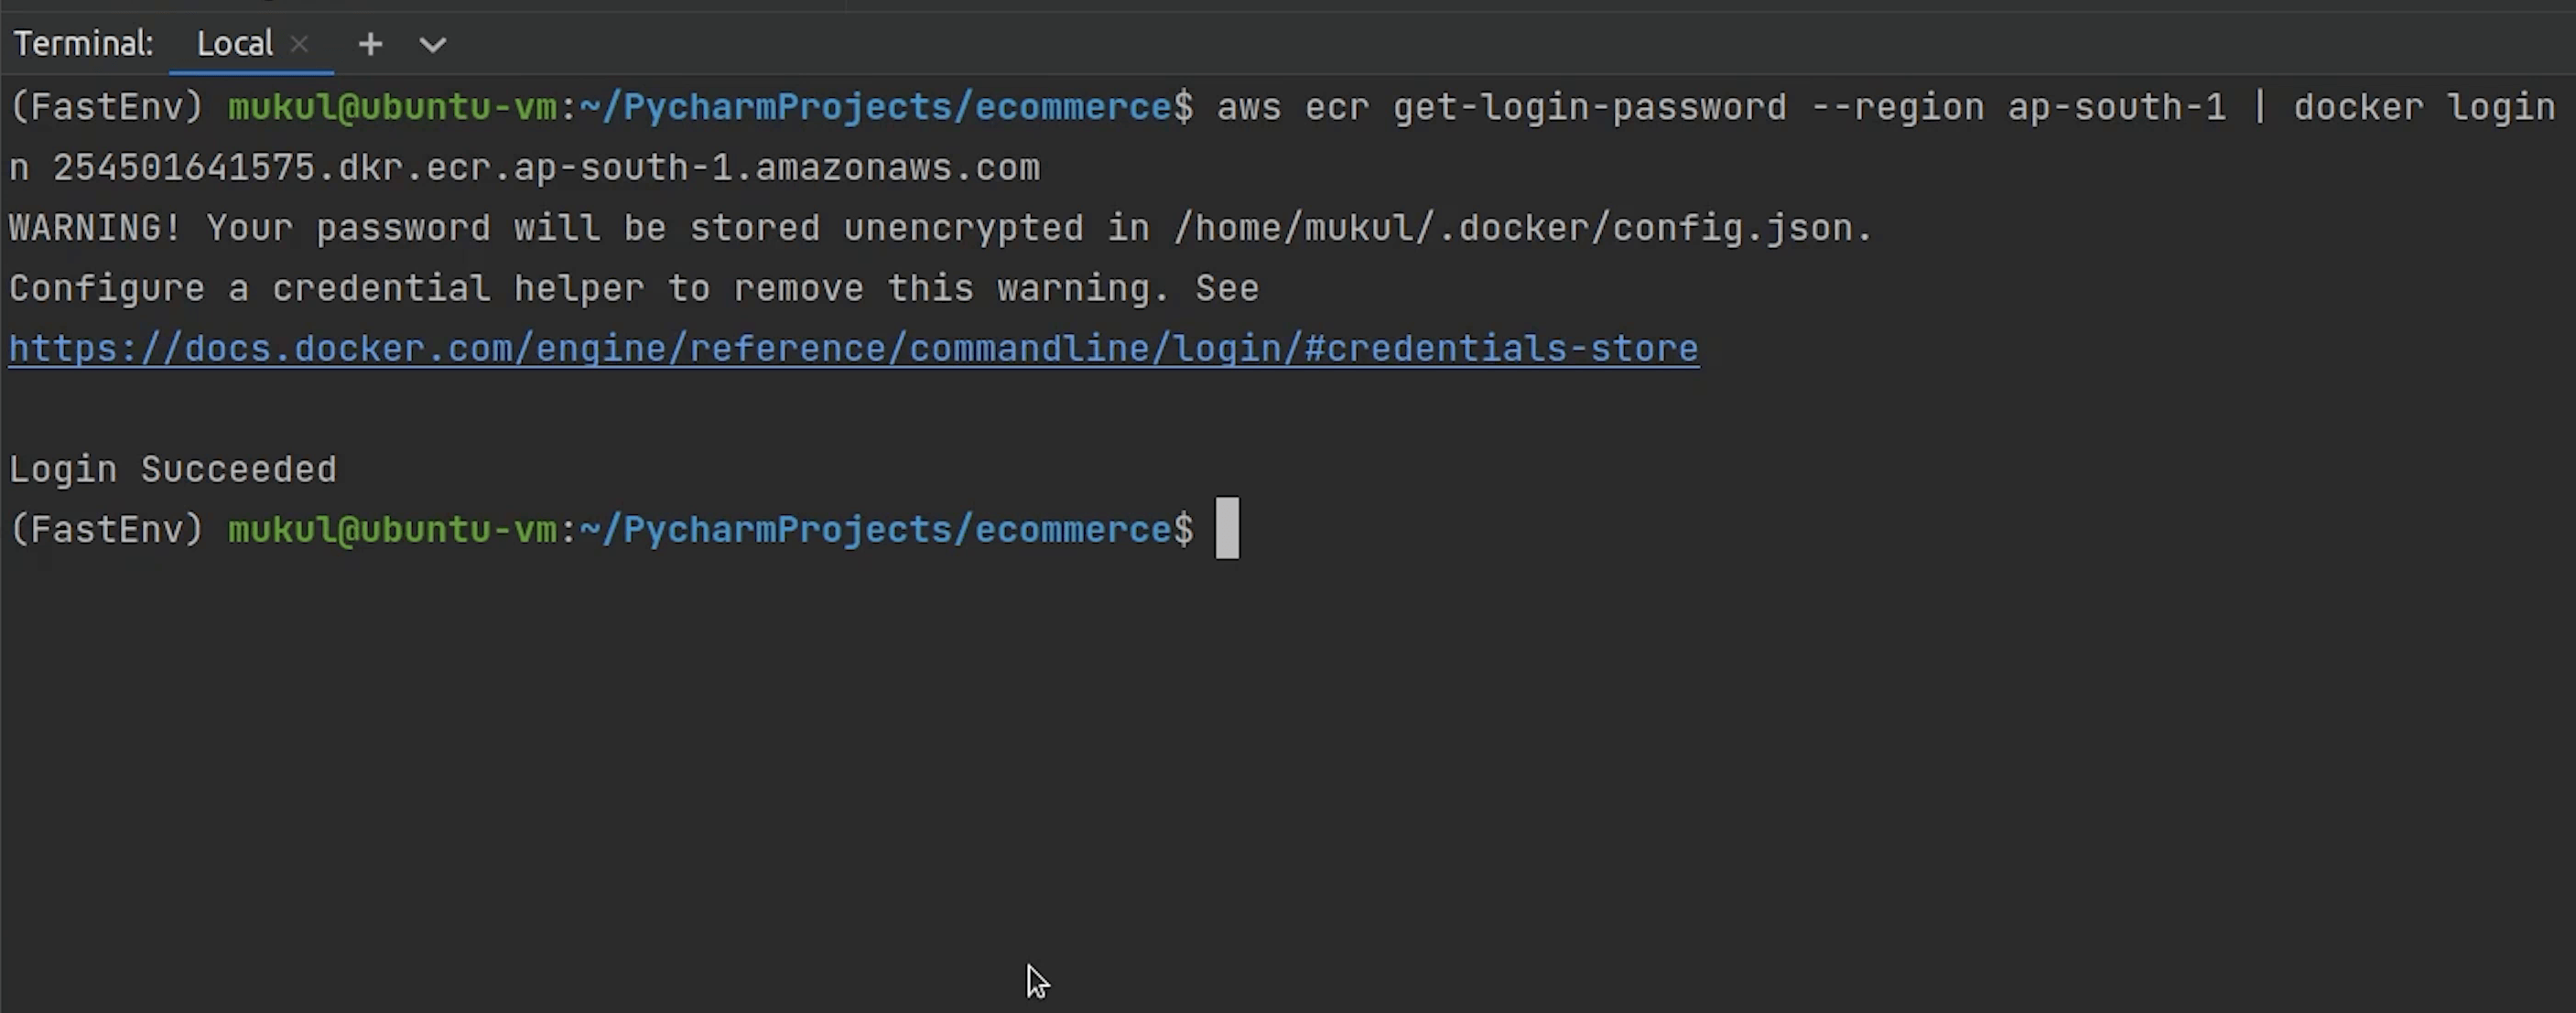
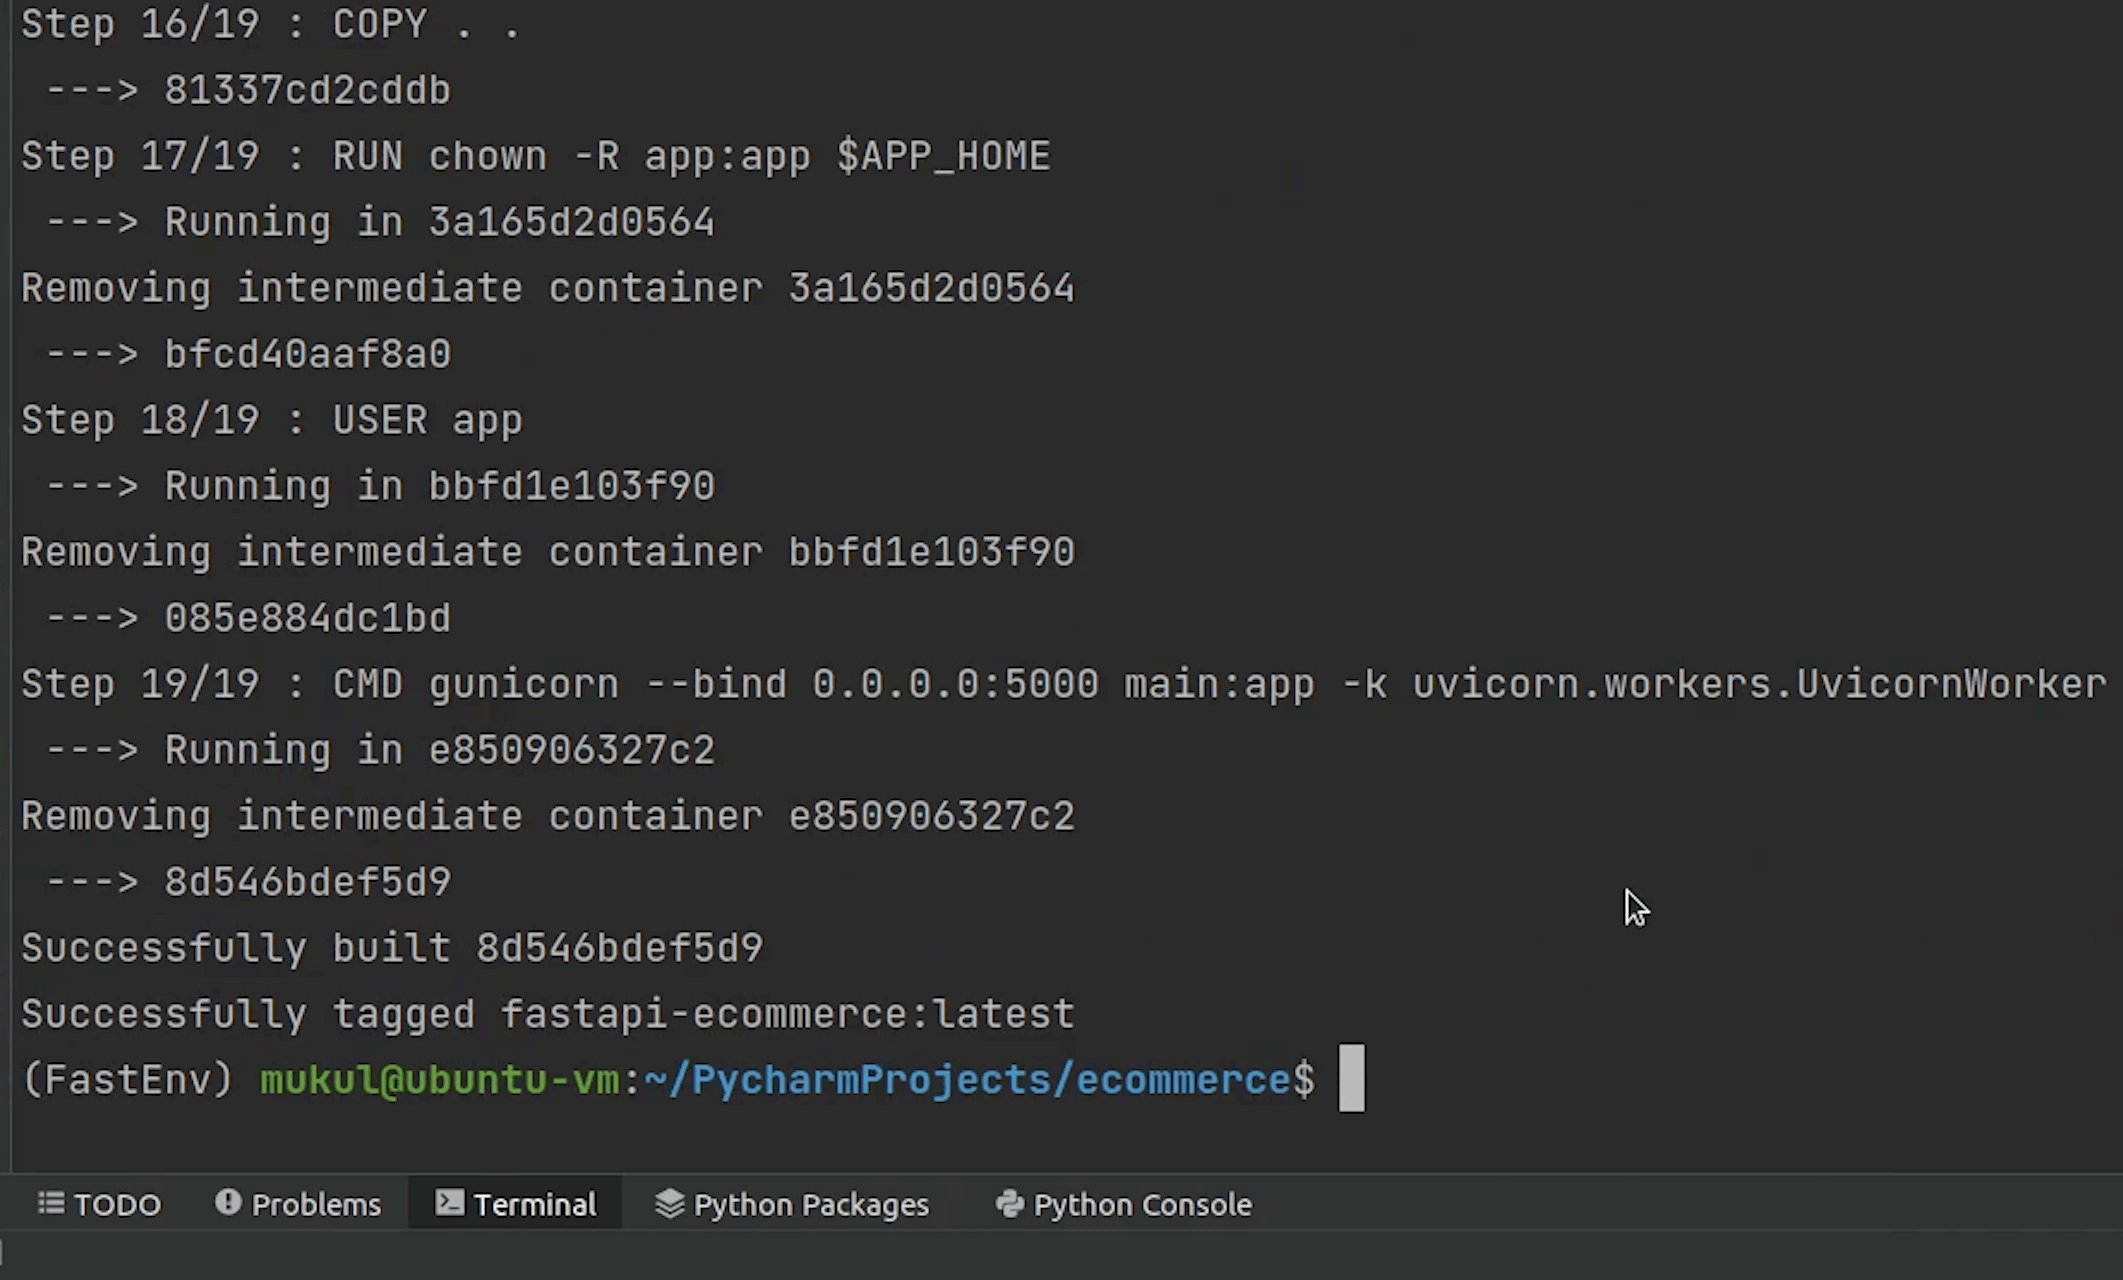
Login Succeeded. Now, build the image then tag it and finally push.
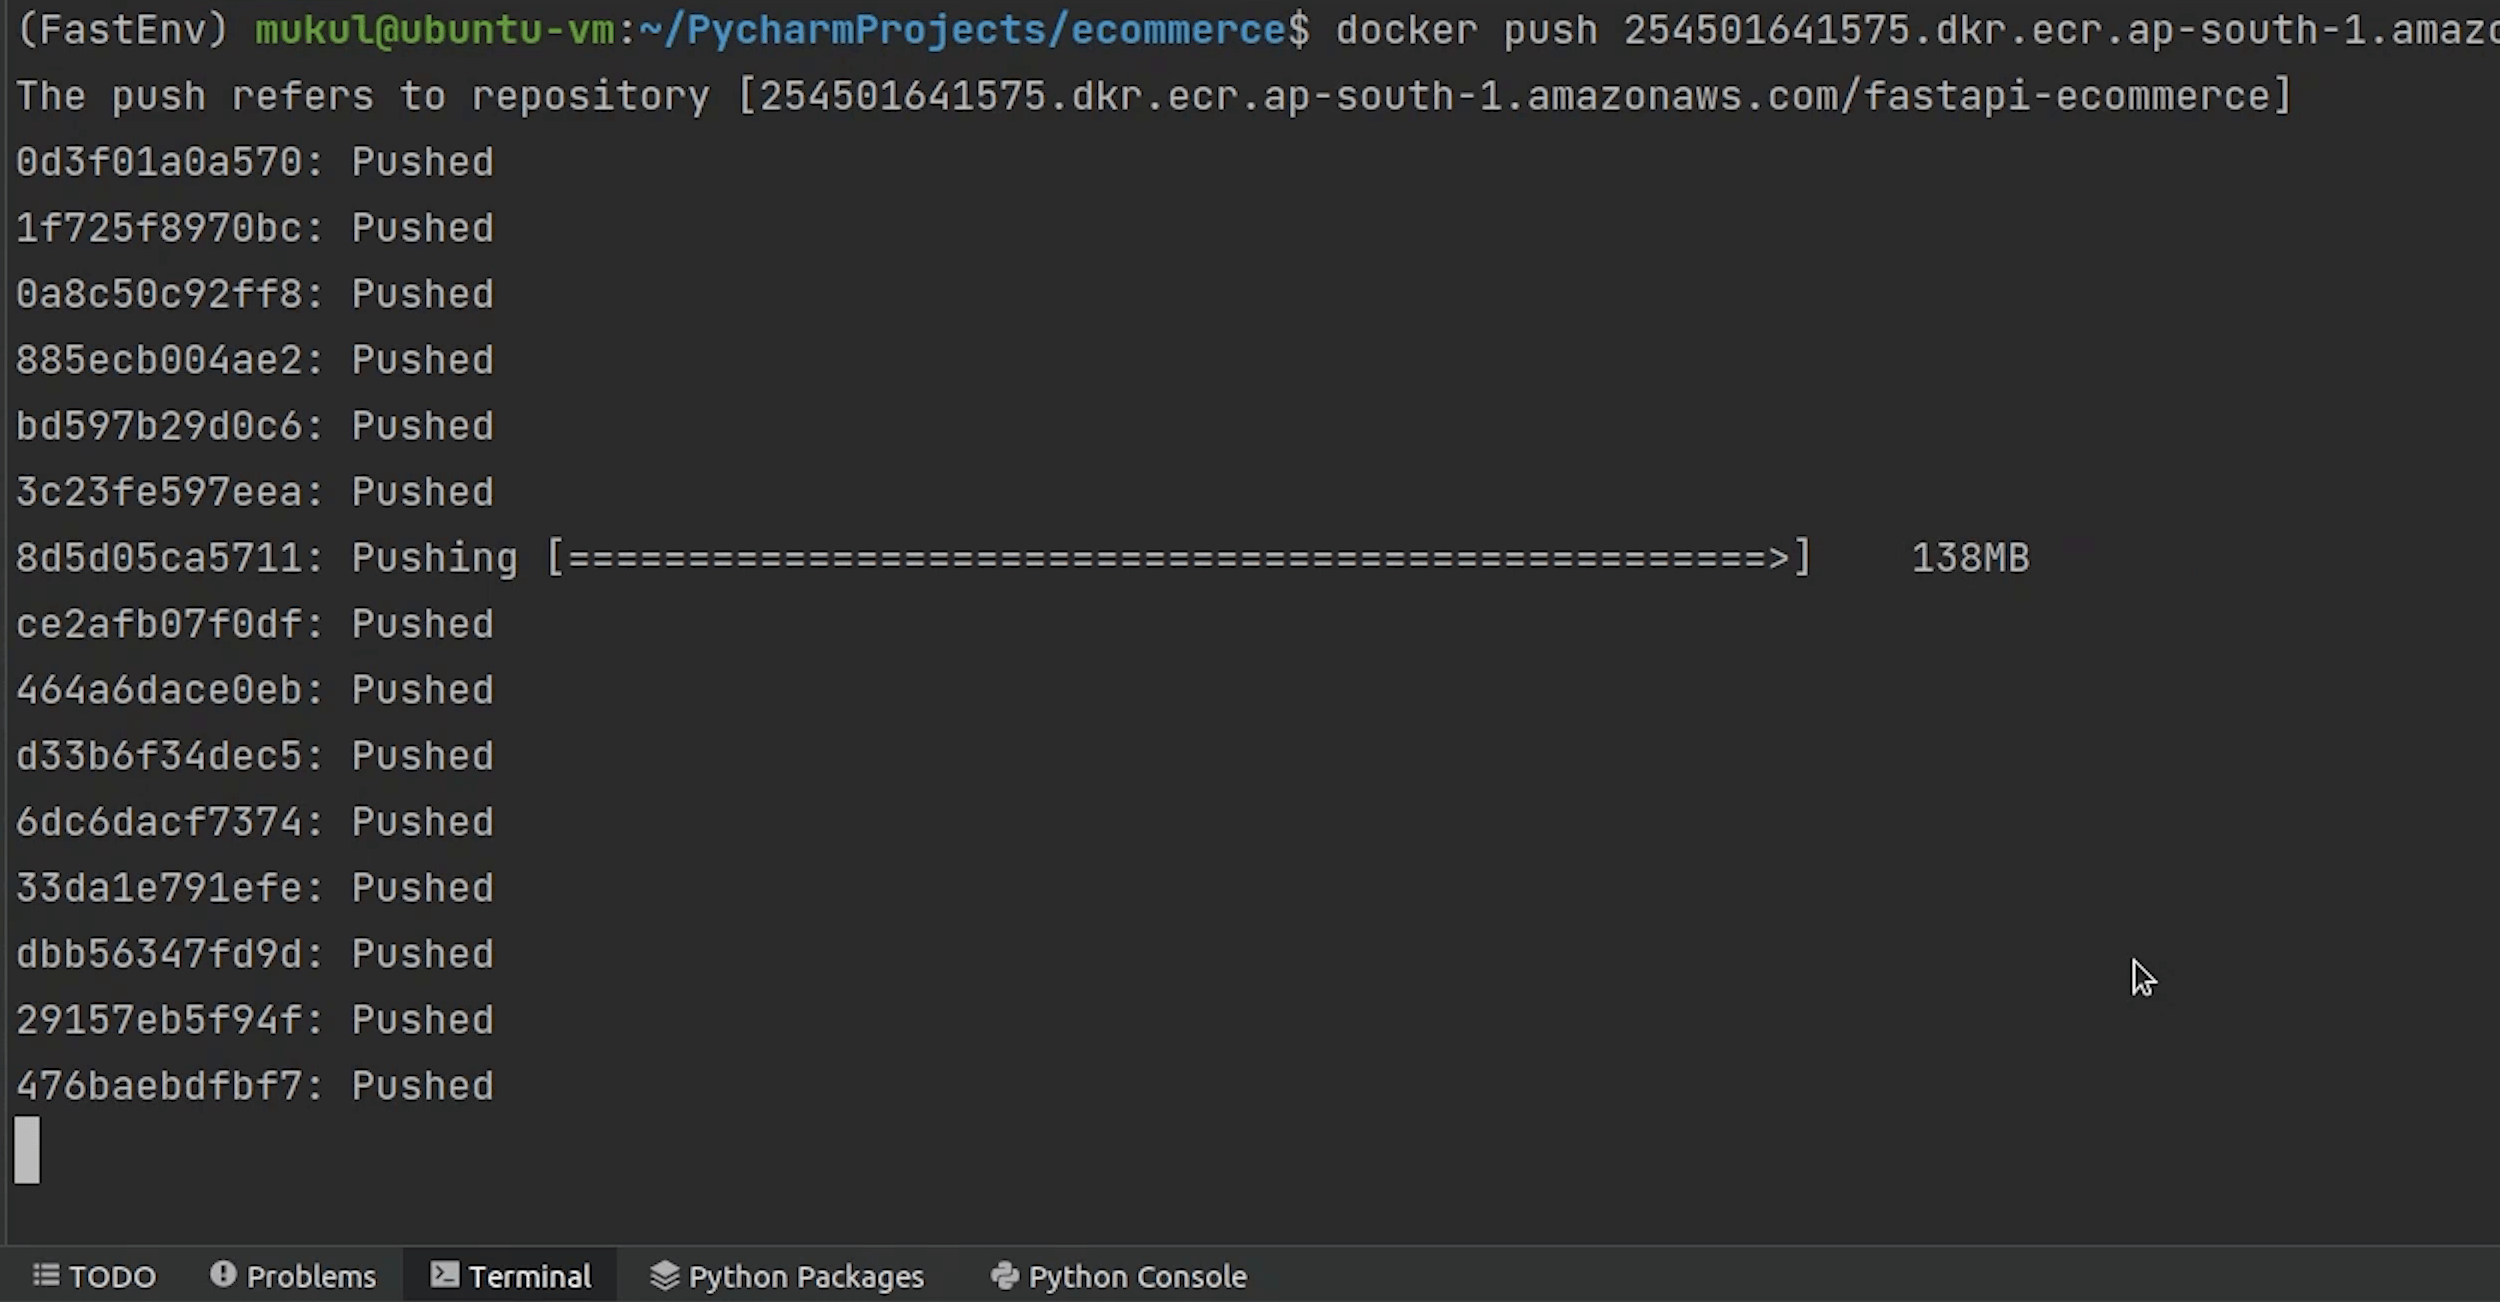

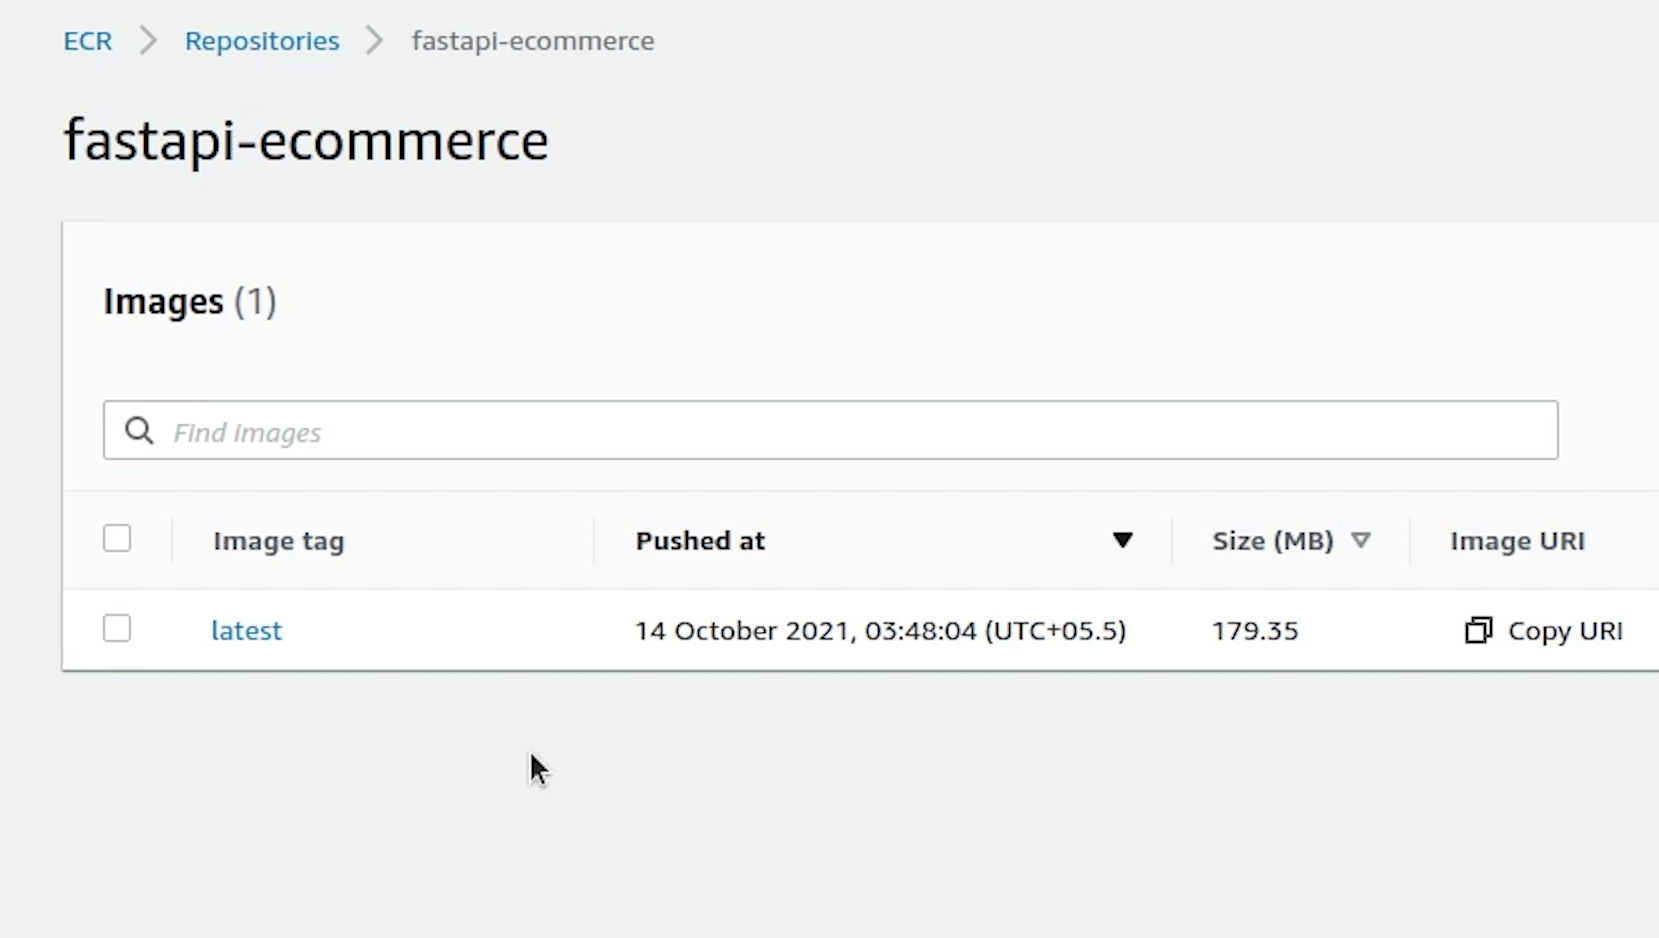
The image has been successfully pushed, let me verify in the console.
Yes, the image is appearing now and the total size is around 179 MB.
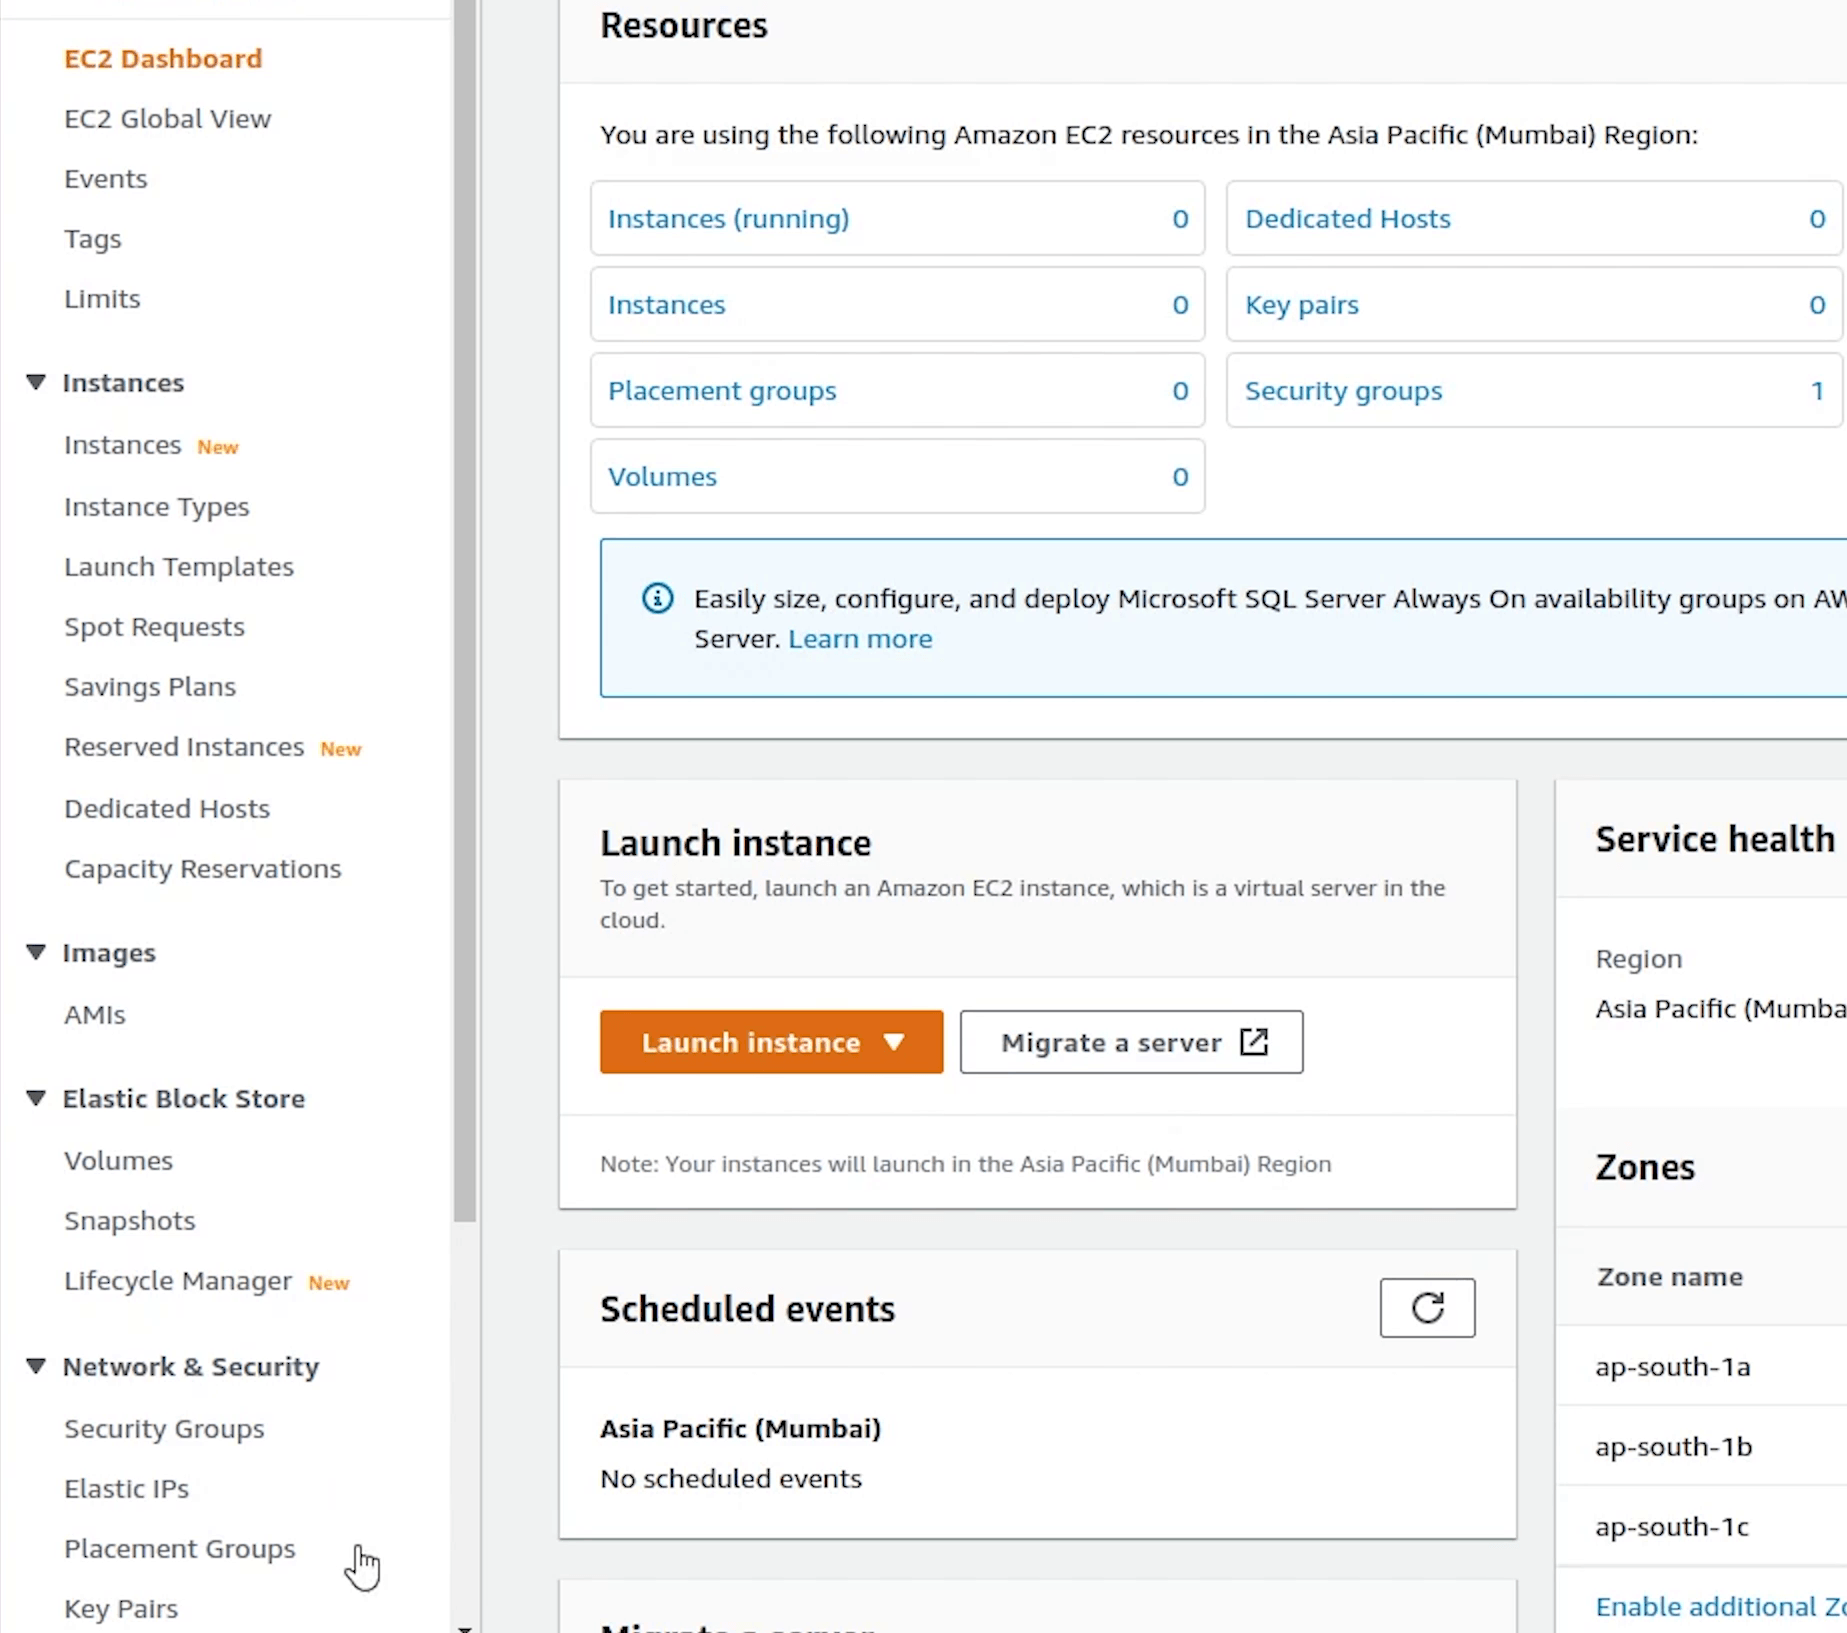
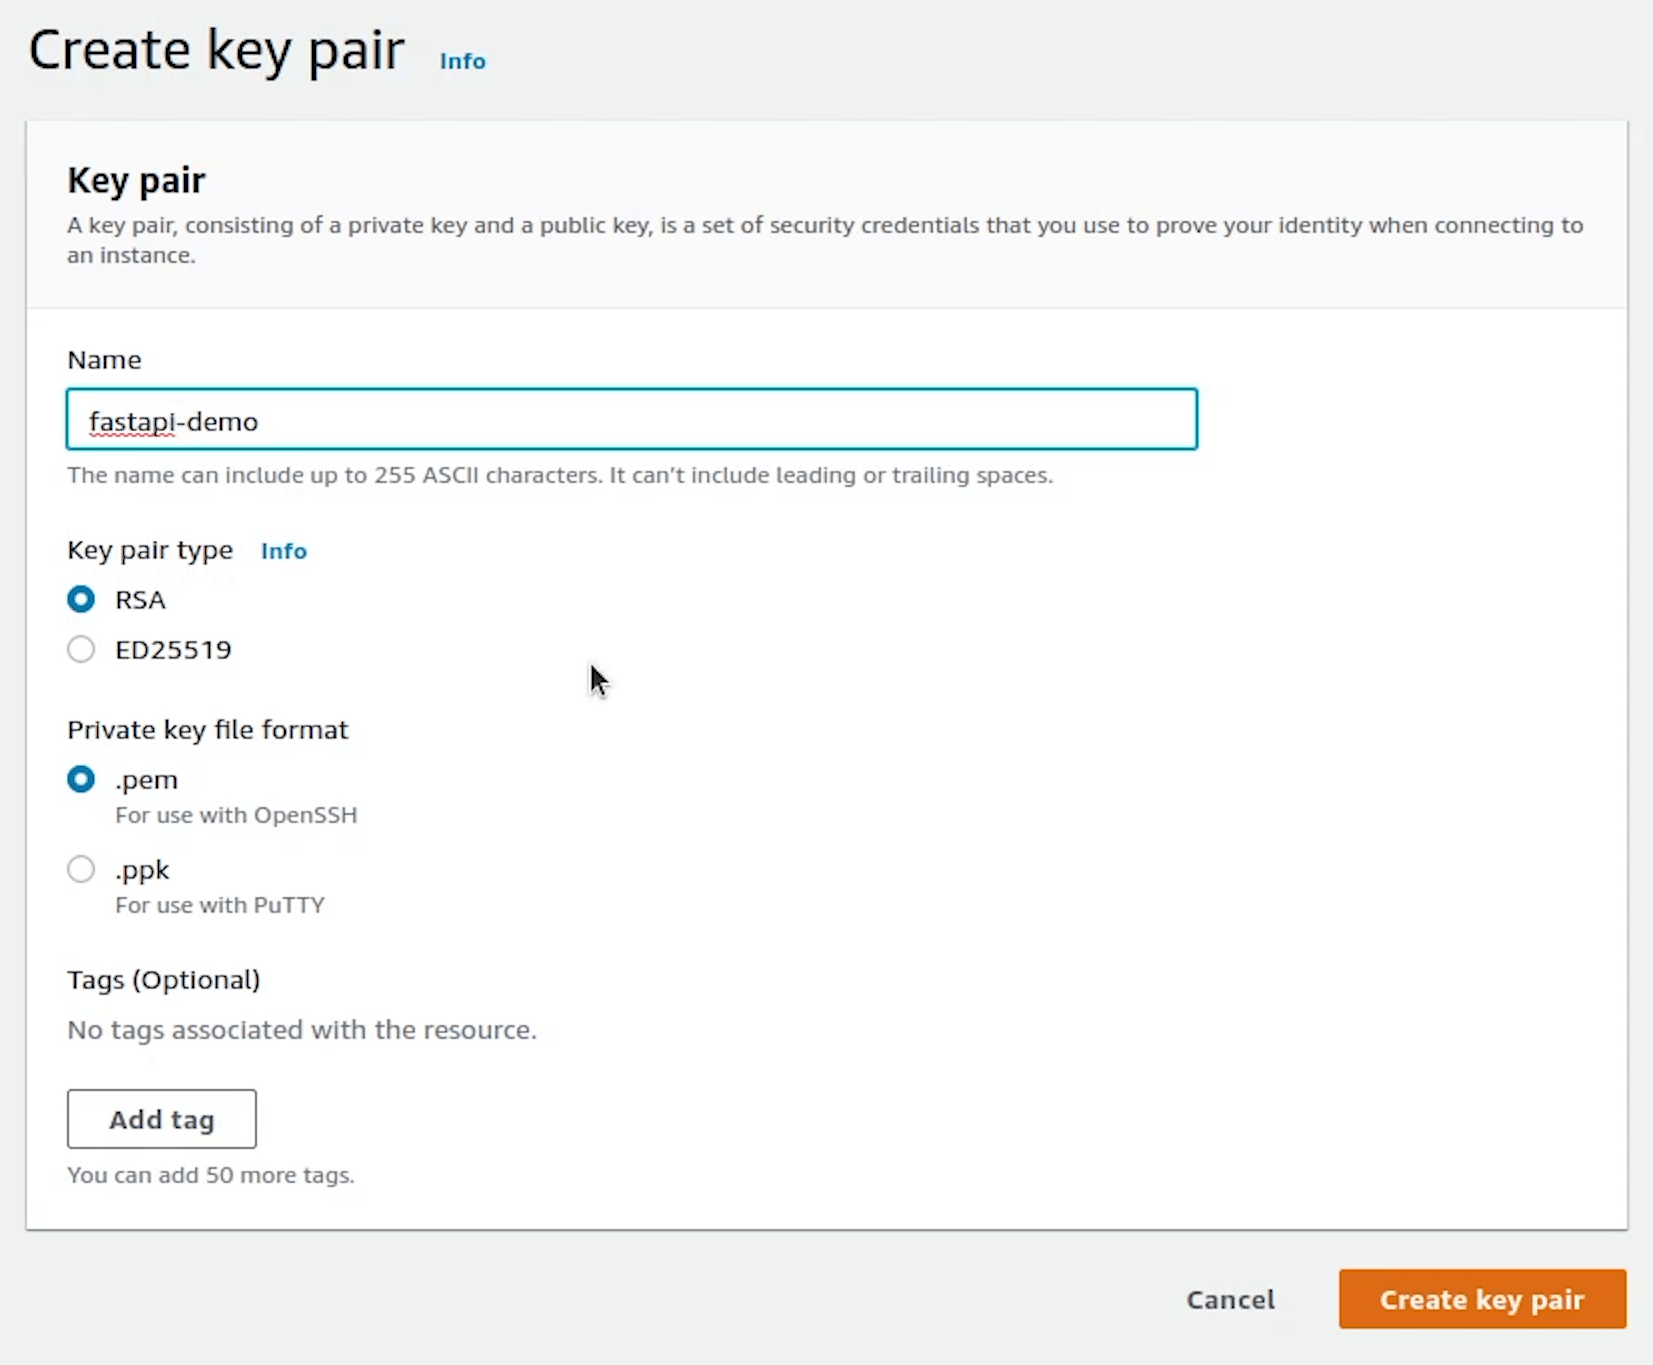
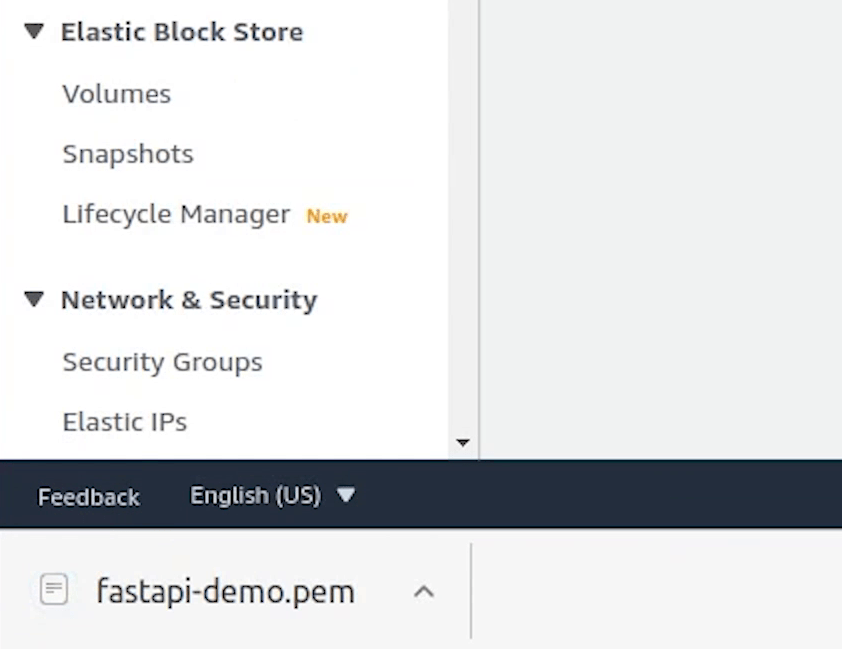
Key Pairs
Now, I will create a private key PEM file, which will be used to get inside the EC2 machine. We won’t be getting inside any particular instance, as we will be handling everything through Kubernetes. But this can be used for many kinds of scenarios like debugging, checking something particular in the machine.
I will open Key Pairs which are going to appear in the EC2 Dashboard under Network & Security.
I will name the key pair as fastapi-demo.
Cluster
I will come back to PyCharm and create a directory called eks.
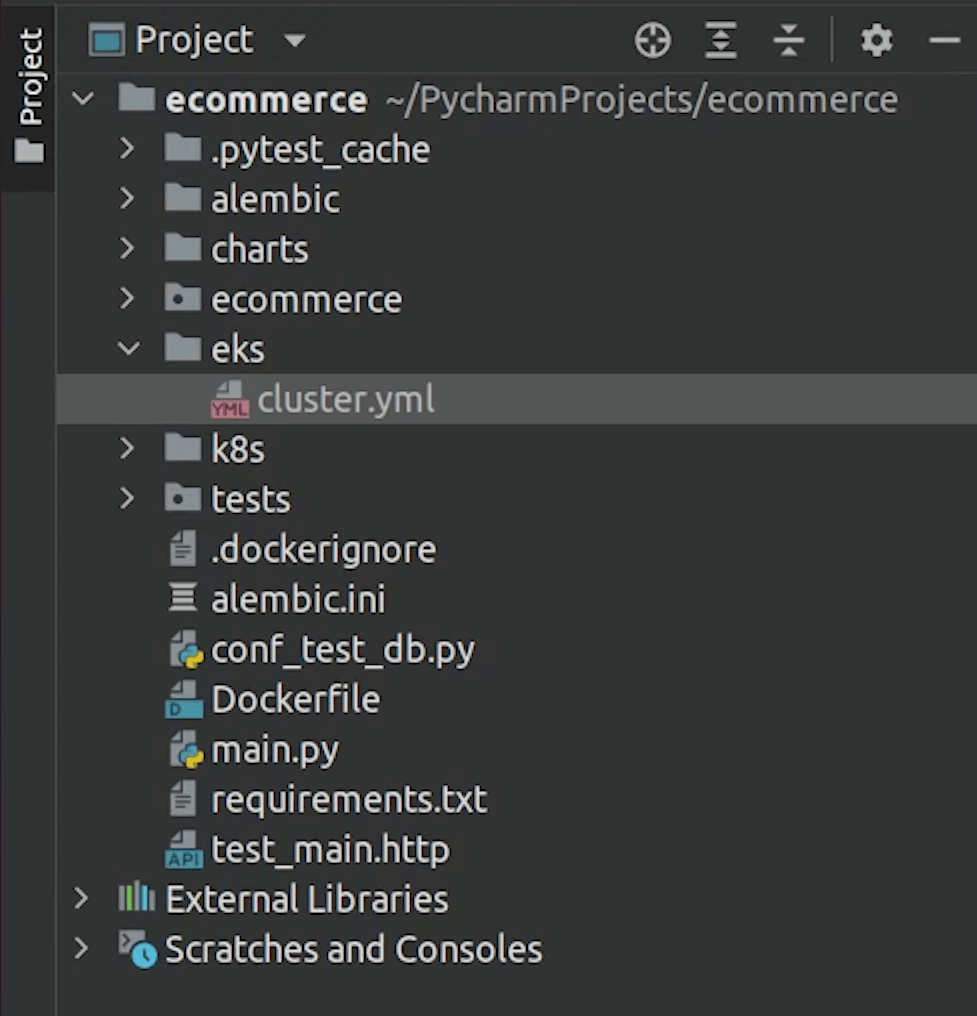
I will create a new file and name it cluster.yml.
We are going to create a three node cluster and the good part is the control plane is taken care of by AWS itself.
Just for your information EKS is not a free service. You pay $0.10 per hour for each Amazon EKS cluster that you create even if you don’t use it and separate cost of instances which are acting as nodes; their costs are different based on instance types.
These are expensive services, make sure you have some credits before going ahead.
cluster.yml
# If a nodegroup includes the attachPolicyARNs it must also include the default node policies,
# like AmazonEKSWorkerNodePolicy, AmazonEKS_CNI_Policy and AmazonEC2ContainerRegistryReadOnly.
apiVersion: eksctl.io/v1alpha5
kind: ClusterConfig
metadata:
name: fastapi-demo
region: ap-south-1
version: "1.21"
managedNodeGroups:
- name: fastapi-private-ng
instanceType: t3a.small
desiredCapacity: 3
minSize: 3
maxSize: 6
volumeType: gp3
volumeSize: 20
privateNetworking: true
iam:
attachPolicyARNs: # Reference: https://eksctl.io/usage/iam-policies/
- arn:aws:iam::<REPLACE_THIS_NUMBER>:policy/SES_EKS_Policy # <-- custom policy
- arn:aws:iam::aws:policy/AmazonEKSWorkerNodePolicy
- arn:aws:iam::aws:policy/AmazonEC2ContainerRegistryReadOnly
- arn:aws:iam::aws:policy/AmazonEKS_CNI_Policy
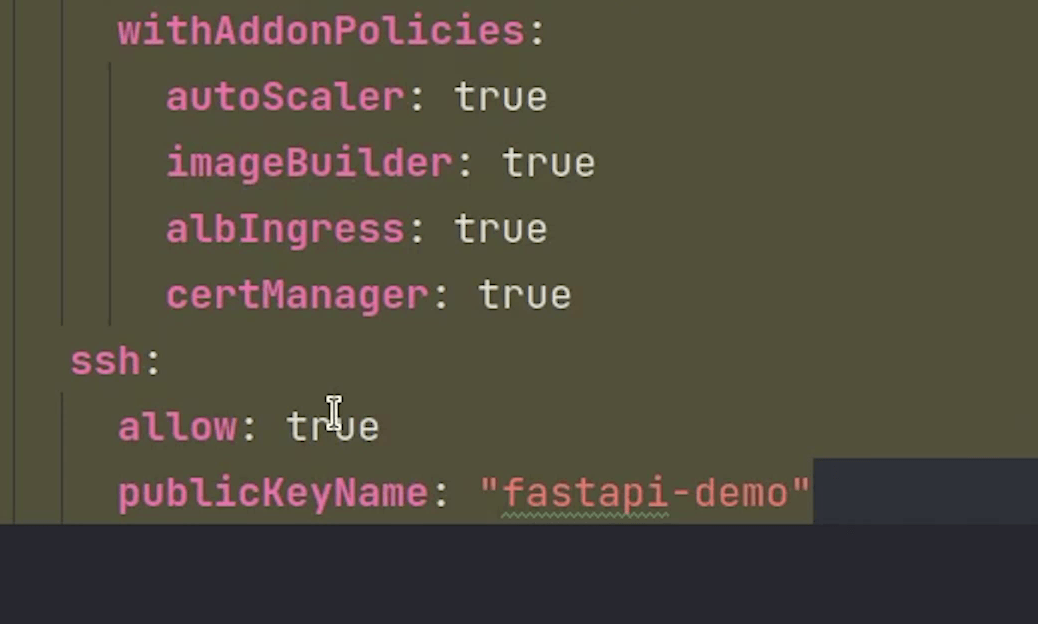
withAddonPolicies:
autoScaler: true
imageBuilder: true
albIngress: true
externalDNS: true
certManager: true
ssh:
allow: true
publicKeyName: "fastapi-demo" # <-- ssh key name
Coming back to the code, you can ignore the yellow highlight which is coming up. This is because of the eksctl configuration and the kubernetes plugin is not able to identify it, completely normal nothing to worry.
Let me explain quickly what we are trying to do.
We are going to create a Kubernetes cluster running 1.21 version, and it will be deployed in ap-south-1 region.
Next we are creating the managed nodegroup. With Amazon EKS managed node groups, you don’t need to separately provision or register the Amazon EC2 instances that provide compute capacity to run your Kubernetes applications. You can create, automatically update, or terminate nodes for your cluster with a single operation, applications stay available.
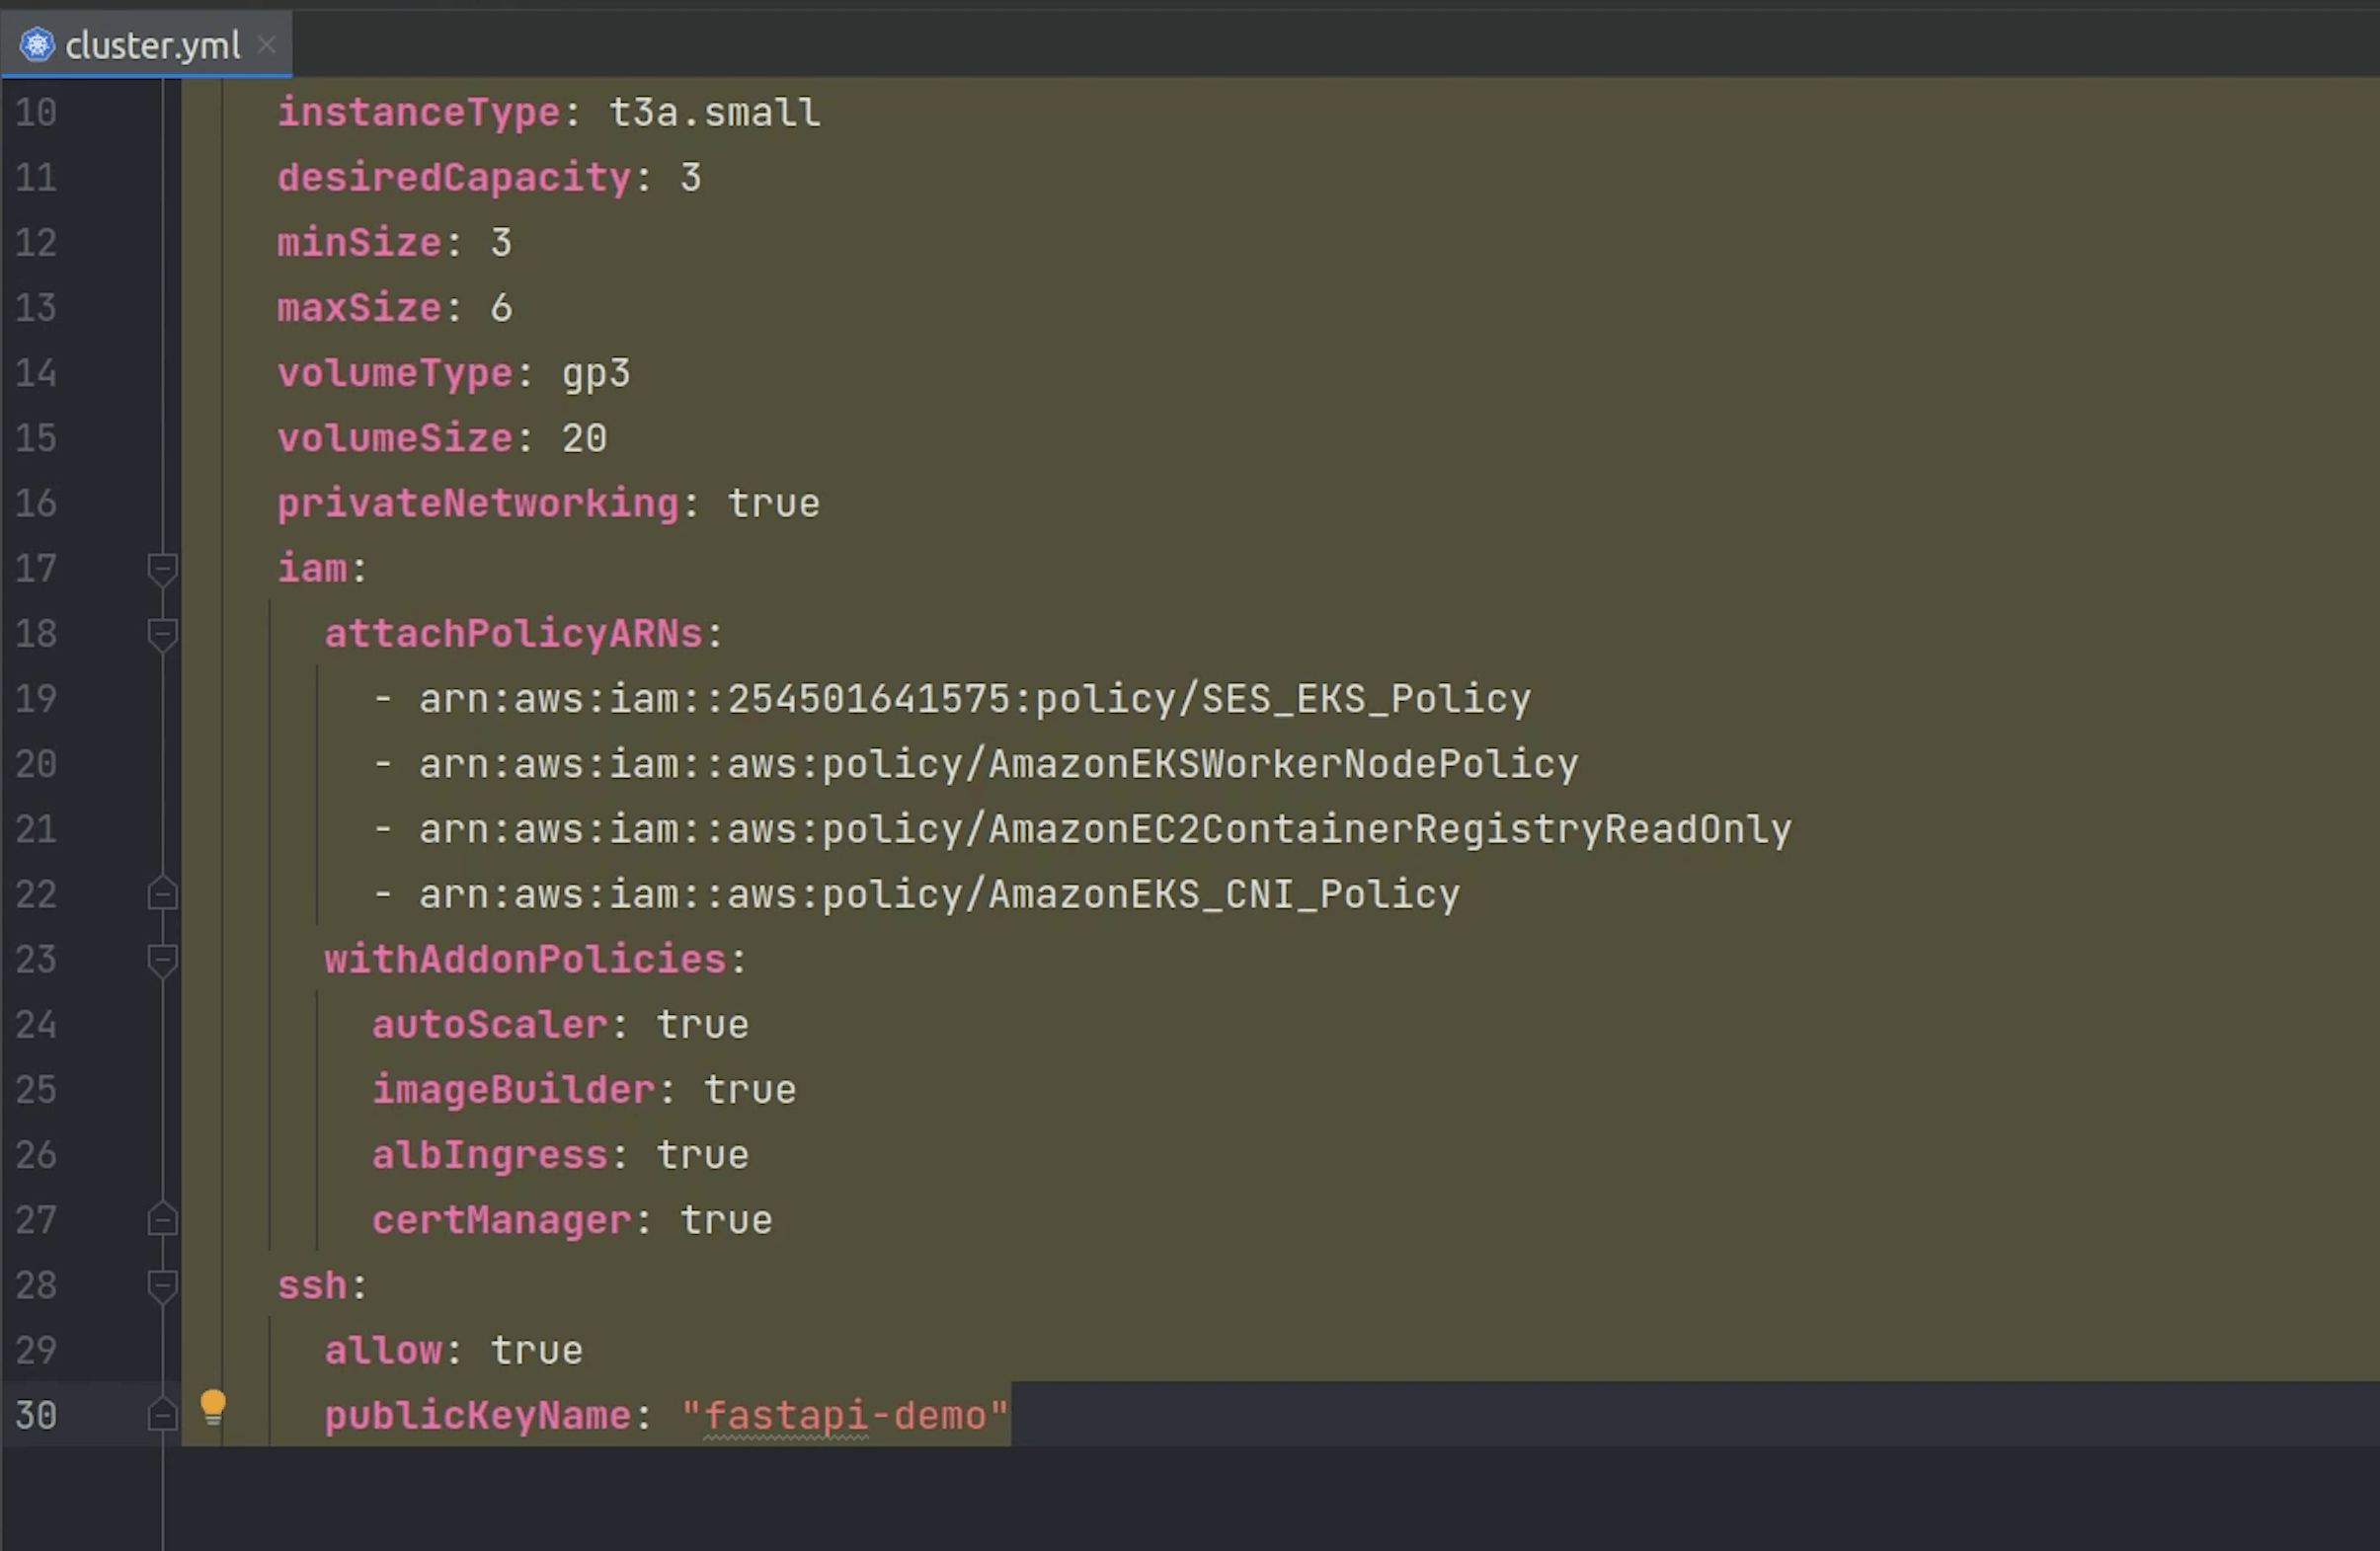
You can go ahead and also create unmanaged nodegroups if you prefer that. We will be creating three ec2 instances and the instance type is going to be t3a.small also we are allocating a gp3 volume type of size 20 GB. Amazon EBS gp3 volumes are the latest generation of general-purpose SSD.
Observe line number 16, privateNetworking set to true. This basically means our nodes can’t be accessed publicly and all the ec2 instances will communicate over the private network. It’s not only EC2 even if you can create Spot Instances or go serverless like Fargate.
Next, observe line number 18 we are using the attachPolicyARNs. There are 4 policies which we have added to work smoothly with the cluster.
If a nodegroup includes the attachPolicyARNs it must also include the default node policies, like:
AmazonEKSWorkerNodePolicyAmazonEKS_CNI_PolicyAmazonEC2ContainerRegistryReadOnly
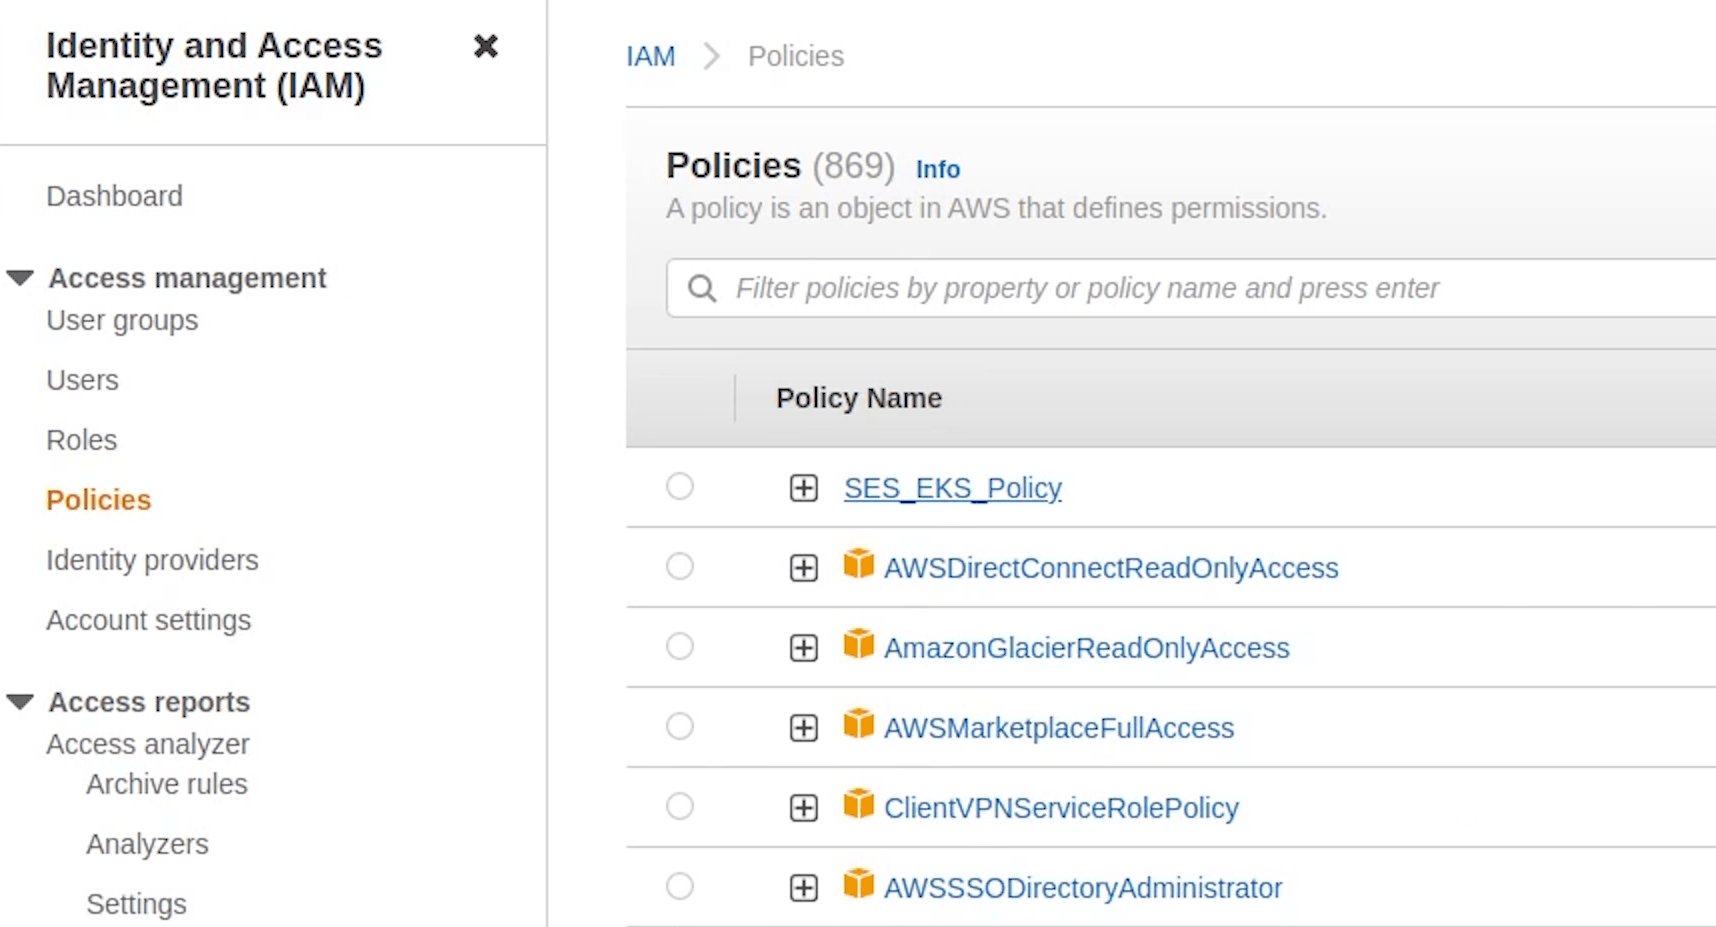
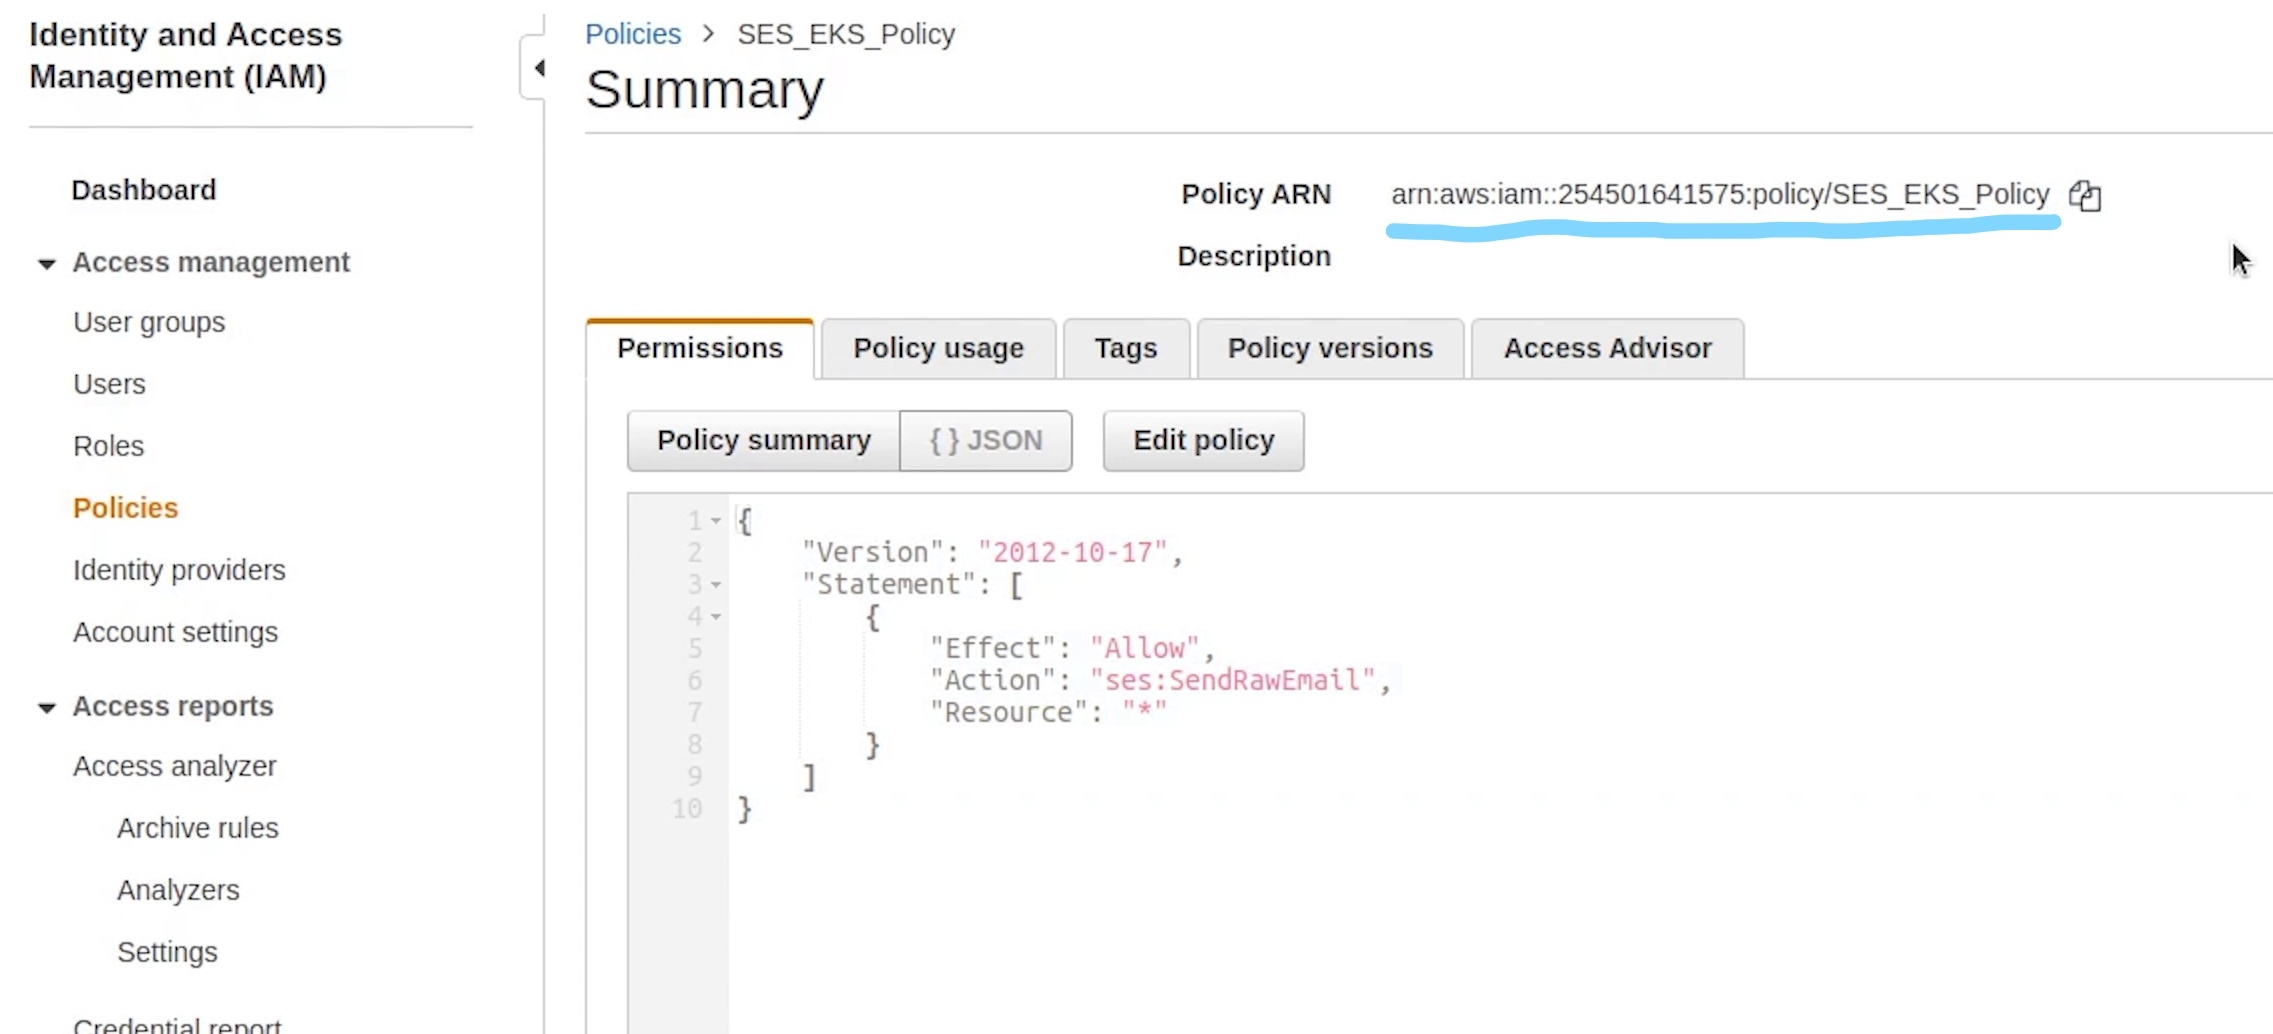
Carefully observe line number 19 the SES EKS Policy, this is not the default policy, instead it’s a custom policy which we have created to grant permission to send email through SES. Hang tight, I will show you in a while. Your ARN number is going to be different so make to sure replace that otherwise the cluster creation will fail.
SES_EKS_Policy
{
	"Version": "2012-10-17",
	"Statement": [
		{
			"Effect": "Allow",
			"Action": "ses:SendRawEmail",
			"Resource": "*"
		}
	]
}
You can observe we have provided ses access to send email.
We are also using some add-on policies like auto-scaling, image builder which allows for full ECR (Elastic Container Registry) access along with certificate manager for managing ssl certificate and ALB Ingress referring to application load balancer.
And finally ssh access to nodes set to true and reference to the private key name fastapi-demo which we created earlier.
There are plenty more add-on policies which you can add based on your requirements, do check the eksctl official documentation.
Let’s now go ahead and create the cluster.
Open up the terminal and move inside the eks directory.
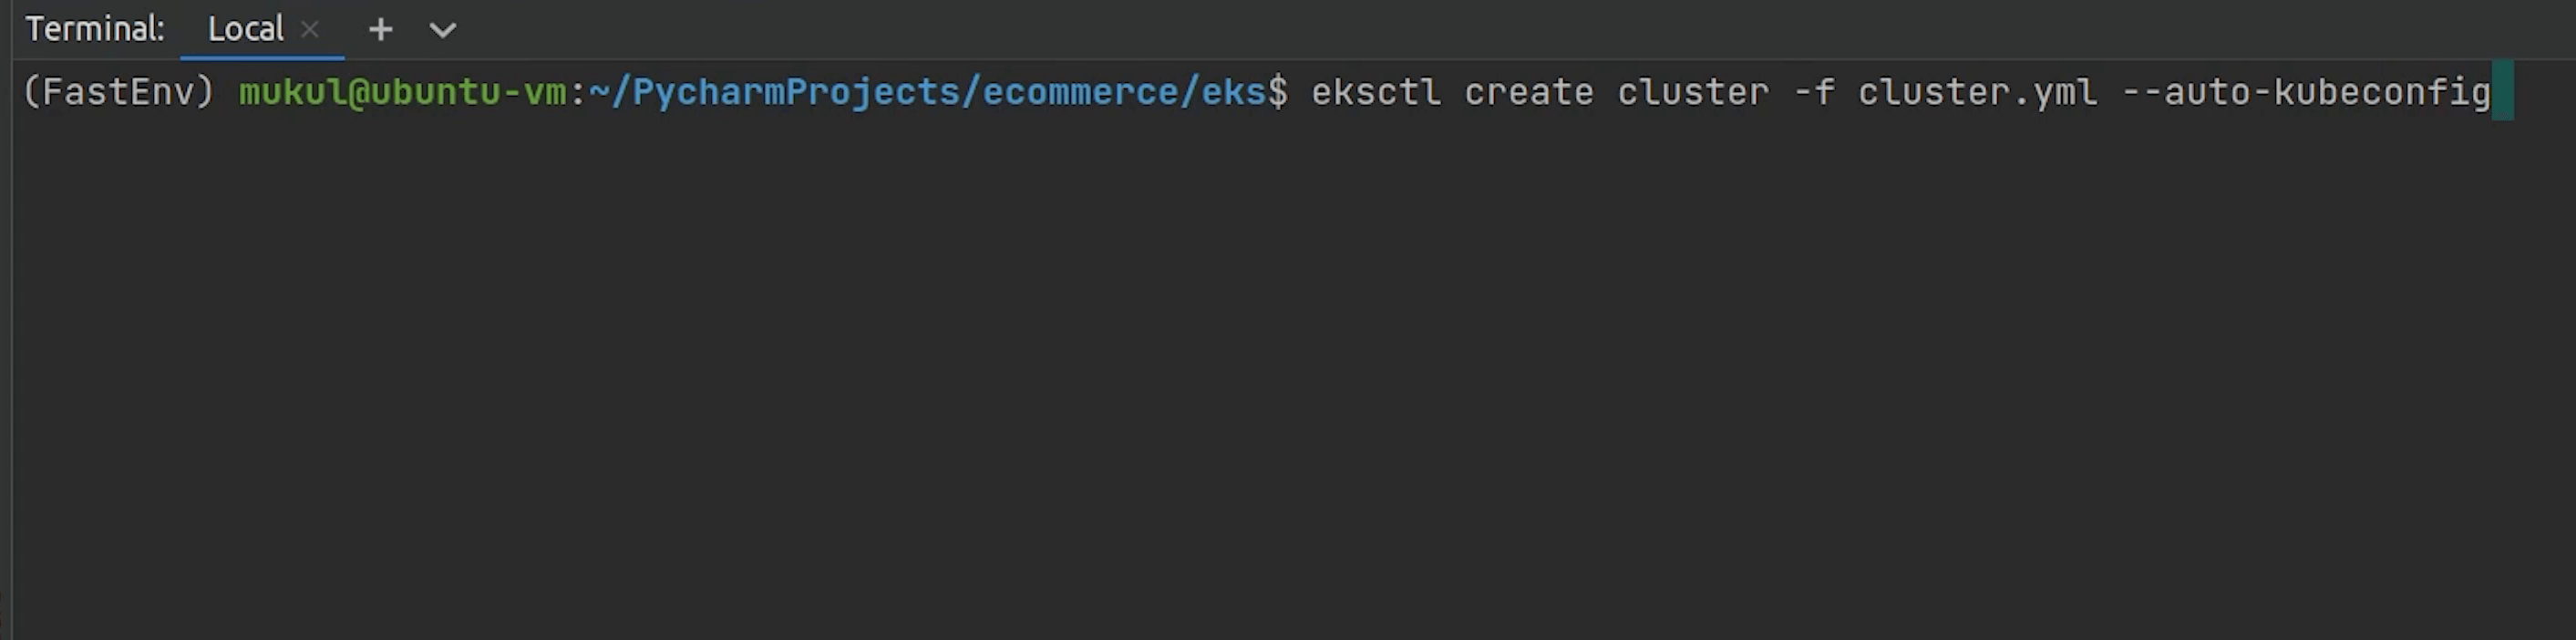
I will type:
eksctl create cluster -f cluster.yml --auto-kubeconfig
auto-kubeconfigis going to save the config file under the directory.kube/eksctl/clusters- The filename will be set as the cluster name which you have provided - Cluster creation process will take somewhere around 15-20 minutes
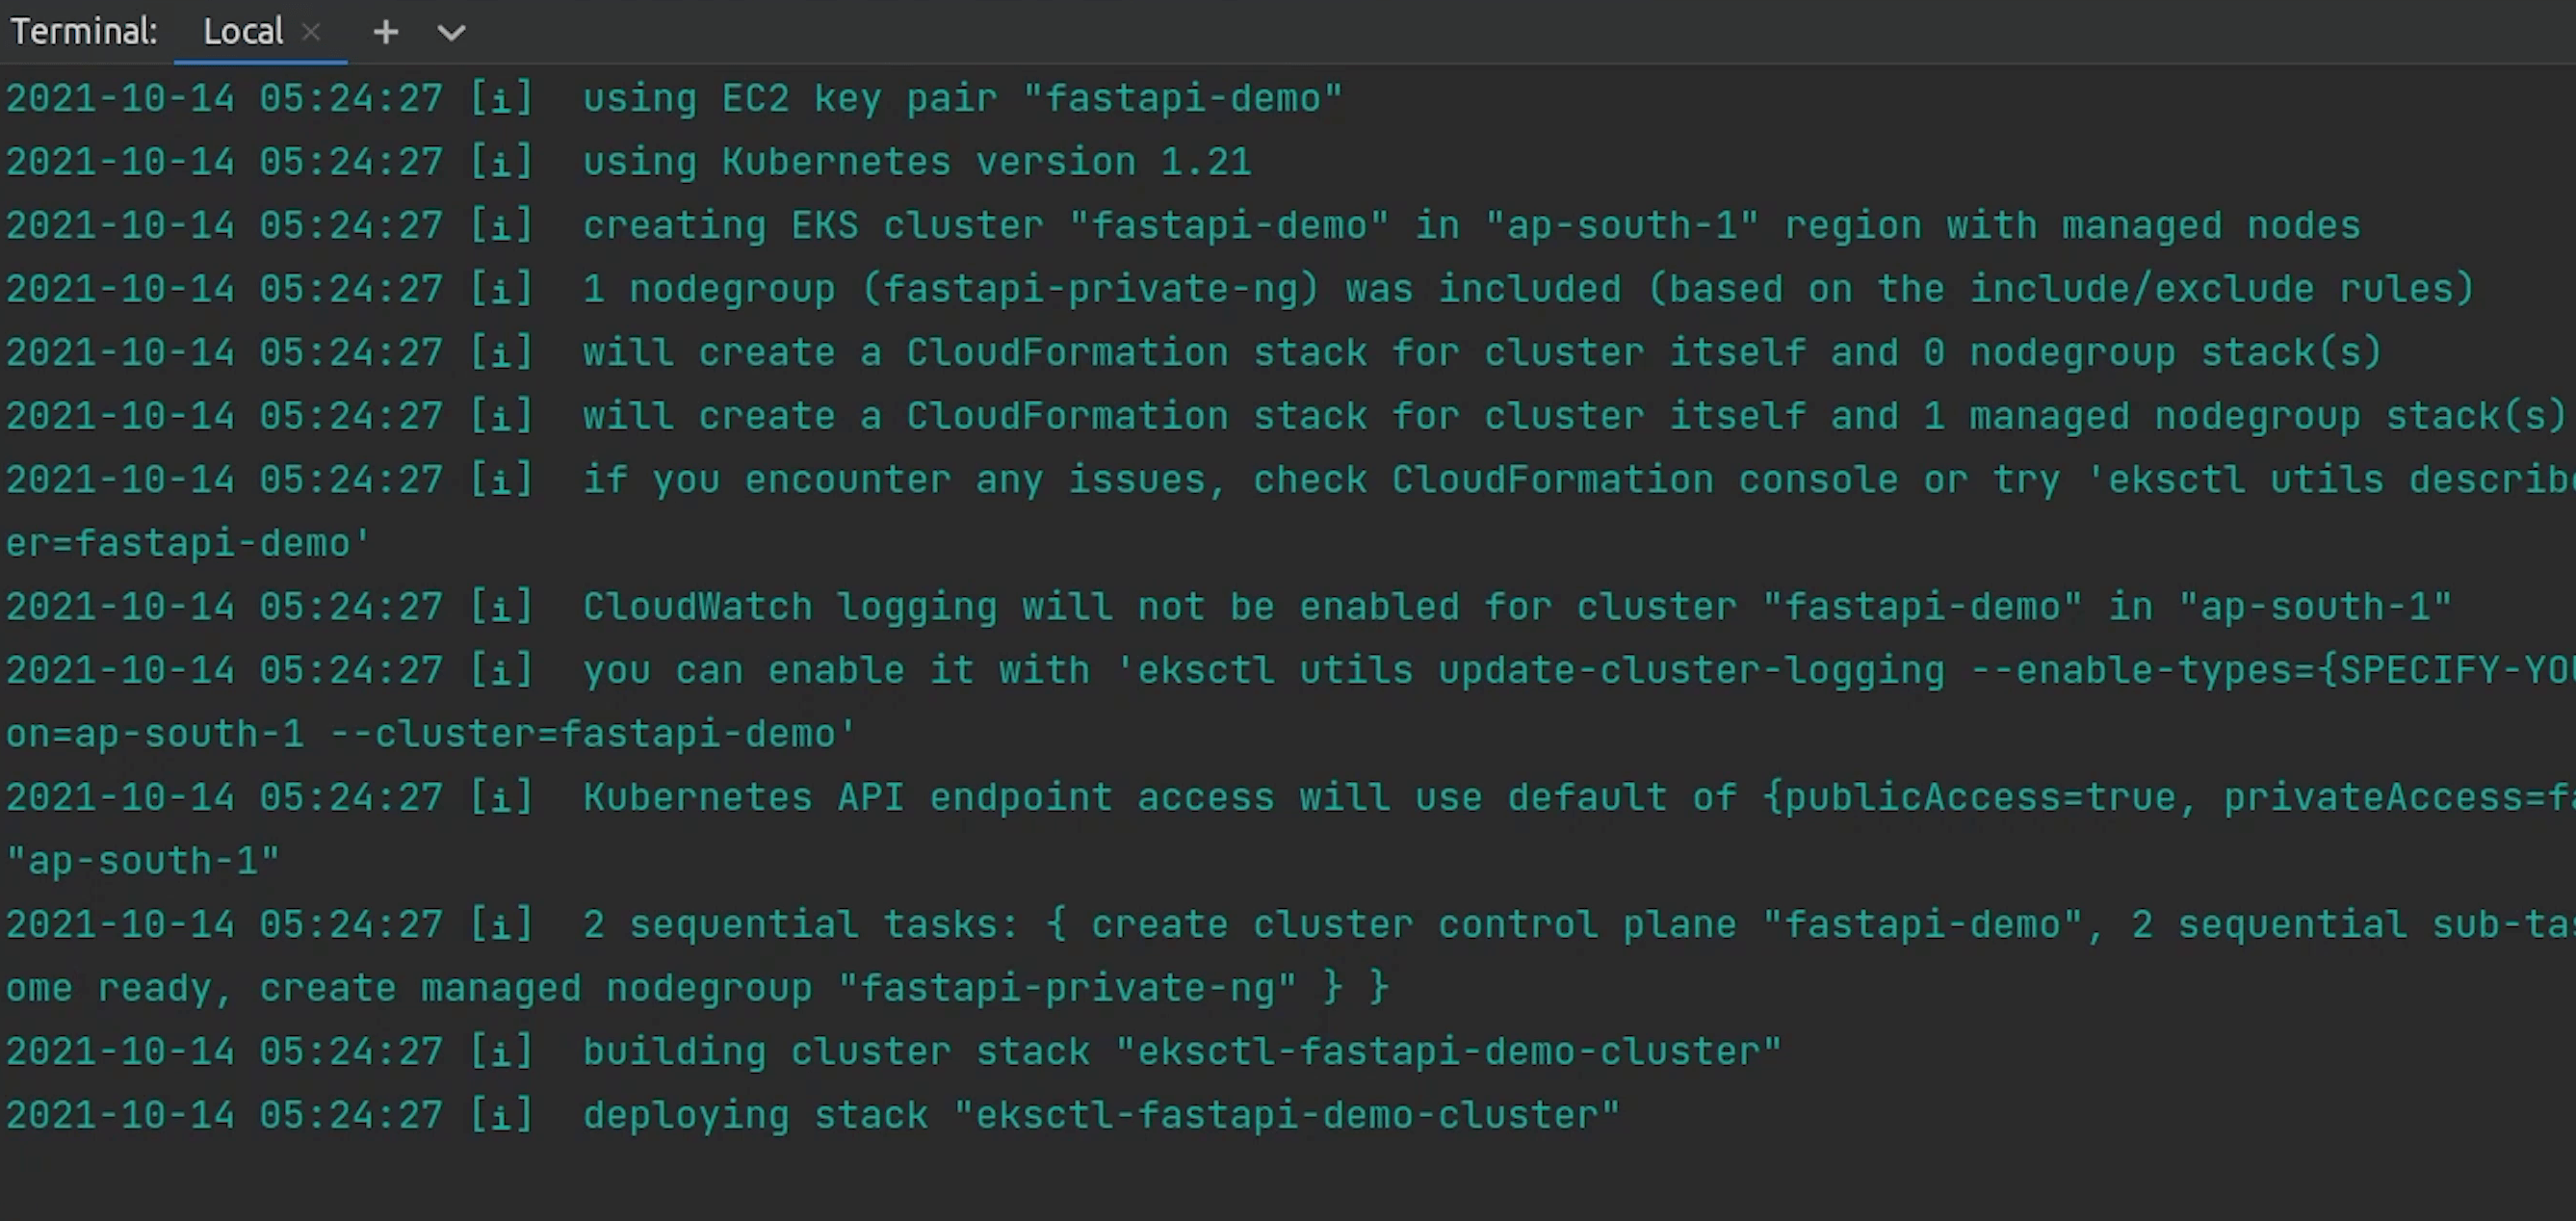
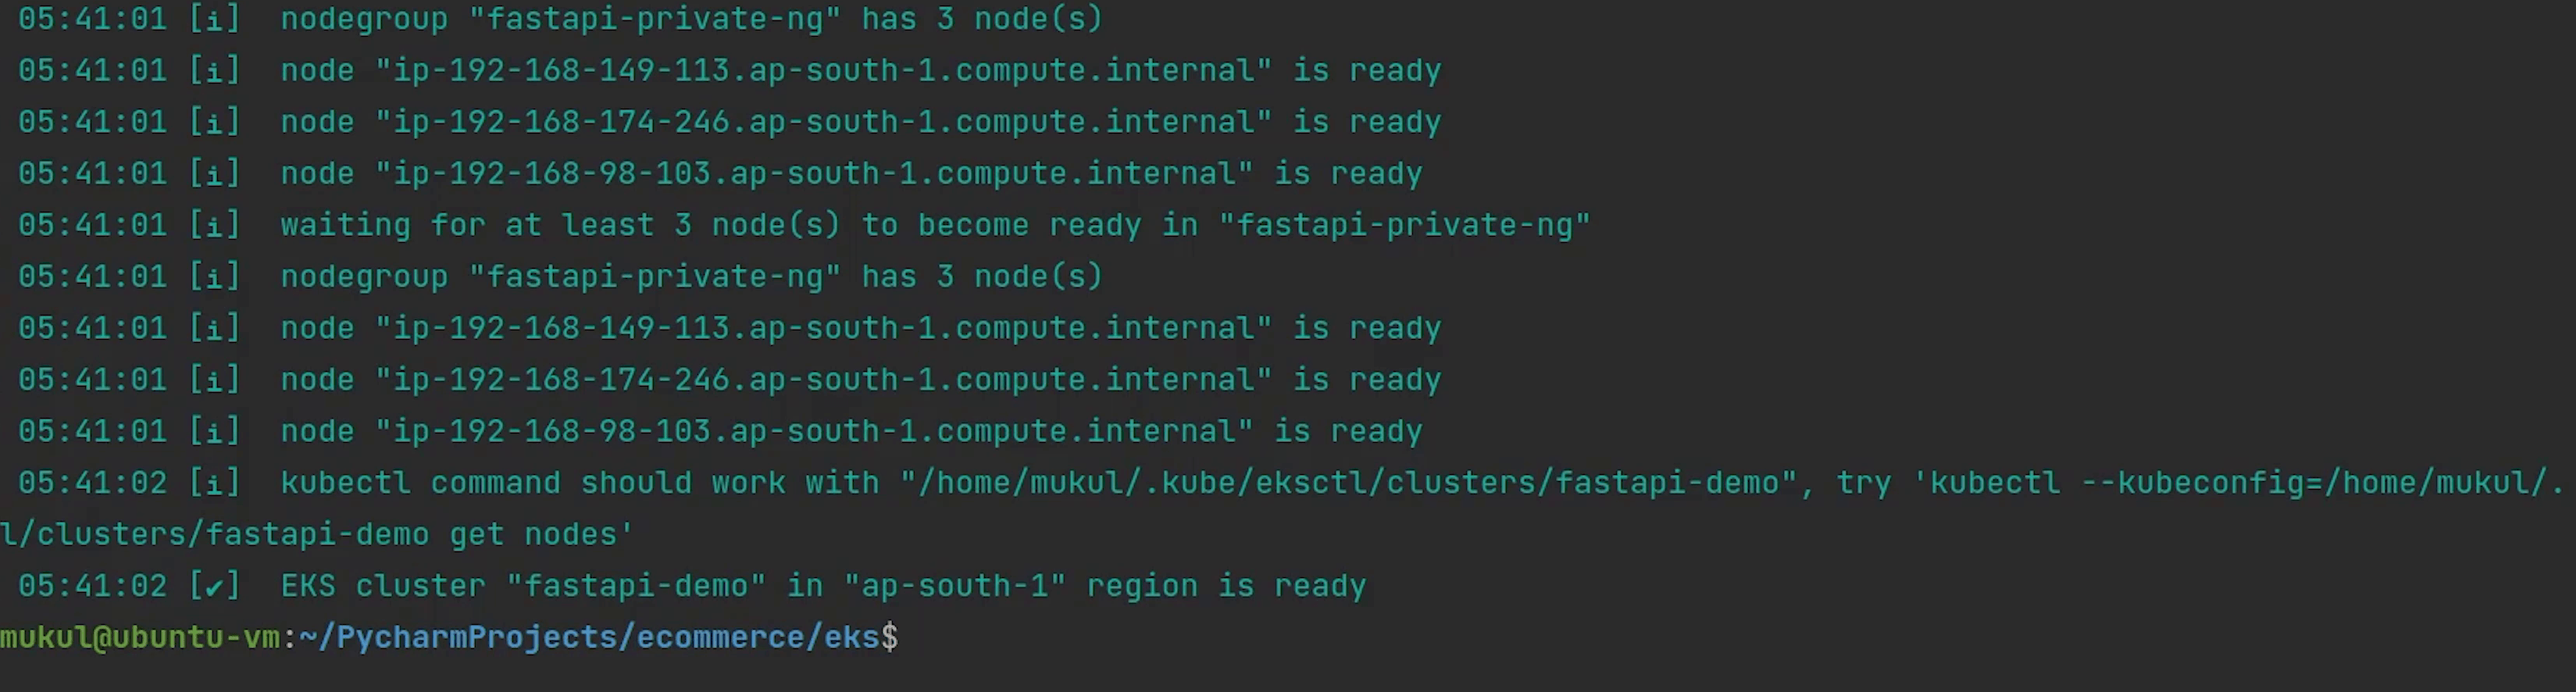
The cluster has been successfully created.
Now, I am going to copy the kubeconfig file fastapi-demo to our eks directory.
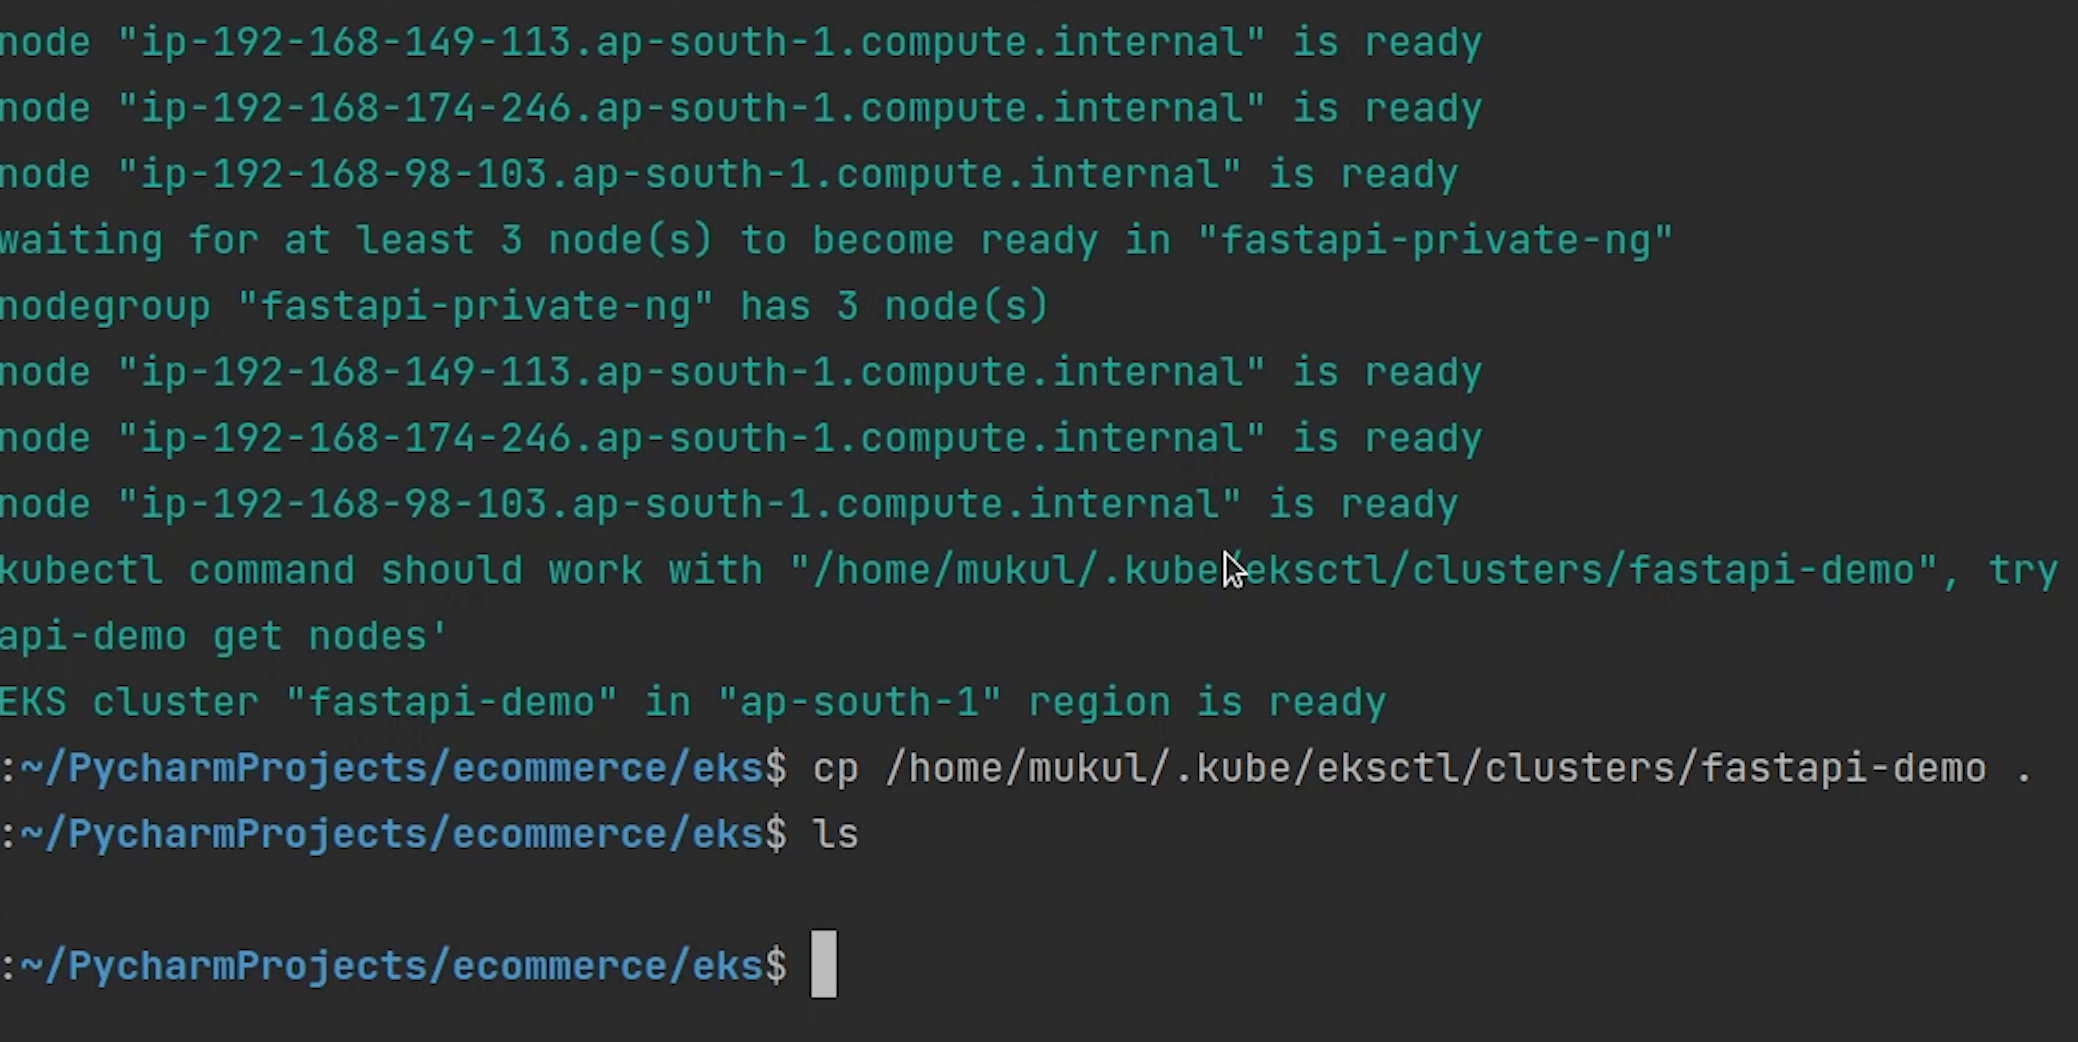
Let me check the number of nodes by passing the kubeconfig fastapi-demo.
kubectl get nodes --kubeconfig=fastapi-demo
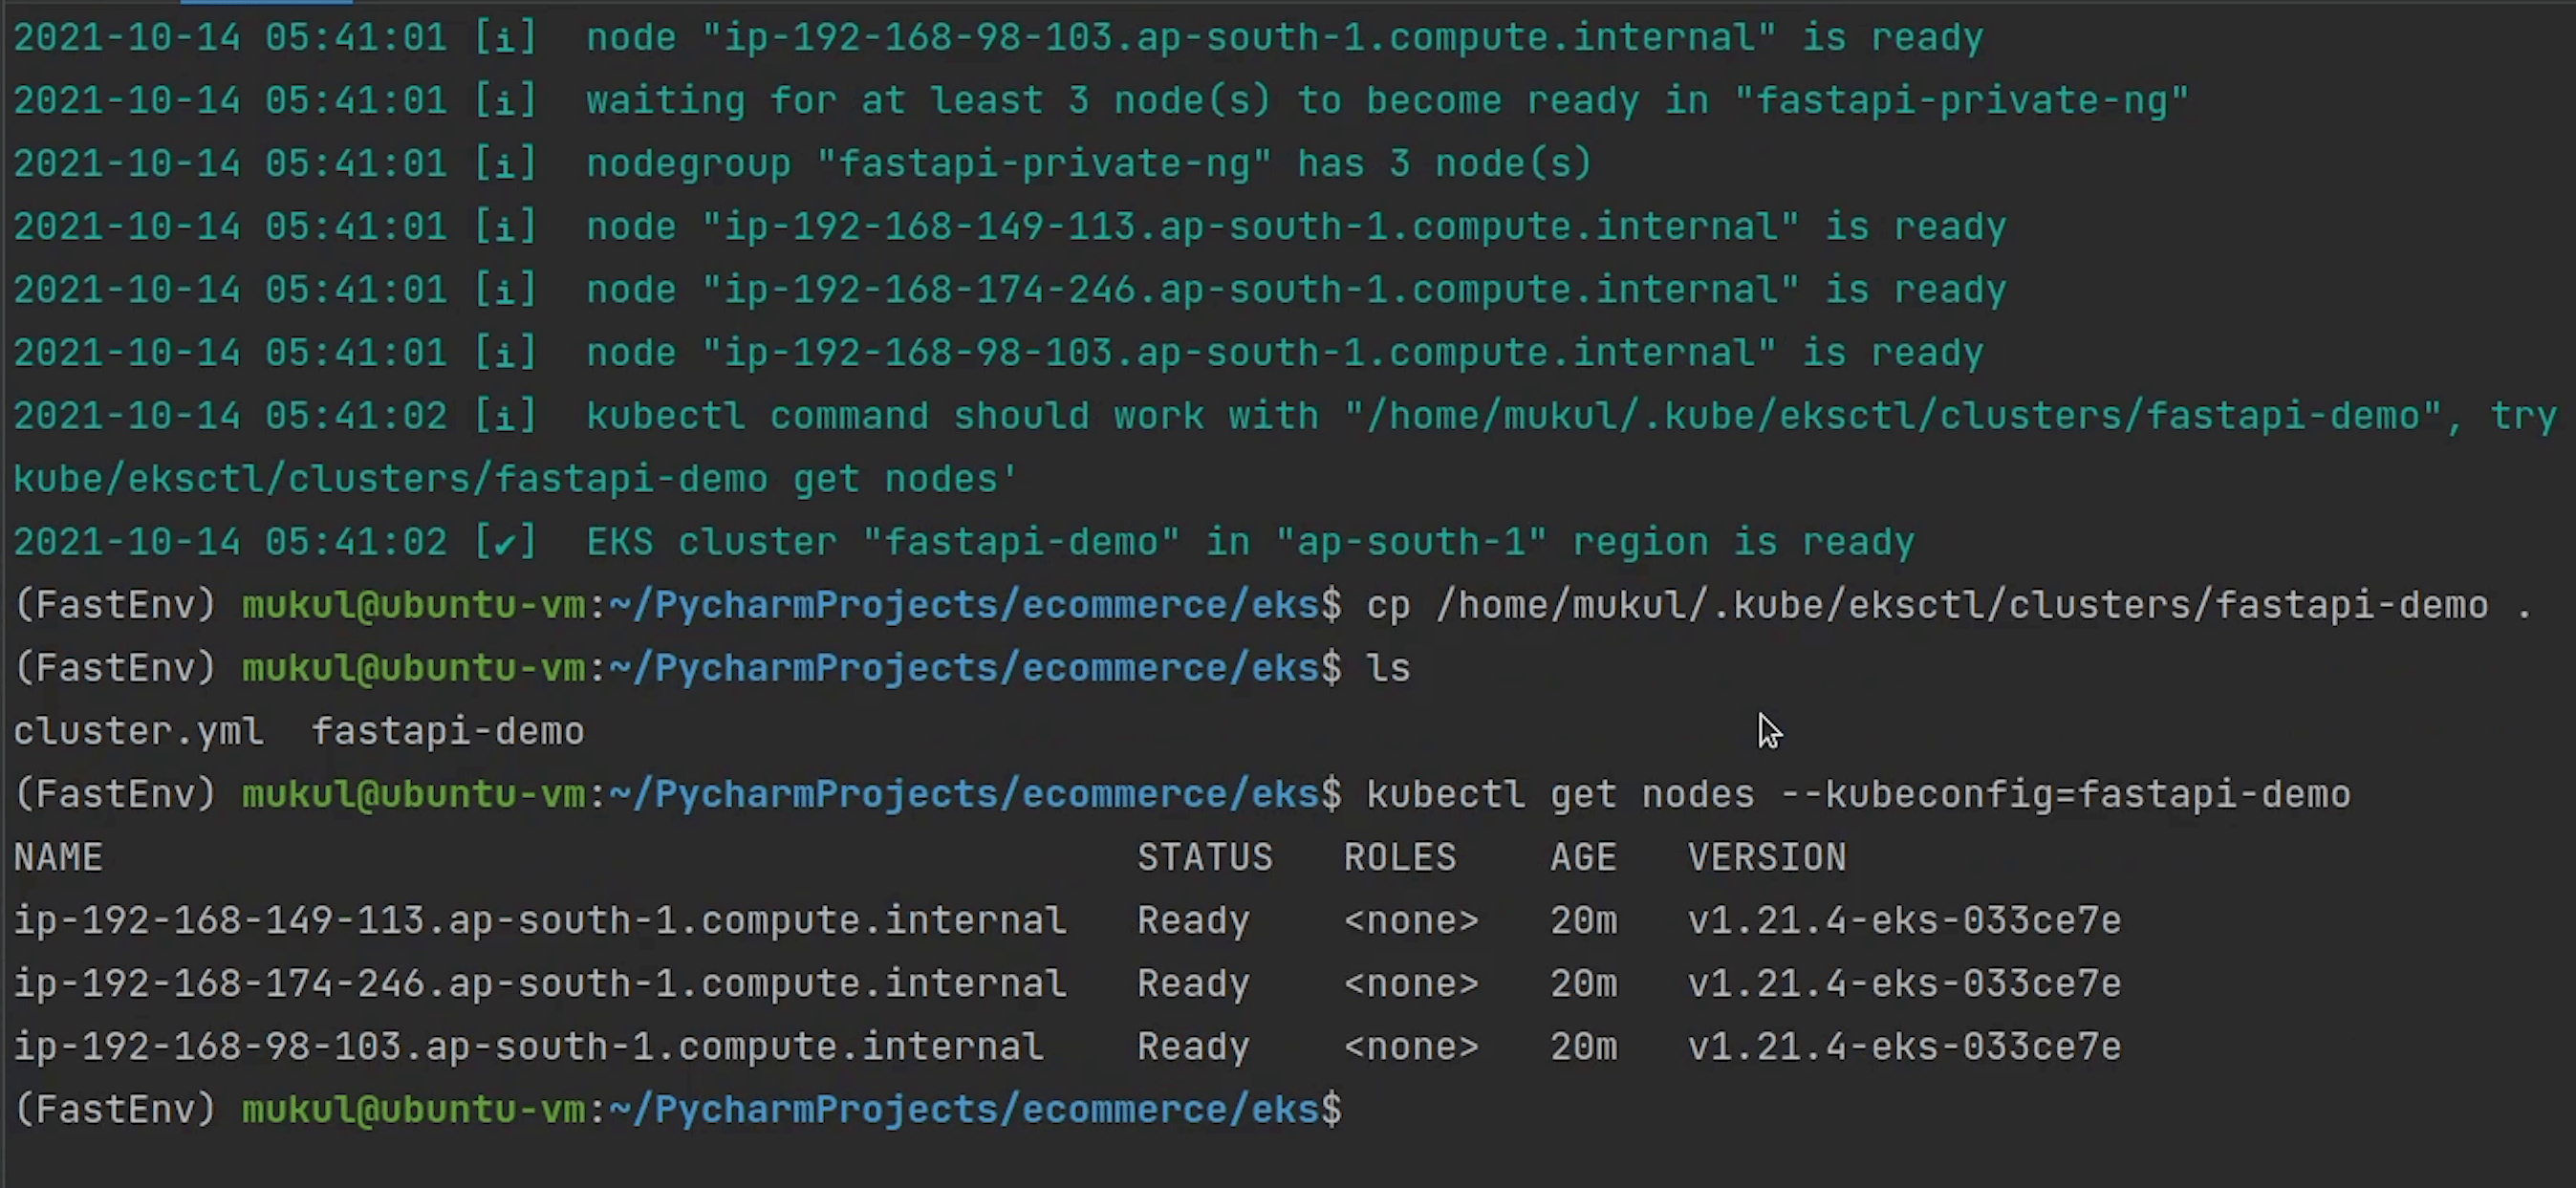

You can observe three nodes are running and the operating system is backed by Amazon Linux 2. The nodes are completely private, you can observe the internal IP and there is no external IP exposed.
OIDC
Next, we are going to approve the OIDC provider. To use IAM roles for service accounts, an IAM OIDC provider must exist for your cluster.
User authentication for Amazon EKS clusters can also be performed from OpenID Connect (OIDC) Identity Provider (IDP). This feature allows customers to integrate an OIDC identity provider with a new or existing Amazon EKS cluster running Kubernetes version 1.16 or later. The OIDC IDP can be used as an alternative to, or along with AWS Identity and Access Management (IAM).
I am going to type:
eksctl utils associate-iam-oidc-provider --region ap-south-1 --cluster fastapi-demo --approve
Reference:
- https://docs.aws.amazon.com/eks/latest/userguide/enable-iam-roles-for-service-accounts.html
- https://eksctl.io/usage/iamserviceaccounts/
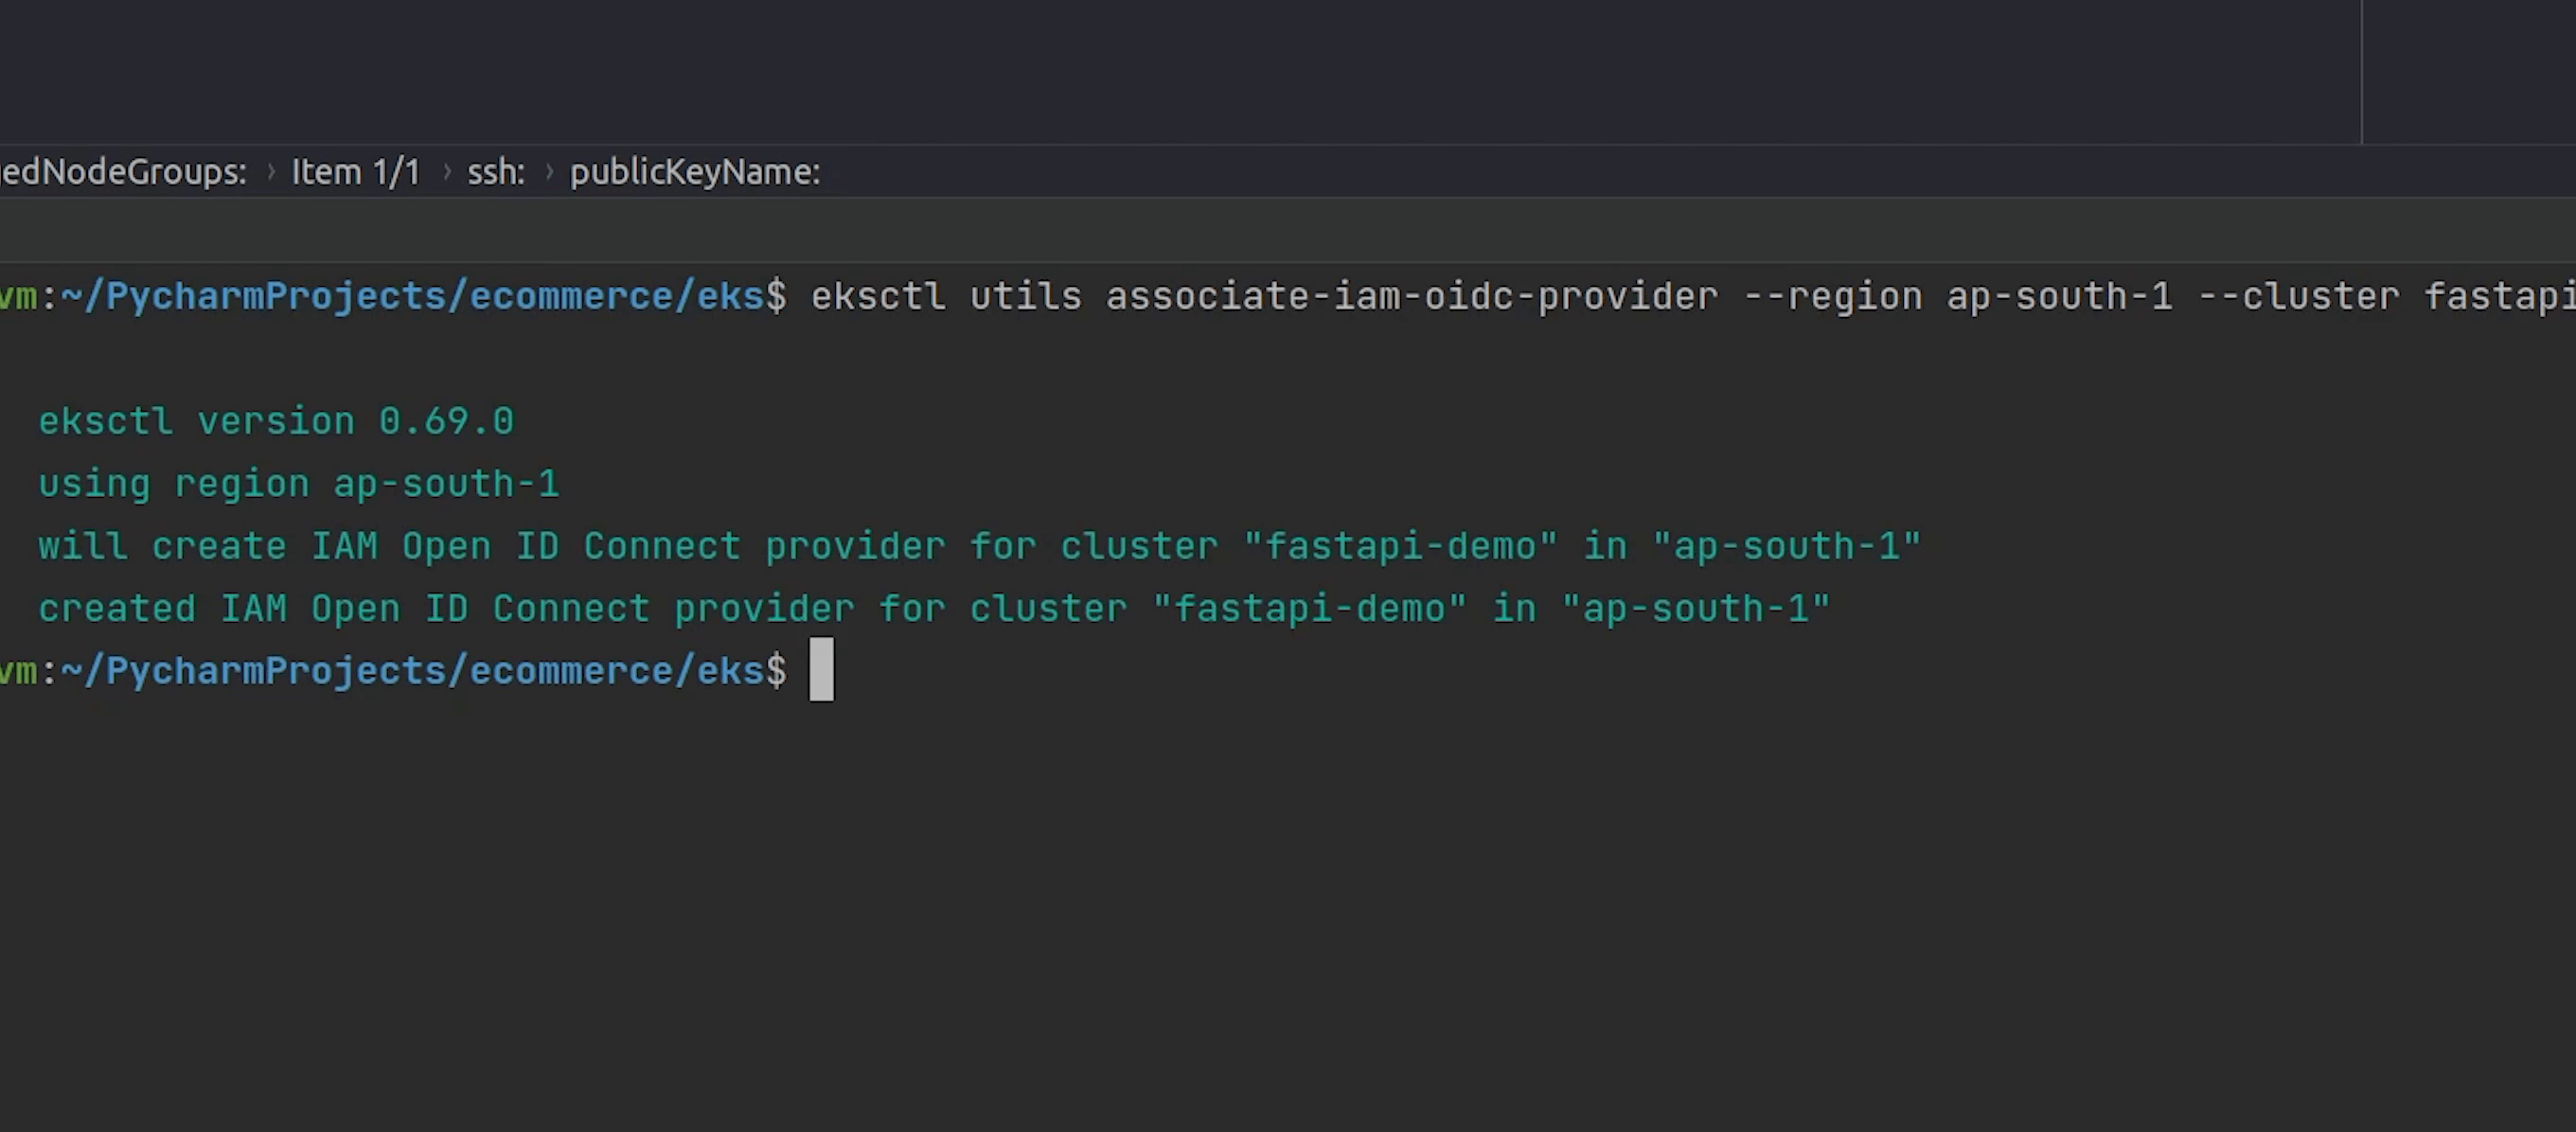
The OIDC provider is successfully created.
Postgres
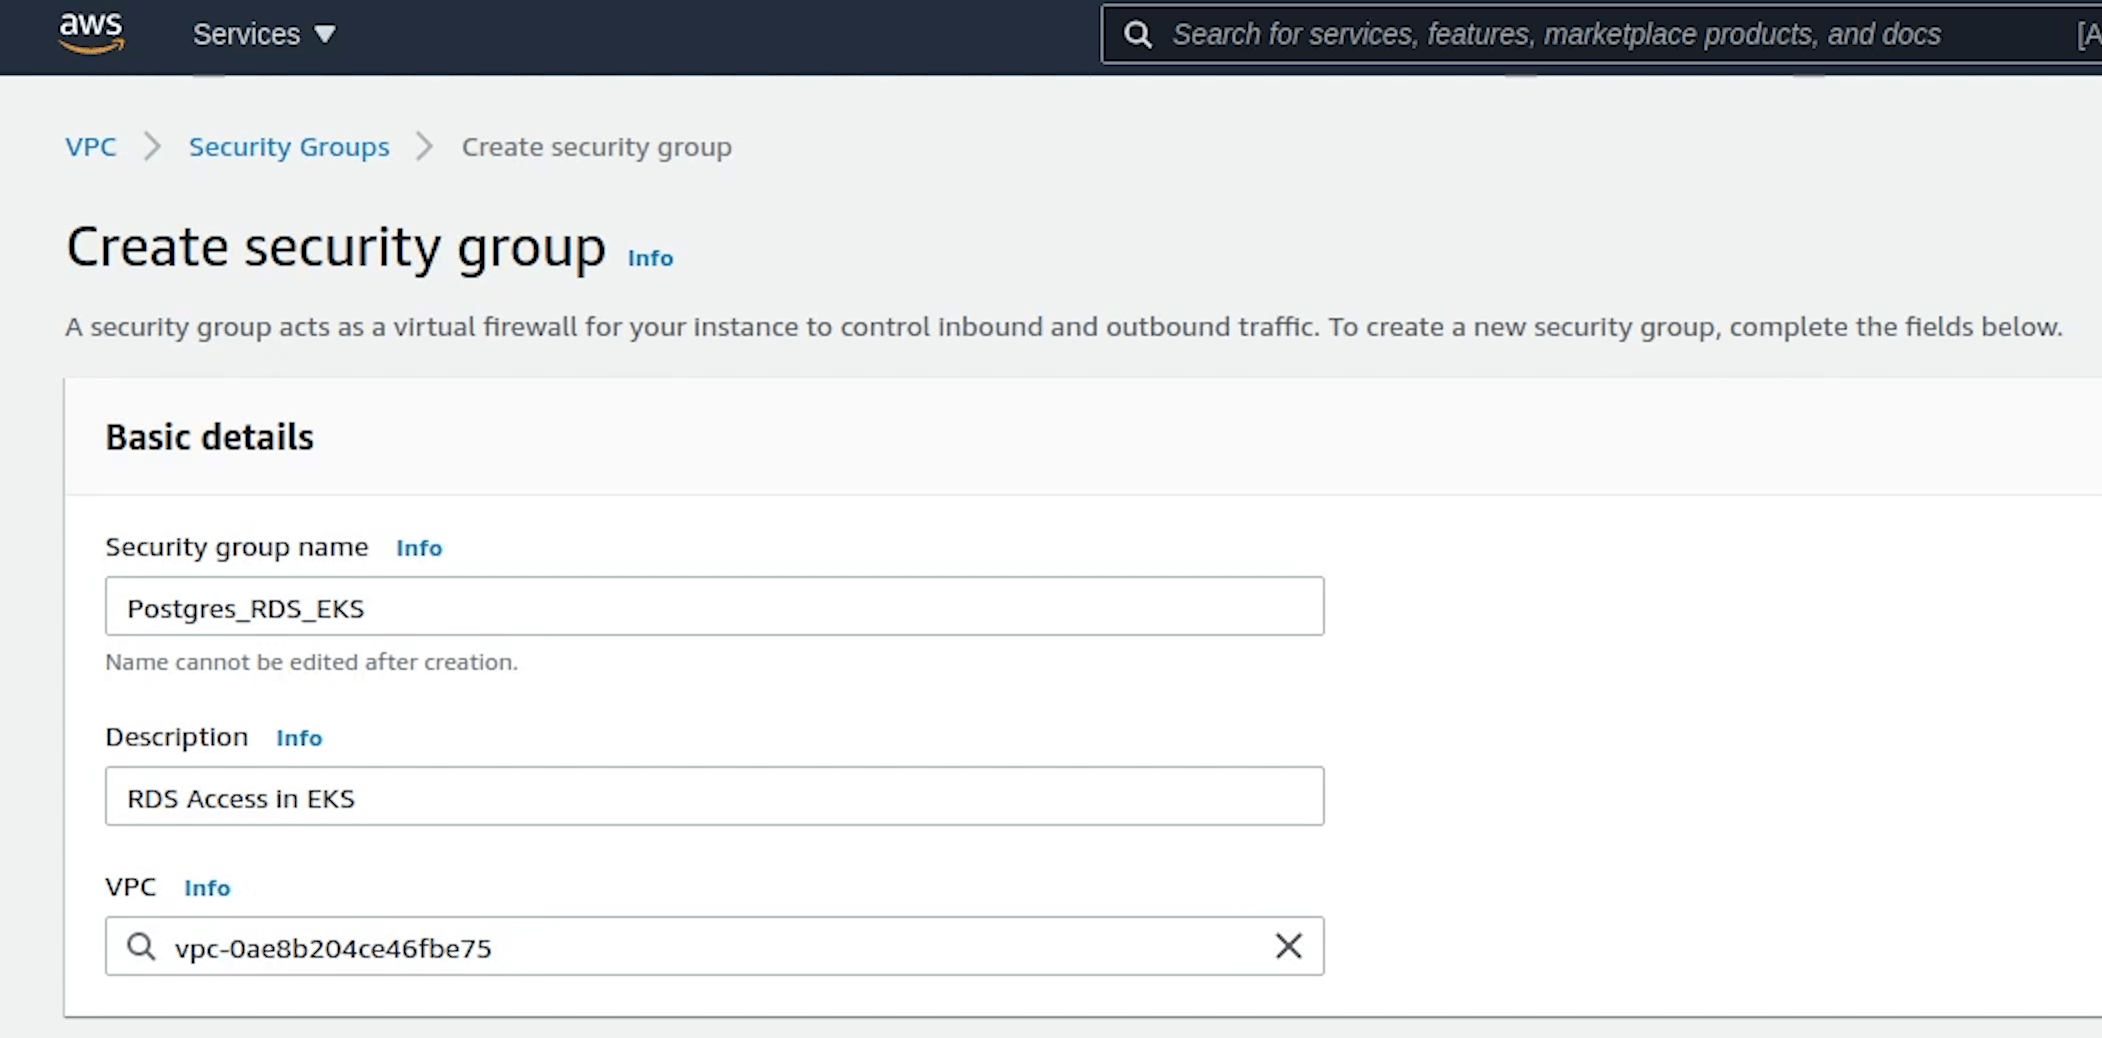
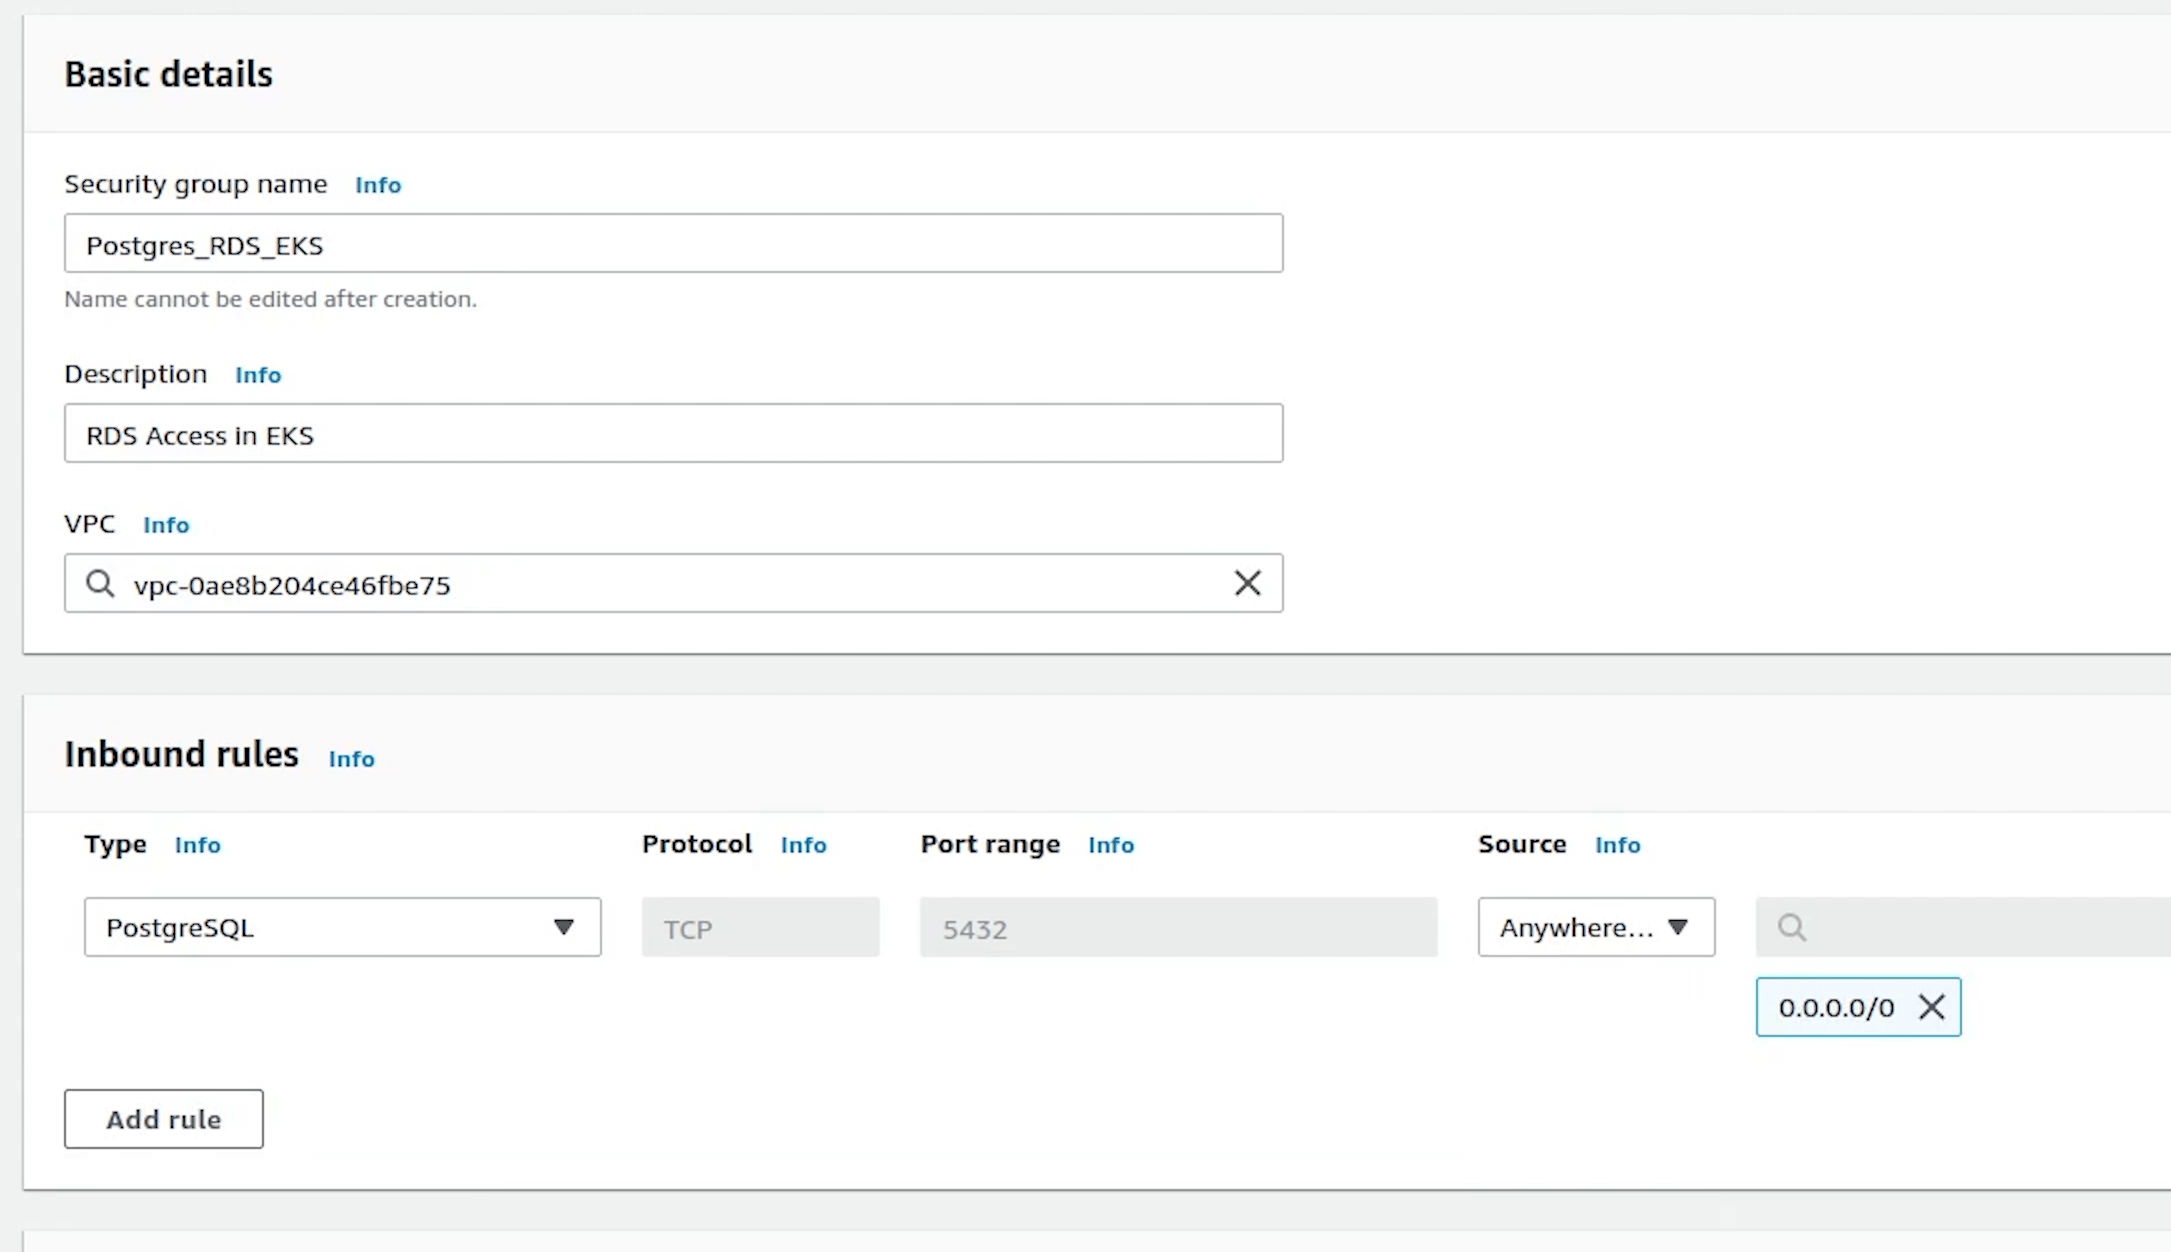
Next, we are going to create a Security Group for Postgres database. This will be required when we will be launching the RDS database.
I will goto VPC and then under Security you will find Security Groups.

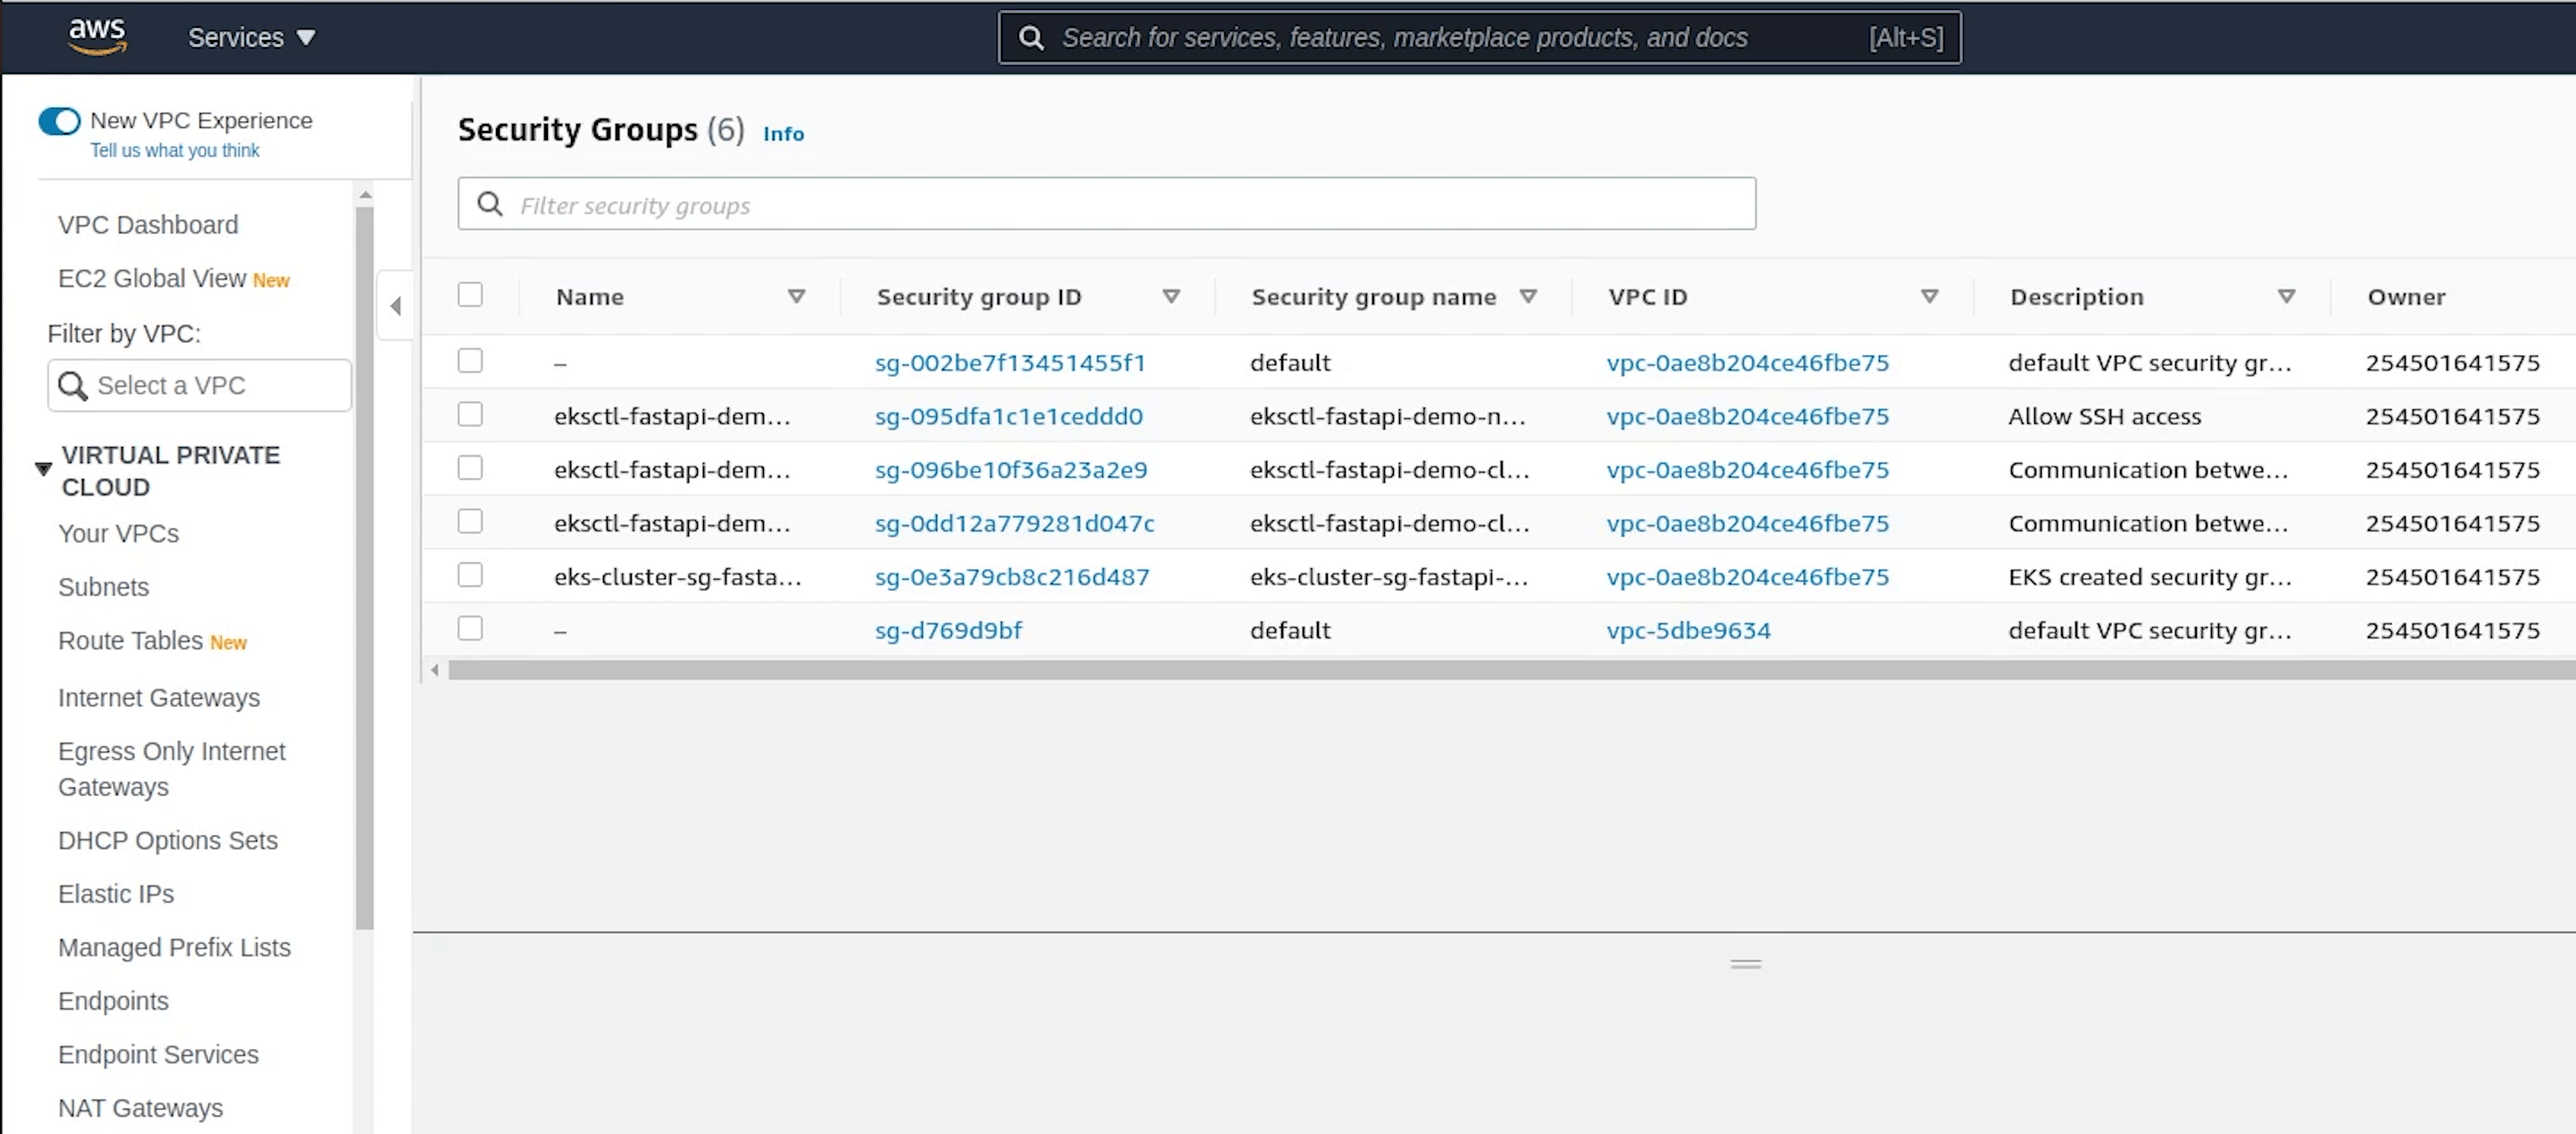
I am going to provide a name and description. I will choose fastapi-demo-cluster as my vpc, this VPC is created by the EKS.
Under Inbound Rules, I will select Postgres which will be running on port 5432 and IP access will be set to anywhere. It does not matter because the cluster nodes are in private mode, so we won’t be able to access the database publicly.
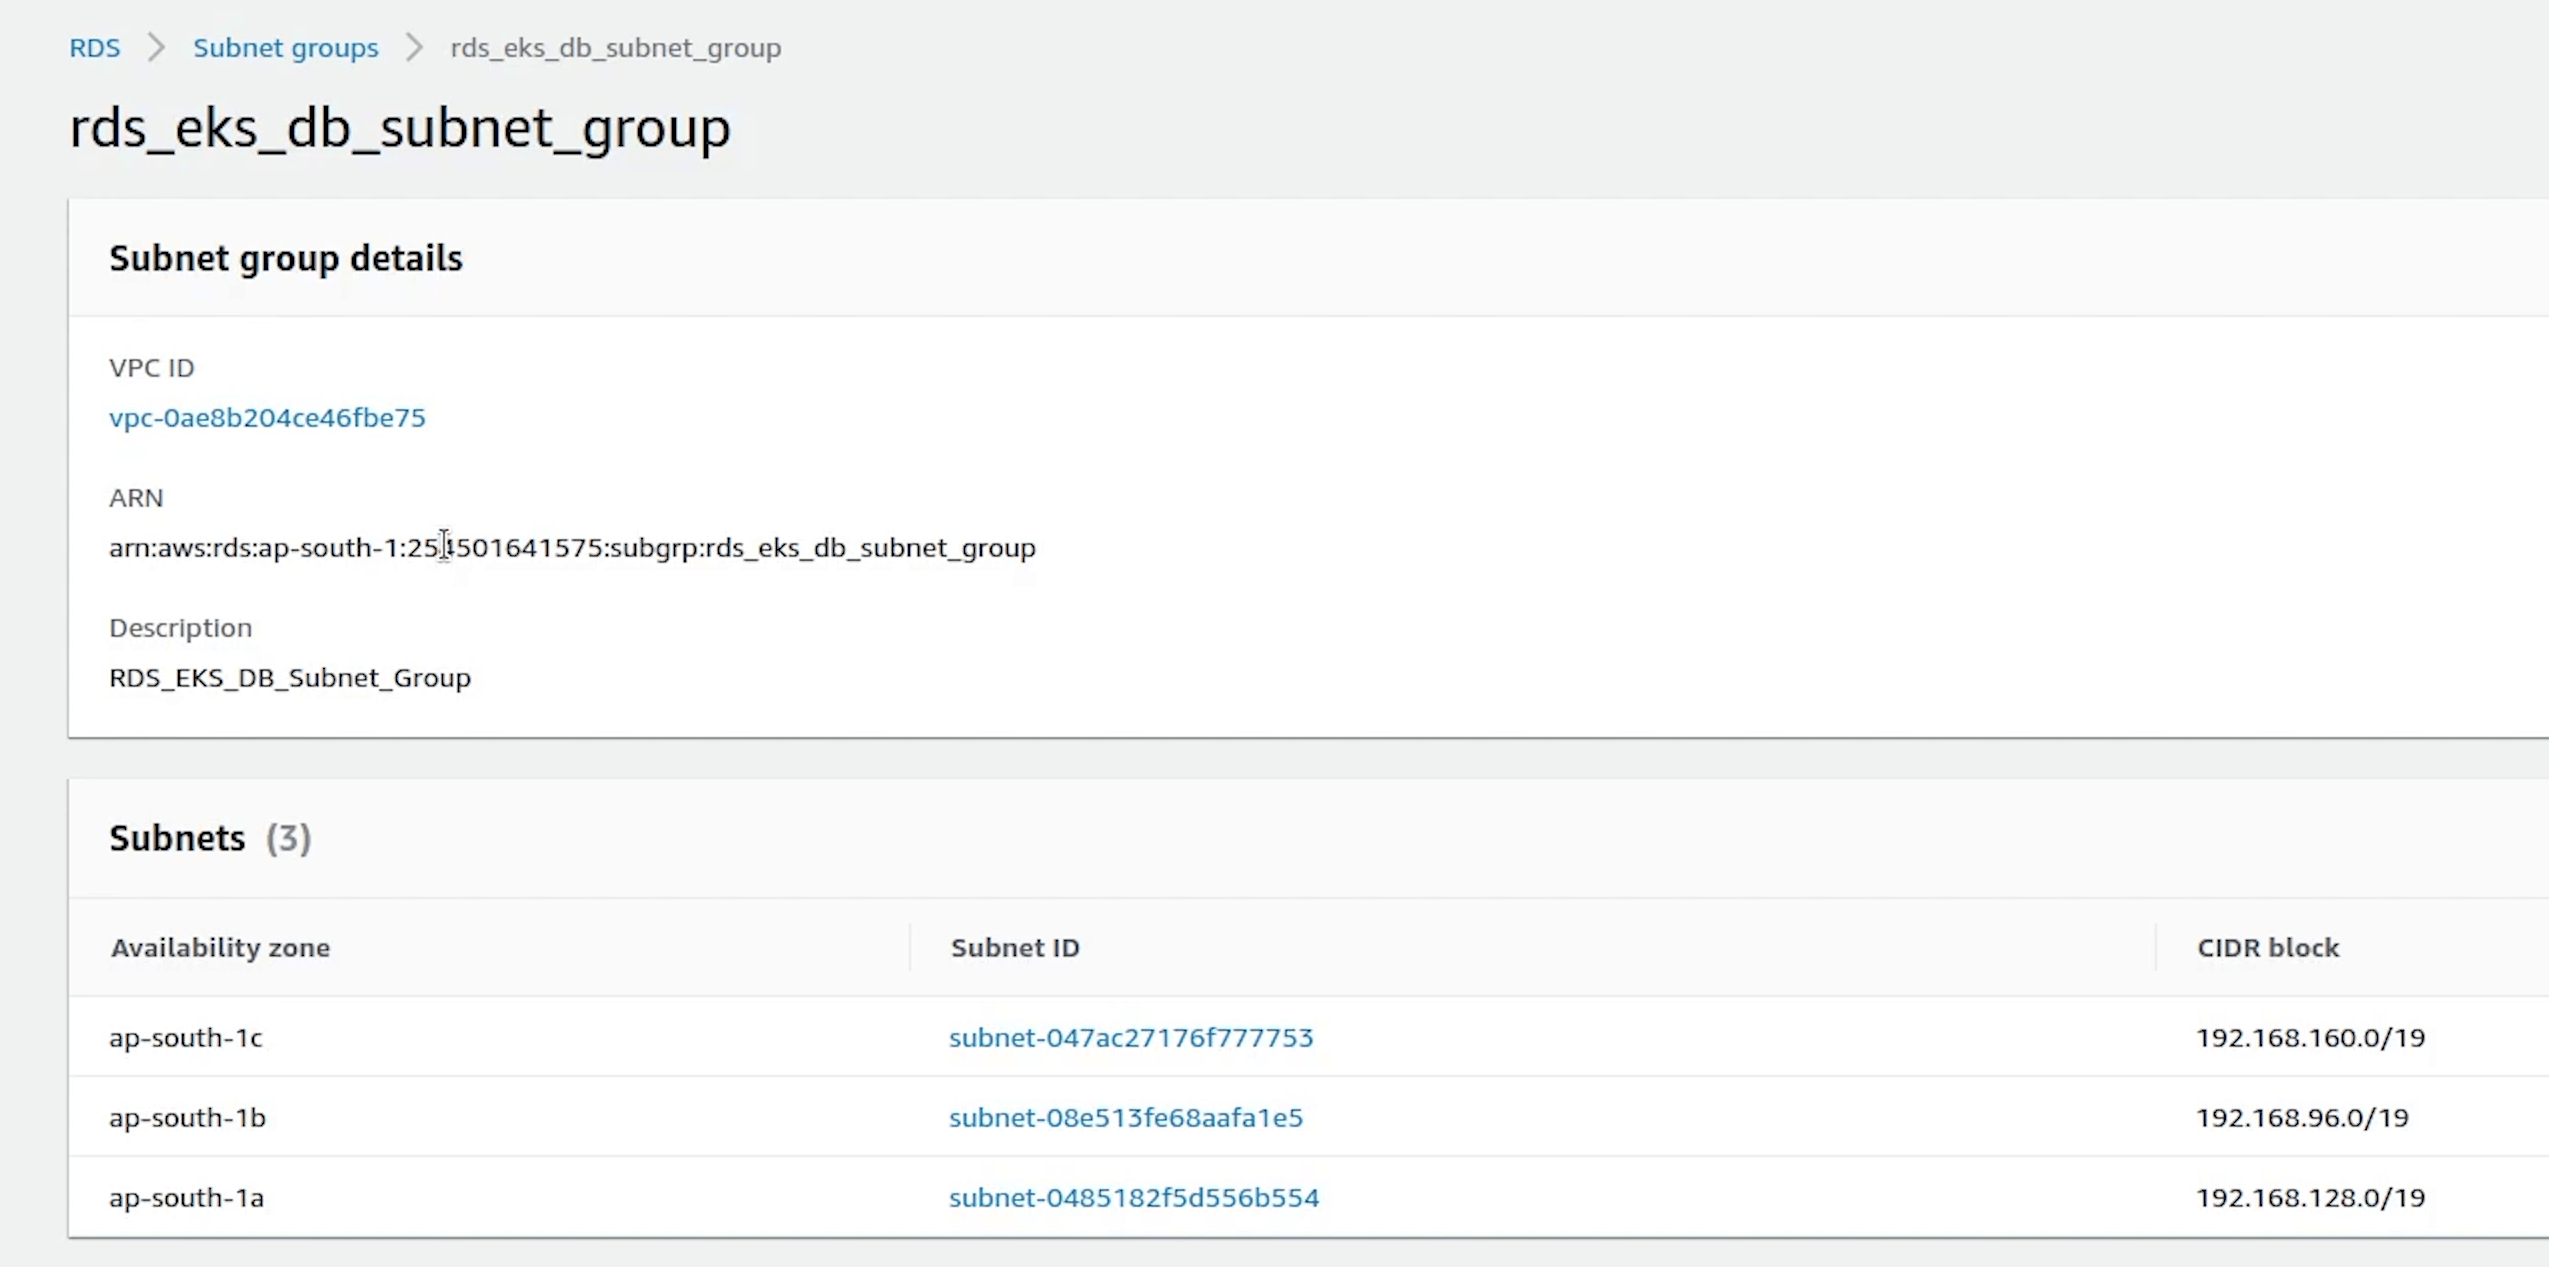
Next we will move to RDS where we will be creating our Subnet Group.
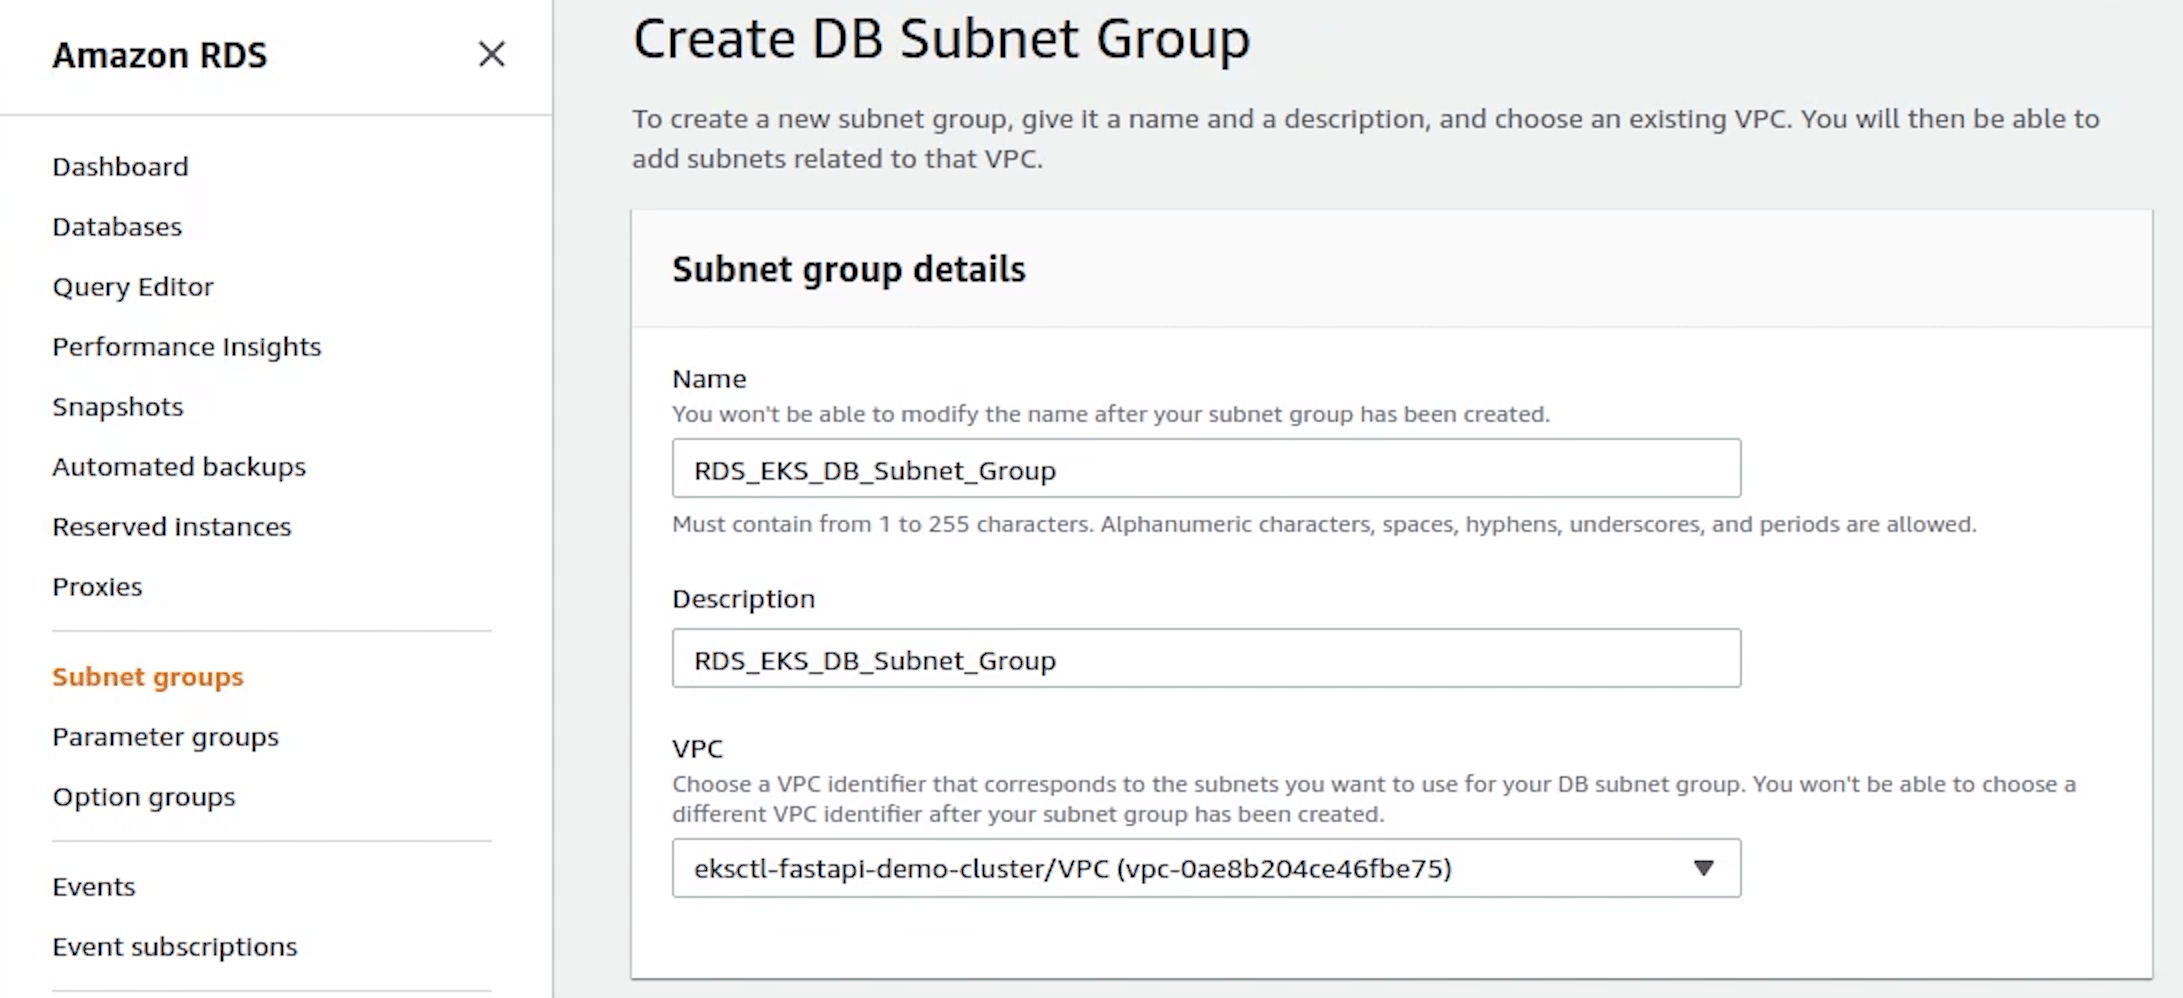
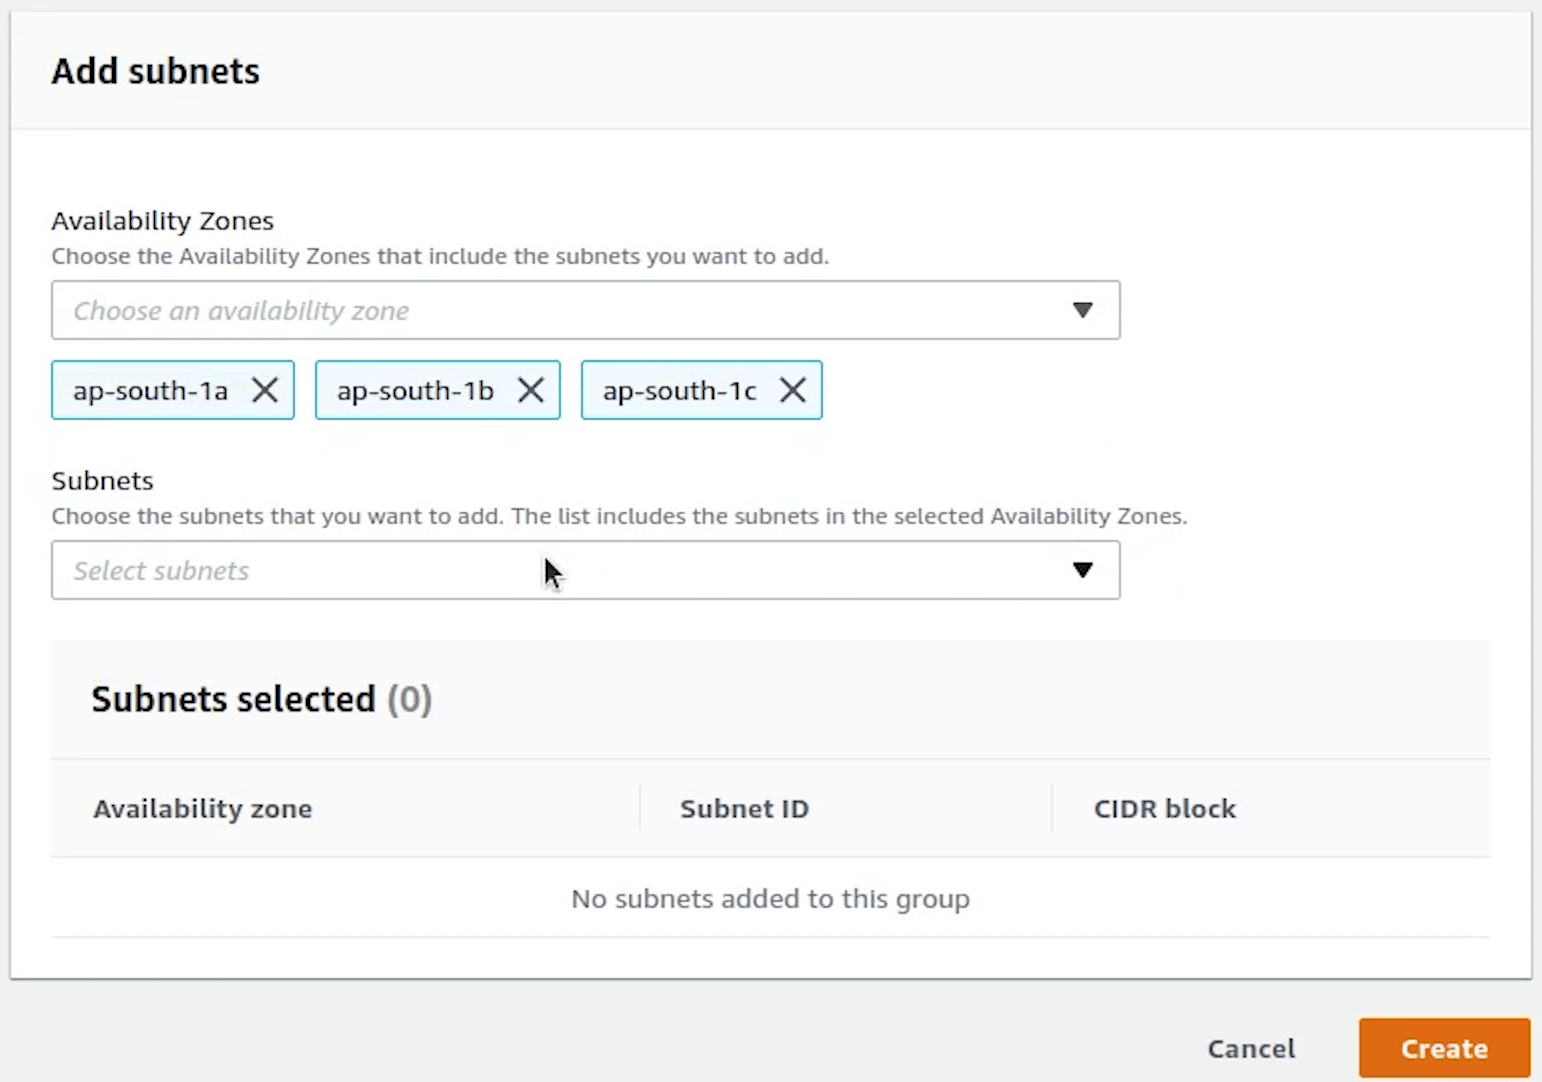
I will be providing the VPC subnet private IP addresses from the three availability zones:
- ap-south-1a
- ap-south-1b
- ap-south-1c
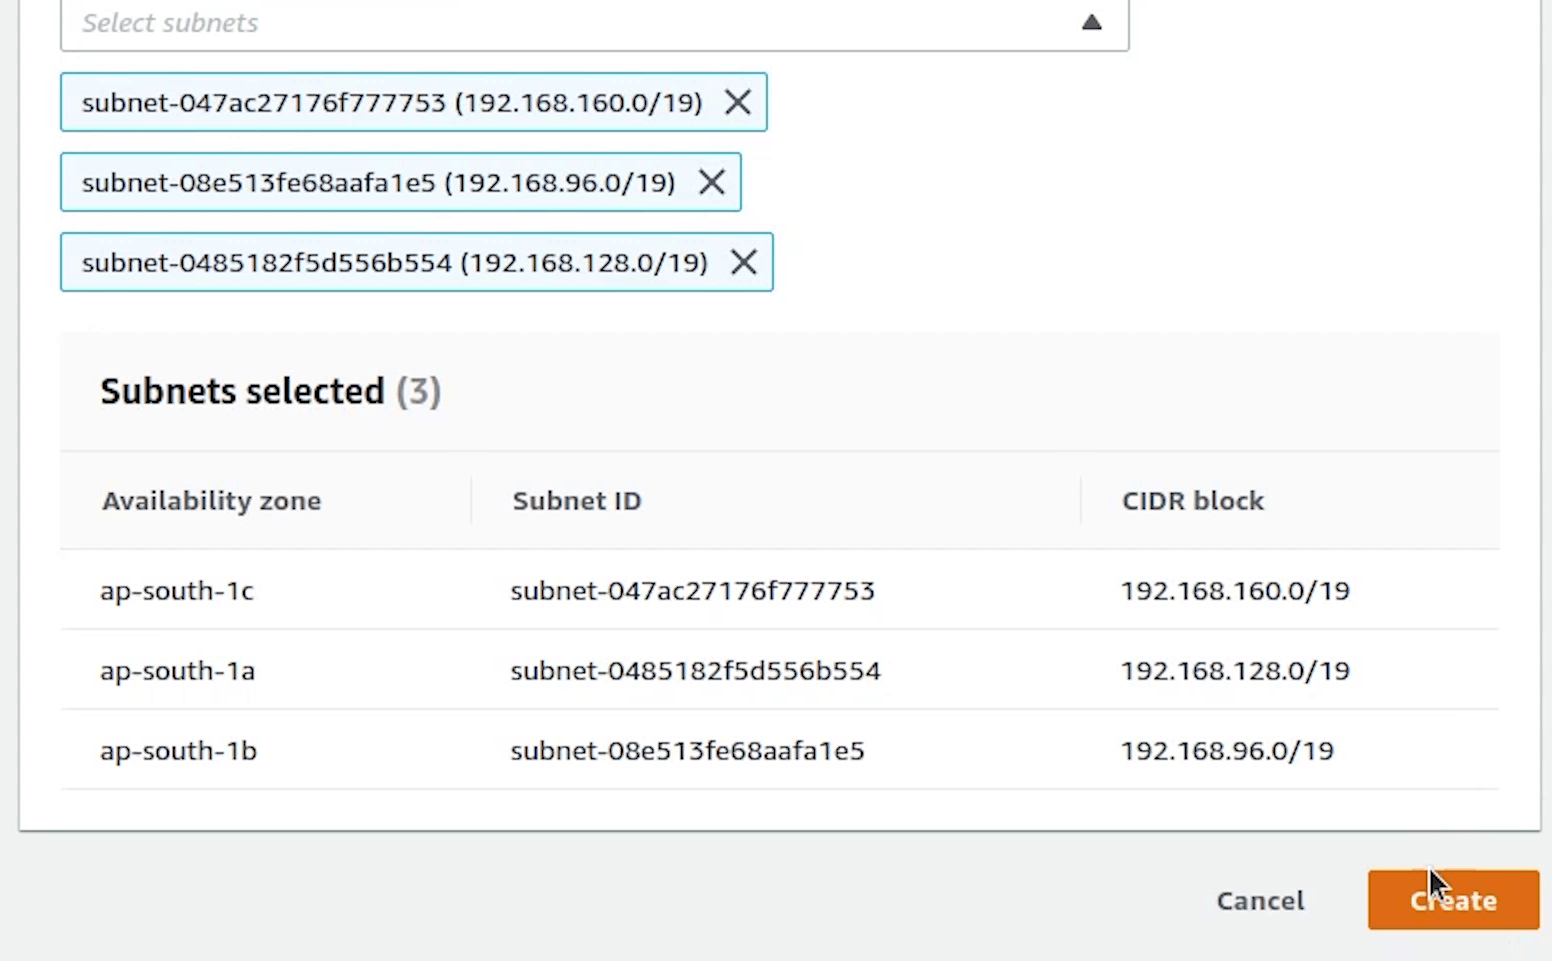
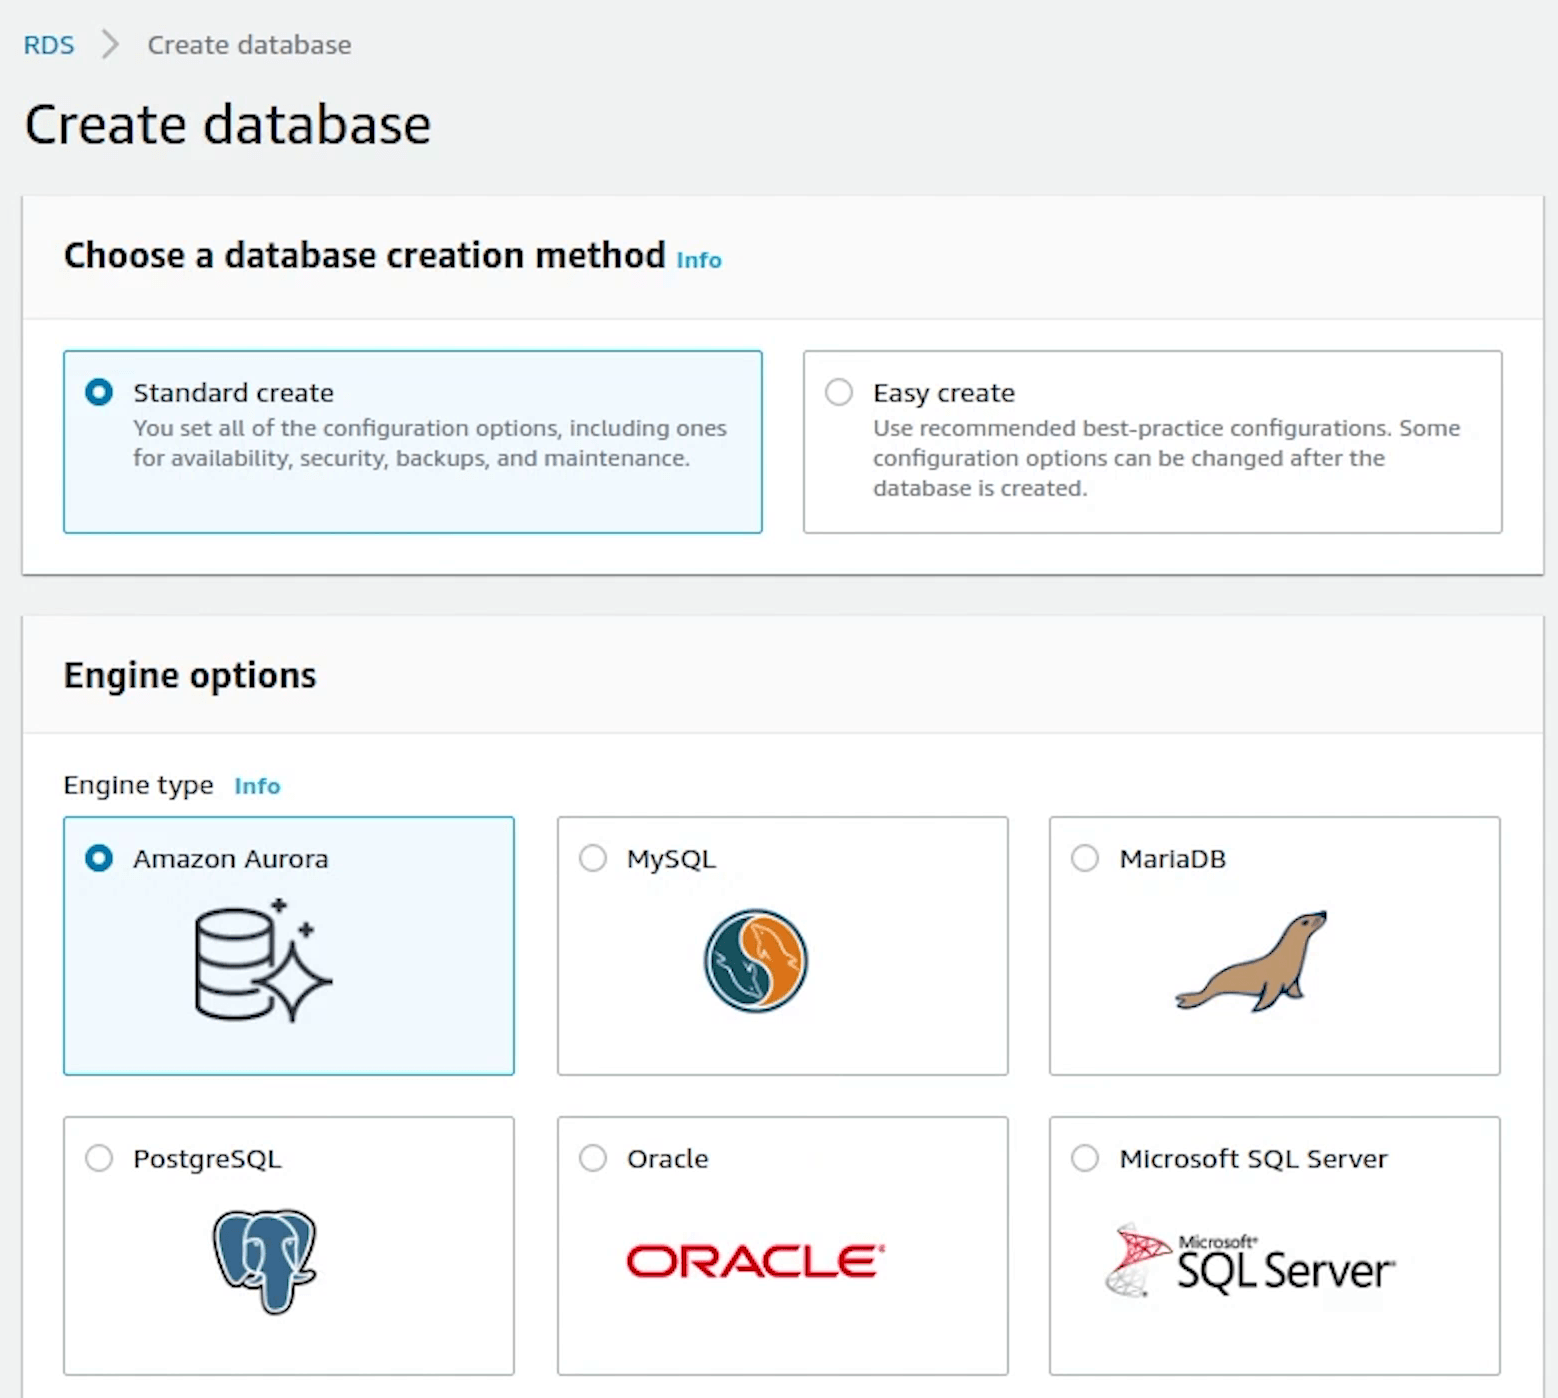
Our subnet group is created, now we will go ahead and complete the process of creating a new database.
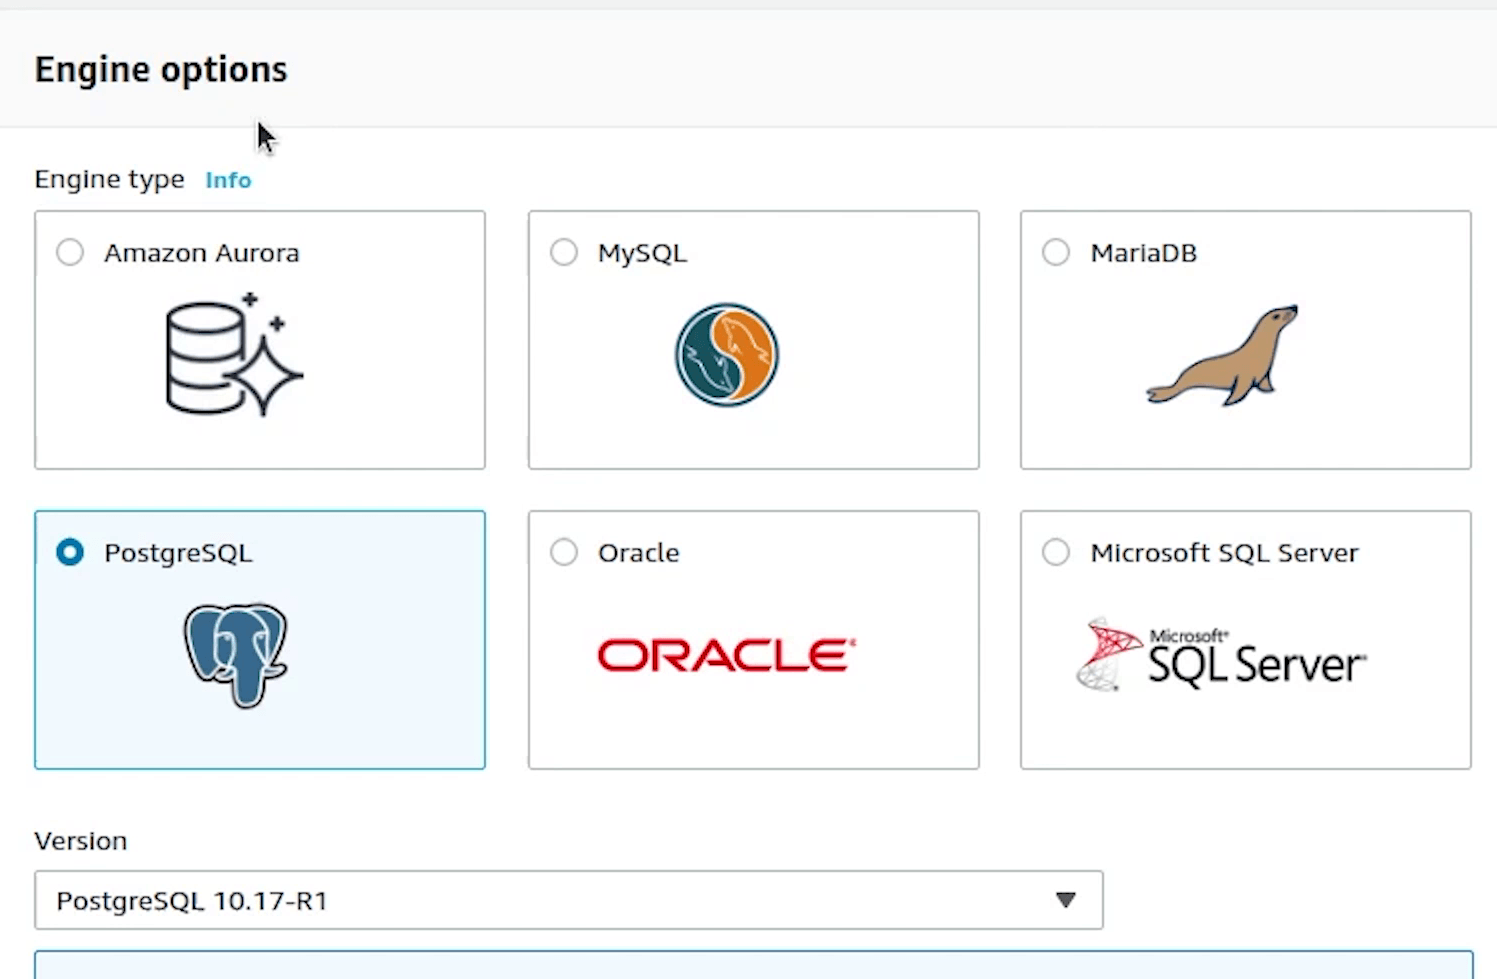
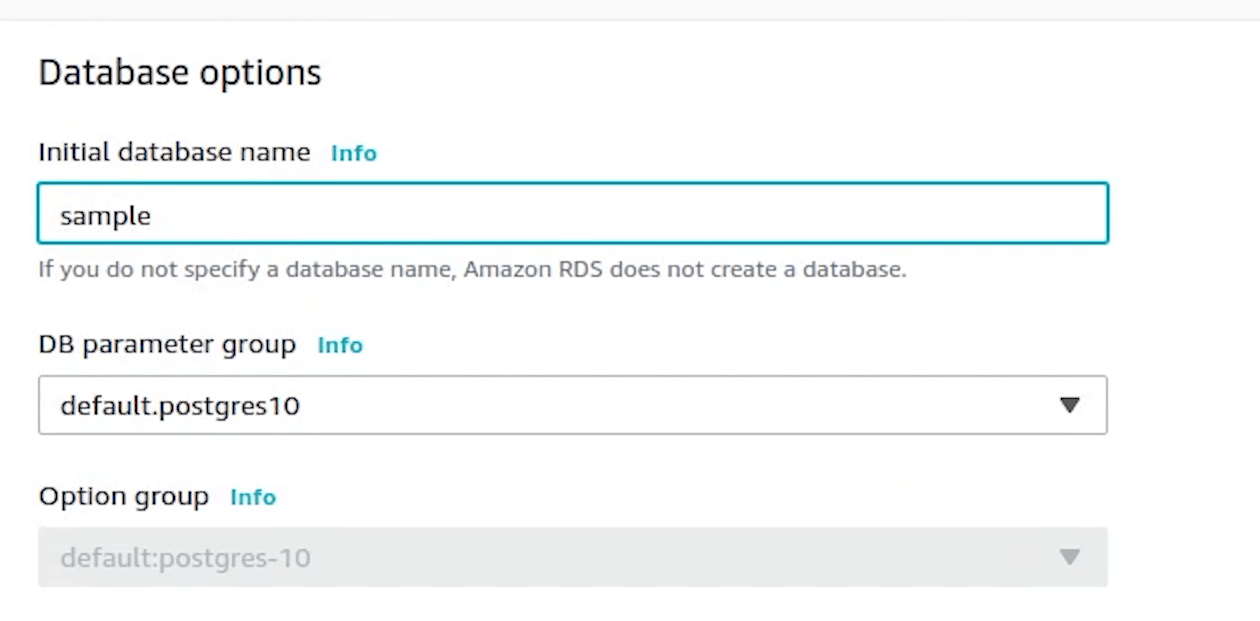
Creation method is going to be standard create and the engine will be Postgres and the version which we are going to use is 10.17
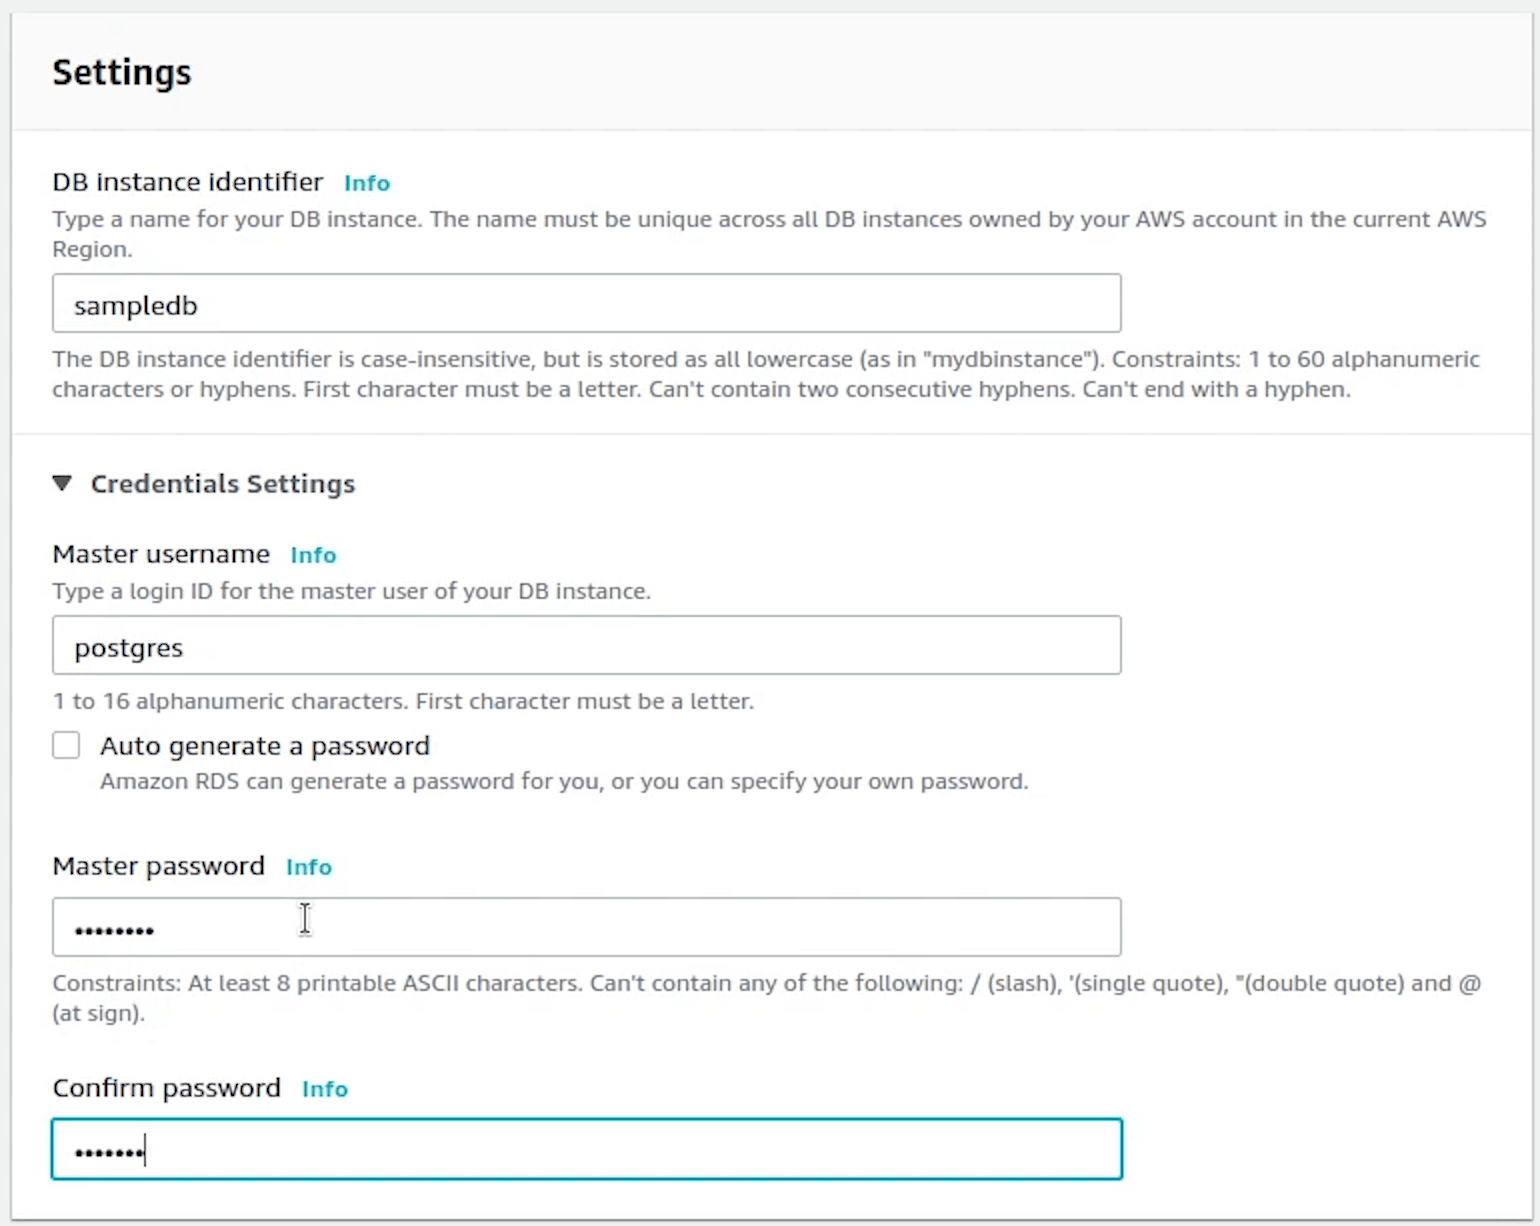
DB instance identifier will be set to sampledb. Username is going to be postgres, and I will provide the master password.
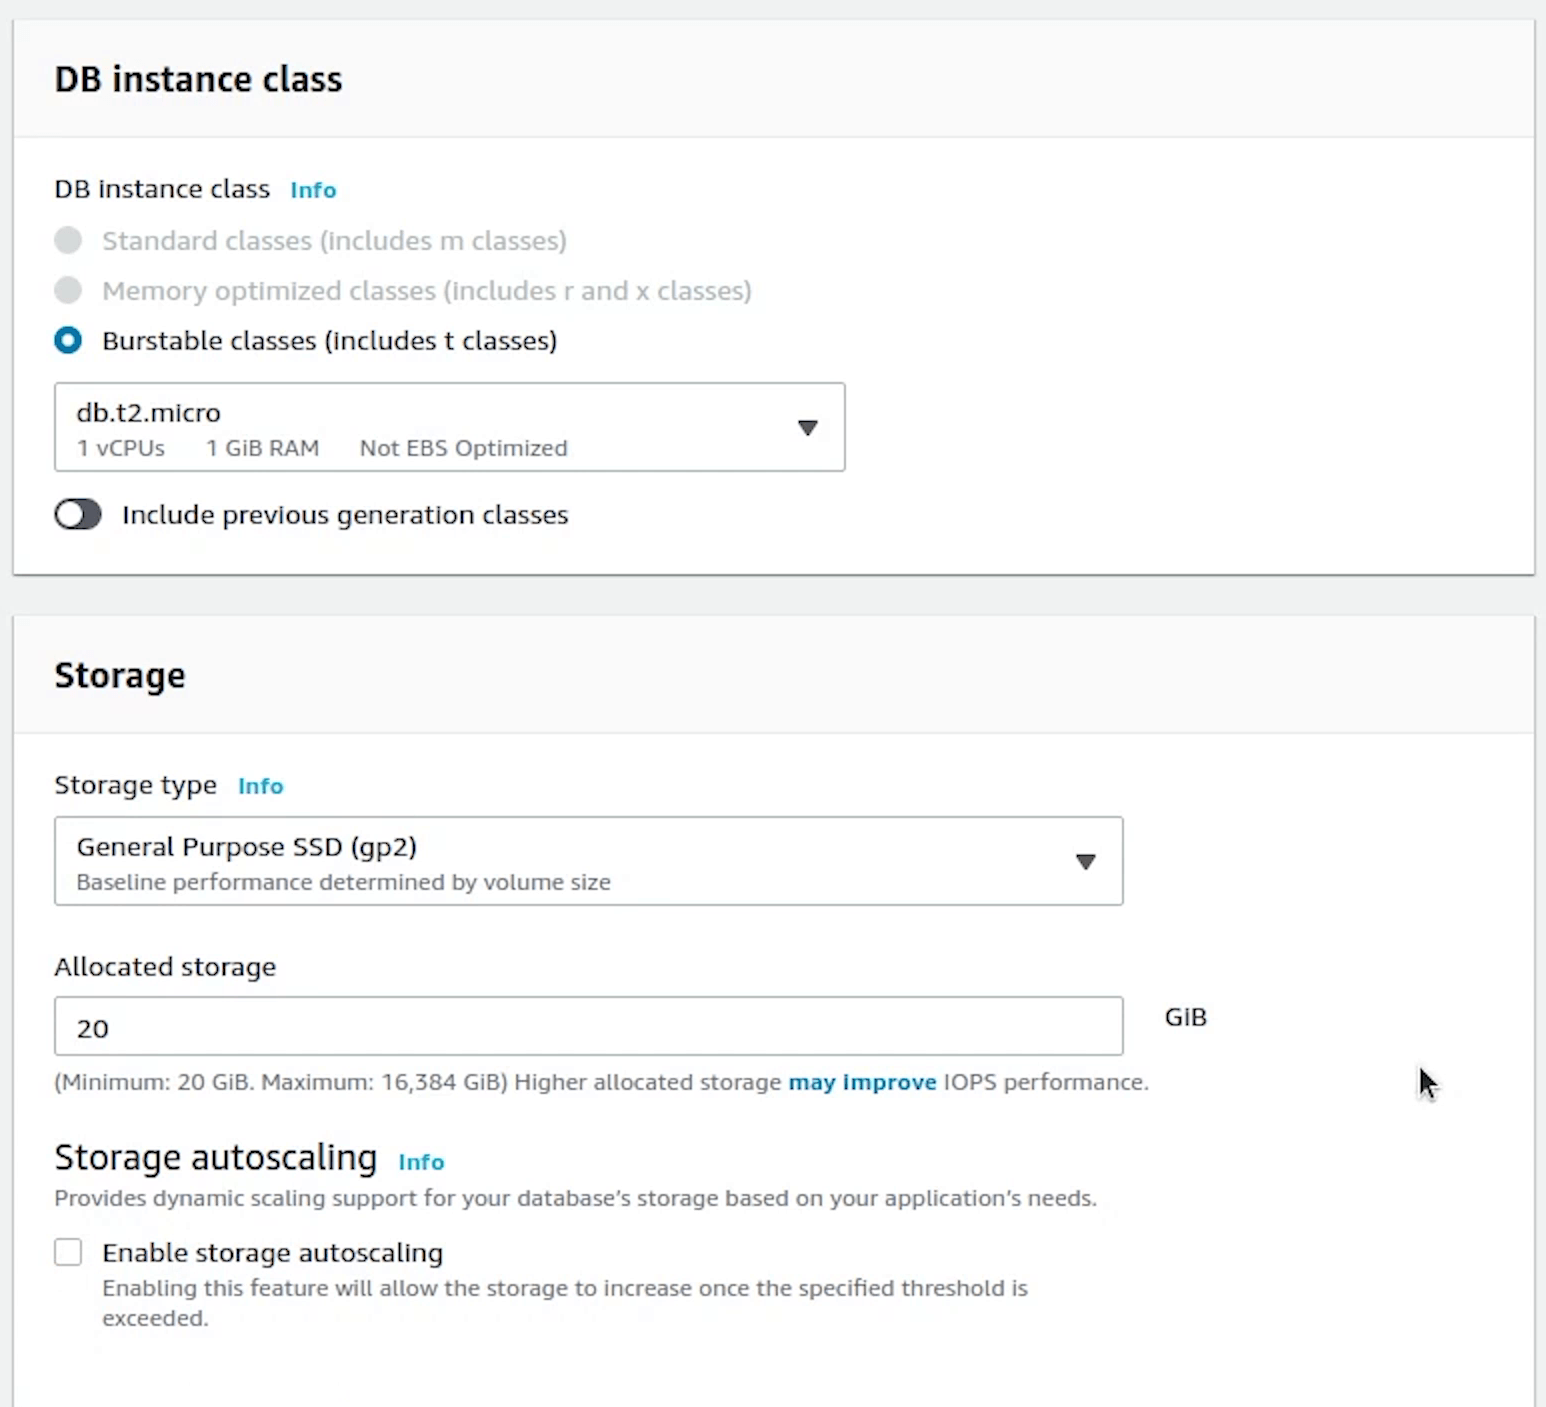
DB instances will be t2.micro, we need to be in control of our costs.
We will disable the storage autoscaling.
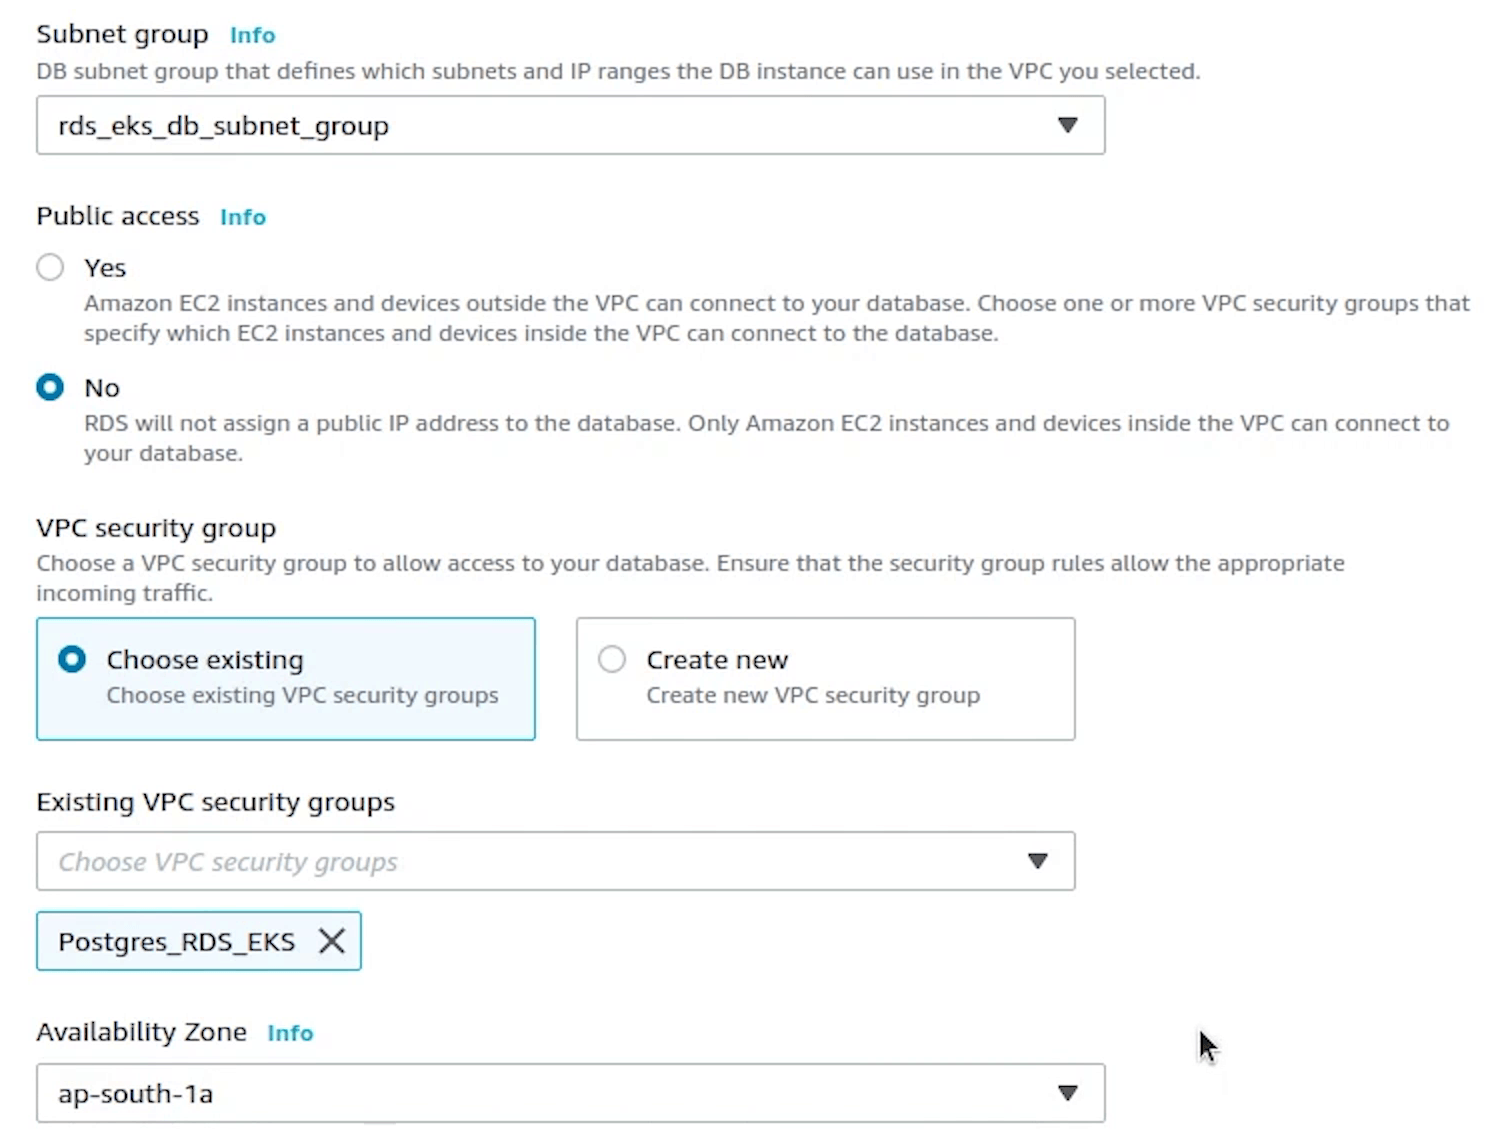
Under Connectivity, choose fastapi-demo cluster, and automatically it has picked our custom rds eks db subnet group.
Public access will be set to No. Kind of extra precaution no one can access our db instance outside our cluster.
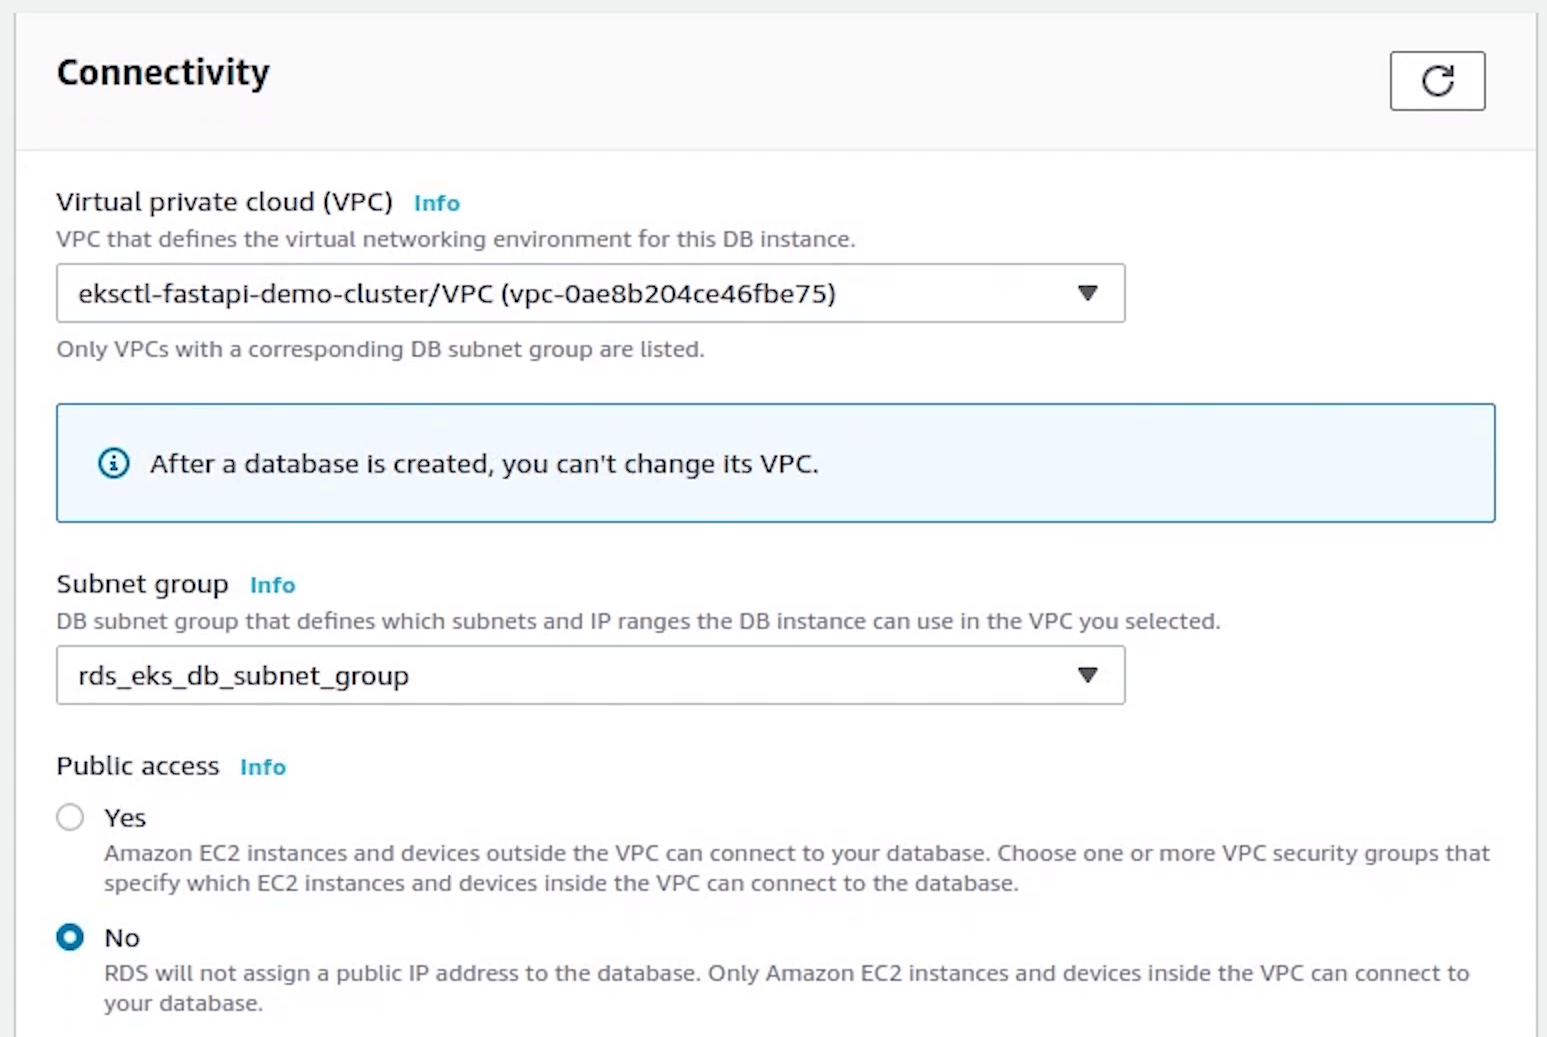
Next, I will be choosing the Security Group which we created earlier.
Under Additional Configuration, I am going to provide the database name.

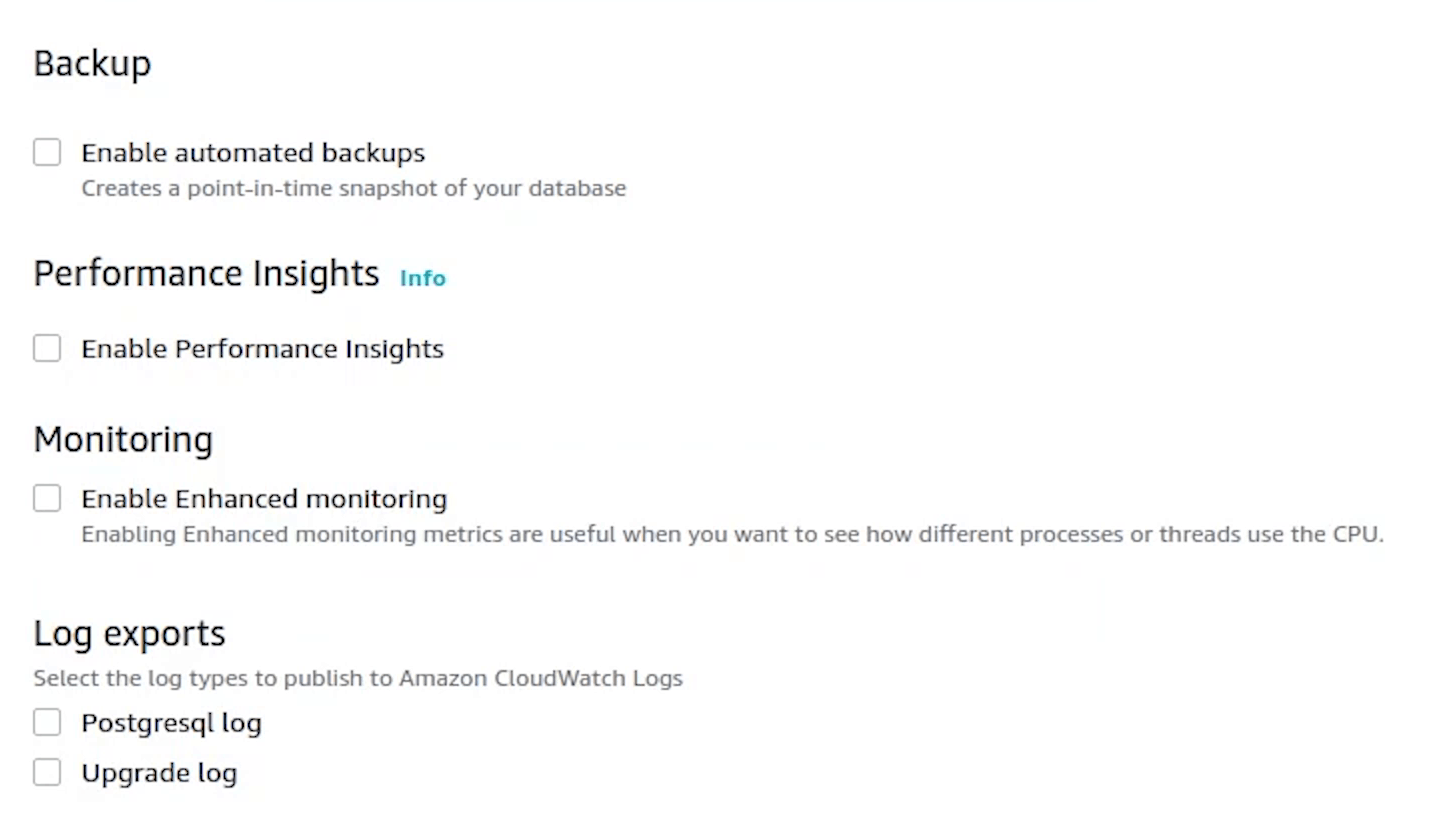
Disable backup, performance insights, maintenance and monitoring. As this is not a production setup, we can skip this.
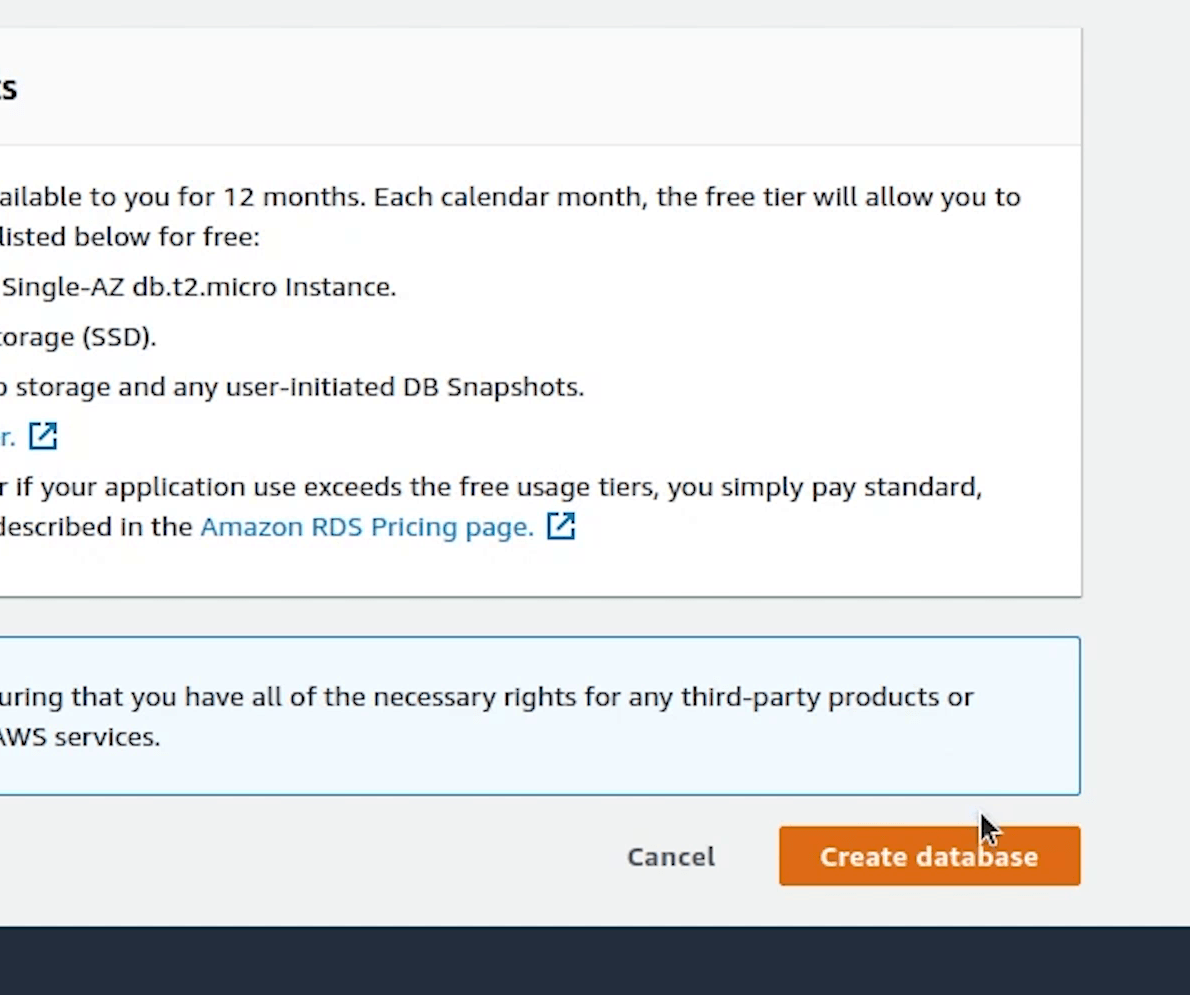
Everything looks good, I am going to click on Create database.
It will take a few minutes to initialize our new db. We will come back to this later.

RBAC
Coming back to the PyCharm Terminal, I am going to create the role based access control (RBAC) for our ingress controller.
A RoleBinding grants permissions within a specific namespace whereas a ClusterRoleBinding grants that access cluster-wide.
kubectl apply -f https://raw.githubusercontent.com/kubernetes-sigs/aws-alb-ingress-controller/master/docs/examples/rbac-role.yaml --kubeconfig=fastapi-demo
eks/utils/rbac-role.yml
---
apiVersion: rbac.authorization.k8s.io/v1
kind: ClusterRole
metadata:
  labels:
    app.kubernetes.io/name: alb-ingress-controller
  name: alb-ingress-controller
rules:
  - apiGroups:
      - ""
      - extensions
    resources:
      - configmaps
      - endpoints
      - events
      - ingresses
      - ingresses/status
      - services
      - pods/status
    verbs:
      - create
      - get
      - list
      - update
      - watch
      - patch
  - apiGroups:
      - ""
      - extensions
    resources:
      - nodes
      - pods
      - secrets
      - services
      - namespaces
    verbs:
      - get
      - list
      - watch
---
apiVersion: rbac.authorization.k8s.io/v1
kind: ClusterRoleBinding
metadata:
  labels:
    app.kubernetes.io/name: alb-ingress-controller
  name: alb-ingress-controller
roleRef:
  apiGroup: rbac.authorization.k8s.io
  kind: ClusterRole
  name: alb-ingress-controller
subjects:
  - kind: ServiceAccount
    name: alb-ingress-controller
    namespace: kube-system
---
apiVersion: v1
kind: ServiceAccount
metadata:
  labels:
    app.kubernetes.io/name: alb-ingress-controller
  name: alb-ingress-controller
  namespace: kube-system
Kubernetes service accounts are Kubernetes resources, created and managed using the Kubernetes API. They are meant to be used by in-cluster Kubernetes-created entities, such as Pods, to authenticate to the Kubernetes API server or external services.
Reference:
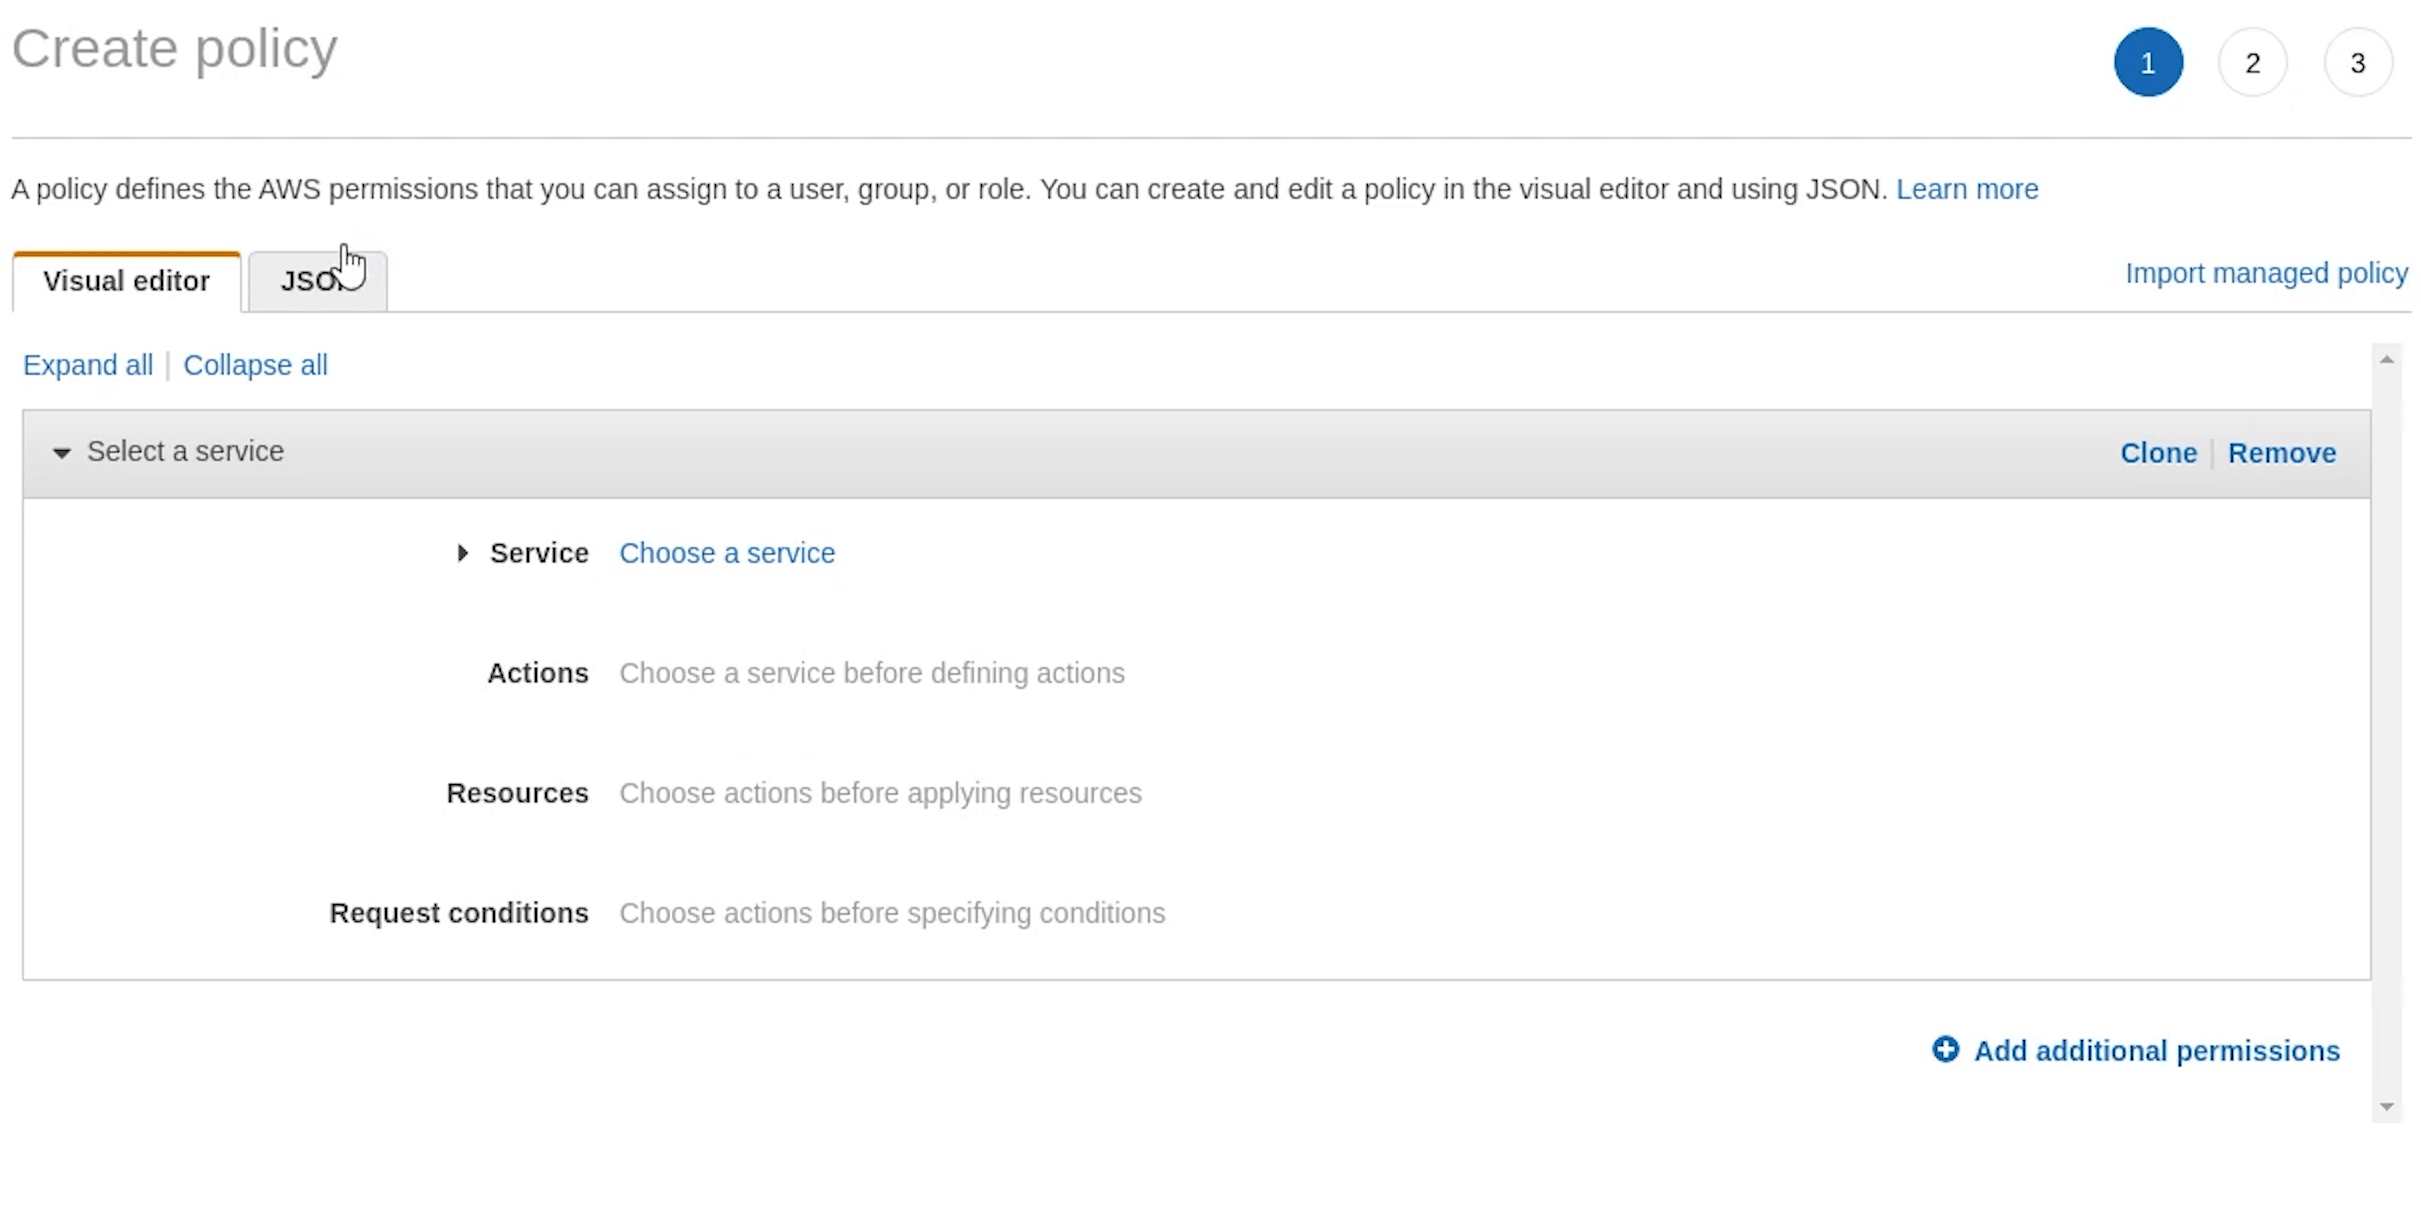
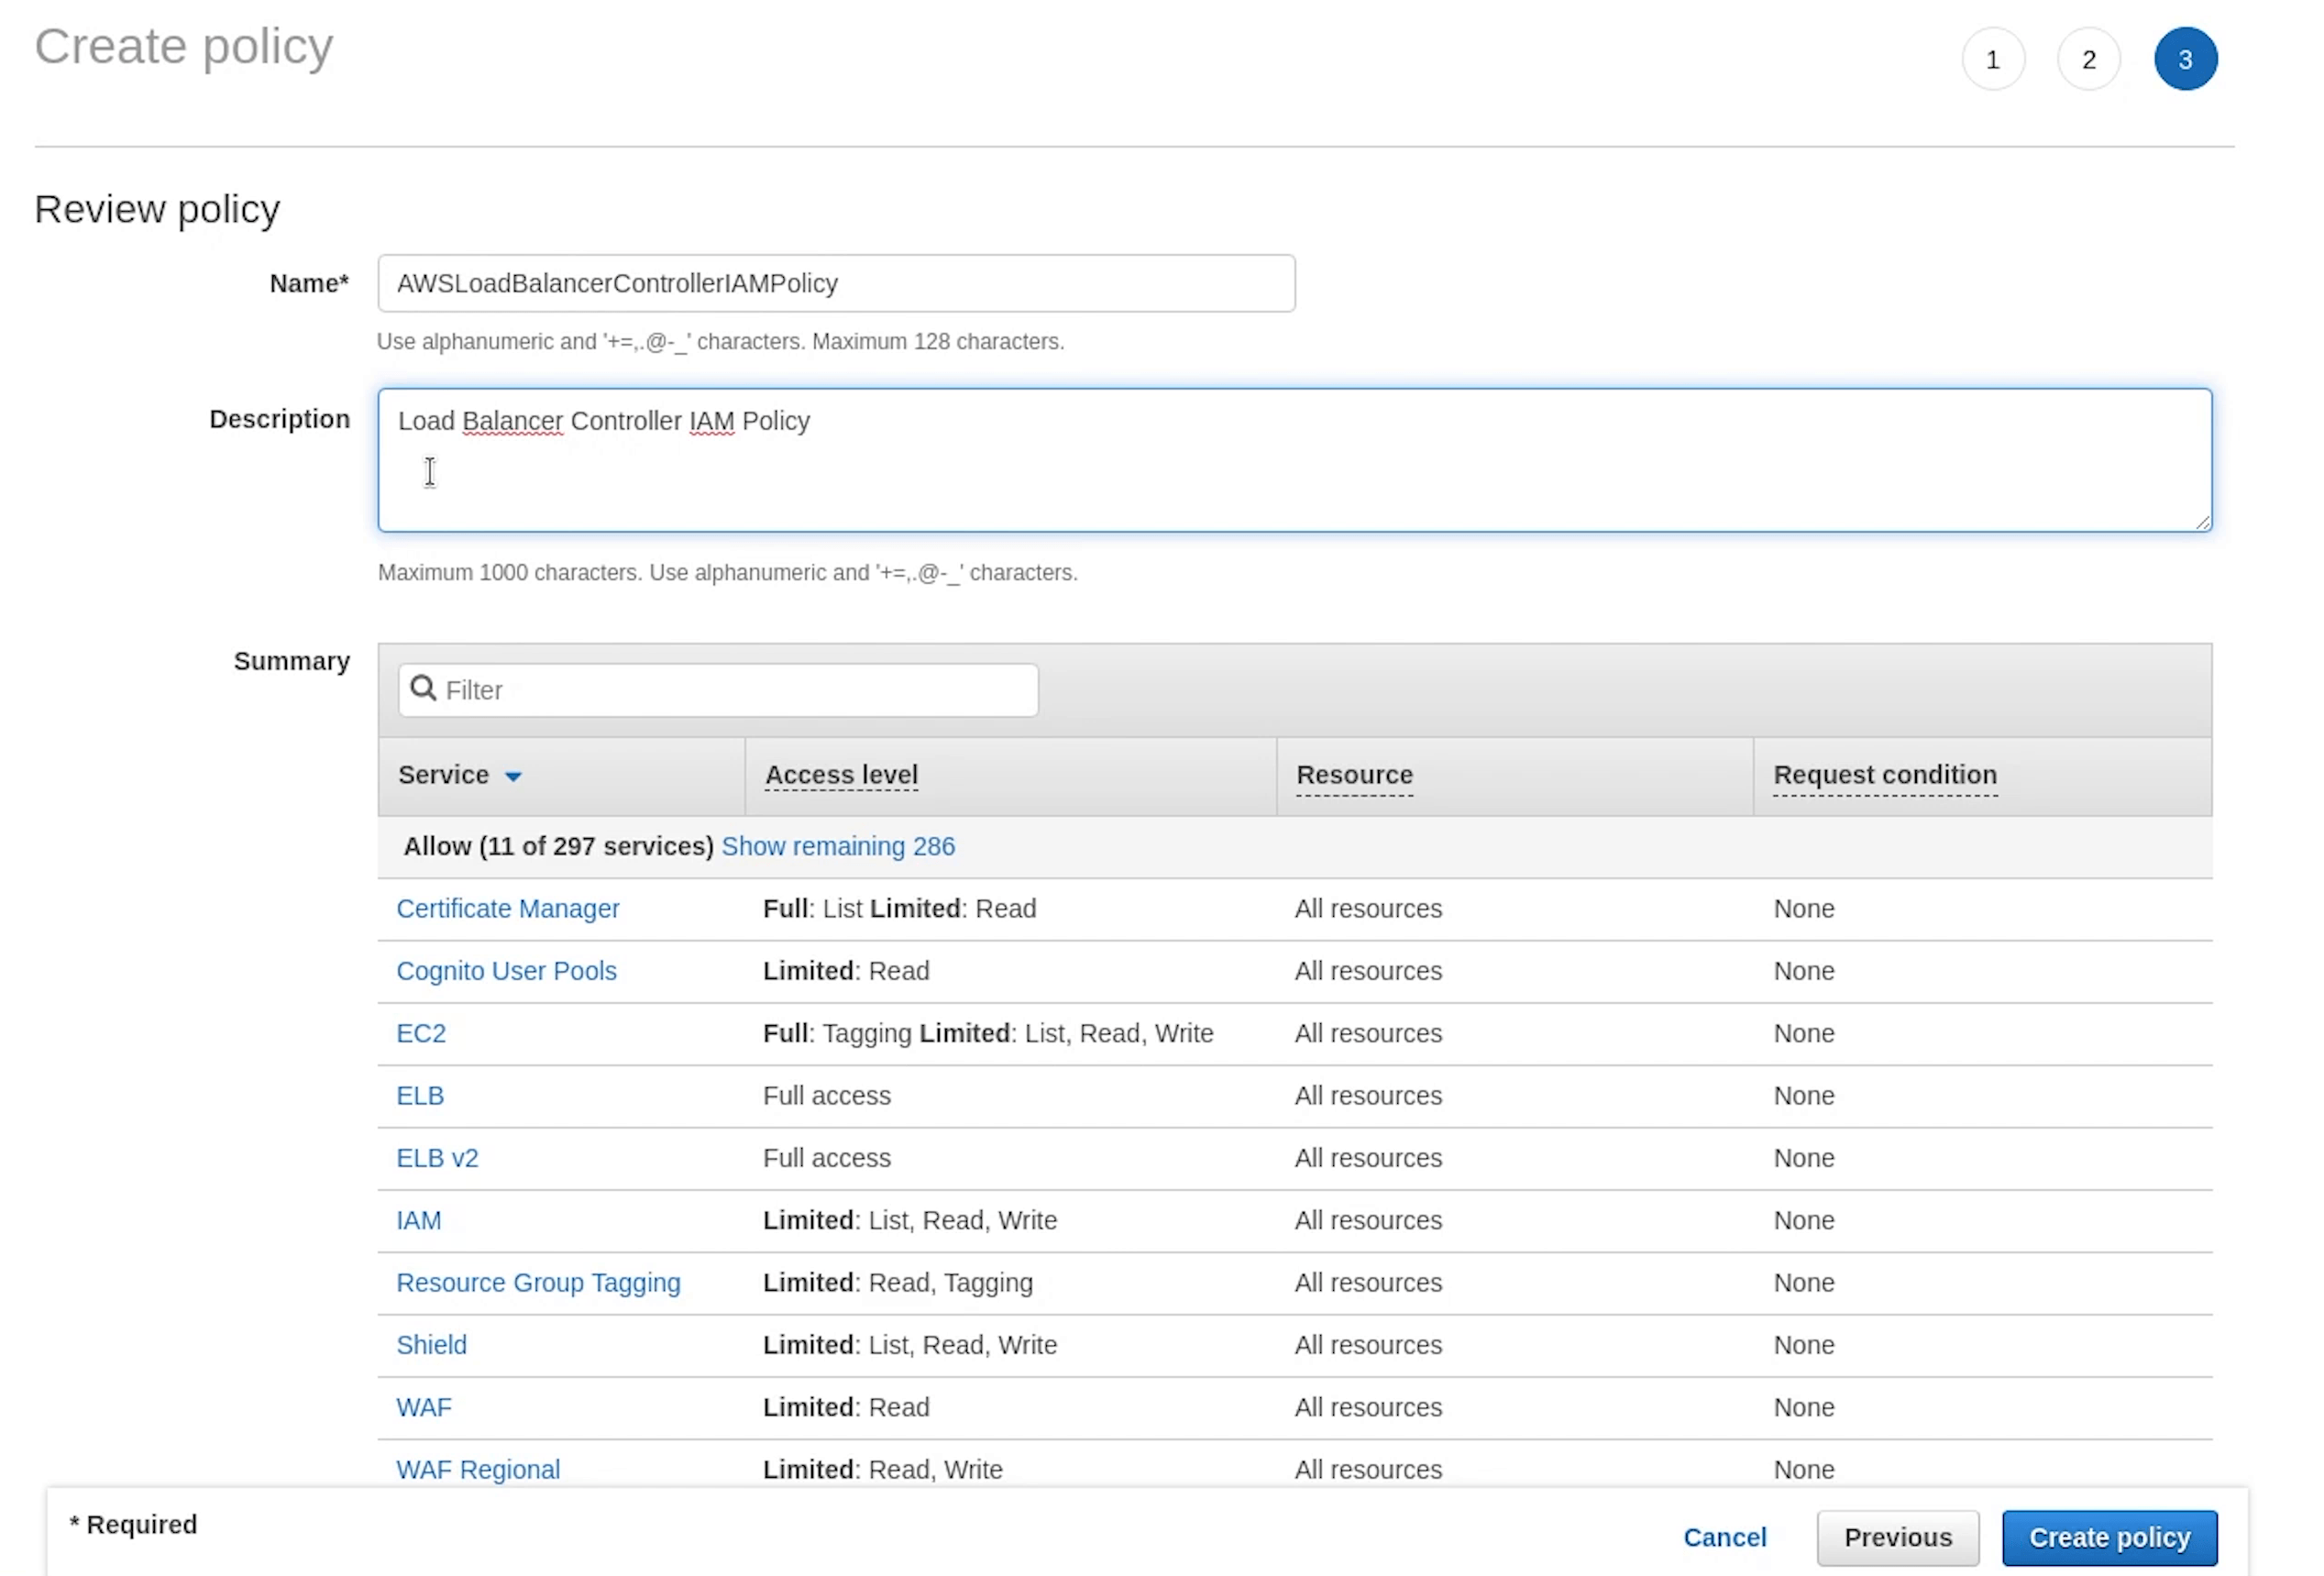
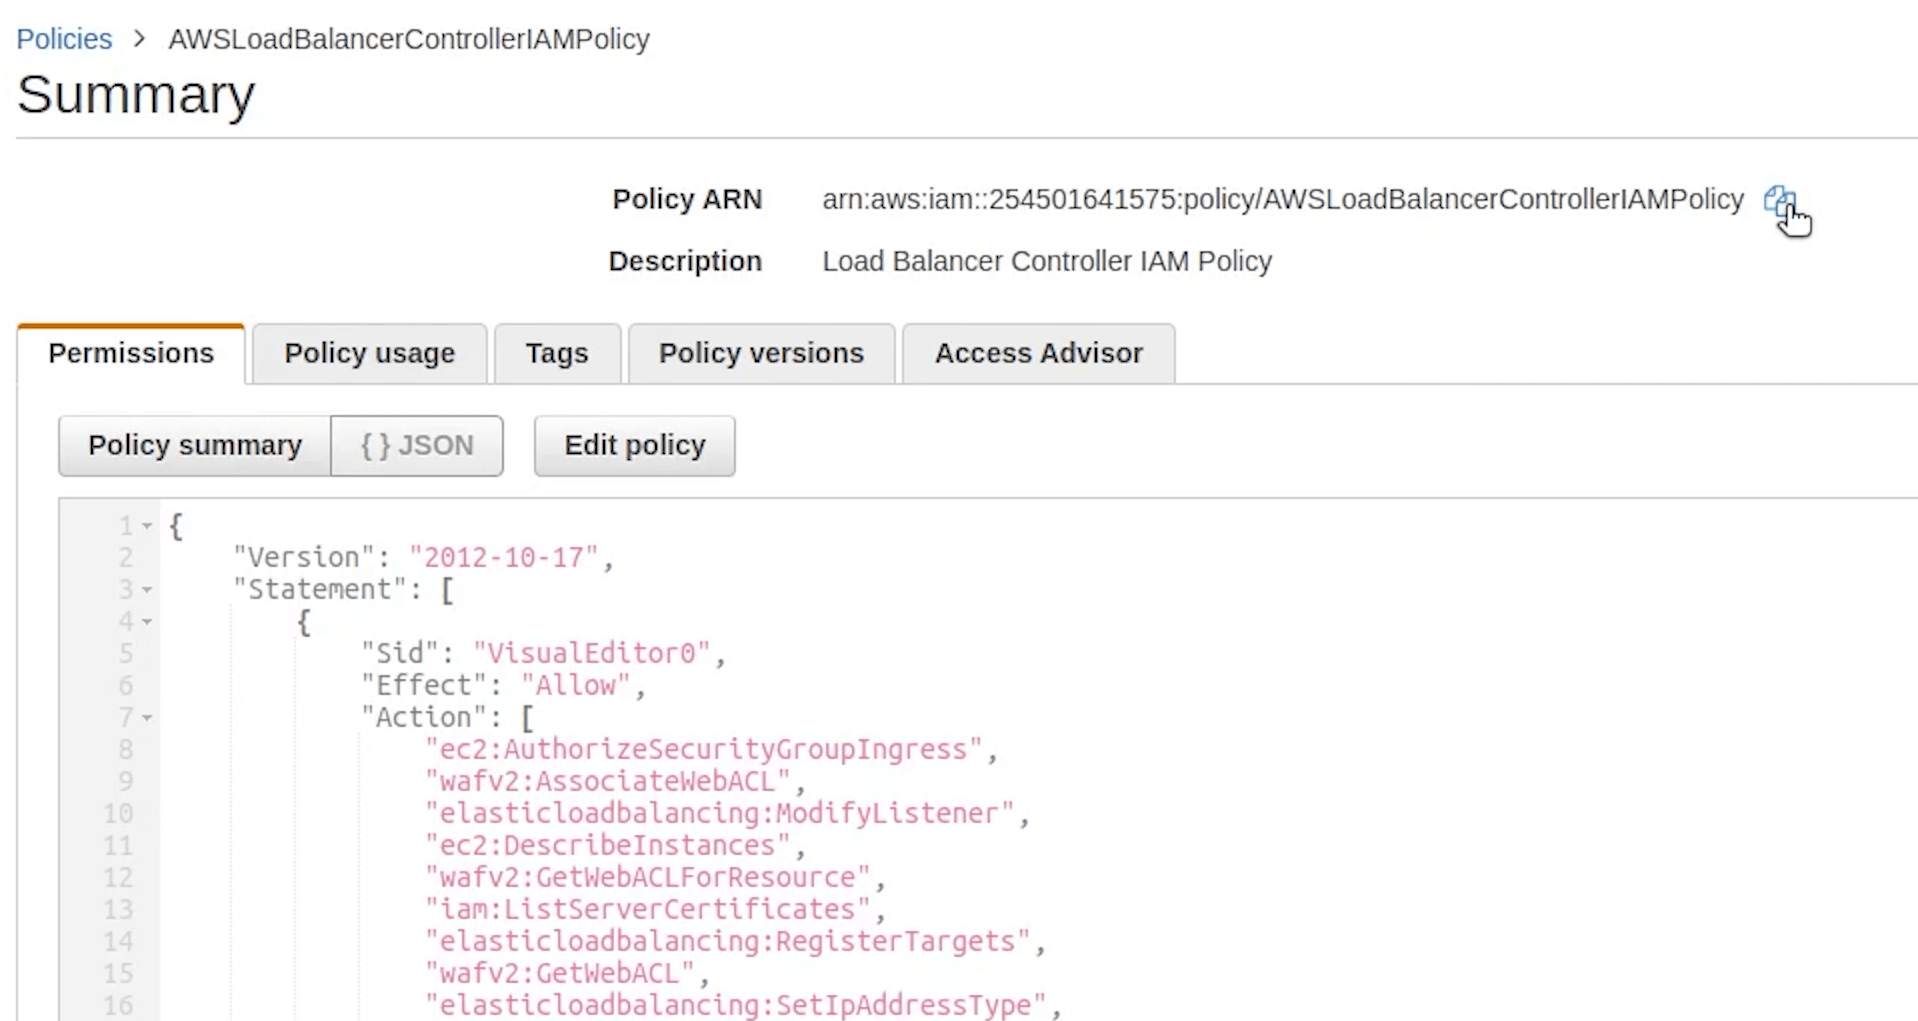
Next, I will go to IAM and create an AWS Load Balancer Policy.
I already have the IAM policy file, you can take it directly from my repository placed under the EKS directory. I will copy and paste the JSON.
eks/utils/iam-policy.json
{
	"Version": "2012-10-17",
	"Statement": [
		{
			"Effect": "Allow",
			"Action": [
				"acm:DescribeCertificate",
				"acm:ListCertificates",
				"acm:GetCertificate"
			],
			"Resource": "*"
		},
		{
			"Effect": "Allow",
			"Action": [
				"ec2:AuthorizeSecurityGroupIngress",
				"ec2:CreateSecurityGroup",
				"ec2:CreateTags",
				"ec2:DeleteTags",
				"ec2:DeleteSecurityGroup",
				"ec2:DescribeAccountAttributes",
				"ec2:DescribeAddresses",
				"ec2:DescribeInstances",
				"ec2:DescribeInstanceStatus",
				"ec2:DescribeInternetGateways",
				"ec2:DescribeNetworkInterfaces",
				"ec2:DescribeSecurityGroups",
				"ec2:DescribeSubnets",
				"ec2:DescribeTags",
				"ec2:DescribeVpcs",
				"ec2:ModifyInstanceAttribute",
				"ec2:ModifyNetworkInterfaceAttribute",
				"ec2:RevokeSecurityGroupIngress"
			],
			"Resource": "*"
		},
		{
			"Effect": "Allow",
			"Action": [
				"elasticloadbalancing:AddListenerCertificates",
				"elasticloadbalancing:AddTags",
				"elasticloadbalancing:CreateListener",
				"elasticloadbalancing:CreateLoadBalancer",
				"elasticloadbalancing:CreateRule",
				"elasticloadbalancing:CreateTargetGroup",
				"elasticloadbalancing:DeleteListener",
				"elasticloadbalancing:DeleteLoadBalancer",
				"elasticloadbalancing:DeleteRule",
				"elasticloadbalancing:DeleteTargetGroup",
				"elasticloadbalancing:DeregisterTargets",
				"elasticloadbalancing:DescribeListenerCertificates",
				"elasticloadbalancing:DescribeListeners",
				"elasticloadbalancing:DescribeLoadBalancers",
				"elasticloadbalancing:DescribeLoadBalancerAttributes",
				"elasticloadbalancing:DescribeRules",
				"elasticloadbalancing:DescribeSSLPolicies",
				"elasticloadbalancing:DescribeTags",
				"elasticloadbalancing:DescribeTargetGroups",
				"elasticloadbalancing:DescribeTargetGroupAttributes",
				"elasticloadbalancing:DescribeTargetHealth",
				"elasticloadbalancing:ModifyListener",
				"elasticloadbalancing:ModifyLoadBalancerAttributes",
				"elasticloadbalancing:ModifyRule",
				"elasticloadbalancing:ModifyTargetGroup",
				"elasticloadbalancing:ModifyTargetGroupAttributes",
				"elasticloadbalancing:RegisterTargets",
				"elasticloadbalancing:RemoveListenerCertificates",
				"elasticloadbalancing:RemoveTags",
				"elasticloadbalancing:SetIpAddressType",
				"elasticloadbalancing:SetSecurityGroups",
				"elasticloadbalancing:SetSubnets",
				"elasticloadbalancing:SetWebAcl"
			],
			"Resource": "*"
		},
		{
			"Effect": "Allow",
			"Action": [
				"iam:CreateServiceLinkedRole",
				"iam:GetServerCertificate",
				"iam:ListServerCertificates"
			],
			"Resource": "*"
		},
		{
			"Effect": "Allow",
			"Action": ["cognito-idp:DescribeUserPoolClient"],
			"Resource": "*"
		},
		{
			"Effect": "Allow",
			"Action": [
				"waf-regional:GetWebACLForResource",
				"waf-regional:GetWebACL",
				"waf-regional:AssociateWebACL",
				"waf-regional:DisassociateWebACL"
			],
			"Resource": "*"
		},
		{
			"Effect": "Allow",
			"Action": ["tag:GetResources", "tag:TagResources"],
			"Resource": "*"
		},
		{
			"Effect": "Allow",
			"Action": ["waf:GetWebACL"],
			"Resource": "*"
		},
		{
			"Effect": "Allow",
			"Action": [
				"wafv2:GetWebACL",
				"wafv2:GetWebACLForResource",
				"wafv2:AssociateWebACL",
				"wafv2:DisassociateWebACL"
			],
			"Resource": "*"
		},
		{
			"Effect": "Allow",
			"Action": [
				"shield:DescribeProtection",
				"shield:GetSubscriptionState",
				"shield:DeleteProtection",
				"shield:CreateProtection",
				"shield:DescribeSubscription",
				"shield:ListProtections"
			],
			"Resource": "*"
		}
	]
}
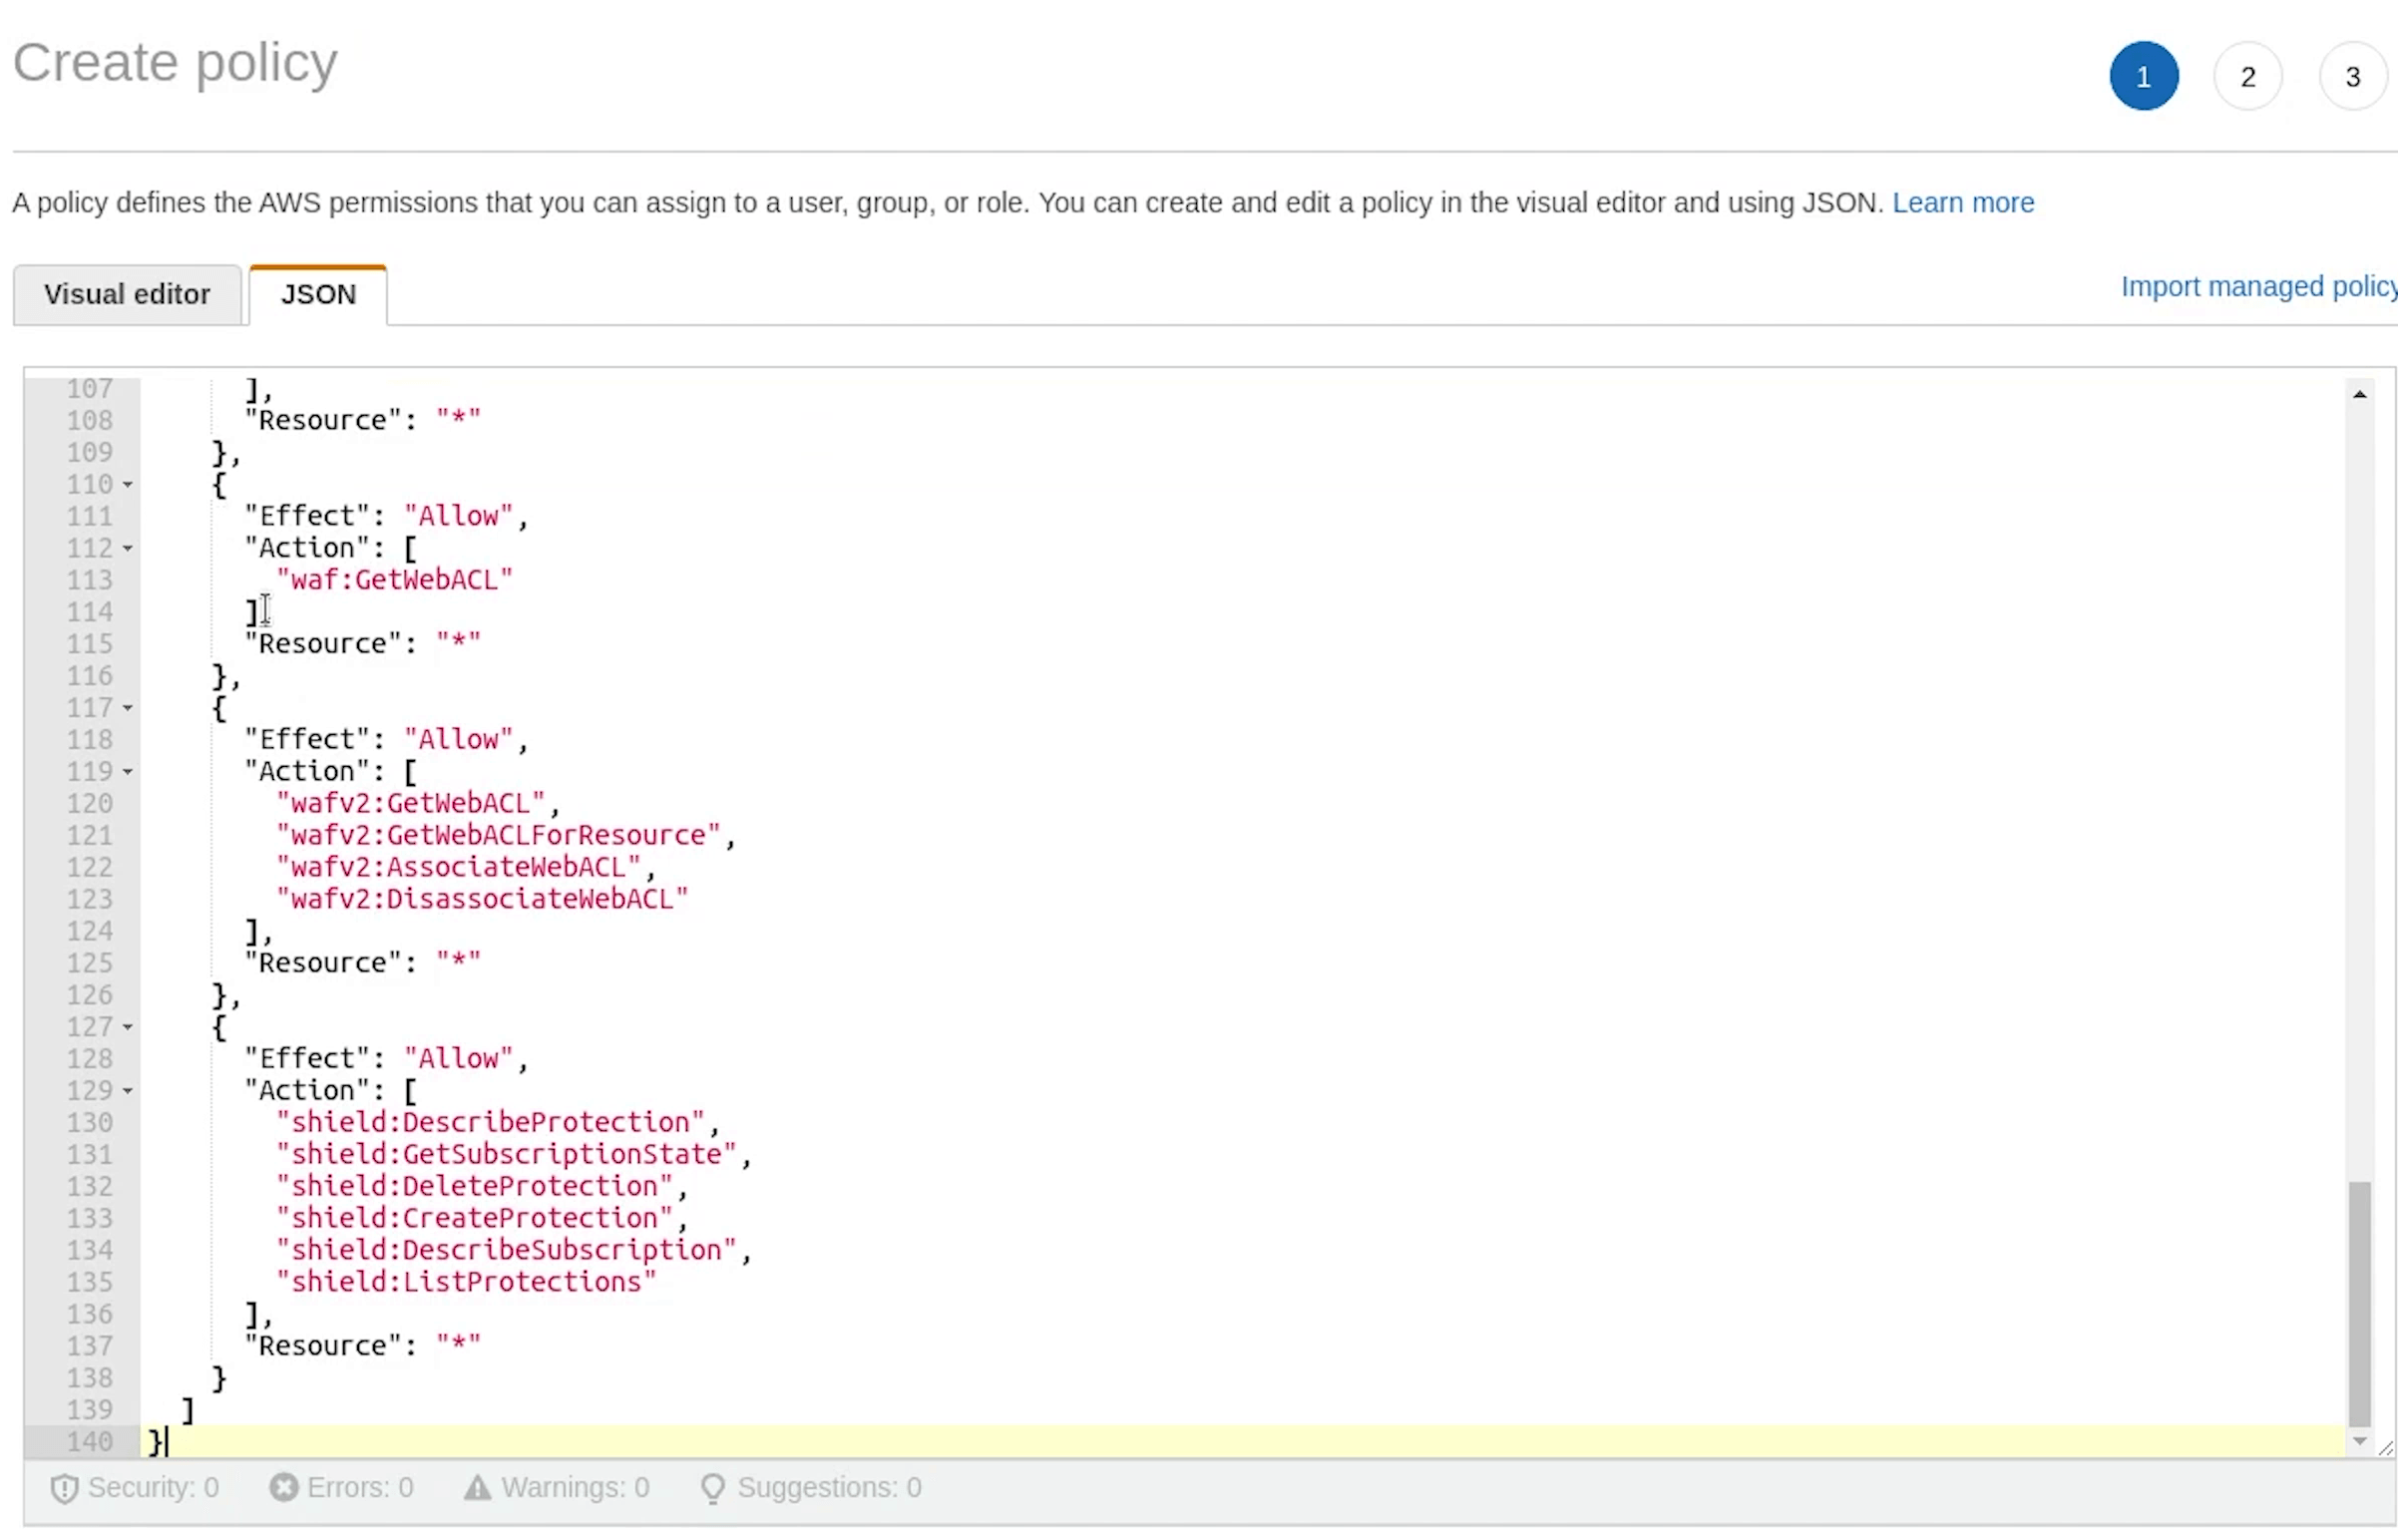
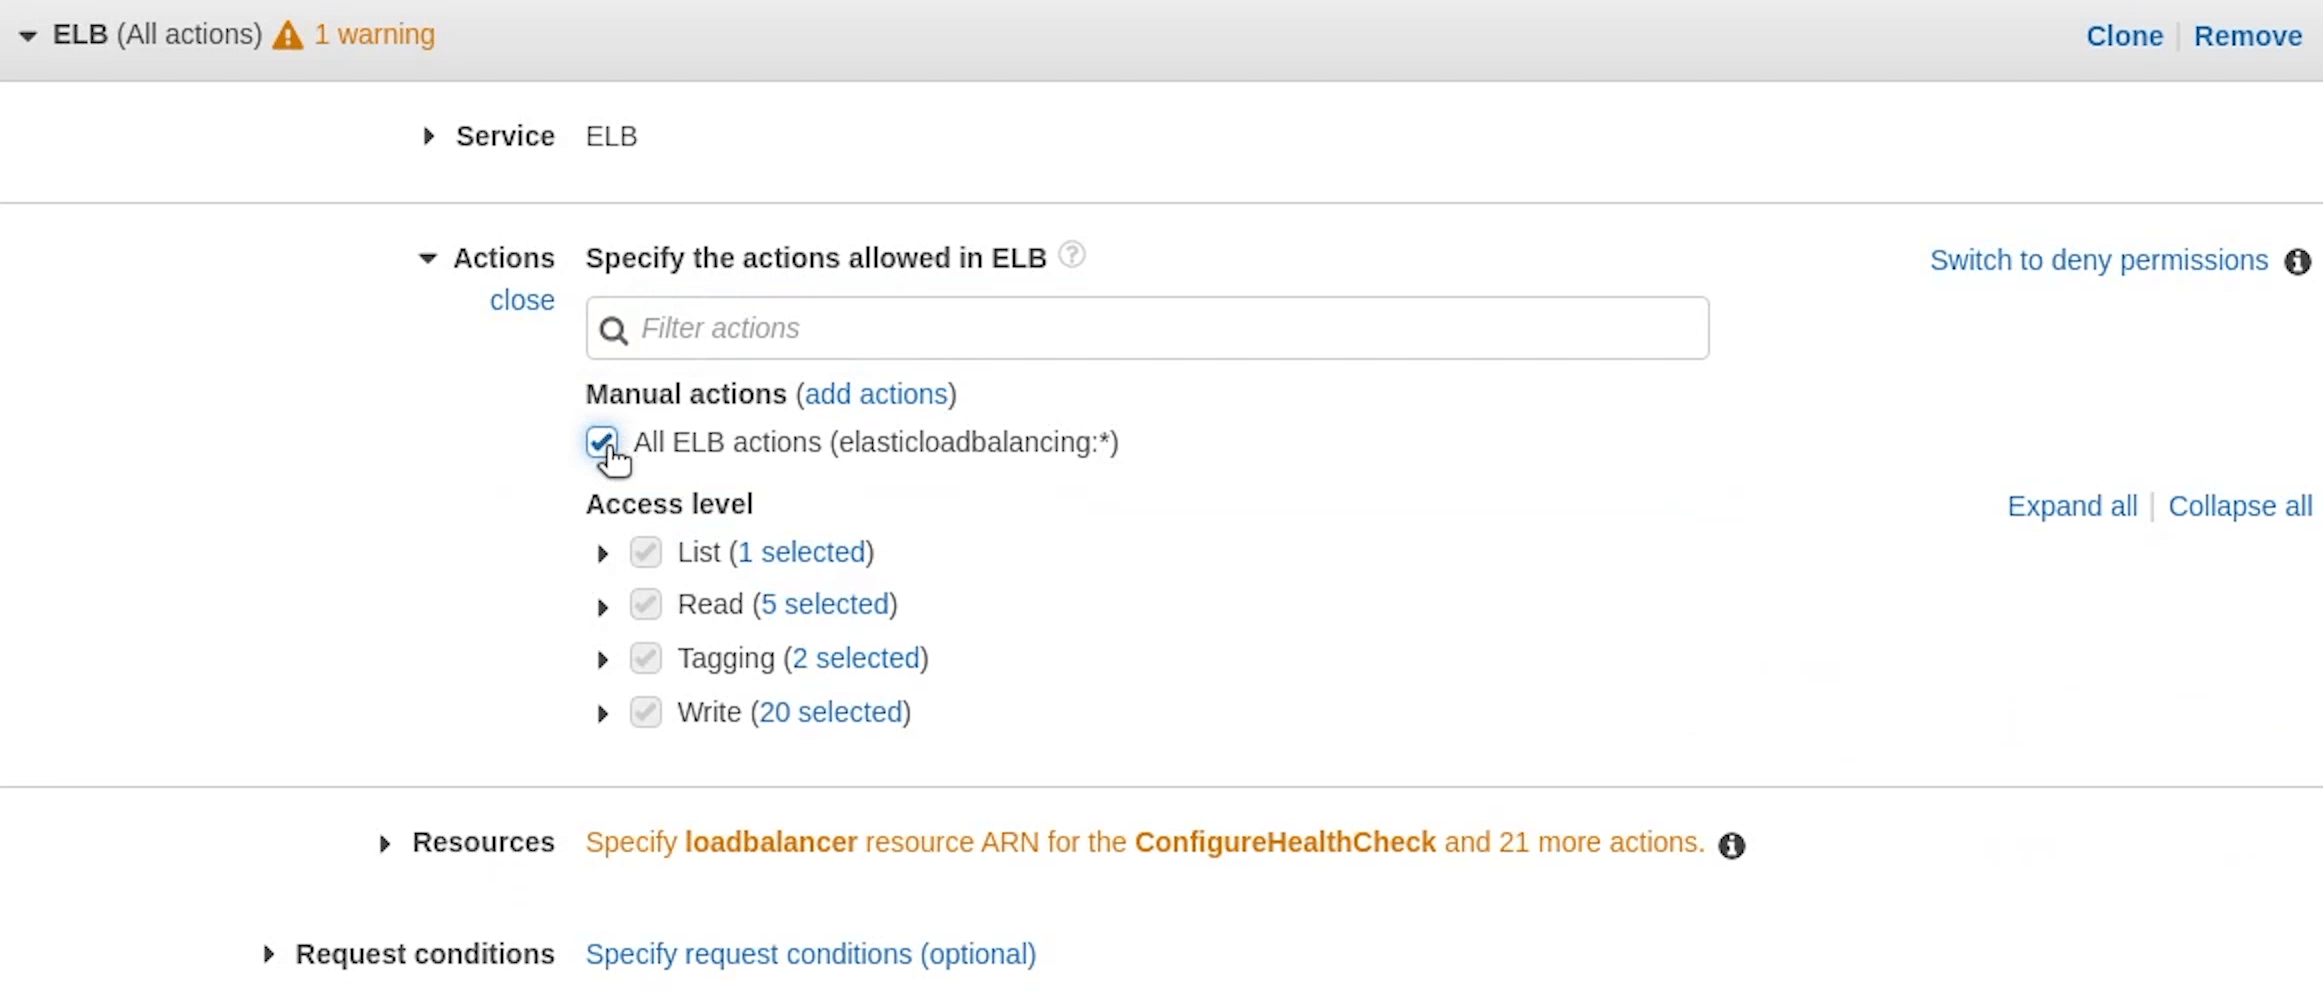
There is a warning coming up in the visual editor, I will remove elb and add it again.
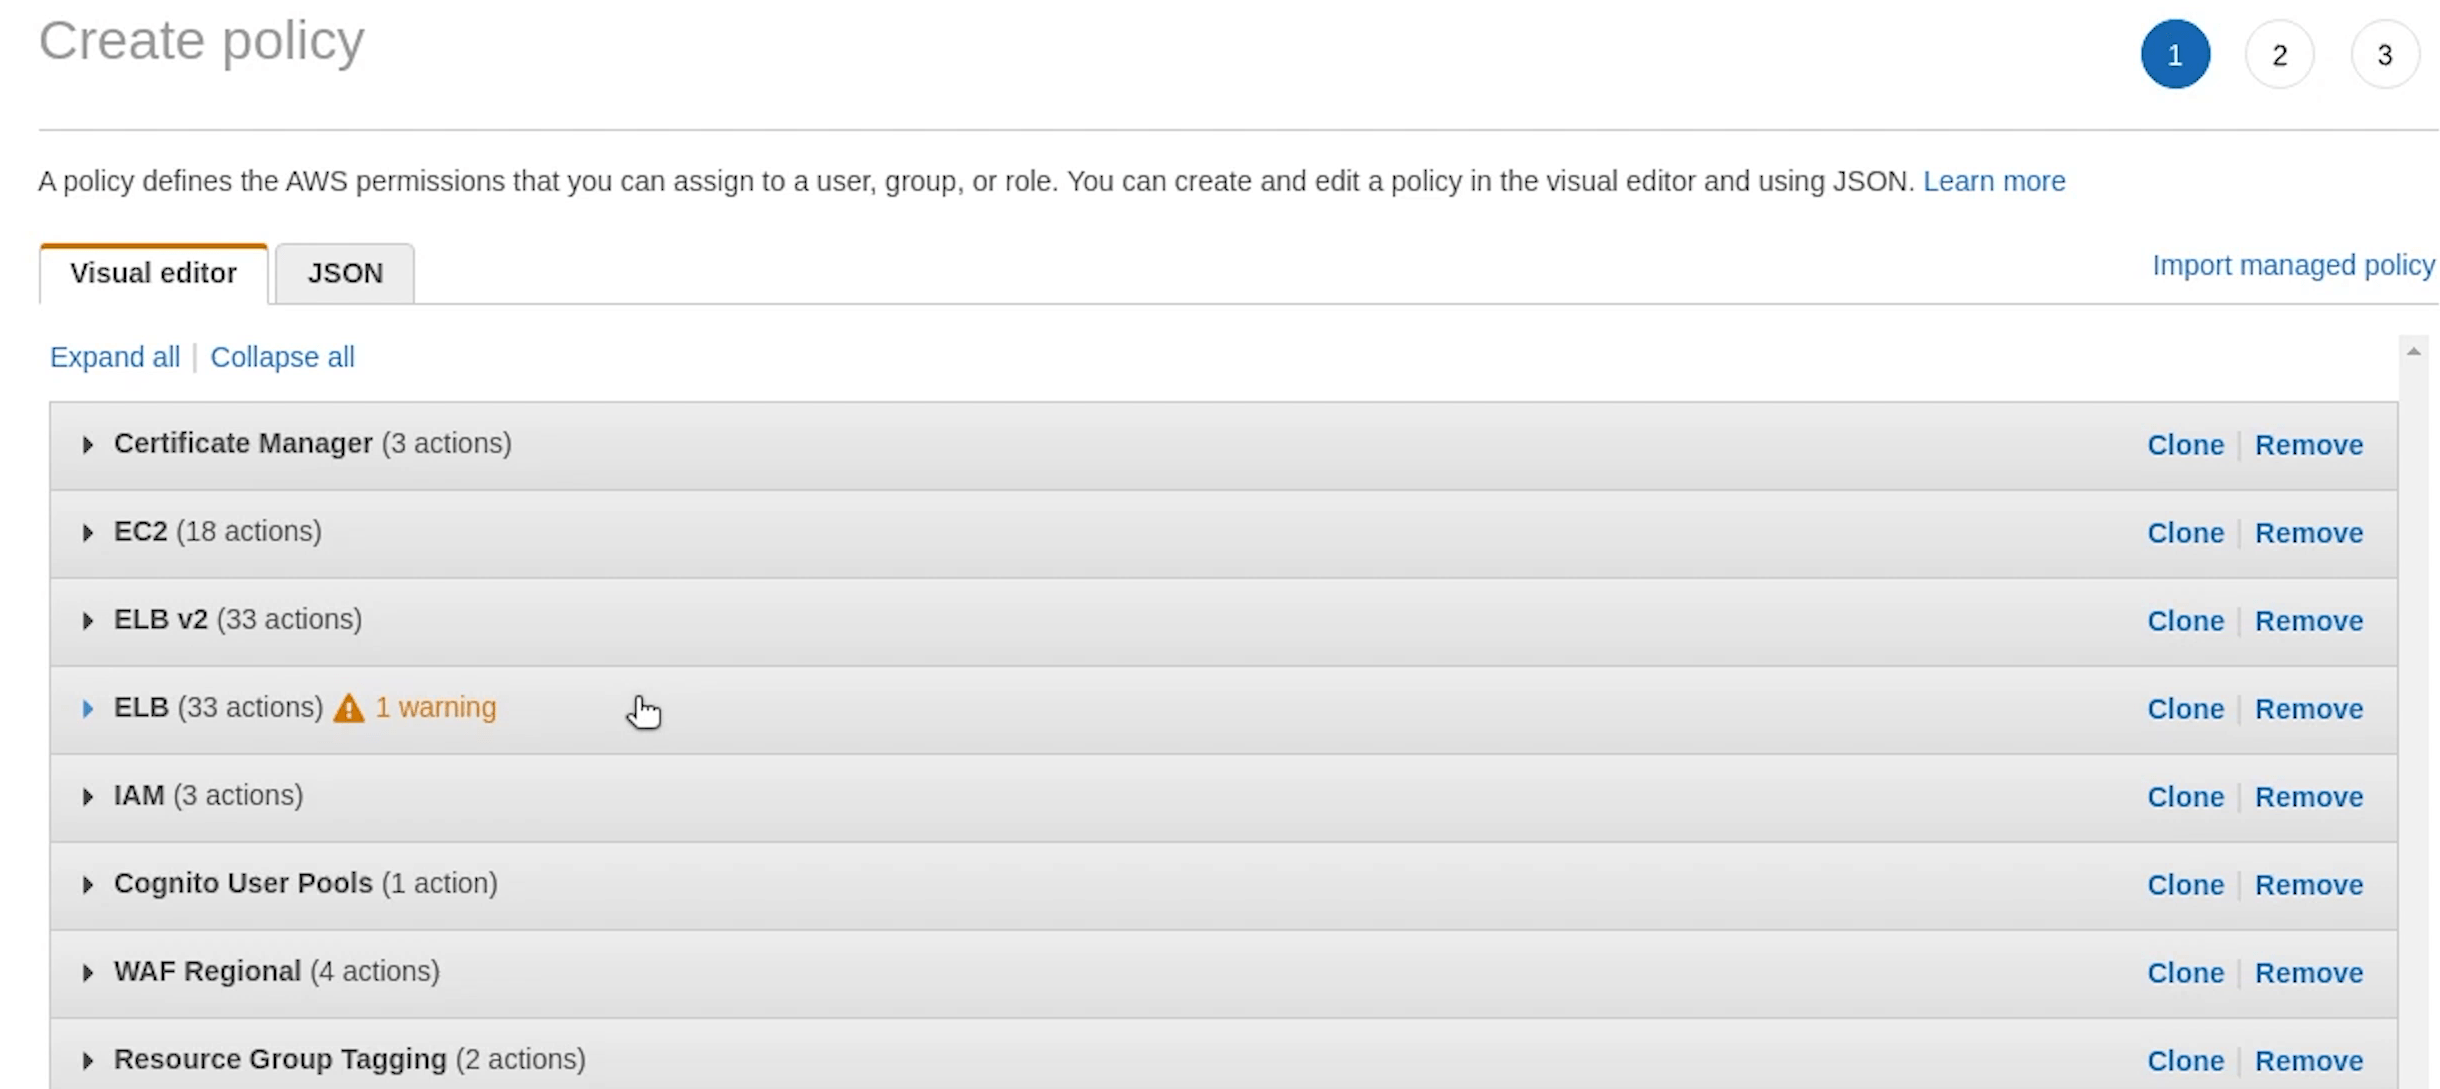
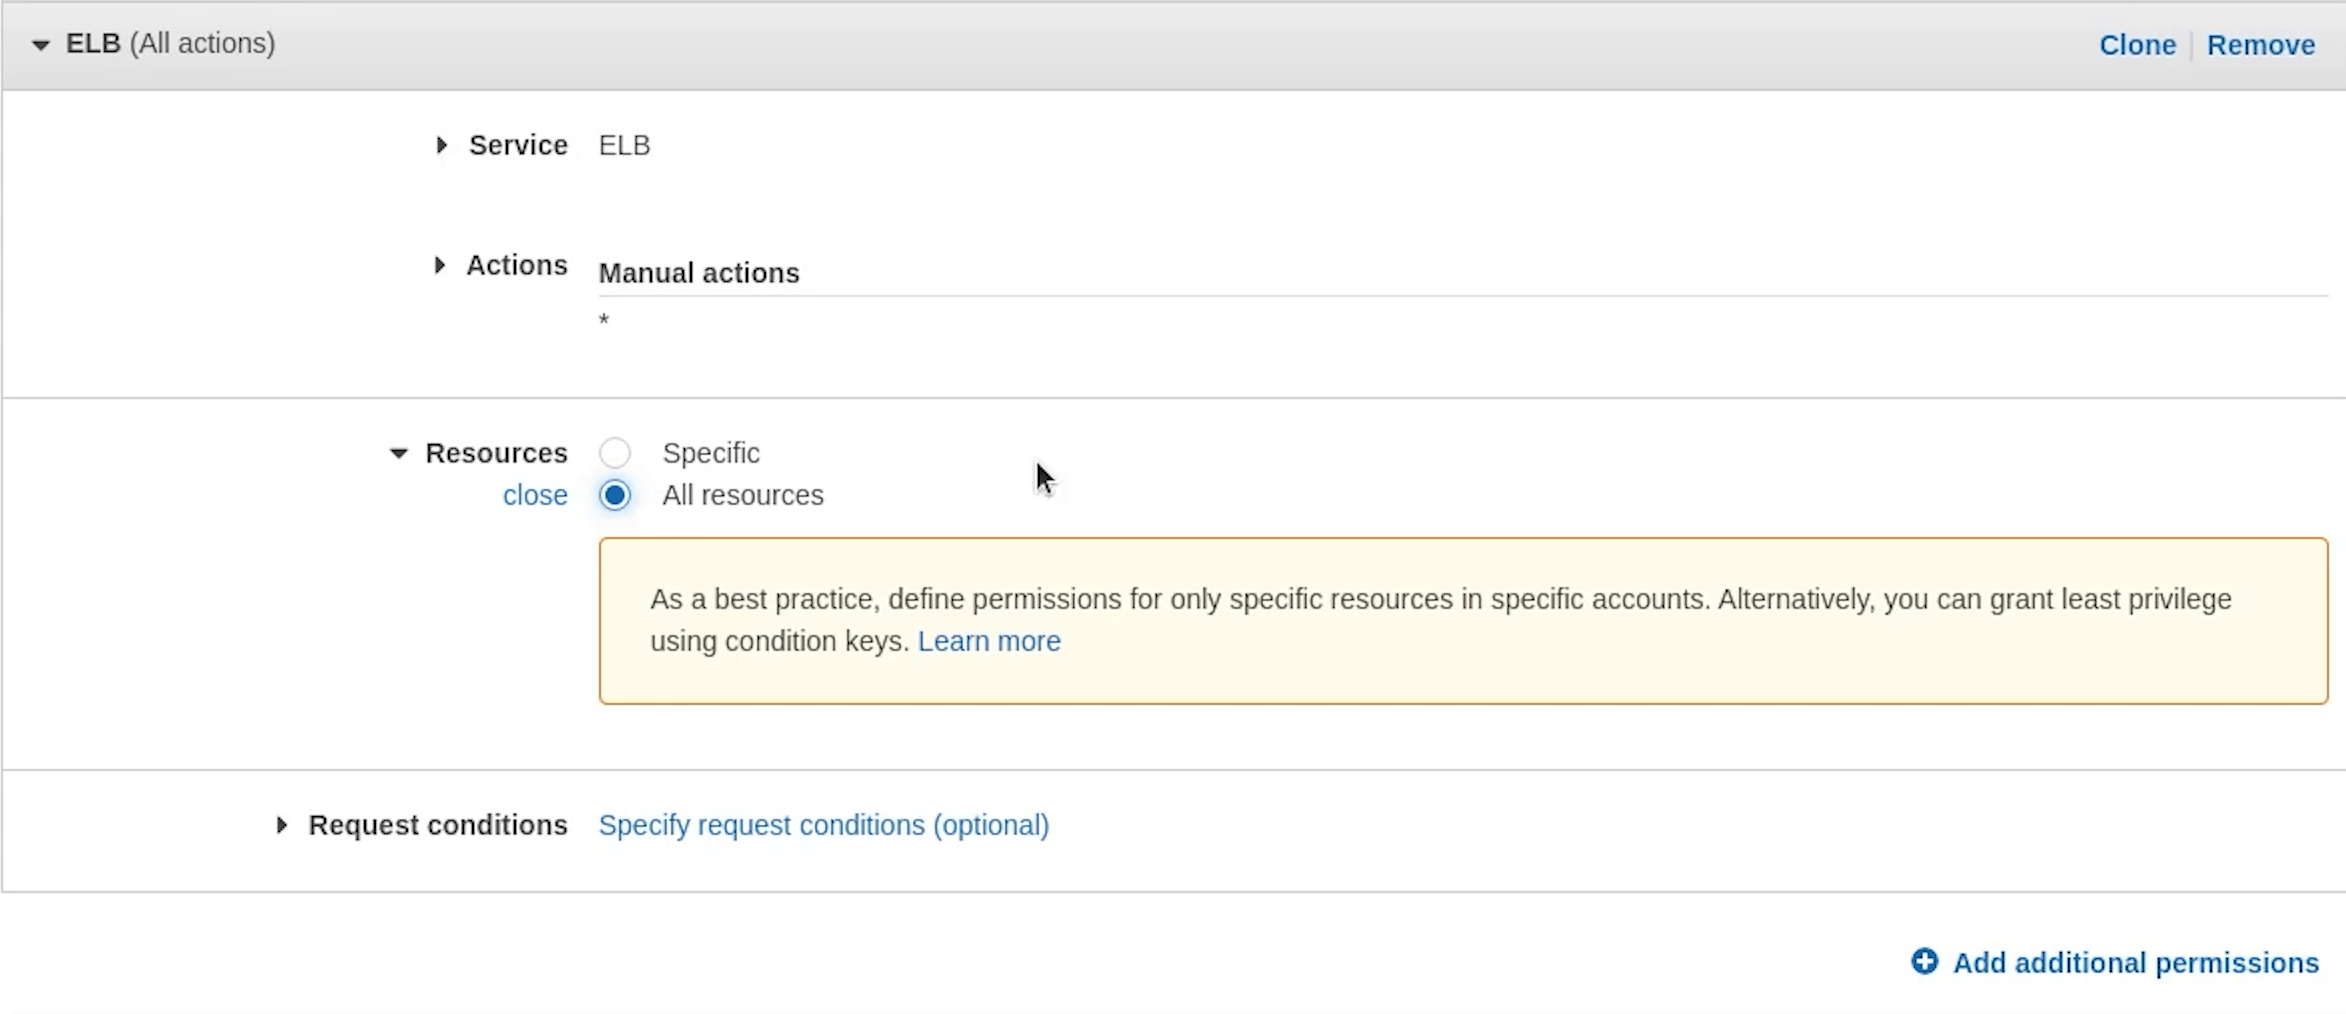
As you can see I am specifying resources to "all resources", but it’s prompting me as a best practice, define permissions for only specific resources.
I completely agree to that point, as this is a tutorial I am not getting too strict but please follow the concept of the least privilege.
IAM Service Account
Next, I am going to create IAM service account. You can associate an IAM role with a Kubernetes service account. This service account can then provide AWS permissions to the containers in any pod that uses that service account.
Reference:

eksctl create iamserviceaccount \
--region ap-south-1 \
--name alb-ingress-controller \
--namespace kube-system \
--cluster fastapi-demo \
--attach-policy-arn <YOUR_POLICY_ARN> \           # <-- AWSLoadBalancerControllerIAMPolicy
--override-existing-serviceaccounts \
--approve
I will copy the policy ARN and replace it.
The IAM service account is created, let me verify that.
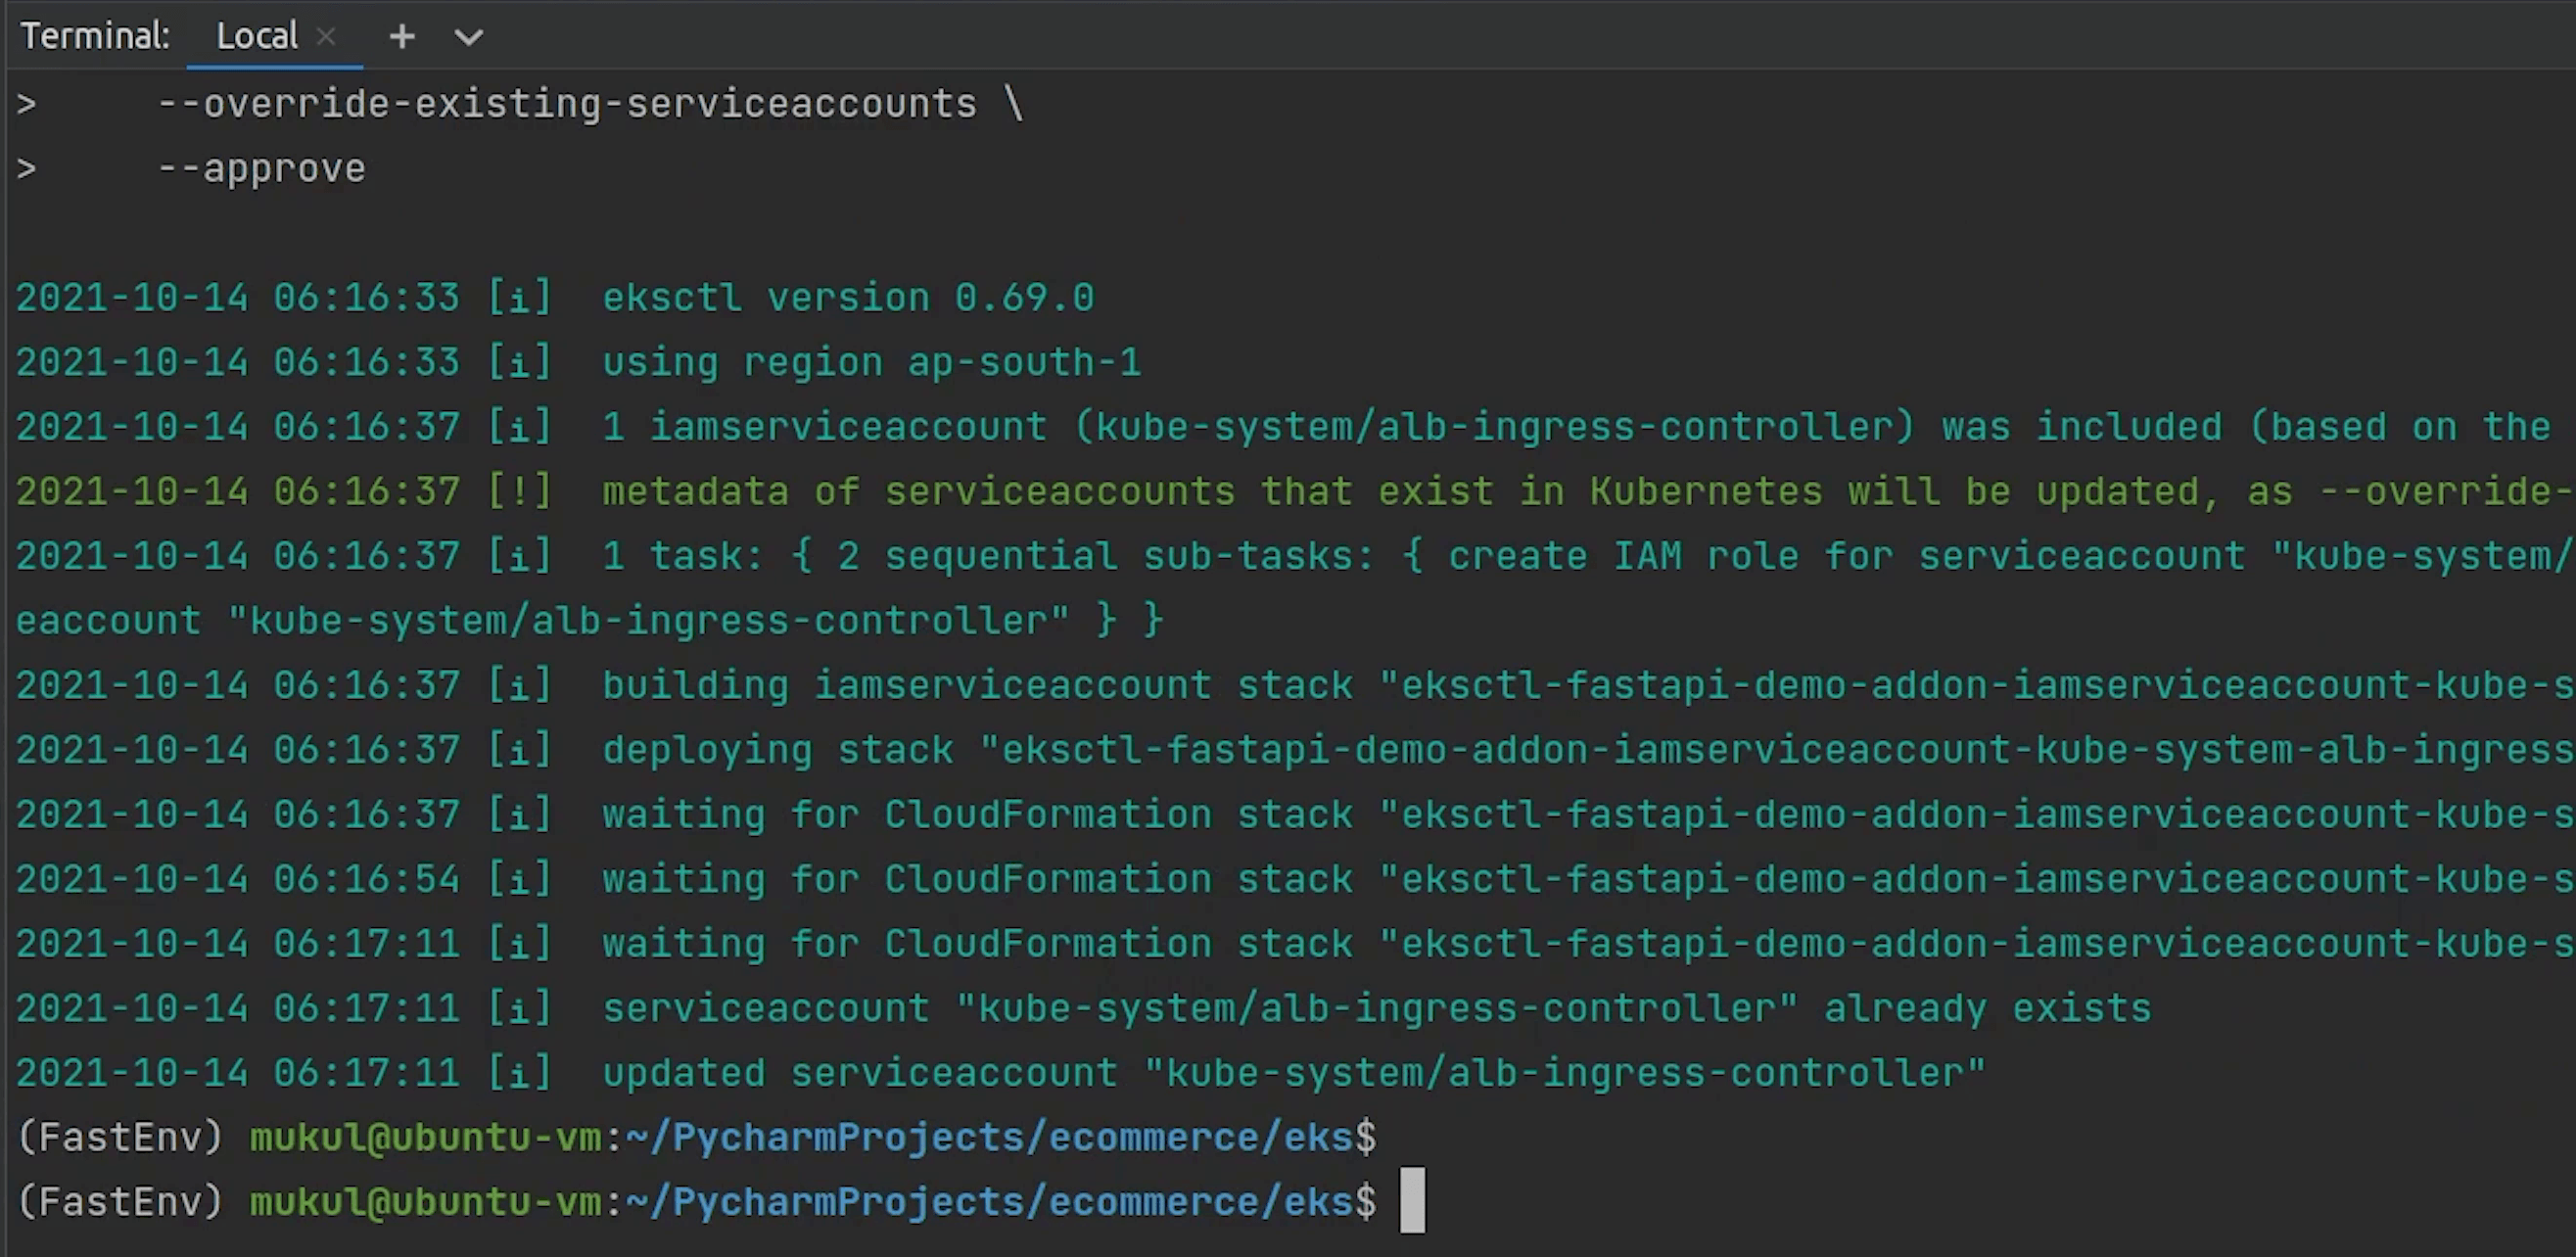
eksctl get iamserviceaccount --cluster fastapi-demo

You can see one role has been successfully attached. You can check this role is present under Roles in the IAM Console.
Ingress Controller
I will go ahead and create the ingress controller. An Ingress controller is a specialized load balancer for Kubernetes (and other containerized) environments. It abstracts away the complexity of Kubernetes application traffic routing and provides a bridge between Kubernetes services and external ones.

Reference:
- https://kubernetes-sigs.github.io/aws-load-balancer-controller/
- https://aws.amazon.com/blogs/opensource/kubernetes-ingress-aws-alb-ingress-controller/
You can check out the website for more information related to deployment, configuration etc.
This project was formerly known as AWS ALB Ingress Controller, and later rebranded to "AWS Load Balancer Controller".
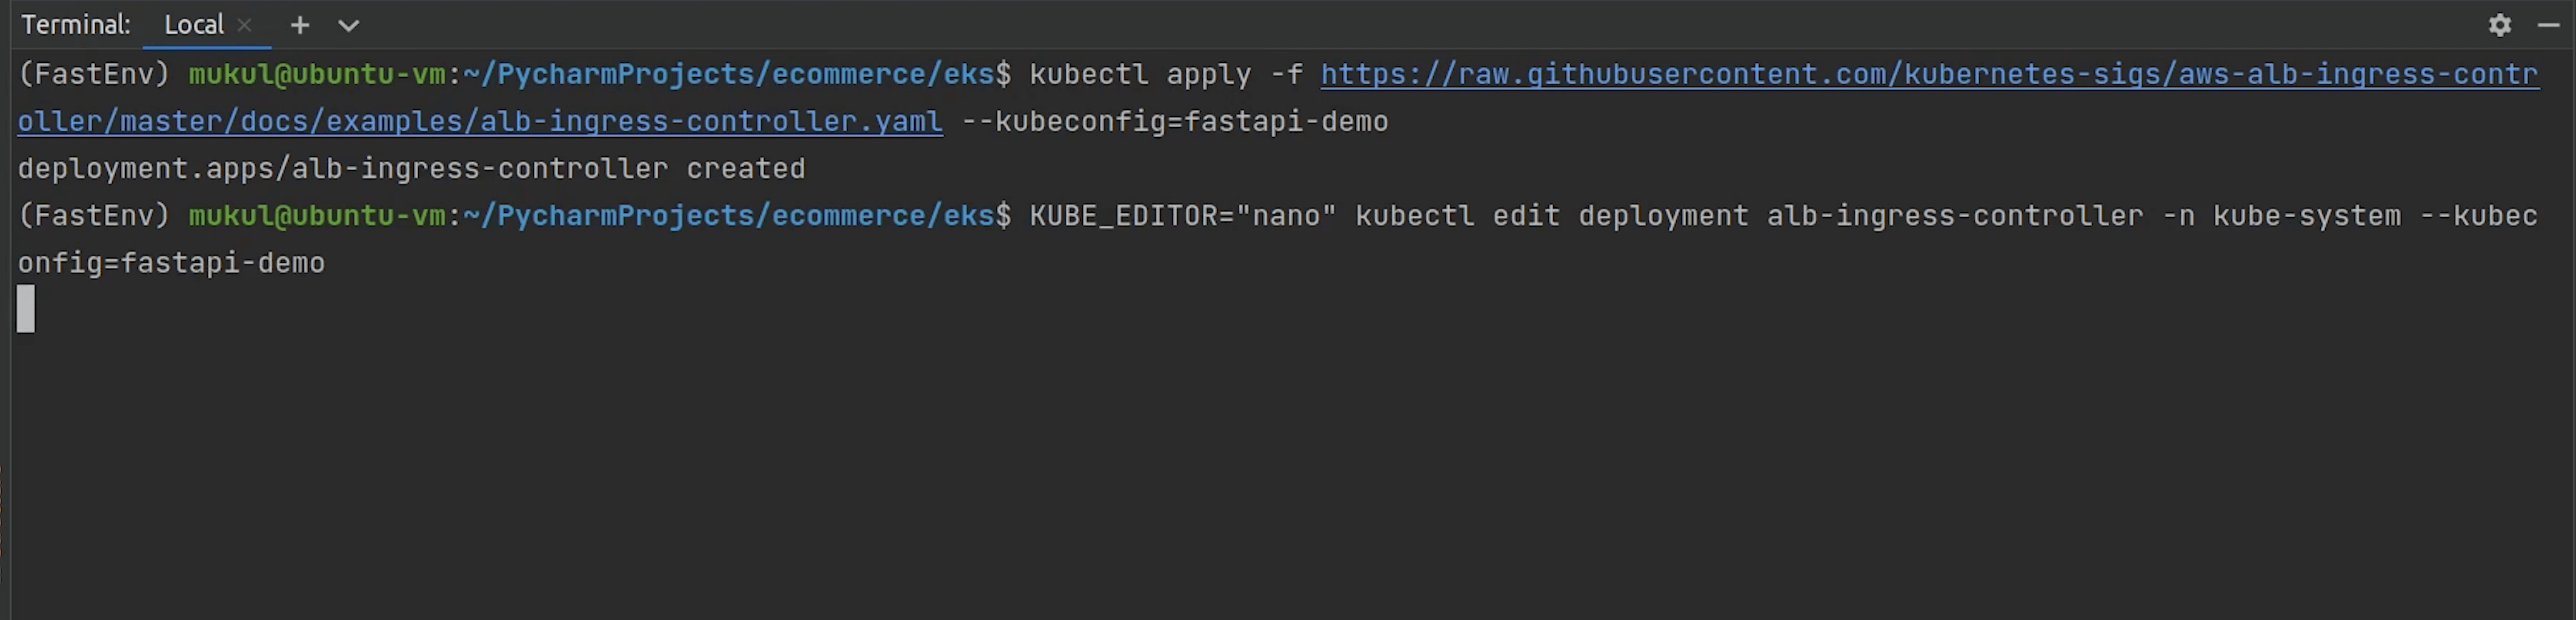
I will go ahead and apply the ingress controller. A copy of this controller file is placed in my repository you can check for more reference.
$ kubectl apply -f https://raw.githubusercontent.com/kubernetes-sigs/aws-alb-ingress-controller/master/docs/examples/alb-ingress-controller.yaml --kubeconfig=<PATH_TO_CONFIG_FILE>

# Replace kubeconfig with fastapi-demo
$ kubectl apply -f https://raw.githubusercontent.com/kubernetes-sigs/aws-alb-ingress-controller/master/docs/examples/alb-ingress-controller.yaml --kubeconfig=fastapi-demo
eks/utils/alb-ingress-controller.yaml
# Application Load Balancer (ALB) Ingress Controller Deployment Manifest.
# This manifest details sensible defaults for deploying an ALB Ingress Controller.
# GitHub: https://github.com/kubernetes-sigs/aws-alb-ingress-controller
apiVersion: apps/v1
kind: Deployment
metadata:
  labels:
    app.kubernetes.io/name: alb-ingress-controller
  name: alb-ingress-controller
  # Namespace the ALB Ingress Controller should run in. Does not impact which
  # namespaces it's able to resolve ingress resource for. For limiting ingress
  # namespace scope, see --watch-namespace.
  namespace: kube-system
spec:
  selector:
    matchLabels:
      app.kubernetes.io/name: alb-ingress-controller
  template:
    metadata:
      labels:
        app.kubernetes.io/name: alb-ingress-controller
    spec:
      containers:
        - name: alb-ingress-controller
          args:
            # Limit the namespace where this ALB Ingress Controller deployment will
            # resolve ingress resources. If left commented, all namespaces are used.
            # - --watch-namespace=your-k8s-namespace

            # Setting the ingress-class flag below ensures that only ingress resources with the
            # annotation kubernetes.io/ingress.class: "alb" are respected by the controller. You may
            # choose any class you'd like for this controller to respect.
            - --ingress-class=alb

            # REQUIRED
            # Name of your cluster. Used when naming resources created
            # by the ALB Ingress Controller, providing distinction between
            # clusters.
            # - --cluster-name=devCluster

            # AWS VPC ID this ingress controller will use to create AWS resources.
            # If unspecified, it will be discovered from ec2metadata.
            # - --aws-vpc-id=vpc-xxxxxx

            # AWS region this ingress controller will operate in.
            # If unspecified, it will be discovered from ec2metadata.
            # List of regions: http://docs.aws.amazon.com/general/latest/gr/rande.html#vpc_region
            # - --aws-region=us-west-1

            # Enables logging on all outbound requests sent to the AWS API.
            # If logging is desired, set to true.
            # - --aws-api-debug

            # Maximum number of times to retry the aws calls.
            # defaults to 10.
            # - --aws-max-retries=10
          env:
            # AWS key id for authenticating with the AWS API.
            # This is only here for examples. It's recommended you instead use
            # a project like kube2iam for granting access.
            # - name: AWS_ACCESS_KEY_ID
            #   value: KEYVALUE

            # AWS key secret for authenticating with the AWS API.
            # This is only here for examples. It's recommended you instead use
            # a project like kube2iam for granting access.
            # - name: AWS_SECRET_ACCESS_KEY
            #   value: SECRETVALUE
          # Repository location of the ALB Ingress Controller.
          image: docker.io/amazon/aws-alb-ingress-controller:v1.1.9
      serviceAccountName: alb-ingress-controller
Ingress Controller has been created, but we need to update some config which is basically the cluster name.
I am directly going to live edit the deployment file, the default editor which is picked is vim, but I am using nano, completely your choice. To use your favorite editor by default, set the environment variable KUBE_EDITOR, even you can use sublime text, notepad etc.
kubectl edit deployment alb-ingress-controller -n kube-system --kubeconfig=fastapi-demo
The controller is deployed in the kube-system namespace.
Under spec, I will provide the cluster name fastapi-demo.
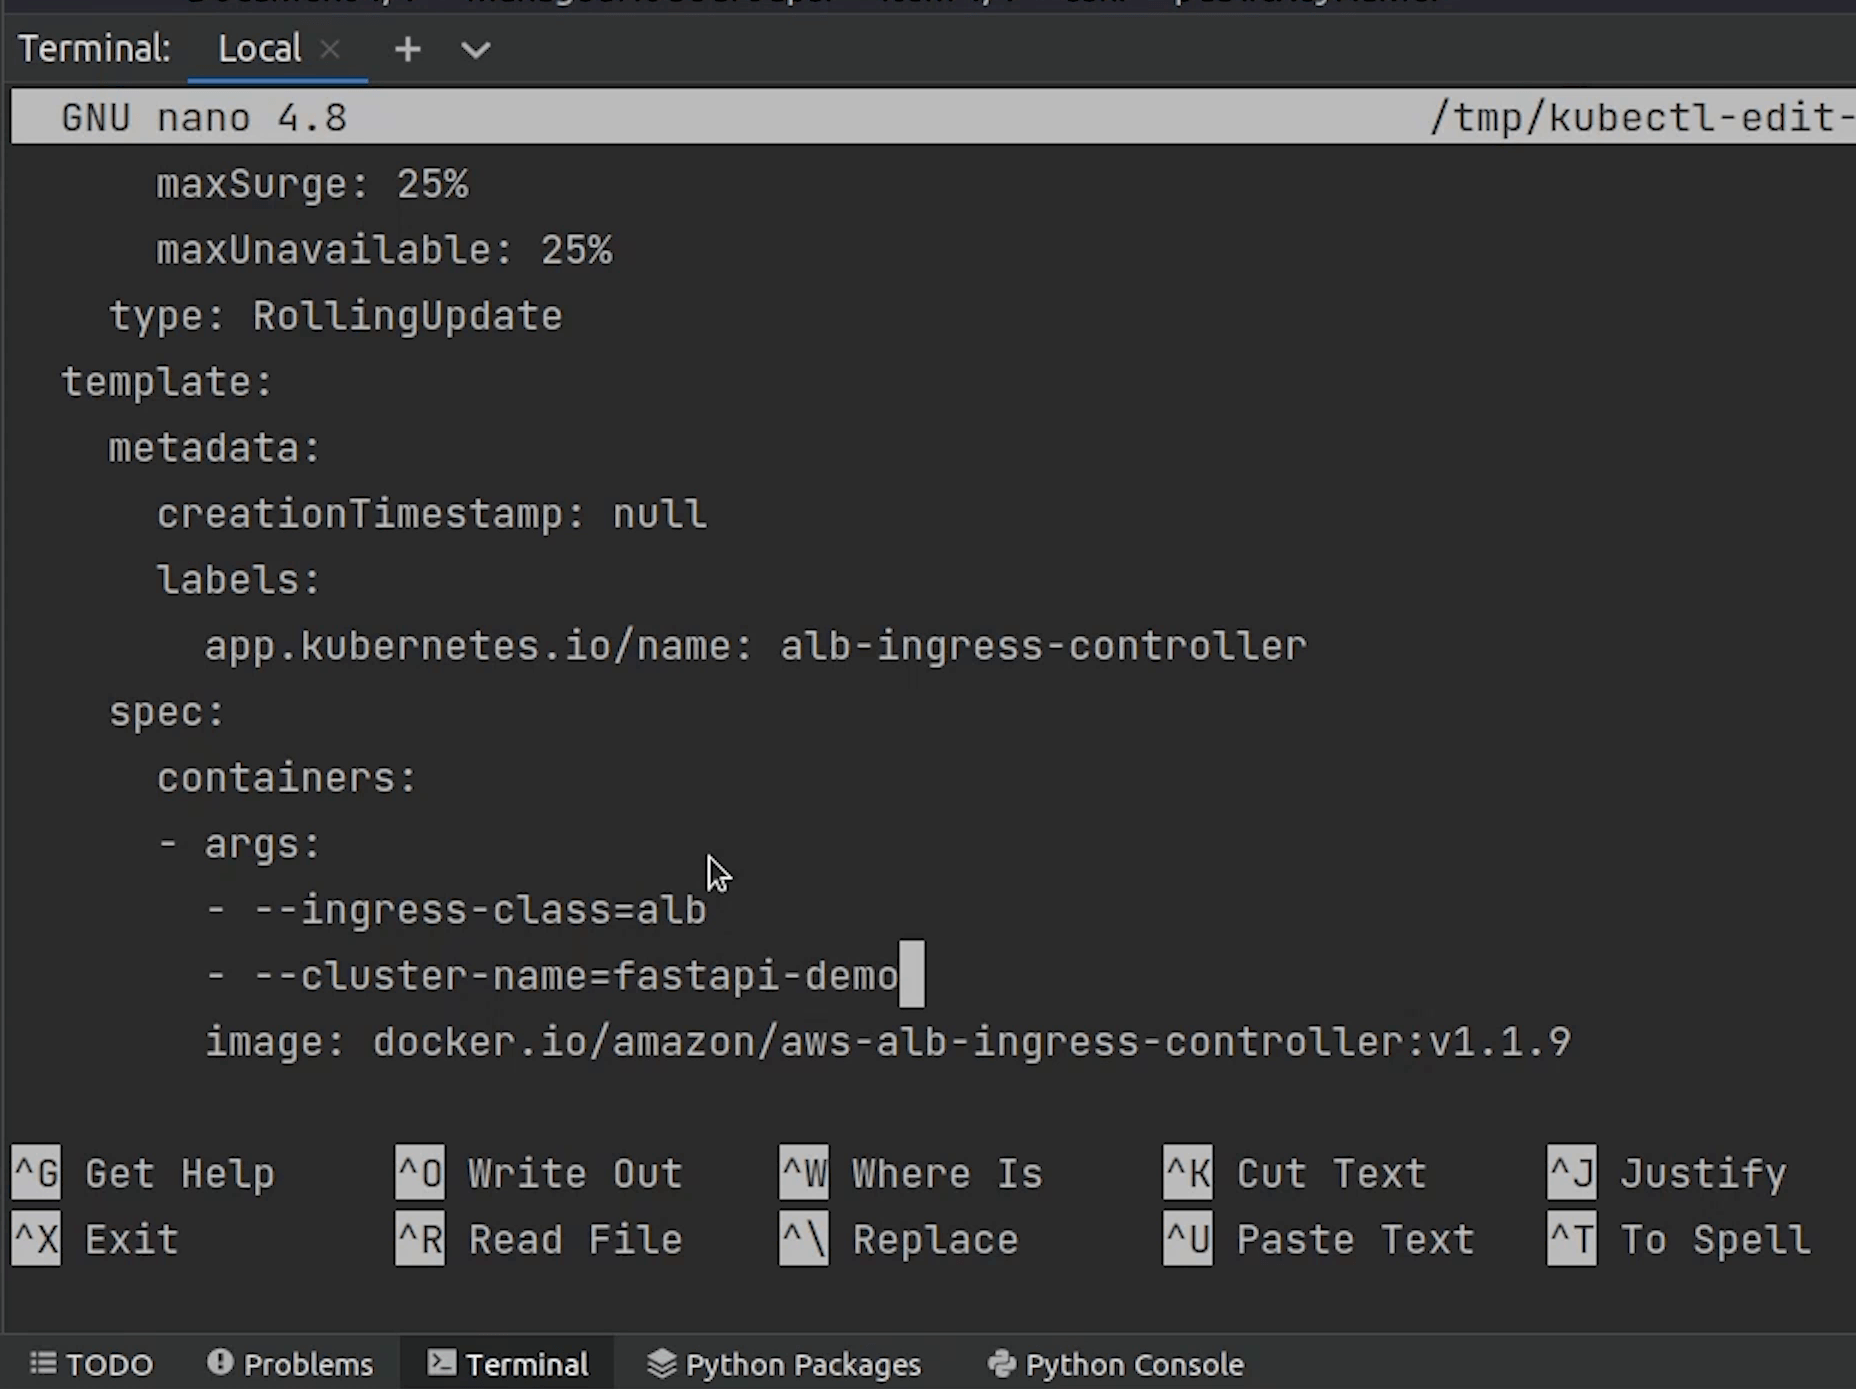
spec:
  containers:
    - args:
        - --ingress-class=alb
        - --cluster-name=fastapi-demo
Save and exit.
I will verify whether the controller is running or not.
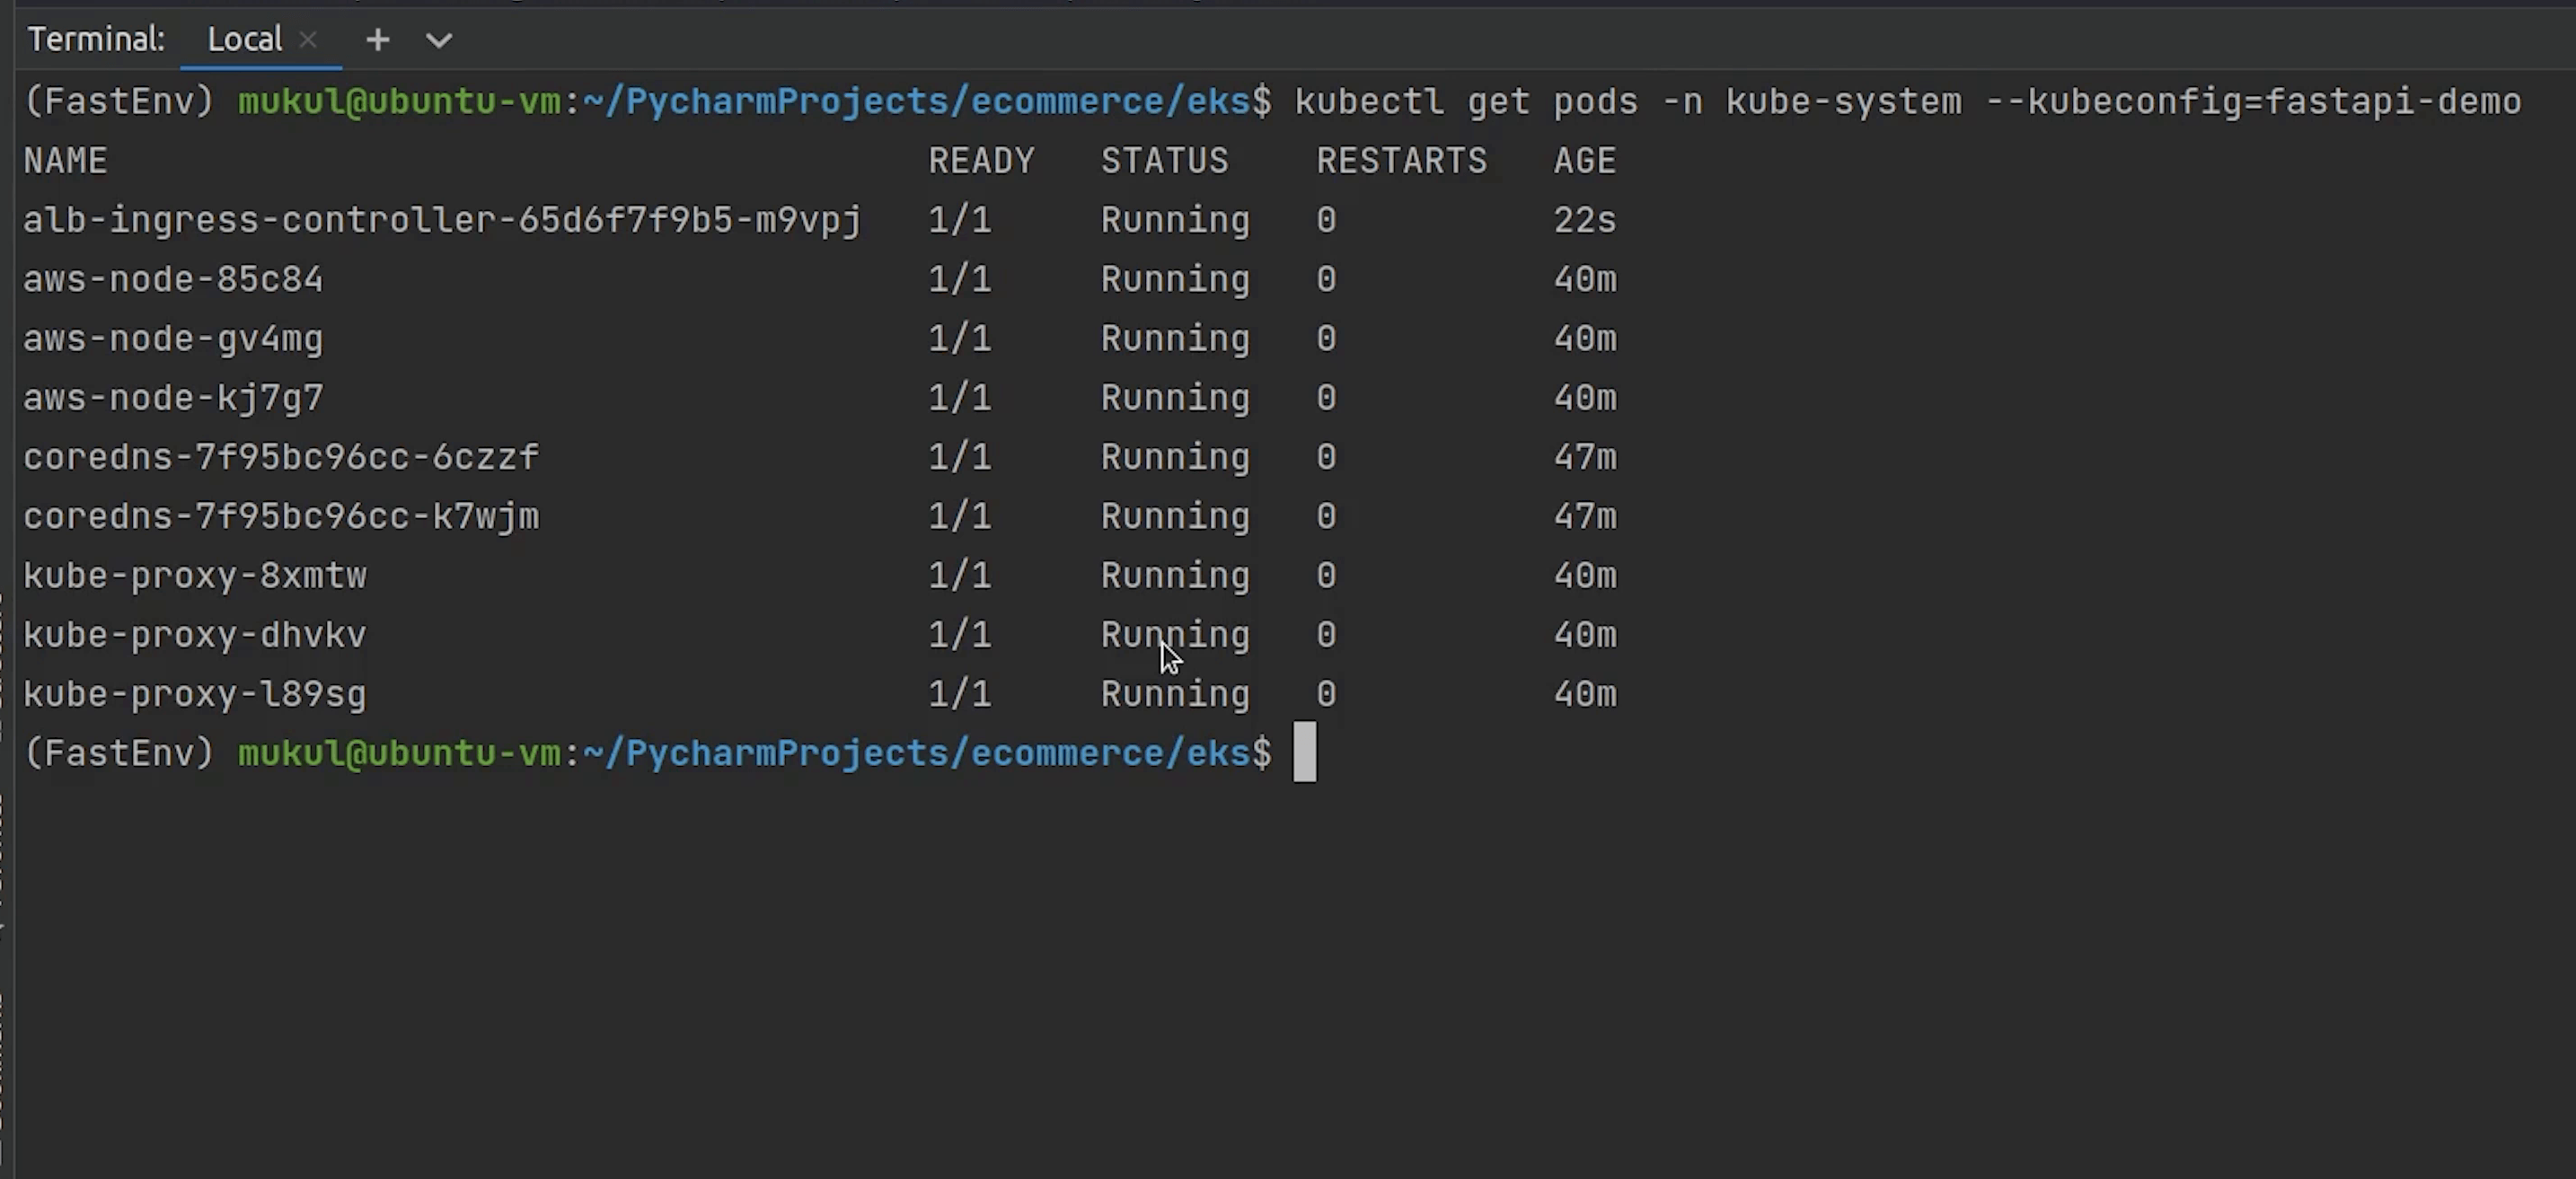
Looks fine.
Subnet Discovery
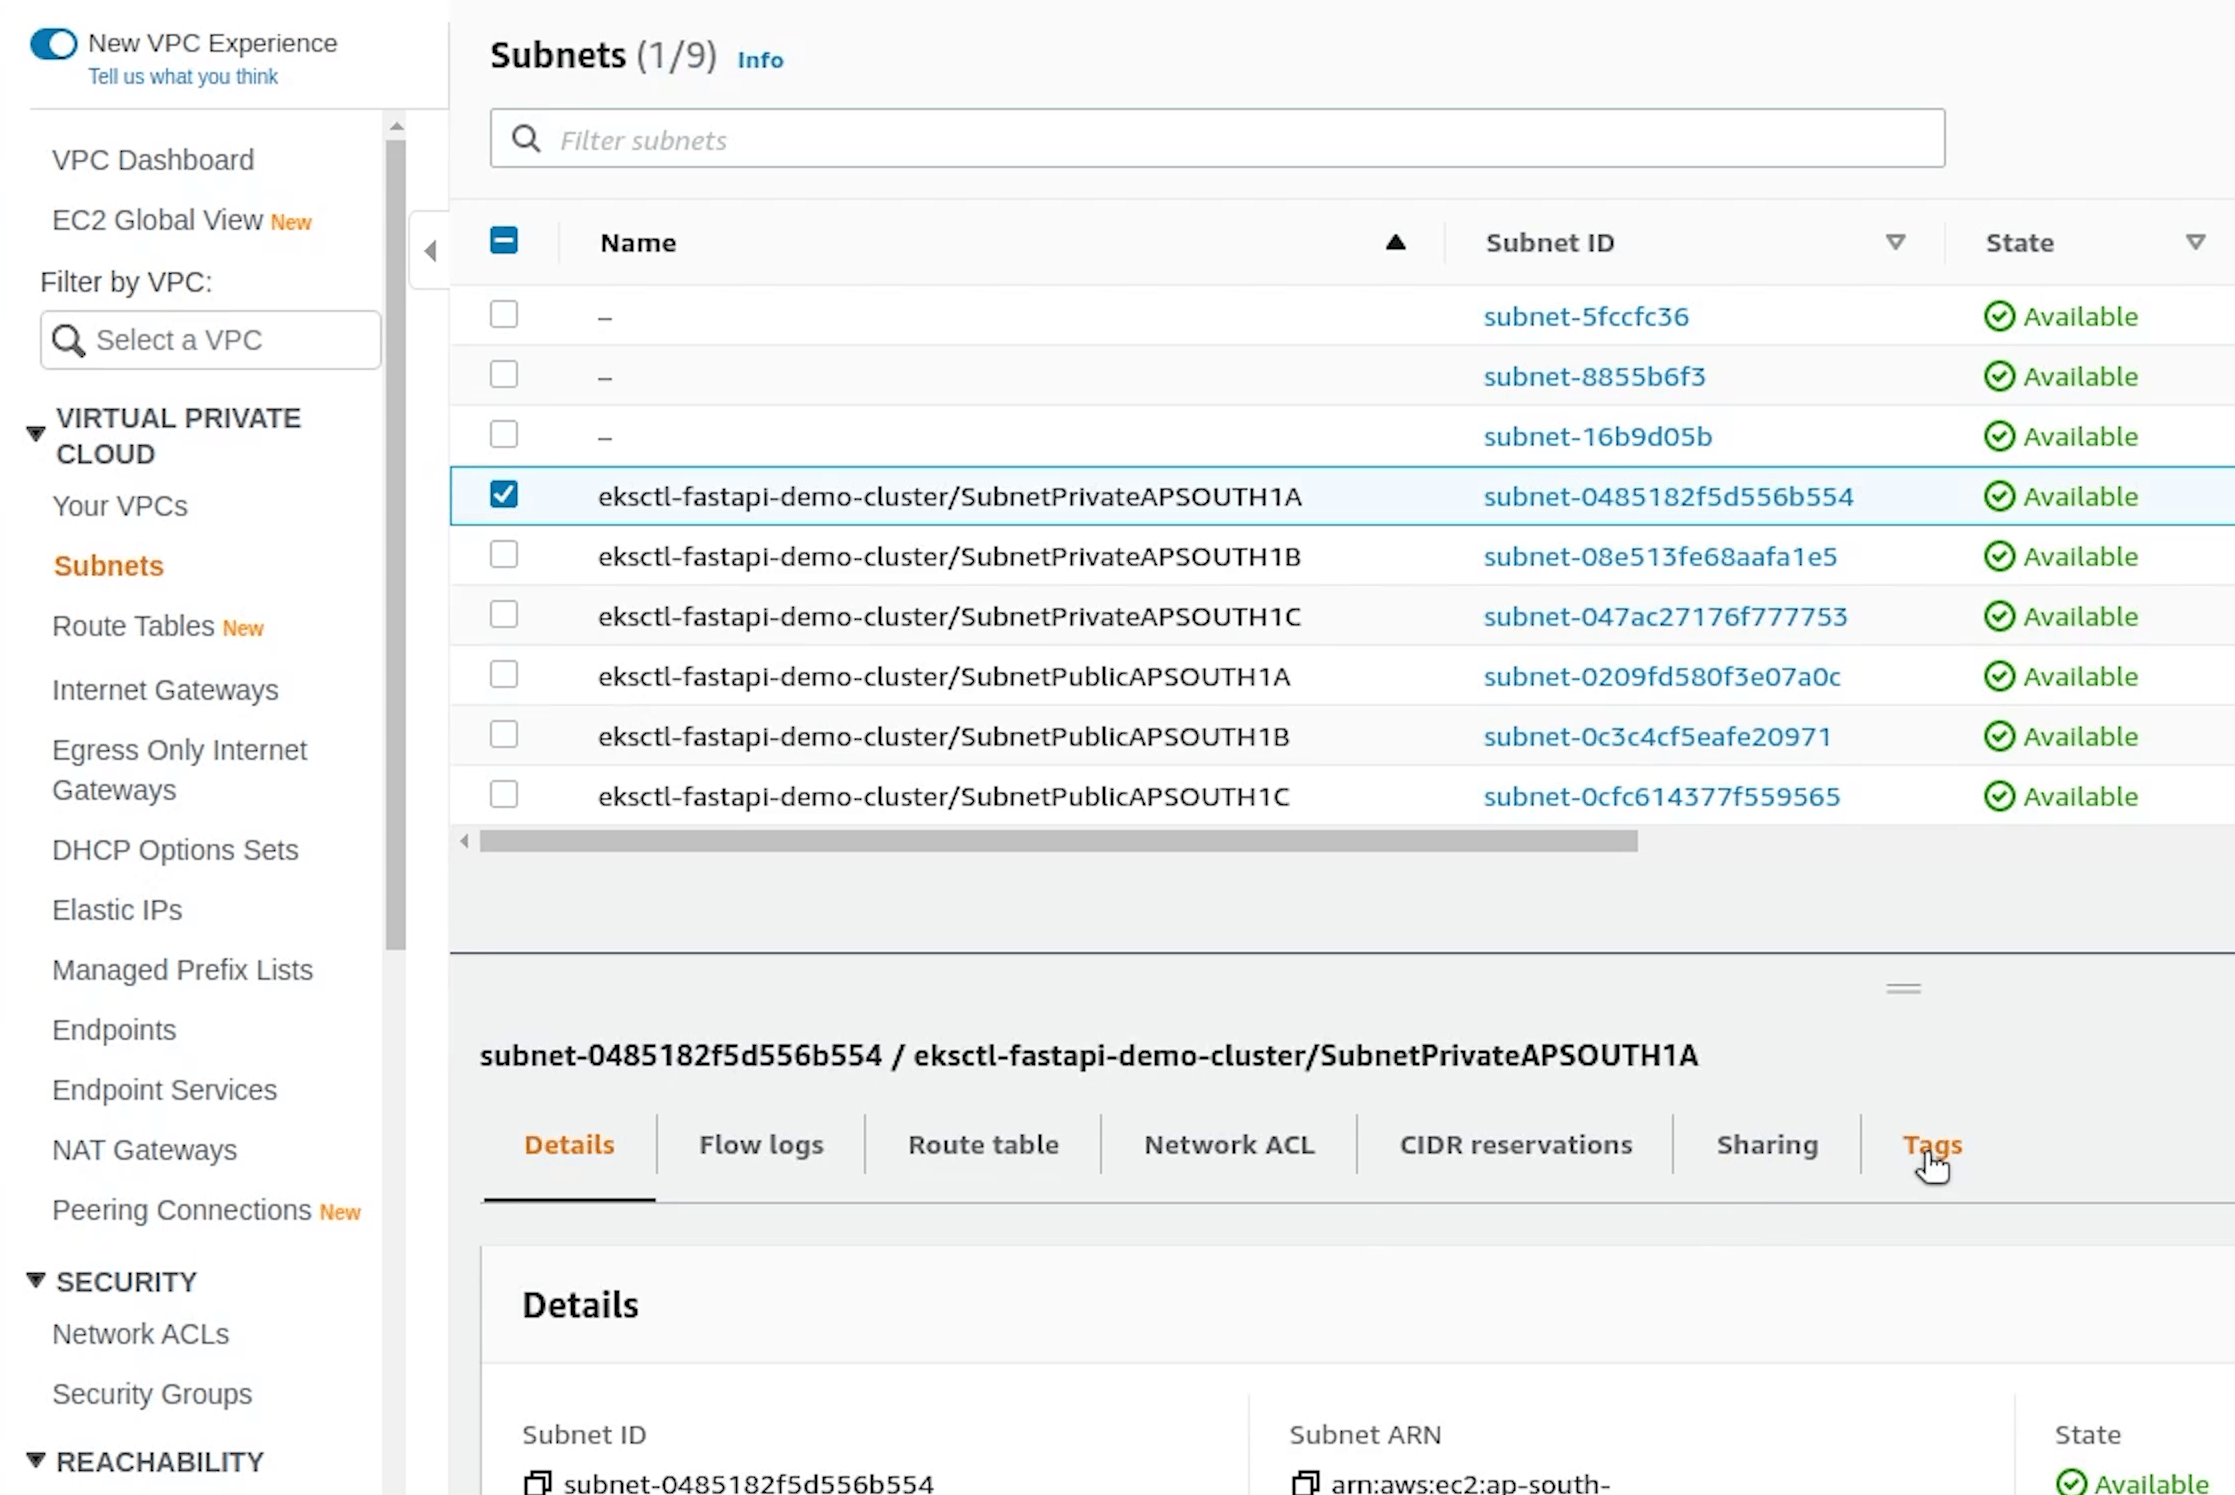
Next, after the controller we need to tag our subnets for subnet discovery by the load balancer.
For more information, visit the below link:
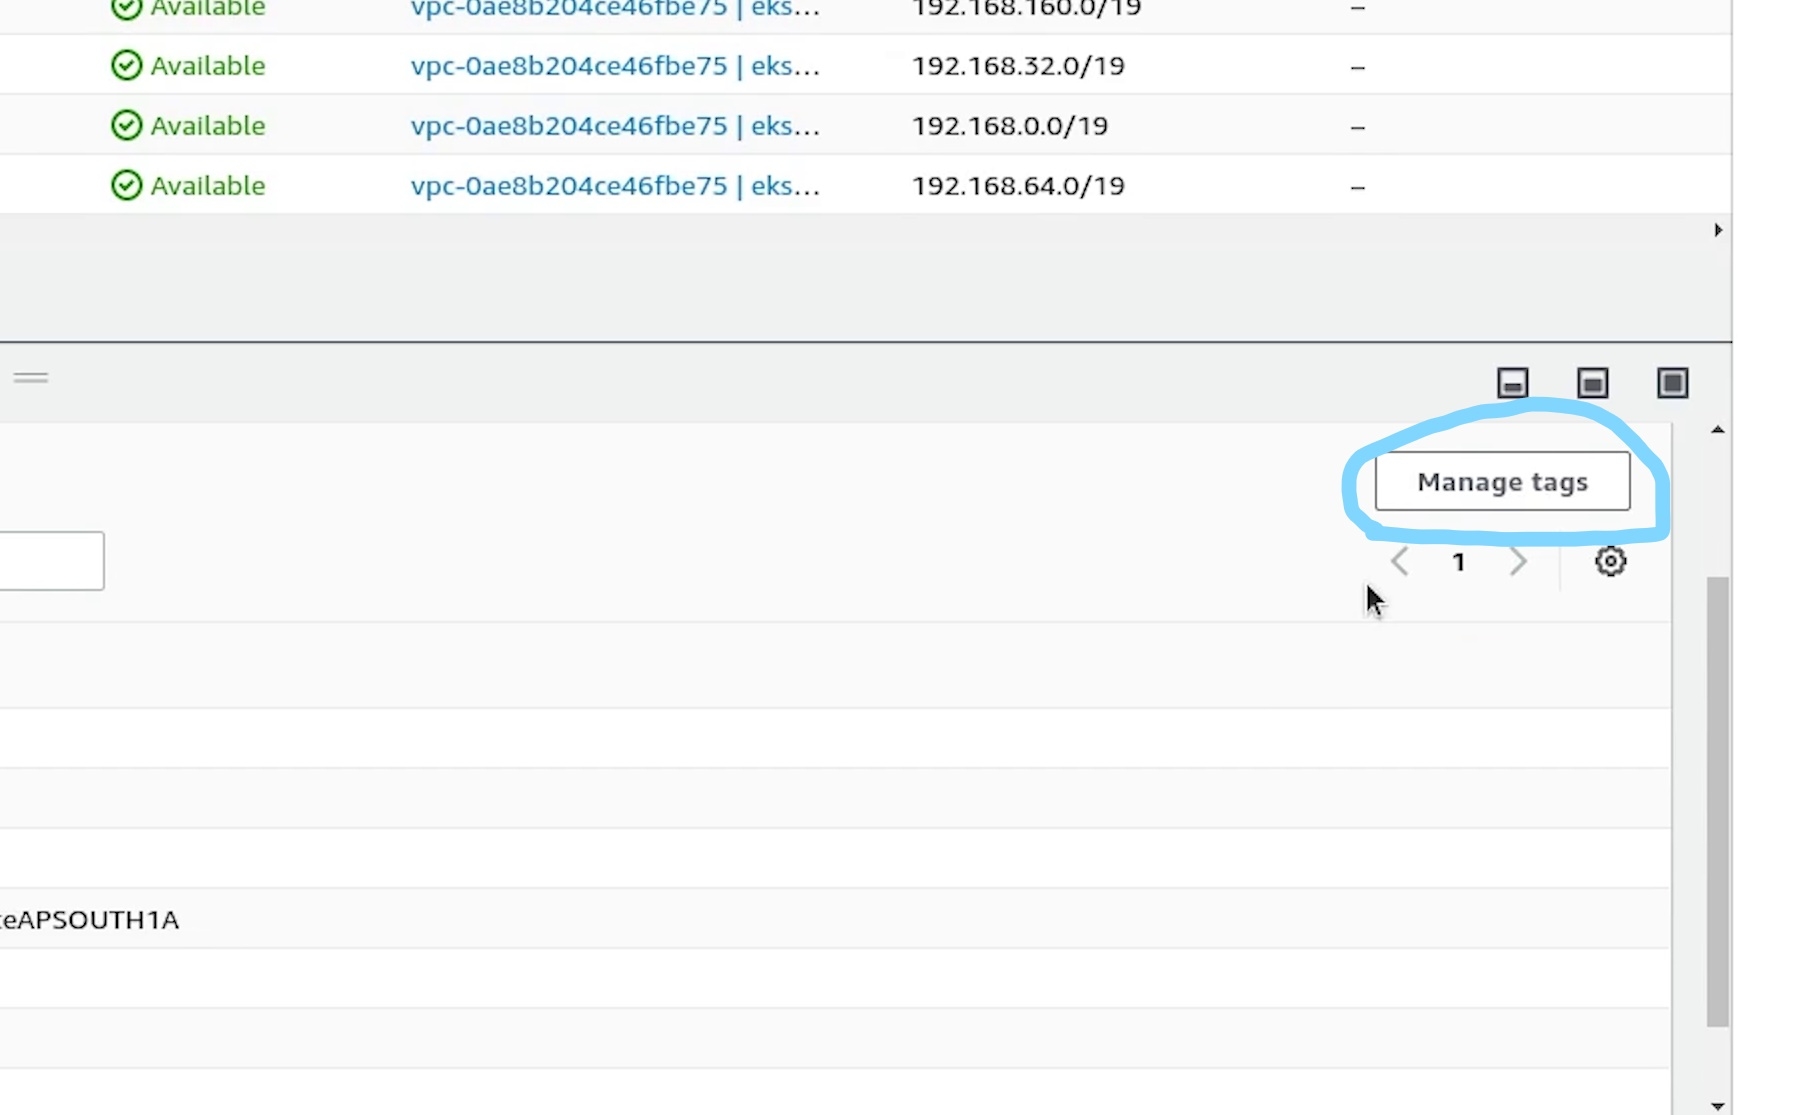
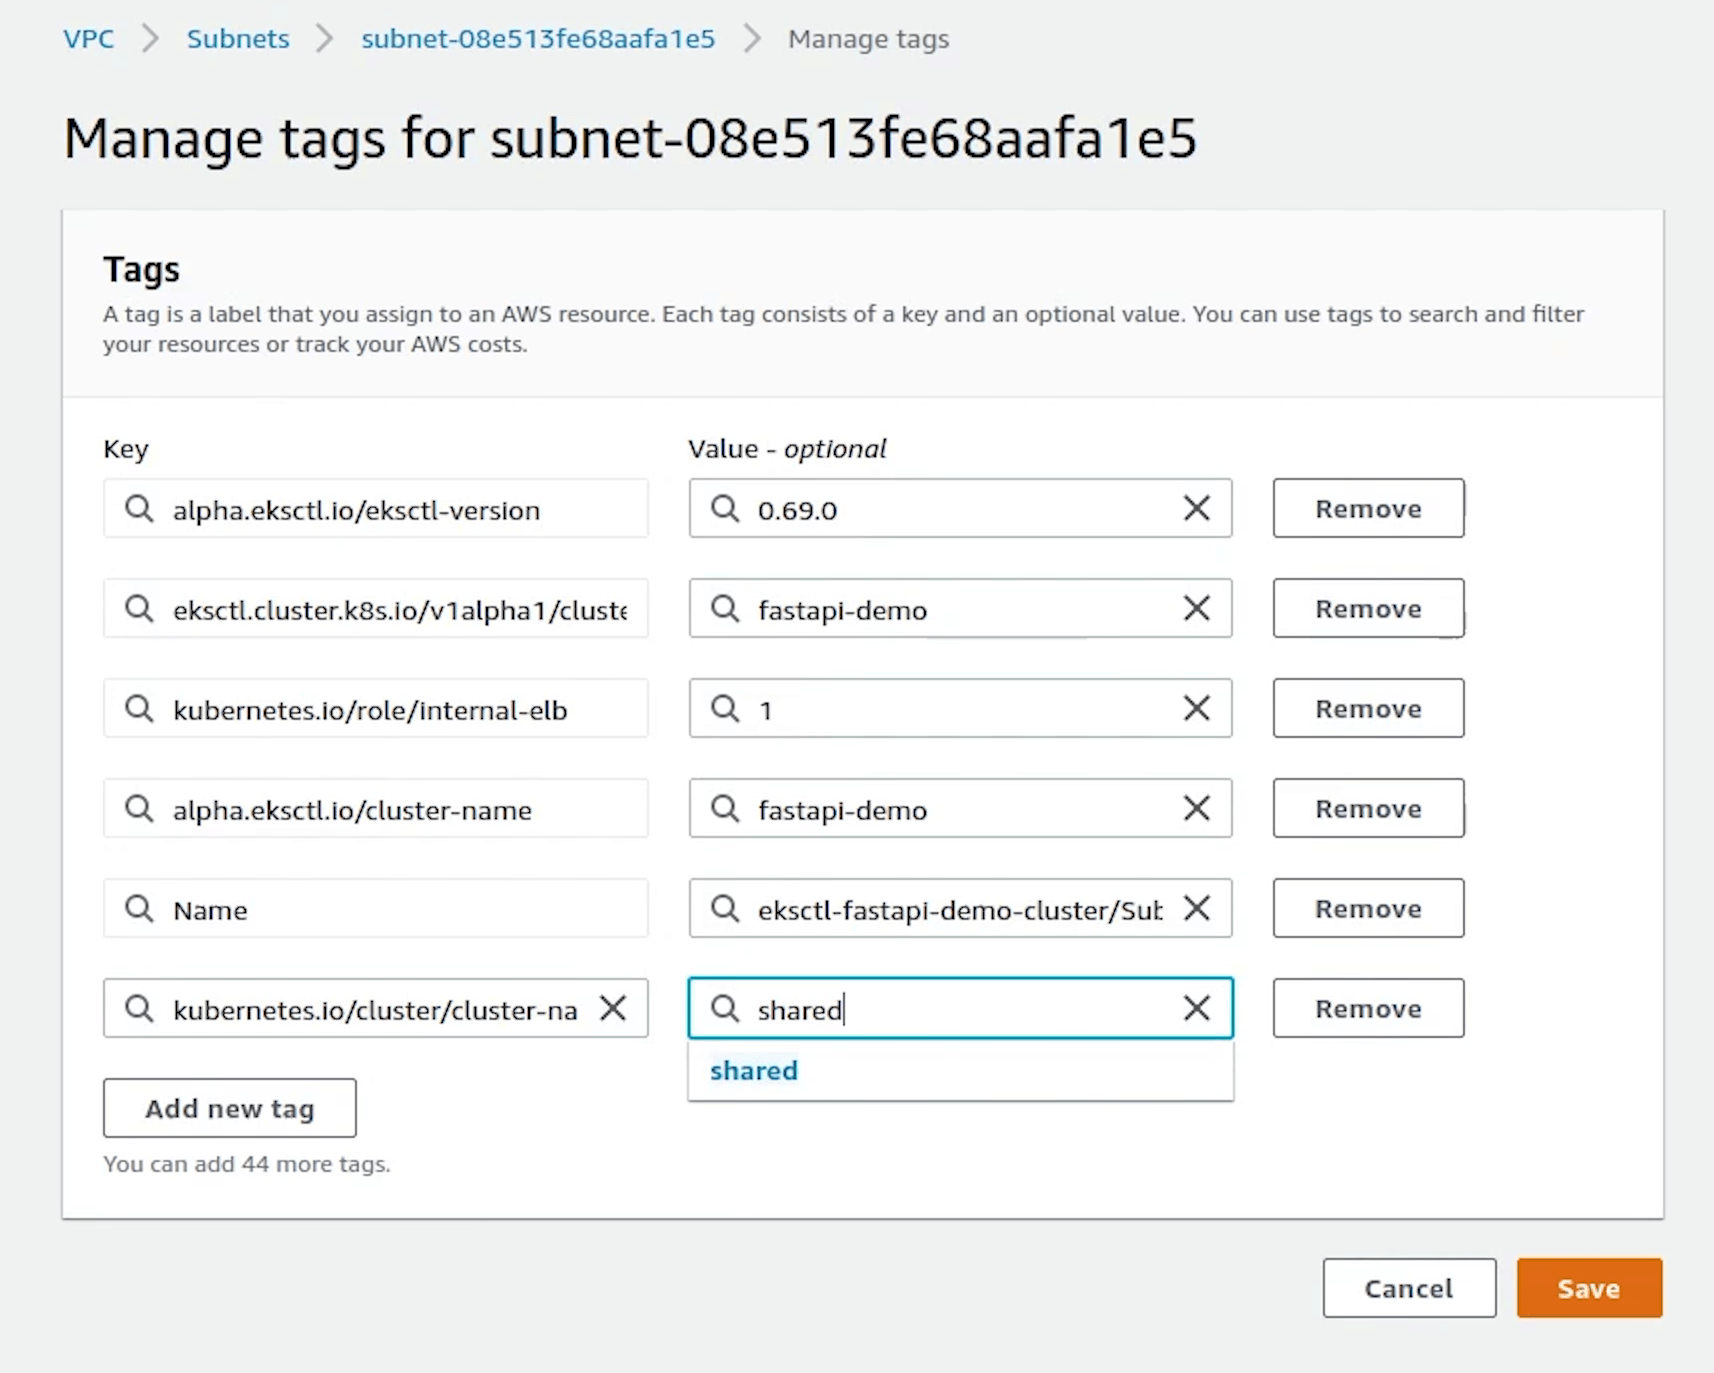
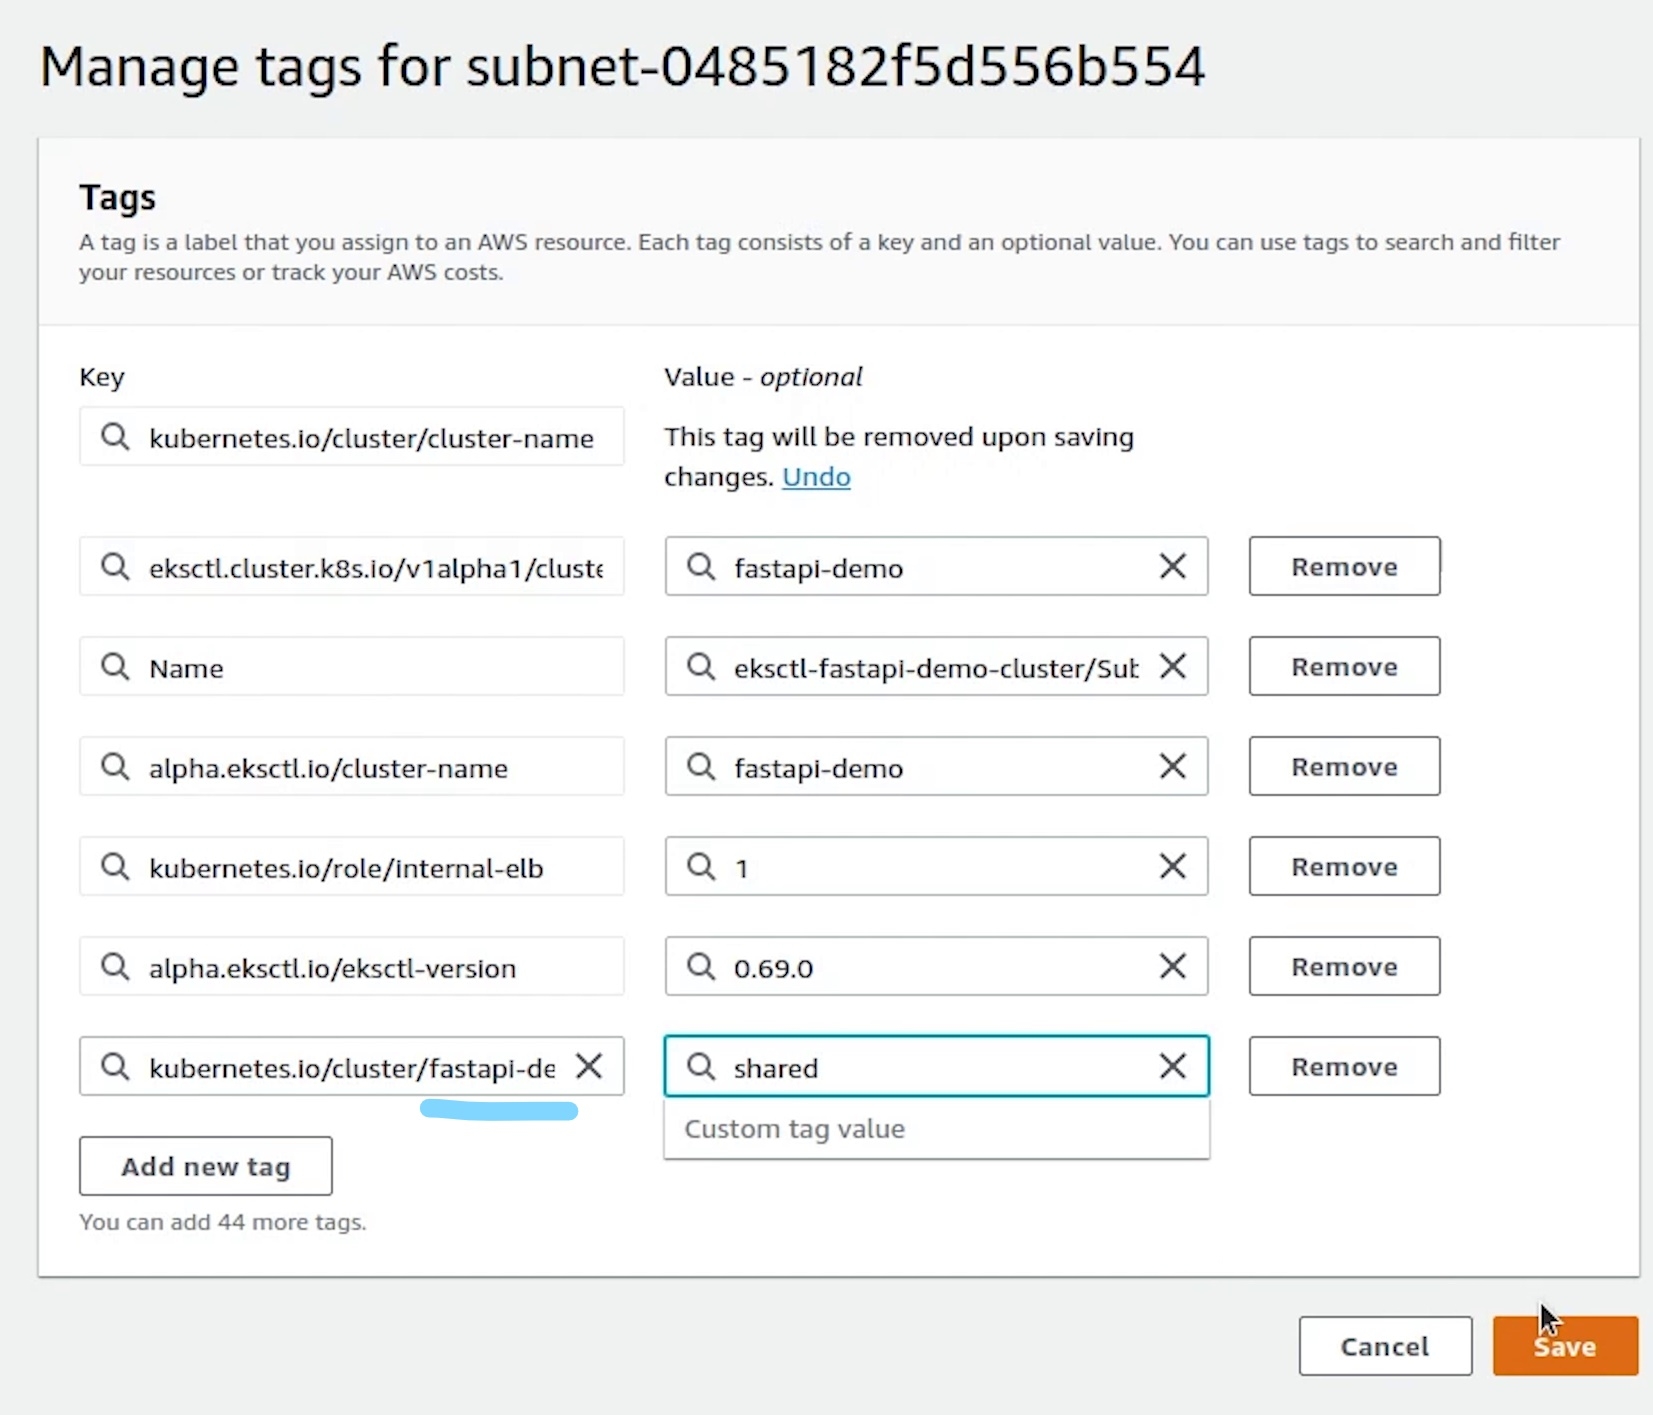
I will tag all the subnets. The shared value allows more than one cluster to use the subnet.
kubernetes.io/cluster/fastapi-demo : shared
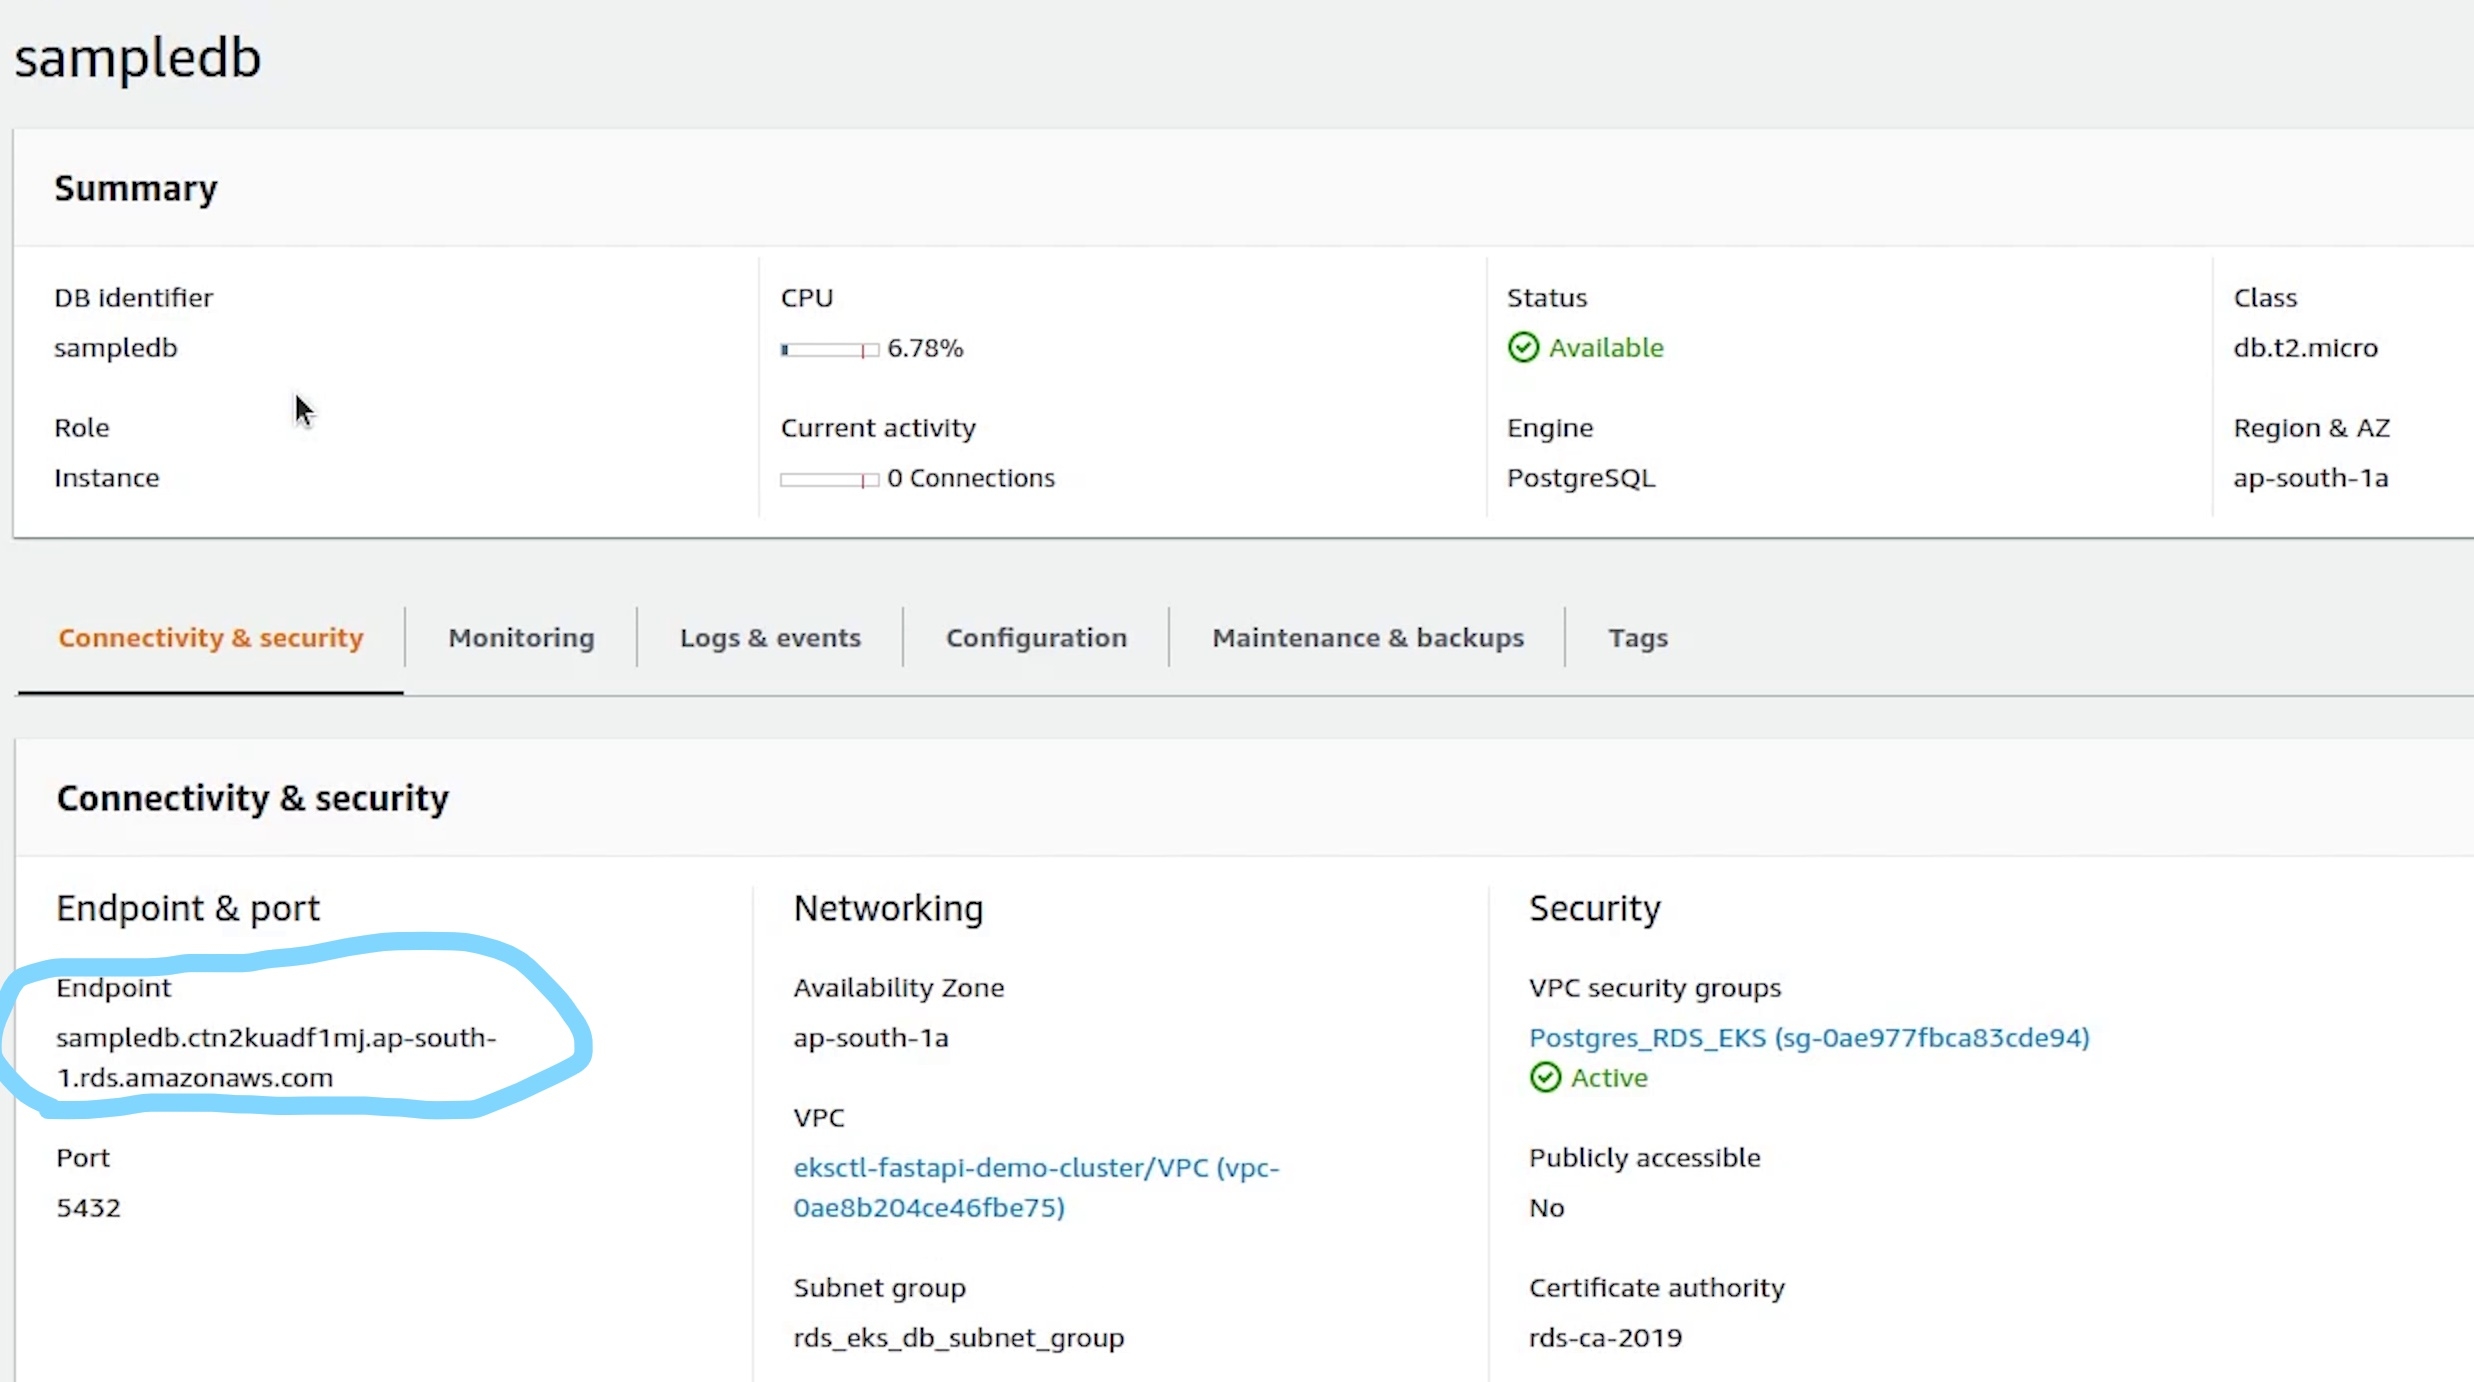
Once, we are done with tagging all subnets, I will come back to RDS to check the status.
K8s Manifests
The db is now available. I am going to copy the endpoint. But before that I will create a folder called deploy under eks.
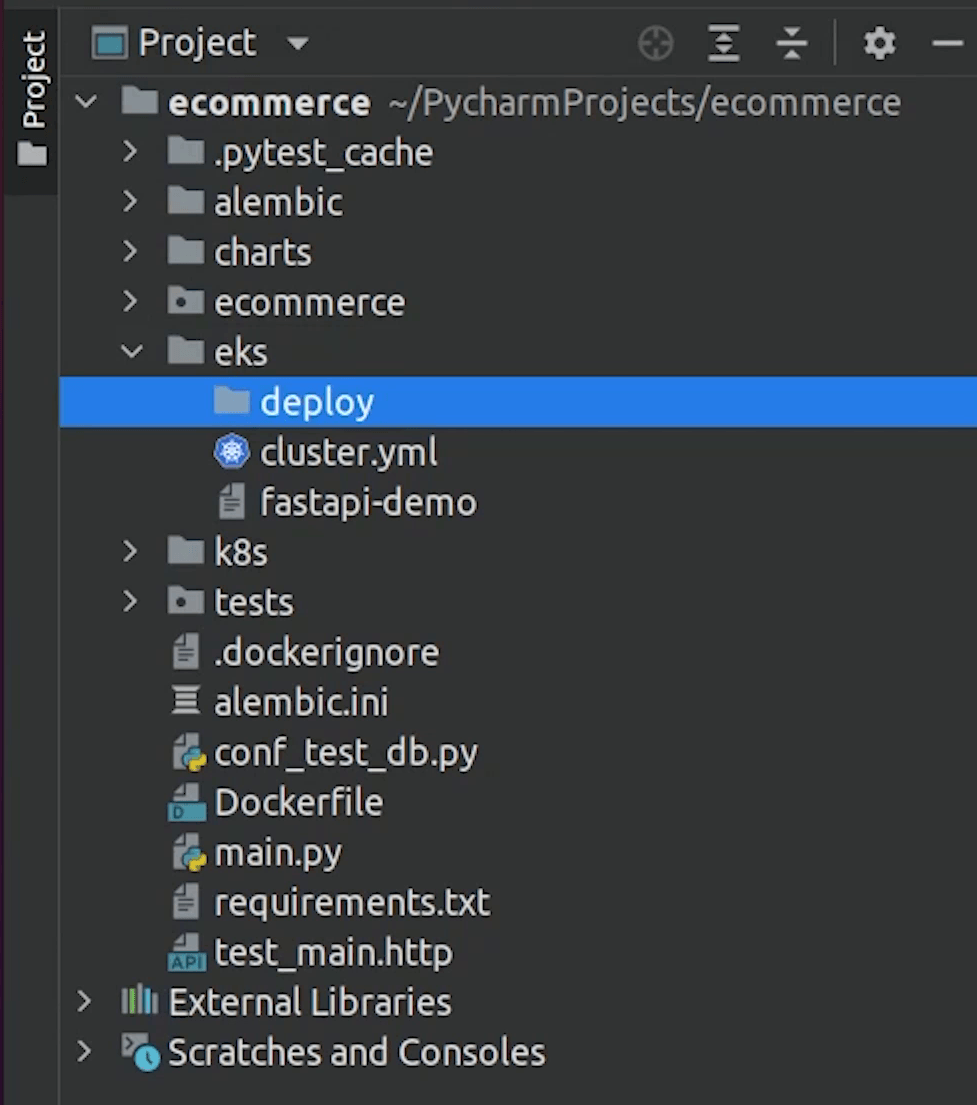
I am going to create a new file and name it db-service.yml.
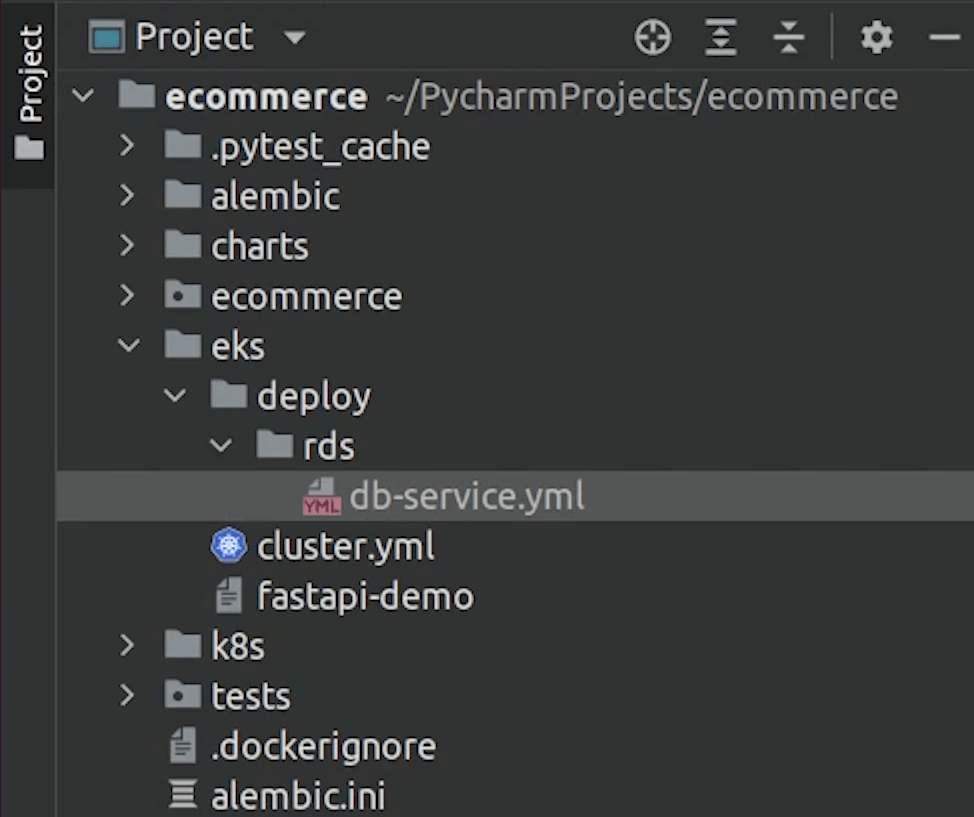
We are going to create an ExternalName Service.
eks/deploy/rds/db-service.yml
apiVersion: v1
kind: Service
metadata:
  name: postgres-service
spec:
  type: ExternalName
  externalName: <RDS_ENDPOINT_URL>
Services with type ExternalName work as other regular services, but when you want to access that service name, instead of returning cluster ip of this service, it returns CNAME record with value that is mentioned in externalName which in this case is the RDS endpoint.

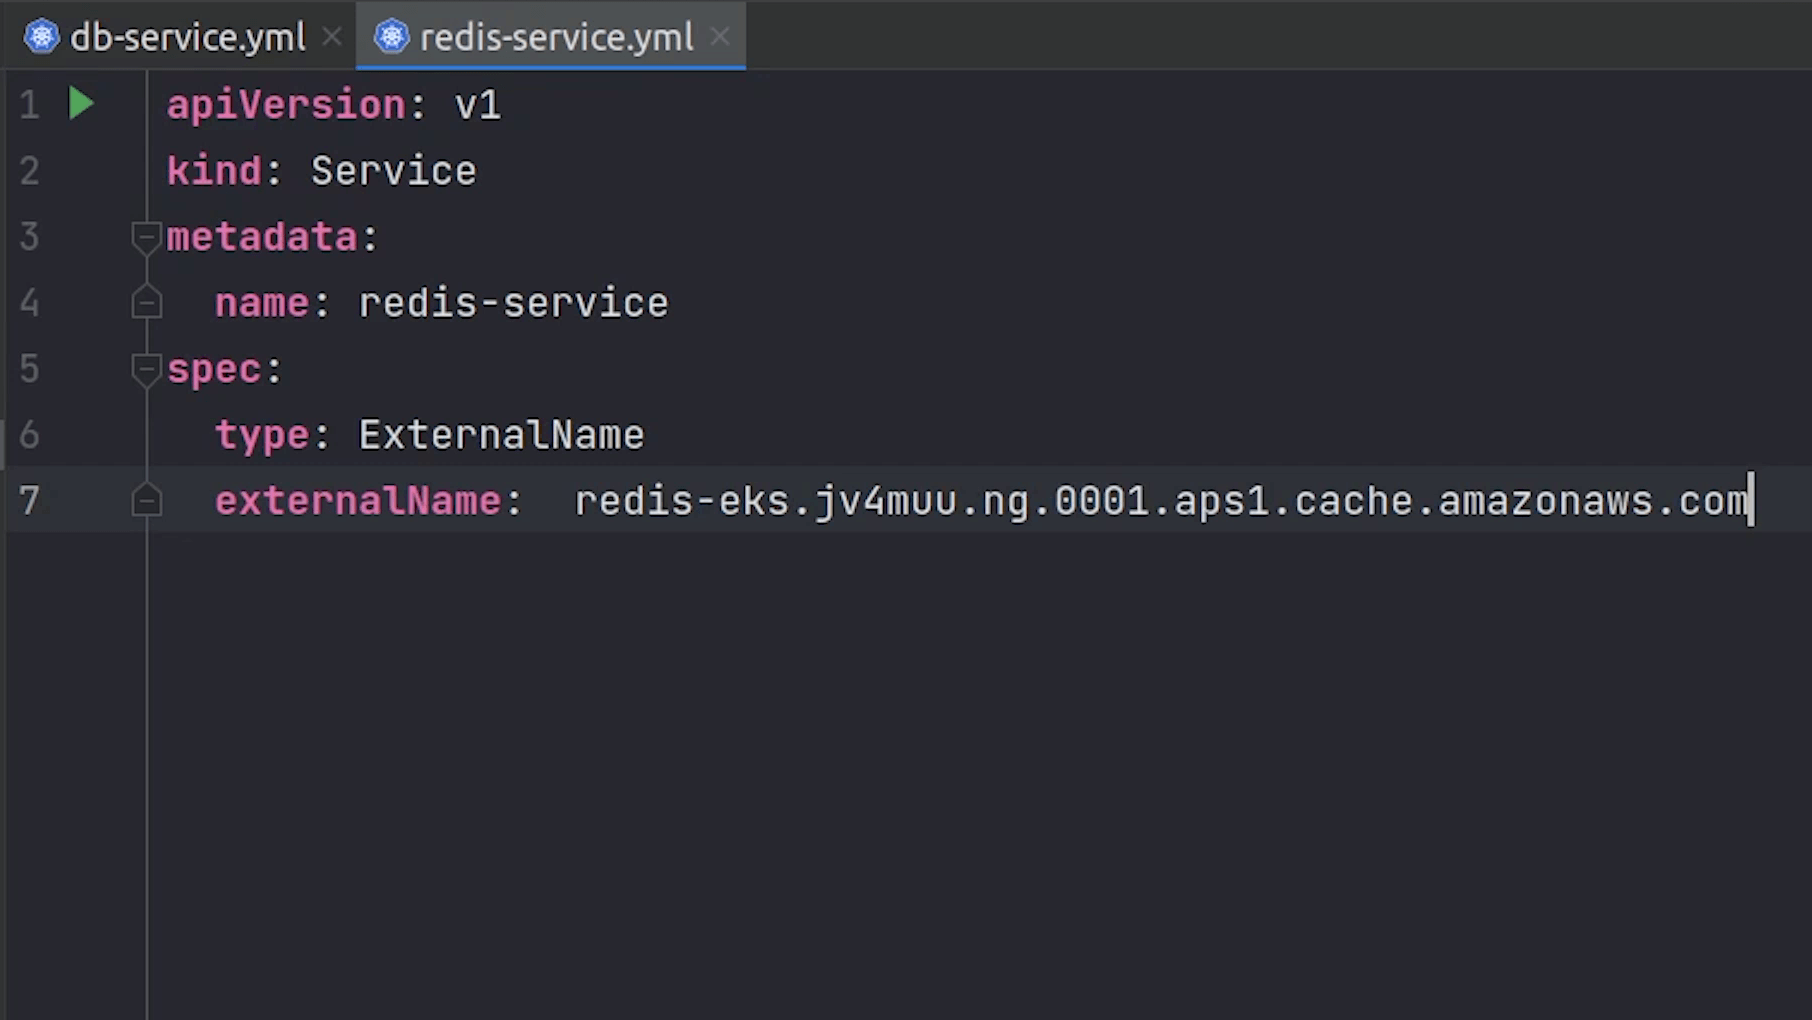
I will be doing the same operation for Redis as well. For redis we will be using the ElastiCache service provided by AWS.
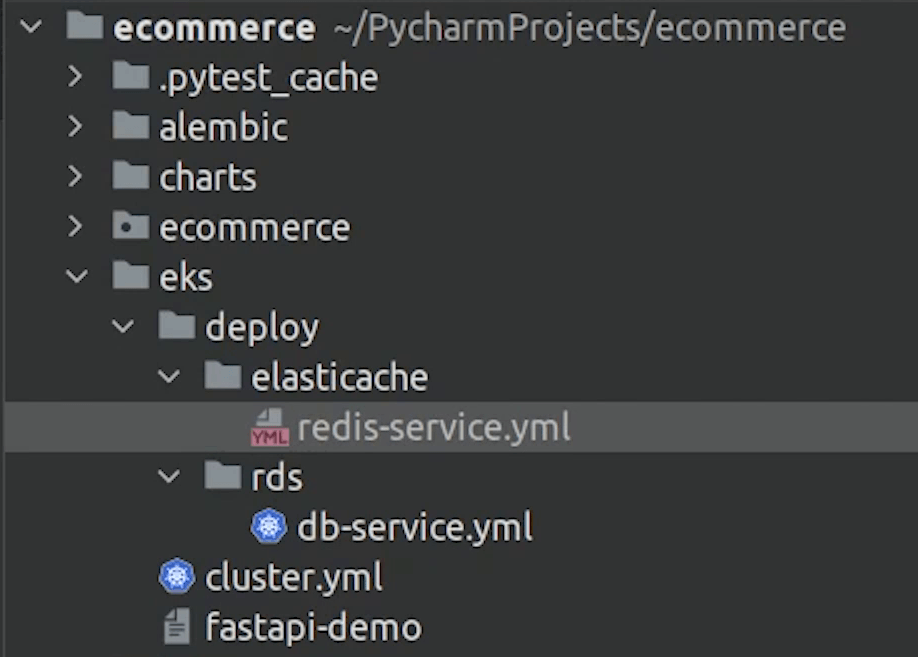
Service name is going to be redis service, and I will come back and replace the external name.
eks/deploy/elasticache/redis-service.yml
apiVersion: v1
kind: Service
metadata:
  name: redis-service
spec:
  type: ExternalName
  externalName: <ELASTICACHE_ENDPOINT_URL>
Let’s go to ElastiCache and create our redis instance.
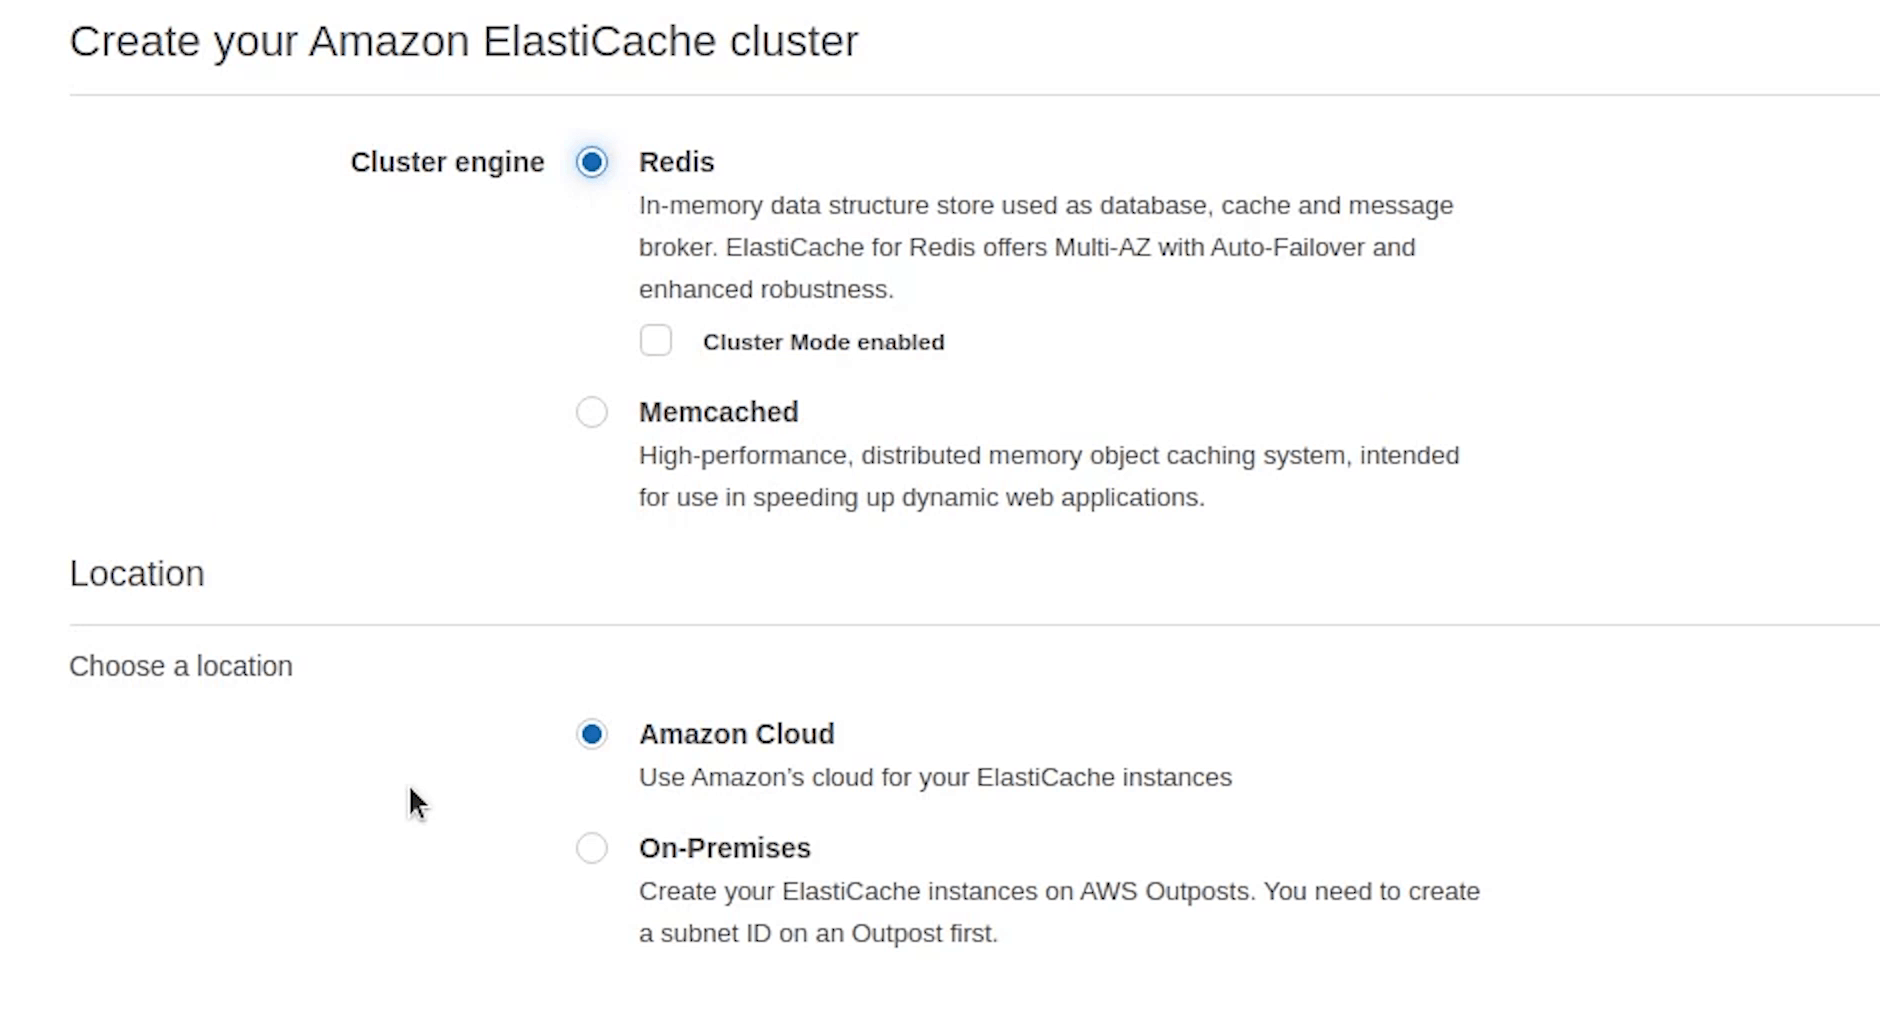
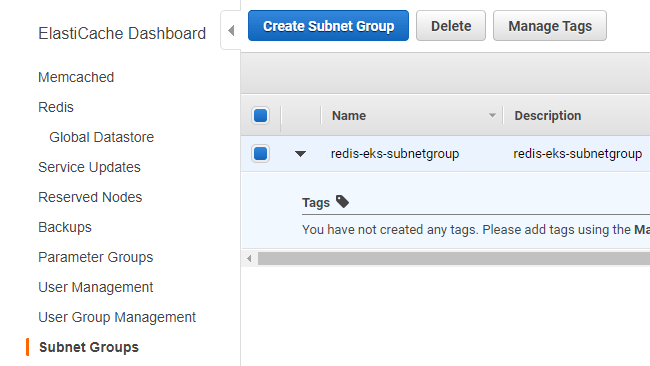
Same as usual I will create a private subnet group for redis (redis-eks-subnetgroup), the same we did for postgres, three private subnets. We are not covering this, if you have any confusion then follow the postgres subnet group setup. It's going to be same for elasticache as well.
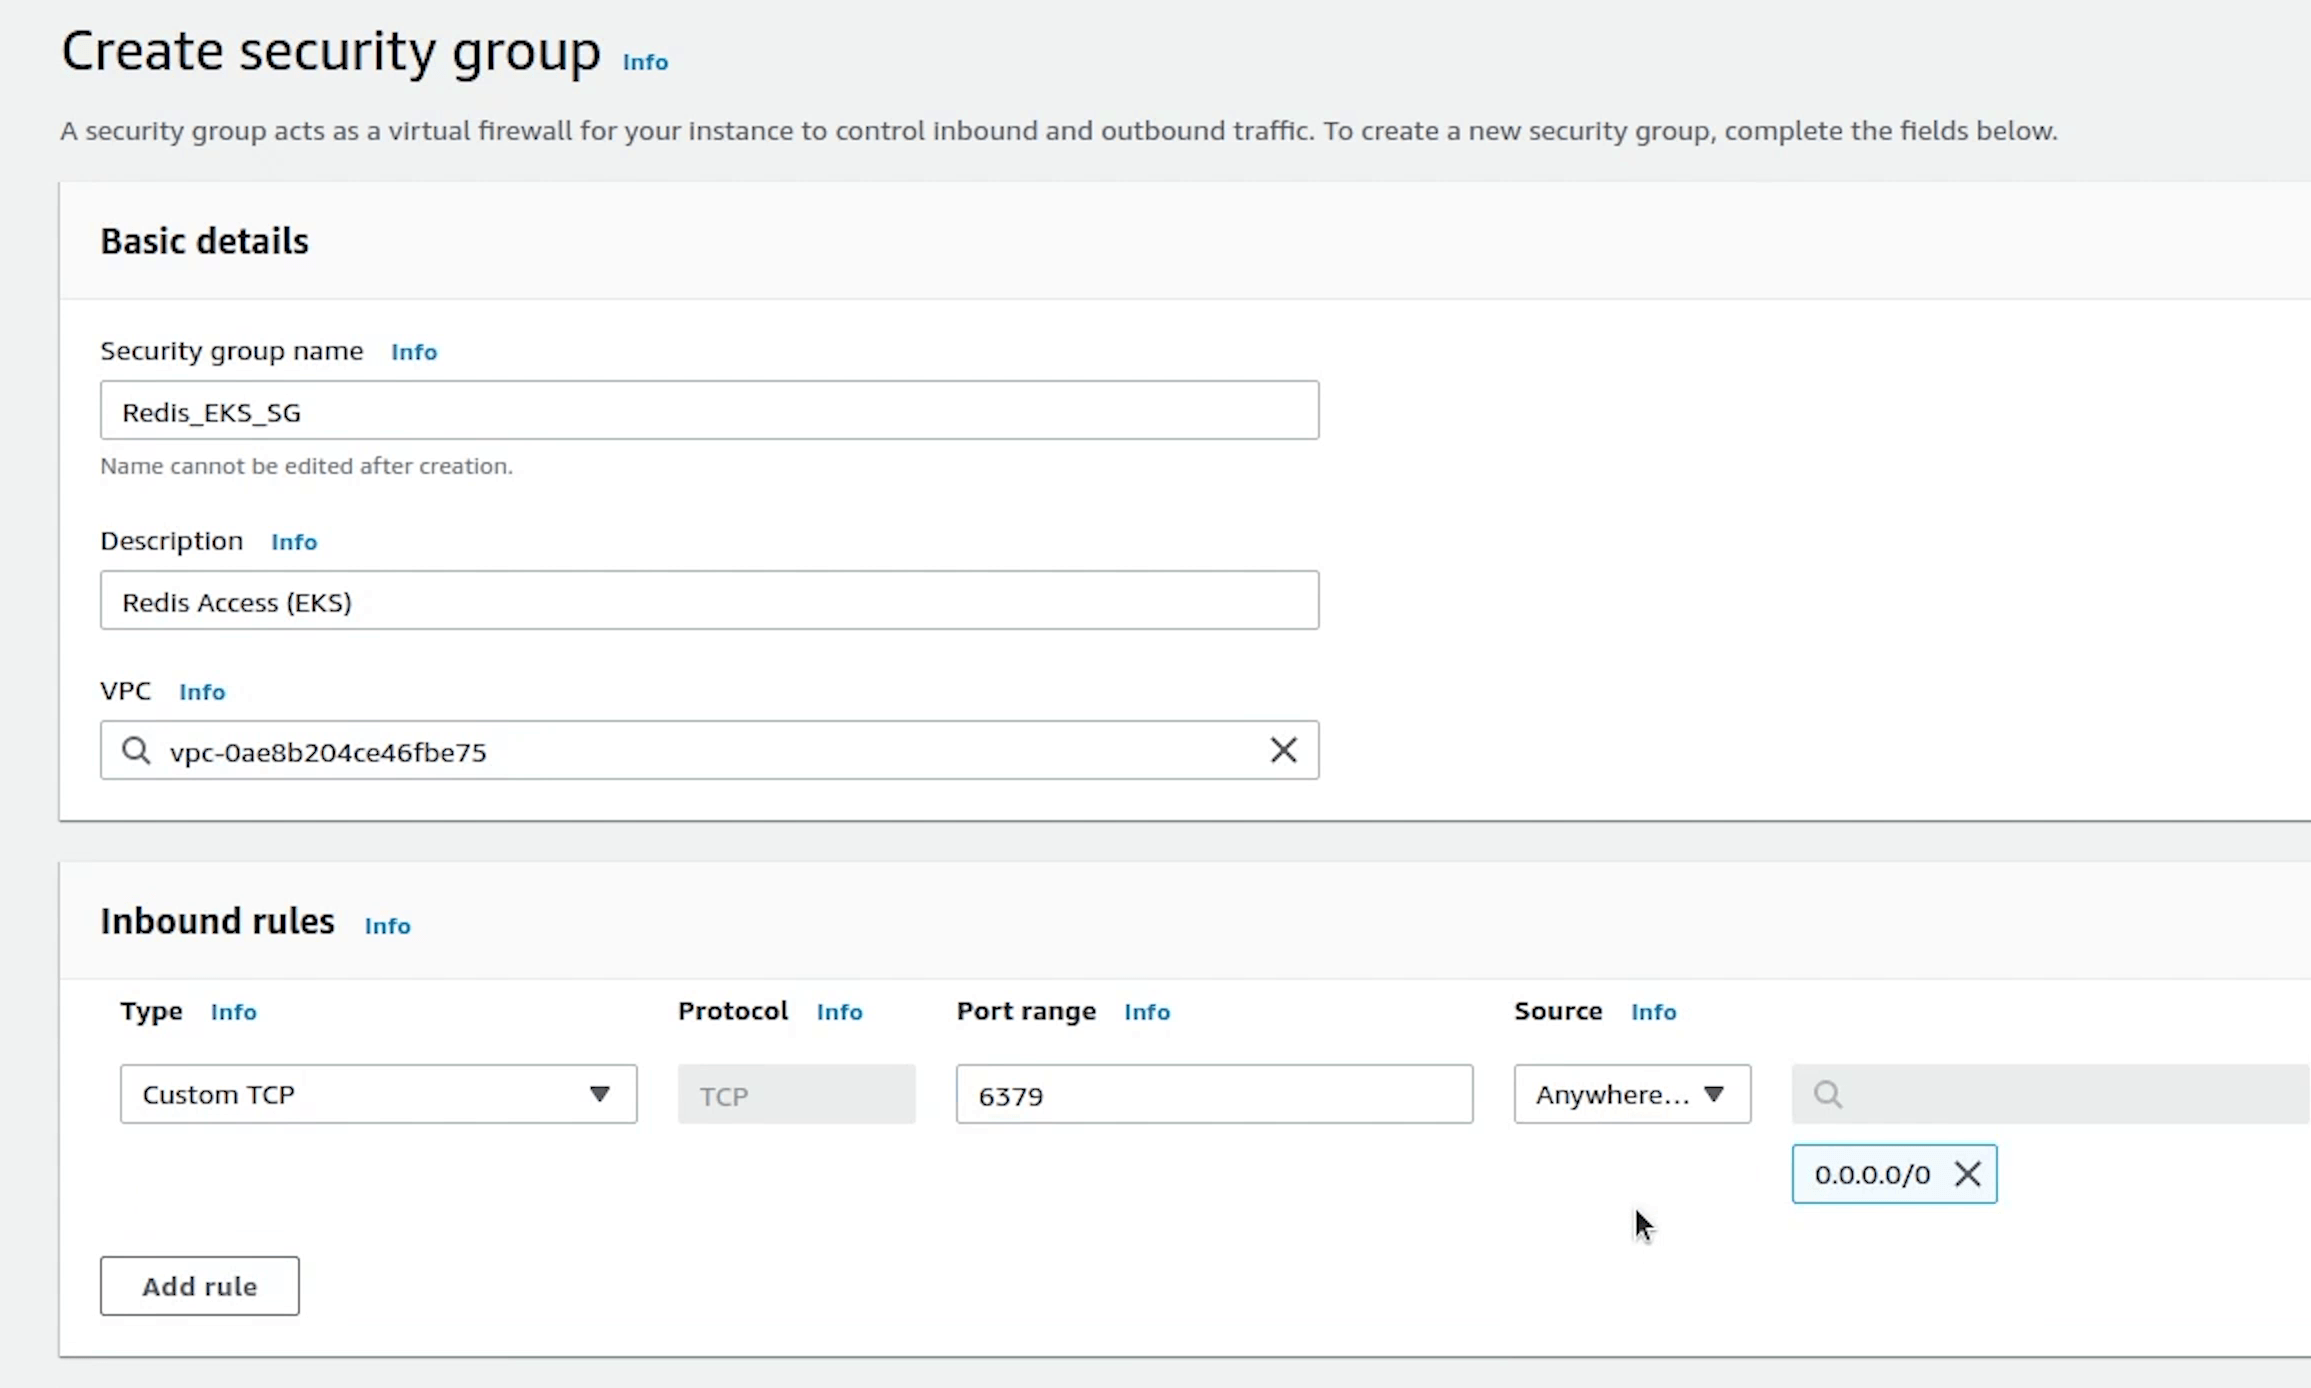
I also need to create a custom security group for redis.
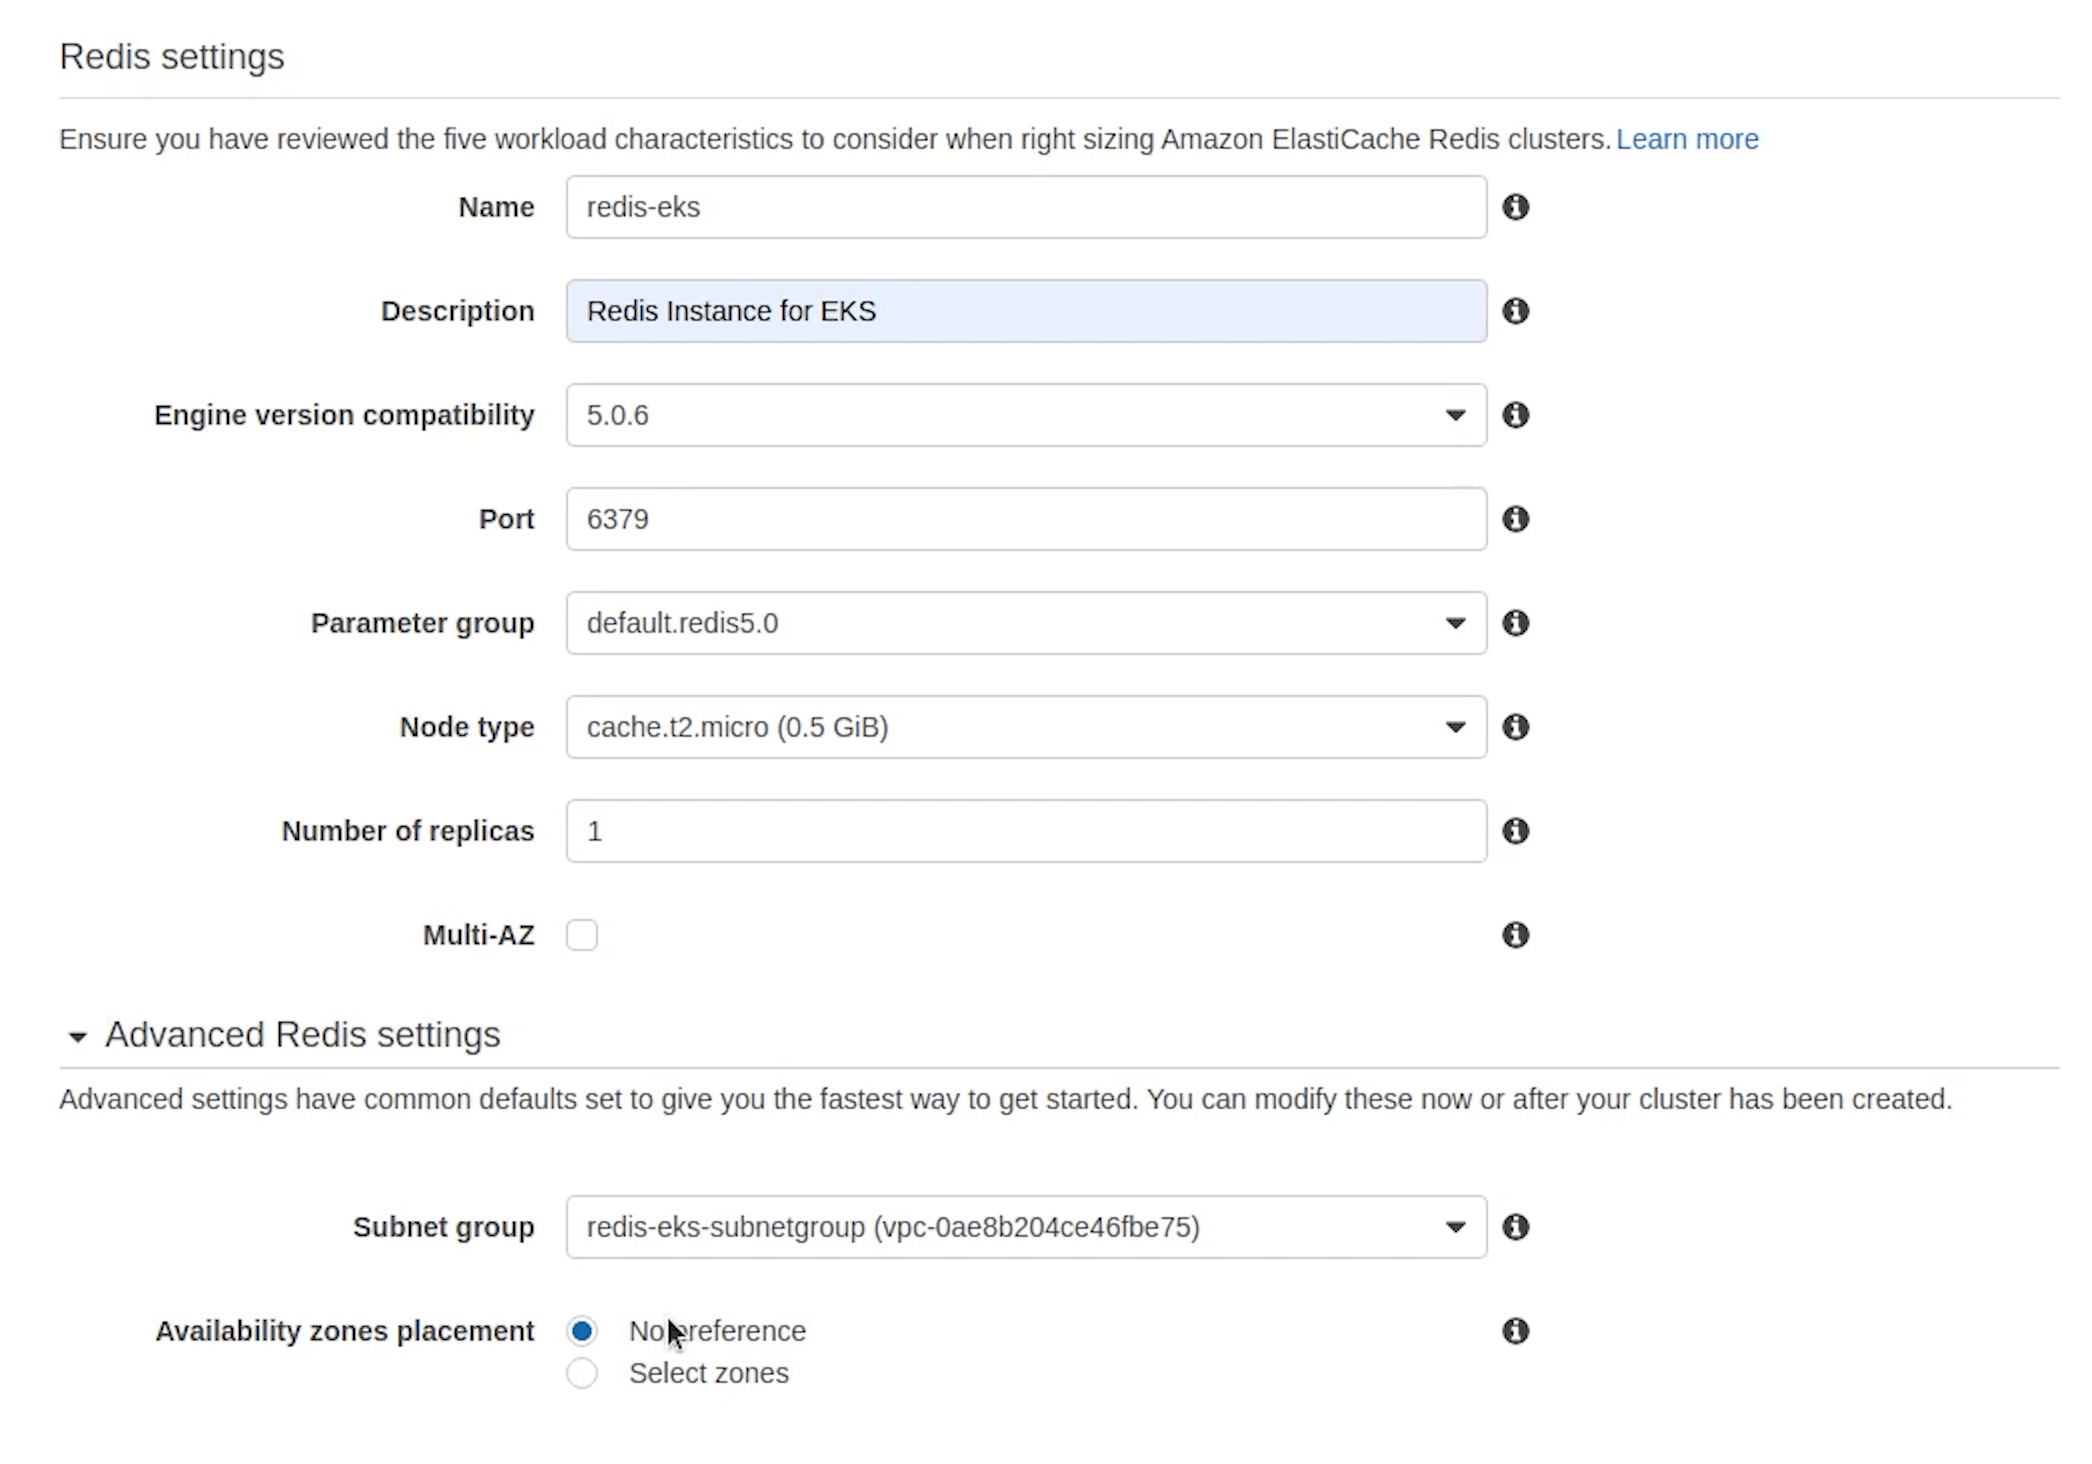
I will choose the version 5.0.6
Make sure the node type is t2.micro, elasticache is an expensive service, be careful with that.
Set replicas to 1 and uncheck Multi-AZ. Encryption I am leaving it as unchecked, completely your choice.
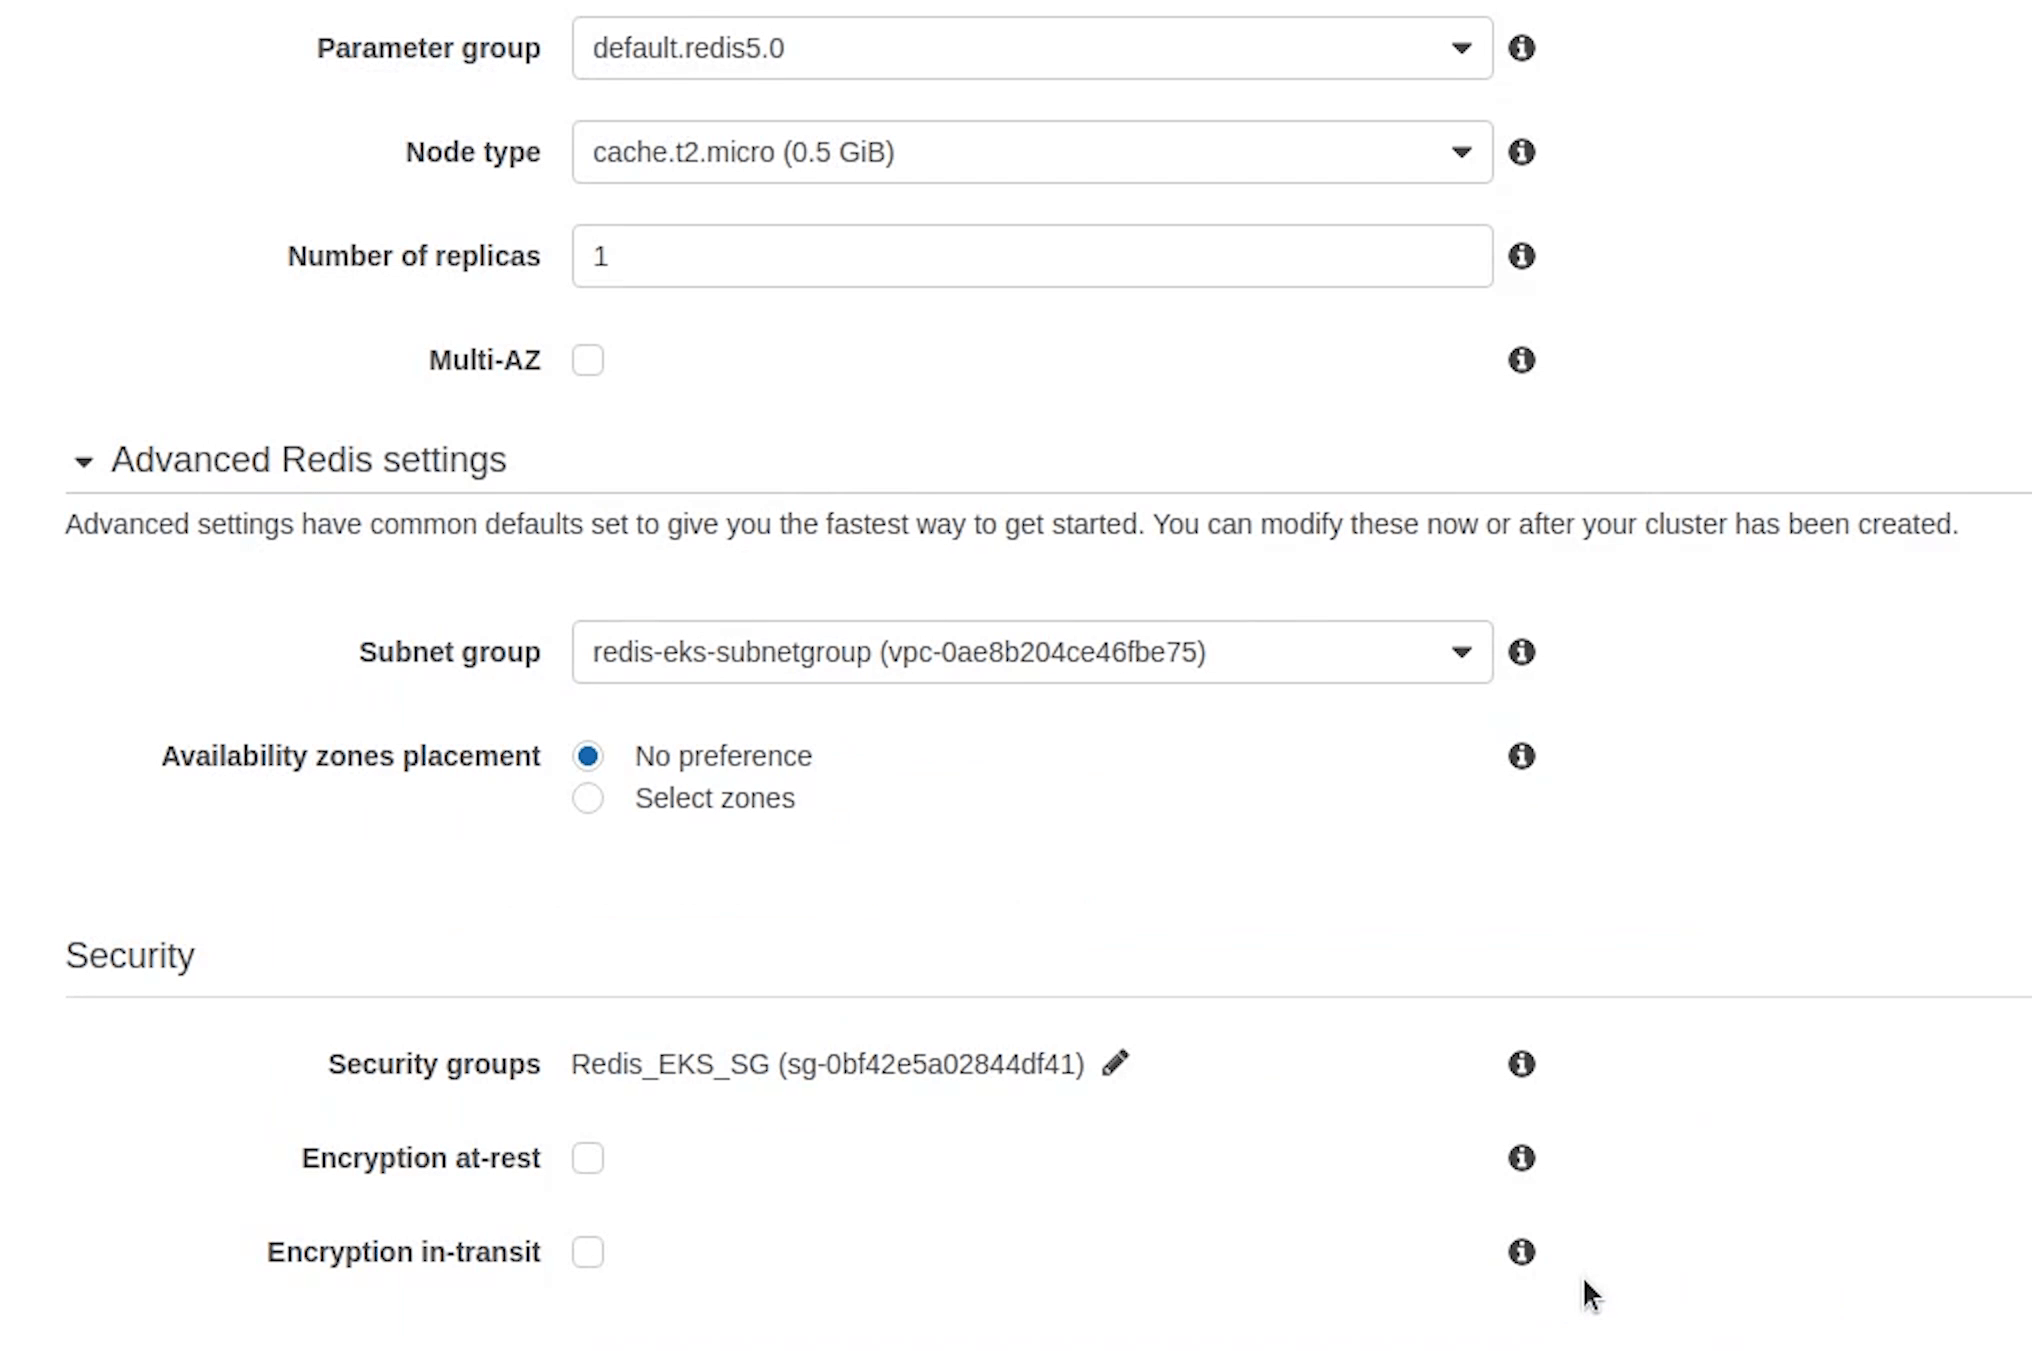
Backups are not required for this tutorial.
I will click on Create, and it’s going to take some time to initialize.
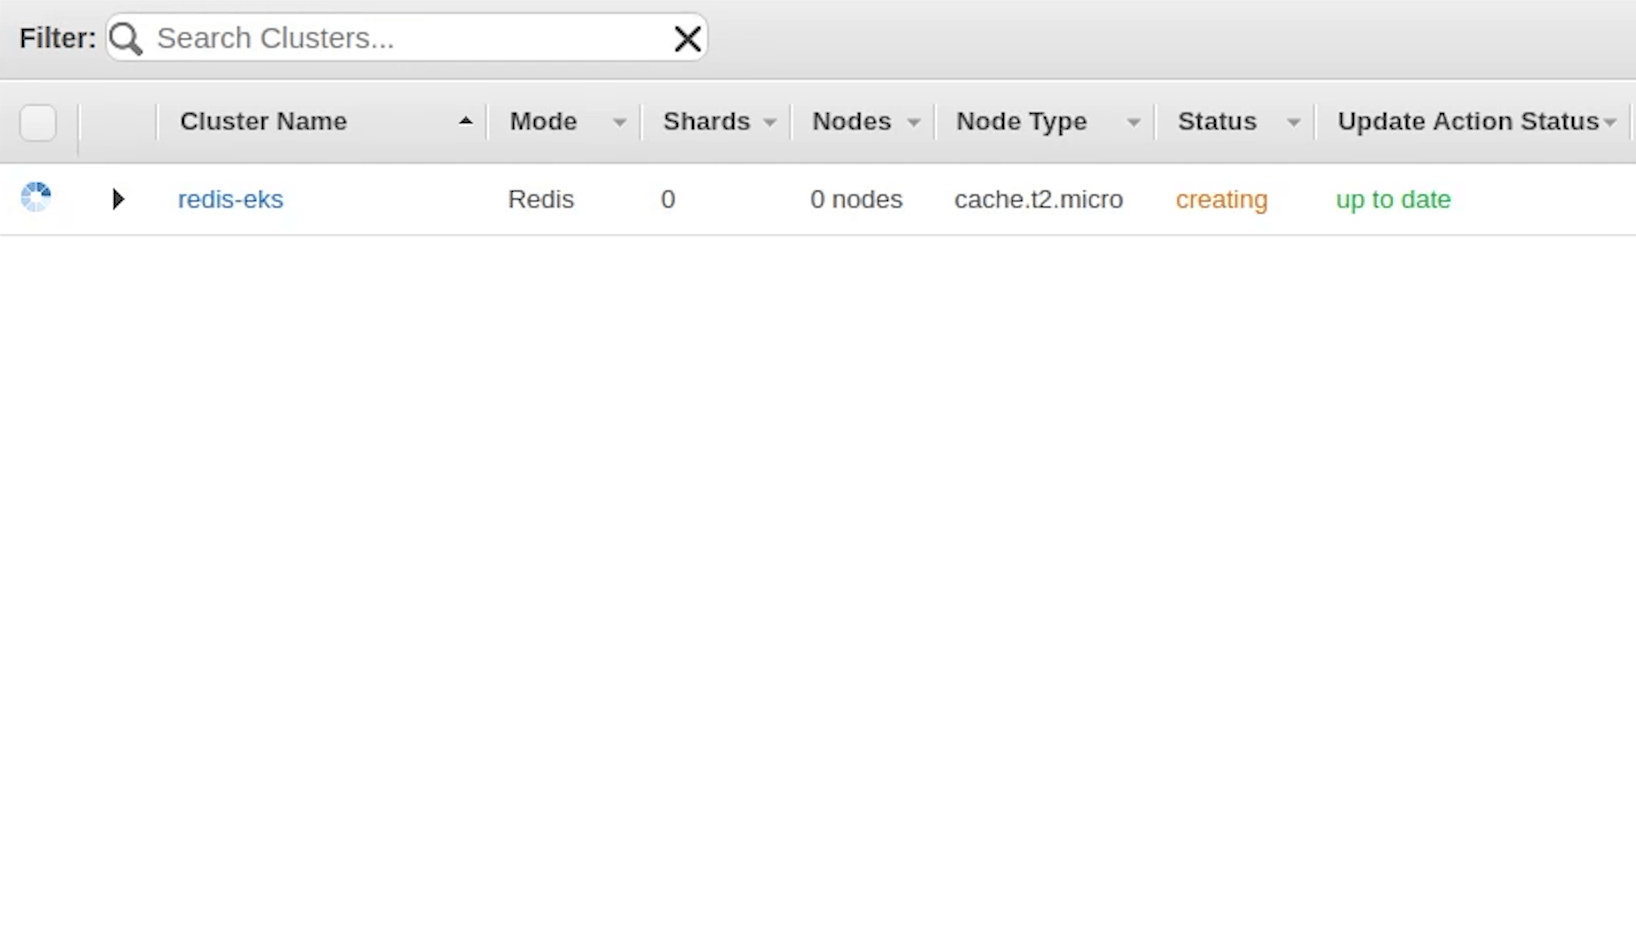
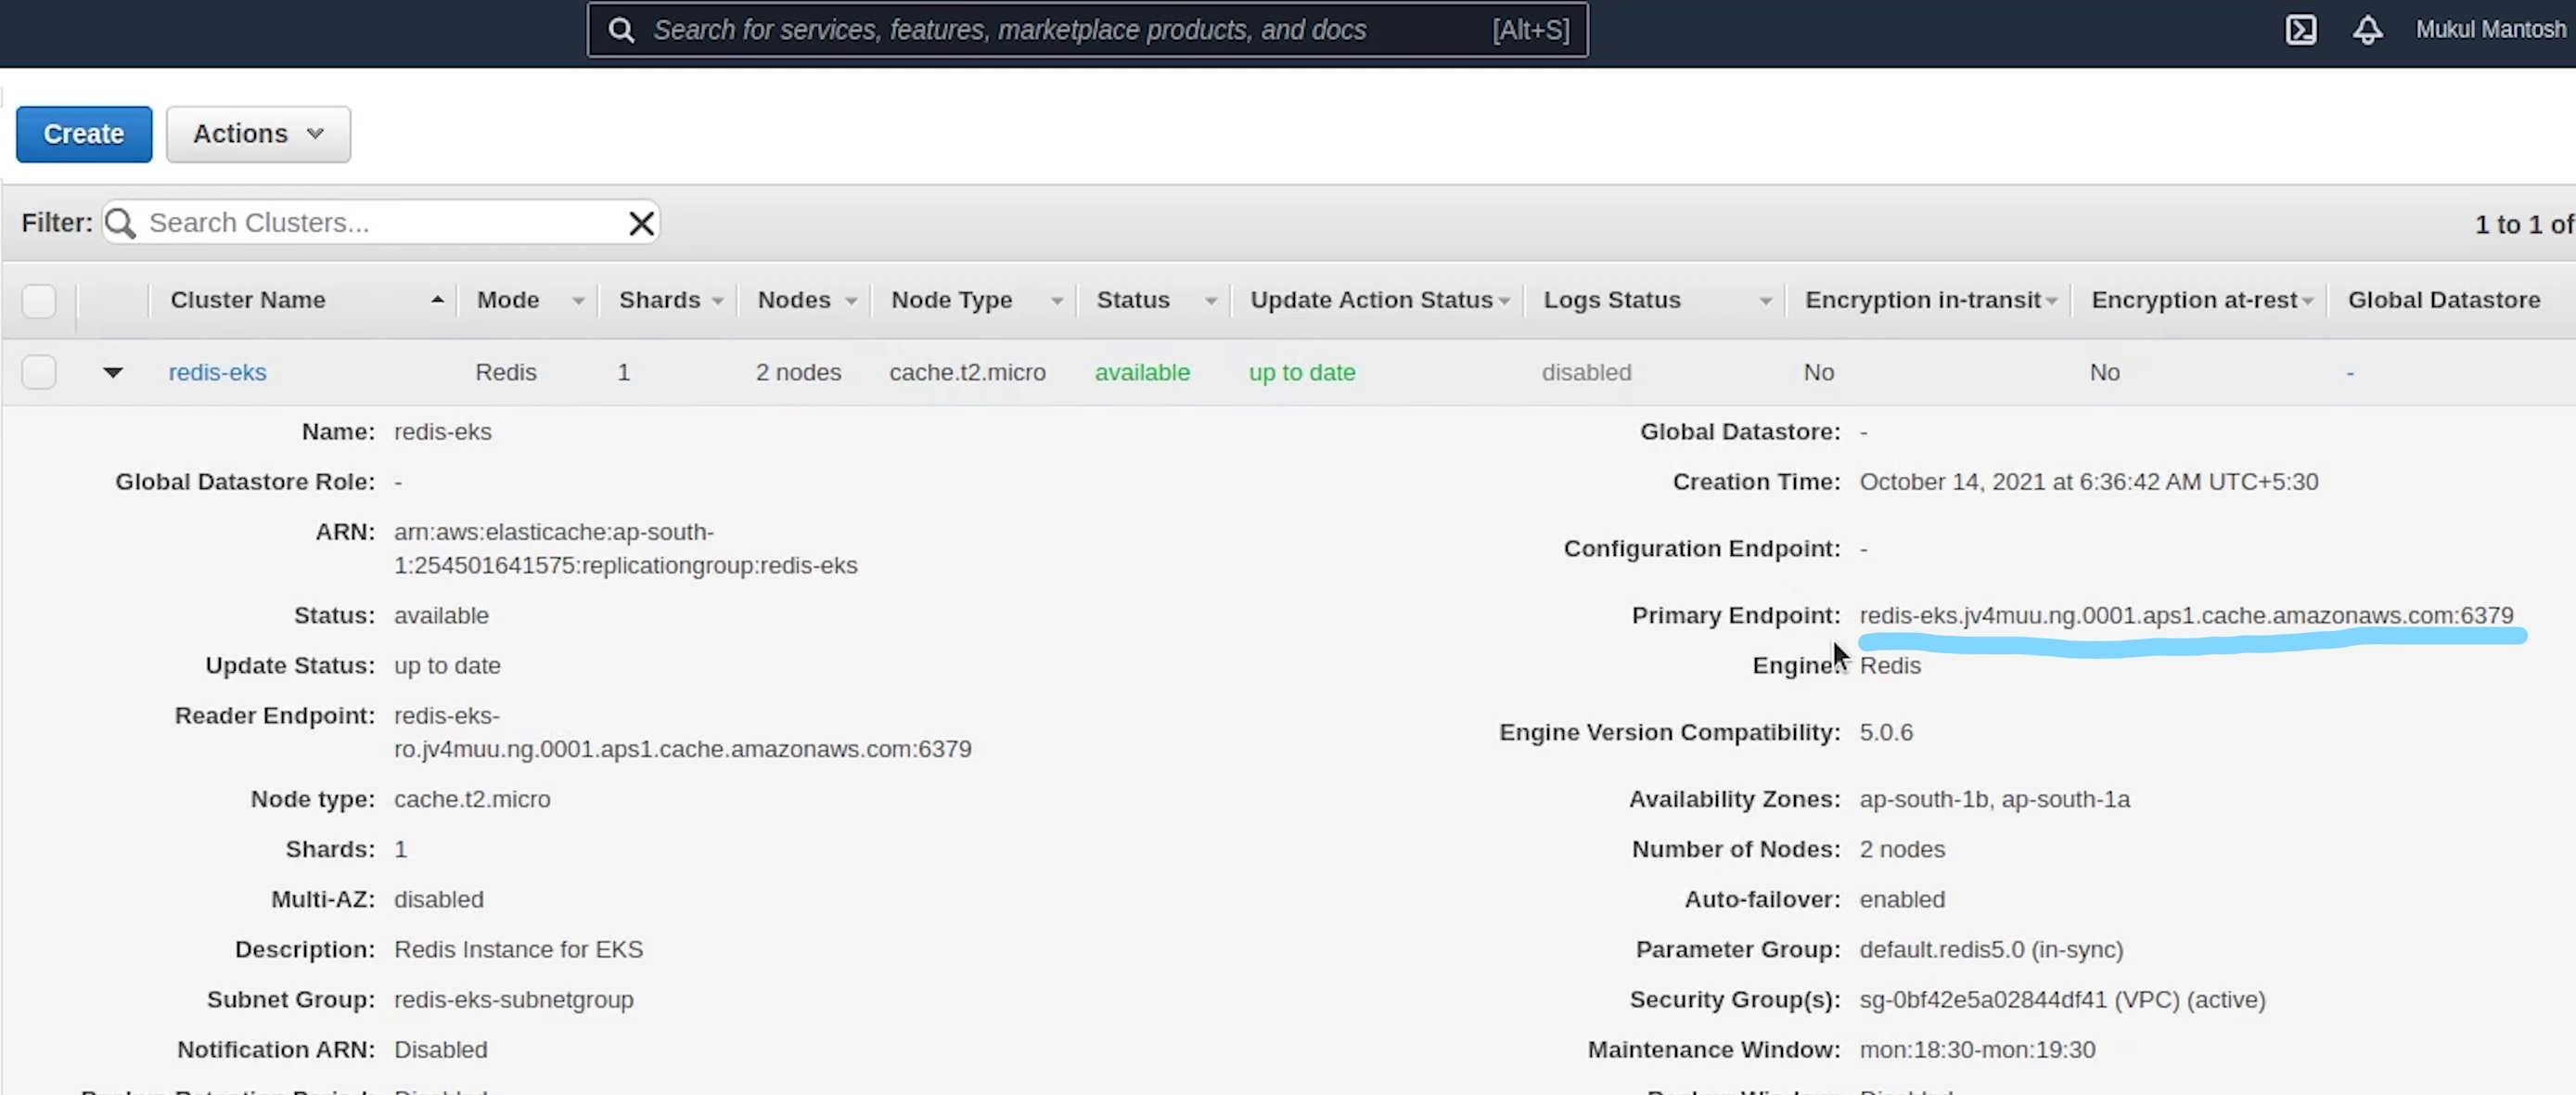
Okay, redis is now available.
I will copy the endpoint and replace it in the external name service.
I will copy the other services which we have done earlier when working with kubernetes locally and there is no change in that.
I need to replace the image url and this time we will be pointing to ECR Container Registry url instead of DockerHub.
eks/deploy/code/deployment.yml
apiVersion: apps/v1
kind: Deployment
metadata:
  name: ecommerce-deployment
  labels:
    app: ecommerce
spec:
  replicas: 1
  selector:
    matchLabels:
      app: ecommerce-app
  template:
    metadata:
      labels:
        app: ecommerce-app
    spec:
      containers:
        - image: 254501641575.dkr.ecr.ap-south-1.amazonaws.com/fastapi-ecommerce:latest # replace with ECR
          imagePullPolicy: Always
          name: sample-container
          envFrom:
            - secretRef:
                name: ecommerce-secret
          ports:
            - containerPort: 5000
              name: fastapi
          readinessProbe:
            httpGet:
              port: 5000
              path: /docs
            initialDelaySeconds: 15
          livenessProbe:
            httpGet:
              port: 5000
              path: /docs
            initialDelaySeconds: 15
            periodSeconds: 15
eks/deploy/code/service.yml
apiVersion: v1
kind: Service
metadata:
  name: ecommerce-service
  labels:
    app: ecommerce
spec:
  type: NodePort
  selector:
    app: ecommerce-app
  ports:
    - port: 5000
      targetPort: 5000
The service file will be running on port 5000, and you can see this needs to be a NodePort. Not a cluster IP because traffic reaching the ALB (Application Load Balancer) is routed to NodePort for your Service and then proxied to your pods.
eks/deploy/code/secret.yml
apiVersion: v1
kind: Secret
metadata:
  name: ecommerce-secret
  labels:
    app: ecommerce
data:
  DATABASE_USERNAME: cG9zdGdyZXM= # postgres
  DATABASE_PASSWORD: bXVrdWwxMjM= # mukul123
  DATABASE_HOST: cG9zdGdyZXMtc2VydmljZQ== # postgres-service
  DATABASE_NAME: c2FtcGxl # sample
  REDIS_HOST: cmVkaXMtc2VydmljZQ== # redis-service
  REDIS_PORT: NjM3OQ== # 6379
  REDIS_DB: MA== # 0
eks/deploy/celery/deployment.yml
apiVersion: apps/v1
kind: Deployment
metadata:
  name: celery-deployment
  labels:
    app: ecommerce
spec:
  replicas: 1
  selector:
    matchLabels:
      app: celery-app
  template:
    metadata:
      labels:
        app: celery-app
    spec:
      containers:
        - image: 254501641575.dkr.ecr.ap-south-1.amazonaws.com/fastapi-ecommerce:latest
          command: ["celery", "-A", "main.celery", "worker", "-l", "info"]
          envFrom:
            - secretRef:
                name: celery-secret
          name: celery-container
eks/deploy/celery/secret.yml
apiVersion: v1
kind: Secret
metadata:
  name: celery-secret
  labels:
    app: ecommerce
data:
  REDIS_HOST: cmVkaXMtc2VydmljZQ== # redis-service
  REDIS_PORT: NjM3OQ== # 6379
  REDIS_DB: MA== # 0
eks/deploy/job/migration.yml
apiVersion: batch/v1
kind: Job
metadata:
  name: fastapi-migrations
spec:
  template:
    spec:
      containers:
        - name: migration-container
          image: 254501641575.dkr.ecr.ap-south-1.amazonaws.com/fastapi-ecommerce:latest
          command: ["alembic", "upgrade", "head"]
          envFrom:
            - secretRef:
                name: ecommerce-secret
      restartPolicy: Never
  backoffLimit: 3
Ingress
Next, we are going to create an ingress. This is something which we did not do in our local system but indeed we need it here. In Kubernetes, an Ingress is an object that allows access to your Kubernetes services from outside the Kubernetes cluster typically via HTTPS/HTTP. With Ingress, you can easily set up rules for routing traffic without creating a bunch of Load Balancers or exposing each service on the node.
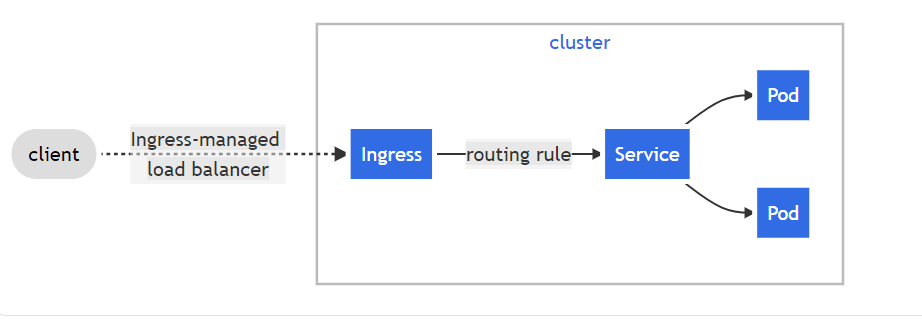
From the point of view of a Kubernetes pod, ingress is incoming traffic to the pod, and egress is outgoing traffic from the pod.
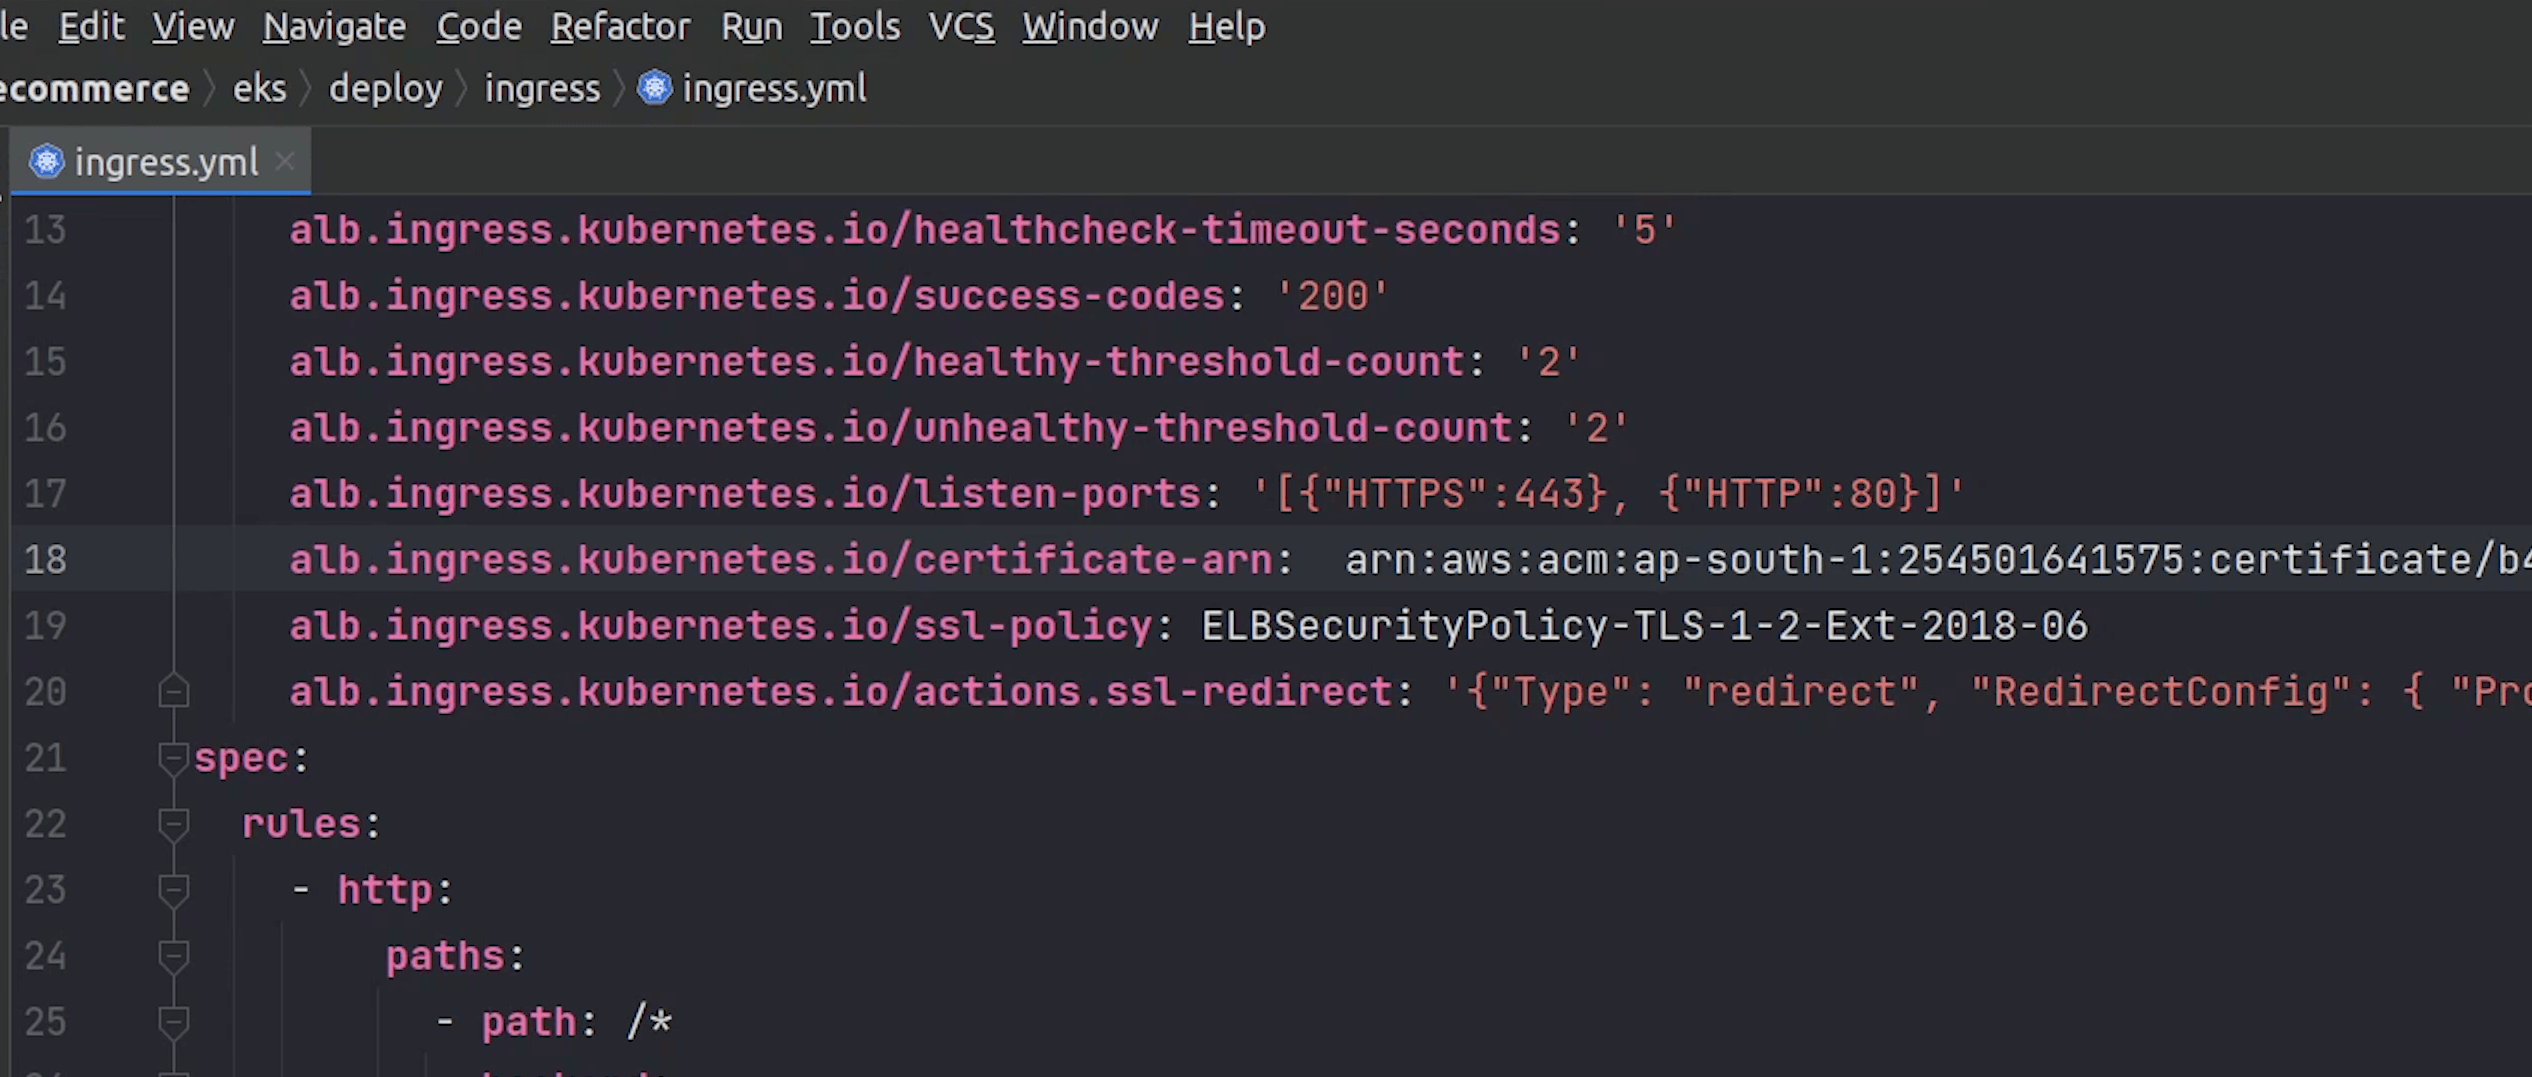
As you can observe from the file, carefully see the data being passed in the annotations.
These are a few values you must have definitely observed when you have created an Application Load Balancer in AWS.
eks/deploy/ingress/ingress.yml
apiVersion: extensions/v1beta1
kind: Ingress
metadata:
  name: ingress-ecommerce-service
  labels:
    app: ecommerce
  annotations:
    kubernetes.io/ingress.class: "alb"
    alb.ingress.kubernetes.io/scheme: internet-facing
    alb.ingress.kubernetes.io/healthcheck-protocol: HTTP
    alb.ingress.kubernetes.io/healthcheck-port: traffic-port
    alb.ingress.kubernetes.io/healthcheck-interval-seconds: "15"
    alb.ingress.kubernetes.io/healthcheck-timeout-seconds: "5"
    alb.ingress.kubernetes.io/success-codes: "200"
    alb.ingress.kubernetes.io/healthy-threshold-count: "2"
    alb.ingress.kubernetes.io/unhealthy-threshold-count: "2"
    alb.ingress.kubernetes.io/listen-ports: '[{"HTTPS":443}, {"HTTP":80}]'
    alb.ingress.kubernetes.io/certificate-arn: <REPLACE_CERTIFICATE_ARN>
    alb.ingress.kubernetes.io/ssl-policy: ELBSecurityPolicy-TLS-1-2-Ext-2018-06
    alb.ingress.kubernetes.io/actions.ssl-redirect: '{"Type": "redirect", "RedirectConfig": { "Protocol": "HTTPS", "Port": "443", "StatusCode": "HTTP_301"}}'
spec:
  rules:
    - http:
        paths:
          - path: /*
            backend:
              serviceName: ssl-redirect
              servicePort: use-annotation
          - path: /*
            backend:
              serviceName: ecommerce-service
              servicePort: 5000
We are doing some health checks and looking for a success response code of 200.
The listening ports are 80 and 443.
Observing line number 18, we need to replace the certificate ARN and for that we need to create a new certificate in AWS Certificate Manager. We are going to do it in a while.

Under Rules we are performing two operations, one is the SSL redirection which is being taken from the annotation as mentioned in line number 20.
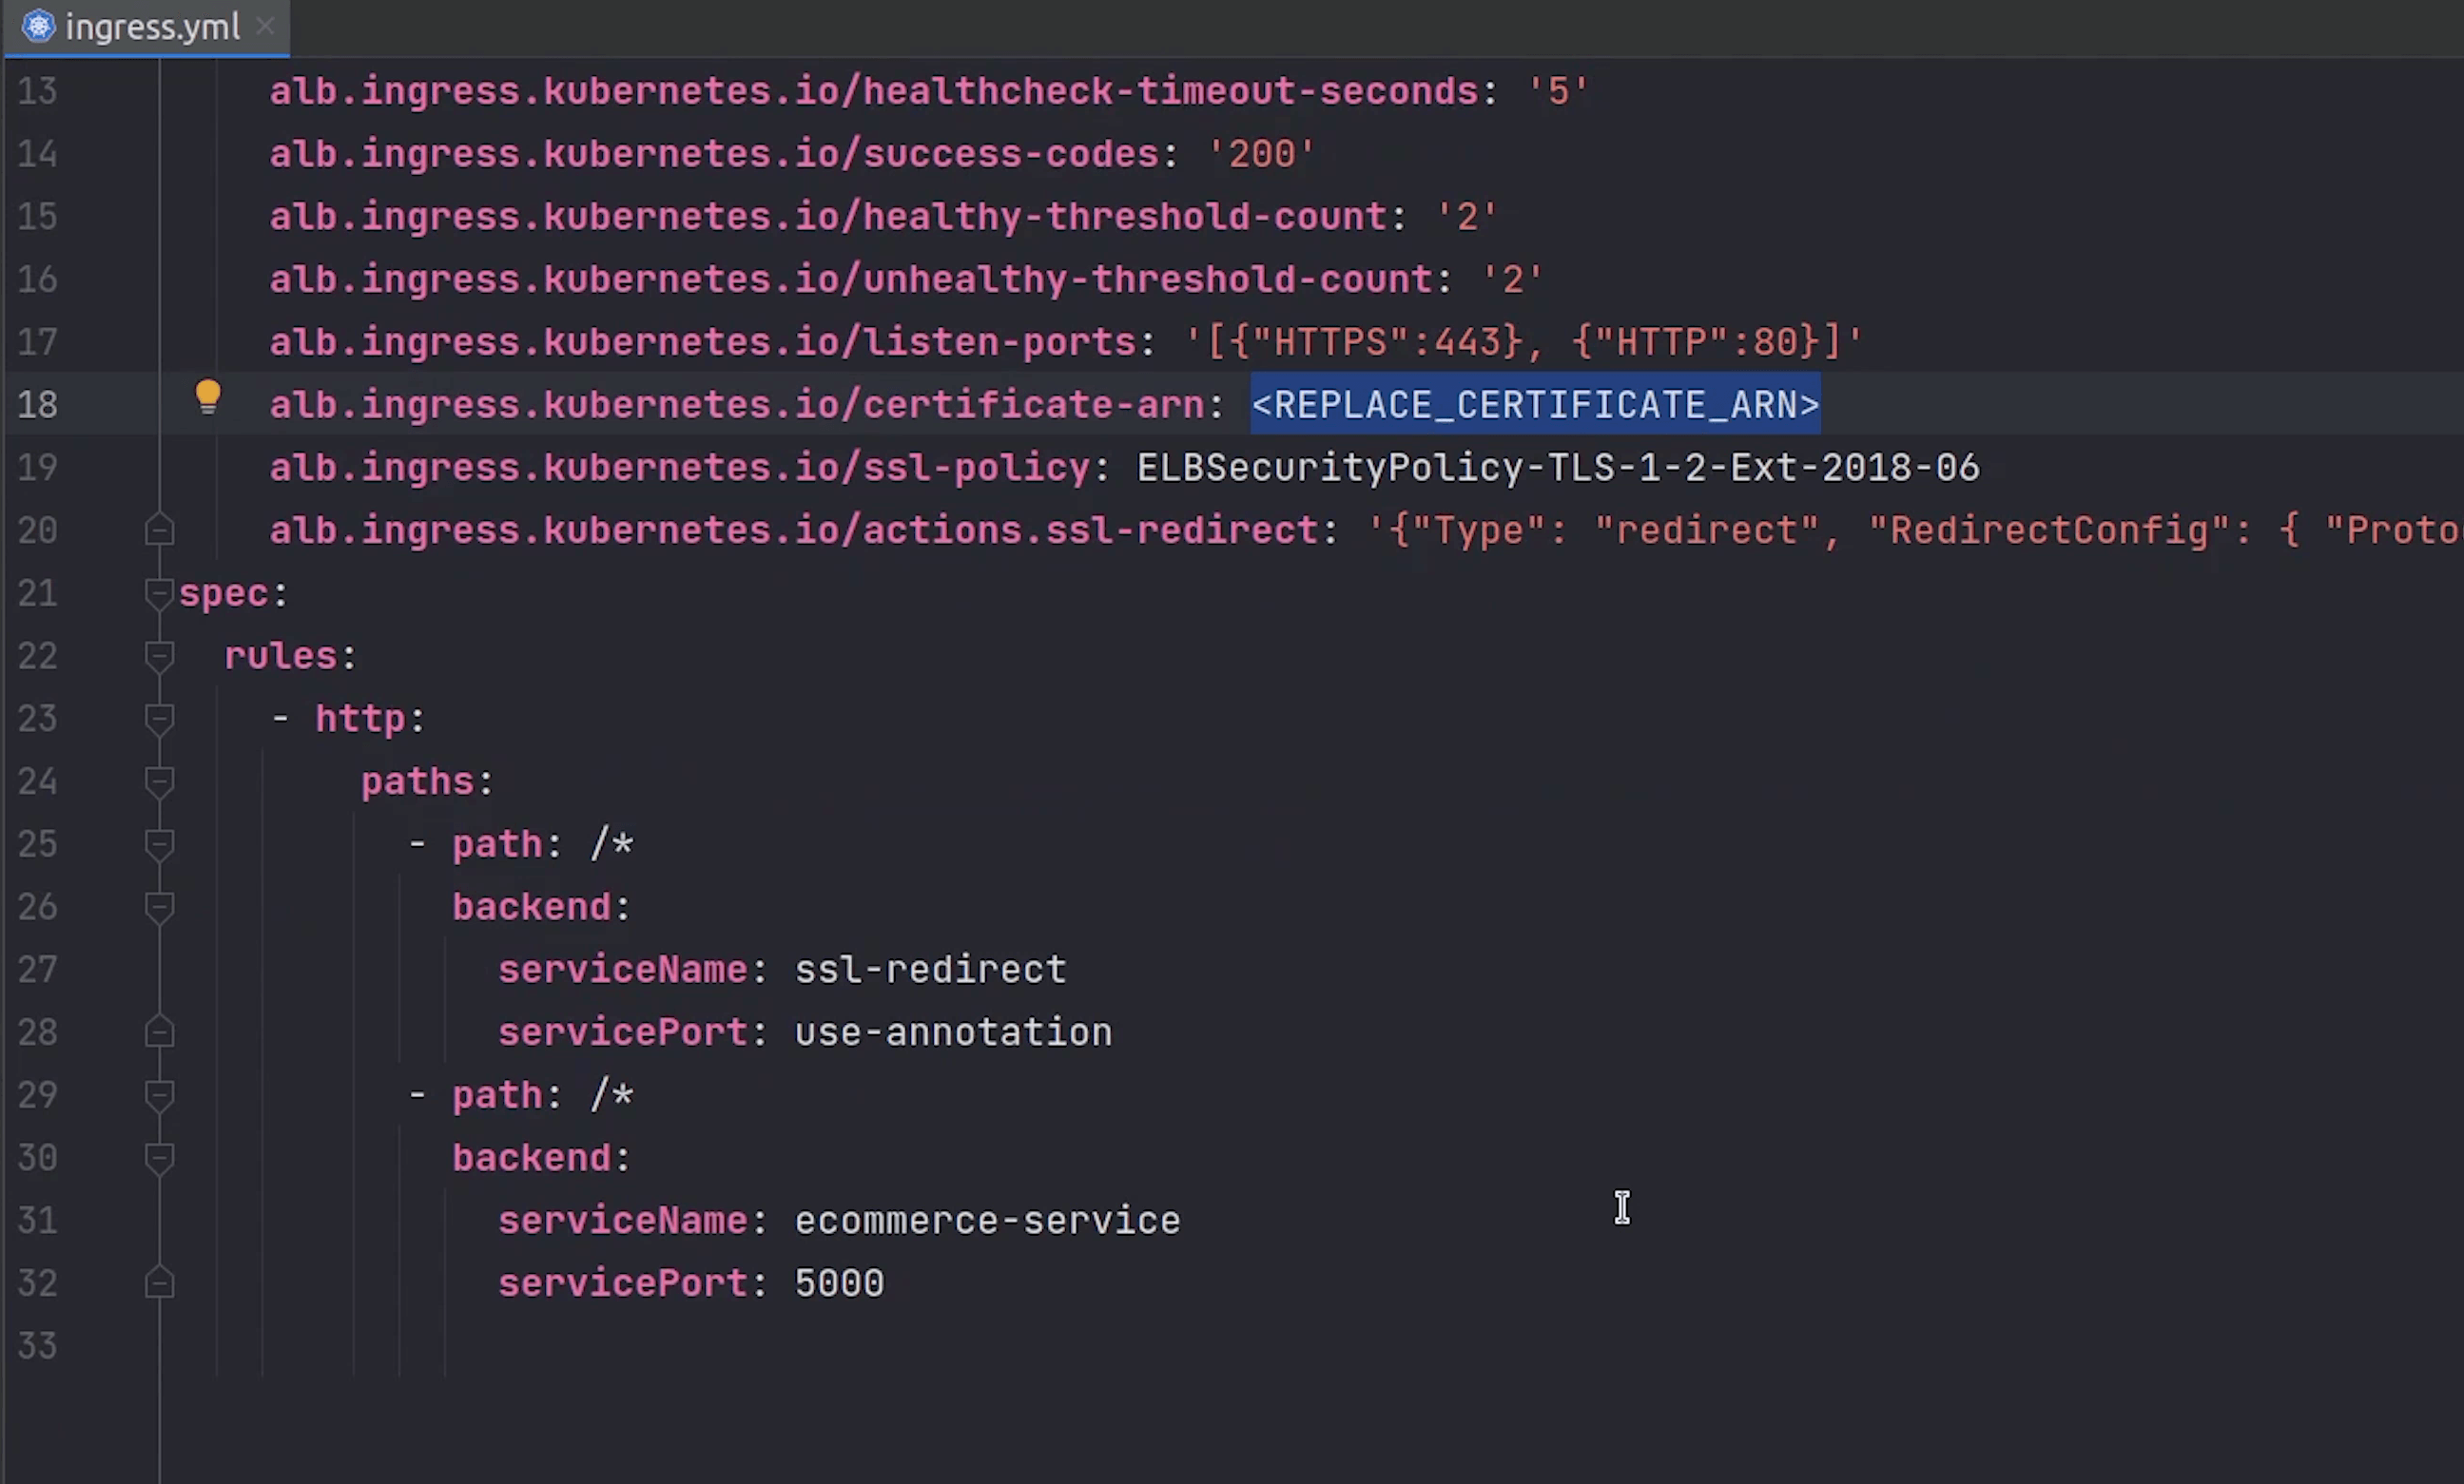
Next, we will be sending the traffic to our ecommerce-service which is running on port 5000 which indeed points to FastAPI backend.
Just imagine in your head that NGINX is proxying requests internally to your backend service. This is what we are trying to achieve through the ingress.
You can also perform path based routing and redirect applications to different services based on the path.
Let me now deploy the kubernetes manifests except the ingress.
I will open up the terminal and move inside the eks directory.
Just to clarify I have deployed these manifests in the default namespace, completely up to you. If you want a separate namespace you can go ahead with that.
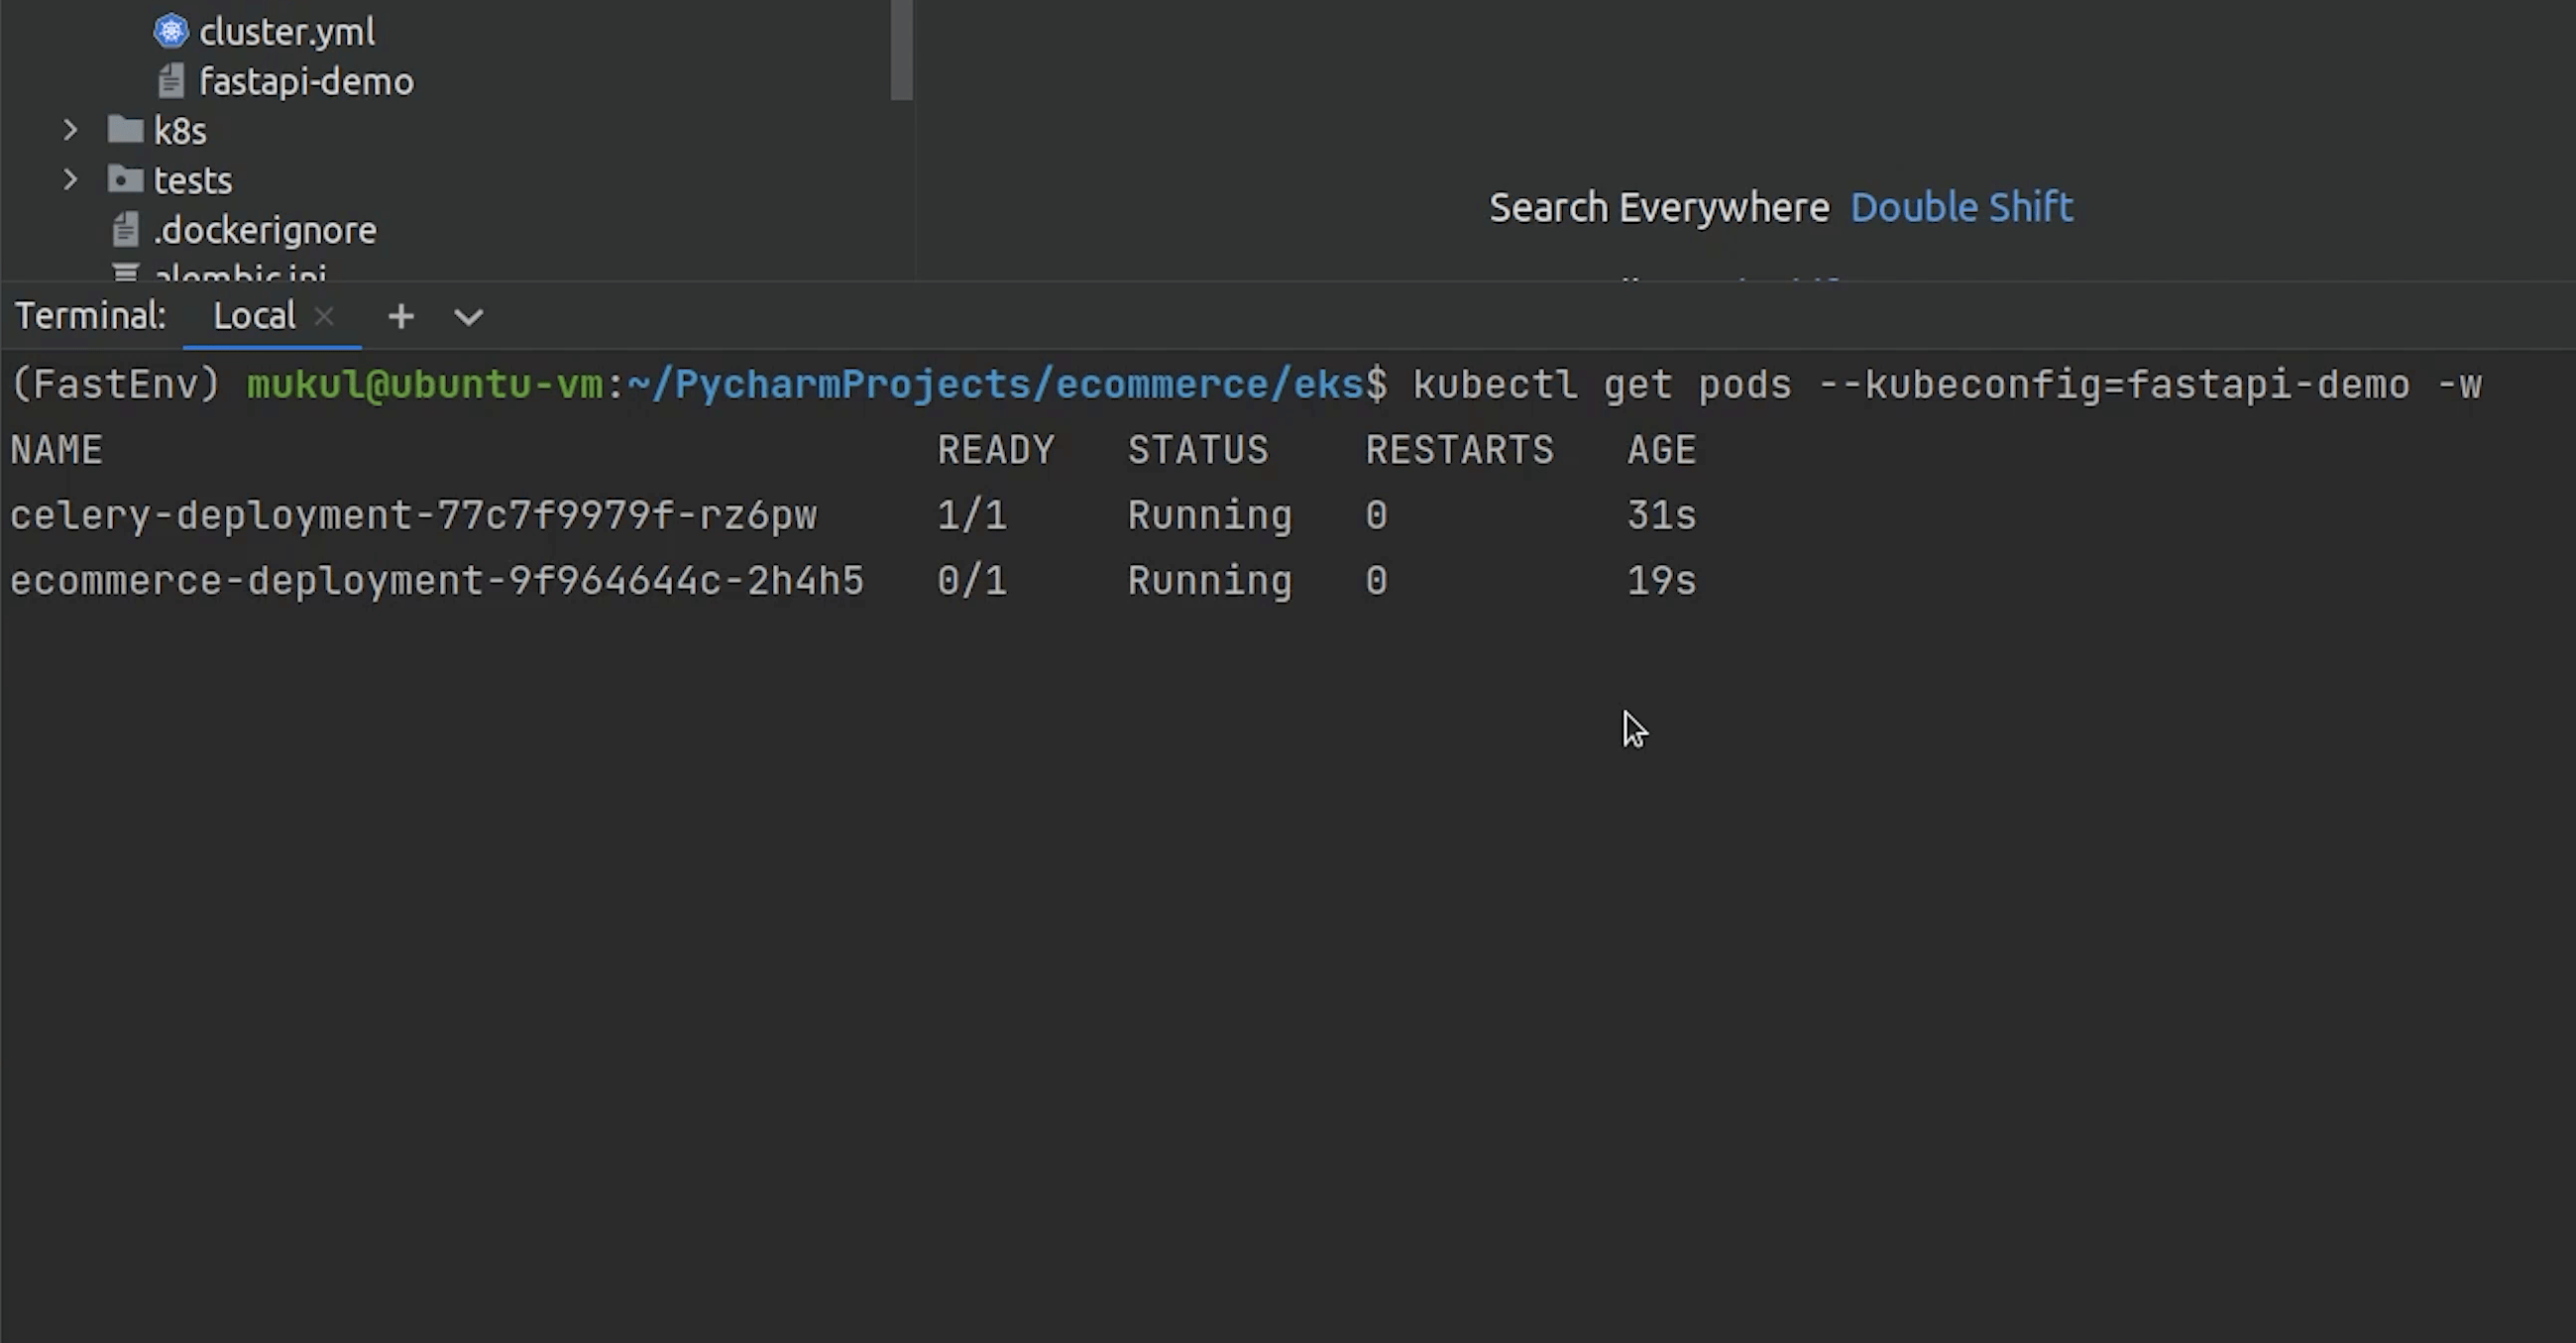
Celery and the backend are running fine, and we don’t need to worry about postgres and redis as they are managed services provided by AWS.
We have enough resources, let’s try to run six replicas of our backend service.
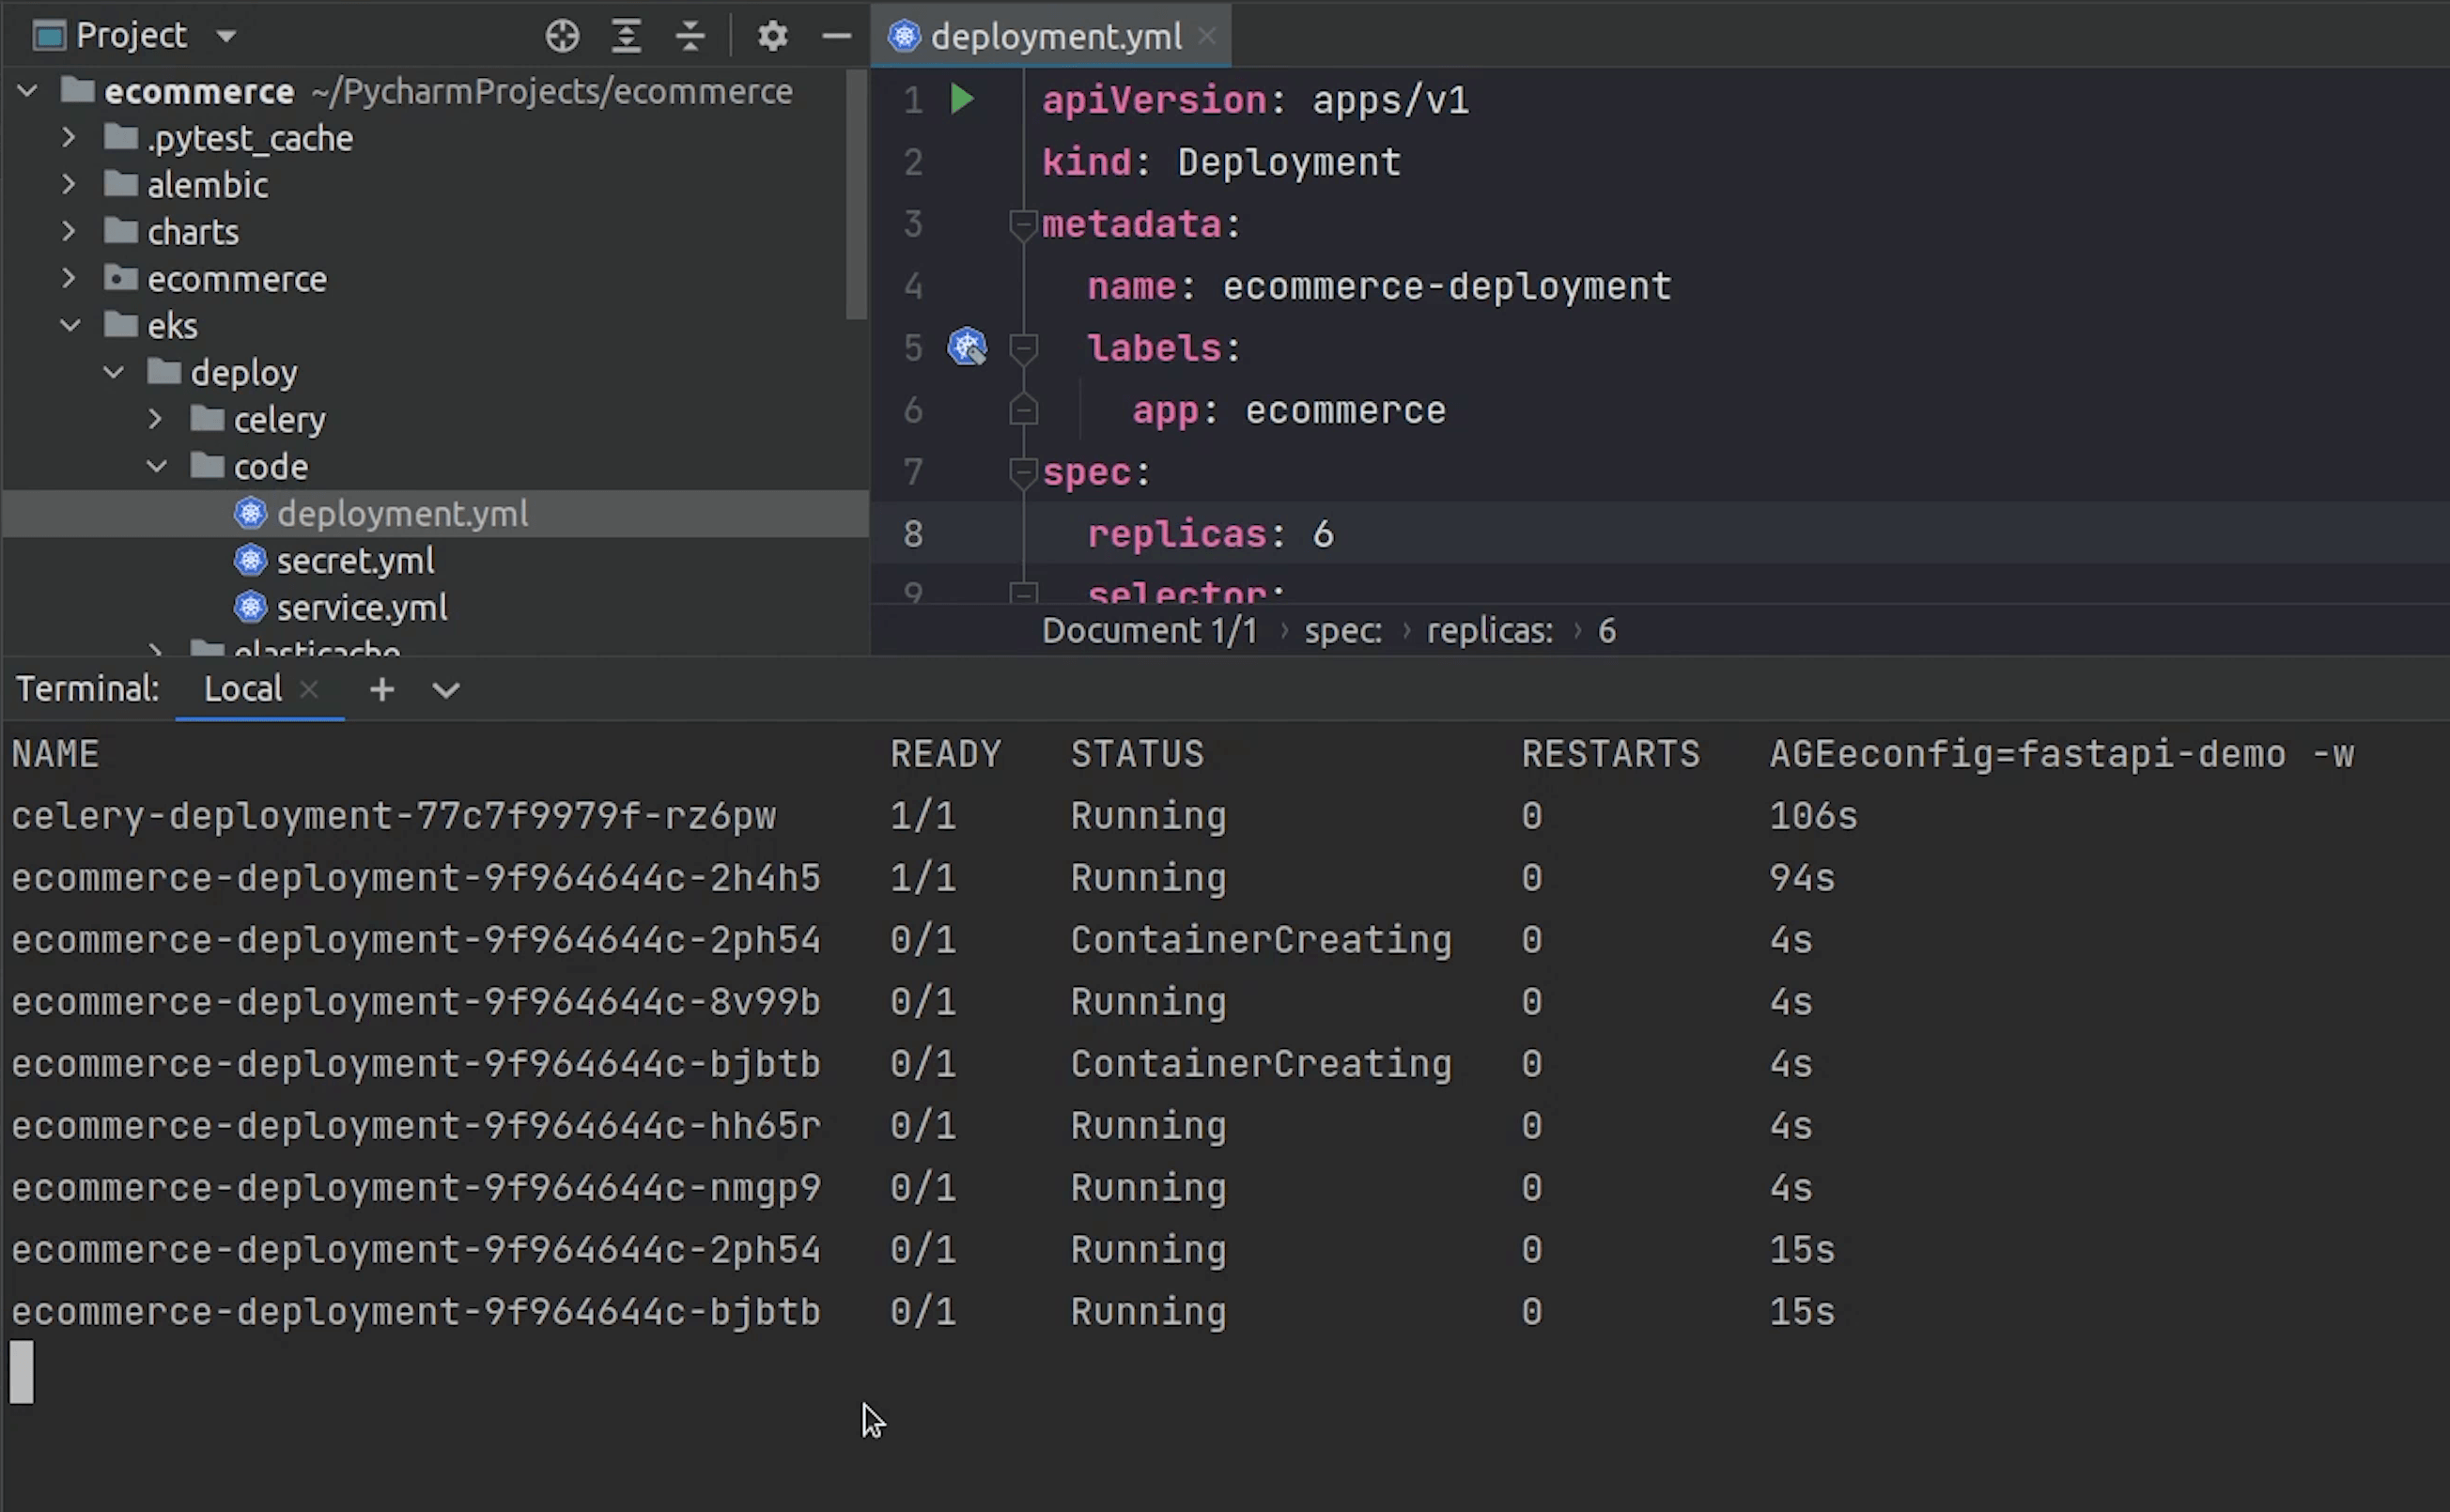
Six pods are running completely fine.
Now, let’s run the migration job.


Migration is completed. It was quite fast.
We are not using the ttlSecondsAfterFinished. If we use that then after a certain amount of seconds the job will be automatically removed.
Reference:
Now, only one thing is remaining and that is the ingress. But to move ahead with that we need to make sure we have domain name setup in Route53 along-with an SSL certificate generated by the Certificate Manager.
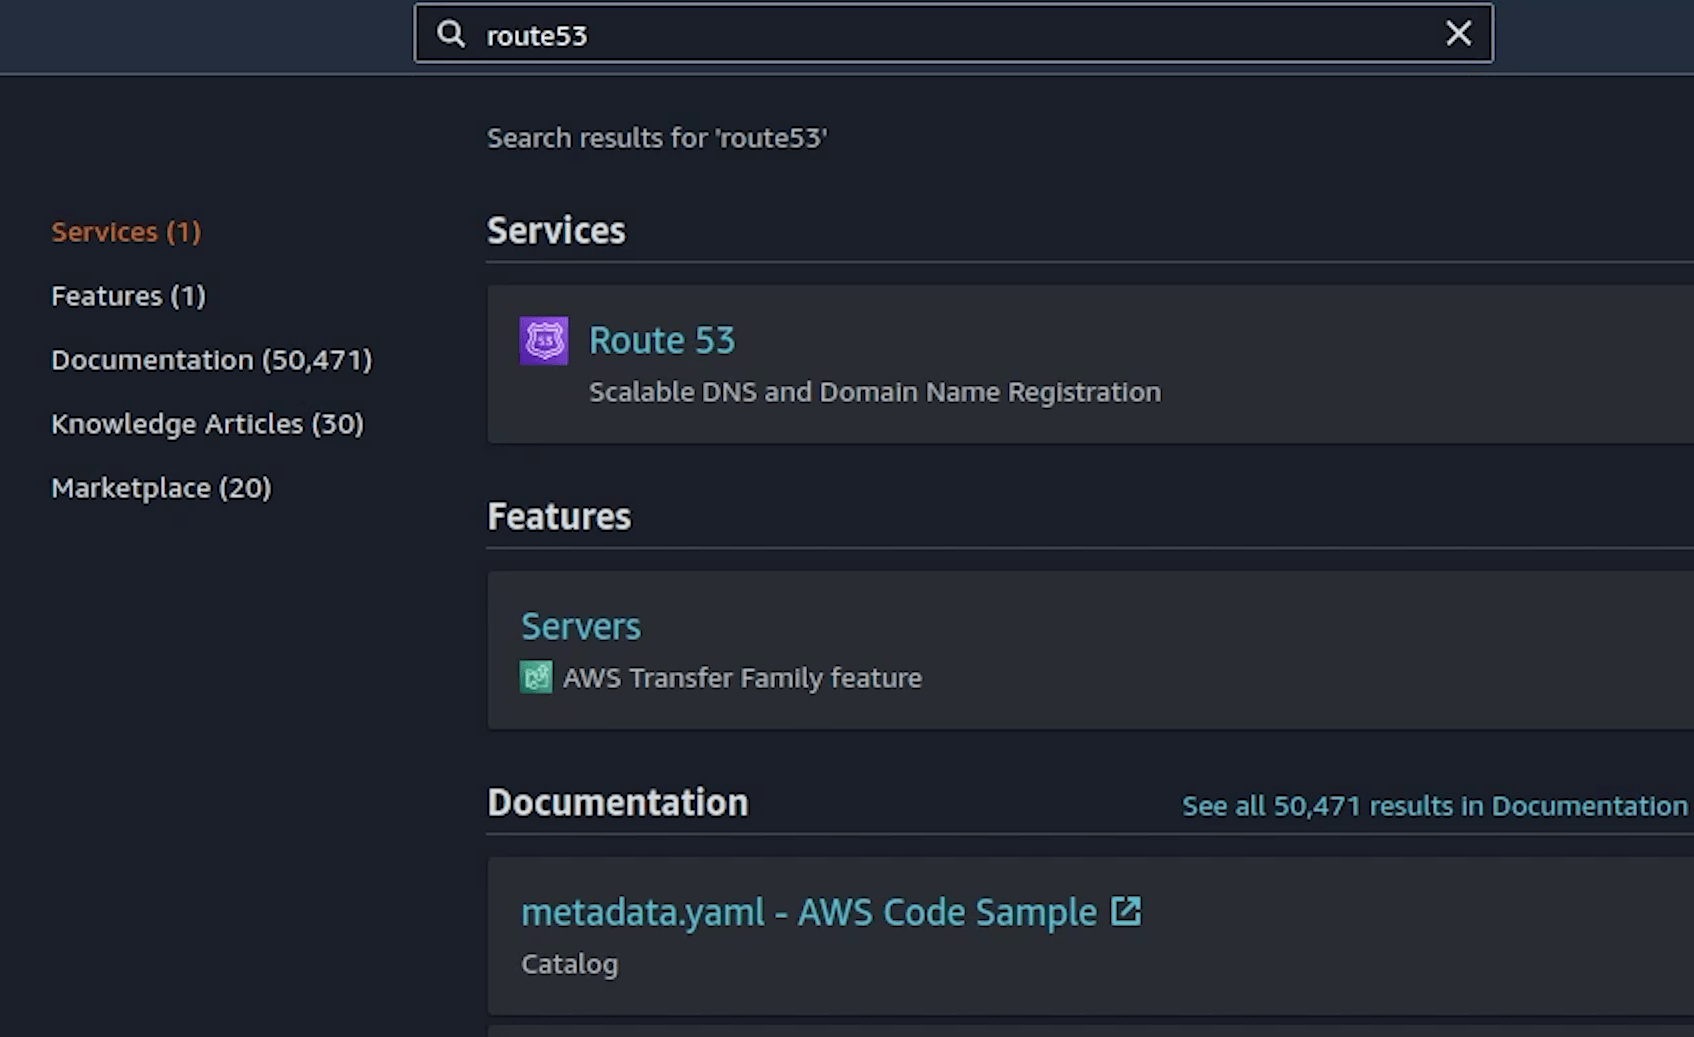
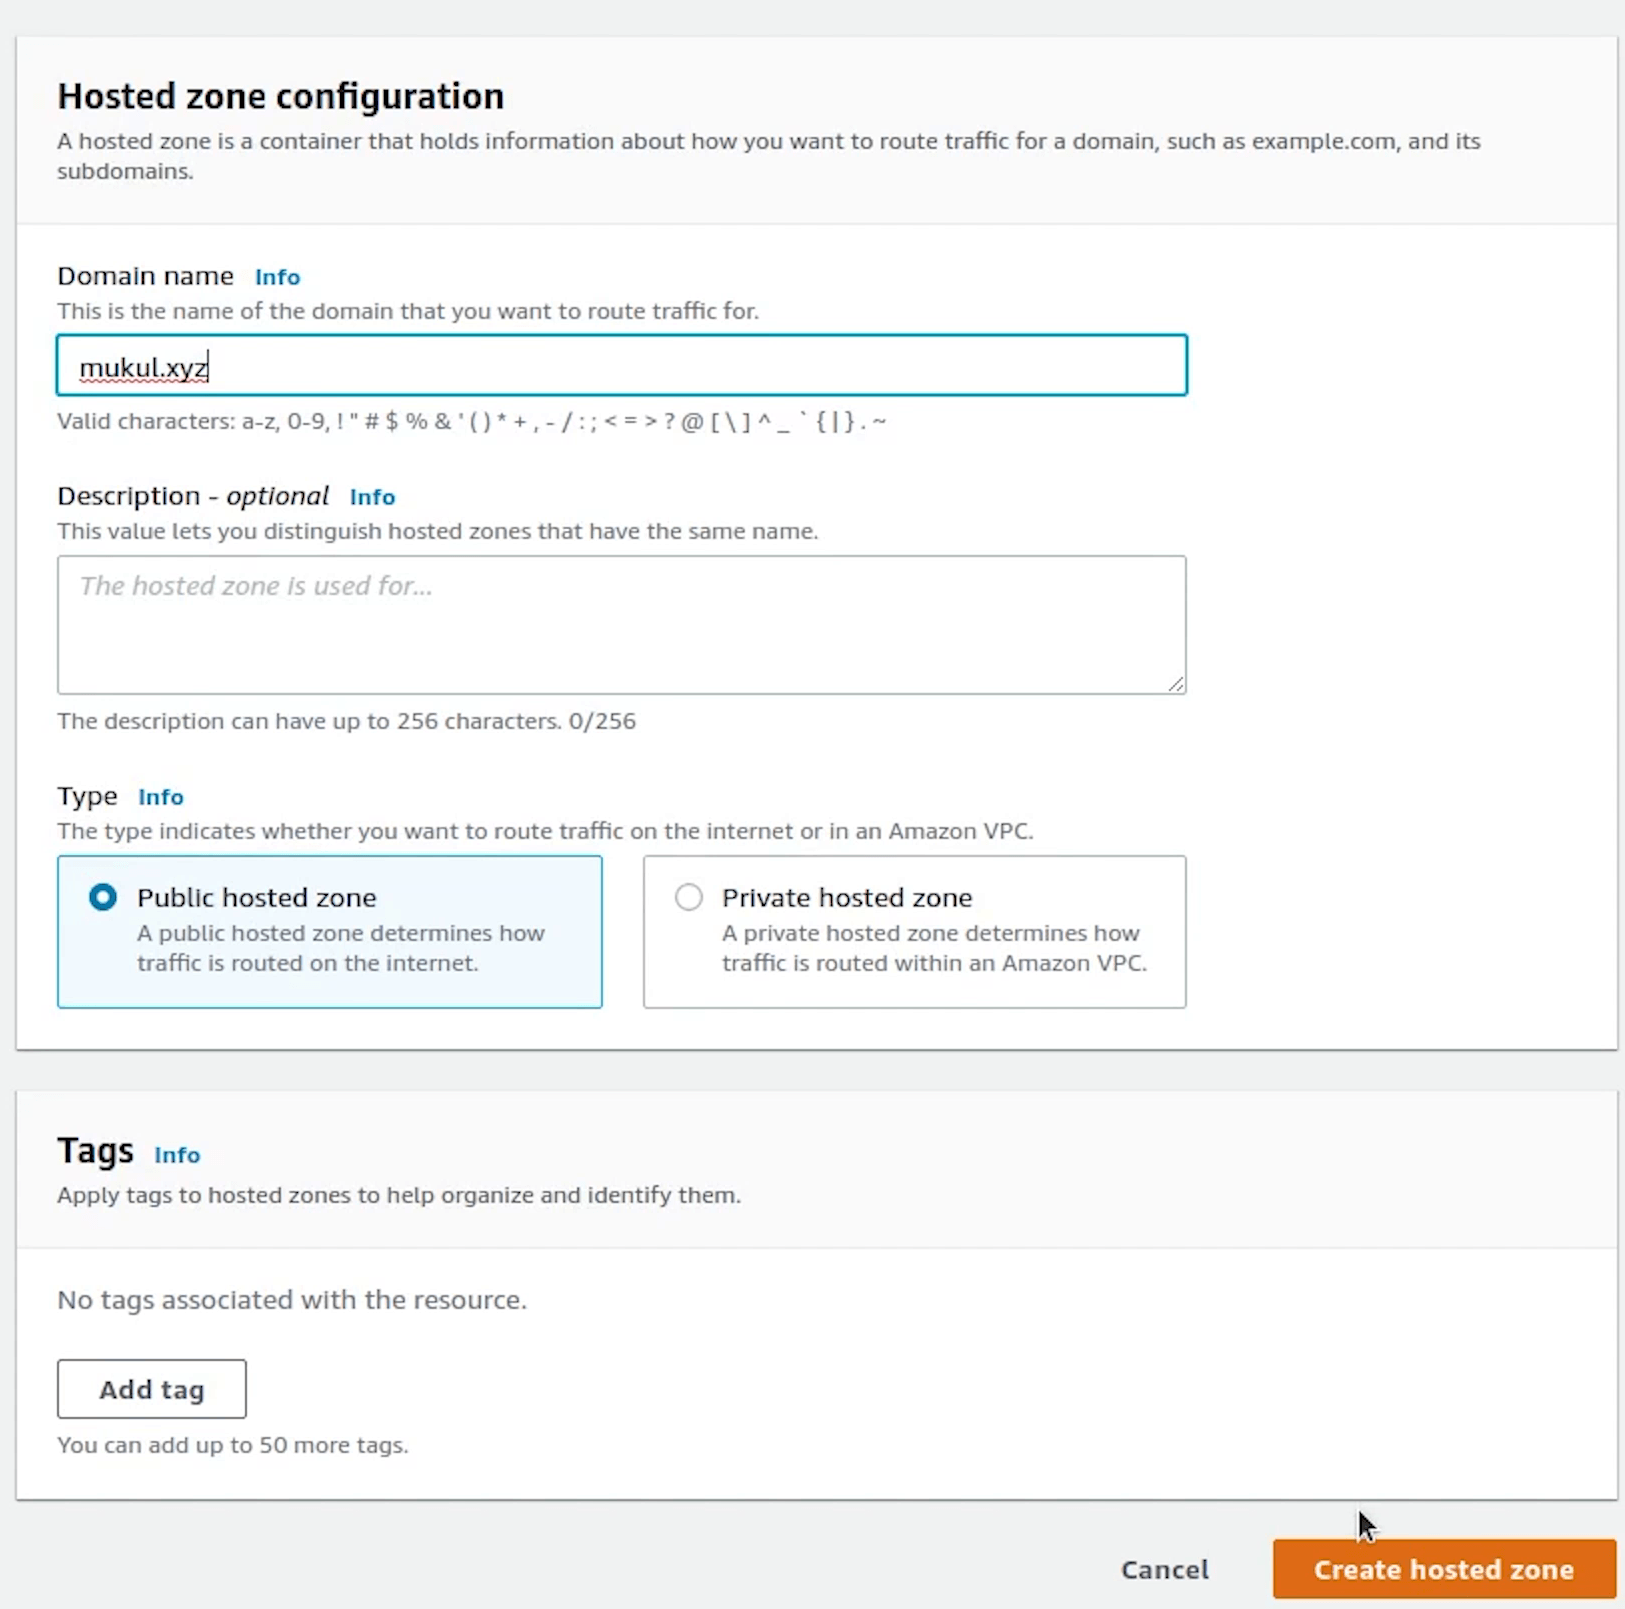
I will now open Route53 and click on Create hosted zone.
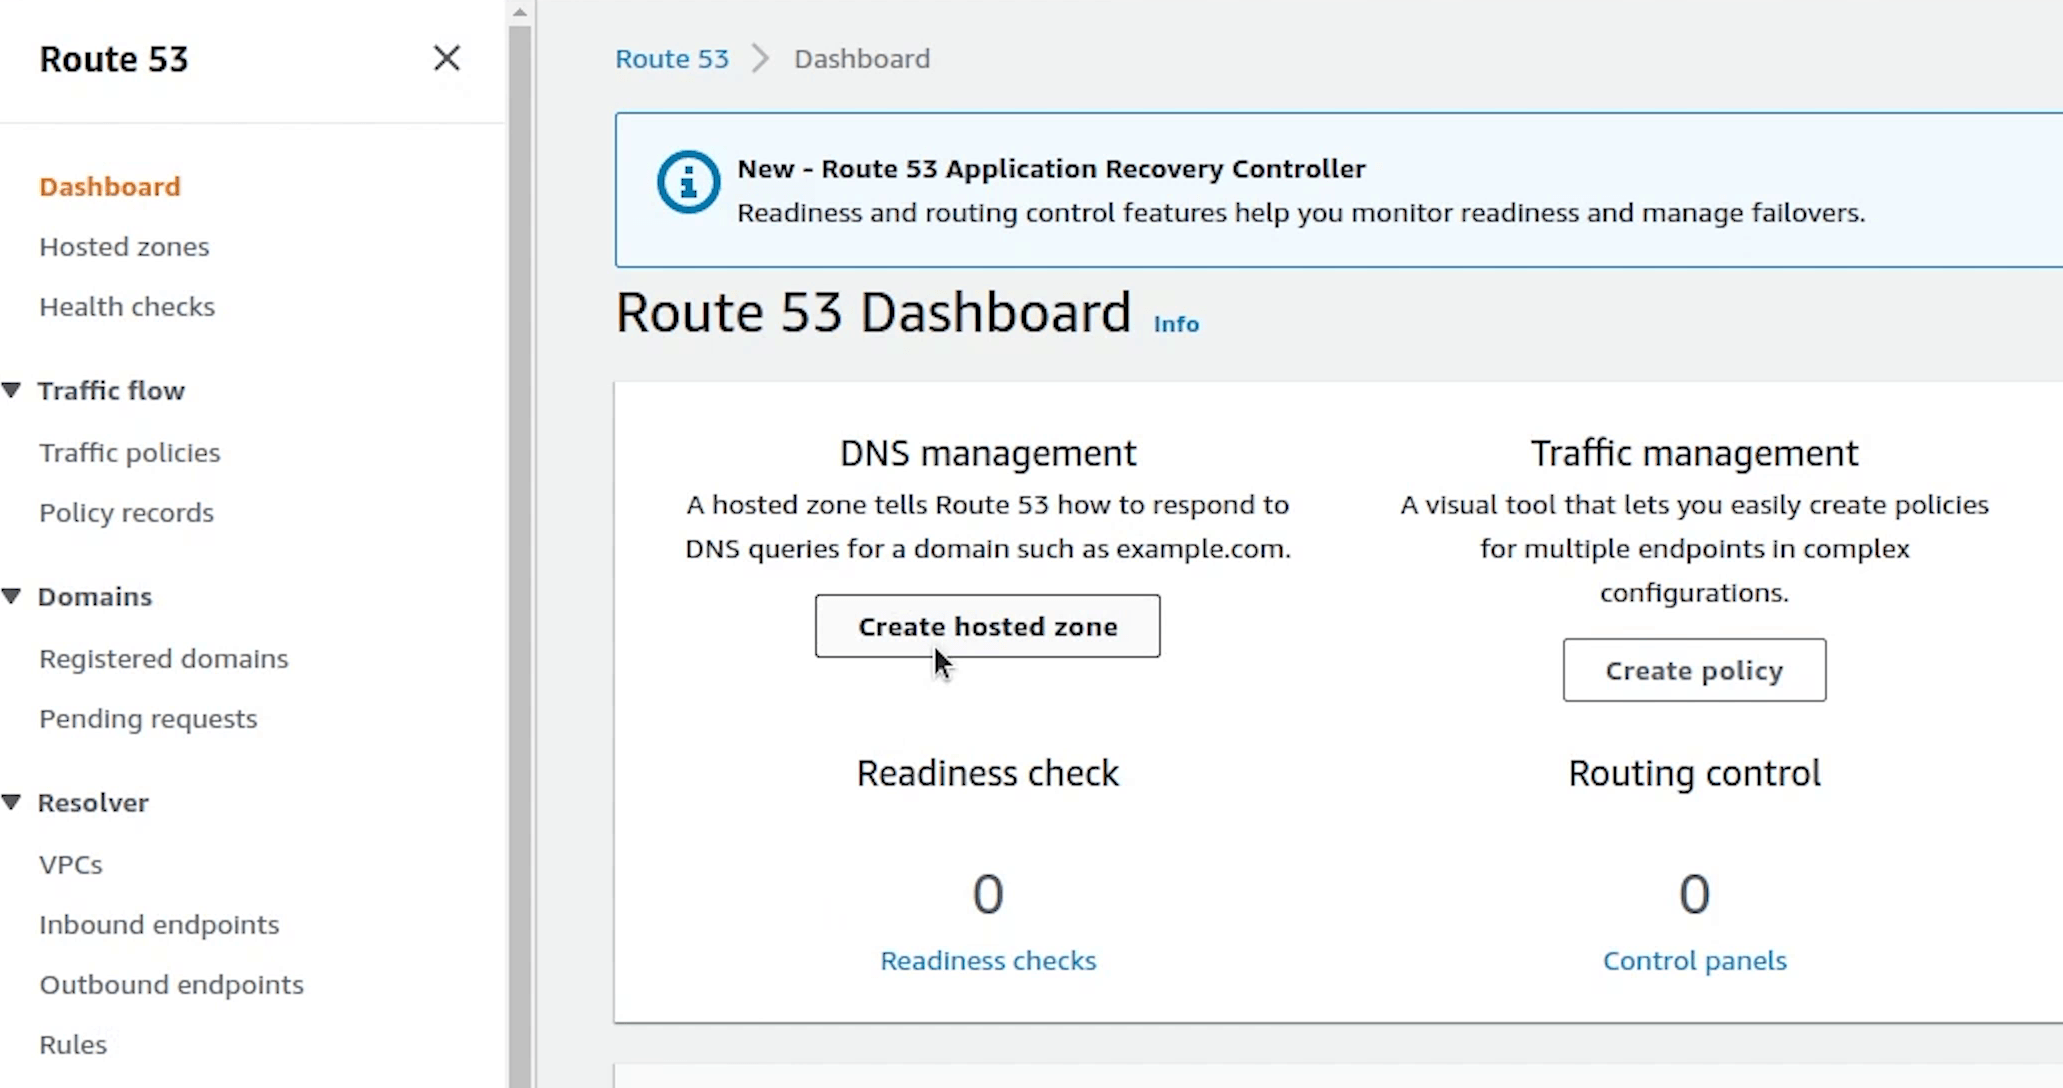
I will provide the domain name: mukul.xyz, make sure the hosted zone should be a public hosted zone.
I have already purchased this domain from namecheap. You can purchase your domain from anywhere like GoDaddy, namecheap etc. or else you can even purchase from AWS itself.
Finally, I will click on Create.
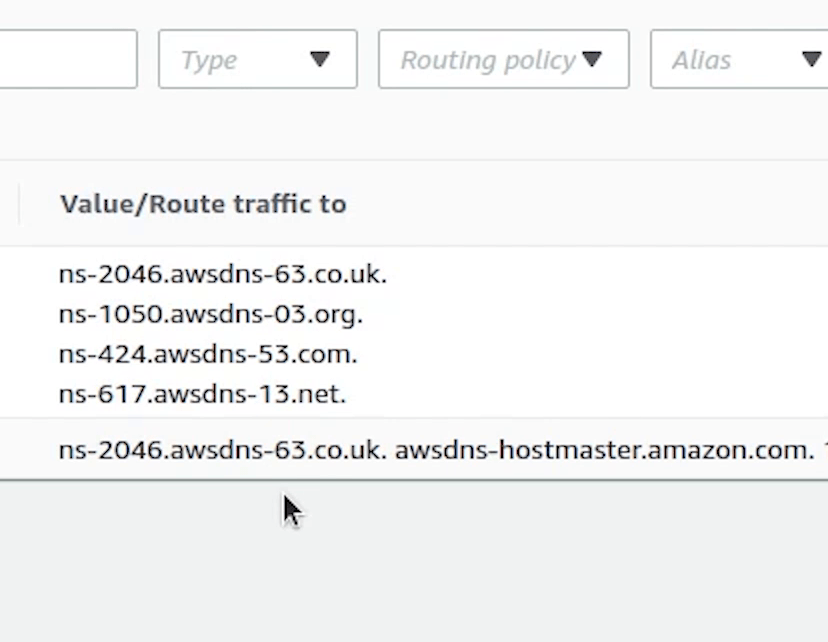
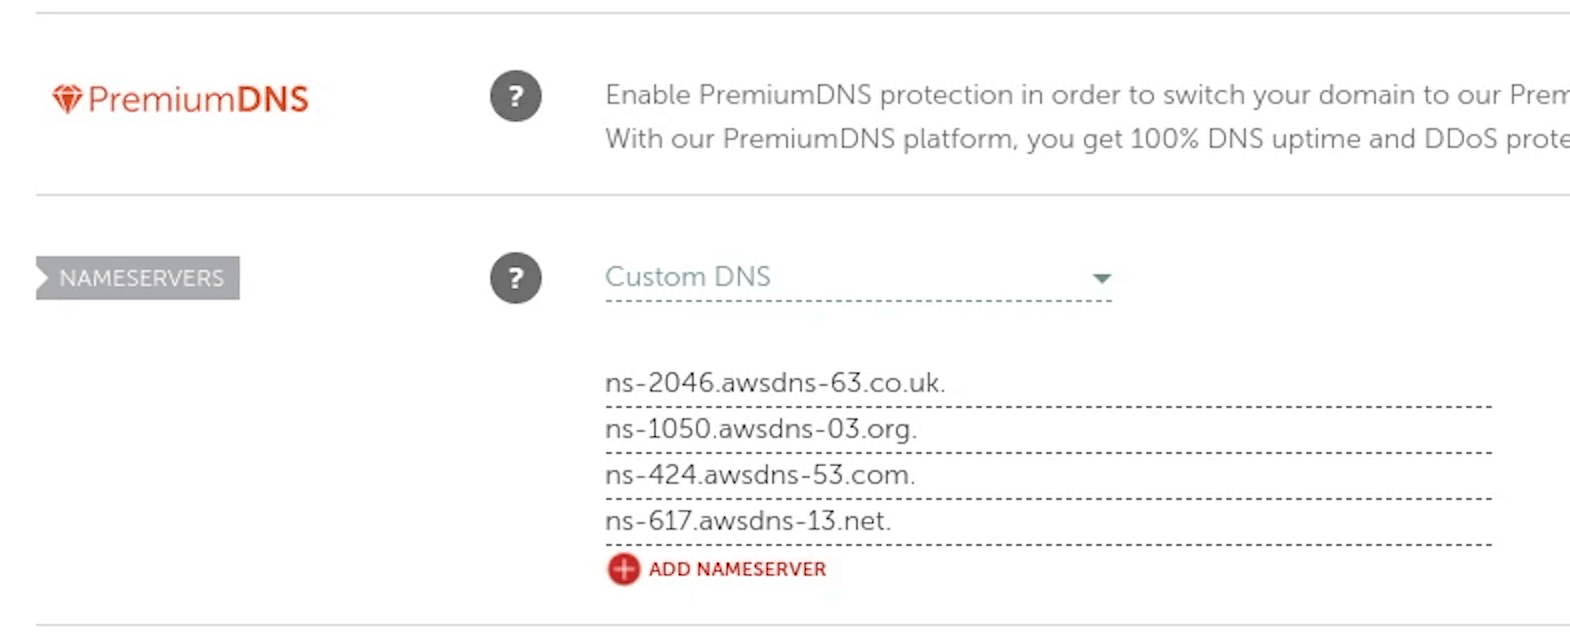
Zone has been successfully created. Now, I am going to update these records in our DNS settings which are currently residing in namecheap because our domain is registered over there.

Different registrar will have different settings, this is an example of how namecheap settings looks like.
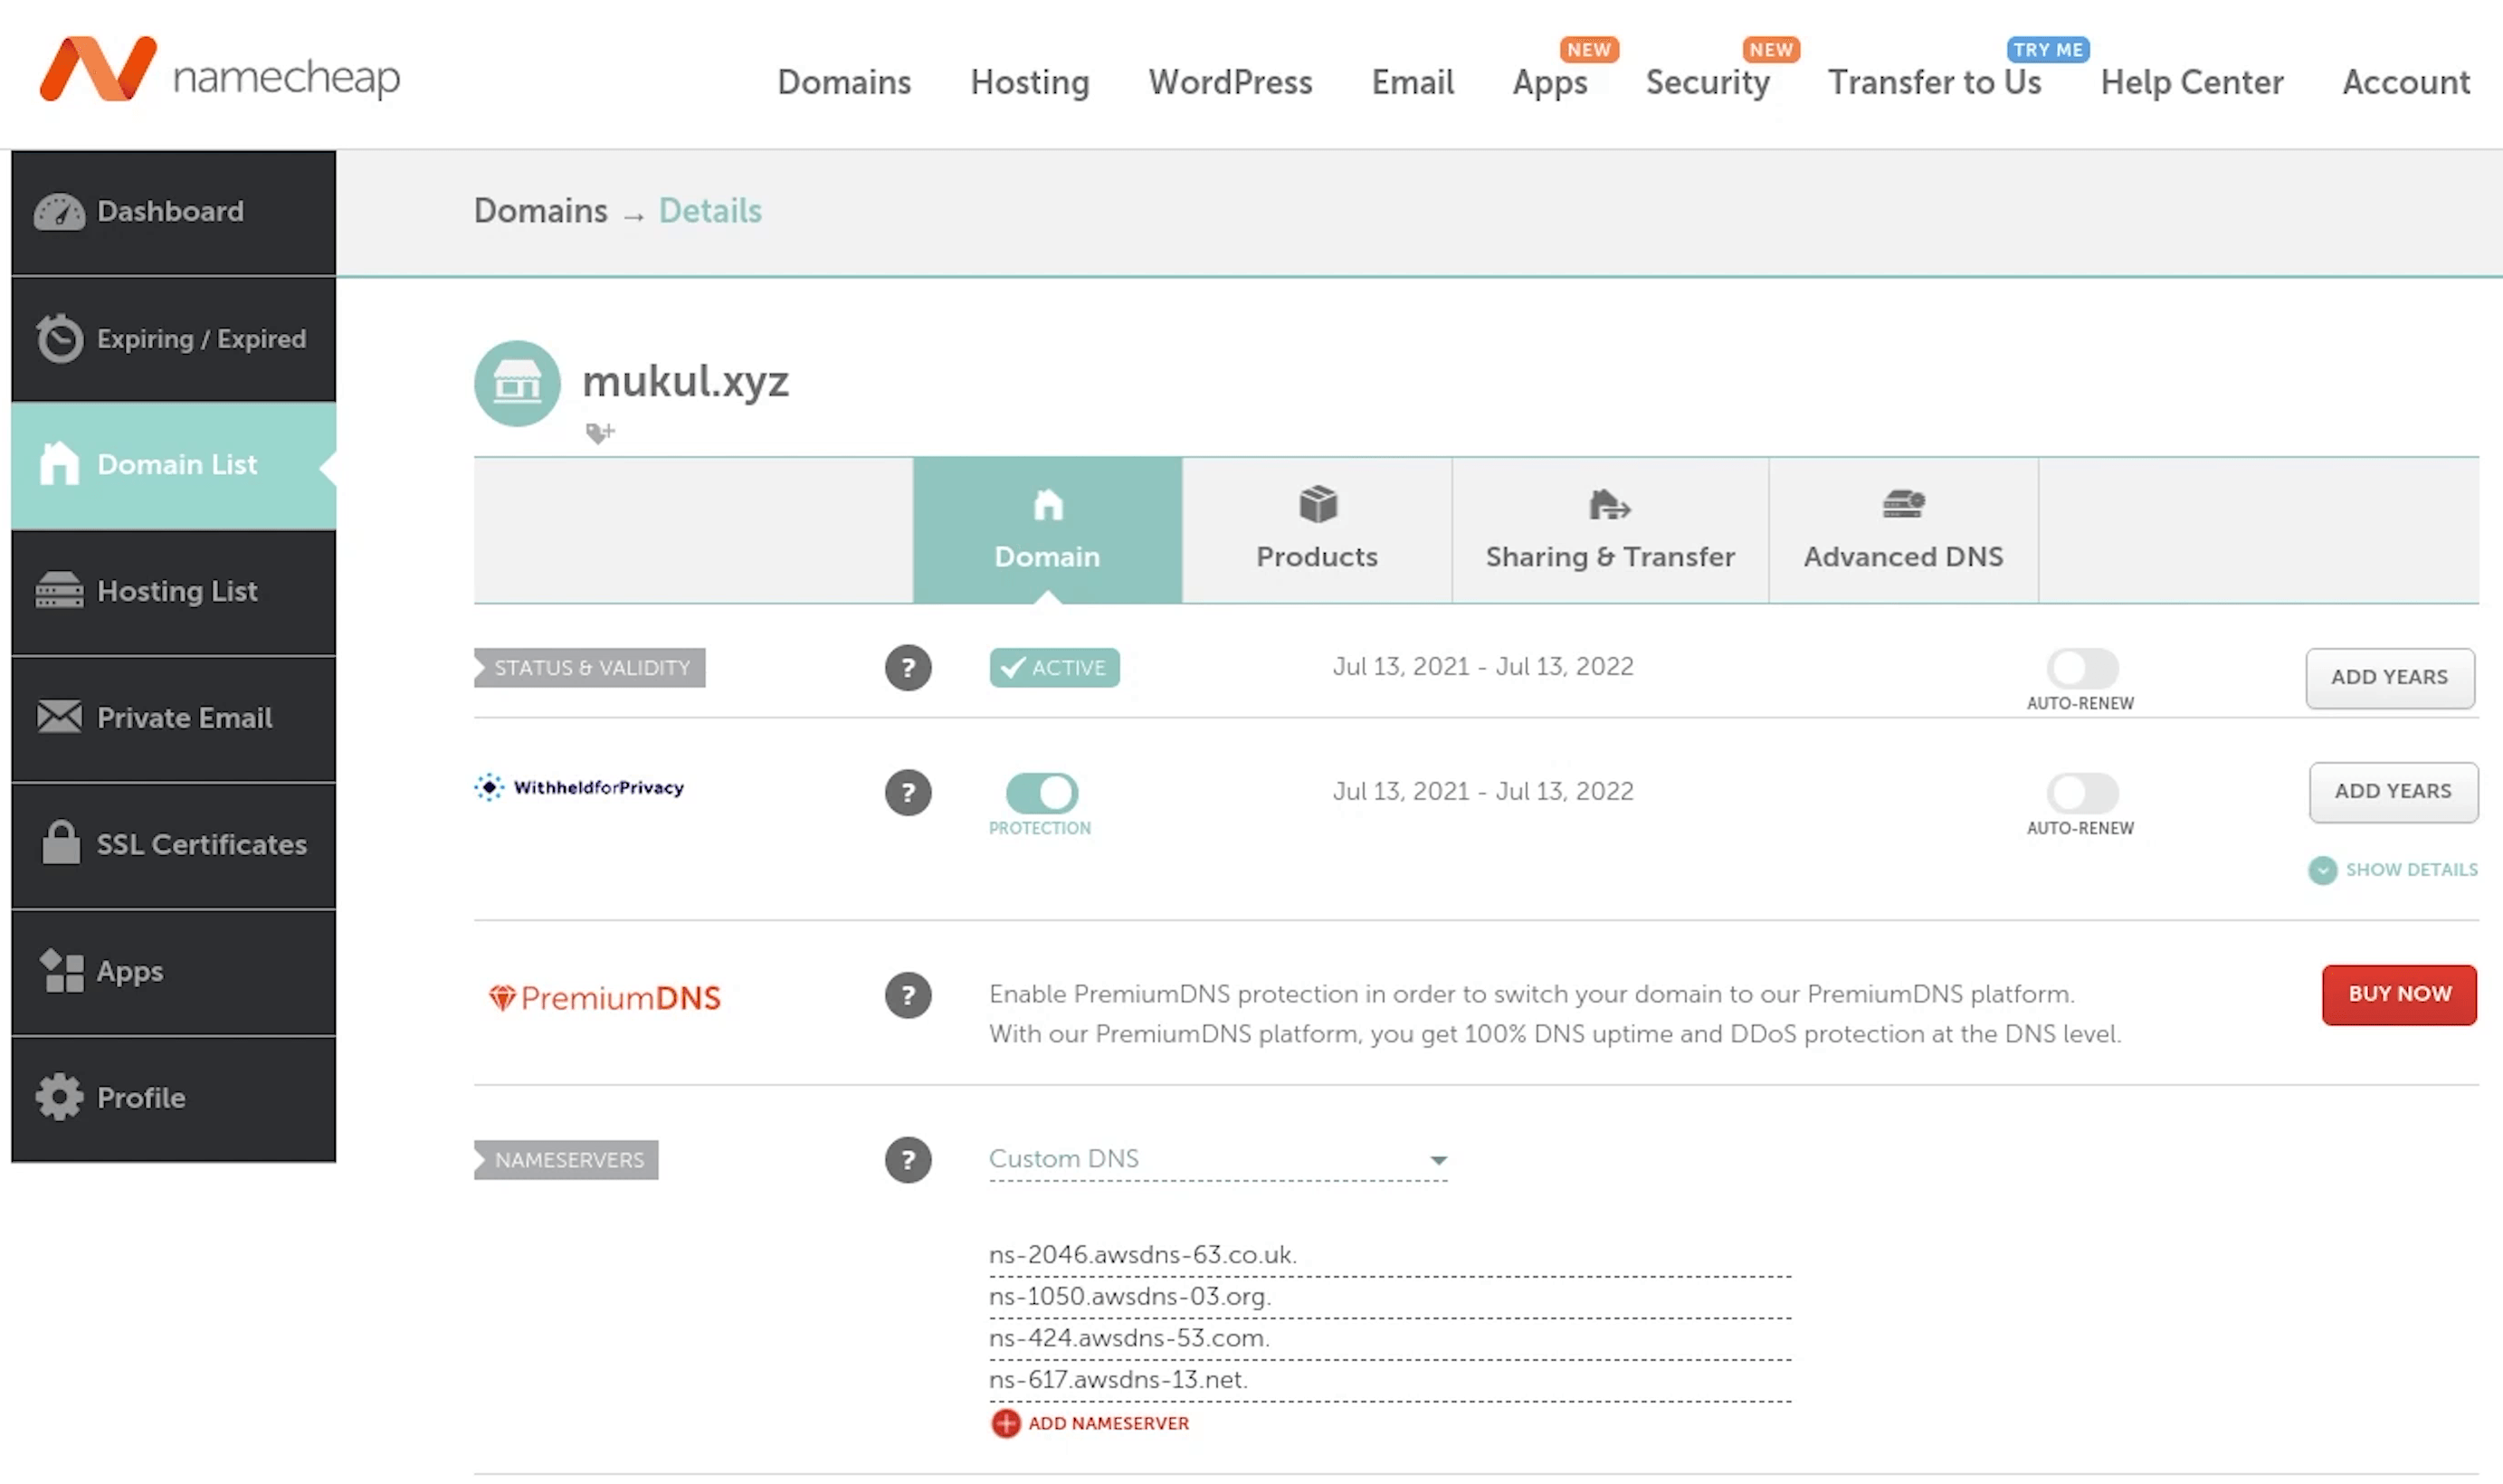
Previously, we were using the Namecheap BasicDNS. Now, we will update it with custom DNS and add records provided by AWS.
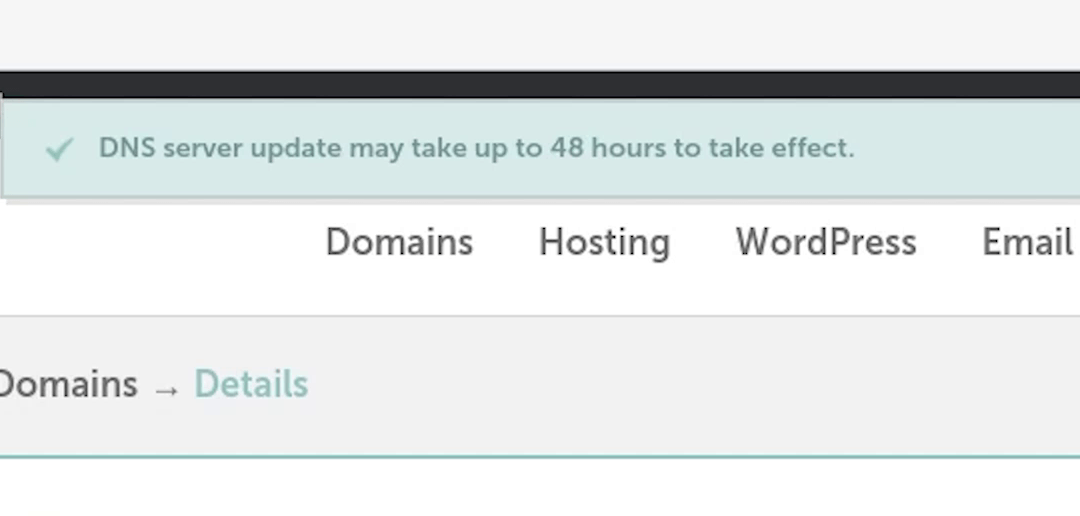
Okay, the DNS records have been successfully applied. The effect might take around 48-72 hours. Sometimes the update takes place immediately within ten minutes also.
Fingers crossed this is something which is not under our control.
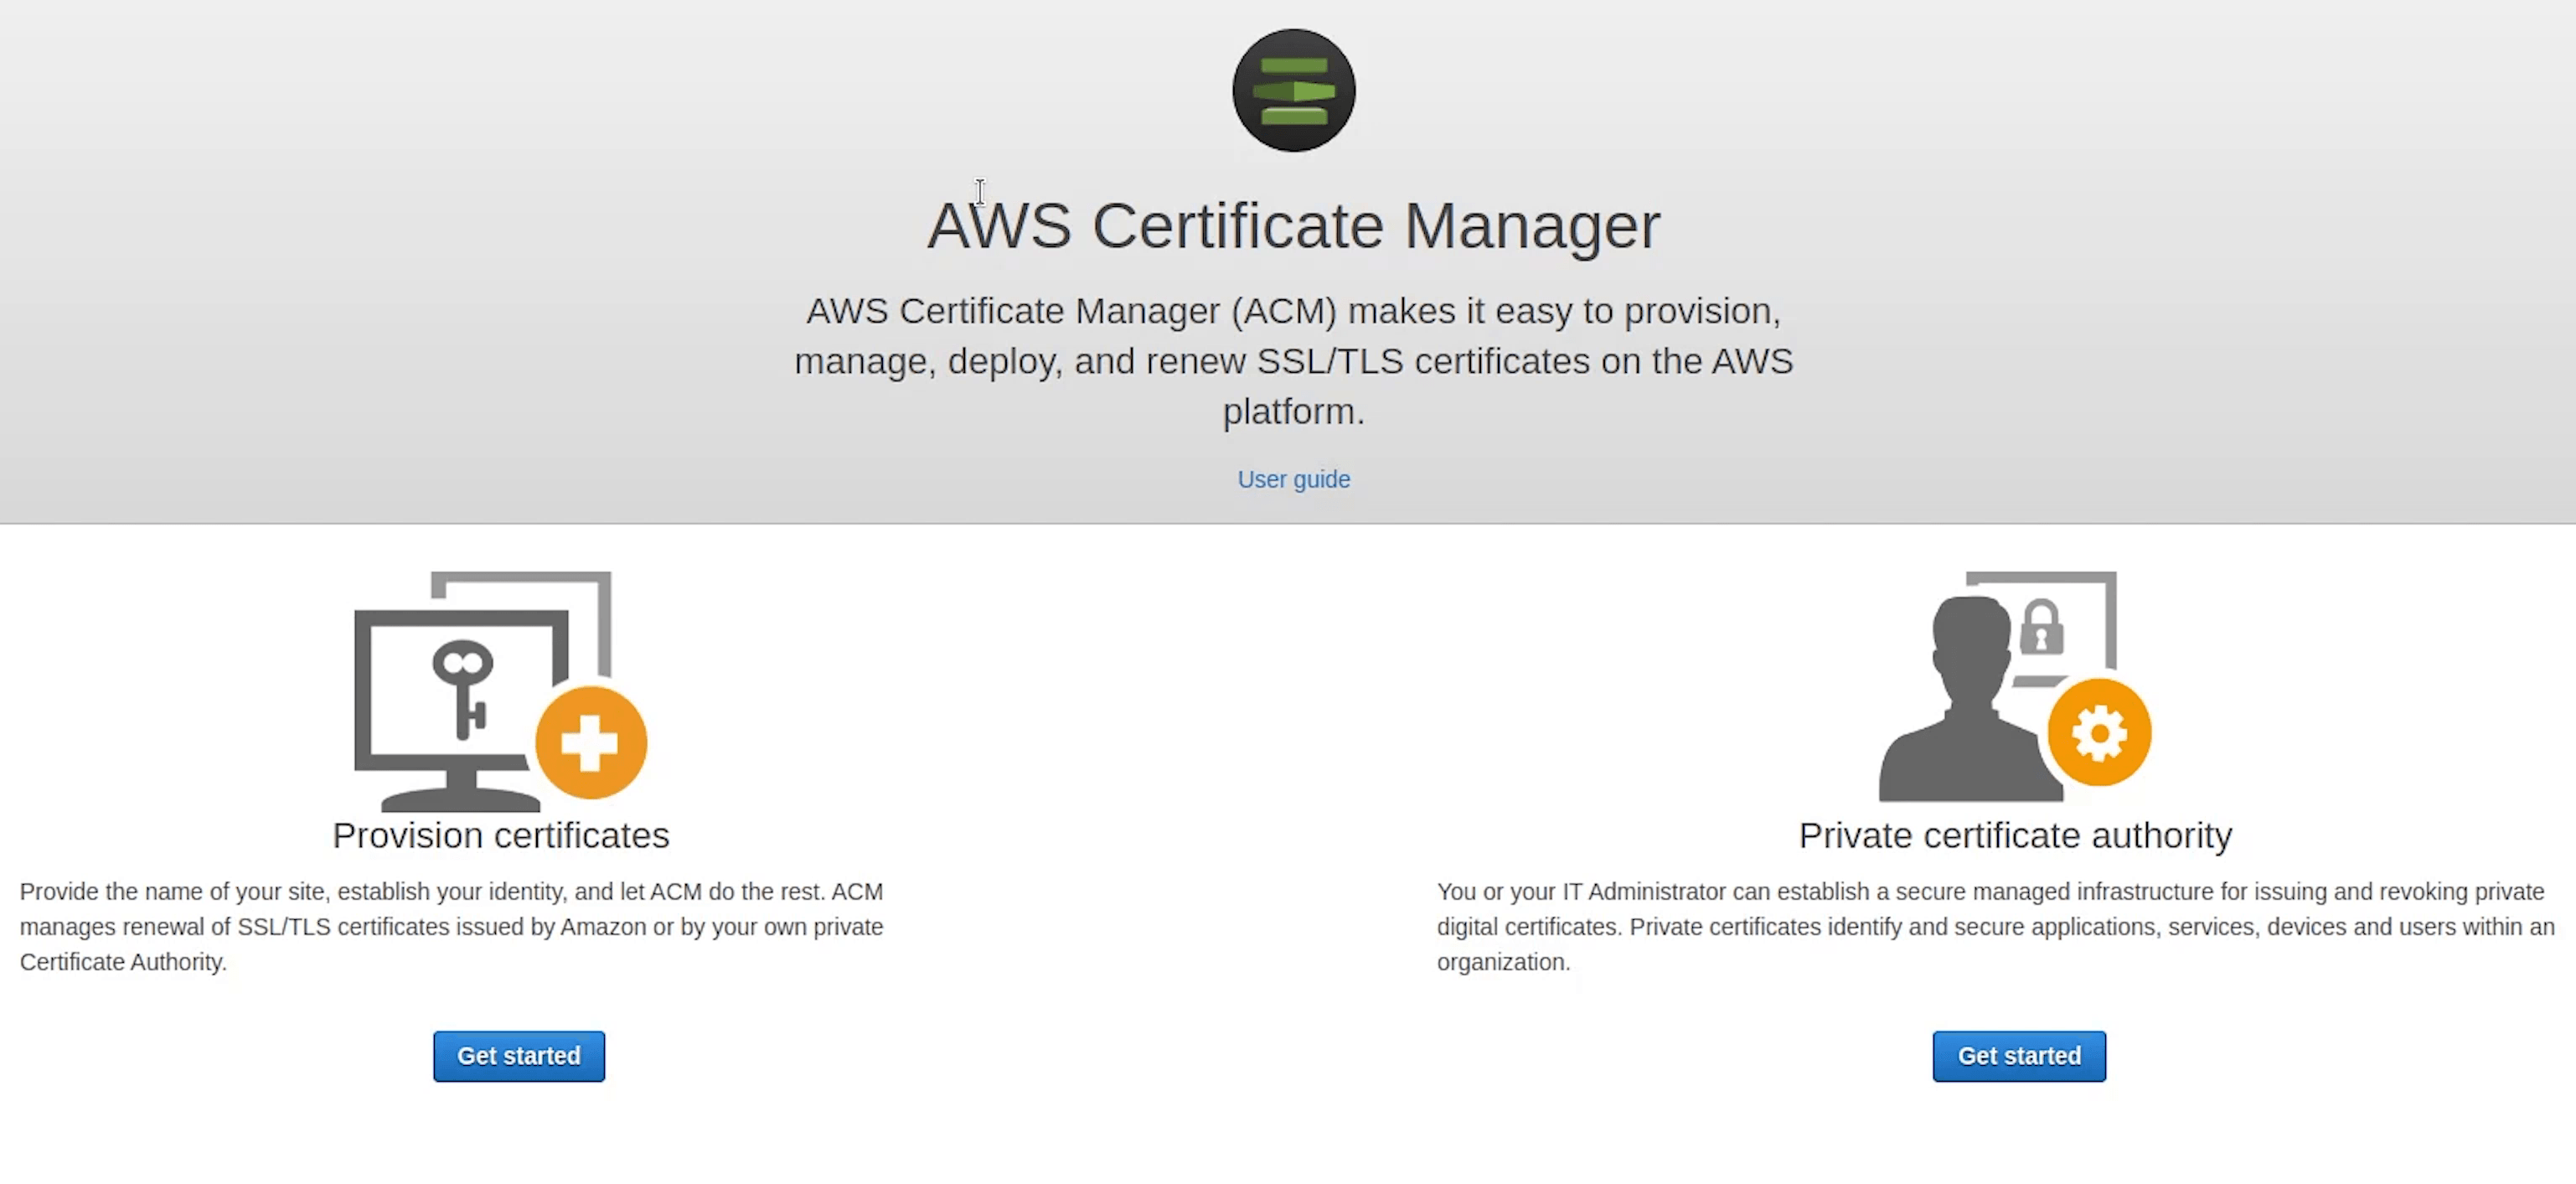
Fast forwarding time our hosted zone setup is complete and the DNS has successfully applied the new records. Now, we will go ahead and set up SSL in Certificate Manager.
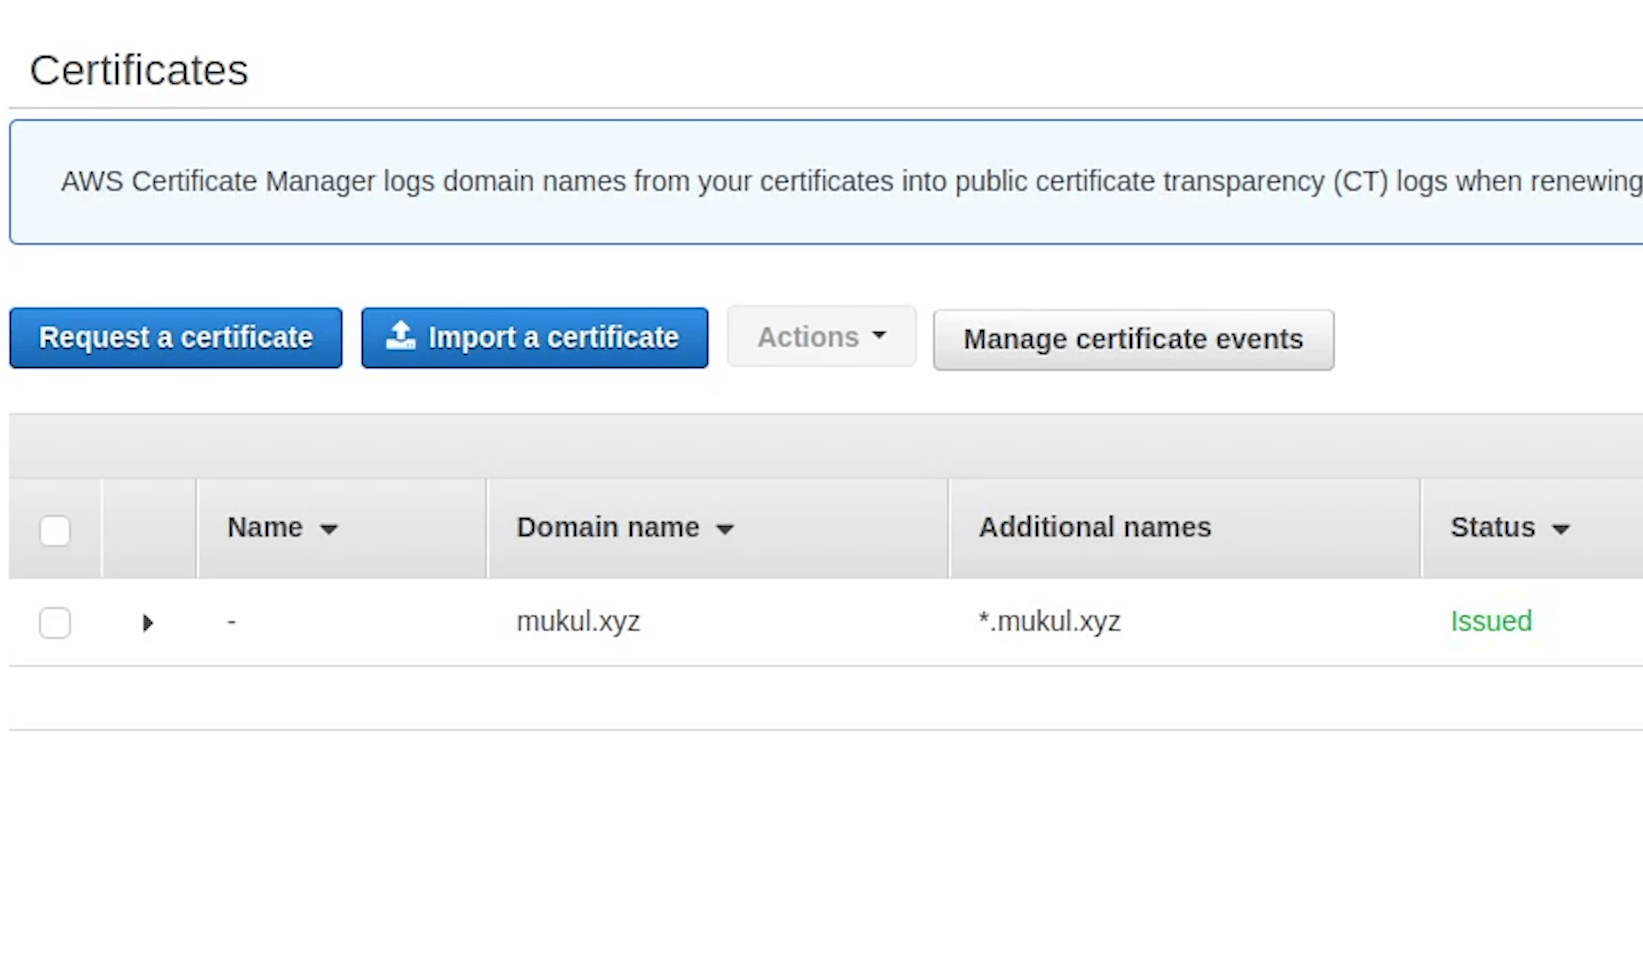
AWS Certificate Manager
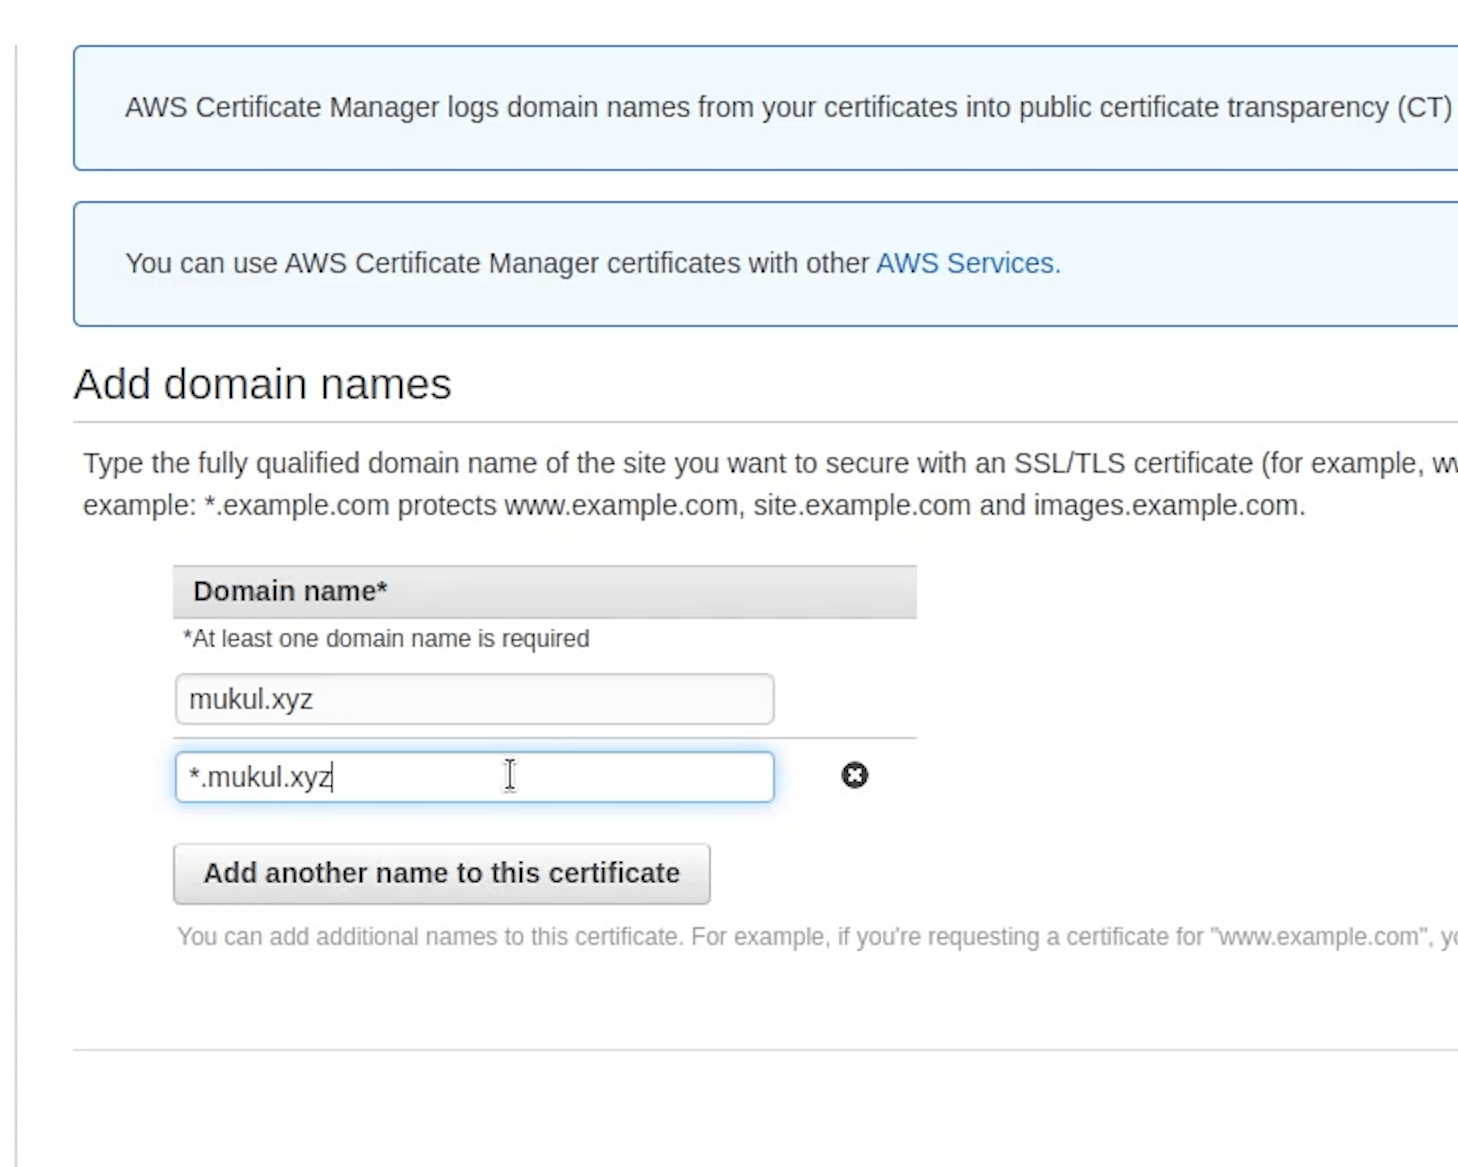
I am going to provide the domain name along-with the wildcard entry.

I will make sure to add these records in Route53.
I will choose DNS validation, it's going to add the record in Route53.
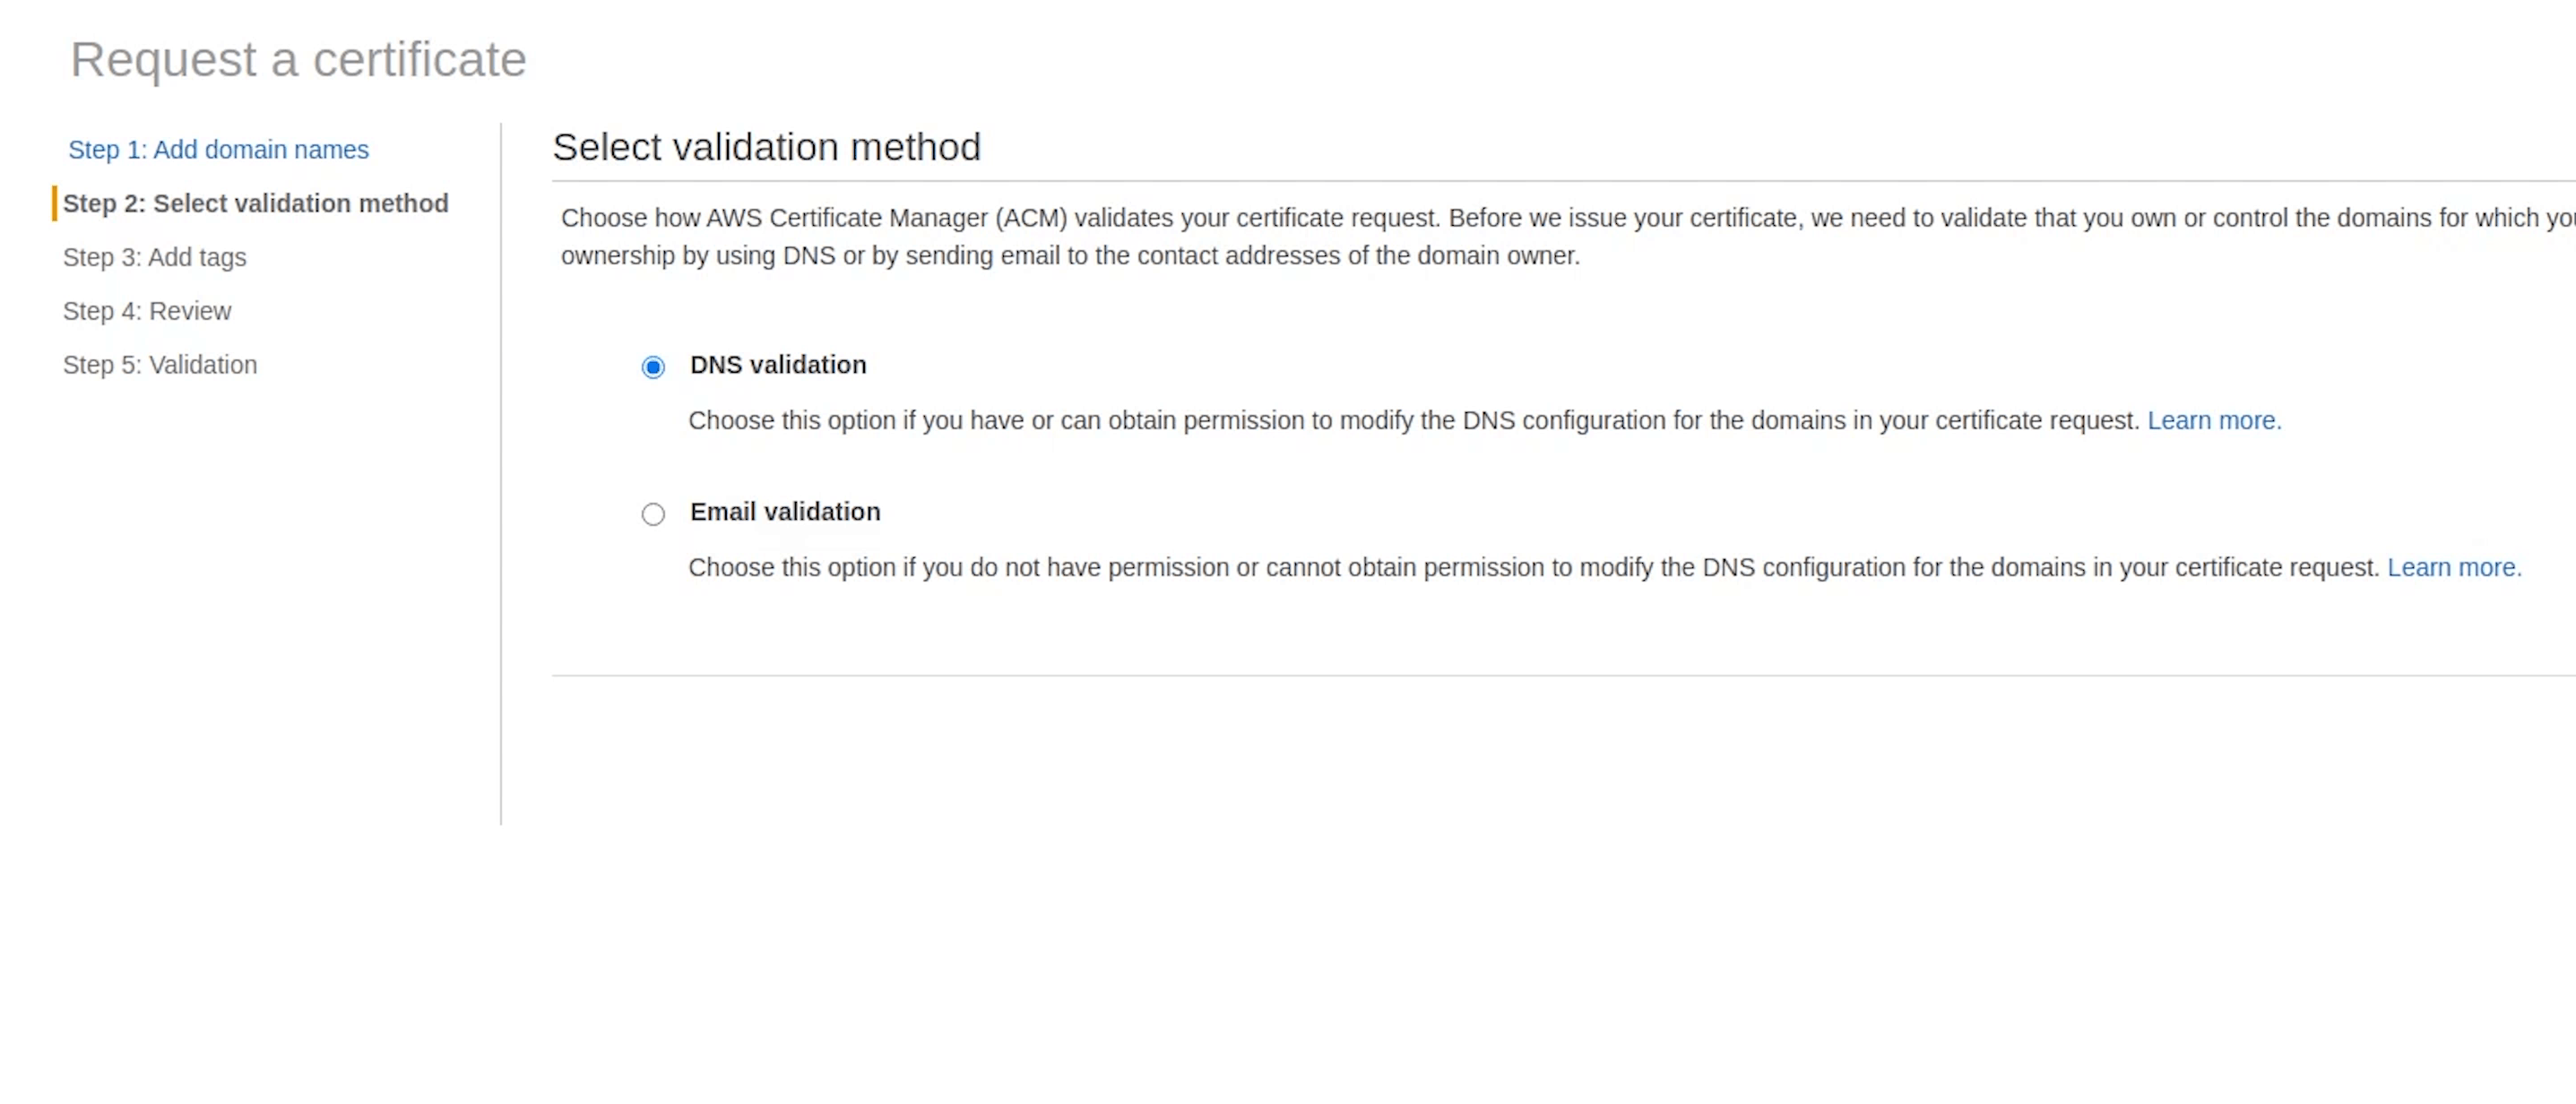
The validation may take somewhat around 30 minutes of time.

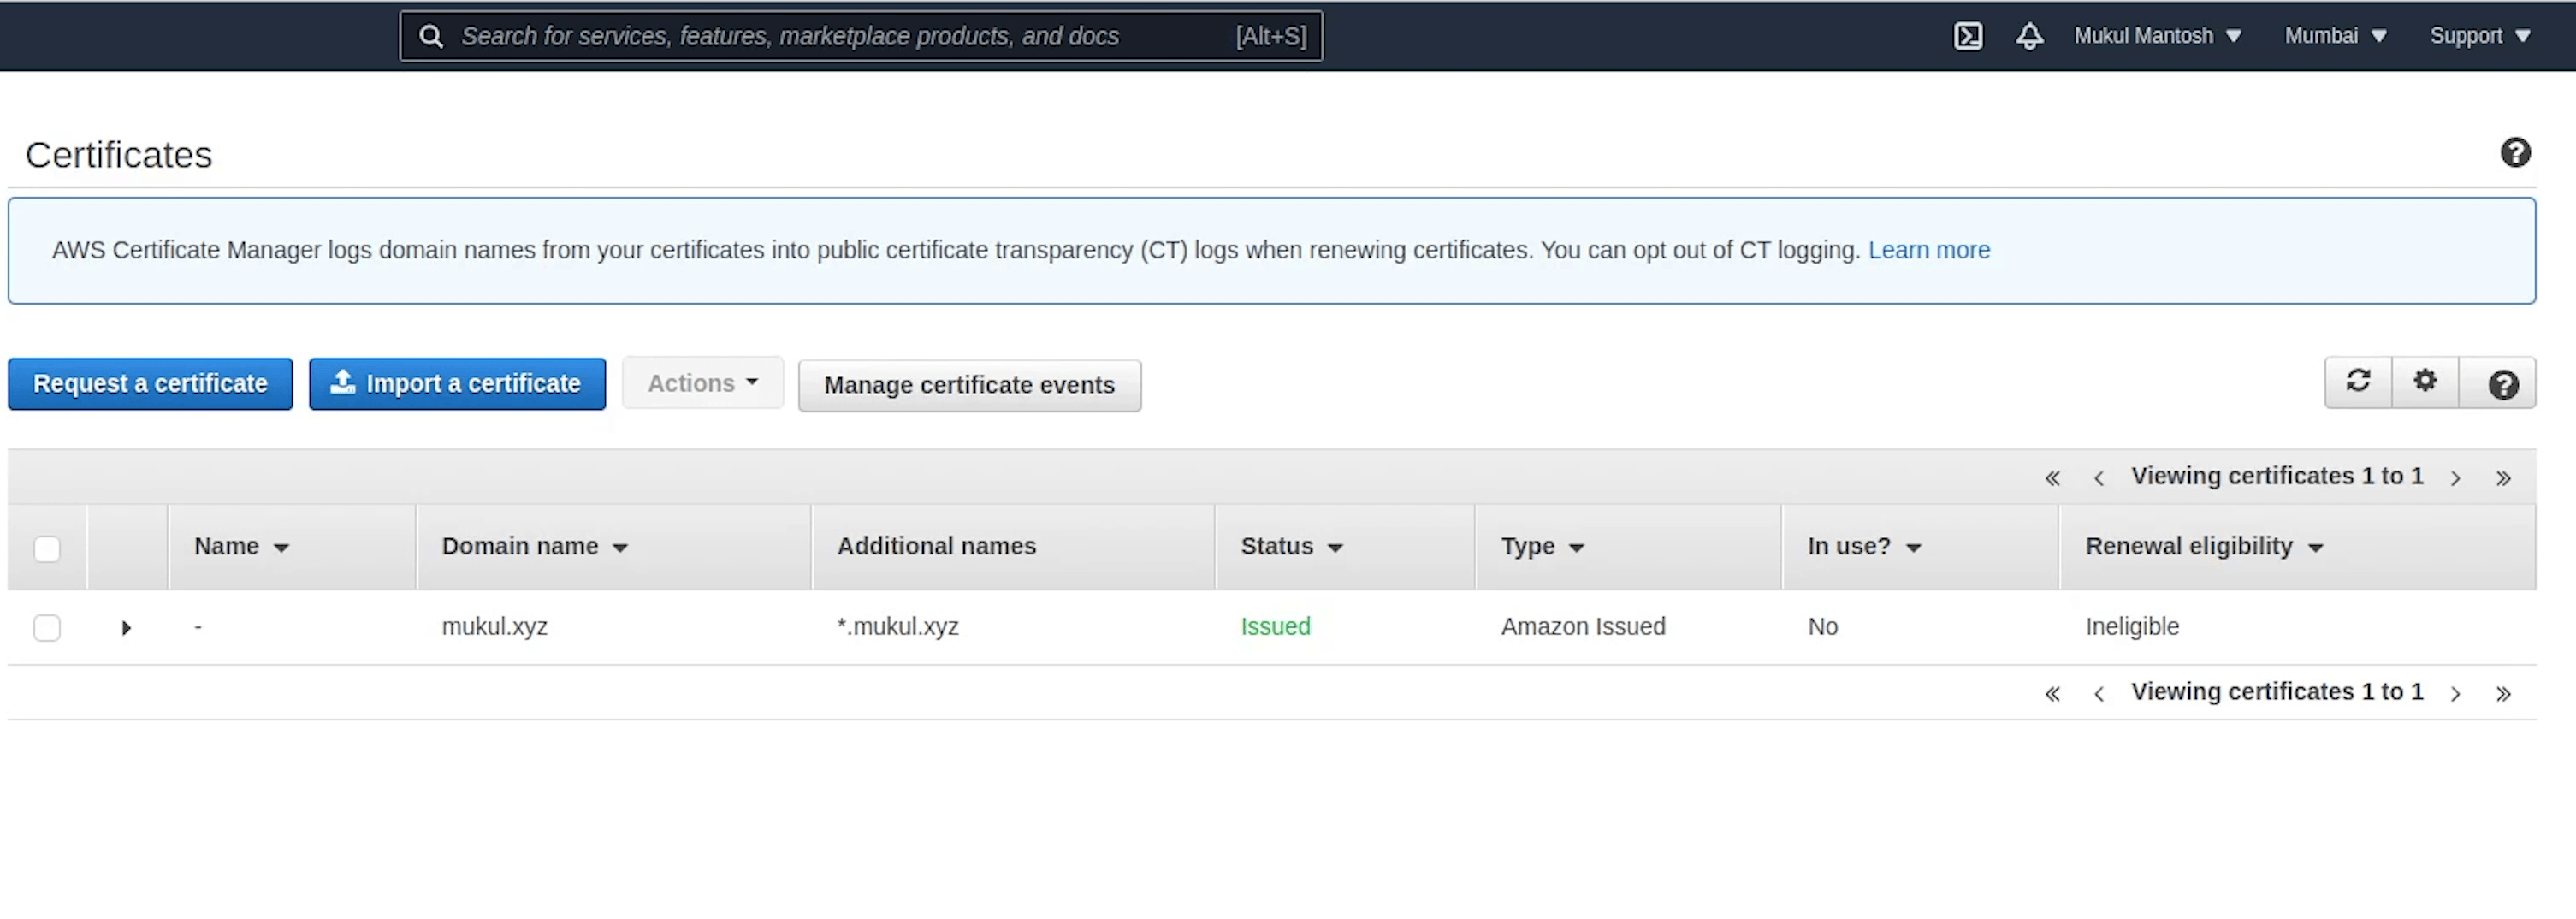
Okay, as you can see the certificate has been issued successfully. Now, I am going to copy the ARN and replace it in the ingress.yaml file.
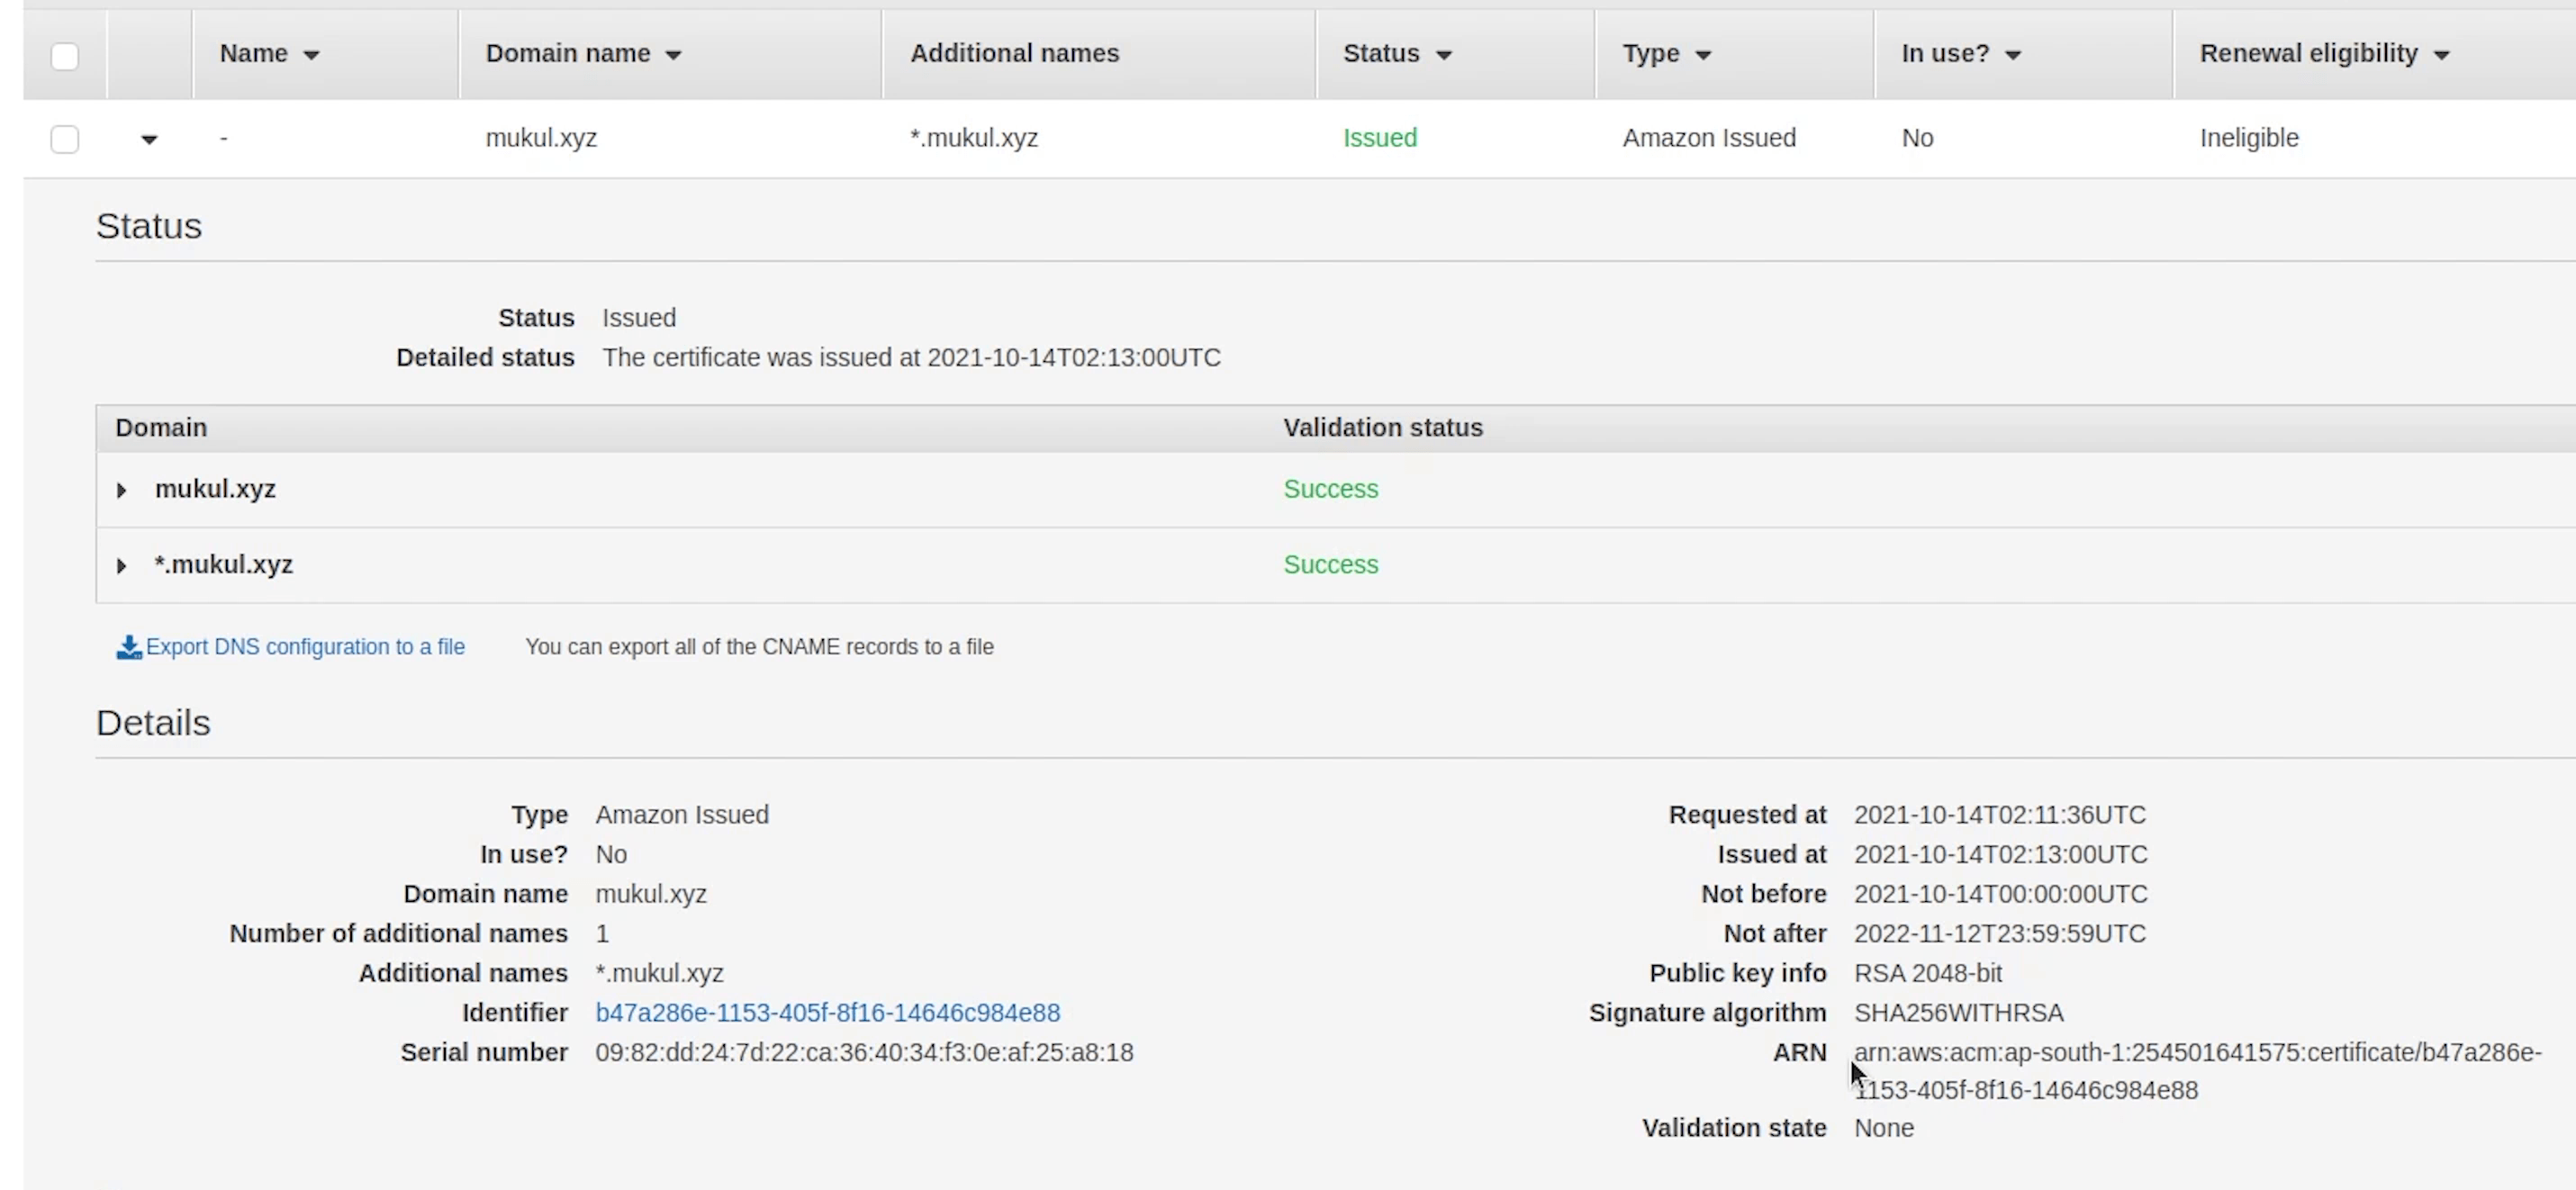
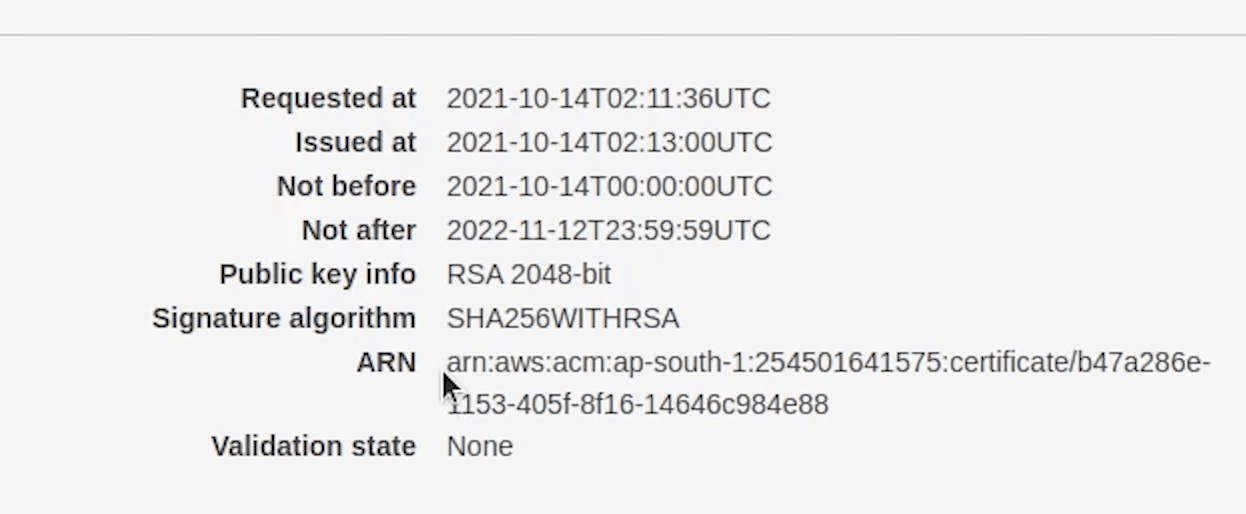

Observing line number 19 we are using the TLS 1.2 protocol.
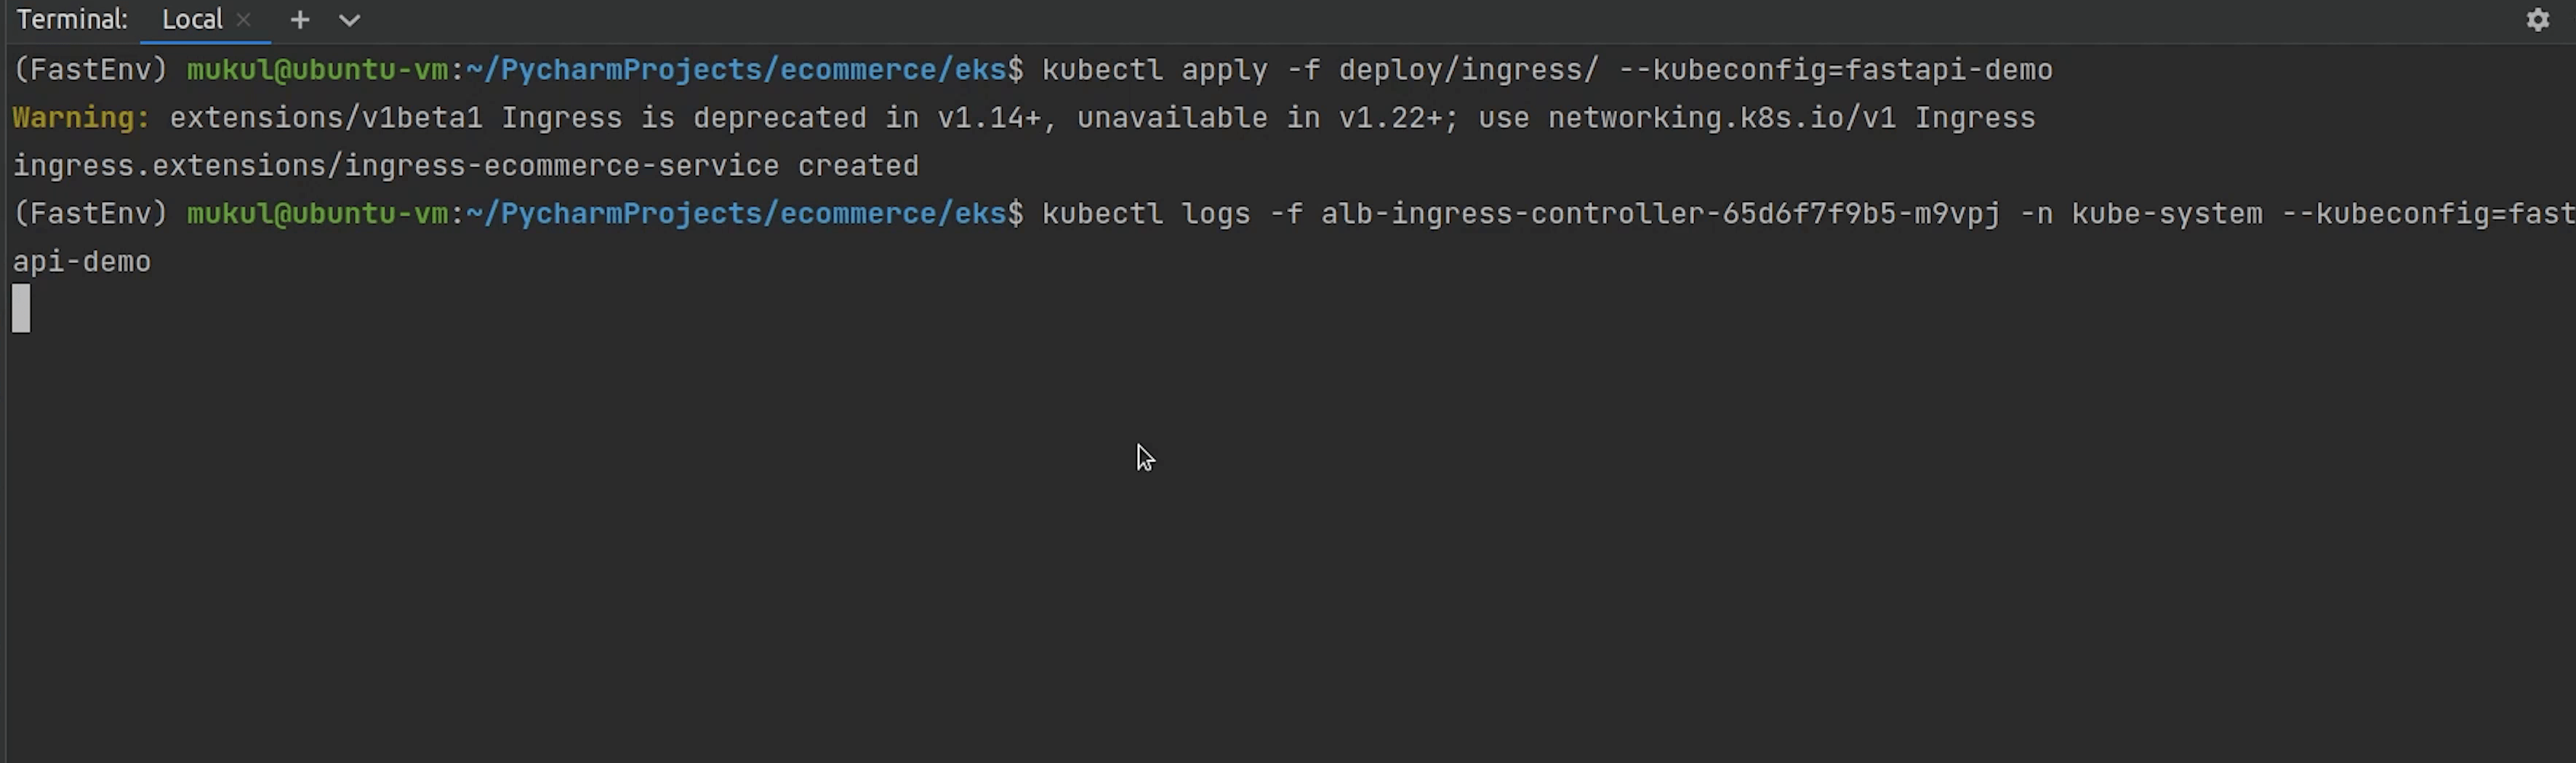
Next, I am going to deploy the ingress.
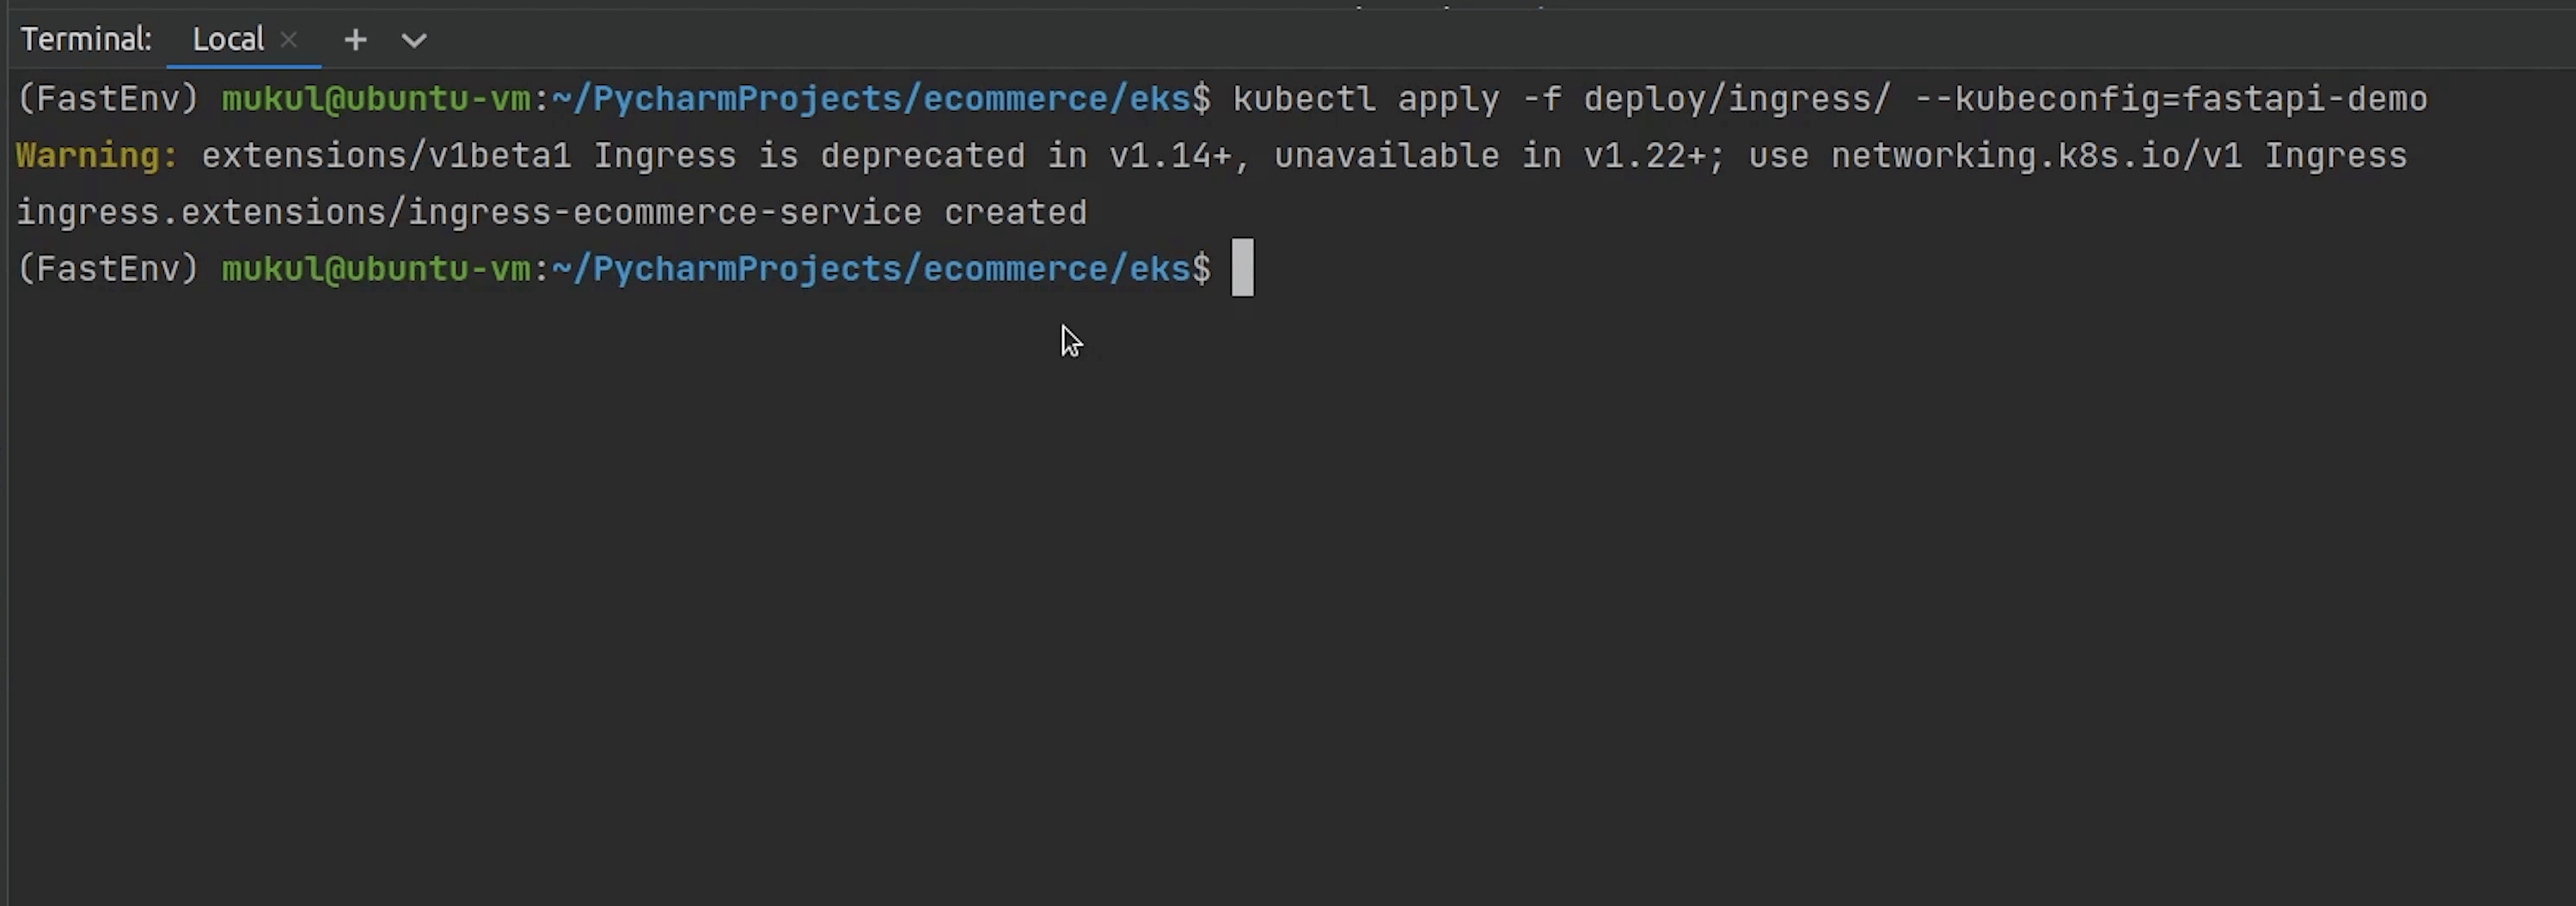
Ingress has been deployed. Let me check the status.
Looks like there is some issue, we haven’t tagged our subnets properly.
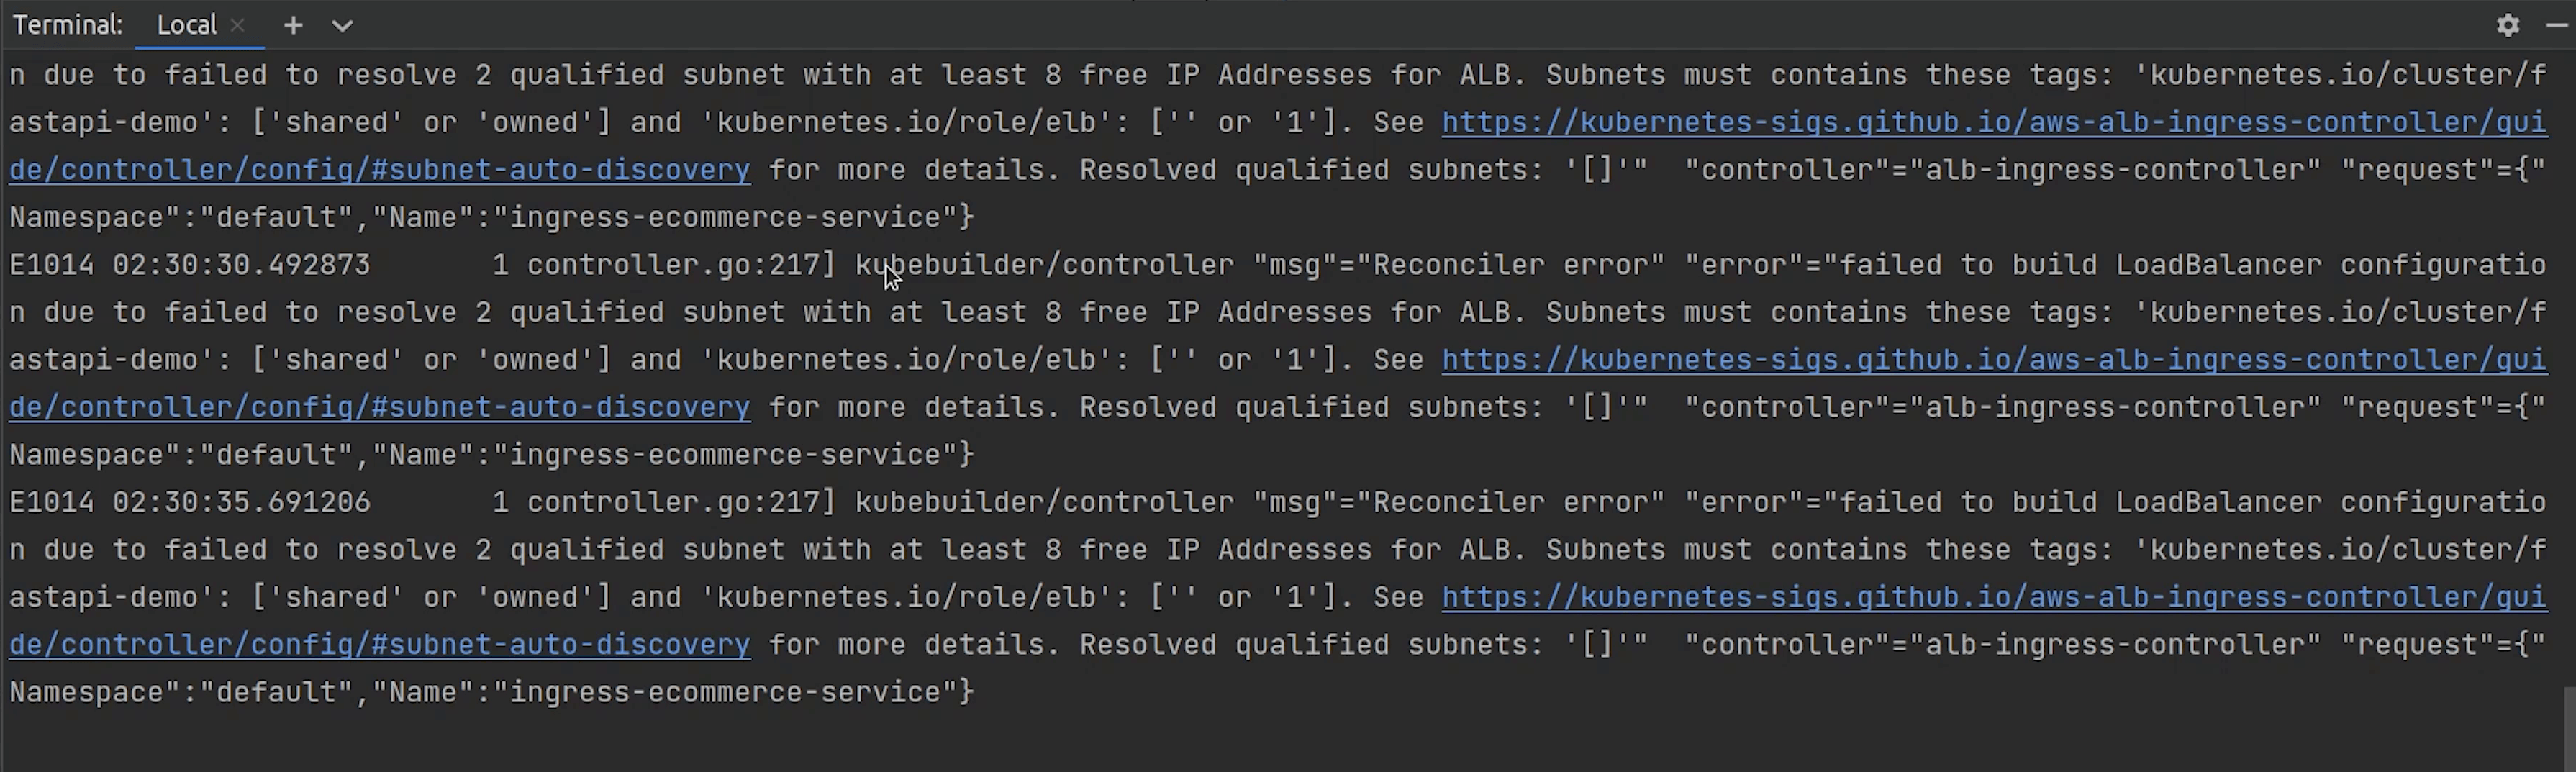
Let me remove the ingress and tag my subnets properly. After that I will re-deploy the ingress again.
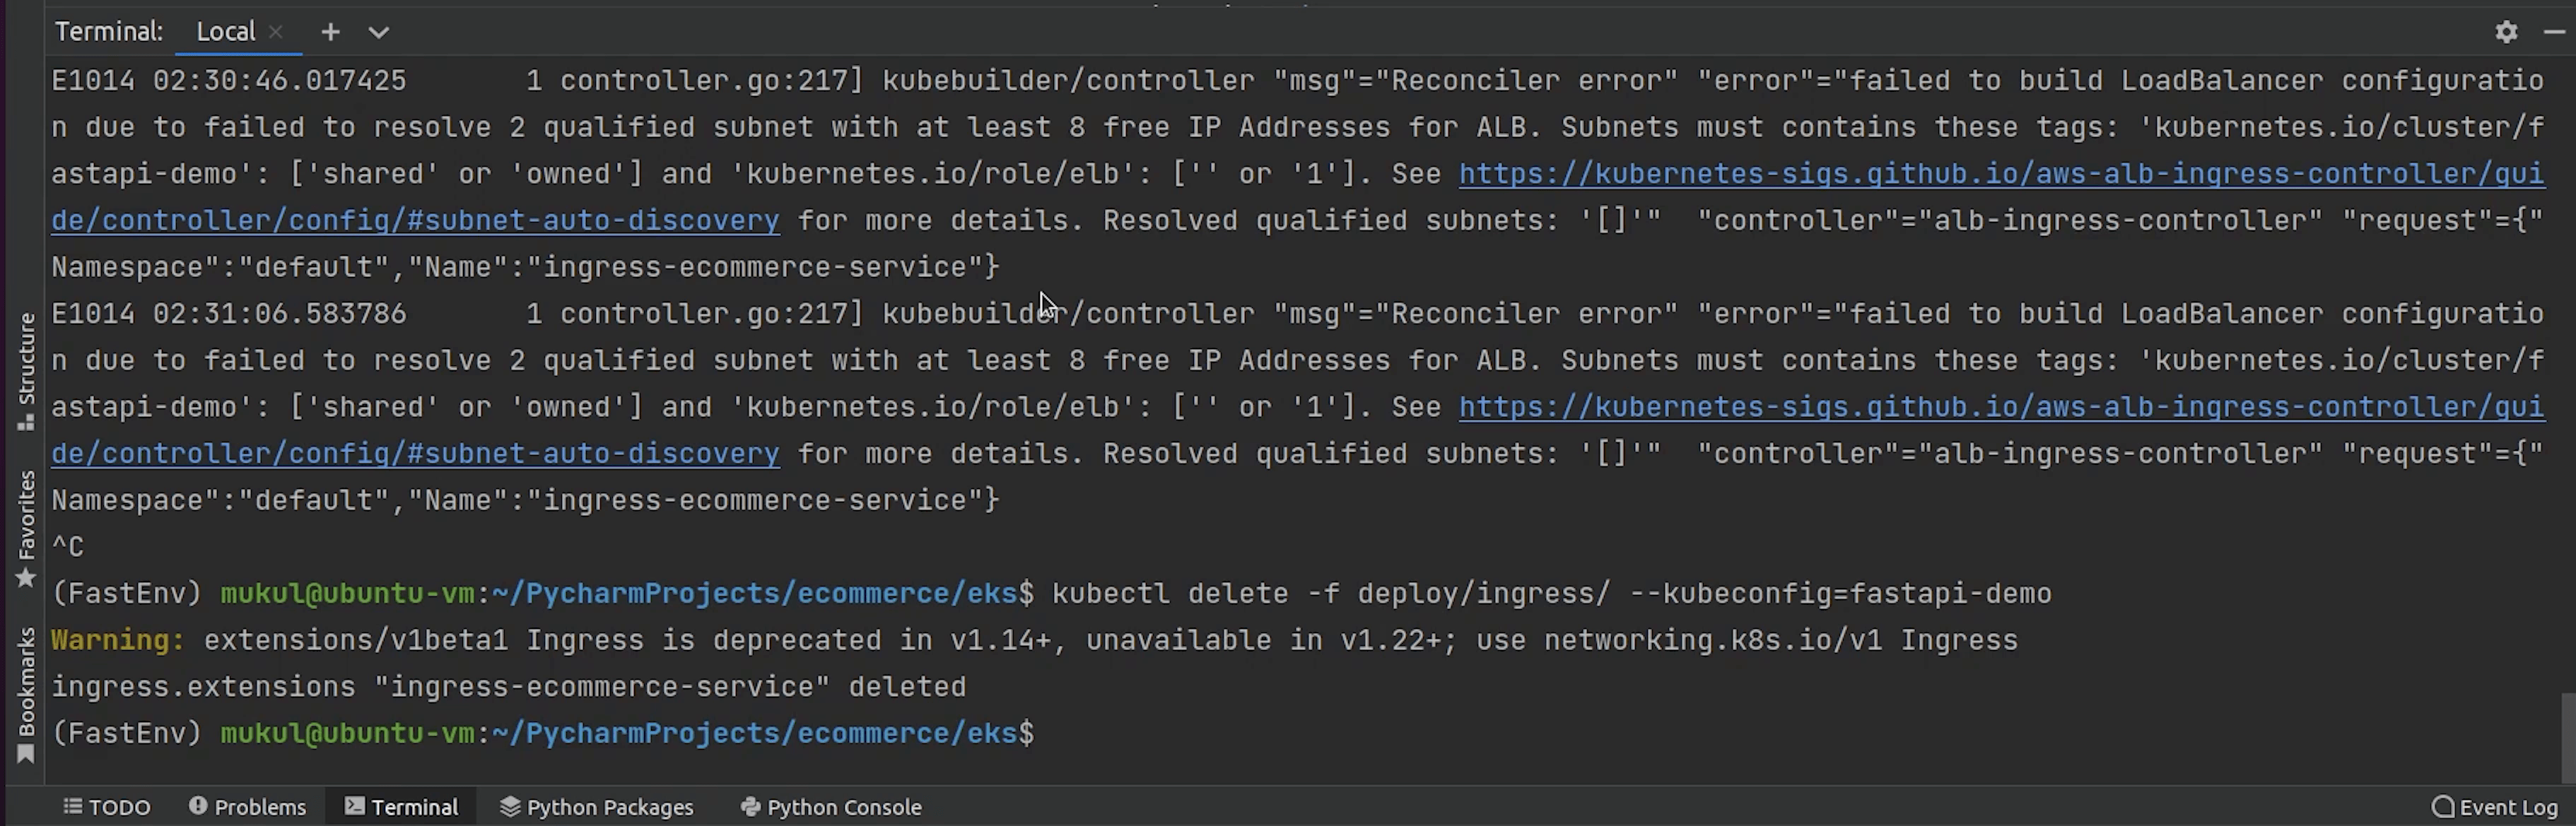
Yes I made a mistake, I need to replace the cluster name with fastapi-demo.
Once, it's fixed. I will try to deploy again and check the logs.
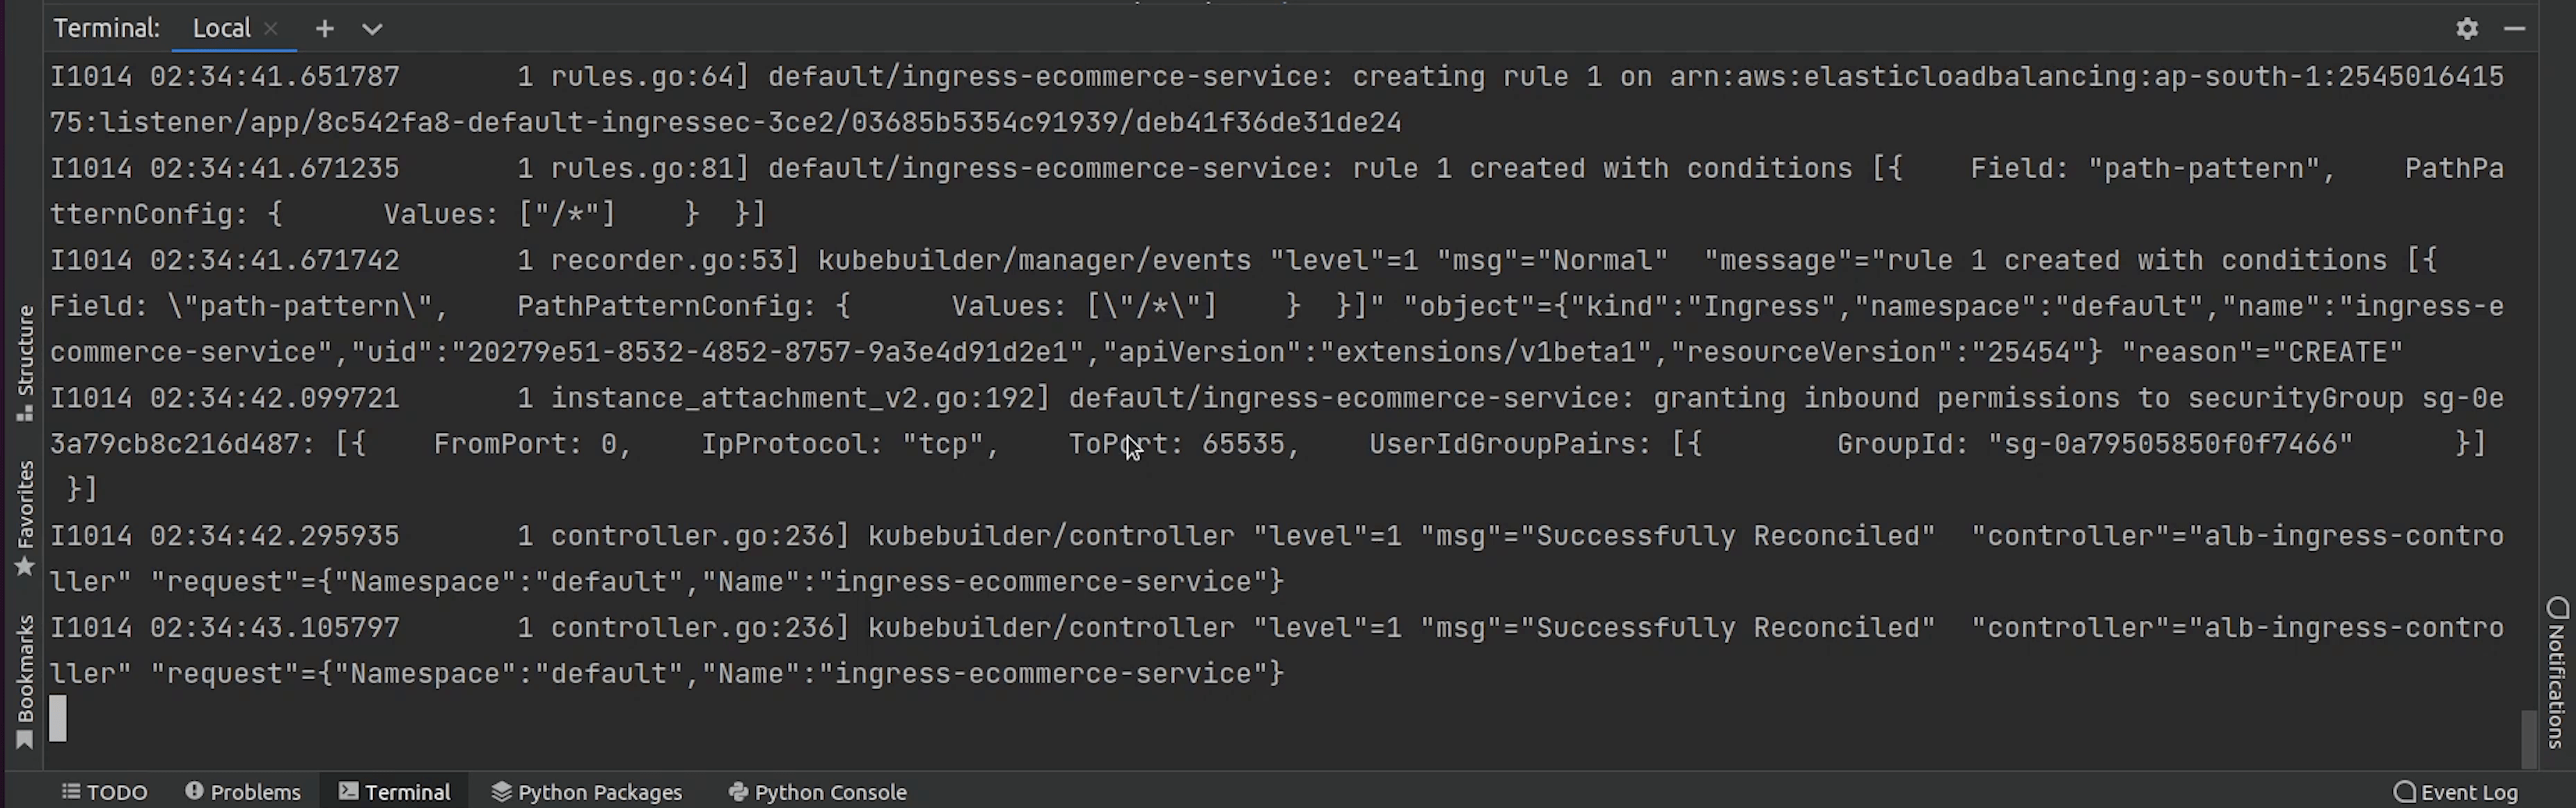
You can see it has been successfully reconciled.
Let me quickly show you the load balancer address where ingress is pointing to.
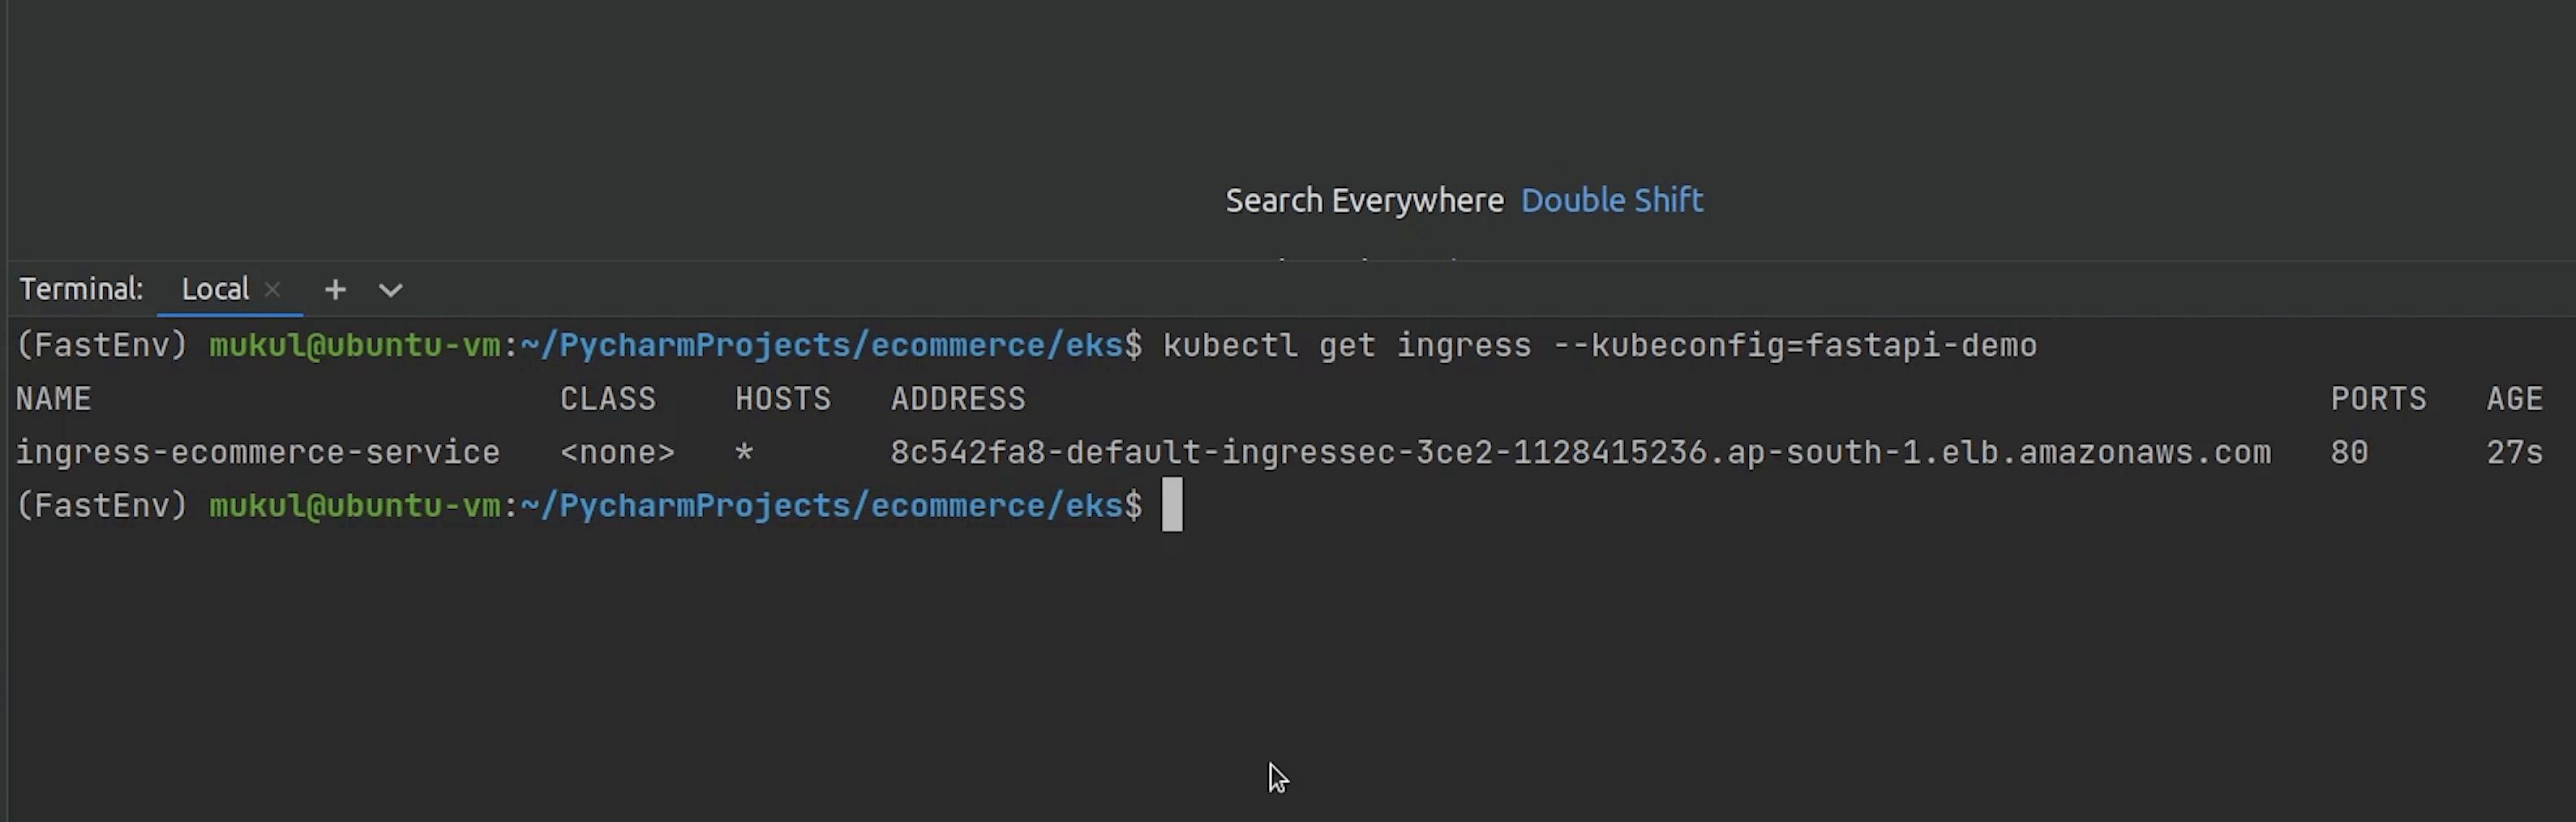
Next, I will go to Route 53 and create a new record pointing to our website.
We are not covering this, but you don’t need to do this manually; you can easily achieve this through externalDNS provided by Kubernetes.
ExternalDNS is a Kubernetes addon that configures public DNS servers with information about exposed Kubernetes services to make them discoverable.
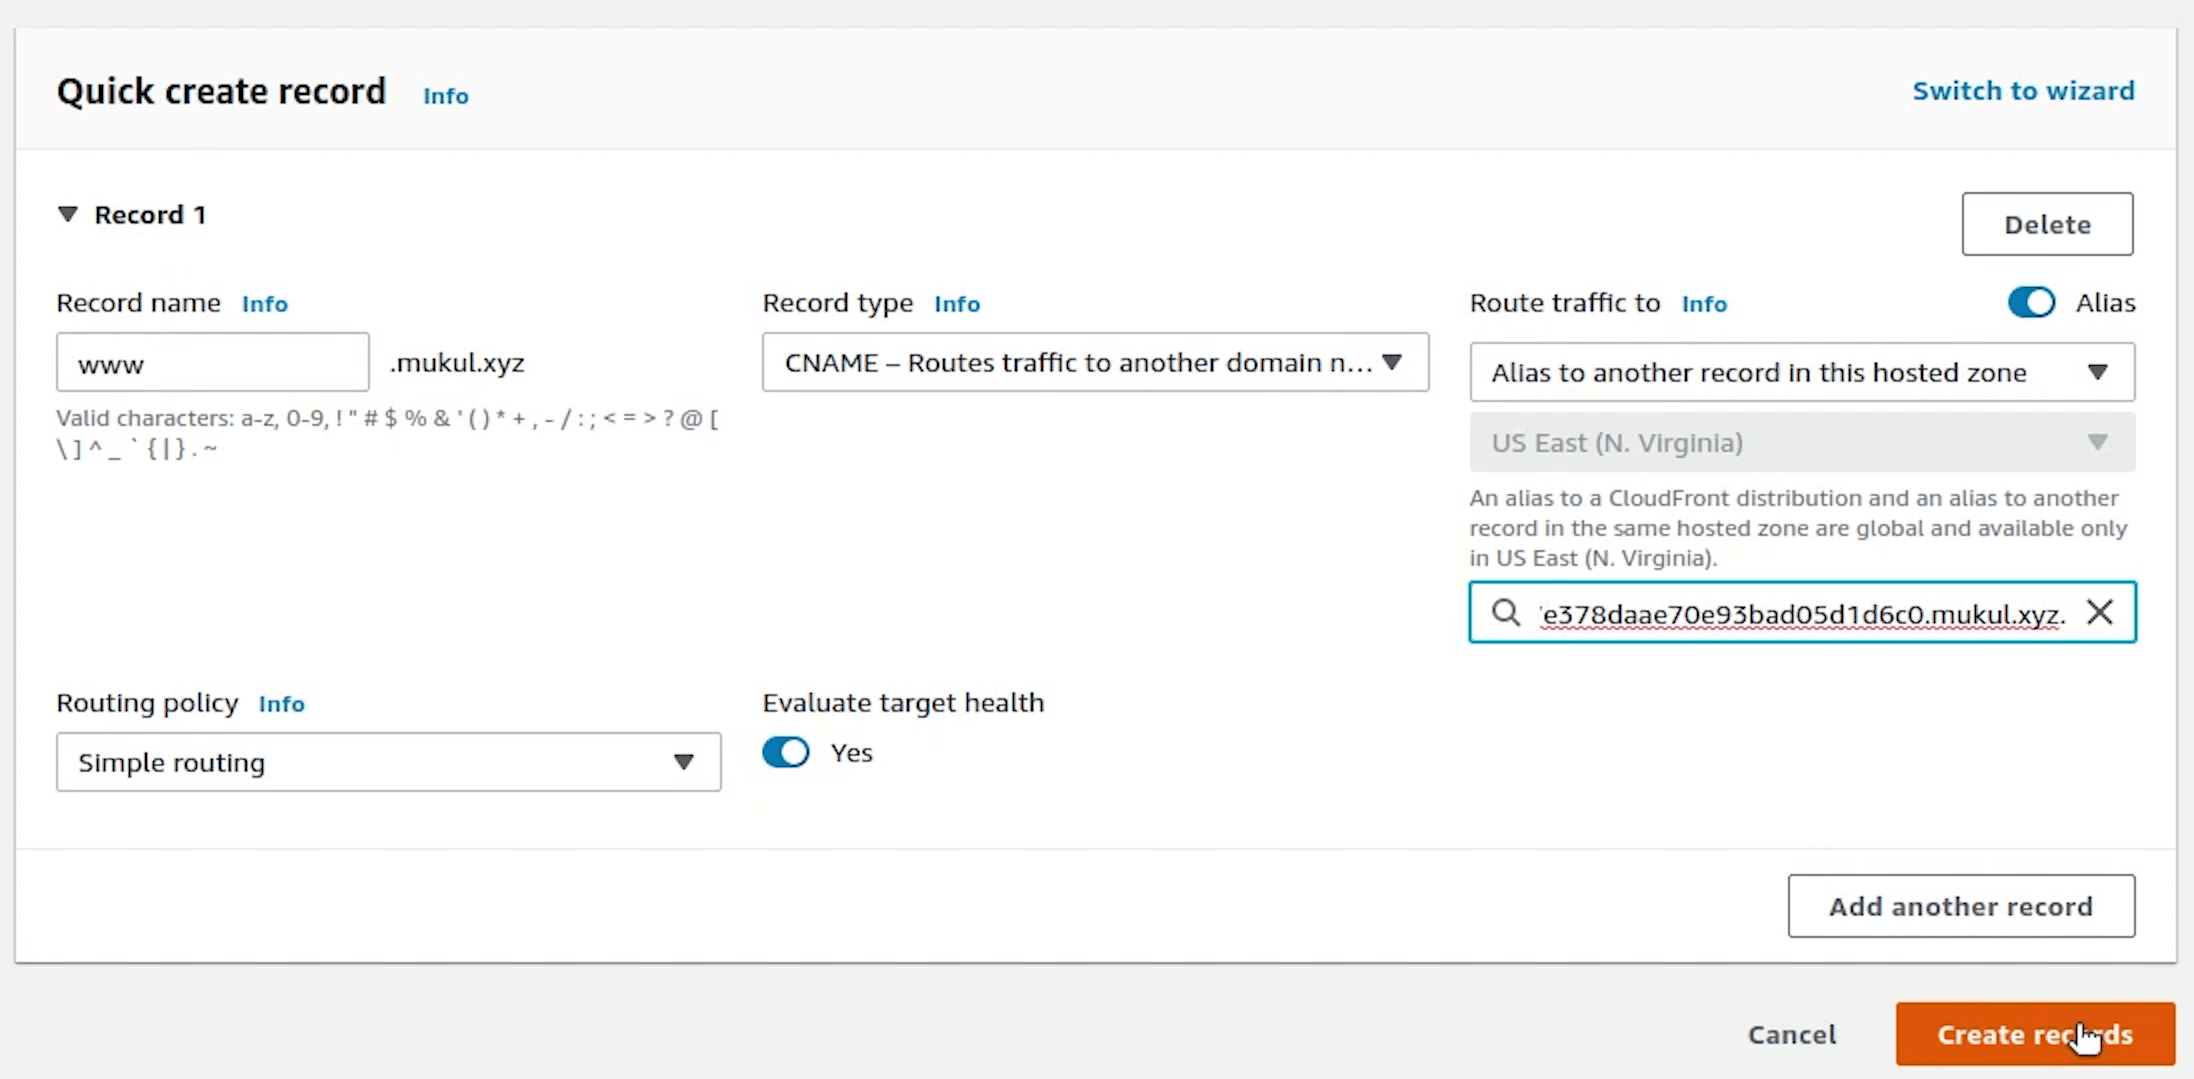
We will create two records: A and CNAME.
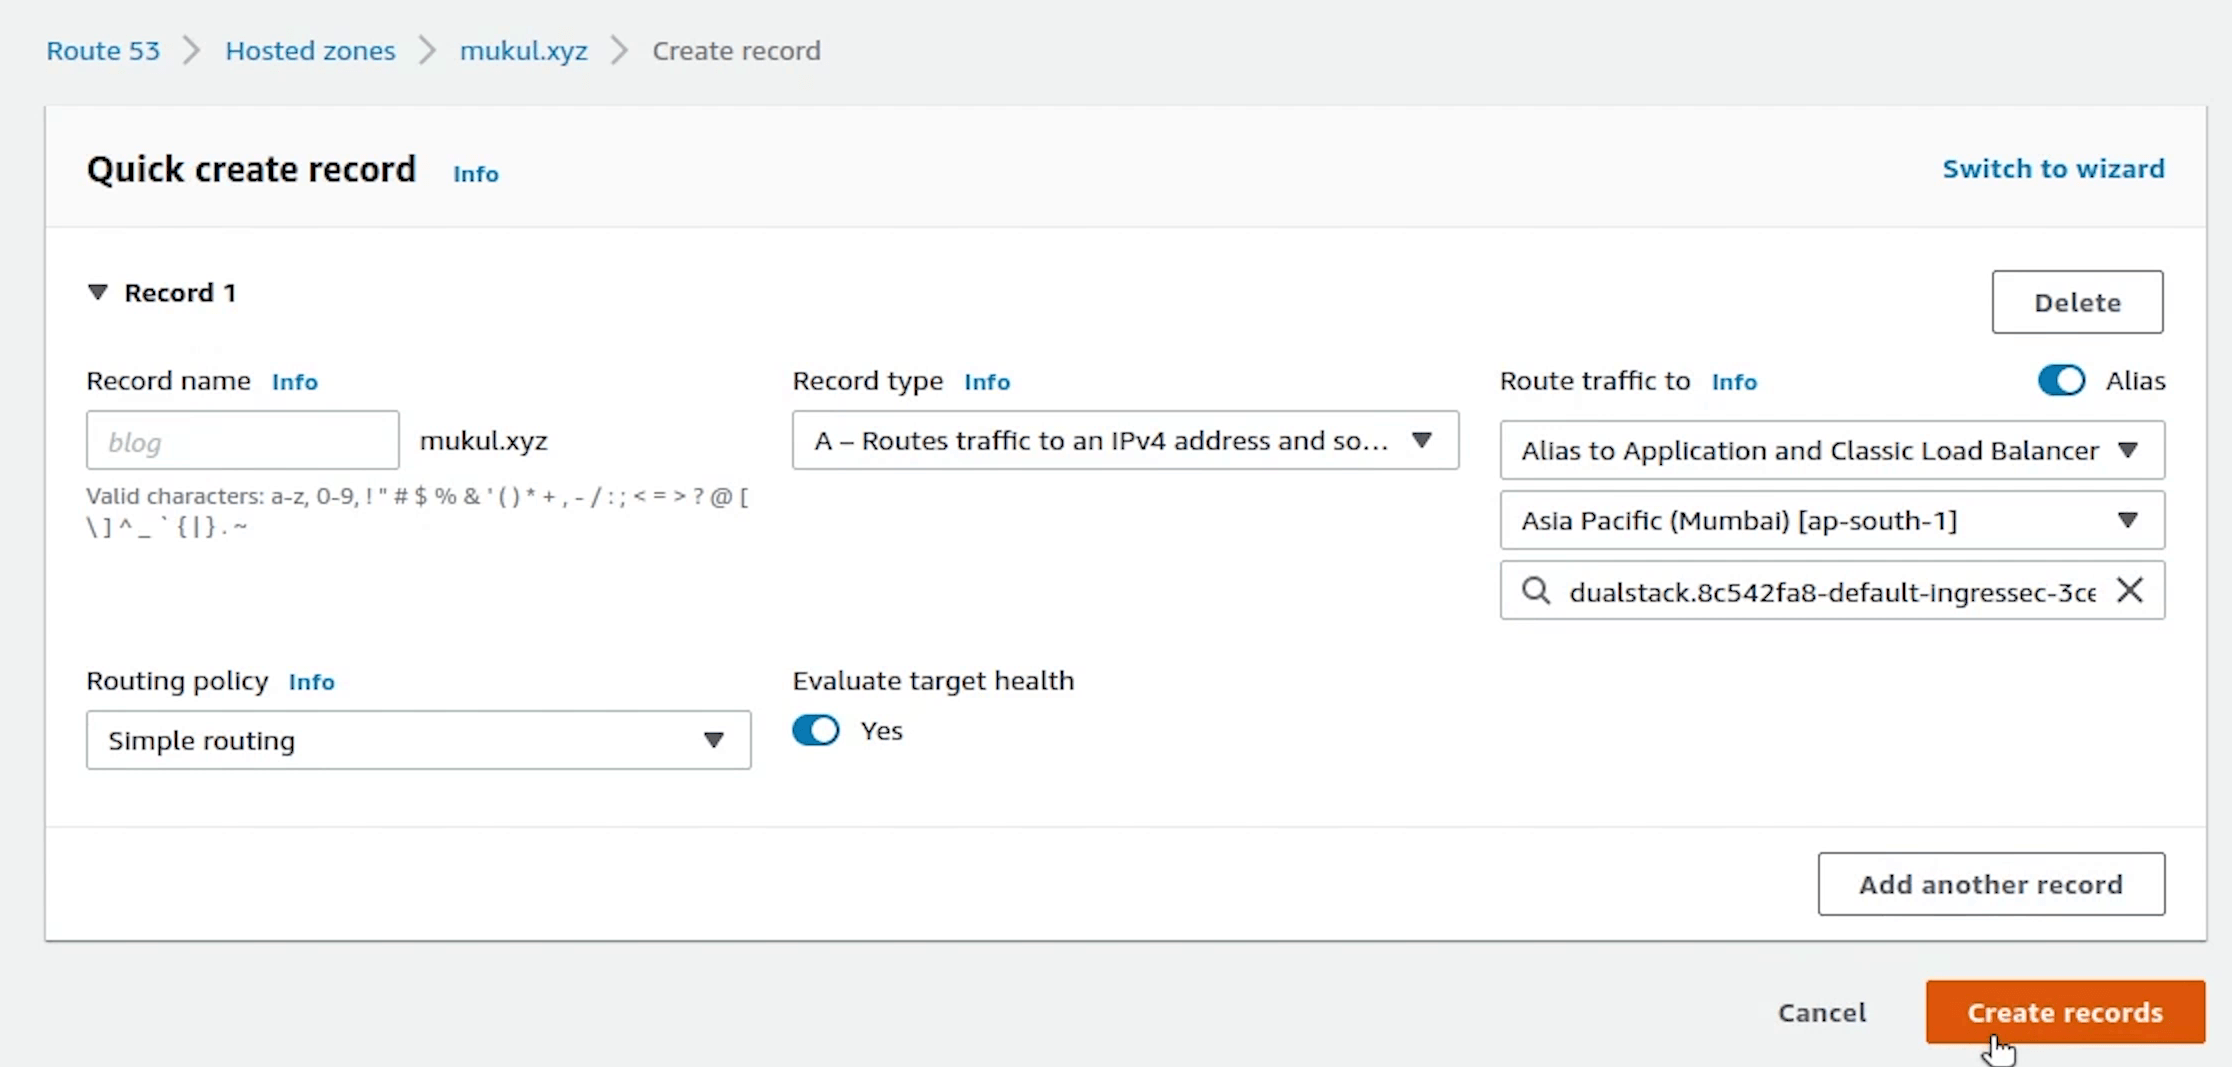
We will create two records: A and CNAME
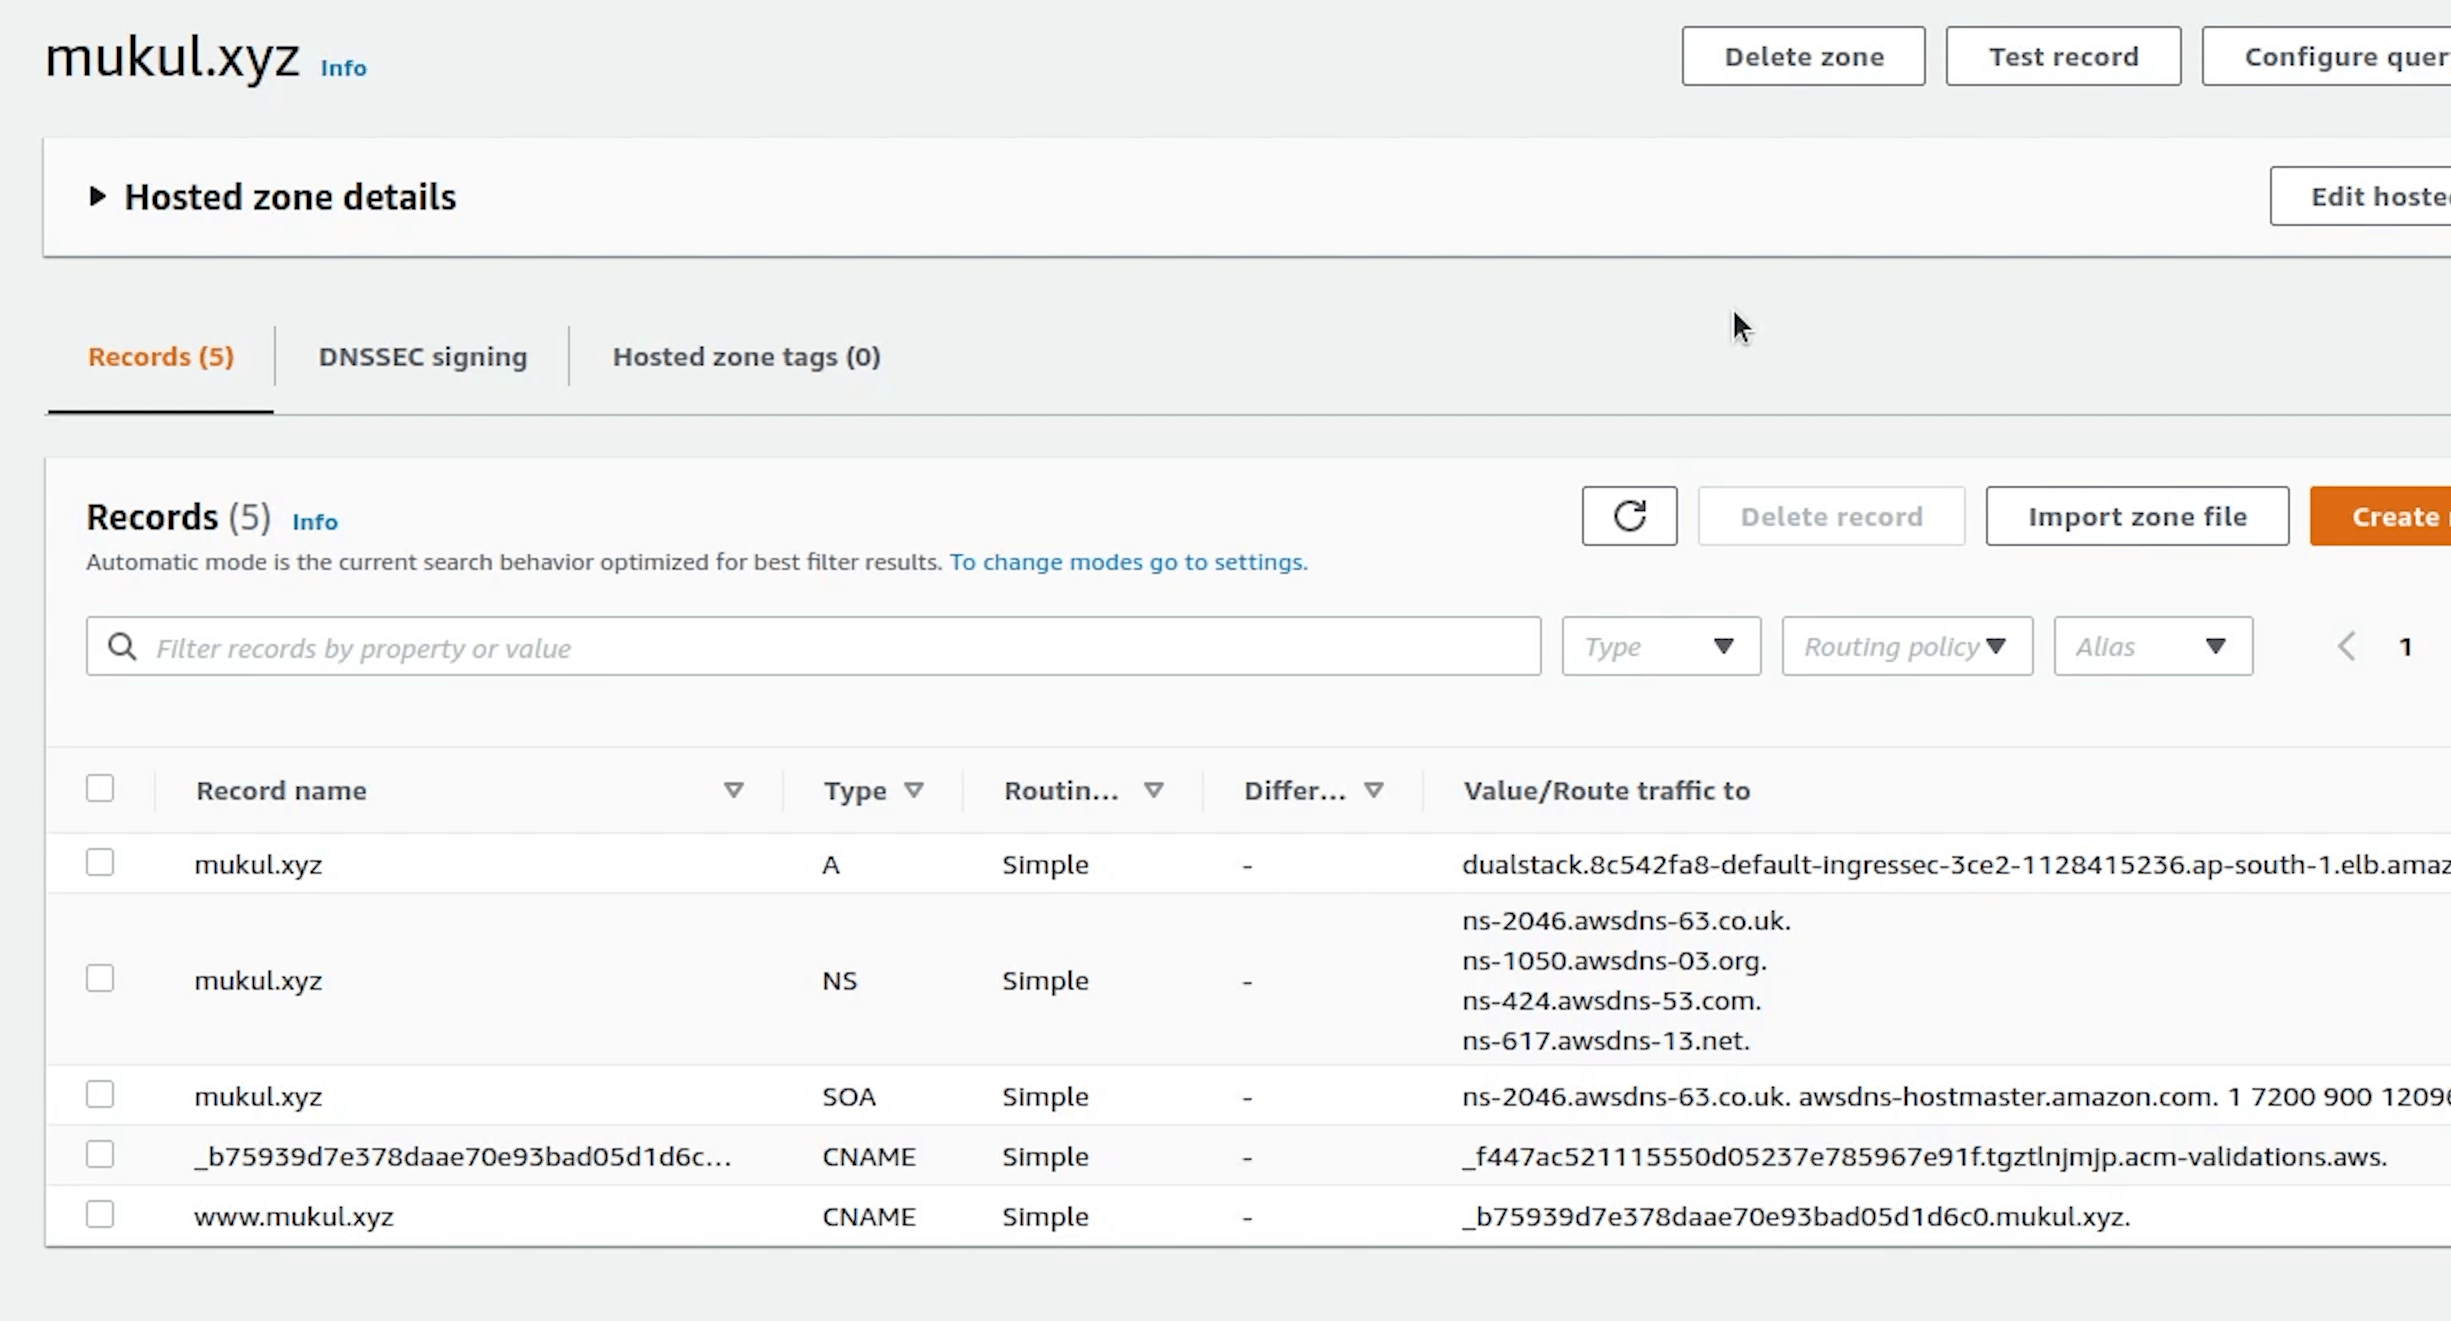
The two records have been created successfully.
The A record maps a name to one or more IP addresses when the IP is known and stable. Here we are pointing to the load balancer.
The CNAME record maps a name to another name. It should only be used when there are no other records on that name.
FastAPI running live
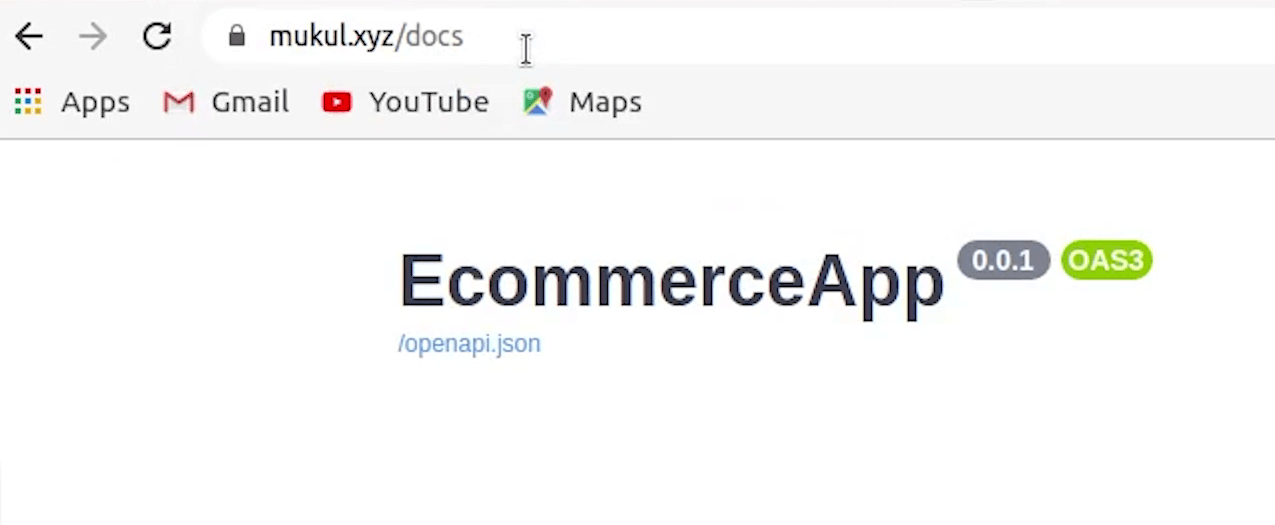
Let me now try to check whether the domain is pointing to the backend or not.
And yes, finally the domain is pointing to our FastAPI backend with SSL secured.
Let me do a quick test. We have already done it multiple times in our local machine, but now it’s live.
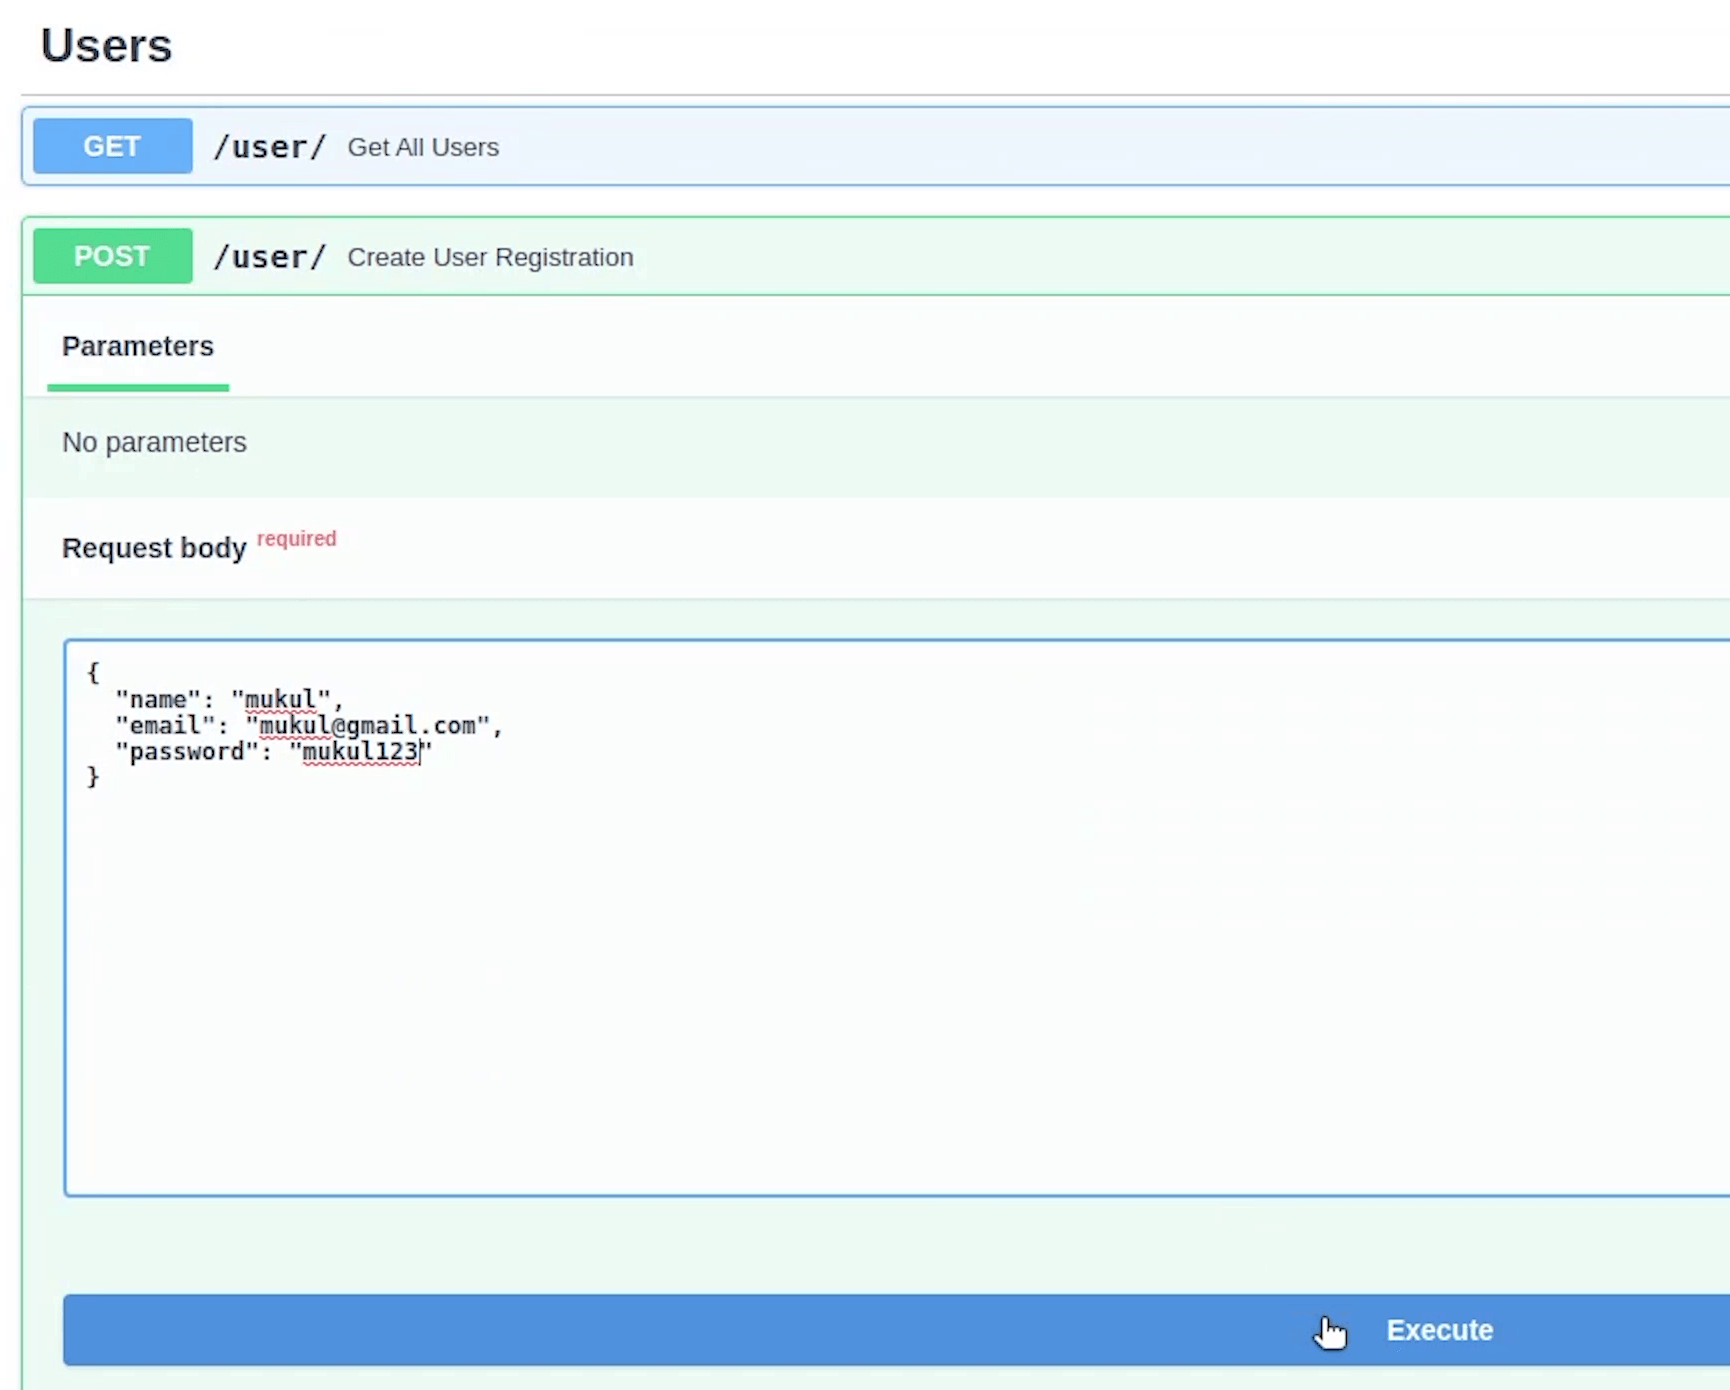
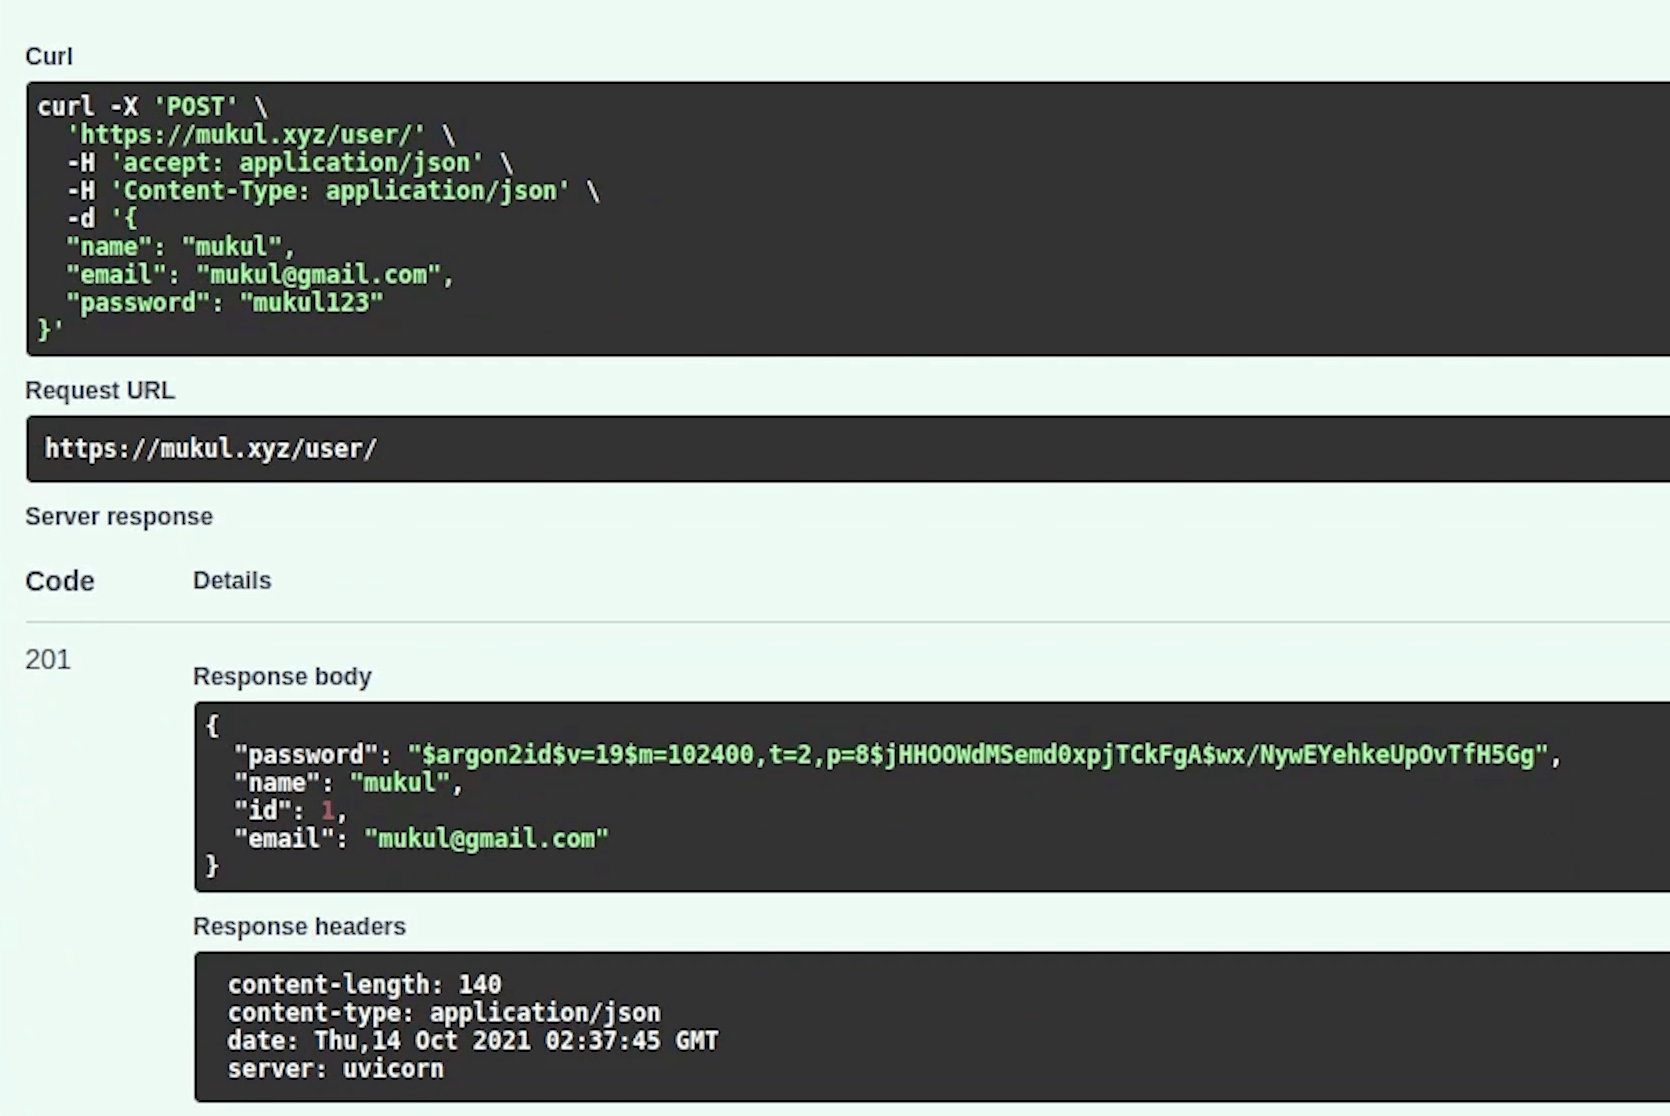
Yes, our record has been created. Let me now try out the remaining apis.

We have successfully executed and listed our orders. So, this is how we did the entire journey of application development, testing and finally end to end deploying the kubernetes stack in AWS with fully qualified domain name and SSL.
Let me check if I receive any new order email. Okay not yet.
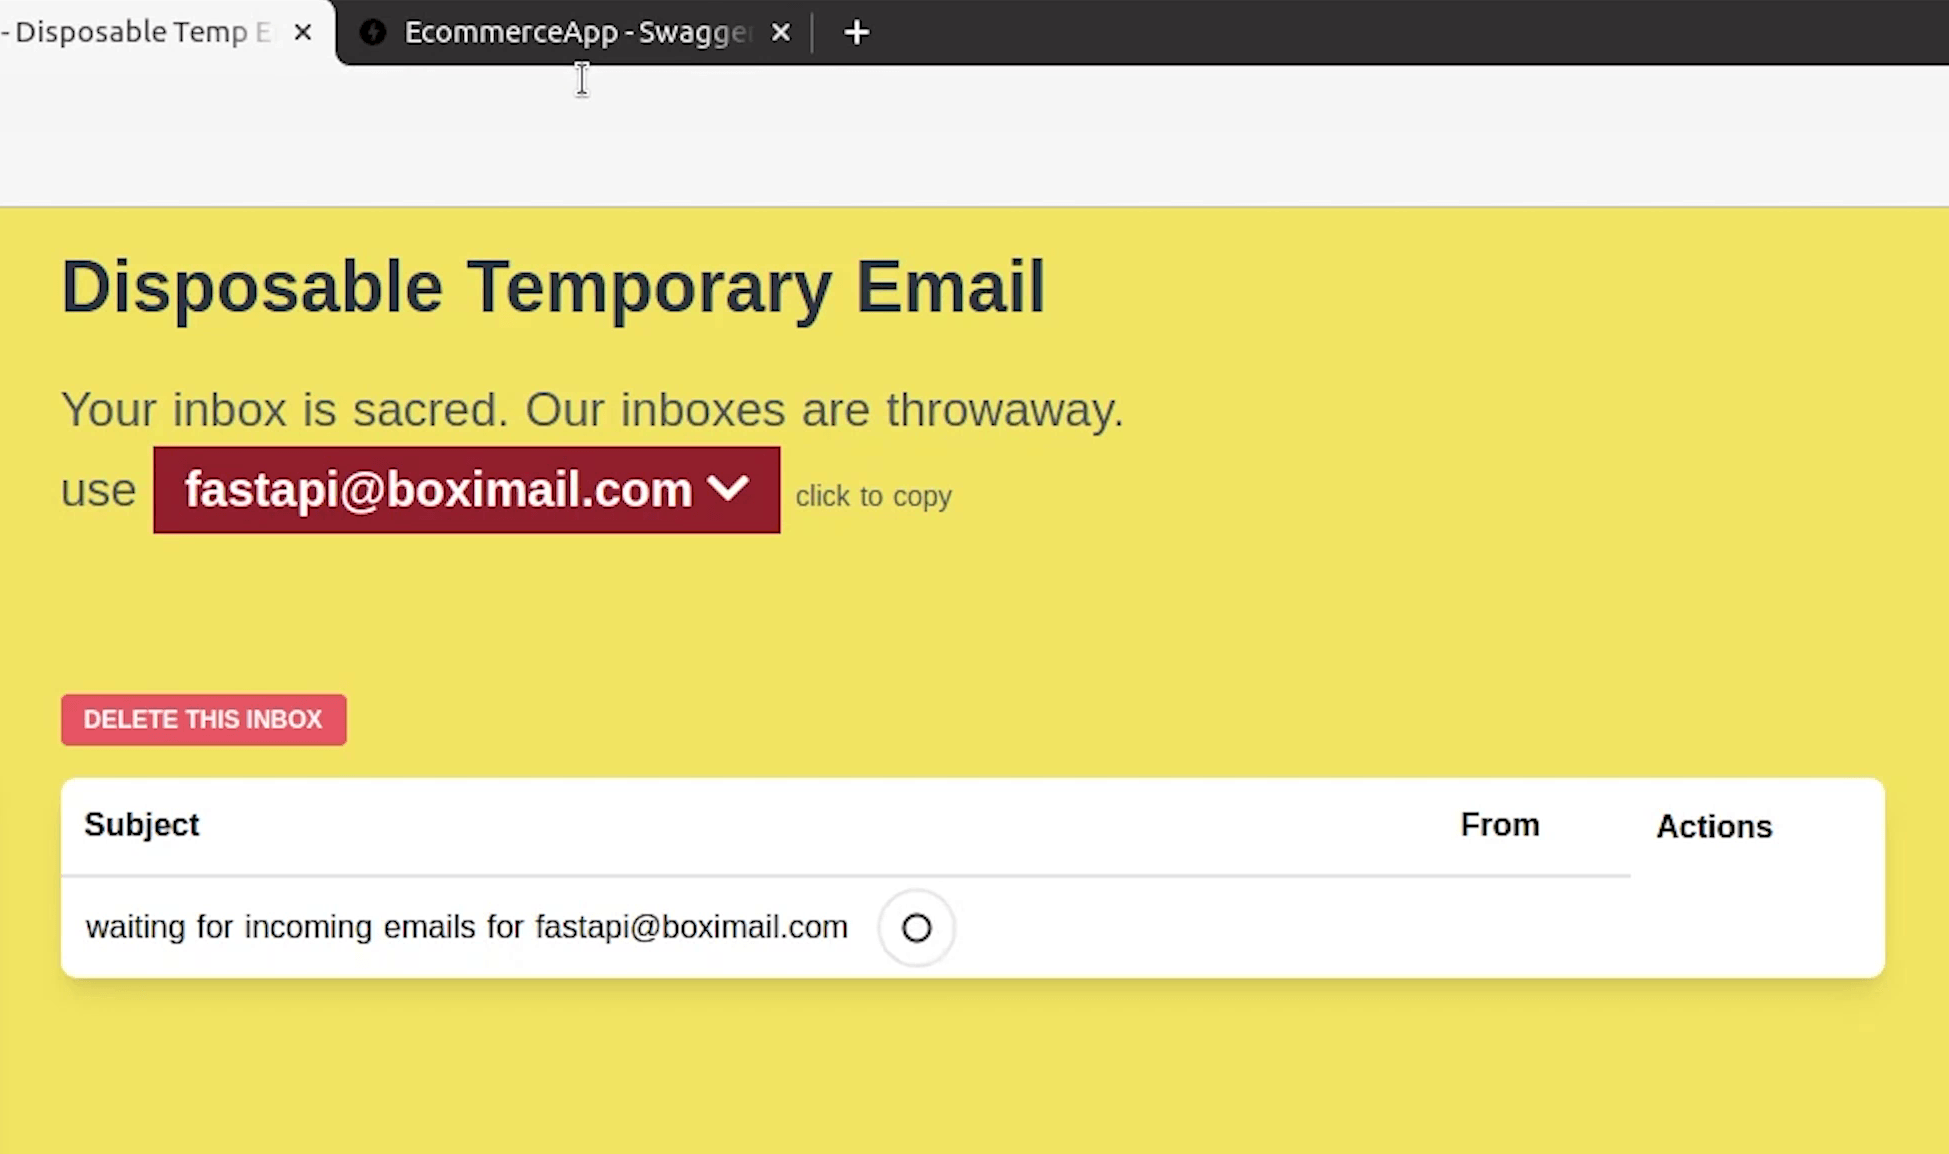
Nothing to worry about. Sometimes the email gets delayed because we are using a temp email service. I recommend using a full-fledged email service like Gmail when you are trying out this application.
There is one more thing which I haven’t shown you.
You can manage your EKS resources directly through PyCharm instead of doing it manually.
I hope you have already played with the Kubernetes plugin or checked out my previous video/tutorial.
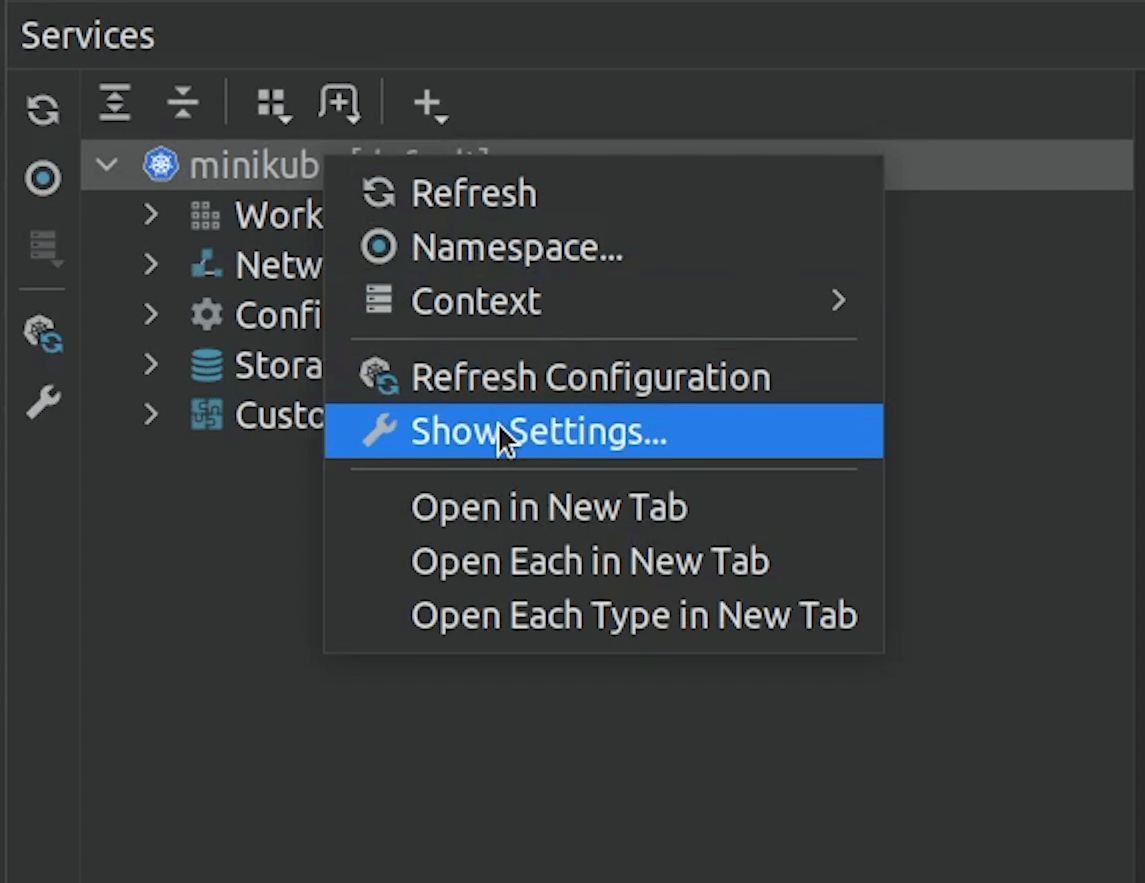
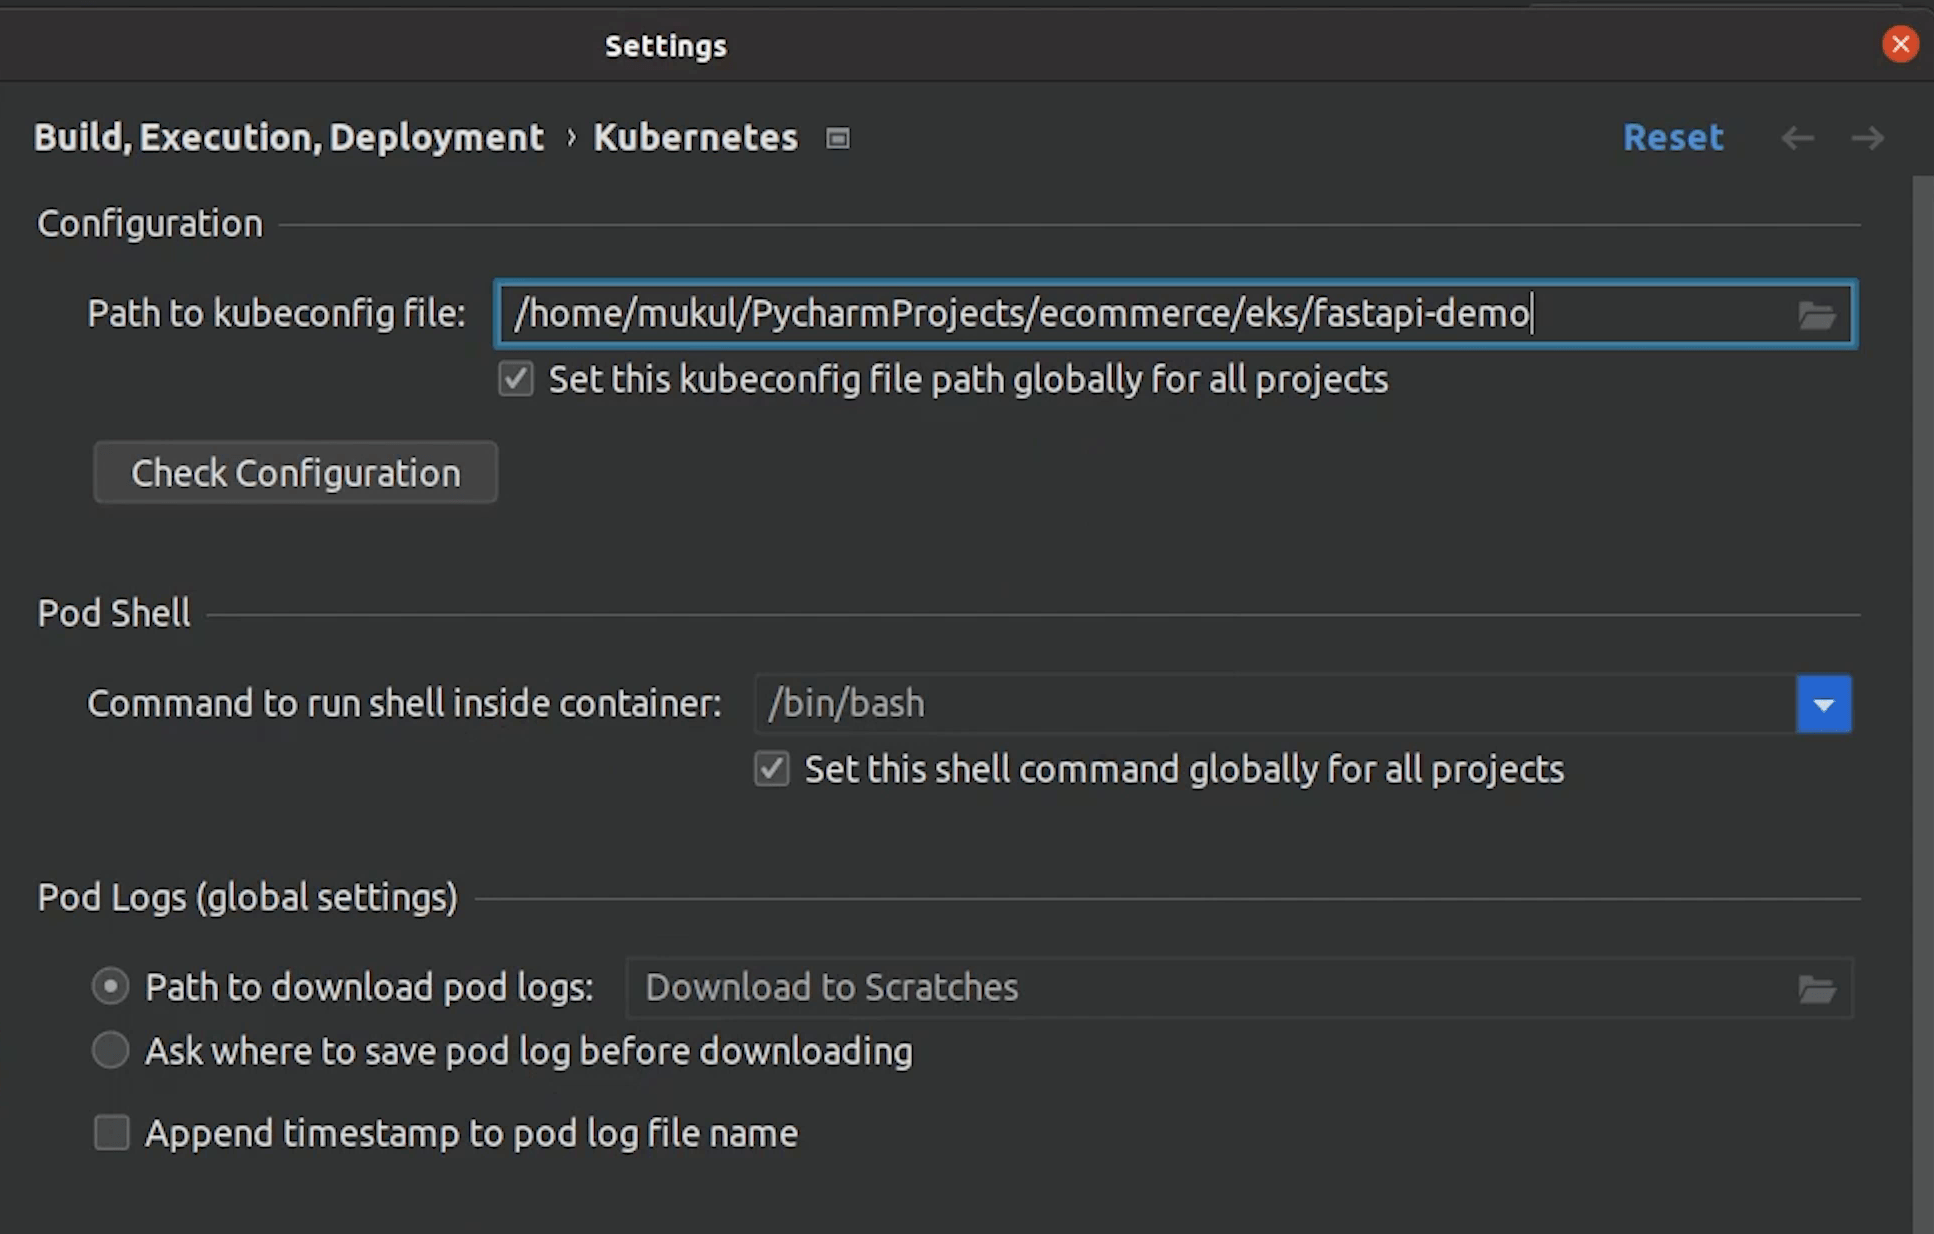
I am just going to point the kubeconfig file to fastapi-demo, and then it works like a charm.
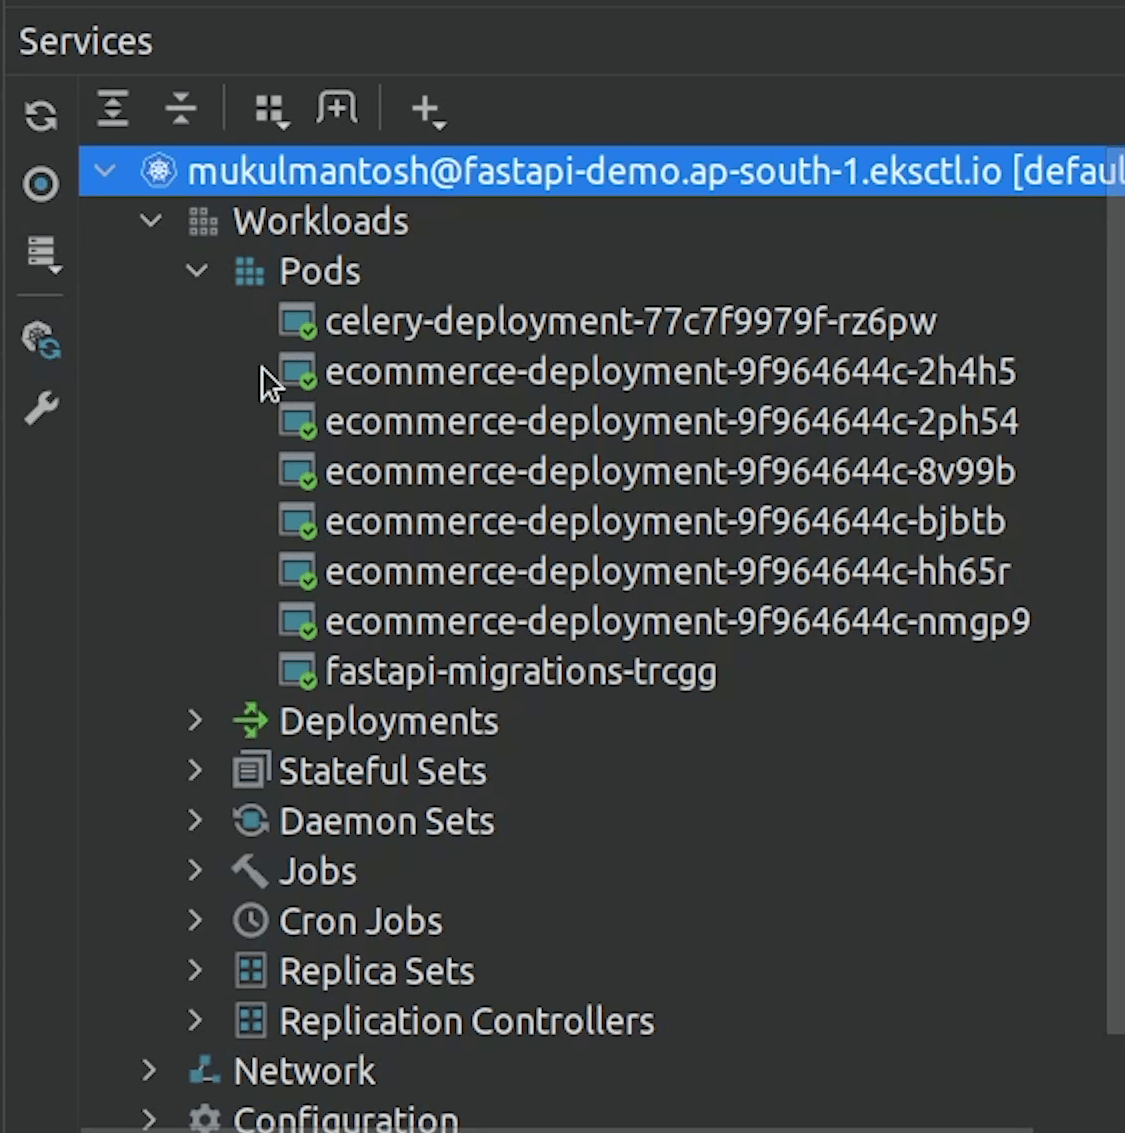
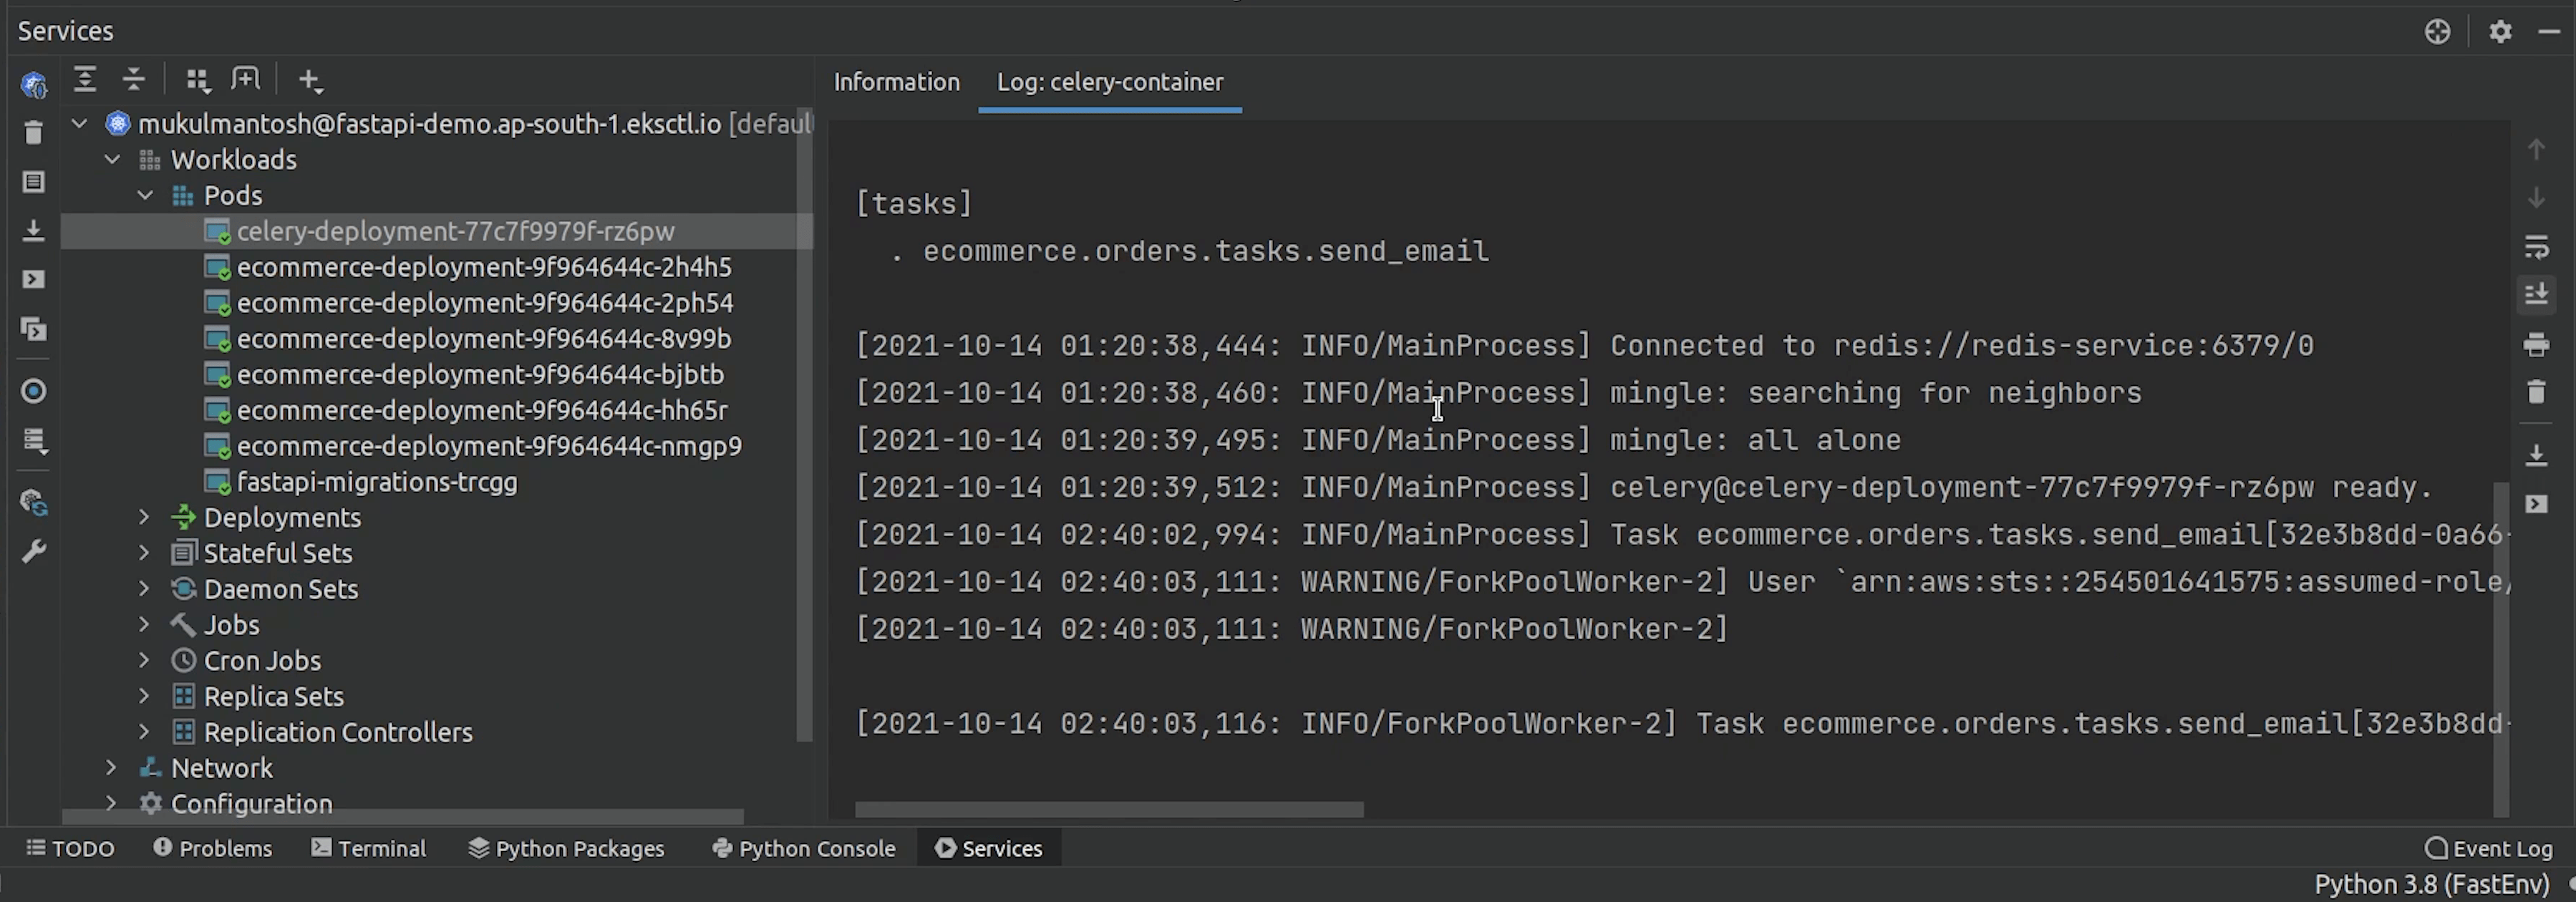
And now you can see our Pods, Deployments, Jobs which are running.
- Important : Make sure your policy has the permission
ses:SendEmail, otherwise your email won't be sent.
SES_EKS_Policy
{
	"Version": "2012-10-17",
	"Statement": [
		{
			"Sid": "VisualEditor0",
			"Effect": "Allow",
			"Action": ["ses:SendEmail", "ses:SendRawEmail"],
			"Resource": "*"
		}
	]
}
I hope you definitely like the video & tutorial and enjoy this long journey from development to deployment.
Do check my next tutorials about reference materials which I have used when I was working on this tutorial. I will share some good tutorials/blogs where you can go and enhance your skills more when working with FastAPI or EKS.