
REST API - Part I
Implementing a REST API for User modules using Pydantic & API Router.
Hello everyone! Welcome to the PyCharm FastAPI Tutorial Series. In this tutorial, we are going to implement REST APIs for our User module. Before moving forward, I need to speak about Pydantic and its benefits.
Pydantic
You might know that FastAPI & Typer use Pydantic. Pydantic helps in data validation and settings management. It also enforces Python type hints during runtime. It’s extremely fast and easy to use as well!
If you have already worked with serializers in Django ReST Framework and marshmallow with Flask then definitely you can compare their similarity with pydantic.
Pydantic also supports dataclasses, if you want the same kind of validation in dataclasses instead of using the base model.
Keep in mind that Pydantic data class is a drop-in replacement.

Coming to benchmarks, Pydantic is very fast compared to other validation libraries. You can observe that django-rest-framework is 12.3x slower along-with marshmallow which is 2.4x slower.
You don’t need to install pydantic separately, it’s already bundled with FastAPI.
Let me go back to the IDE, and create a few files which I will explain their usage in a while.
Schema Definition
In the schema.py file, We are going to write our pydantic models.
Let me do the necessary imports. I will create a class User which imports BaseModel.
As from the pydantic documentation, The primary means of defining objects in pydantic is via models (models are simply classes which inherit from BaseModel).

As you can see we have created three fields: name, email, password.
Name is constr which is basically a Constrained Type. It’s possible to define primitive types that have more constraints on their values. The
str must have at least 2 characters and max 50 characters.
Email requires email-validator to be installed; the input string must be a valid email address.
Make sure to install email-validator otherwise the EmailStr will throw an error.

pip install email-validator==1.13
And finally the password will be a normal string.
If you are interested to know more about different types of validators, then it’s already mentioned in the official documentation, you can check over there.
As you can see we can do a lot of things with Pydantic, like converting to lowercase, strip whitespaces and even regex pattern matching.
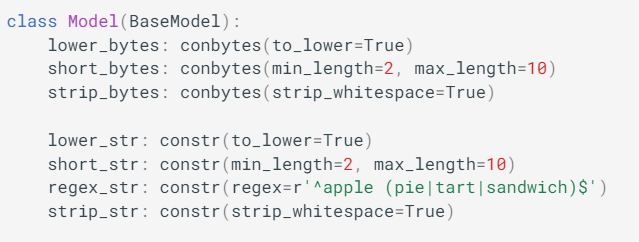 Image Credits : Pydantic
Our schema has been successfully defined, now switch back to router.py file.
API Router
Once your application starts growing up, you might need to place your path operations in a specific file like what we are going to do in our router.py file. This helps better organize your code and focus only on the user routes.
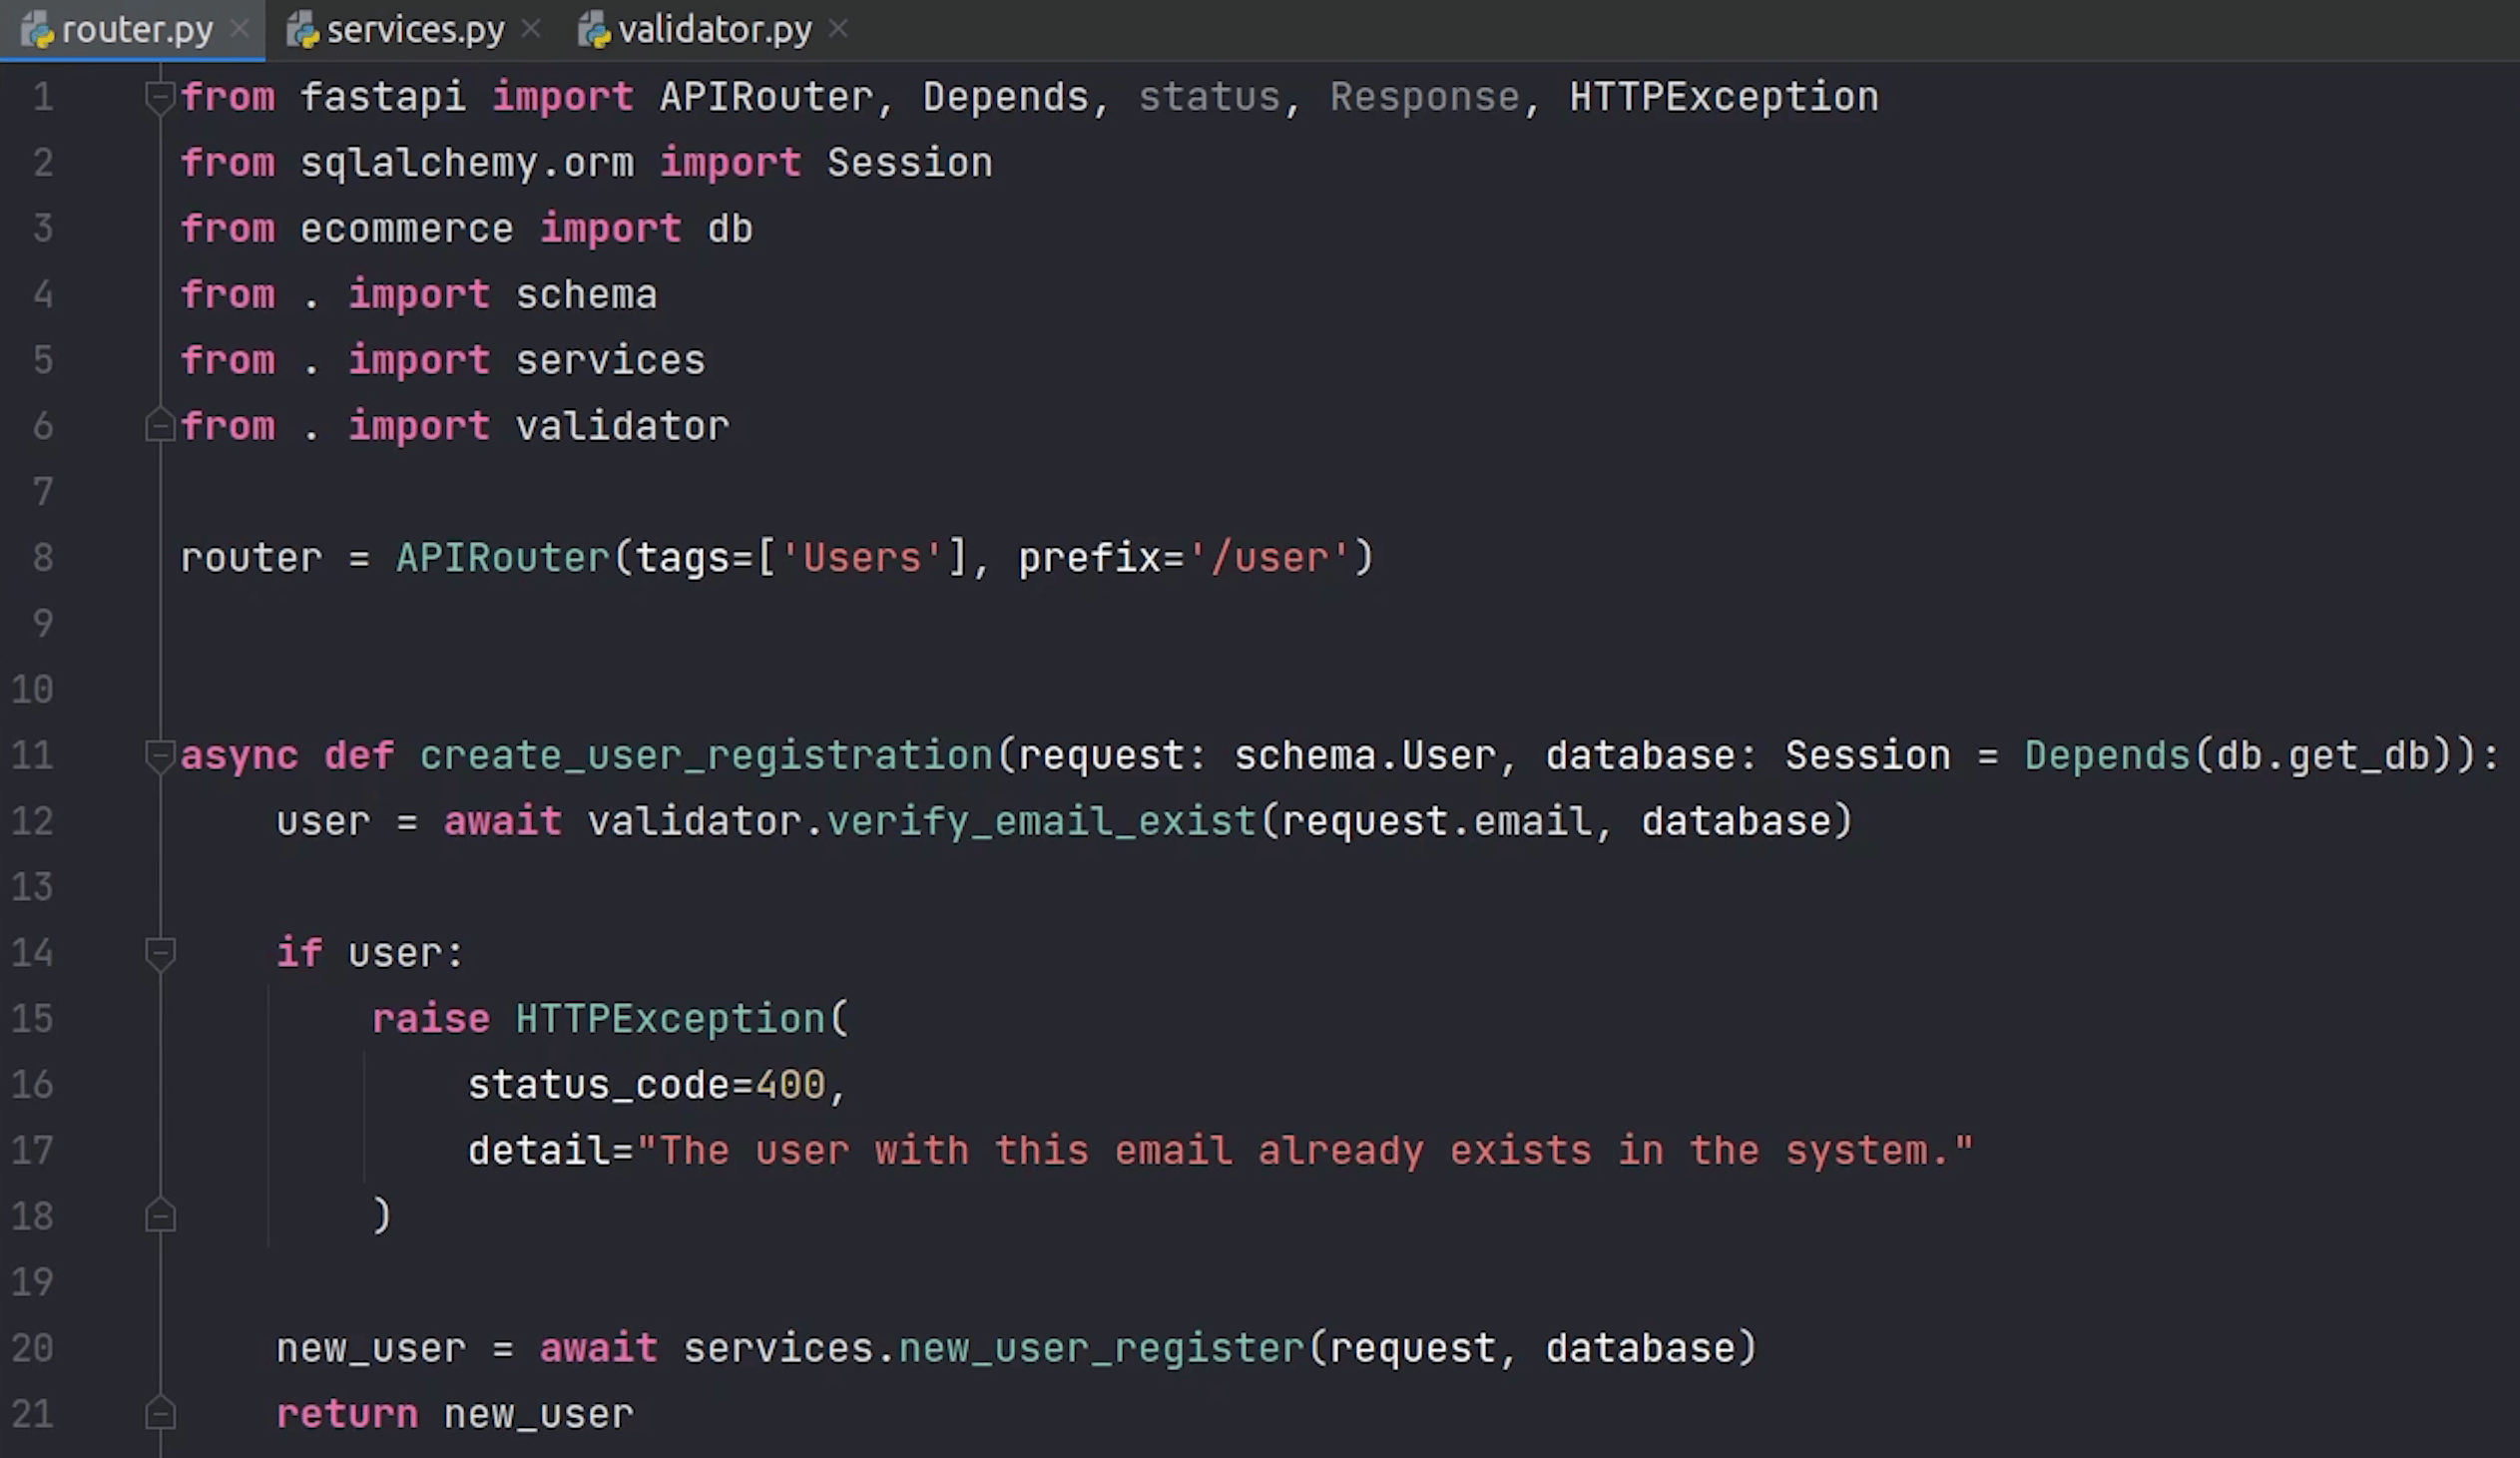
We are going to import the APIRouter and create an instance for it.
I will also do the necessary imports apart from api router like Depends, status, Response and HTTPException which
will be required.
I am also going to do imports from sqlalchemy, services, validator, schema etc.
Don’t worry about How I will be writing the implementation in the above files which I mentioned like services and validator.
As you can see on line number 8, we are going to create an instance of our APIRouter.
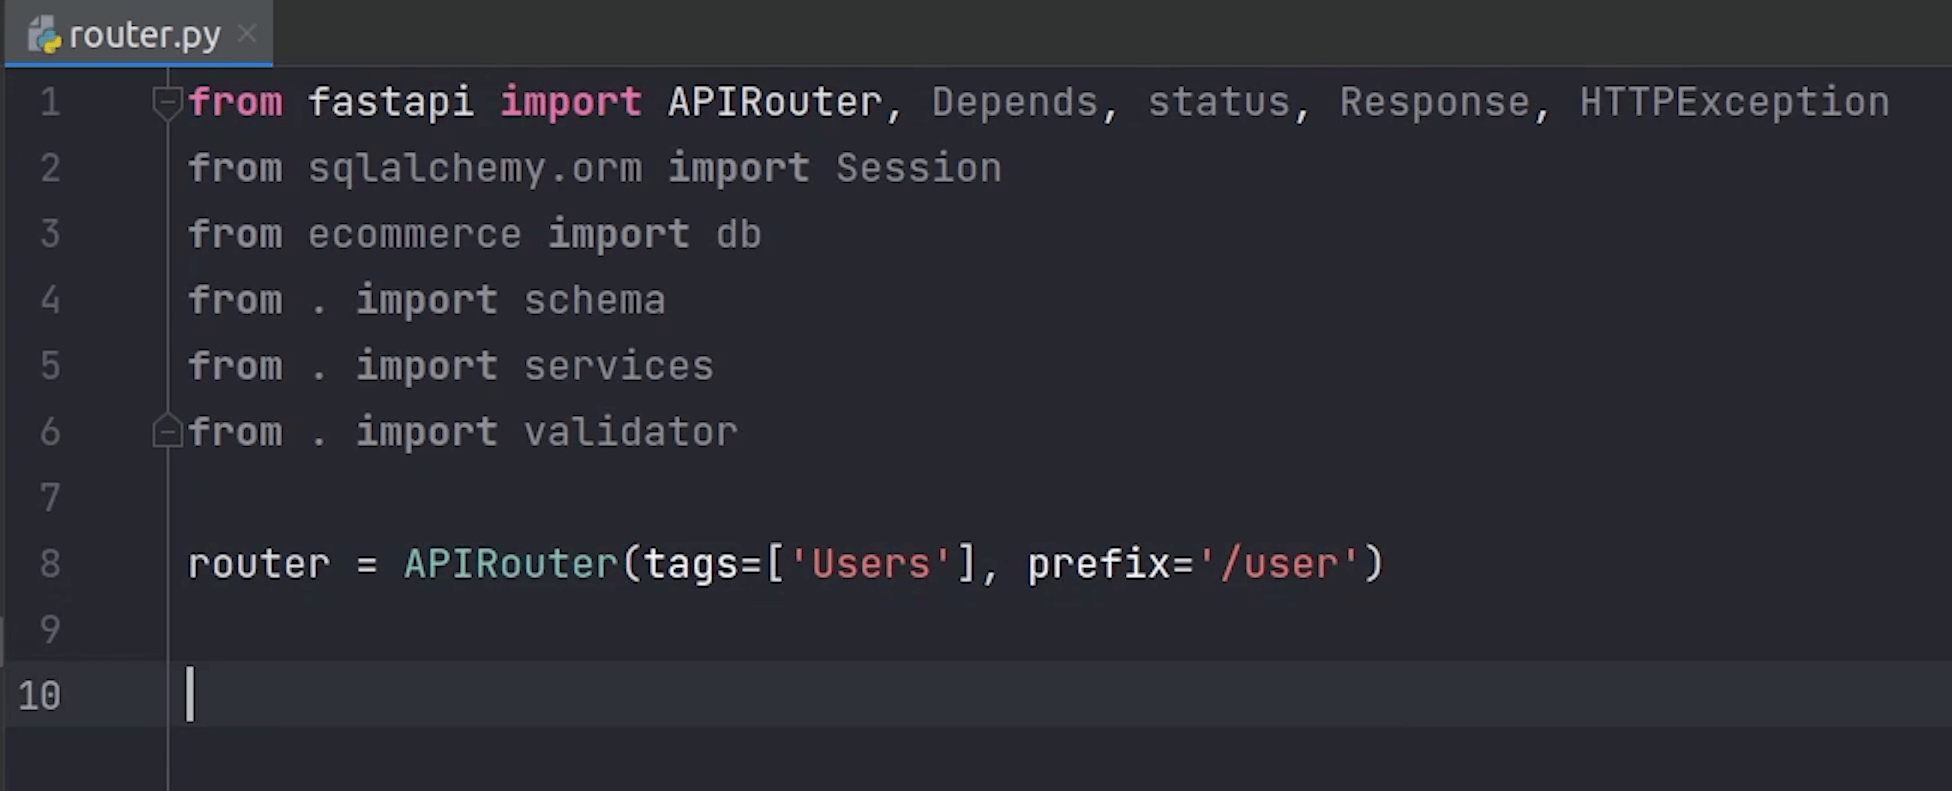
It’s going to be prefixed with “/user” and I will also provide a tag name, which helps in categorizing it easily.
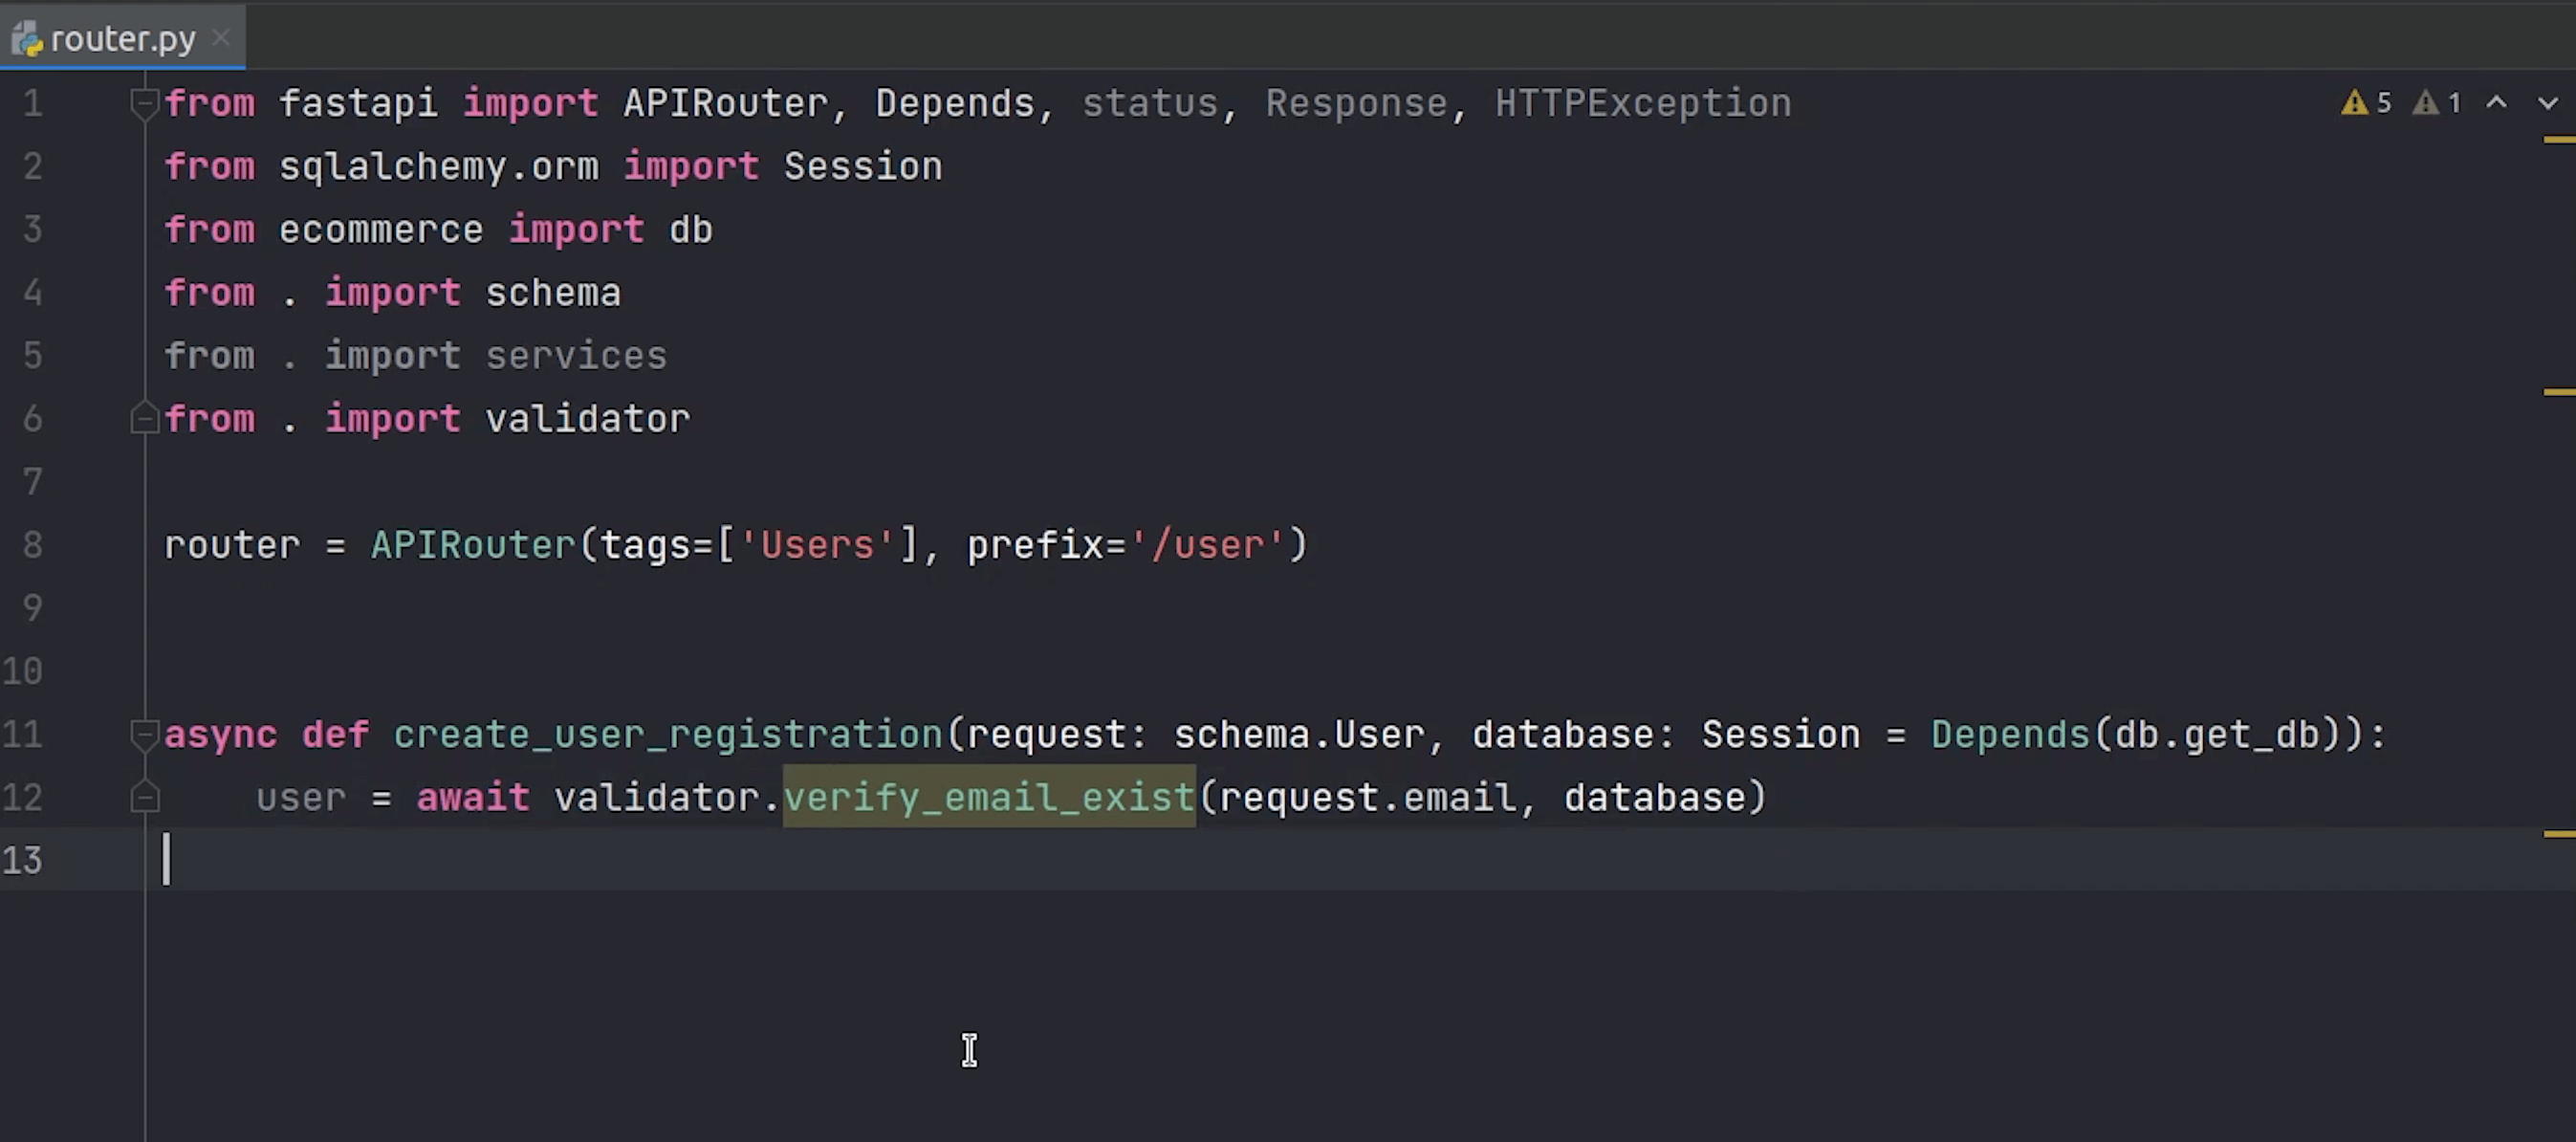
Let’s begin by creating our first api endpoint for our User Registration.
I will create an async function create_user_registration in which I am going to pass two params, one is a request which takes in User schema, the pydantic model which we defined earlier and the second one is the database, if you don’t mention anything in database it will accept it as query parameter which we don’t want.
The database is going to be a type of Session which comes from SQLAlchemy, if you now directly go and run it, then it throws an error saying it’s not a valid pydantic field.
Dependency Injection
To overcome that we are going to use Depends, which is basically a Dependency Injection provided by FastAPI itself.
We are going to inject the get_db connection.
As per the FastAPI Documentation: Dependency Injection means, in programming, that there is a way for your code (in this case, your path operation functions) to declare things that it requires working and use: "dependencies".
This is very useful when you need to:
- Have shared logic (the same code logic again and again).
- Share database connections.
- Enforce security, authentication, role requirements, etc.
- Minimize code repetition.
I encourage you to check more about this in the FastAPI Documentation. You can even create sub-dependencies and global dependencies as well.
Validation
Moving ahead with our API creation, we need to first make sure to check whether email already exists in the database or not. If it exists then we won’t allow the user to register again with the same email address.
I am going to create a verify_email_exist function which is going to take email and database.
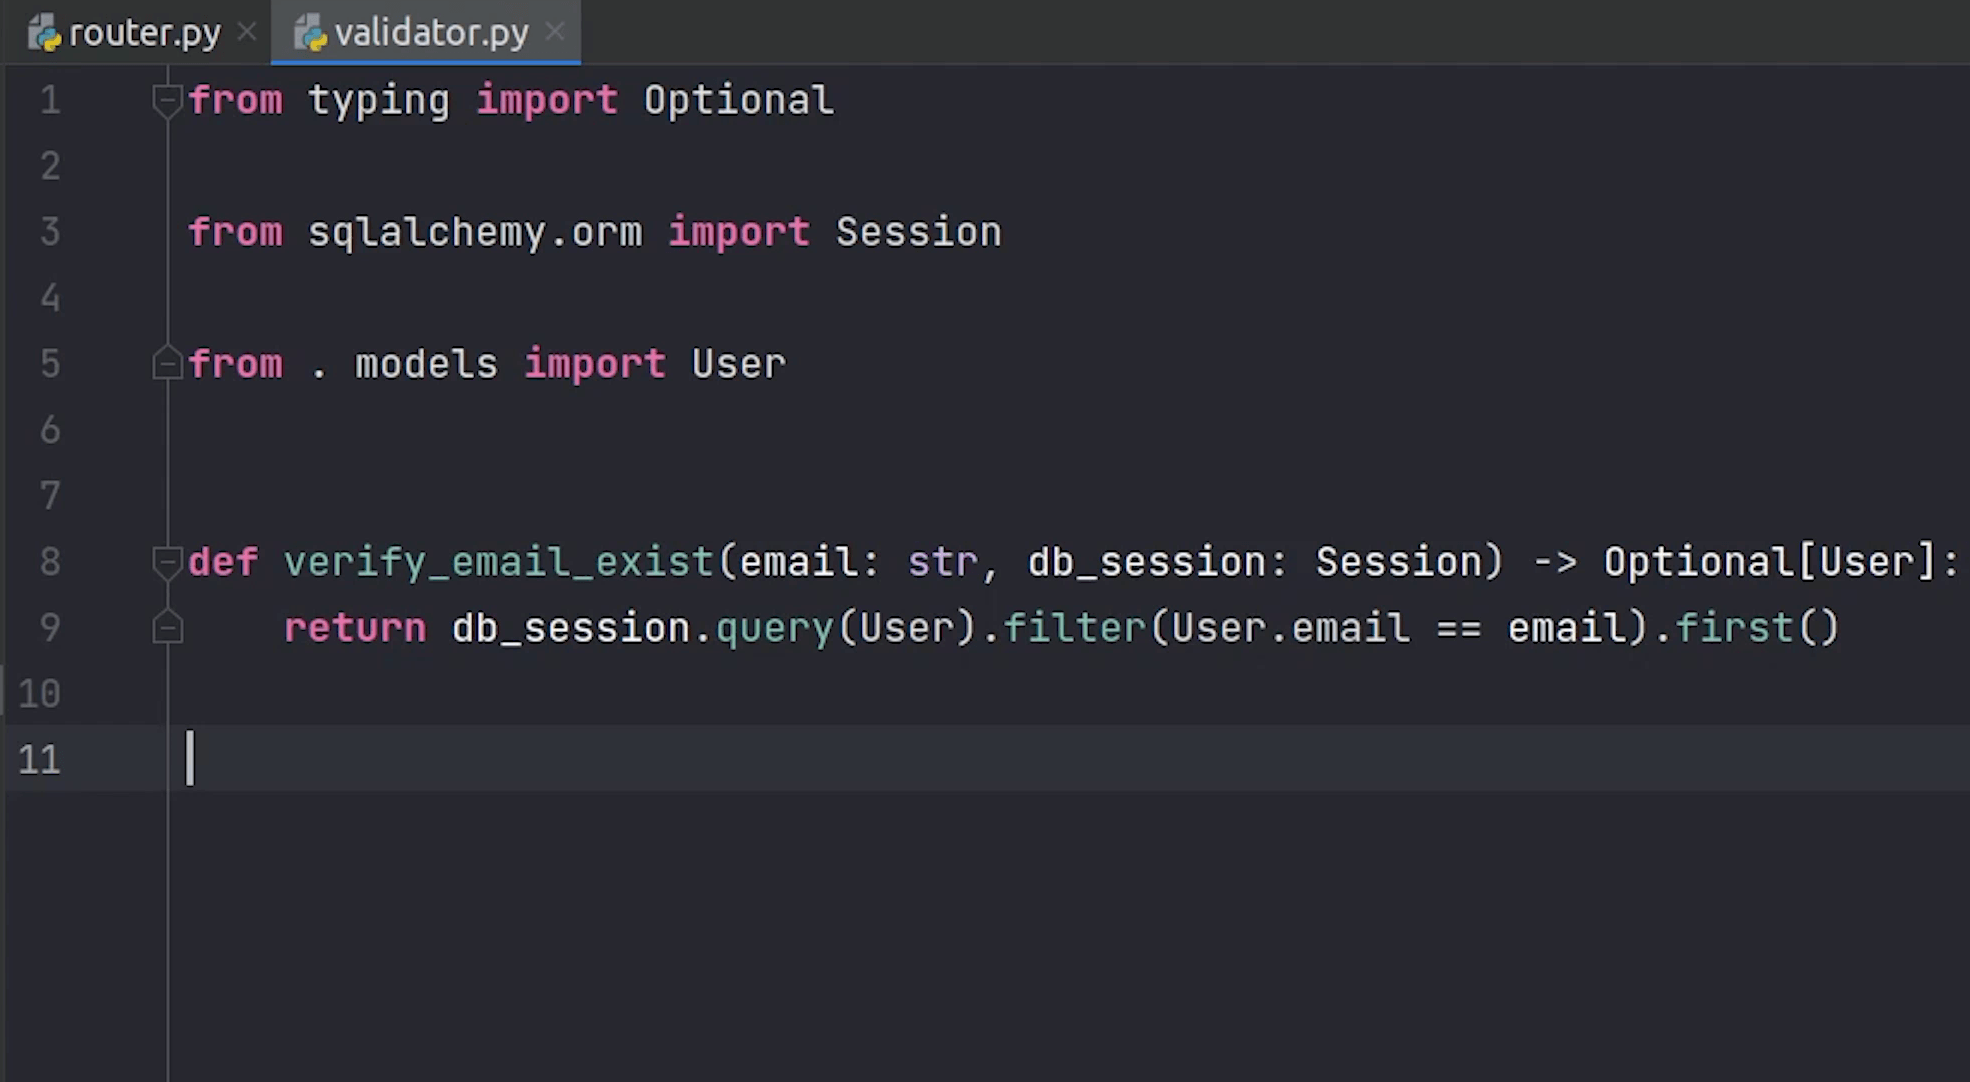
Email will be string and database will be a session. Let me change database to db_session that looks clearer to me.
The function might return User, or it will return None.
Let me come back to the router.
If a user exists then I will raise an HTTPException with status 400 and a message.
If the user is not present then I will move ahead and store the new record in the db. I will write the business logic in services where I will create a function called new_user_register.
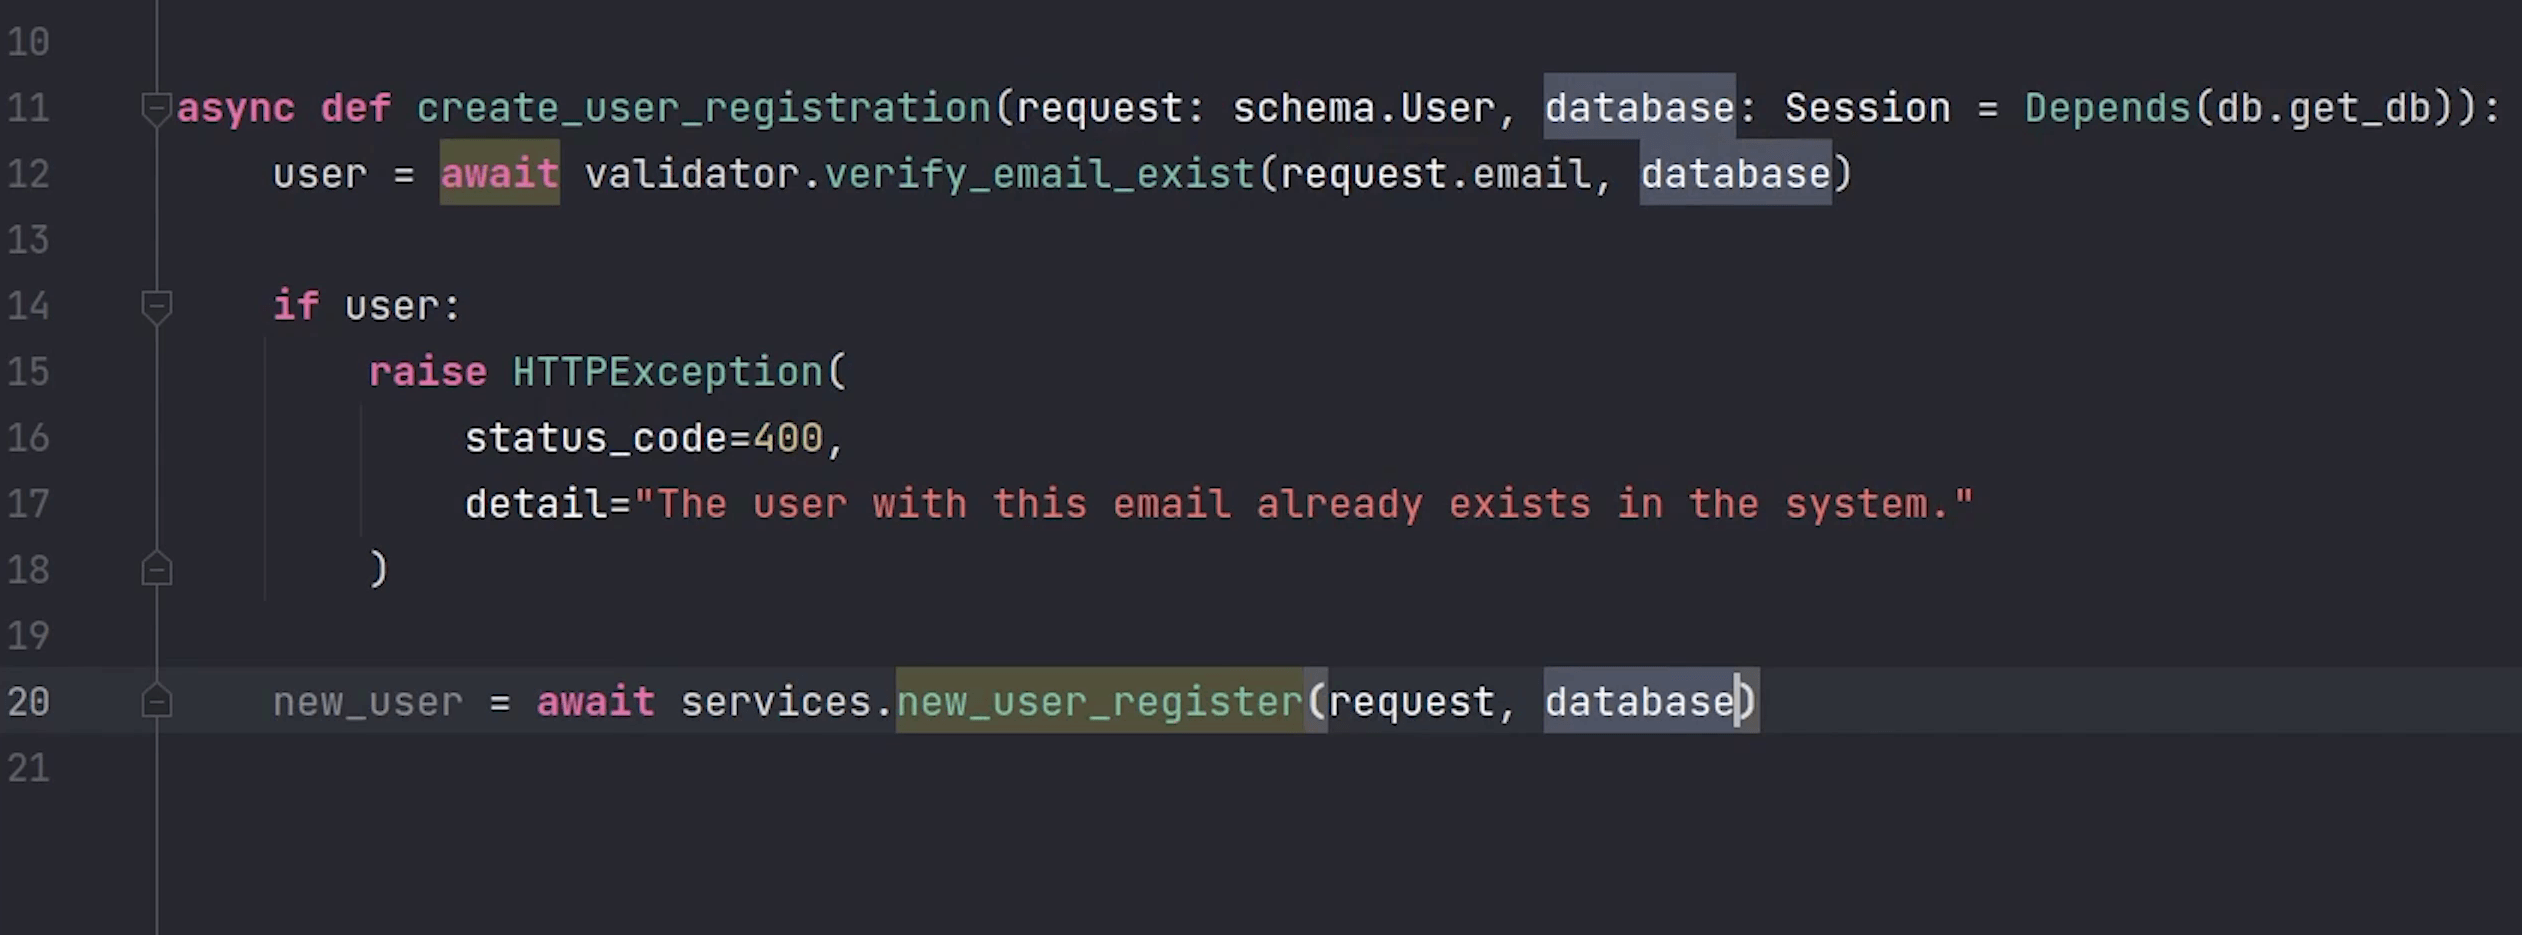
One thing I missed is that the function needs to be async. Async and Await go hand in hand.
Taking a pause in the router at line between 14-18, you might be thinking this validation could have taken care at the pydantic level itself.
You shouldn't be performing any IO inside pydantic validators. I was also exploring in the beginning, when I came across this interesting issue where there is discussion going on for Pydantic validation with database connection.
You can check out this link to know more about it : https://github.com/fastapi/fastapi/discussions/7780
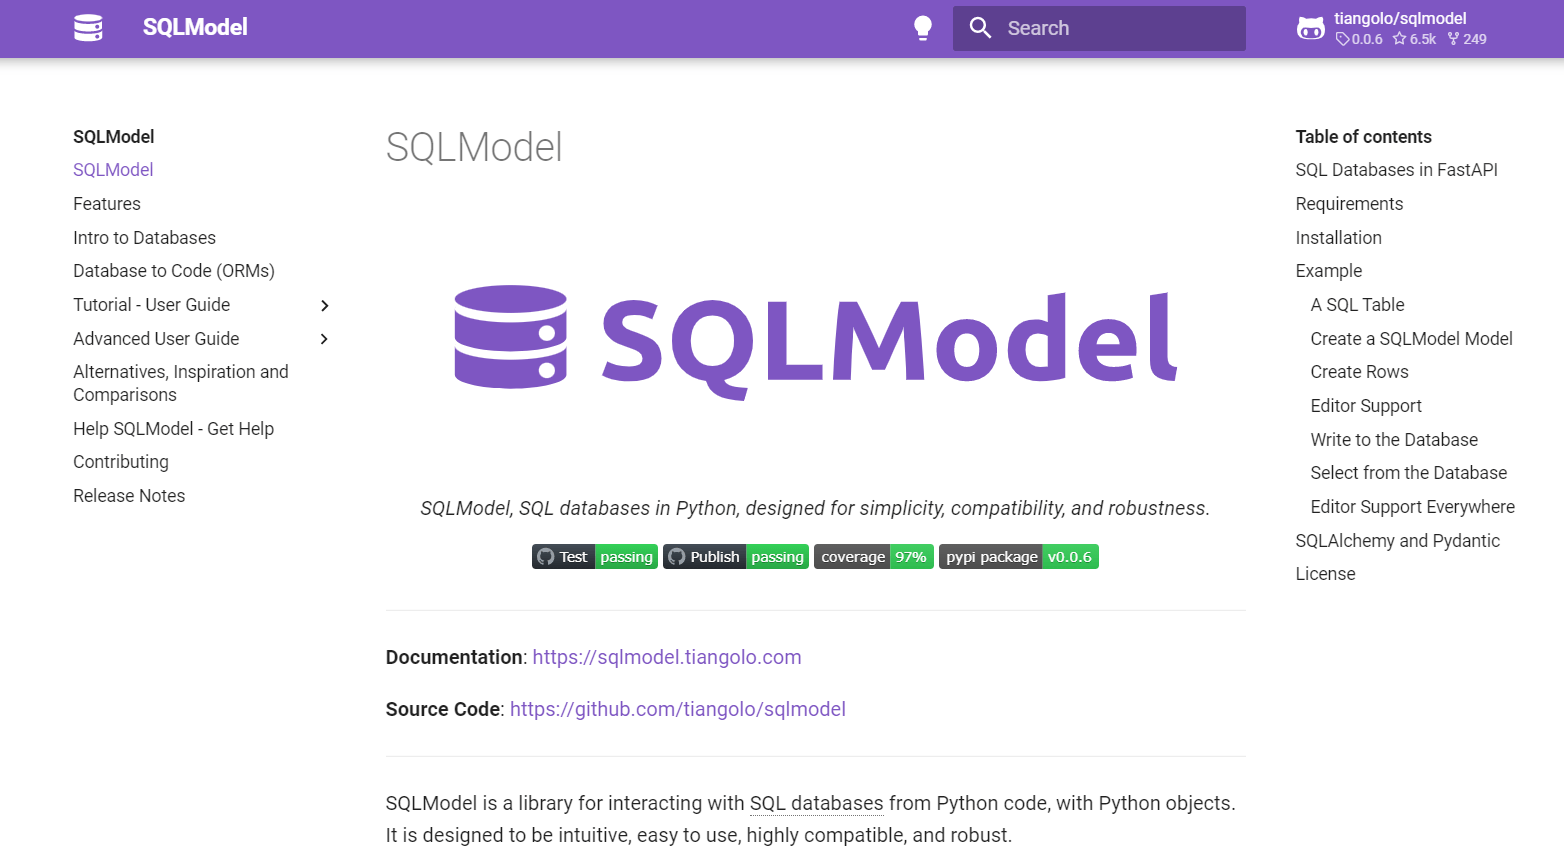
Luckily, I got a chance to interact with Sebastian in PyCon India 2021, and to get rid of these issues he built something called SQLModel which you might have heard recently. It is designed to be compatible with FastAPI, Pydantic, and SQLAlchemy.
Do check out SQLModel documentation, it’s quite interesting.
User Register Service
Coming back to PyCharm, let’s move ahead with our register function. I am going to do as usual necessary imports.
The function is going to return a new User object.
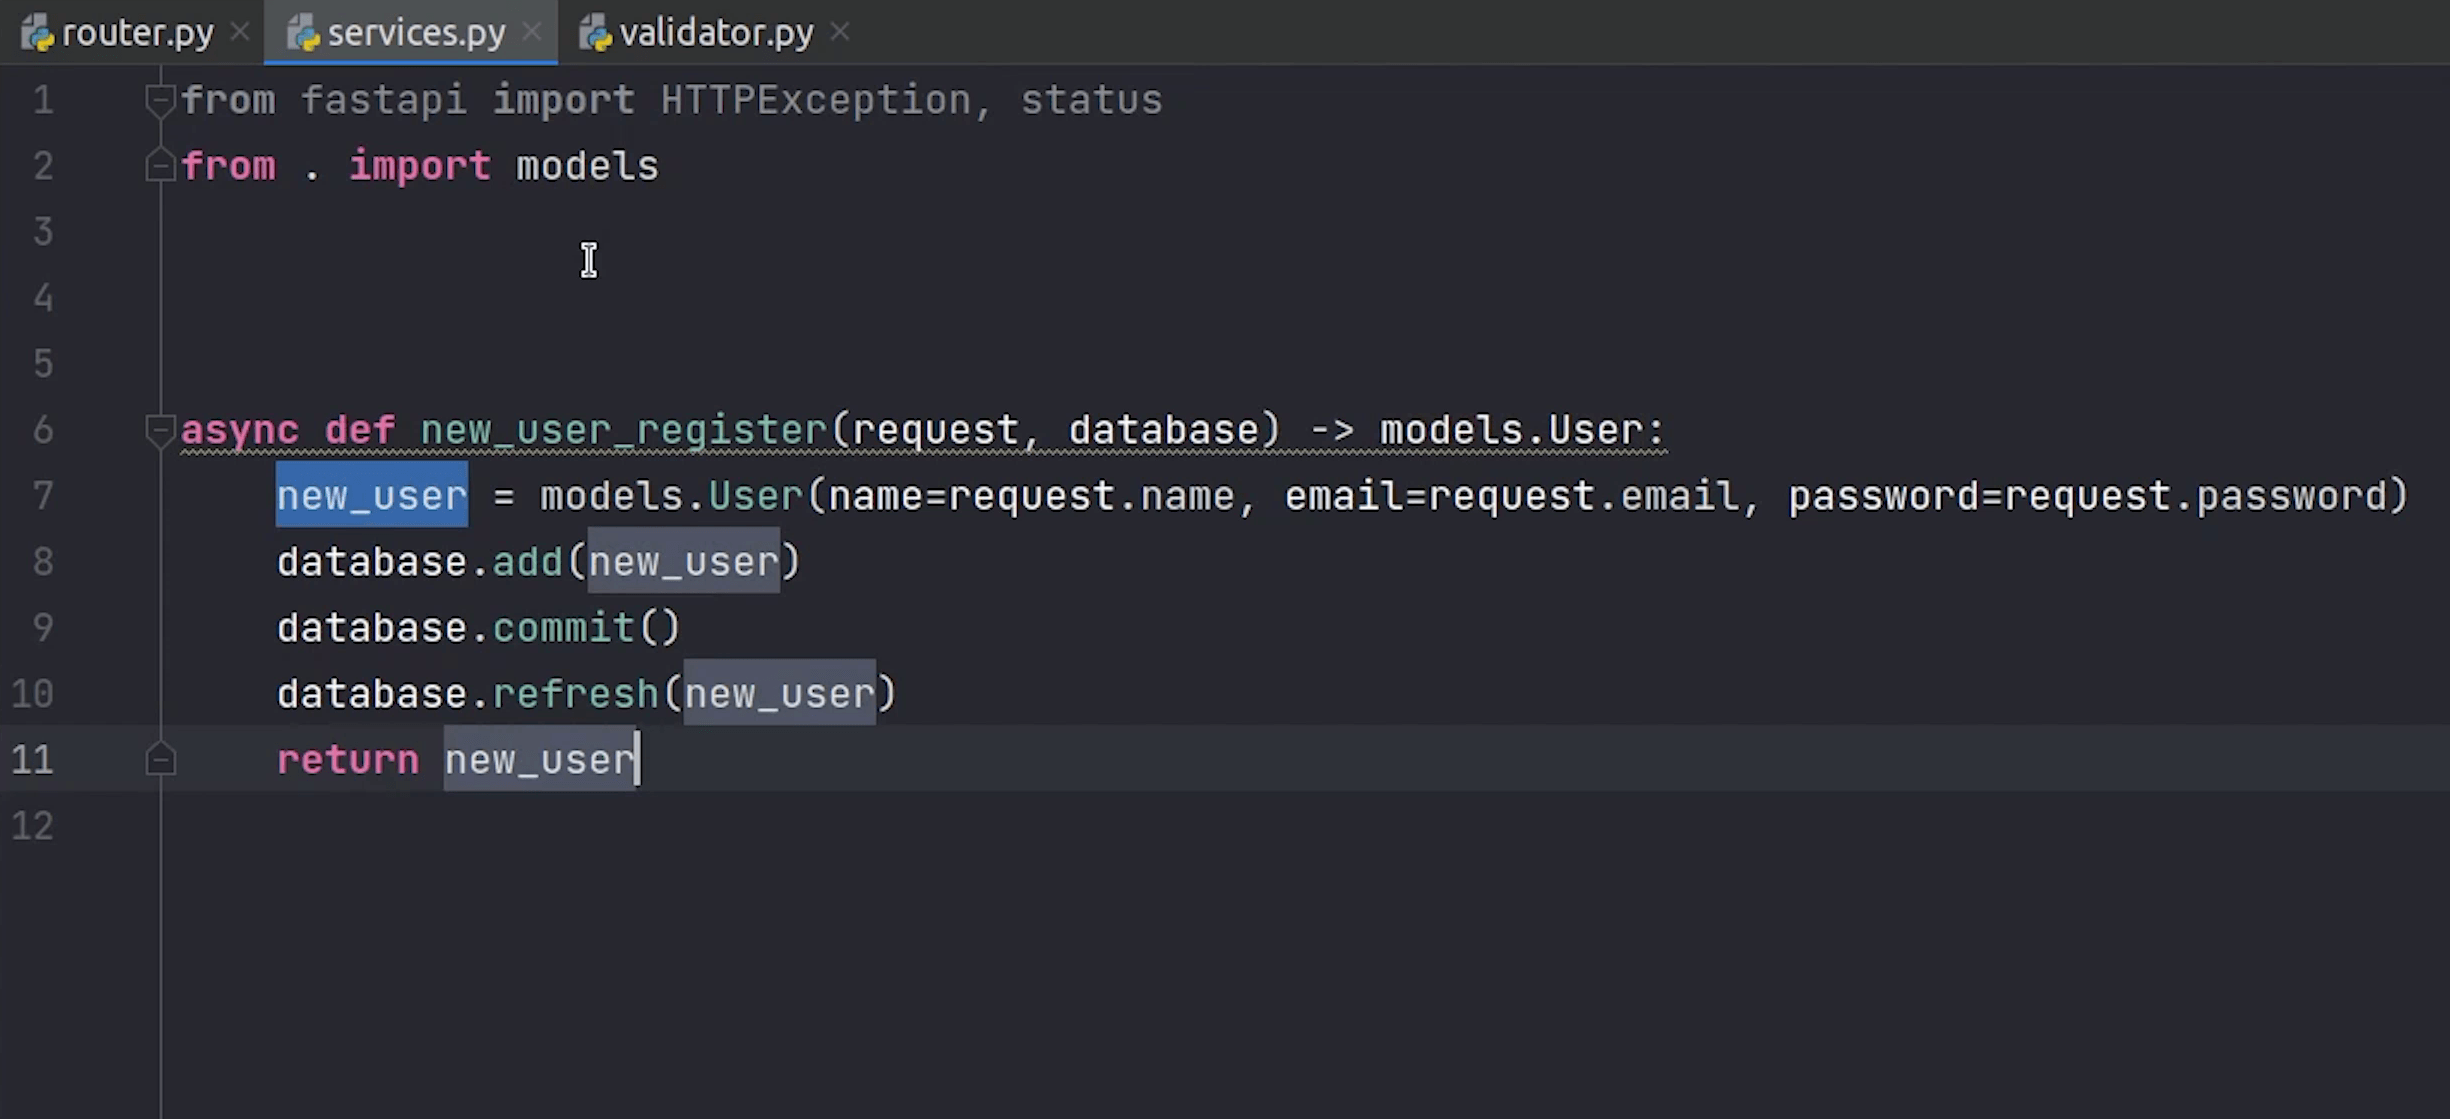
We are now going to commit and then refresh.
Basically,db.refresh means to expire and then immediately get the latest data for the object from the database. It involves an immediate database query, which you may consider unnecessarily expensive.
You can use the type annotation, it’s not mandatory. But it’s good to use because this is going to be the future of Python where everything will be leading towards type hints. PyCharm does provide great support for type hints.
So, our router part is done. Now we need to register the route in our main controller.
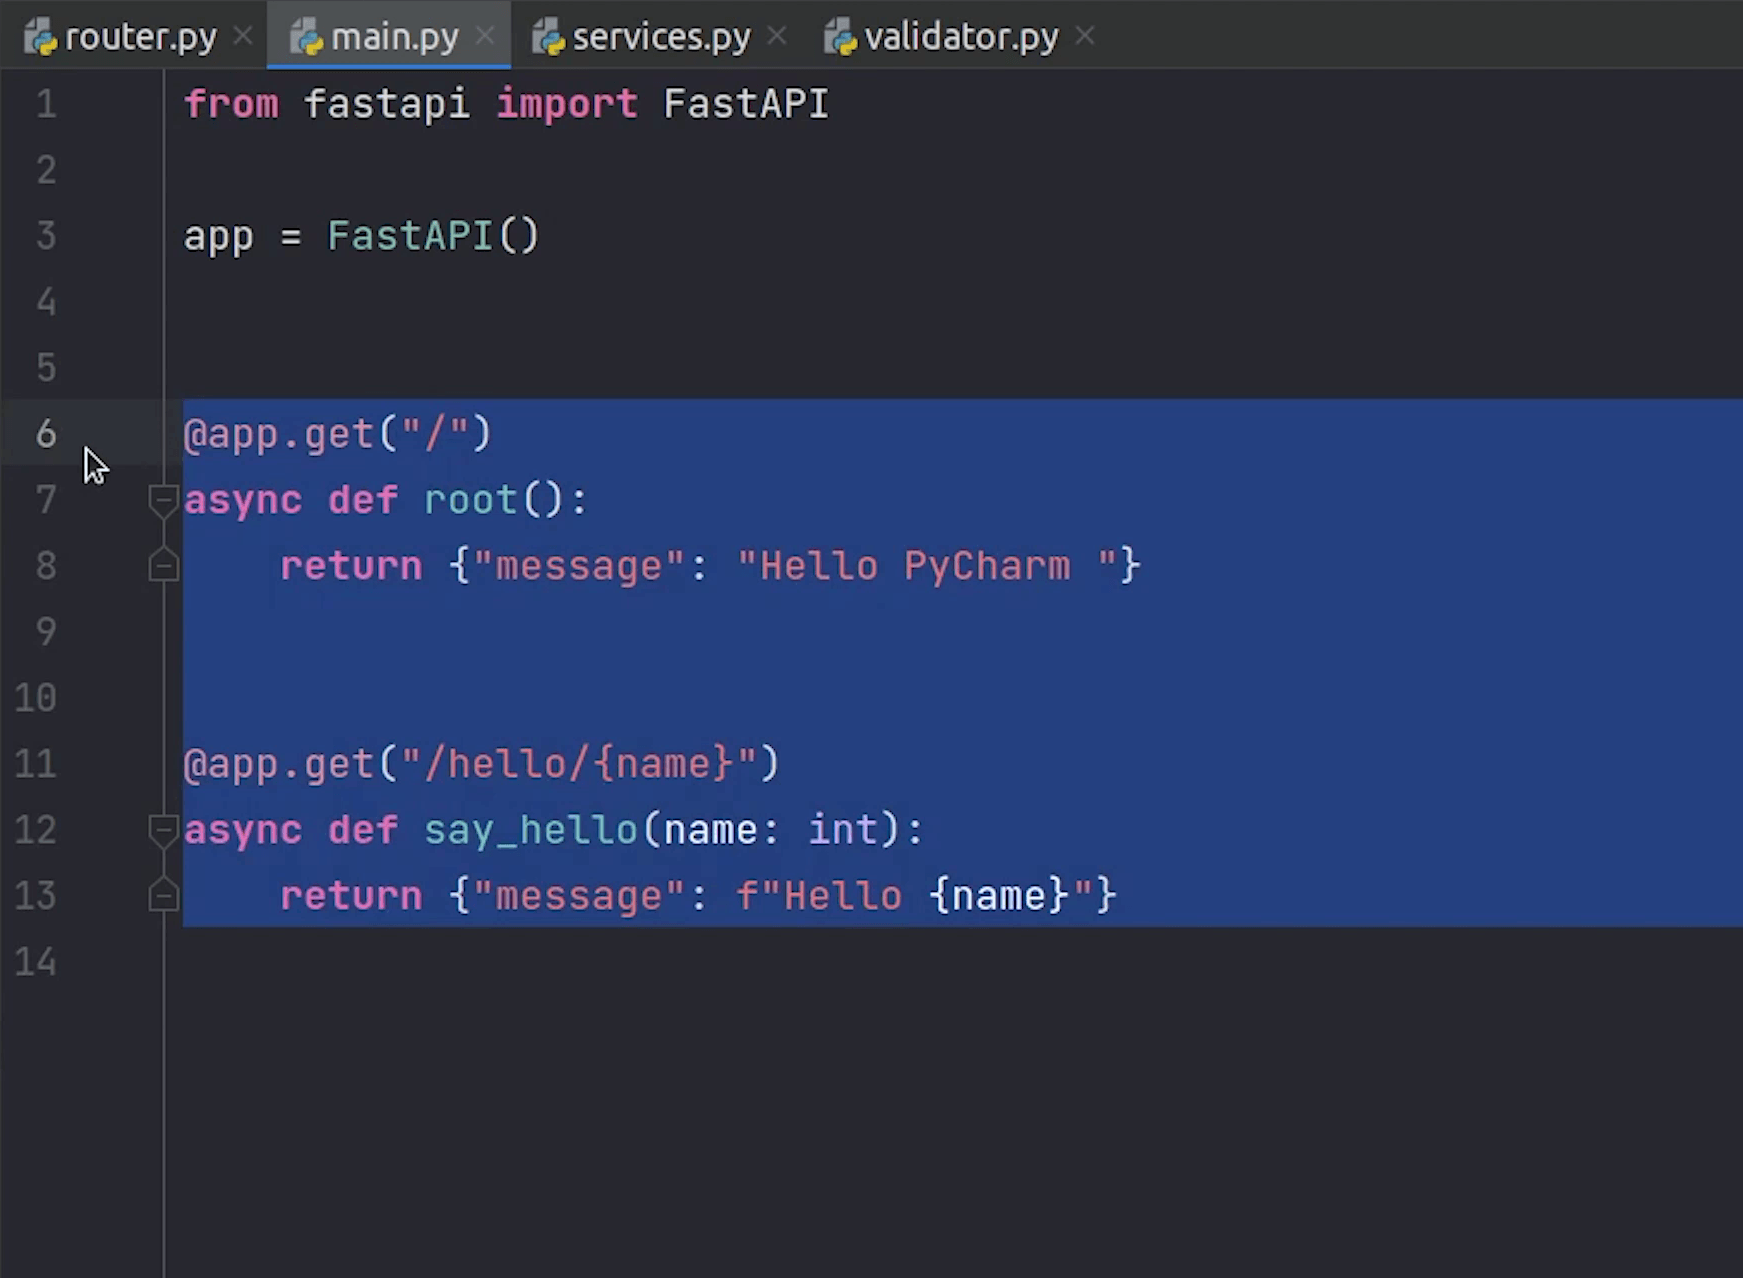
Open main.py, first I am going to remove the two routes which were generated through PyCharm. We don’t need this anymore.
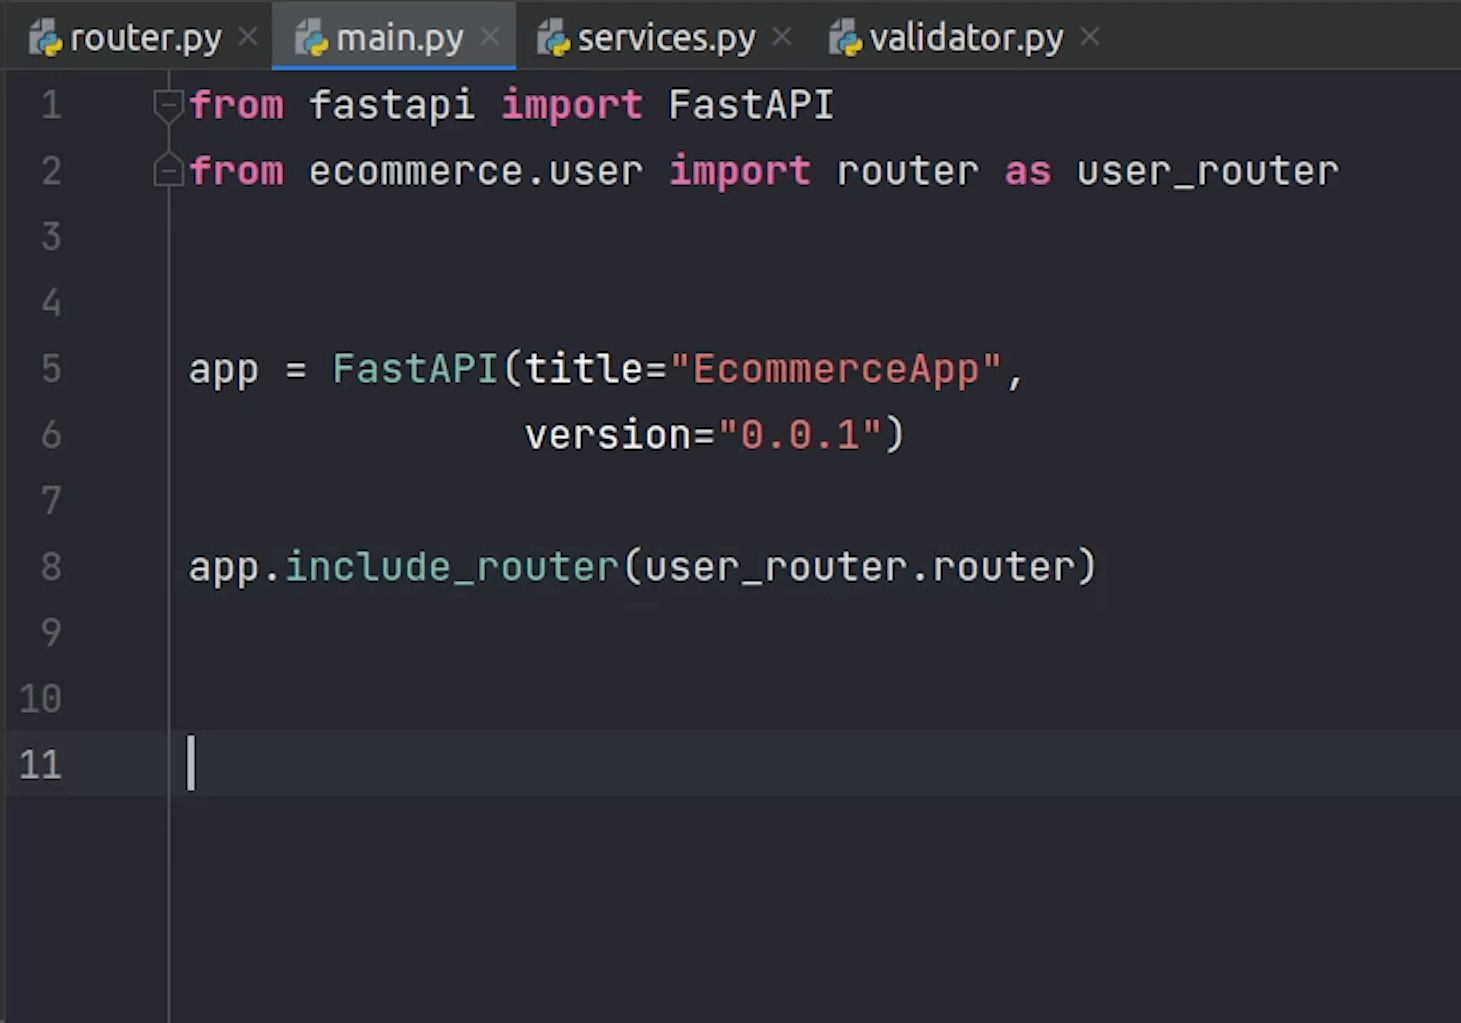
Let me give brief information to our API Docs, we can add more information. I am just sticking to only title and version.
Now, we need to include the router. I will type app.include_router()
I am going to import the user router and pass it in the include_router.
Registering our router is done. Let’s move ahead and start our server. Open the browser and navigate to docs.
Looks like I missed something. I missed adding the router decorator to our function.
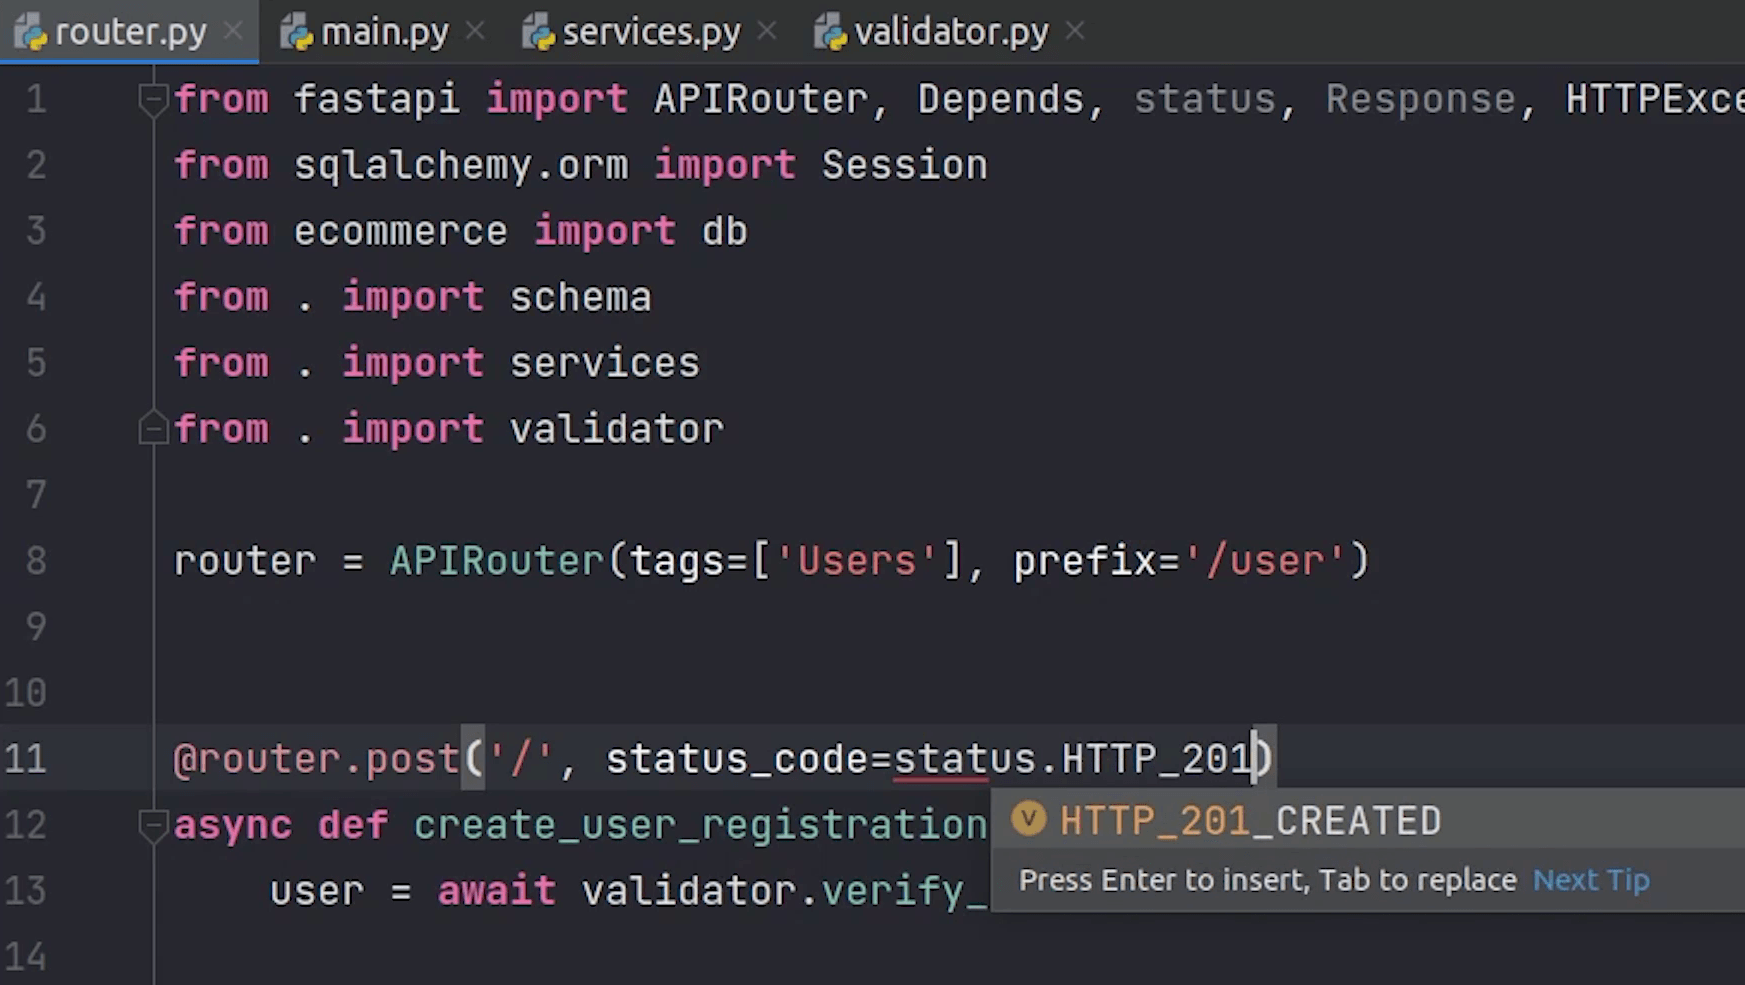
It’s going to be a POST method, pointing at / slash path and 201 status code will be returned in response.
router.py
from typing import List

from fastapi import APIRouter, Depends, status, Response, HTTPException
from sqlalchemy.orm import Session

from ecommerce import db
from ecommerce.auth.jwt import get_current_user
from . import schema
from . import services
from . import validator

router = APIRouter(
    tags=['Users'],
    prefix='/user'
)


@router.post('/', status_code=status.HTTP_201_CREATED)
async def create_user_registration(request: schema.User, database: Session = Depends(db.get_db)):
    # Read More : Pydantic Validation with Database (https://github.com/fastapi/fastapi/discussions/7780)

    user = await validator.verify_email_exist(request.email, database)
    if user:
        raise HTTPException(
            status_code=400,
            detail="The user with this email already exists in the system.",
        )

    new_user = await services.new_user_register(request, database)
    return new_user
Let me check what is coming up in docs.
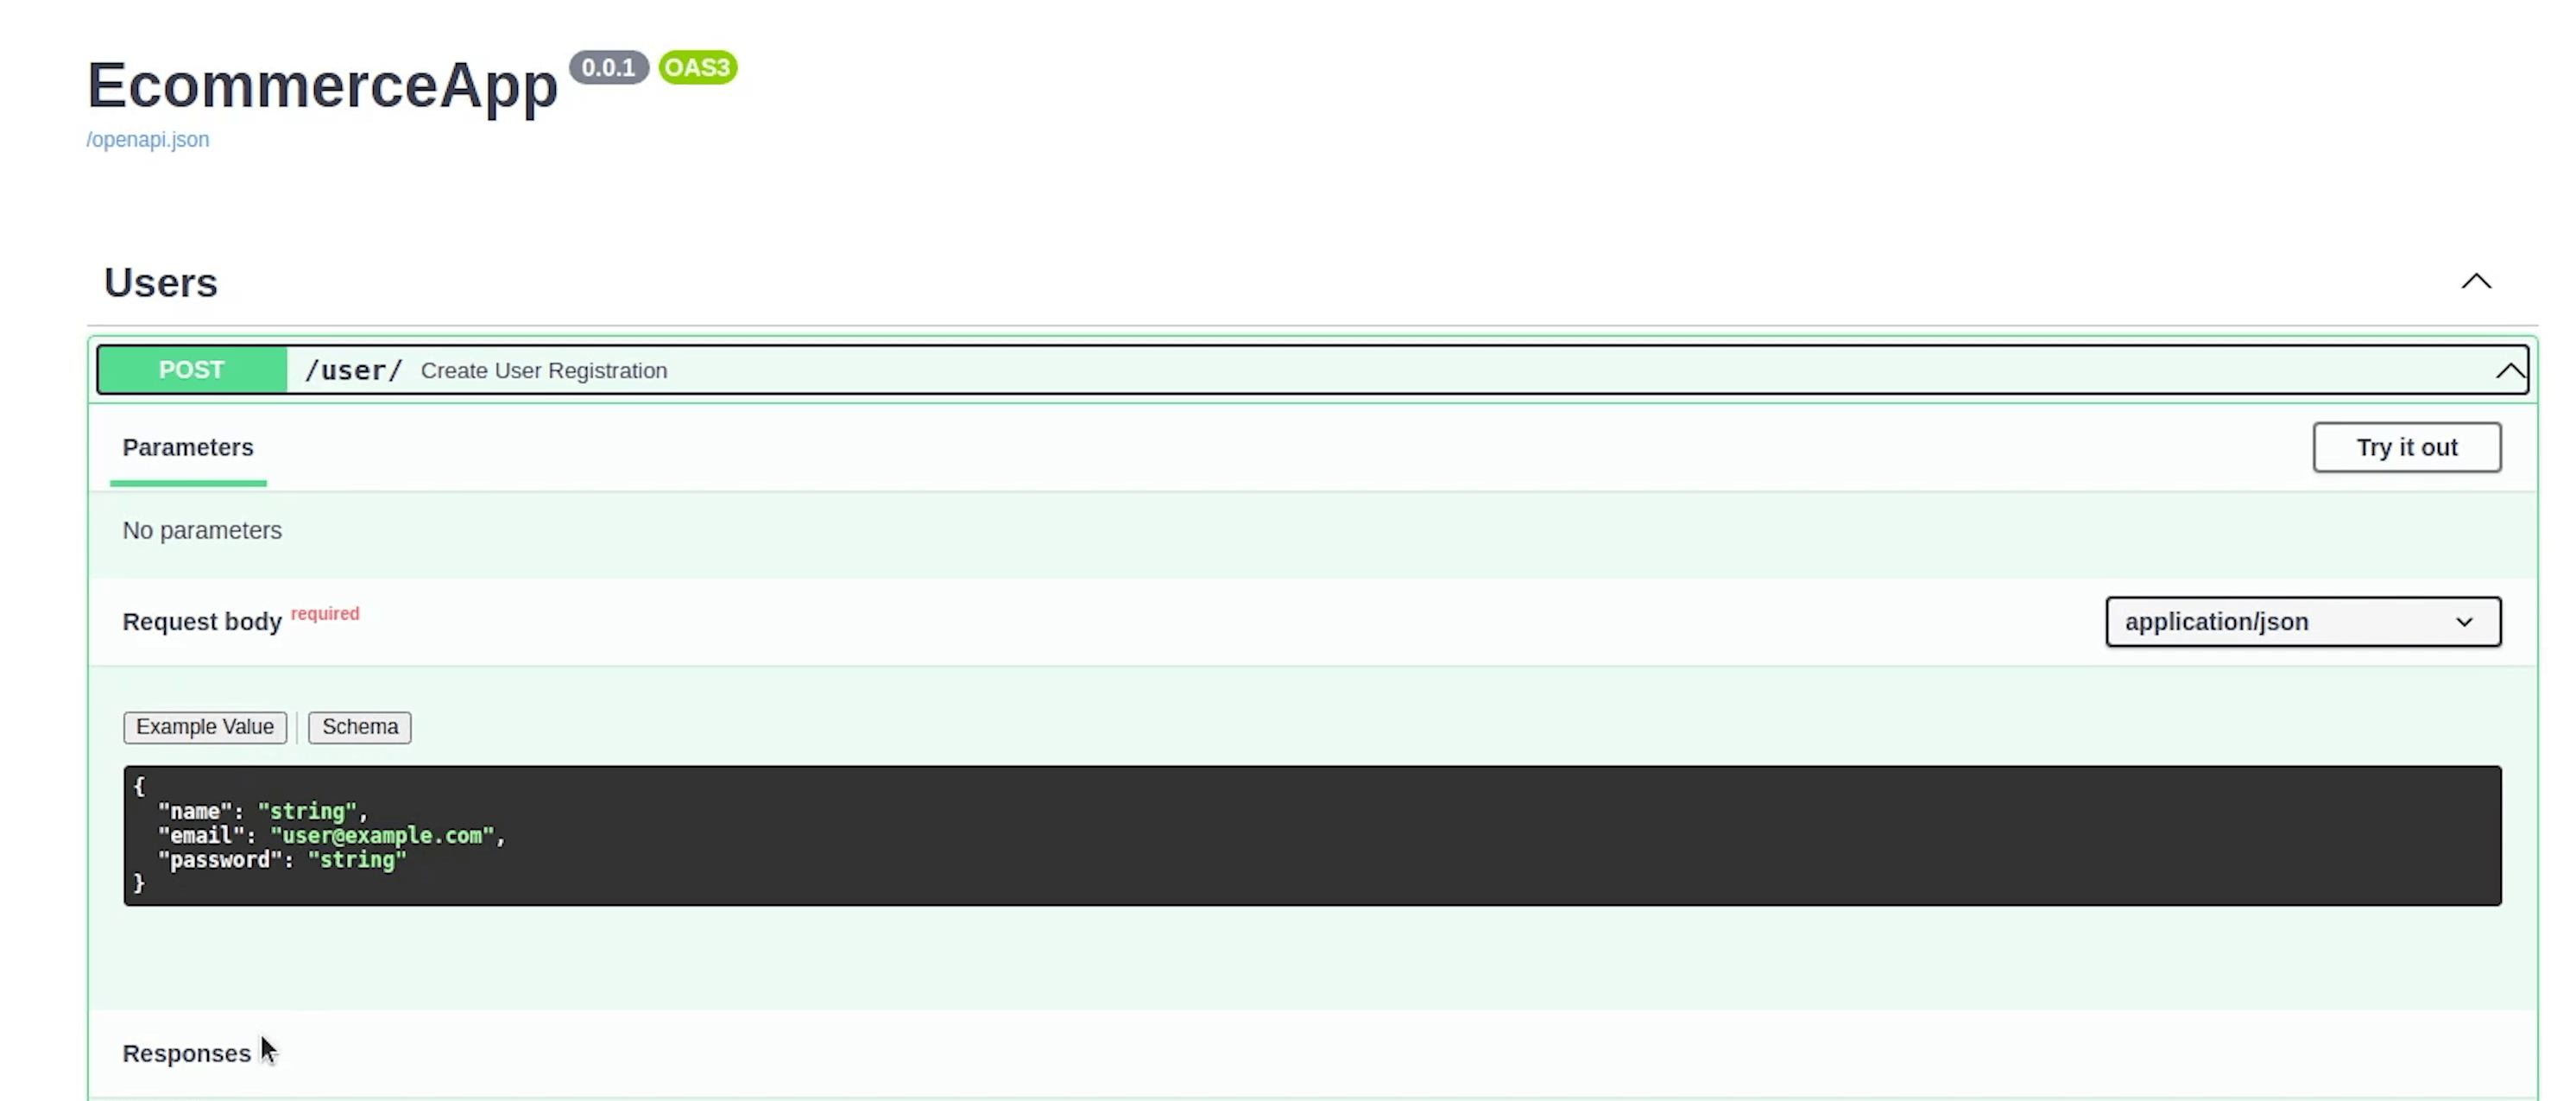
Thanks to Pydantic, the schema was generated very smoothly.
Let me try out the API and try registering a new user. I will provide a name, email and password and click on Execute.
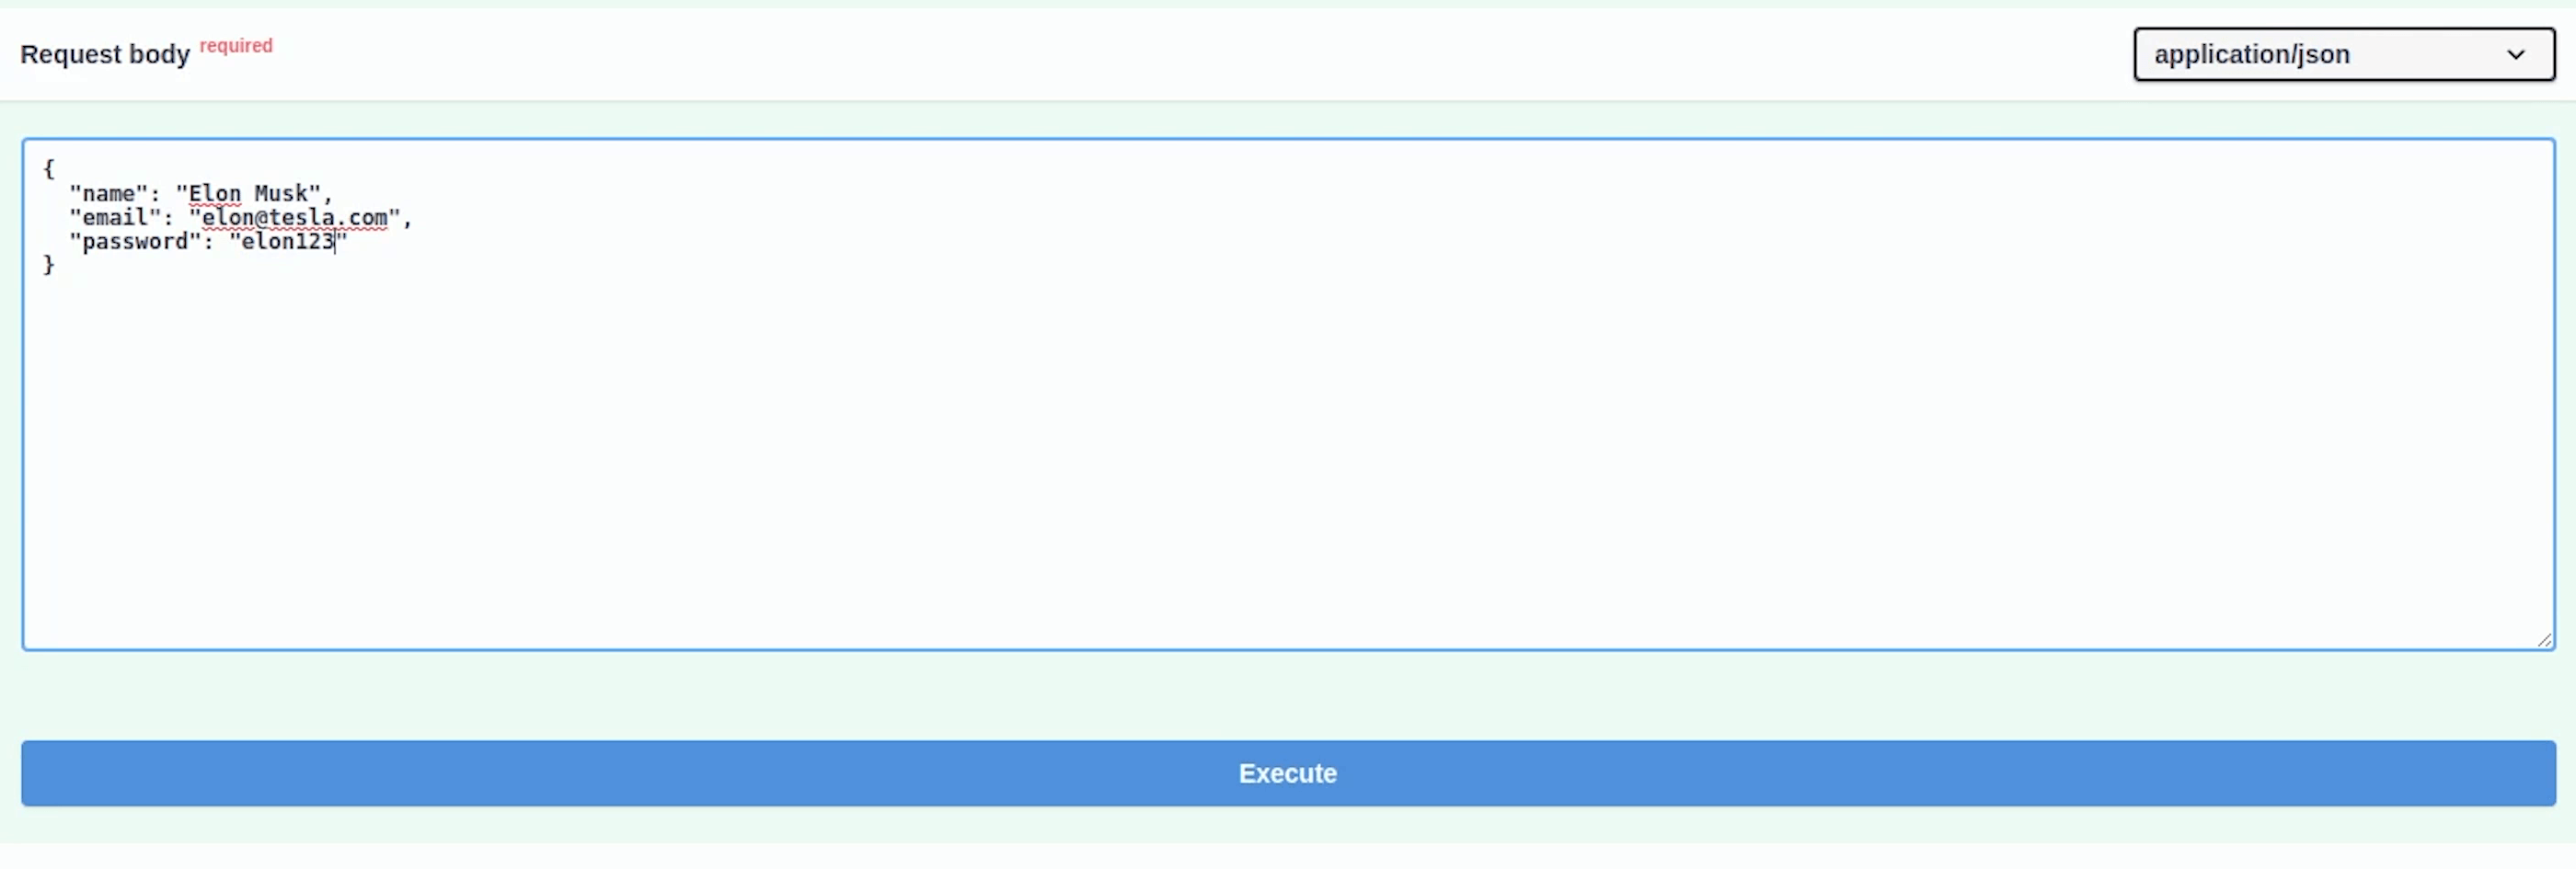
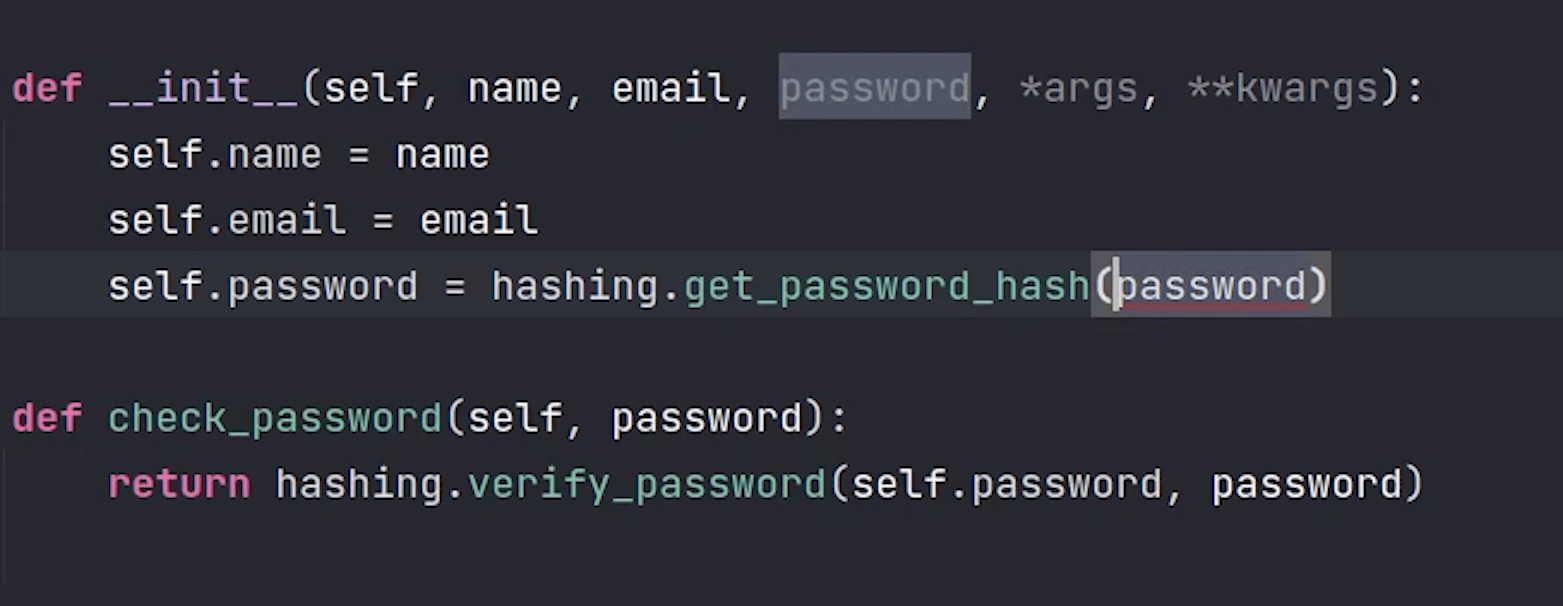
Before going ahead, there is an issue in storing password. Let me fix it quickly and try again.
This issue has been already addressed. You can get the latest copy of the source code from GitHub.
Replace self.password with password
I will try now to register.
Yes, it works. Our user has been successfully registered.
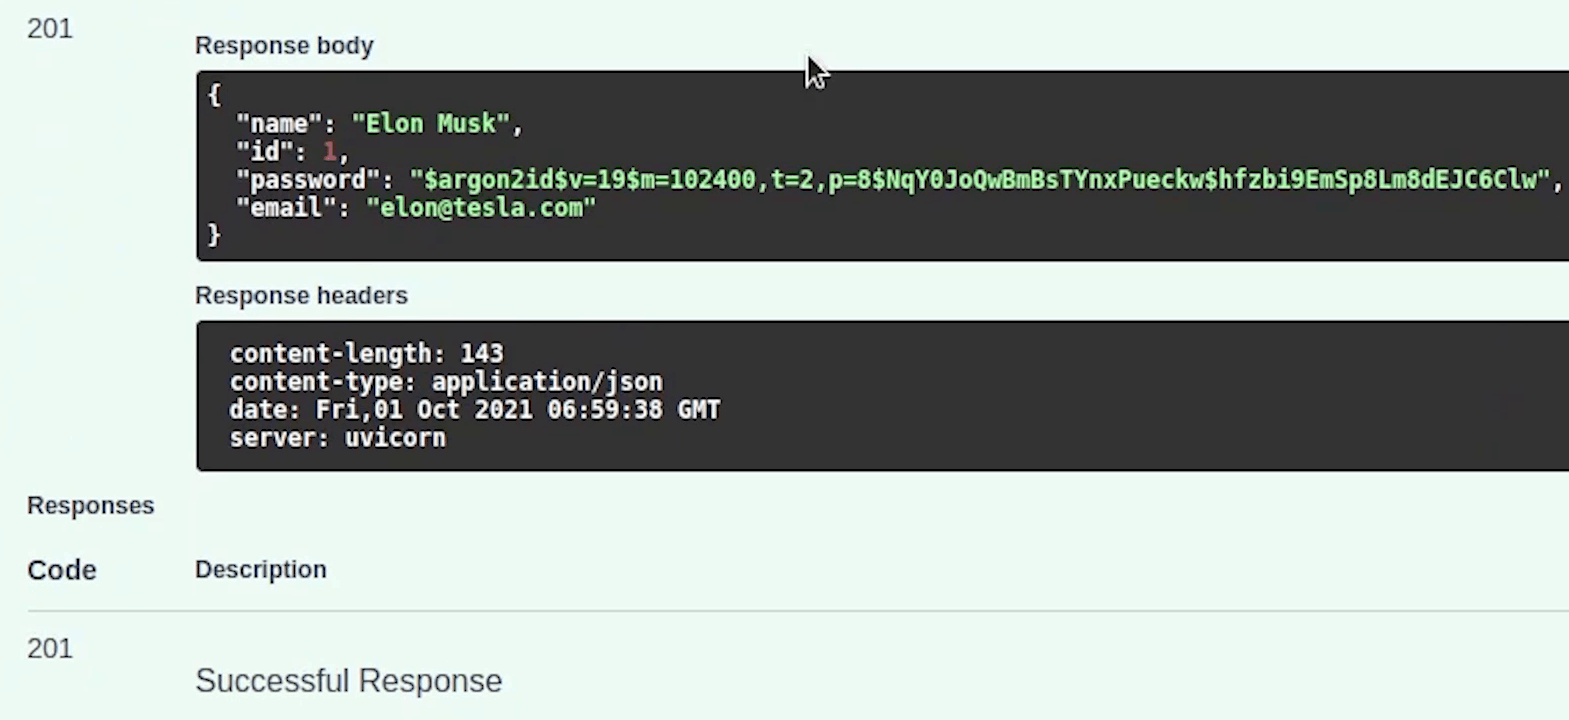
I am returning the user model response, if you want you can even return a custom response.
I hope you enjoyed this tutorial. In the upcoming tutorial I will be focusing more on writing REST APIs for other modules.
Stay tuned!